
'90 Build: Not Really Faster, Just Less Slow


Thread Starter
Junior Member
iTrader: (1)
Joined: Oct 2011
Posts: 412
Total Cats: 78
From: New Hampshire
I suppose since I'm starting to make some actual progress on my turbo build, I should start a build thread. Some of it will be to document what I've done and some will be to gather advice. My upgrade path has been mostly on a budget and is similar to what a lot of other  might try to do, hopefully I can make things a little easier from someone else out there.
First some history.
I bought my 1990 as an 18 year old in the summer of 2000 for $4750 with 50,000 miles, it took all the money I had at the time. As my funds replenished from working shitty jobs I installed a roll bar, the FM spring & AGX combo, SuperPro polyurethane bushings, a Borla exhaust, some Azenis (they were the hot **** once upon a time) and got into autocrossing. I was never all that good but I learned a lot and had fun.
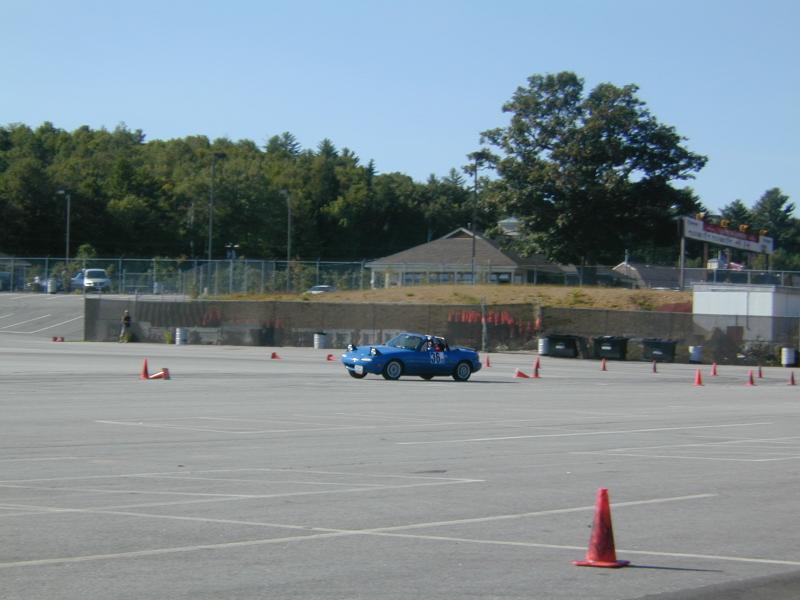
The car was my only form of transportation for a long time so it got driven year-round in New Hampshire. Flat-brimmed driftarding wasn't really a thing back then but I did have altezza style tail lights for a time. Sorry.
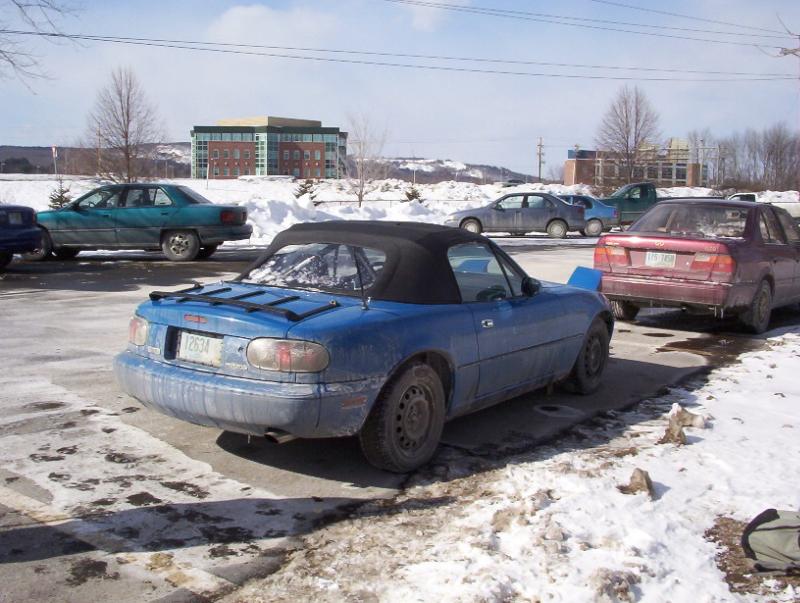
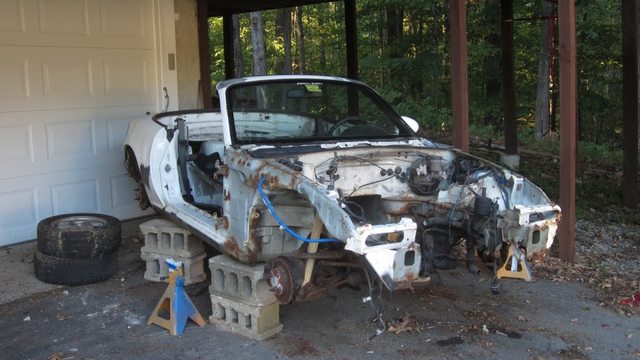
Not surprisingly, I ended up with rocker rust and the car was parked for a couple years, but I refused to part with it. Eventually I graduated, got a real job and a garage, and started working on the car again.
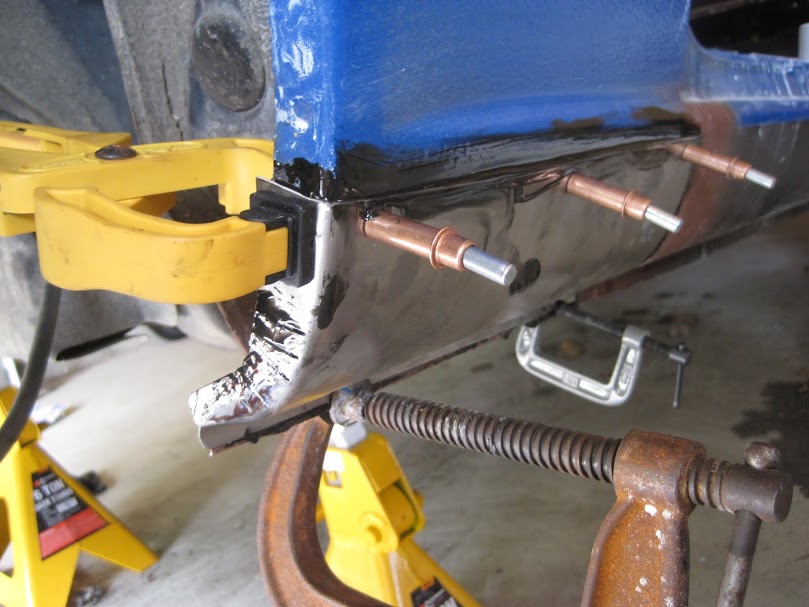
I took the whole thing apart for a cleaning a repaint
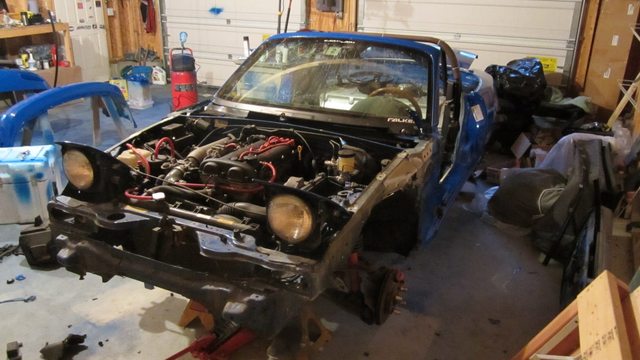
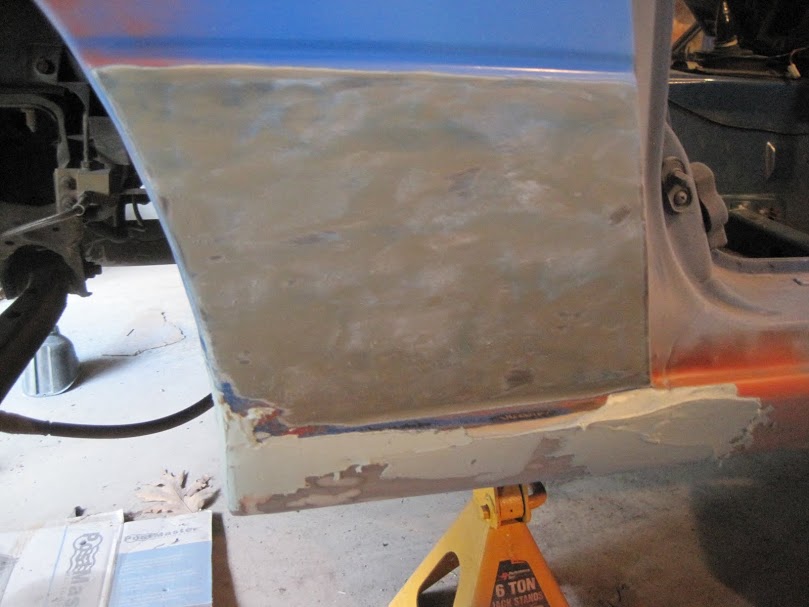
Rust repair:
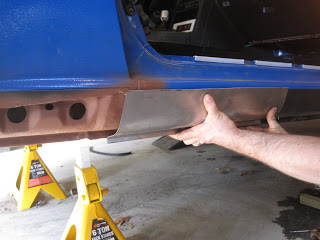

I had never painted a car before, but I figured it out in my garage with a Harbor Fright gun, a cheap Home Depot compressor, and the help of a friend.
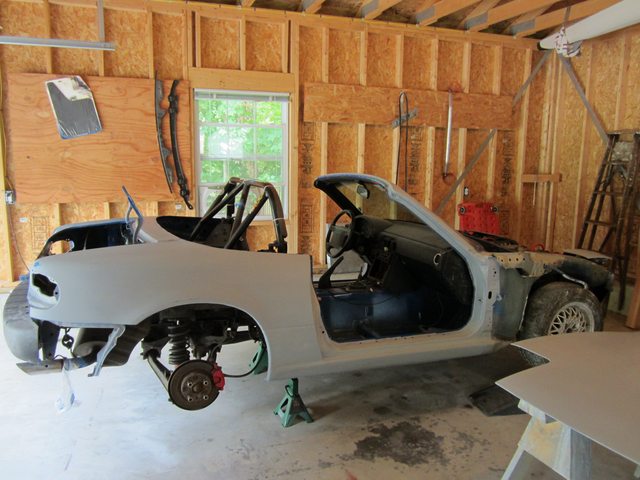
There was a lot of wet sanding involved.

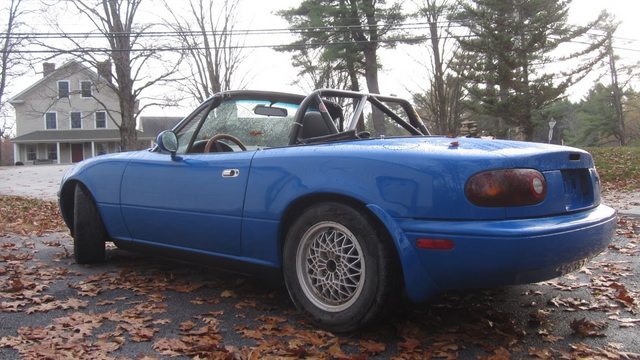
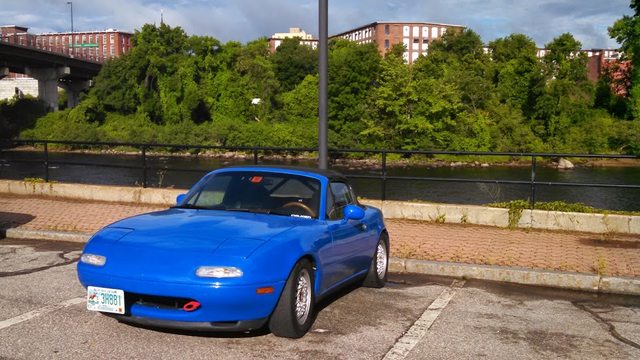
I'm reasonably happy with how it came out, a pretty surprised that I accumulated no real mechanical problems after 5 years of sitting. With a fresh charge, she started right up. Brakes, suspension, engine are all still good and I easily got an inspection sticker.
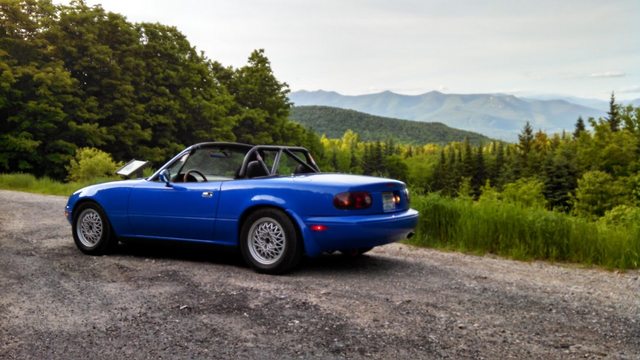
I spent a lot of time just driving and enjoying myself, getting up to 125k miles, but started to get bothered by a bunch of little things. The ride is, in a word, horrendous. My 15 year-old FM springs have sagged and hit the bumpstops pretty frequently. I also get stuck behind slower traffic pretty frequently and I'm not comfortable trying to pass with so little power.
Going forward, I'd like to push power as high as I can on the stock internals, replace my old 14" wheels with something lighter and wider, and make the ride more enjoyable on the shitty roads I have in my area. I may autocross again, but I'm not really interested in tailoring my build to any particular class.
To be continued. I'll make another post with further upgrades I've done, parts I've accumulated, and decisions I still need to make.
might try to do, hopefully I can make things a little easier from someone else out there.First some history.
I bought my 1990 as an 18 year old in the summer of 2000 for $4750 with 50,000 miles, it took all the money I had at the time. As my funds replenished from working shitty jobs I installed a roll bar, the FM spring & AGX combo, SuperPro polyurethane bushings, a Borla exhaust, some Azenis (they were the hot **** once upon a time) and got into autocrossing. I was never all that good but I learned a lot and had fun.
The car was my only form of transportation for a long time so it got driven year-round in New Hampshire. Flat-brimmed driftarding wasn't really a thing back then but I did have altezza style tail lights for a time. Sorry.
Not surprisingly, I ended up with rocker rust and the car was parked for a couple years, but I refused to part with it. Eventually I graduated, got a real job and a garage, and started working on the car again.
I took the whole thing apart for a cleaning a repaint
Rust repair:
I had never painted a car before, but I figured it out in my garage with a Harbor Fright gun, a cheap Home Depot compressor, and the help of a friend.
There was a lot of wet sanding involved.
I'm reasonably happy with how it came out, a pretty surprised that I accumulated no real mechanical problems after 5 years of sitting. With a fresh charge, she started right up. Brakes, suspension, engine are all still good and I easily got an inspection sticker.
I spent a lot of time just driving and enjoying myself, getting up to 125k miles, but started to get bothered by a bunch of little things. The ride is, in a word, horrendous. My 15 year-old FM springs have sagged and hit the bumpstops pretty frequently. I also get stuck behind slower traffic pretty frequently and I'm not comfortable trying to pass with so little power.
Going forward, I'd like to push power as high as I can on the stock internals, replace my old 14" wheels with something lighter and wider, and make the ride more enjoyable on the shitty roads I have in my area. I may autocross again, but I'm not really interested in tailoring my build to any particular class.
To be continued. I'll make another post with further upgrades I've done, parts I've accumulated, and decisions I still need to make.
Last edited by adamiata; Aug 21, 2014 at 07:02 AM.
Reply
 4
4

4
Thread Starter
Junior Member
iTrader: (1)
Joined: Oct 2011
Posts: 412
Total Cats: 78
From: New Hampshire
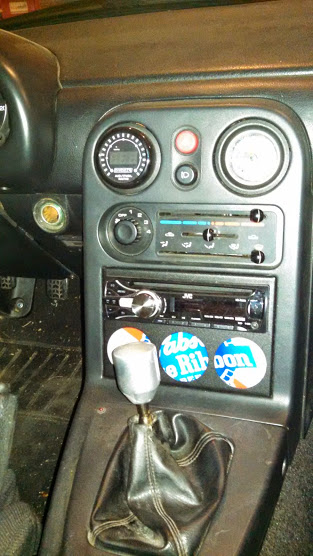
After reading through Matt Cramer's Performance Fuel Injection Systems book and much reading here, I decided to start slow with an Autometer vac/boost gauge and an Innovate MTX-L wideband just to get a sense for what the factory ECU does. This also gave me a much better handle on vaccuum behavior during different driving conditions.
I'll probably move the gages below the radio at some point. Sorry for the shitty picture.
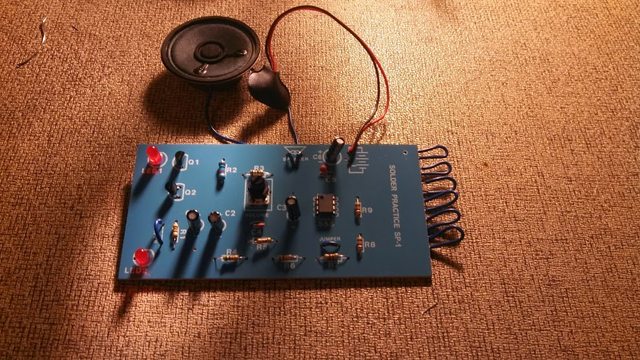
Then I picked up Megasquirt DIYPNP kit from DIY Autotune. I was a little intimidated, not having any experience soldering circuit boards before so I bought a cheap educational practice kit off Amazon. It flashes some LEDs and sounds a siren and ****.
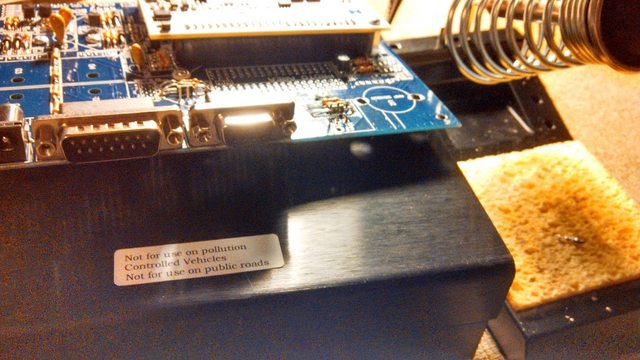
Then I built up my DIYPNP. It was easier than I expected - just had to follow the instructions methodically.
Installation in the car was easy enough and I used a 2.75" aluminum coupler to mount the IAT sensor and an AEM Dryflow filter.
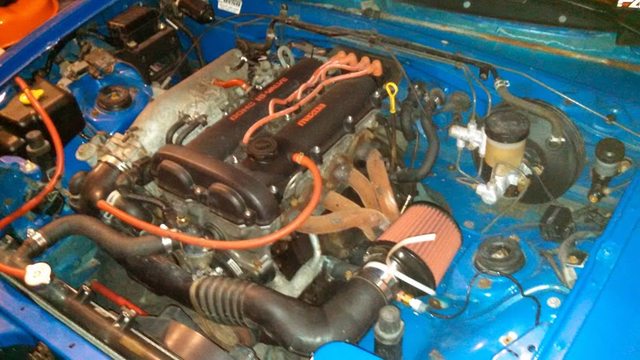
Initial start up went smooth enough and VEAL has been treating me well. I've put about 1500 street miles on the new computer with no real issues. It does feel a little down on power compared to stock but I imagine that's due to the conservative ignition timing tables that I don't really have the means to tune without going to a dyno.
I'll probably move the gages below the radio at some point. Sorry for the shitty picture.
Then I picked up Megasquirt DIYPNP kit from DIY Autotune. I was a little intimidated, not having any experience soldering circuit boards before so I bought a cheap educational practice kit off Amazon. It flashes some LEDs and sounds a siren and ****.
Then I built up my DIYPNP. It was easier than I expected - just had to follow the instructions methodically.
Installation in the car was easy enough and I used a 2.75" aluminum coupler to mount the IAT sensor and an AEM Dryflow filter.
Initial start up went smooth enough and VEAL has been treating me well. I've put about 1500 street miles on the new computer with no real issues. It does feel a little down on power compared to stock but I imagine that's due to the conservative ignition timing tables that I don't really have the means to tune without going to a dyno.
Reply
2
2
Thread Starter
Junior Member
iTrader: (1)
Joined: Oct 2011
Posts: 412
Total Cats: 78
From: New Hampshire
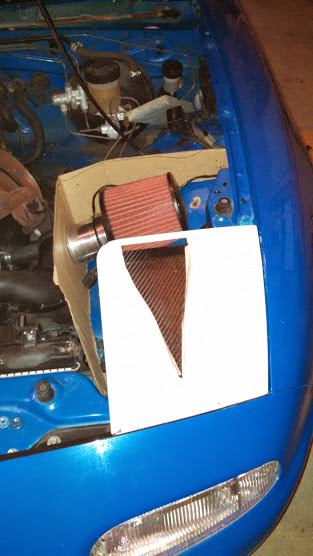
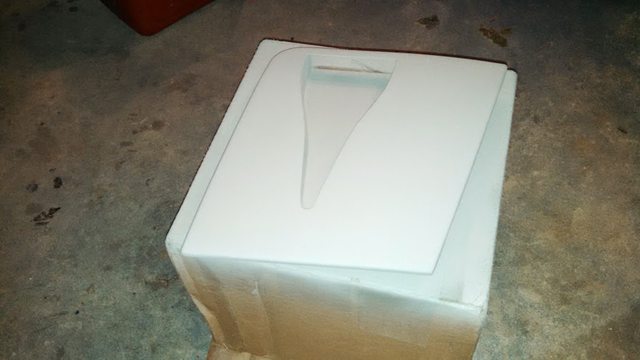
I really don't like how close the filter is to my manifold, so I'm starting work on an airbox and NACA duct in the headlight lid.
I bought a flanged 4" NACA vent from the same place Revlimiter did. Unlike him, I don't have dual lens low-profile headlights and I found that some trimming of the headlight frame was necessary to get the duct to fit. if I were to do it again, I'd probably order the 2 or 3 inch size. Lucky for me, I had a spare pop-up assembly from a parts car and I felt free to hack away.
Mocked up:
Epoxied, Bondo-ed, and primed:
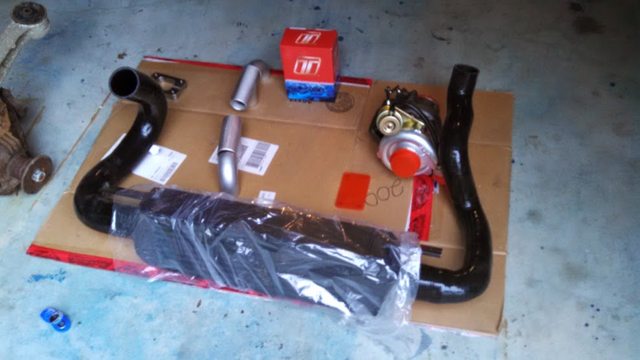
Meanwhile, I picked up a tiny T3 churbo off eBay (with the .48 turbine AR that everyone seems to like), a Vibrant intercooler from Fab9, FM silicone charge piping, a Turbosmart dual port BOV from Fab9, and some stainless weld-els and a T3 flange off Amazon.
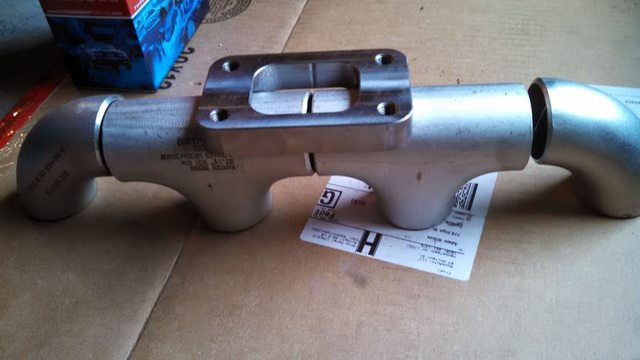
Manifold mocked up. The T3 flange came machined to nest on 1.5 inch pipe pretty nicely.
Then I freed up some cash by selling a bunch of climbing gear that I haven't used in a long time so I could buy a MIG welder off Craigslist. It's a good thing I bought some extra fittings to practice on, this **** is harder than it looks and now I need to buy more gas.

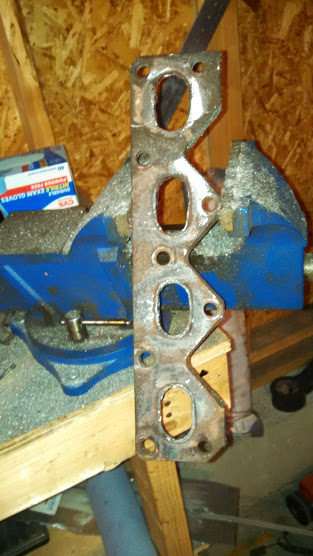
I'm hoping to reuse the flange off a spare stock manifold I have. Burring out the old welds has been a colossal pain in the ***.
As for the manifold, I have no power steering or air conditioning so I'm going to mount the turbo as low as I can while maintaining access to the fasteners and compatibility with the FM silicone pipe. Then I'll make my own downpipe and exhaust; 3" all the way to the bumper.
I thought pretty hard about going the ArtTech route for exhaust parts, but I realize that my motor and turbo combination is a little weak and if either blows up, I'd like to be able to just fabricate a new manifold for a 1.8 and a larger turbo. Plus, I want to learn how to weld just like I taught myself to paint and solder, even if it takes longer and costs more that just buying off the shelf parts.
Also, I have a set of used Toyota COPs to wire up, a torsen with new axles, green RX8 injectors, and a homemade BEGI-style coolant reroute waiting to be installed.
On order, I'm waiting for a set of Tecna coilovers and some 15x8 tungsten 6ULs. I figure when the new suspension arrives I'll drop the rear subframe to clean and paint it and install the torsen at the same time.
Sometime in the near future I'll pull my motor out to do a timing belt, seals, clutch (to be decided on), coolant reroute, and drill the oil pan.
Items remaining to be procured:
-Throttle body elbow, BOV pipe, misc clamps and fittings
-Clutch
-Turbo oil plumbing
-Turbo studs
-Downpipe and exhaust materials, muffler
-Grease fittings for bushings
-Tires - probably 205/50R15 Federal RS595s
-Valve stems and lug nuts
I bought a flanged 4" NACA vent from the same place Revlimiter did. Unlike him, I don't have dual lens low-profile headlights and I found that some trimming of the headlight frame was necessary to get the duct to fit. if I were to do it again, I'd probably order the 2 or 3 inch size. Lucky for me, I had a spare pop-up assembly from a parts car and I felt free to hack away.
Mocked up:
Epoxied, Bondo-ed, and primed:
Meanwhile, I picked up a tiny T3 churbo off eBay (with the .48 turbine AR that everyone seems to like), a Vibrant intercooler from Fab9, FM silicone charge piping, a Turbosmart dual port BOV from Fab9, and some stainless weld-els and a T3 flange off Amazon.
Manifold mocked up. The T3 flange came machined to nest on 1.5 inch pipe pretty nicely.
Then I freed up some cash by selling a bunch of climbing gear that I haven't used in a long time so I could buy a MIG welder off Craigslist. It's a good thing I bought some extra fittings to practice on, this **** is harder than it looks and now I need to buy more gas.
I'm hoping to reuse the flange off a spare stock manifold I have. Burring out the old welds has been a colossal pain in the ***.
As for the manifold, I have no power steering or air conditioning so I'm going to mount the turbo as low as I can while maintaining access to the fasteners and compatibility with the FM silicone pipe. Then I'll make my own downpipe and exhaust; 3" all the way to the bumper.
I thought pretty hard about going the ArtTech route for exhaust parts, but I realize that my motor and turbo combination is a little weak and if either blows up, I'd like to be able to just fabricate a new manifold for a 1.8 and a larger turbo. Plus, I want to learn how to weld just like I taught myself to paint and solder, even if it takes longer and costs more that just buying off the shelf parts.
Also, I have a set of used Toyota COPs to wire up, a torsen with new axles, green RX8 injectors, and a homemade BEGI-style coolant reroute waiting to be installed.
On order, I'm waiting for a set of Tecna coilovers and some 15x8 tungsten 6ULs. I figure when the new suspension arrives I'll drop the rear subframe to clean and paint it and install the torsen at the same time.
Sometime in the near future I'll pull my motor out to do a timing belt, seals, clutch (to be decided on), coolant reroute, and drill the oil pan.
Items remaining to be procured:
-Throttle body elbow, BOV pipe, misc clamps and fittings
-Clutch
-Turbo oil plumbing
-Turbo studs
-Downpipe and exhaust materials, muffler
-Grease fittings for bushings
-Tires - probably 205/50R15 Federal RS595s
-Valve stems and lug nuts
Reply
4
4

Max props!! You saved a Miata from the rust demons and are doing everything right. I applaud all the DIY here.
Don't be in a hurry to move those gauges. The visibility behind the shift **** is lousy.
Don't be in a hurry to move those gauges. The visibility behind the shift **** is lousy.
Reply
2
2
Thread Starter
Junior Member
iTrader: (1)
Joined: Oct 2011
Posts: 412
Total Cats: 78
From: New Hampshire
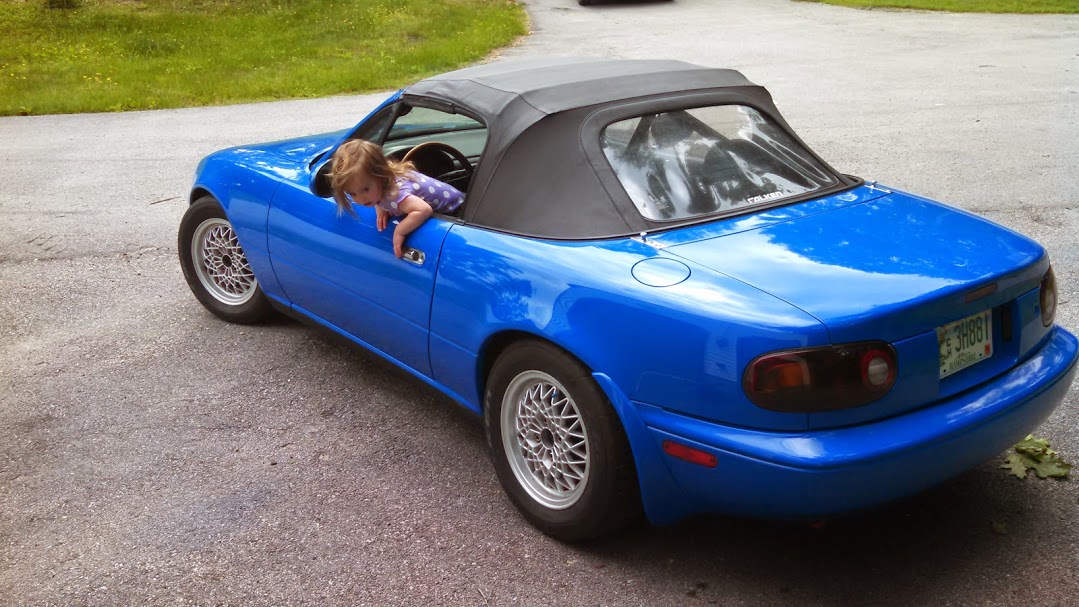
I had a '91 parts car that was even rustier. It donated a rear bumper cover, passenger door, spare motor, and 5 speed (Oxford comma FTW). My wife made me get rid of it for some reason...
I forgot, I also added FM frame rails and a replica R-package lip. The wheels are 14x6 Ronals that people usually confuse for BBSs. I bought them from my dad who got them out of the newspaper classifieds in the mid '90s for a Civic coupe he had. I've never seen another set but I'll probably sell them to offset the cost of my 6ULs.
Bonus cat pic:

Reply
2
2
Thread Starter
Junior Member
iTrader: (1)
Joined: Oct 2011
Posts: 412
Total Cats: 78
From: New Hampshire
I completed my thermostat spacer this morning. Considering that I started with a 2" x 4" x 6" piece of aluminum stock that I got for free, and only had a bandsaw and a sloppy Chinese mini-lathe to work with, I'm fairly pleased with how it came out. A friend did the welding for me.
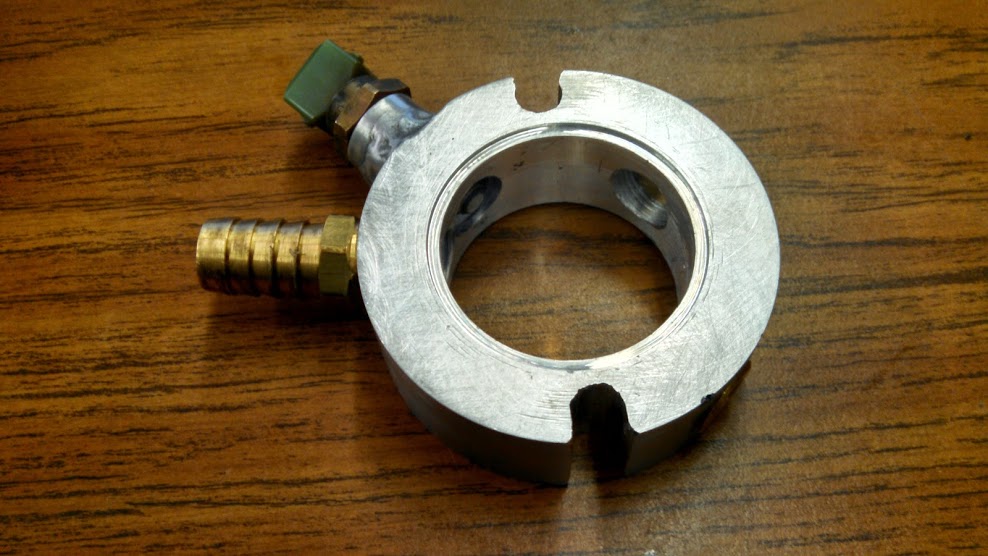
I have a Kia waterneck and GM truck hose ready to go, just need to come up with a freeze plug and block off plate for the front of the motor.
I have a Kia waterneck and GM truck hose ready to go, just need to come up with a freeze plug and block off plate for the front of the motor.
Reply
2
2
Thread Starter
Junior Member
iTrader: (1)
Joined: Oct 2011
Posts: 412
Total Cats: 78
From: New Hampshire
I made some progress on my NACA duct last night - finally blended the filler to my satisfaction. I still had some pinholes in the carbon fiber that I couldn't really get good access to sand, so I decided to paint the duct part with bedliner. It seems to help hide a lot of the imperfections.
I got some mariner blue in an aerosol can from my local paint place, the color match concerns me a little but I'll wait until it's fully cured, wed sanded and buffed before I make a judgment on that. I'm kind of wishing I'd just gotten a pint of the same urethane single stage for my spray gun, like I did for the rest of the car.

Botto of the lid, showing epoxxy mess.

I got some mariner blue in an aerosol can from my local paint place, the color match concerns me a little but I'll wait until it's fully cured, wed sanded and buffed before I make a judgment on that. I'm kind of wishing I'd just gotten a pint of the same urethane single stage for my spray gun, like I did for the rest of the car.
Botto of the lid, showing epoxxy mess.
Reply
1
1
Thread Starter
Junior Member
iTrader: (1)
Joined: Oct 2011
Posts: 412
Total Cats: 78
From: New Hampshire

I received my green RX8 injectors (195500-4460) back from being cleaned and flowed at Witch Hunter yesterday. They commented "Turned out OK. Not the best we've ever seen, should be usable."
I'm not sure what to make of that, but I went ahead and installed them with the highest flowing one on cylinder #4 and the lowest on cylinder #1. The install went alright until I broke off one of the fuel pressure regulator bolts.
 I'll have to go back and fix it, but it doesn't leak so I left it for the time being so I could start and tune the car.
I revised Req Fuel with Tuner Studios calculator, changing nothing else. It started a little hard and ran rough, very rich, but once it warmed up Autotune took care of everything pretty well. It idles a little richer and faster than before, but throttle response and power seem to be improved. I've of course got more tuning to do.
One slightly disturbing thing is that I was getting knock at very low engine speeds with very high vacuum, basically WOT in second gear at 15 MPH. AFR was very rich when this happened, so maybe I need to pull some timing if it persists after further fuel tuning.
Reply
1
1

Thread Starter
Junior Member
iTrader: (1)
Joined: Oct 2011
Posts: 412
Total Cats: 78
From: New Hampshire
Thanks.  A couple more:

I had surprising success filling in all the gouges on the bumper cover with plastic filler from JB Weld. I did a test on a junk bumper cover, flexing it to try and get the filler to pop out, but it never did. So far, so good.
It's funny how obsessive I got over getting rid of the orange peel. Some of it's still there and it bugs me until I take a close look at my Forester and see what passes for a factory paint job.
Also, some 205/50R15 Rivals showed up on my doorstep last week. The $70 BFG rebate is what sold me on them over the Federals. I can't wait for my tungsten 6ULs and Tecnas to come in. I really like the mesh wheels I have, but they take a lot of weight to balance and the tires are pretty old.
A couple more:I had surprising success filling in all the gouges on the bumper cover with plastic filler from JB Weld. I did a test on a junk bumper cover, flexing it to try and get the filler to pop out, but it never did. So far, so good.
It's funny how obsessive I got over getting rid of the orange peel. Some of it's still there and it bugs me until I take a close look at my Forester and see what passes for a factory paint job.
Also, some 205/50R15 Rivals showed up on my doorstep last week. The $70 BFG rebate is what sold me on them over the Federals. I can't wait for my tungsten 6ULs and Tecnas to come in. I really like the mesh wheels I have, but they take a lot of weight to balance and the tires are pretty old.
Reply
2
2

Thread Starter
Junior Member
iTrader: (1)
Joined: Oct 2011
Posts: 412
Total Cats: 78
From: New Hampshire
Epoxxied and clamped it in place:
Filled it:
And painted it:
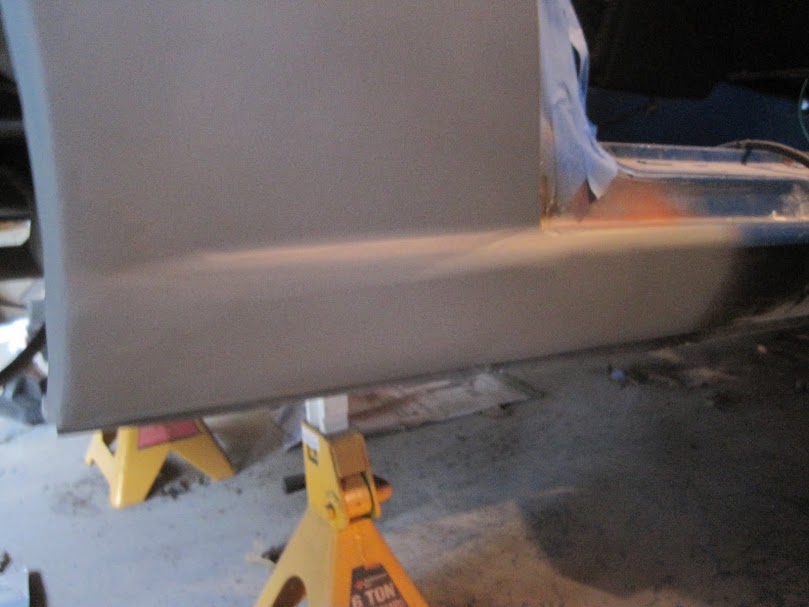
You really can't tell it's there now unless you notice that I filled in the seam at the back of the door. 1500 miles later and there's no cracking of the filler or anything from chassis flex.
Filled it:
And painted it:
You really can't tell it's there now unless you notice that I filled in the seam at the back of the door. 1500 miles later and there's no cracking of the filler or anything from chassis flex.
Reply
2
2
Amazing man. I love a clean mariner blue.. one day I'll repaint mine.
Not until I have a covered parking spot though, or preferably a garage.
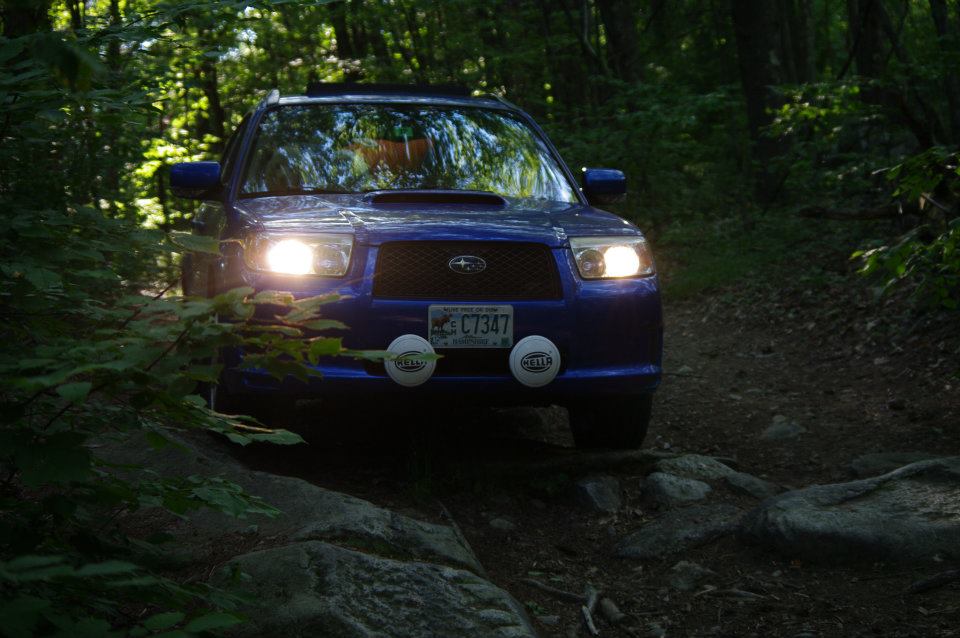
What year/model is your FOZ? Foz/miata is the best combo.
Not until I have a covered parking spot though, or preferably a garage.
What year/model is your FOZ? Foz/miata is the best combo.
Reply
1
1
Thread Starter
Junior Member
iTrader: (1)
Joined: Oct 2011
Posts: 412
Total Cats: 78
From: New Hampshire
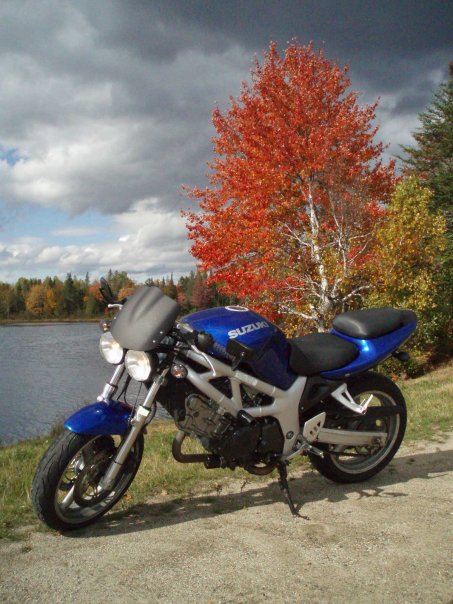
Very cool. I've seen it when lurking in your build thread. I also have an SV650 to your Buell.
Mariner is still my favorite Miata color. A decent DIY paint job is very doable if you've got a clean place to work, but it's a very different skill than mechanical work. Much more of an art than turning wrenches. I had to adopt a much more patient mindset.
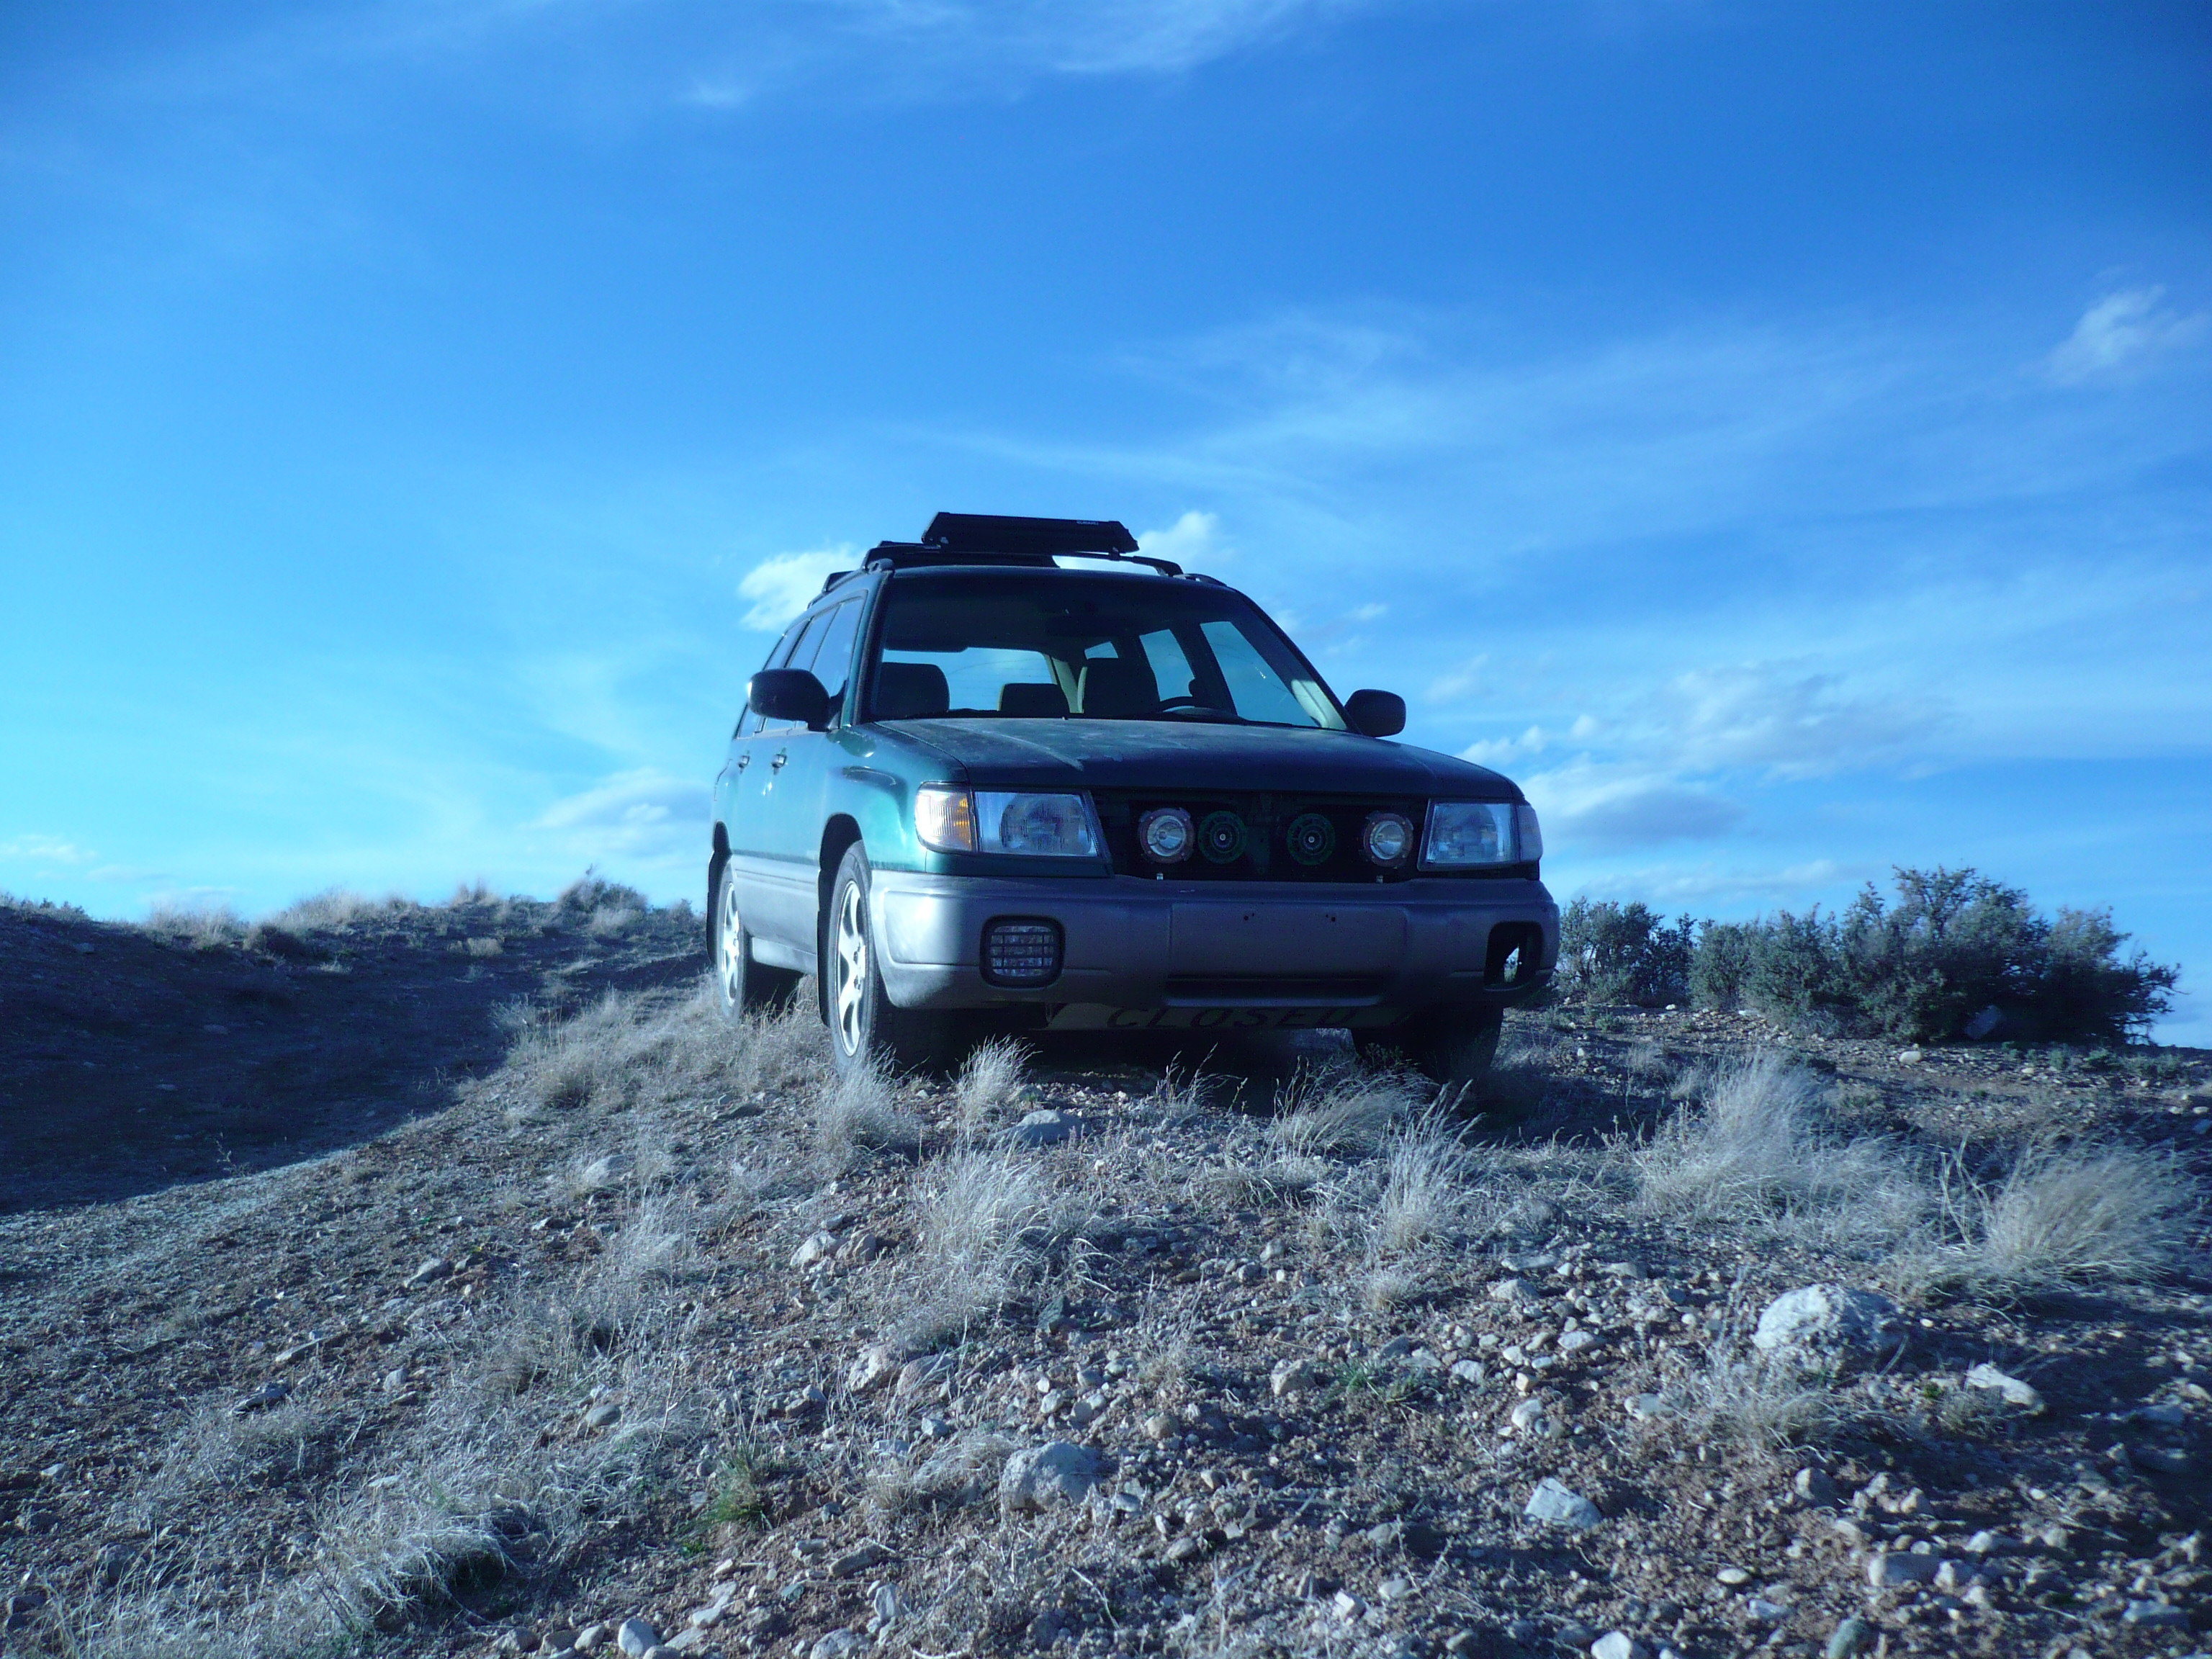
My Forester is an '07. They do make nice daily drivers.

Aforementioned SV:
Mariner is still my favorite Miata color. A decent DIY paint job is very doable if you've got a clean place to work, but it's a very different skill than mechanical work. Much more of an art than turning wrenches. I had to adopt a much more patient mindset.
My Forester is an '07. They do make nice daily drivers.
Aforementioned SV:
Reply
1
1
 .
.
Reply
0
0


