

How to: Repack a front hub


Thread Starter
Elite Member
iTrader: (37)
Joined: Apr 2010
Posts: 10,477
Total Cats: 1,924
From: Very NorCal
Ok, so I got tired of finding broken links to the guy who did a write up on this, so I decided to do my own. Please forgive me if any of this is unclear or if the pics suck. Remember that I did this with my phone while mostly drunk wearing gloves covered in grease. 
Some critical thinking and restraint must be applied when attempting this job. There are several parts that cannot be replaced (such as the plastic bearing retainer) so don't get all angry monkey when prying on things. This is the process that I used for MY hubs. I would imagine most hubs will follow the same basic steps but the internal parts may be slightly different. Remember that Mazda claims these hubs ARE NOT SERVICEABLE so please, use your head and [SIZE="5"]PROCEED AT YOUR OWN RISK! I accept no liability or responsibility if you choose to attempt this yourself.[/SIZE]
SAFETY WARNING: Before you proceed, please be aware that not all hubs are created equal and we have documented failures for specific types of hubs due to substandard machining practices. Please read this thread and make sure your hubs are safe for track duty: https://www.miataturbo.net/race-prep...el-hubs-90331/
Stuff you gonna need:

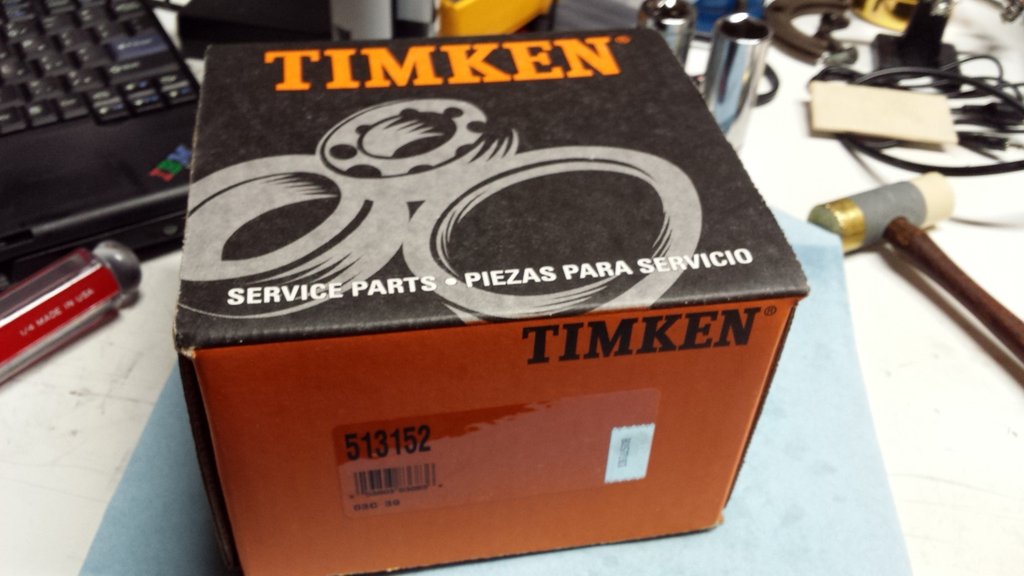
This is my hub, there are many like it but this one is mine. Its a Timken 513152 fresh from Amazon. I've been told that any eBay Chinese hub should be fine, but I chose to go with a known quantity as I don't plan on doing this again any time soon.
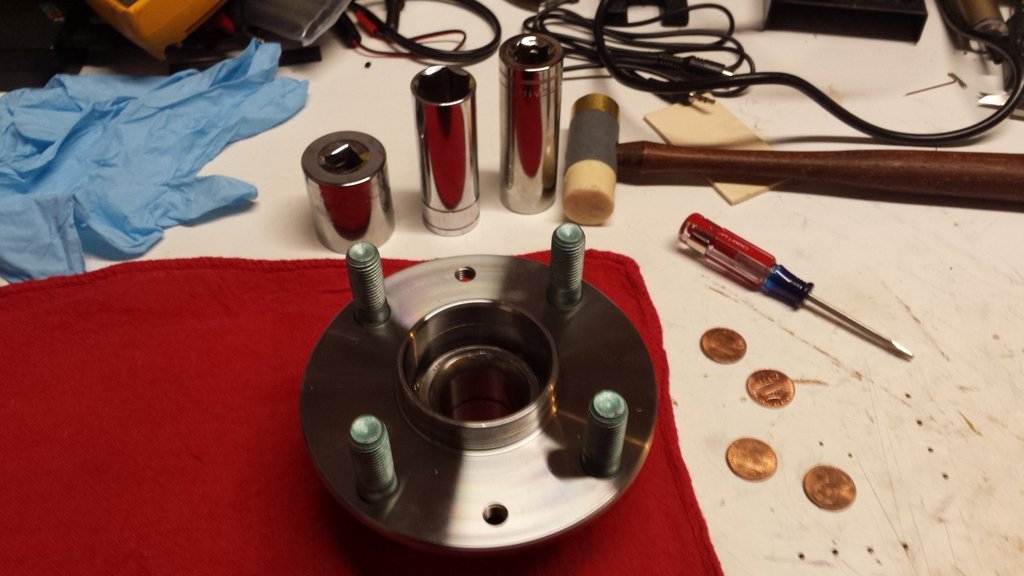
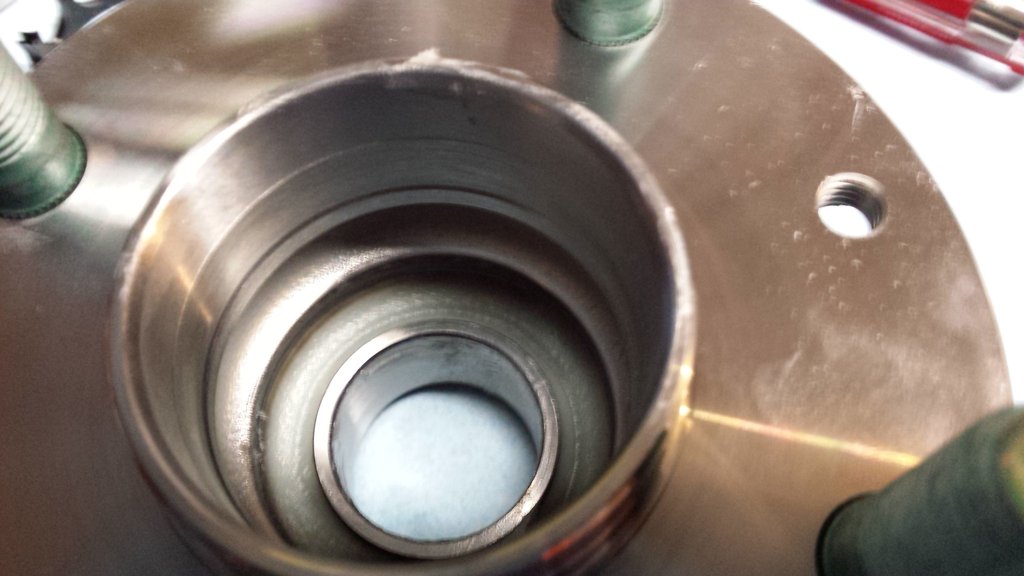
It looks like this, its a hub. Also pictured are some tools
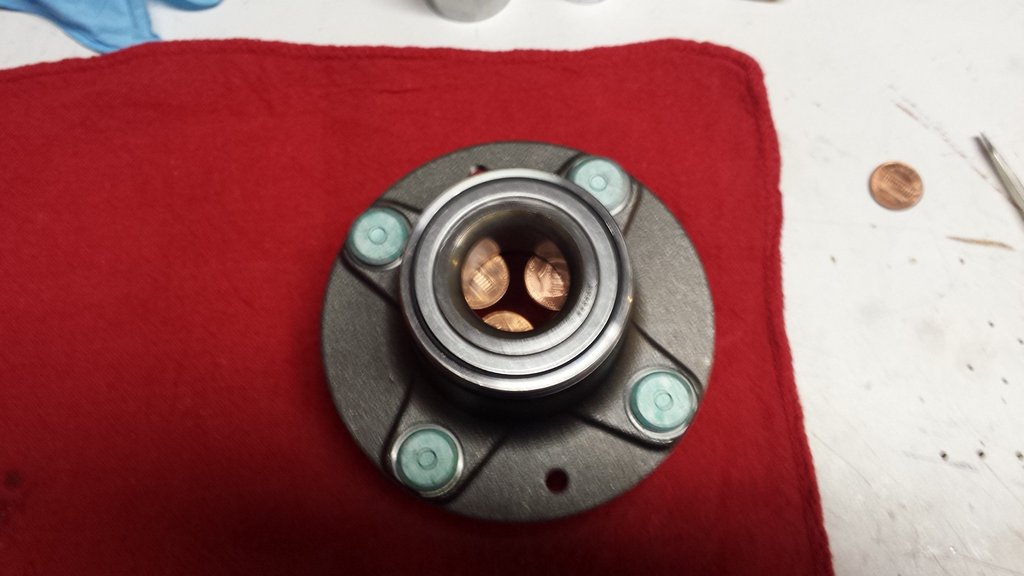
First things first: jam a couple pennies or washers between the 2 inner races
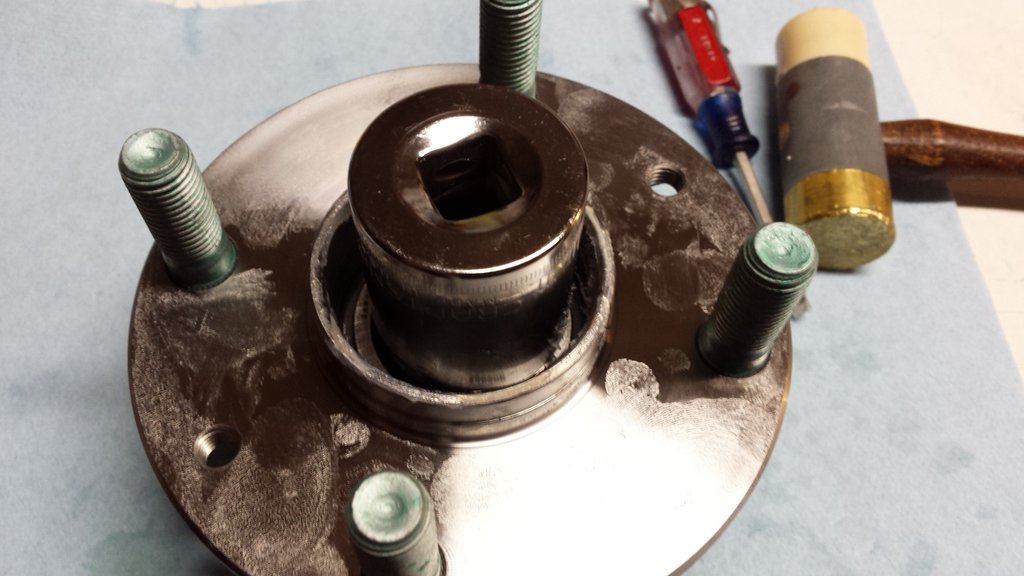
Now drop your 21mm socket down the hole and smack it with a hammer
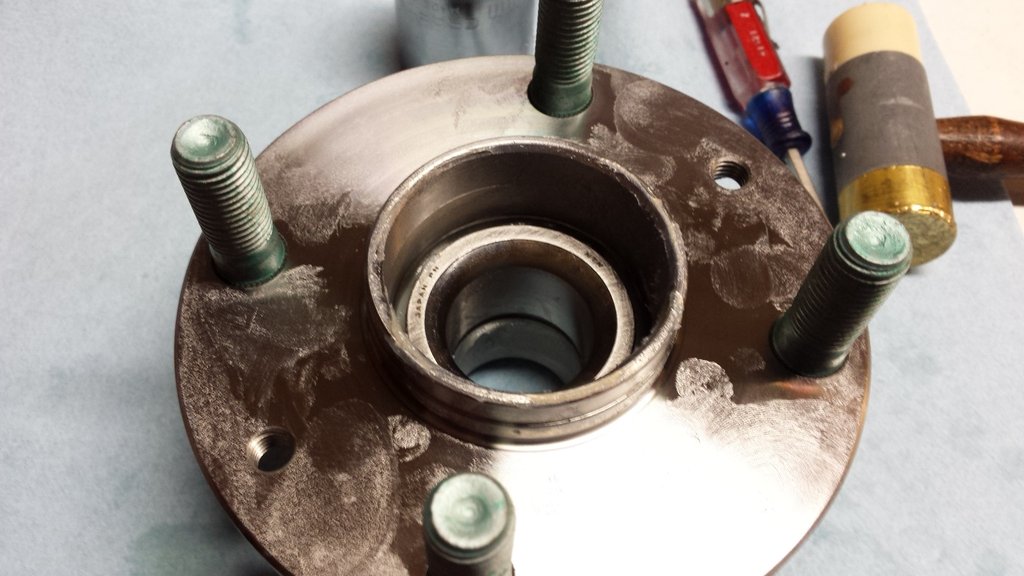
If you did this correctly, the outer race and pennies should pop out the bottom. If not, hit it harder.
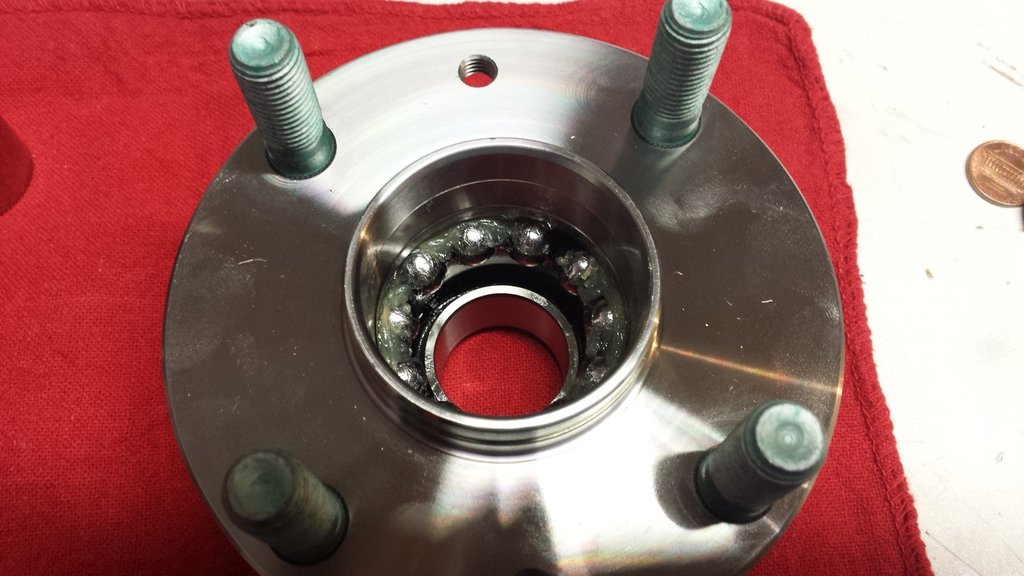
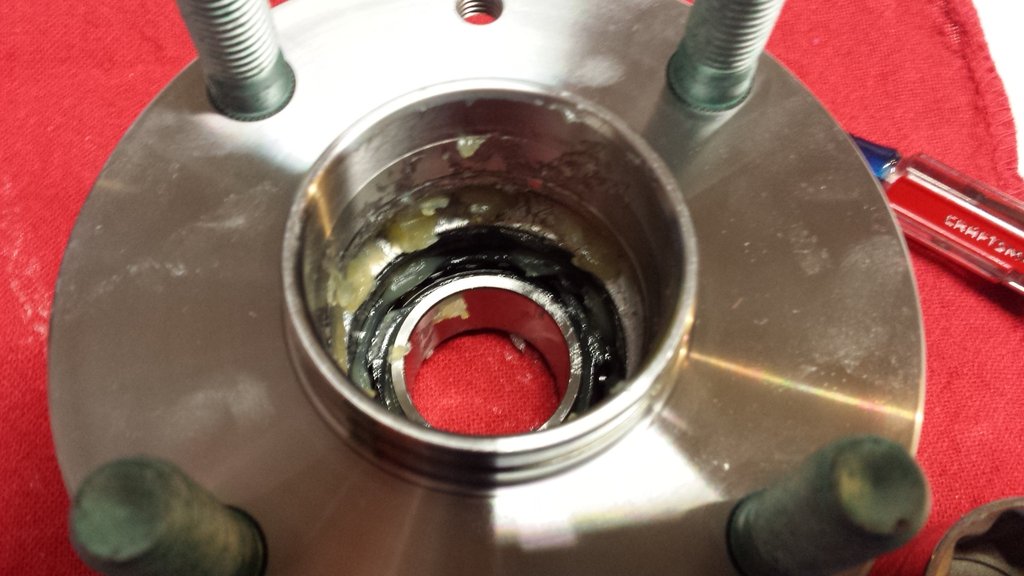
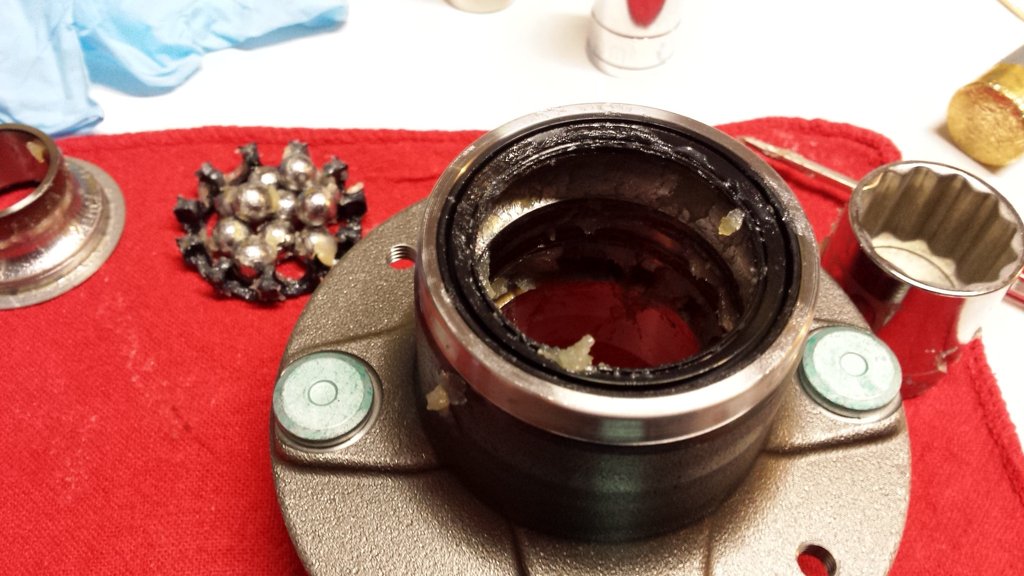
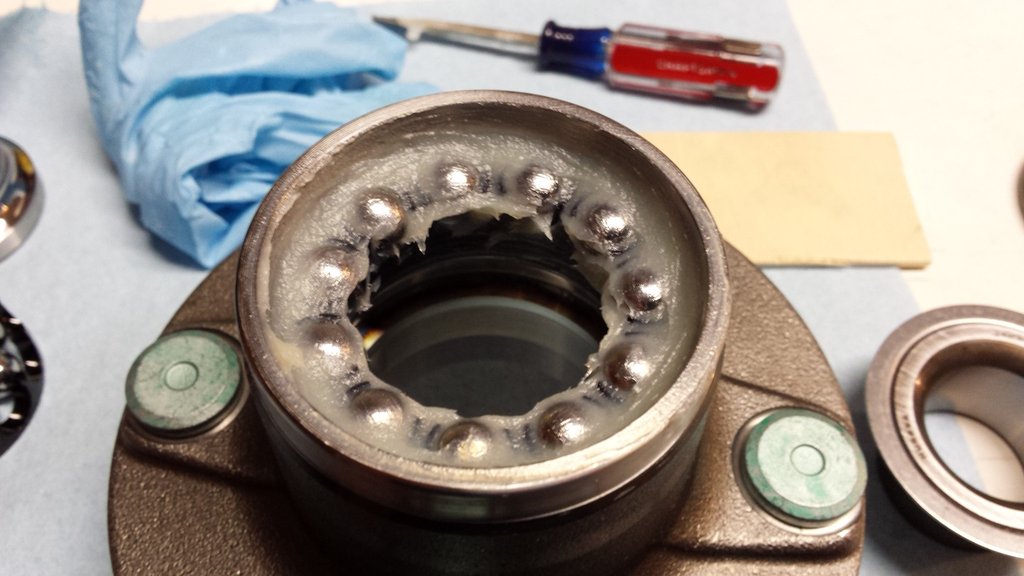
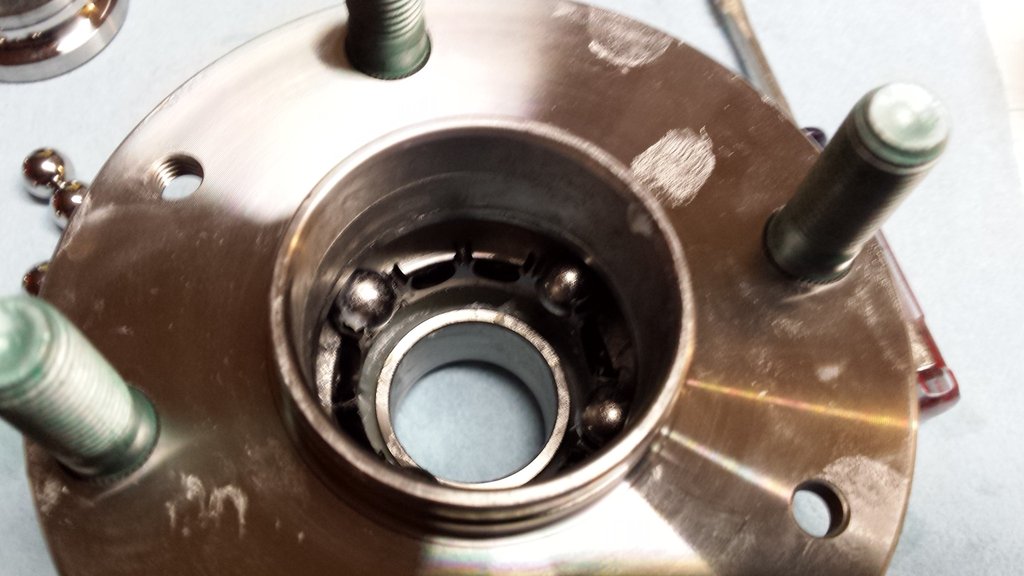
Flip the hub over an check out dem greasy *****. You can see them held in place by the black plastic bearing retainer.
Take the smaller of your screwdrivers and pop the ***** loose. You can do this by putting the blade of the screwdriver behind the ball and gently prying it forward. DO NOT BREAK THE PLASTIC RETAINER! Pay attenton to how much force you are using or you will scratch the outer race.
See the race back there? Don't screw it up!
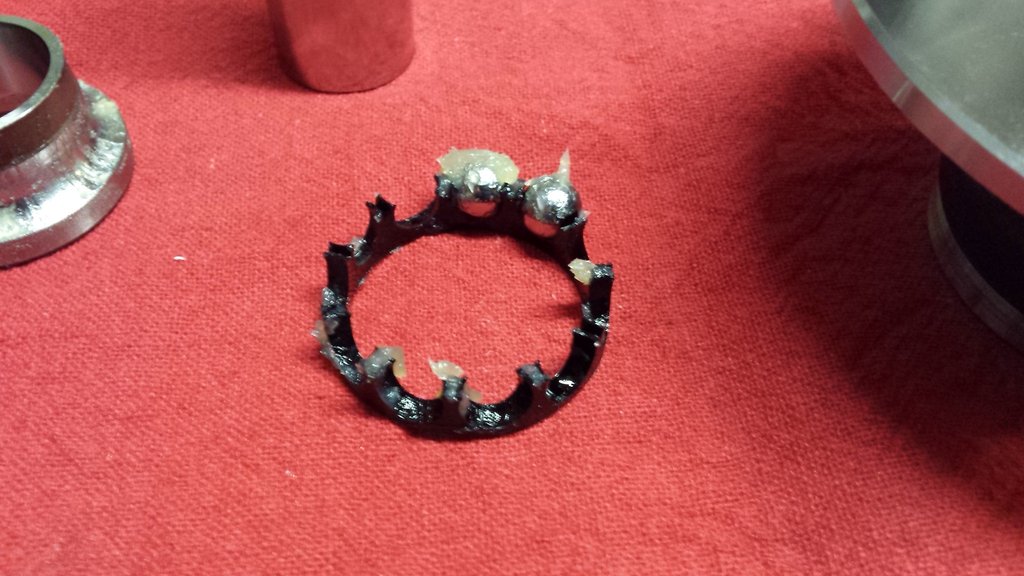
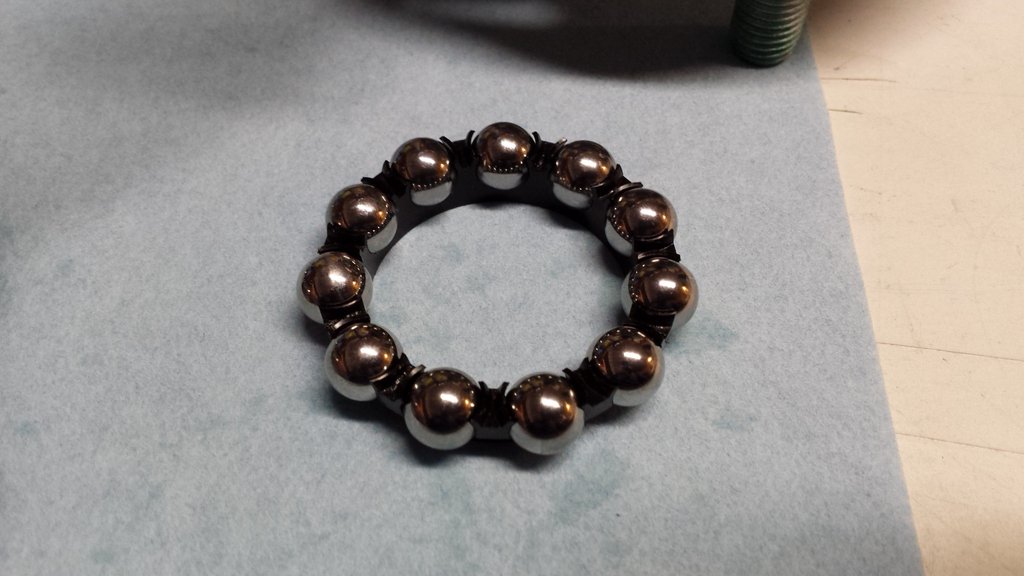
Now remove the bearing retainer. I stuck a couple of them sticky ***** in there so you can see what I'm talking about. Put the ***** and the retainer together off to the side. We don't want to mix them up with the rear *****.
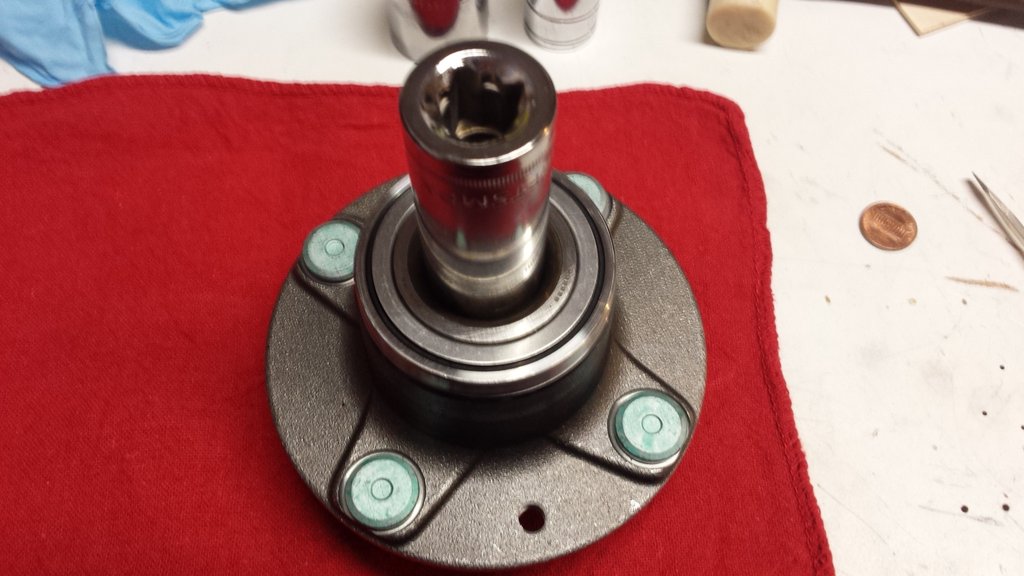
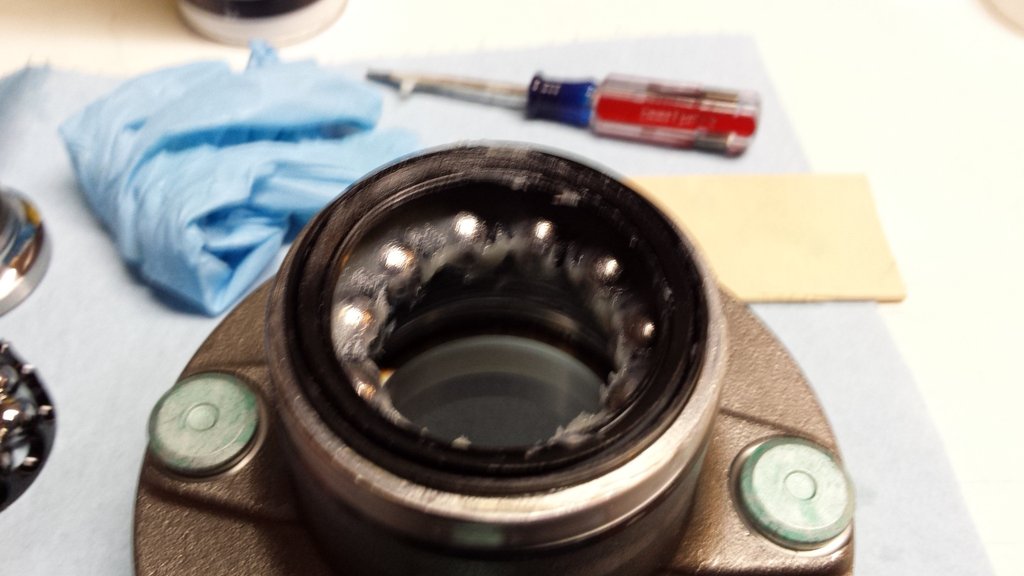
Look down into that greasy hole and try not to get too excited. The exposed silver ring in there is the face of the inner race. That's the next part we will be removing
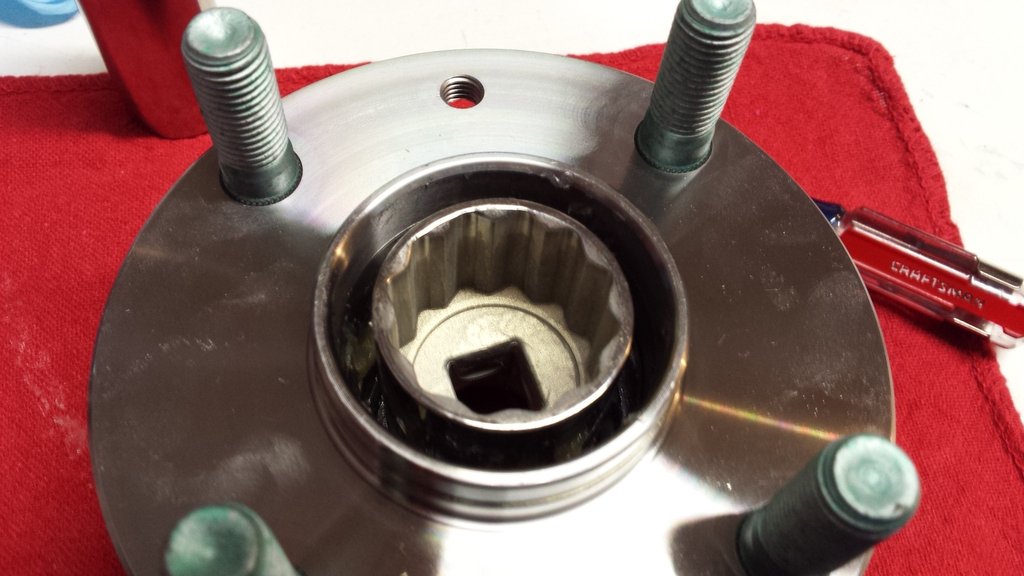
Drop your 29mm socket down the hole
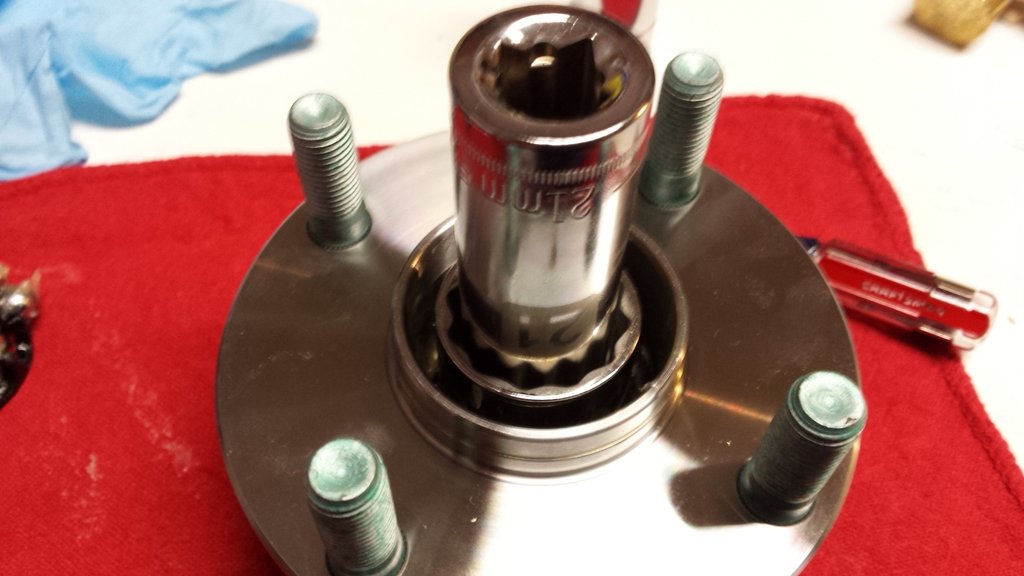
Now dock your slimmer 21mm socket inside the 29mm
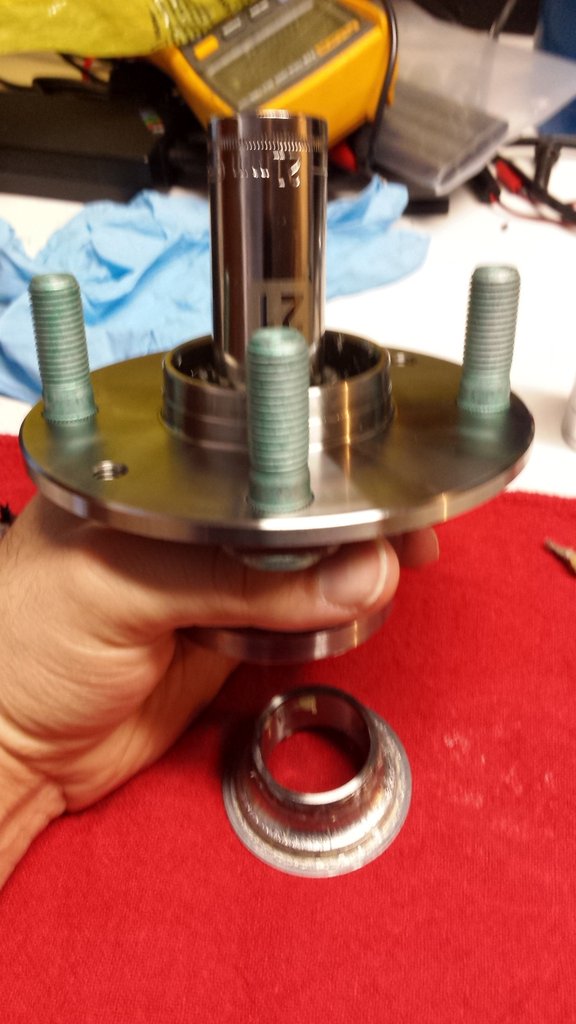
Now smack it with a hammer watch the inner race pop out
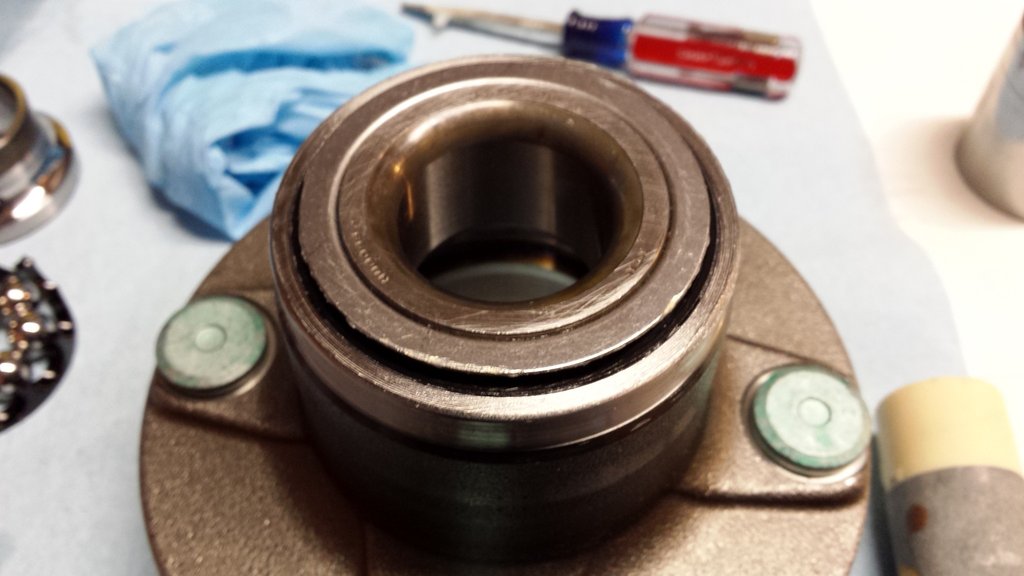
My camera decided to miss some pictures but here is what the hub looks like after the inner ***** and retainer are removed. It's the same process as the outer so you should be able to handle it. You can also see the rear rubber seal my Timken hubs were equipped with. You may need to squeeze the retainer to get it past the seal, just don't pry against or otherwise damage the seal. Do not mix up the 2 sets of *****, keep them separated.
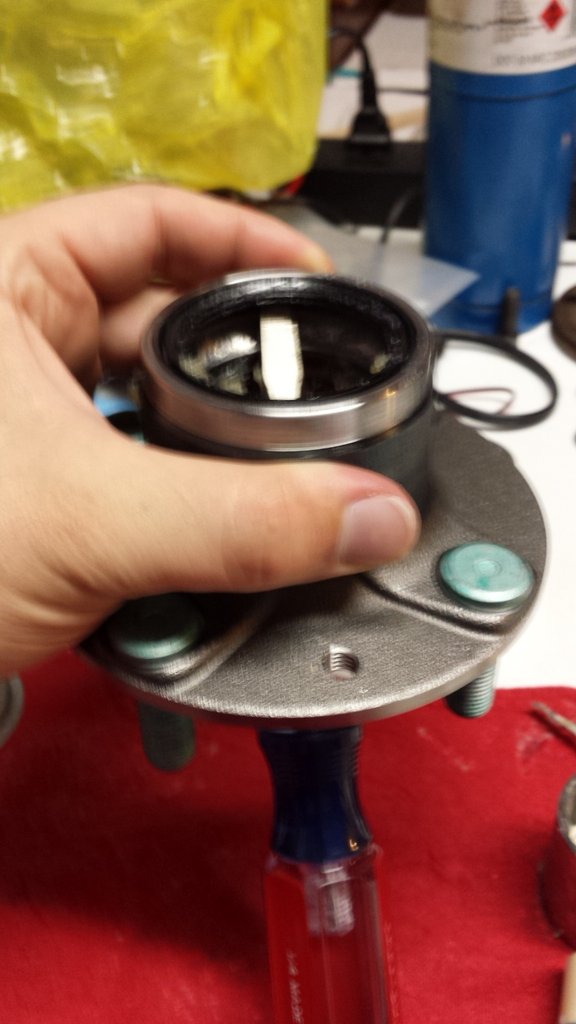
Our next step is to remove the seal. Insert your largish screwdriver from the backside and use it to GENTLY tap the seal loose.
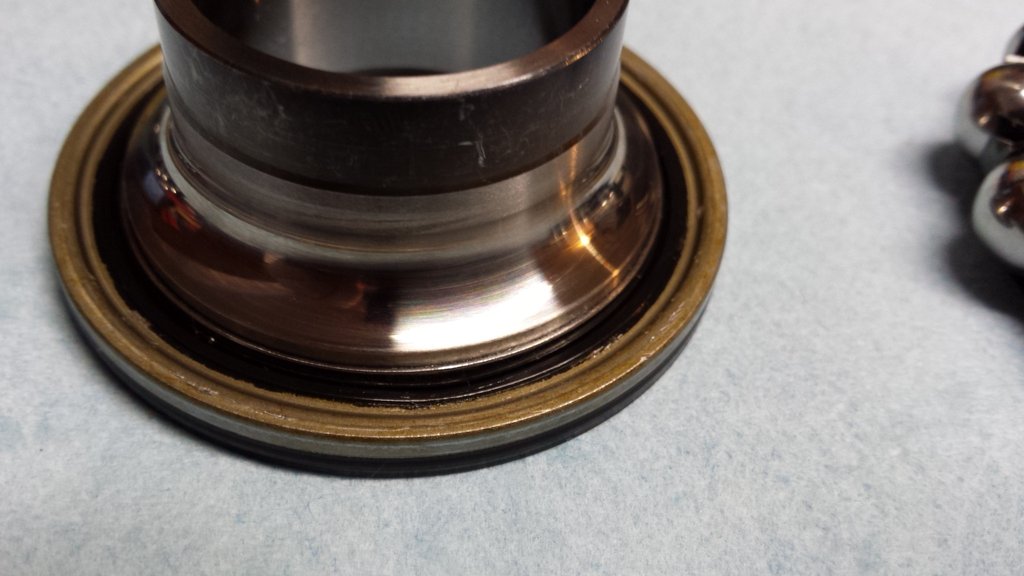
This is what the seal looks like on the inside. I popped it back over the inner race so you can get a better idea of what you are looking at. The rubber part is bonded to the yellow metal part. Obviously we want to push on the metal part.
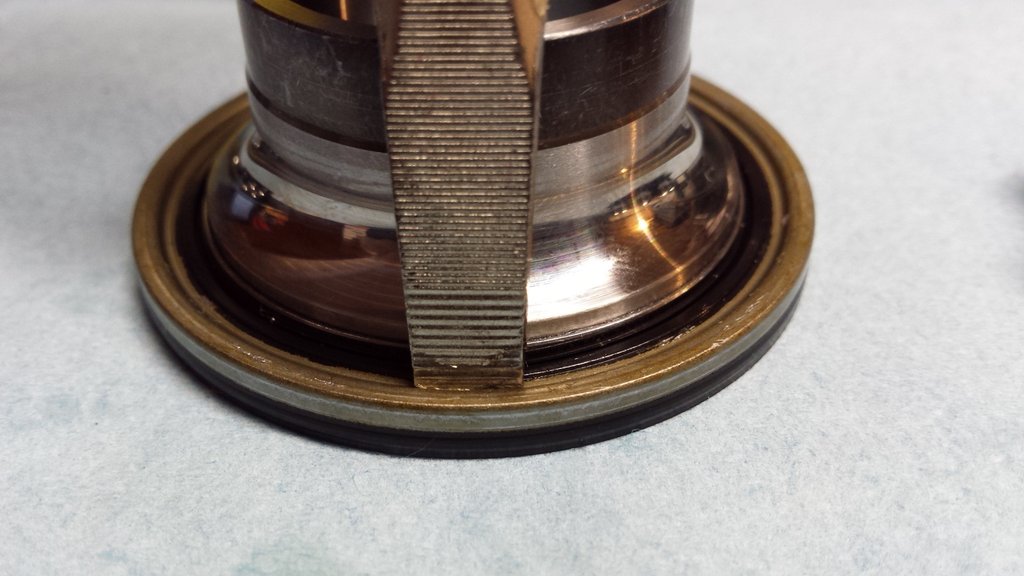
This is pretty much ideal screwdriver placement. Don't screw this up as the seals are very difficult to find.
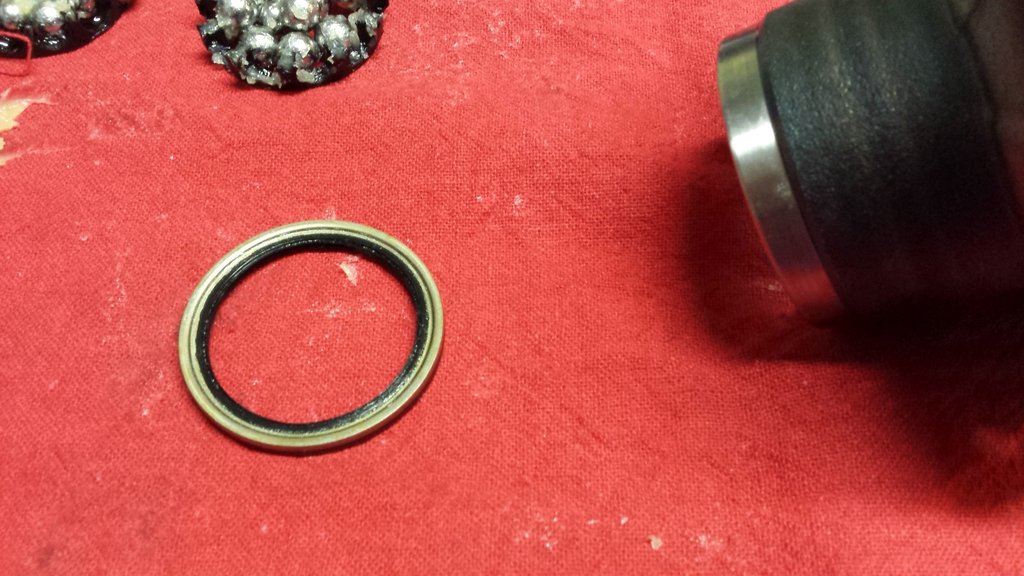
Seal free of hub. Run little seal, run!
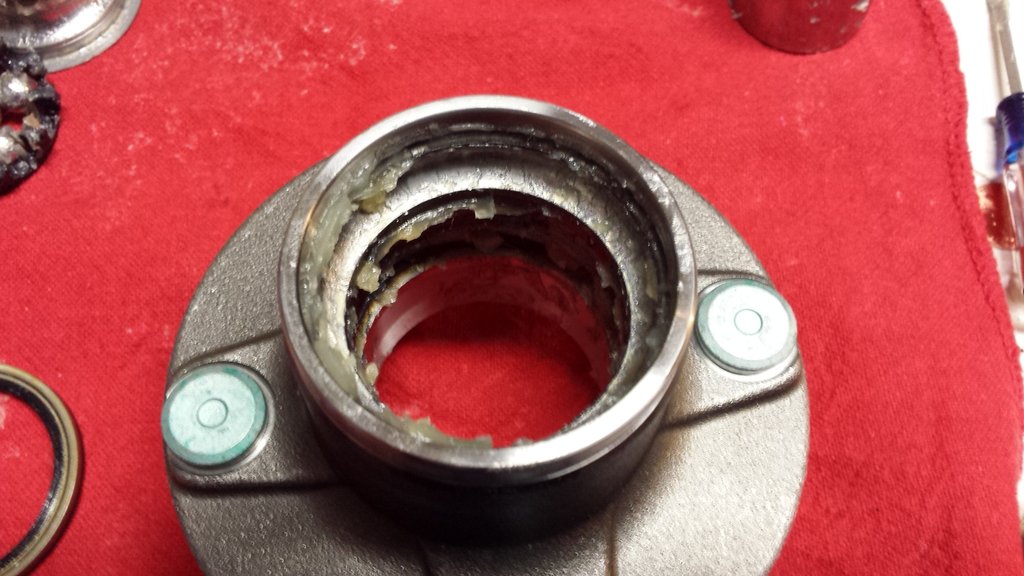
Now here is the greasy hole you need to clean.
I started by wiping everything down with disposable blue shop towels to get as much grease cleared away as possible. The hub body and bearings clean up really well with a rag soaked in acetone. Thicker deposits seem to yield to WD-40 + rag followed by acetone. The idea is to get everything as clean as humanly possible as to not contaminate the new grease and thus destroy the shiny new bearings.
[SIZE="5"]WARNING![/SIZE]

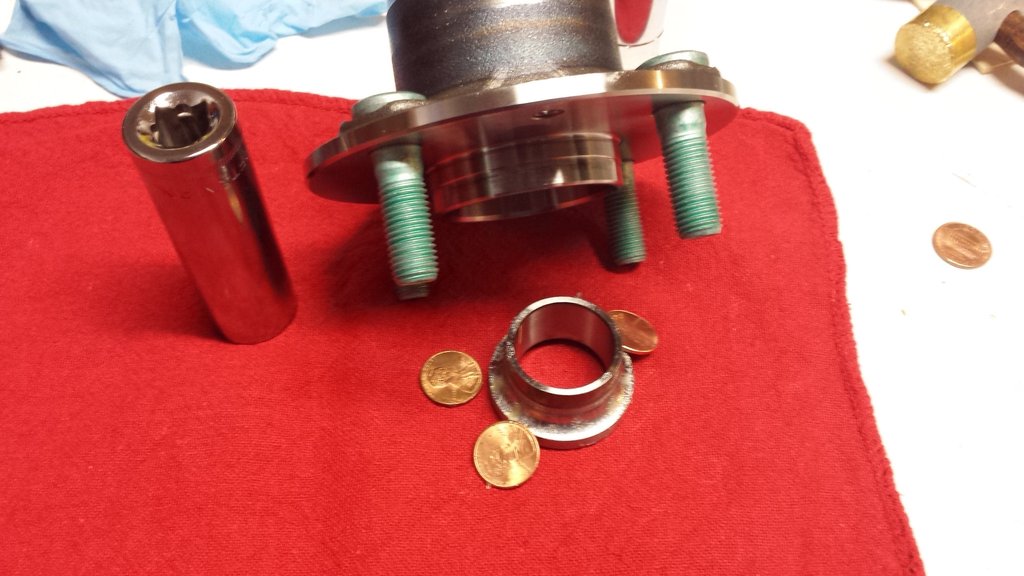
For reference, left is outer bearing retainer and race, right is inner.
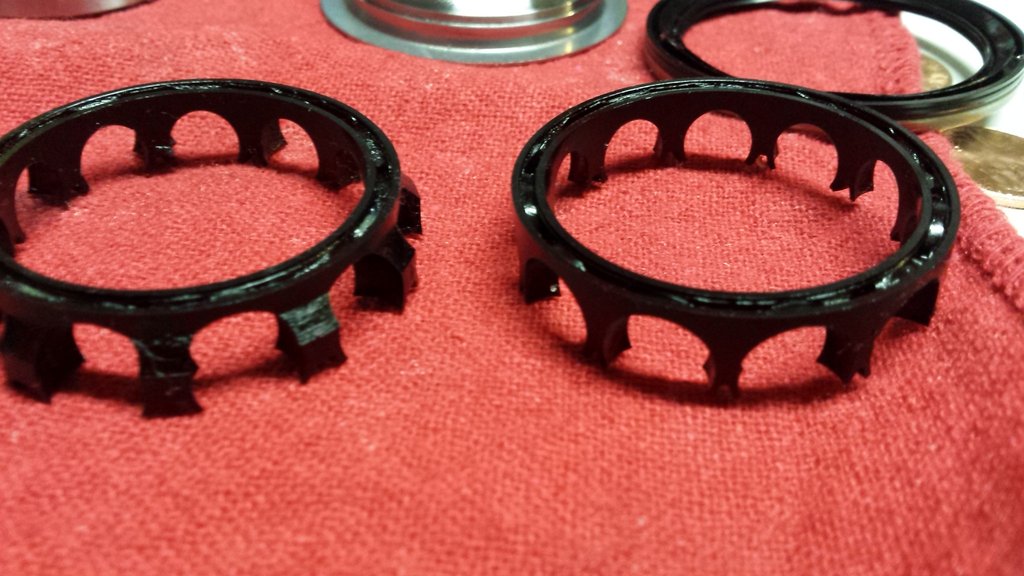
Just to confuse you, I flipped them over and reversed their locations so you can better see how they are different.
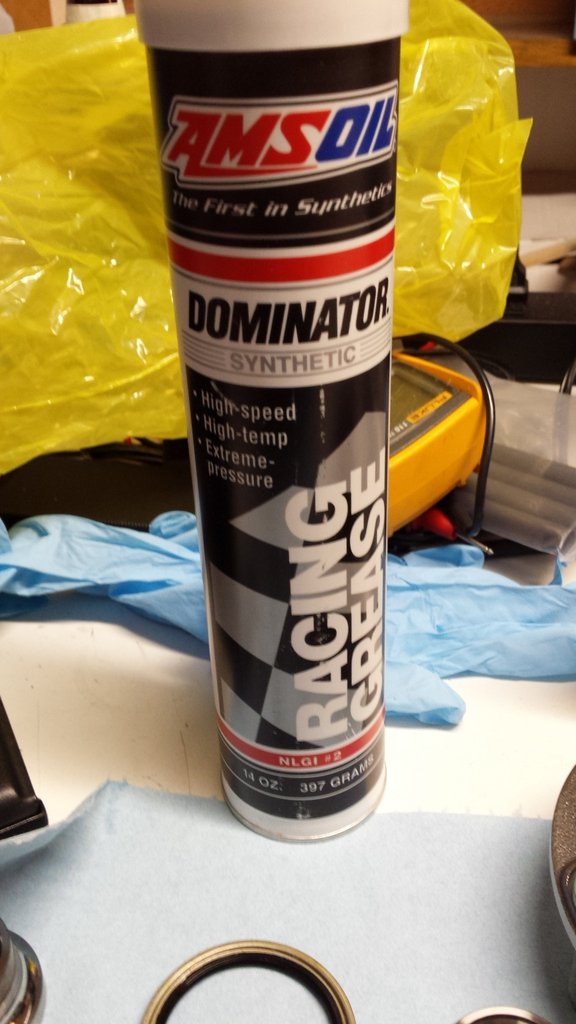
This is the grease we will be using. Its AMSOIL Dominator Synthetic Racing Grease. You will recognize its smell if you have ever met Hustler in person. This is the same product as the AMSOIL 2000 Race Grease but in their infinate wisdom AMSOIL decided to change the name. I got my tube from Andrew @ Trackspeed Engineering. PM Savington (Andrew) about it as he does not list the AMSOIL goodies on his website.
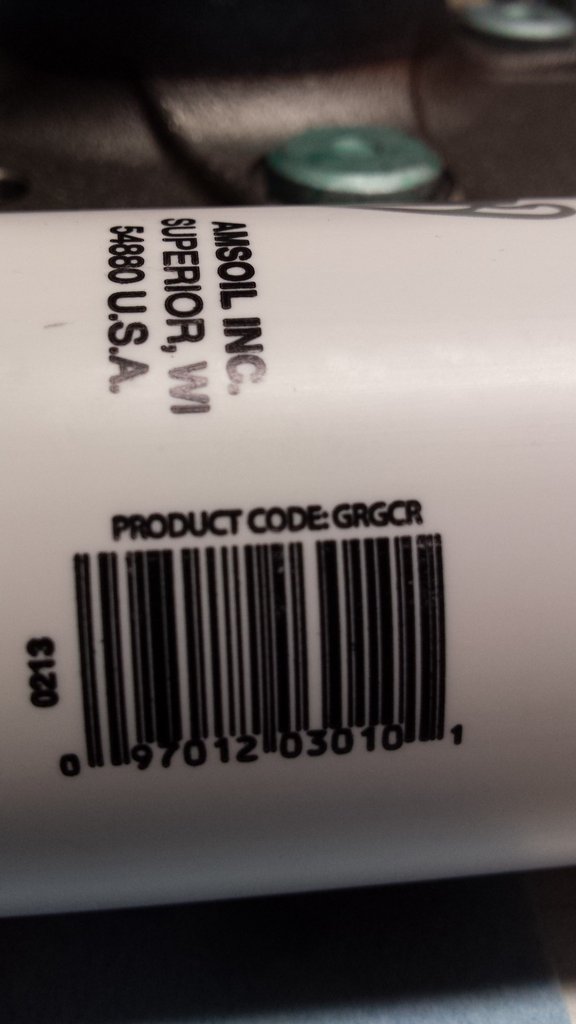
Here is the product code so you don't get confused.
Start by popping your rear ***** back into the appropriate retainer.
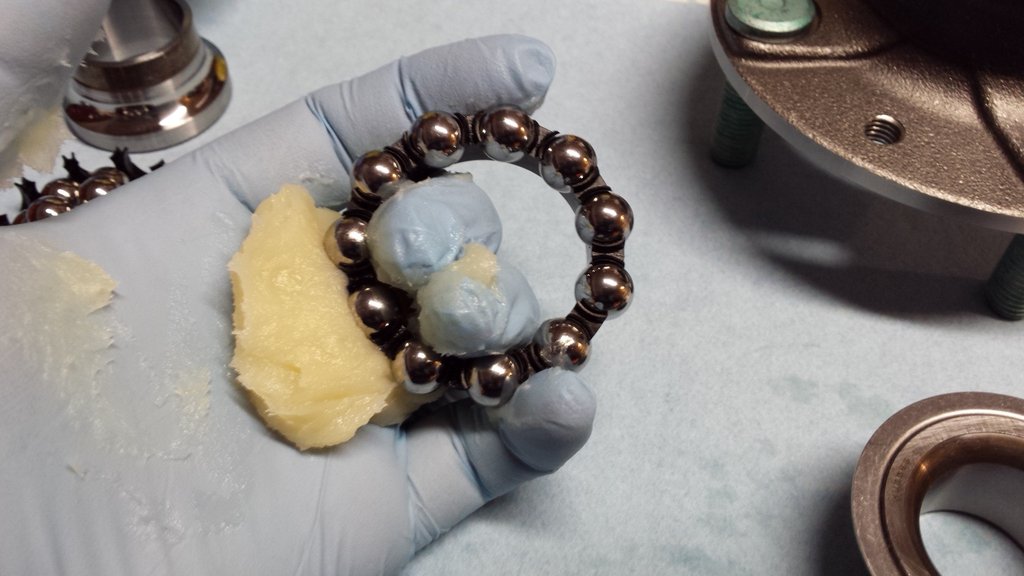
Get yourself a generous gob of grease and get packin' (I think this was actually way too much grease)
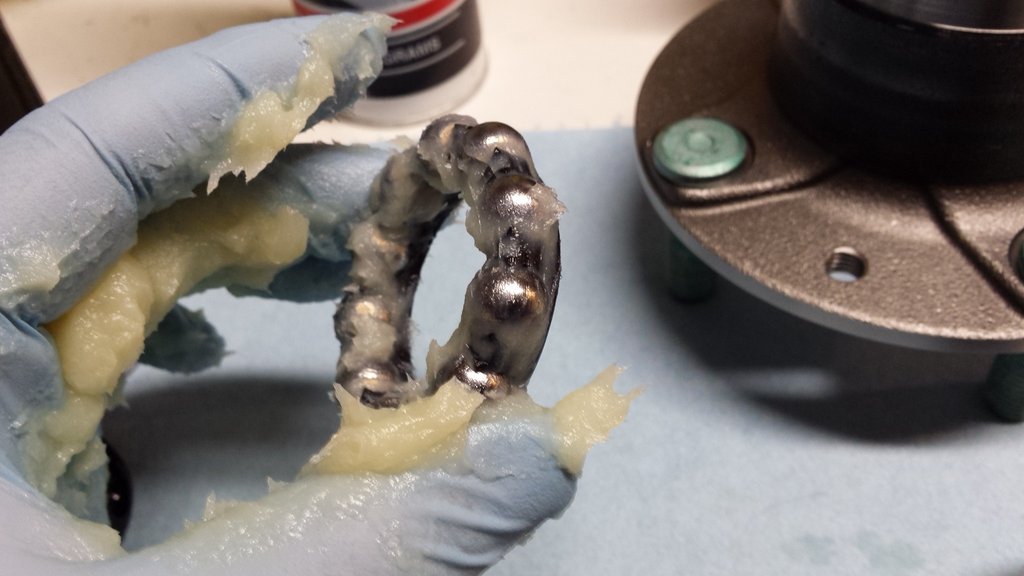
Check out my greasy *****!
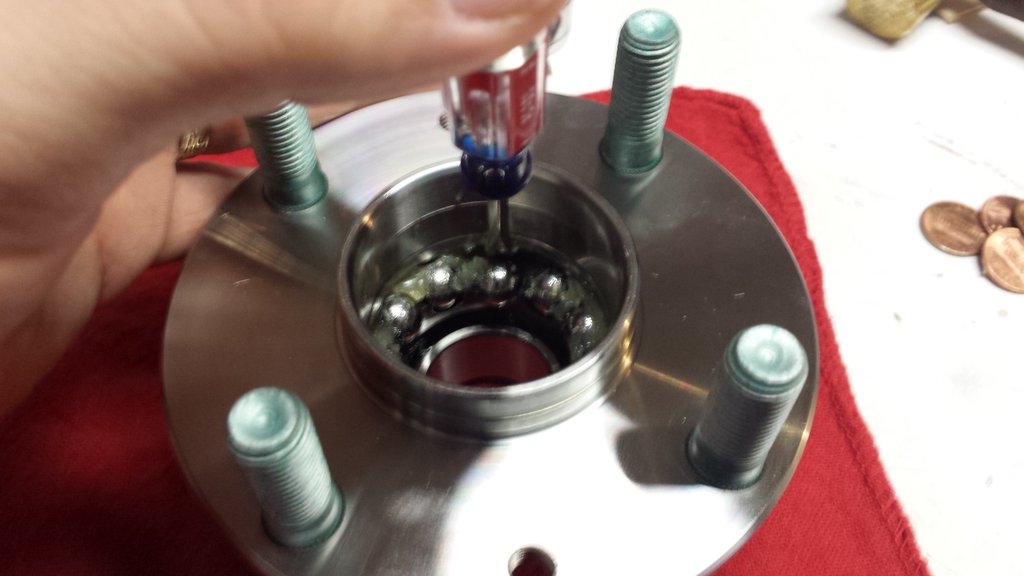
Flip the hub back over, put a little grease on the inner bearing race (no one likes it when you go in dry) and drop the retainer assembly back into place. Pack more grease in on top if you have the paranoia as I do.
Now that the bearings are back in the hub, re-install the seal. Be sure to GENTLY tap it back into place until its flush with the face of the hub. Put a smidge of grease on the face of the seal.

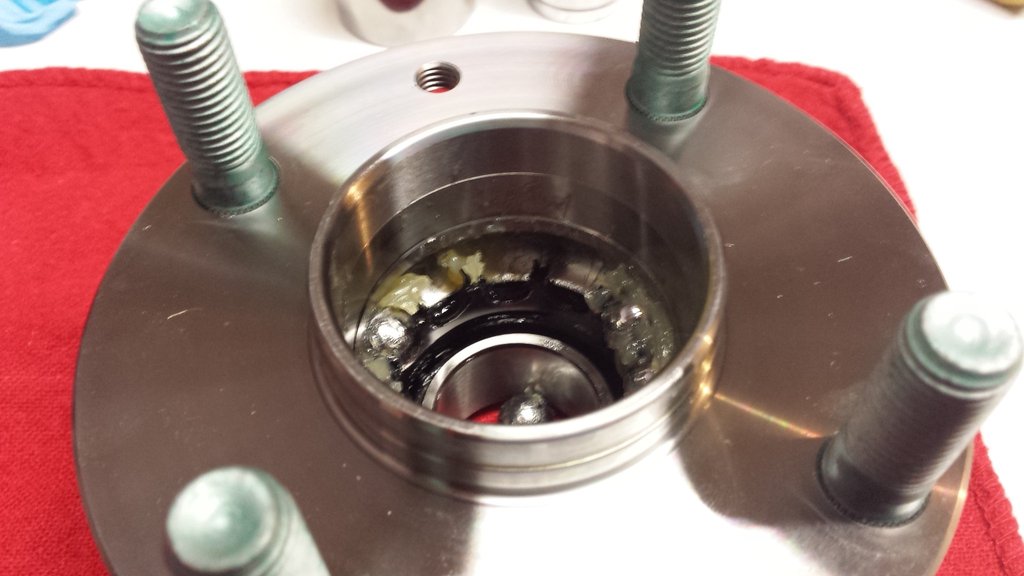
Now grab that inner race, smear some grease on the bearing surface. (Sorry, pics are a little out of sequence, the hub should have the seal installed already as in the previous step)
Now drop it in from the rear...
...and GENTLY tap it into place until its flush with the face of the hub.
Here is the inner race as seen from the outside. I pushed a little extra grease in there, because paranoia.
This next step is truly terrible and frustrating. I only have this one pic so hopefully it gets the idea across. I started by putting a layer of grease on the bearing surface. Unlike the inner retainer, the outer one will not hold the ***** for you. You have to hold the retainer in place form the inside of the hub with one finger on one hand while you pop the ***** into place with one finger on the other hand. Like I say, its frustrating as hell but you will eventually get it done.
IMAGE MISSING
Once you get all the ***** in place, pack them little bastards up with grease.
IMAGE MISSING
Grab the outer race and smear some grease on the bearing surface then drop it inside the bearings.
Put your socket on top of the race and give it a good tap...
...and the race will drop back into place.
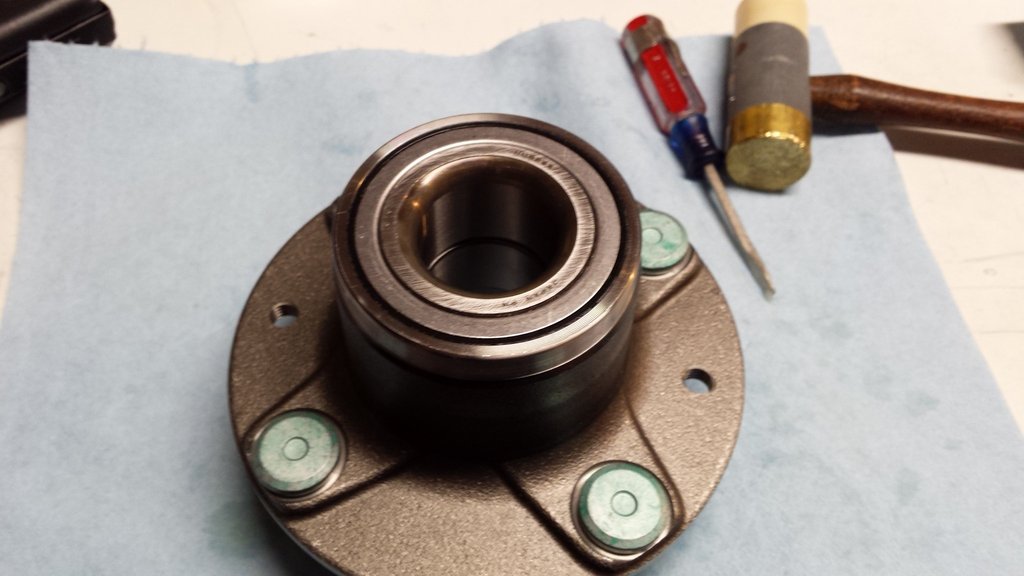
Congratulations! If your ***** is not currently stuck in the hub then you should have a properly repacked hub at this point. Wipe down the hub with the acetone rag and have that beer I mentioned earlier.
[SIZE="5"]NOW, repeat the process with the second hub [/SIZE]
Some critical thinking and restraint must be applied when attempting this job. There are several parts that cannot be replaced (such as the plastic bearing retainer) so don't get all angry monkey when prying on things. This is the process that I used for MY hubs. I would imagine most hubs will follow the same basic steps but the internal parts may be slightly different. Remember that Mazda claims these hubs ARE NOT SERVICEABLE so please, use your head and [SIZE="5"]PROCEED AT YOUR OWN RISK! I accept no liability or responsibility if you choose to attempt this yourself.[/SIZE]
SAFETY WARNING: Before you proceed, please be aware that not all hubs are created equal and we have documented failures for specific types of hubs due to substandard machining practices. Please read this thread and make sure your hubs are safe for track duty: https://www.miataturbo.net/race-prep...el-hubs-90331/
Stuff you gonna need:
- hub (duh)
- 29mm socket (You are going to need this for the giant hub nut anyway)
- 21mm socket
- smallish hammer
- smallish screwdriver
- largish screwdriver
- several pennies or penny sized washers
- bearing grease (We use AMSOIL around here but the SpecMiata guys seem to like Redline CV2)
- WD-40
- Acetone
- many rags or shop towels
- toothbrush
- nitrile gloves
- safety glasses
- beer
This is my hub, there are many like it but this one is mine. Its a Timken 513152 fresh from Amazon. I've been told that any eBay Chinese hub should be fine, but I chose to go with a known quantity as I don't plan on doing this again any time soon.
It looks like this, its a hub. Also pictured are some tools
First things first: jam a couple pennies or washers between the 2 inner races
Now drop your 21mm socket down the hole and smack it with a hammer
If you did this correctly, the outer race and pennies should pop out the bottom. If not, hit it harder.
Flip the hub over an check out dem greasy *****. You can see them held in place by the black plastic bearing retainer.
Take the smaller of your screwdrivers and pop the ***** loose. You can do this by putting the blade of the screwdriver behind the ball and gently prying it forward. DO NOT BREAK THE PLASTIC RETAINER! Pay attenton to how much force you are using or you will scratch the outer race.
See the race back there? Don't screw it up!
Now remove the bearing retainer. I stuck a couple of them sticky ***** in there so you can see what I'm talking about. Put the ***** and the retainer together off to the side. We don't want to mix them up with the rear *****.
Look down into that greasy hole and try not to get too excited. The exposed silver ring in there is the face of the inner race. That's the next part we will be removing
Drop your 29mm socket down the hole
Now dock your slimmer 21mm socket inside the 29mm
Now smack it with a hammer watch the inner race pop out
My camera decided to miss some pictures but here is what the hub looks like after the inner ***** and retainer are removed. It's the same process as the outer so you should be able to handle it. You can also see the rear rubber seal my Timken hubs were equipped with. You may need to squeeze the retainer to get it past the seal, just don't pry against or otherwise damage the seal. Do not mix up the 2 sets of *****, keep them separated.
Our next step is to remove the seal. Insert your largish screwdriver from the backside and use it to GENTLY tap the seal loose.
This is what the seal looks like on the inside. I popped it back over the inner race so you can get a better idea of what you are looking at. The rubber part is bonded to the yellow metal part. Obviously we want to push on the metal part.
This is pretty much ideal screwdriver placement. Don't screw this up as the seals are very difficult to find.
Seal free of hub. Run little seal, run!
Now here is the greasy hole you need to clean.
I started by wiping everything down with disposable blue shop towels to get as much grease cleared away as possible. The hub body and bearings clean up really well with a rag soaked in acetone. Thicker deposits seem to yield to WD-40 + rag followed by acetone. The idea is to get everything as clean as humanly possible as to not contaminate the new grease and thus destroy the shiny new bearings.
[SIZE="5"]WARNING![/SIZE]
- DO NOT SOAK THE BEARING RETAINER IN ACETONE!
- DO NOT SOAK THE RUBBER SEAL IN ACETONE!
For reference, left is outer bearing retainer and race, right is inner.
Just to confuse you, I flipped them over and reversed their locations so you can better see how they are different.
This is the grease we will be using. Its AMSOIL Dominator Synthetic Racing Grease. You will recognize its smell if you have ever met Hustler in person. This is the same product as the AMSOIL 2000 Race Grease but in their infinate wisdom AMSOIL decided to change the name. I got my tube from Andrew @ Trackspeed Engineering. PM Savington (Andrew) about it as he does not list the AMSOIL goodies on his website.
Here is the product code so you don't get confused.
Start by popping your rear ***** back into the appropriate retainer.
Get yourself a generous gob of grease and get packin' (I think this was actually way too much grease)
Check out my greasy *****!
Flip the hub back over, put a little grease on the inner bearing race (no one likes it when you go in dry) and drop the retainer assembly back into place. Pack more grease in on top if you have the paranoia as I do.
Now that the bearings are back in the hub, re-install the seal. Be sure to GENTLY tap it back into place until its flush with the face of the hub. Put a smidge of grease on the face of the seal.
Now grab that inner race, smear some grease on the bearing surface. (Sorry, pics are a little out of sequence, the hub should have the seal installed already as in the previous step)
Now drop it in from the rear...
...and GENTLY tap it into place until its flush with the face of the hub.
Here is the inner race as seen from the outside. I pushed a little extra grease in there, because paranoia.
This next step is truly terrible and frustrating. I only have this one pic so hopefully it gets the idea across. I started by putting a layer of grease on the bearing surface. Unlike the inner retainer, the outer one will not hold the ***** for you. You have to hold the retainer in place form the inside of the hub with one finger on one hand while you pop the ***** into place with one finger on the other hand. Like I say, its frustrating as hell but you will eventually get it done.
IMAGE MISSING
Once you get all the ***** in place, pack them little bastards up with grease.
IMAGE MISSING
Grab the outer race and smear some grease on the bearing surface then drop it inside the bearings.
Put your socket on top of the race and give it a good tap...
...and the race will drop back into place.
Congratulations! If your ***** is not currently stuck in the hub then you should have a properly repacked hub at this point. Wipe down the hub with the acetone rag and have that beer I mentioned earlier.
[SIZE="5"]NOW, repeat the process with the second hub
[/SIZE]
Last edited by EO2K; Jan 20, 2017 at 12:54 PM. Reason: fixed pictures or something
Reply
 16
16

16

Thread Starter
Elite Member
iTrader: (37)
Joined: Apr 2010
Posts: 10,477
Total Cats: 1,924
From: Very NorCal
There are 35 pictures in that post, but I uploaded them from North America. Turn your computer upside down and they should load fine.
They are hosted here on imgur because the MiataTurbo image uploader thing only lets me put 25 in an album and I have to upload them 3 at a time. Ain't nobody got time fo' dat'
They are hosted here on imgur because the MiataTurbo image uploader thing only lets me put 25 in an album and I have to upload them 3 at a time. Ain't nobody got time fo' dat'
Reply
5
5

Thread Starter
Elite Member
iTrader: (37)
Joined: Apr 2010
Posts: 10,477
Total Cats: 1,924
From: Very NorCal
I've checked this from 2 different laptops and desktops and all the images load without issue, so

Reply
0
0


Thread Starter
Elite Member
iTrader: (37)
Joined: Apr 2010
Posts: 10,477
Total Cats: 1,924
From: Very NorCal
And my imgur links generally work as well, I can't tell you why it decided to be suck and fail this time.
Ok, so now I've deleted most of the pictures of my cat out of my album to make room for these things. I hope you people are happy now.
Ok, so now I've deleted most of the pictures of my cat out of my album to make room for these things. I hope you people are happy now.
Reply
0
0


Good stuff.
I did this to my new hub when I bought the car a few years ago to replace a bad bearing/hub it came with. I usually don't trust the manufacturers grease.
I love the detailed pics and starting with a new hub makes the job looks so clean.
I'm going to try this with my Clutch Throw-Out Bearing
I did this to my new hub when I bought the car a few years ago to replace a bad bearing/hub it came with. I usually don't trust the manufacturers grease.
I love the detailed pics and starting with a new hub makes the job looks so clean.
I'm going to try this with my Clutch Throw-Out Bearing
Reply
0
0
Thread Starter
Elite Member
iTrader: (37)
Joined: Apr 2010
Posts: 10,477
Total Cats: 1,924
From: Very NorCal
Yeah, my old hubs are god-damn miserable dirty externally. The factory grease that isn't in direct contact with the bearings themselves is super hard and crusty and looks pretty much useless. My plan is to pull them apart and check them out. If the bearings and races look good, I may do a full clean/repack and put them in the "track spares" box.
Reply
0
0

Redline CV2 is significantly prettier than the Amsoil stuff (I'm hooked on Redline assembly lube for the same reason). Not sure if it is ***** rated, but getting a gob of CV2 down there might scare the hell out of you at first glance.
Nice how-to!
Nice how-to!
Reply
0
0
Thread Starter
Elite Member
iTrader: (37)
Joined: Apr 2010
Posts: 10,477
Total Cats: 1,924
From: Very NorCal
I was trying to avoid the "Instructions unclear, ***** stuck in hub" comments that were sure to follow. 
I'm sure CV2 works great but I couldn't find it locally. I was already ordering magic AMSOIL juice for my 6 speed so I had Andrew add the grease to the order as well.
One week later and I'm not shitting grease all over my brakes so I must have done something right
I'm sure CV2 works great but I couldn't find it locally. I was already ordering magic AMSOIL juice for my 6 speed so I had Andrew add the grease to the order as well.
One week later and I'm not shitting grease all over my brakes so I must have done something right
Reply
0
0


