

How to: Repack a front hub


Top shelf How-To. I just rebuilt my front hubs using EO2K's amazing and witty instructions.
I did find it easier to remove the individual ball bearings prior to removing the cages, but YMMV. Nevertheless, a very helpful post.
Oh, and Nitrile gloves made sure I don't smell like Huster aka AMSoil Dominator grease.
I did find it easier to remove the individual ball bearings prior to removing the cages, but YMMV. Nevertheless, a very helpful post.
Oh, and Nitrile gloves made sure I don't smell like Huster aka AMSoil Dominator grease.
Reply
 1
1

1


I also recently repacked my rears
 using a similar procedure and took a lot of pictures: https://www.miataturbo.net/build-thr...2/#post1184839
It wasn't very different from the fronts - a bit easier because you can remove and install the retainer without pulling each ball out individually.
I more or less used the procedure outlined in this thread to get the bearings out of the of the car:
https://www.miataturbo.net/suspensio...t-press-56506/
Reply
0
0

This next step is truly terrible and frustrating. I only have this one pic so hopefully it gets the idea across. I started by putting a layer of grease on the bearing surface. Unlike the inner retainer, the outer one will not hold the ***** for you. You have to hold the retainer in place form the inside of the hub with one finger on one hand while you pop the ***** into place with one finger on the other hand. Like I say, its frustrating as hell but you will eventually get it done.
I could use a little advice on this step. Maybe I'm not doing it right, but everytime I try to tap the inner race back in, it drives the retainer out. I've trashed two hubs so far trying to learn how to do this. Looking at the bottom of the inner race, I don't see how it's dimensionally possible to have the outer race hold the ***** in place while trying to be spread apart by the inner race.
Reply
0
0

Thread Starter
Elite Member
iTrader: (37)
Joined: Apr 2010
Posts: 10,477
Total Cats: 1,924
From: Very NorCal
If I remember correctly, I had to stick one finger up from the bottom while pushing the ***** in with another finger from the top. Once all the ***** were in, the retainer just kinda stayed in place while the race pushed by. Is there any chance you mixed up the races? What hubs are you using?
I'm at a loss because I've only done this on the one set of Timkin hubs so I'm not sure what other ones would look like. I have my 120k/mi OEM ones in the garage that I've been meaning to repack but I've not got around to it quite yet.
I remember it was amazingly frustrating and it took some finger gymnastics to make it happen, and I didn't get it until the 4th or 5th try. Sorry its being a particular PITA for you :(
Reply
1
1

Junior Member
Joined: Jan 2013
Posts: 59
Total Cats: 9
Reply
2
2
If I remember correctly, I had to stick one finger up from the bottom while pushing the ***** in with another finger from the top. Once all the ***** were in, the retainer just kinda stayed in place while the race pushed by. Is there any chance you mixed up the races? What hubs are you using?
I'm at a loss because I've only done this on the one set of Timkin hubs so I'm not sure what other ones would look like. I have my 120k/mi OEM ones in the garage that I've been meaning to repack but I've not got around to it quite yet.
I remember it was amazingly frustrating and it took some finger gymnastics to make it happen, and I didn't get it until the 4th or 5th try. Sorry its being a particular PITA for you :(
I'm at a loss because I've only done this on the one set of Timkin hubs so I'm not sure what other ones would look like. I have my 120k/mi OEM ones in the garage that I've been meaning to repack but I've not got around to it quite yet.
I remember it was amazingly frustrating and it took some finger gymnastics to make it happen, and I didn't get it until the 4th or 5th try. Sorry its being a particular PITA for you :(
If I understand you correctly, it sounds like i never had the *****/cage fully seating before i started trying to drive it in. AND...I grabbed a 19mm deep socket, because I figured it was the same thing. Looks like 19 is the right size to fit just inside the cage and break those tabs off.....
I'll try again tomorrow.
EDIT: How much force does it take to get the ***** and cage into the race with your fingers?
Reply
0
0

Joined: Apr 2014
Posts: 18,643
Total Cats: 1,870
From: Beaverton, USA
Just did mine, couple things to add.
Compressed air works great for blasting grease off the retainers.
When doing the finger gymnastics with the outer race bearing retainer, try and push it as far away from the side you are trying to put the ball in. You want maximum space between the race and the retainer.
Compressed air works great for blasting grease off the retainers.
When doing the finger gymnastics with the outer race bearing retainer, try and push it as far away from the side you are trying to put the ball in. You want maximum space between the race and the retainer.
Reply
1
1

I just got done doing this to a set of new Mazda hubs. I left the bearings and cradles in the hub and sprayed the crap out of them with brake cleaner. Used compressed air to make sure they where clean and packed with CV-2. Do not use the chlorinated brake cleaner.
Reply
0
0

I just did one of mine last night. Kinda surprised how easy it was, which is good because I used Mobil1 grease, so I'll probably be doing it again pretty soon... Surely this grease is better than what it had in it, and if nothing else, I used a lot more grease than the factory.
The hub I'm replacing is a Timken that I bought at Autozone about three years (20k miles, couple hundred autocross runs, and a few tack days) ago. It has started to develop some play, and I'd rather not worry about it. As far as I know the other front hub is OEM and still feels perfectly fine after 111k miles. I'm going to replace it too though.
The hub I'm replacing is a Timken that I bought at Autozone about three years (20k miles, couple hundred autocross runs, and a few tack days) ago. It has started to develop some play, and I'd rather not worry about it. As far as I know the other front hub is OEM and still feels perfectly fine after 111k miles. I'm going to replace it too though.
Reply
0
0
Thread Starter
Elite Member
iTrader: (37)
Joined: Apr 2010
Posts: 10,477
Total Cats: 1,924
From: Very NorCal
I have a link that says Advanced Autosports (https://www.advanced-autosports.com/) carries them, but their website is currently "down for maintenance" and none of the links work.
This should be the link, assuming the site comes back up and the paths do not change:
As long as you ignore threads from before 2014 I'm sure one of the Spec Miata specific forums has a link or part number somewhere, but those guys are notorious for sharing dead links so be prepared for some internet archaeology.
This should be the link, assuming the site comes back up and the paths do not change:
Code:
https://www.advanced-autosports.com/index.php?main_page=product_reviews_info&products_id=248&reviews_id=13
Reply
0
0


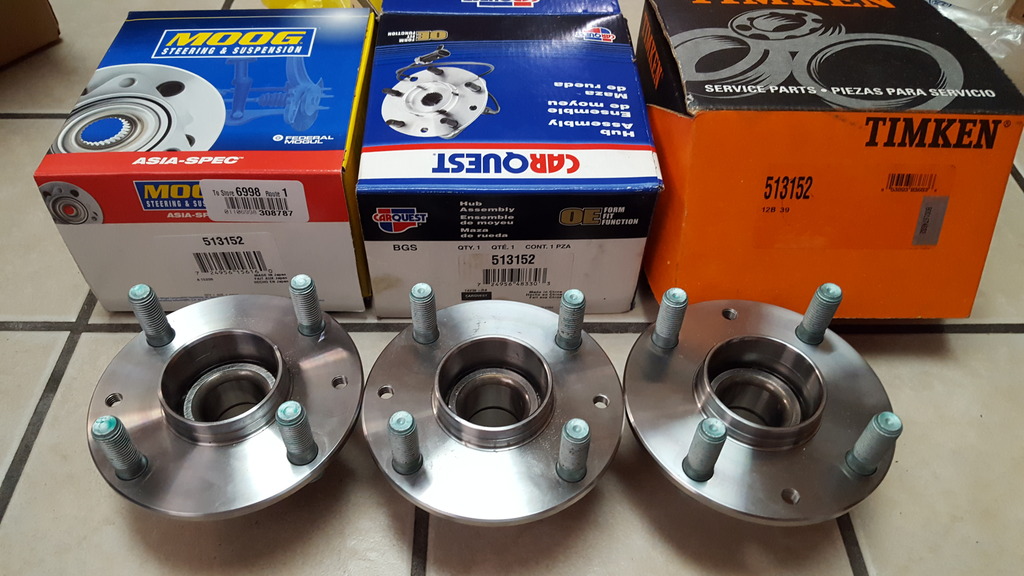
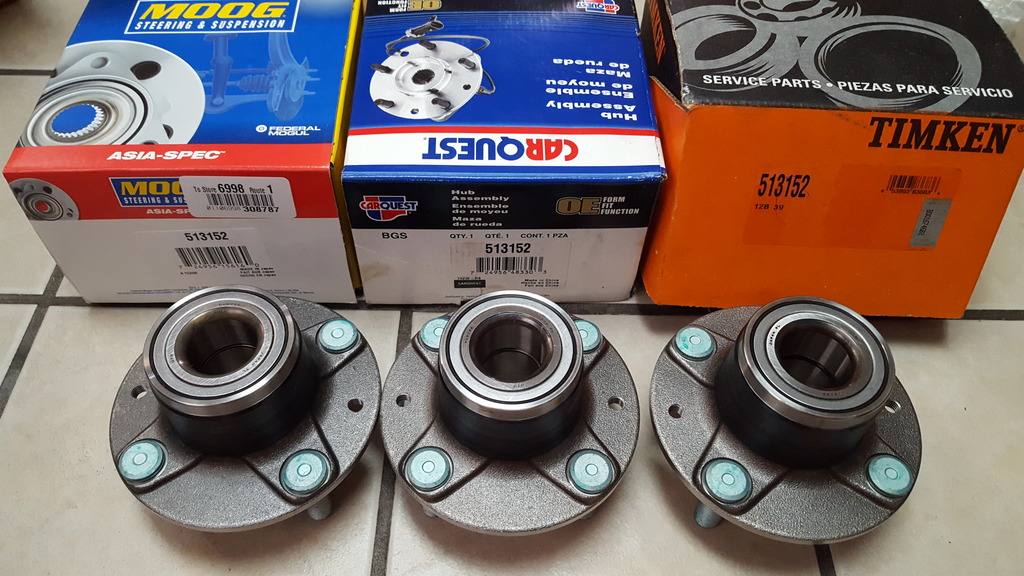
Has anyone used a Moog 513152 non-ABS hub? The Timken 513152 has always been my preferred hub, but it looks like it's NLA. I'm getting ready to install the two spare hubs that I've had sitting on the shelf since last summer- one Timken 513152 and one "Carquest Premium" 513152, which is 100% indistinguishable from the Timken- and I need to buy a couple new spares. It looks like the Moog *might* just be a rebranded Timken/Carquest.
I know everyone will tell me to just buy the Timken ABS hub, but my inner engineer prefers the non-ABS hub without the machined-in stress risers.
I know everyone will tell me to just buy the Timken ABS hub, but my inner engineer prefers the non-ABS hub without the machined-in stress risers.
Reply
0
0
Joined: Sep 2012
Posts: 4,560
Total Cats: 1,143
From: your mom's house phoenix, AZ
Maybe on a stock oem hub? Theyre not on my timkens, or duras, or detroit axles, or the 2 other no names i have sitting here. I also measured them and they cross over with nothing in the timken catalog. This leads me to believe they are a custom seal.
Reply
0
0
My Detroit axle ones do. Its etched into the metal part of the seal.
Reply
0
0
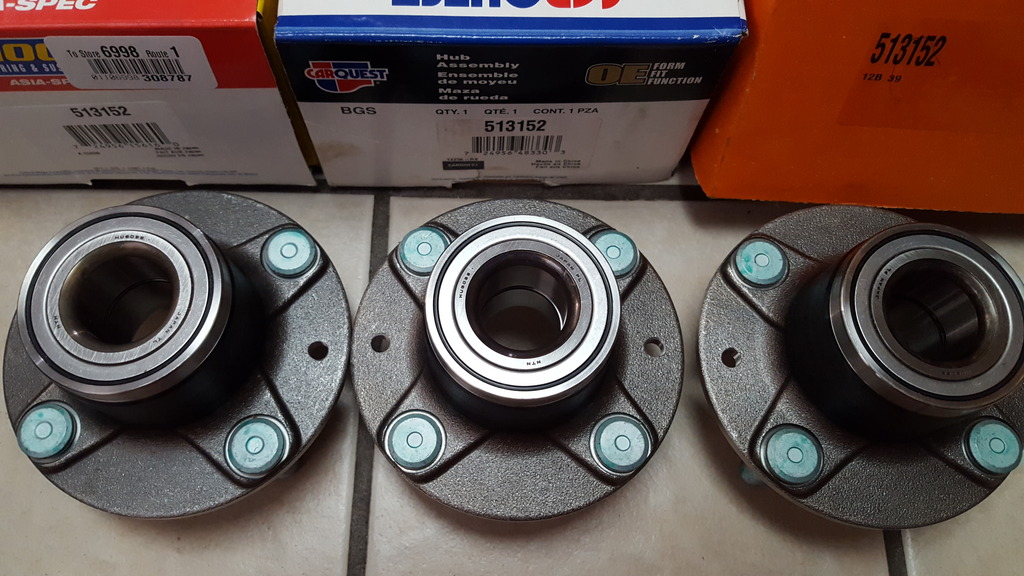
Just received the Moog. It's exactly the same as the Timken and Carquest, except that the races are stamped "NTN JAPAN TL" on the Moog vs. "NTN JAPAN PL" on the other two. All have identical heat treating with the same pattern of ***** marks from hardness testing. The Timken and Carquest have been in my spares box for at least a year, so the newer Timken hubs may be "TL" also. I'm going to keep the Carquest in the spares box and install the Moog and Timken this weekend. I'll post an update if the Moog sucks.
Reply
0
0


