When you click on links to various merchants on this site and make a purchase, this can result in this site earning a commission. Affiliate programs and affiliations include, but are not limited to, the eBay Partner Network.
Hey guys. I just mocked up a Mtuned bracket kit to adapt the 10.9 sport rotors. Everything is new. Rotors, mtuned kit, caliper hub bearings...everything. The kit bolts on but the rotor is not centered in the bracket. I see no way to space it out since it�s rubbing on the inside. Any ideas on how to get past this?
The easiest way I can see is to grind down the area of the bracket that is making contact.
Hub/bearing was professionally installed. Torqued to 190 ftlbs.
Rotor or was fully seated and torqued with lug nuts as well.
Any issue grinding the caliper bracket? The contact area does not modify pad placement or retention. I fitted the oem caliper and result was the same. Thanks!
Basically the inside of rotor is sitting on the caliper bracket. Shimming it would push the bracket farther out, making more contact and not allowing rotor to seat right. If it was hitting on the outboard side shimming would work fine.
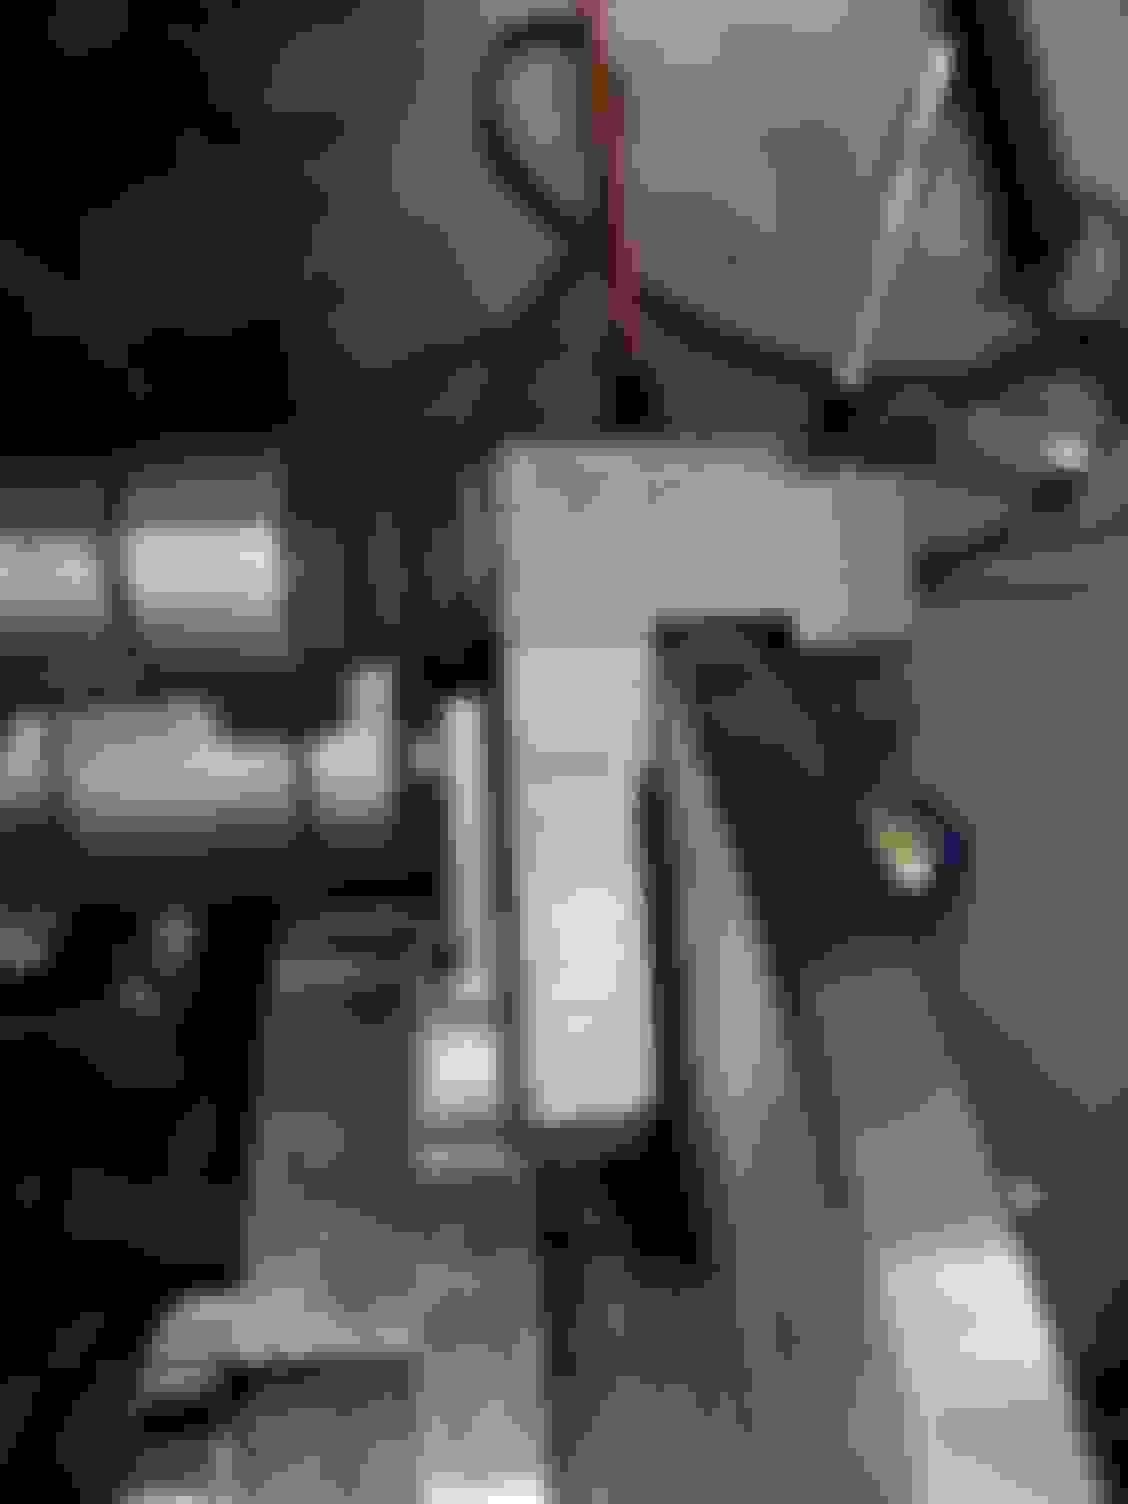
I ended up grinding the area in this picture last night which gave me clearance. It�s still not going to be centered, but since the calipers float I don�t see that as an issue.
Machining the mtuned brackwt would definitely work, I just don�t have the tools to do that properly (mill). If I did it by hand it wouldn�t be flat haha.
I have this pic. If this won�t work I can take more tonight. This picture was BEFORE I modified the dust shield. The dust shield is modified and not an issue.
I think you have the driver side on the passenger and vice versa. I ran into this as well with mine. I drank a beer, flipped stuff around, and works great.
I tried to put driver to passenger. No way to make it go. Tried to flip and rotate every which way. There is only one way to seat the thing and that�s how I have it. Looks the same as the old mtuned instructions. Maybe the brackets I got were machined a mm too thick. Who knows. Either way I ground the caliper bracket and have full clearance of rotor now so it should be fine. I know the caliper bracket wasn�t different as I tried the oem one and it was the same so it has to be the mtuned piece. Or I�m crazy. That�s always possible
Figured out the variable which caused the centering issue. It�s the axles. I got new manufactured axles. Same manufacturer same part number. They were the same length as stock. Manufactured at different times. The axle ends are machined to different depths which makes them sit slightly different when seated. Weird.
Another thing. The rear bearing dust seal seats against the taper on the 10.3xmm one. On the 15.3x it doesn�t reach the taper.
strangely enough, the longer one had no centering issues...the shorter one, which is roughly the same length as the stock one I pulled out, is the one that had issues centering lol.
Oh well. It�s all good and clearanced just wanted to update my findings.
Keep in mind that if the axle is affecting rotor offset then the bearing isn't getting clamped properly. Definitely figure out exactly what's going on here.....just shimming the bracket is not what you want to do here.
Appreciate it. The bearings are fully seated. The shank length is the same on both axles it�s the depth where the taper for wheel seal begins that is a different length. This does not effect the seating of the bearing.
Both axles have the same amount of protrusion out of the torqued axle nut as well.
There is is one other variable. One of the uprights was changed. The original broke an ear off in the press. I threw the original away so I can�t take measurements. I wish I could say exactly what the problem is but I have t been able to pinpoint it.
I did not not shim anything though. I clearanced the inner edge of the bracket after consulting with a trusted mechanic.
I guess what I'm envisioning is that the axle is getting bound up on that seal protrusion and seal not allowing the axle to stack against the bearing on the backside. Without the axle cinching down on the bearing inner race the races are free to float.
I'm sure I'm just not envisioning what you're trying to explain.


 0
0