When you click on links to various merchants on this site and make a purchase, this can result in this site earning a commission. Affiliate programs and affiliations include, but are not limited to, the eBay Partner Network.
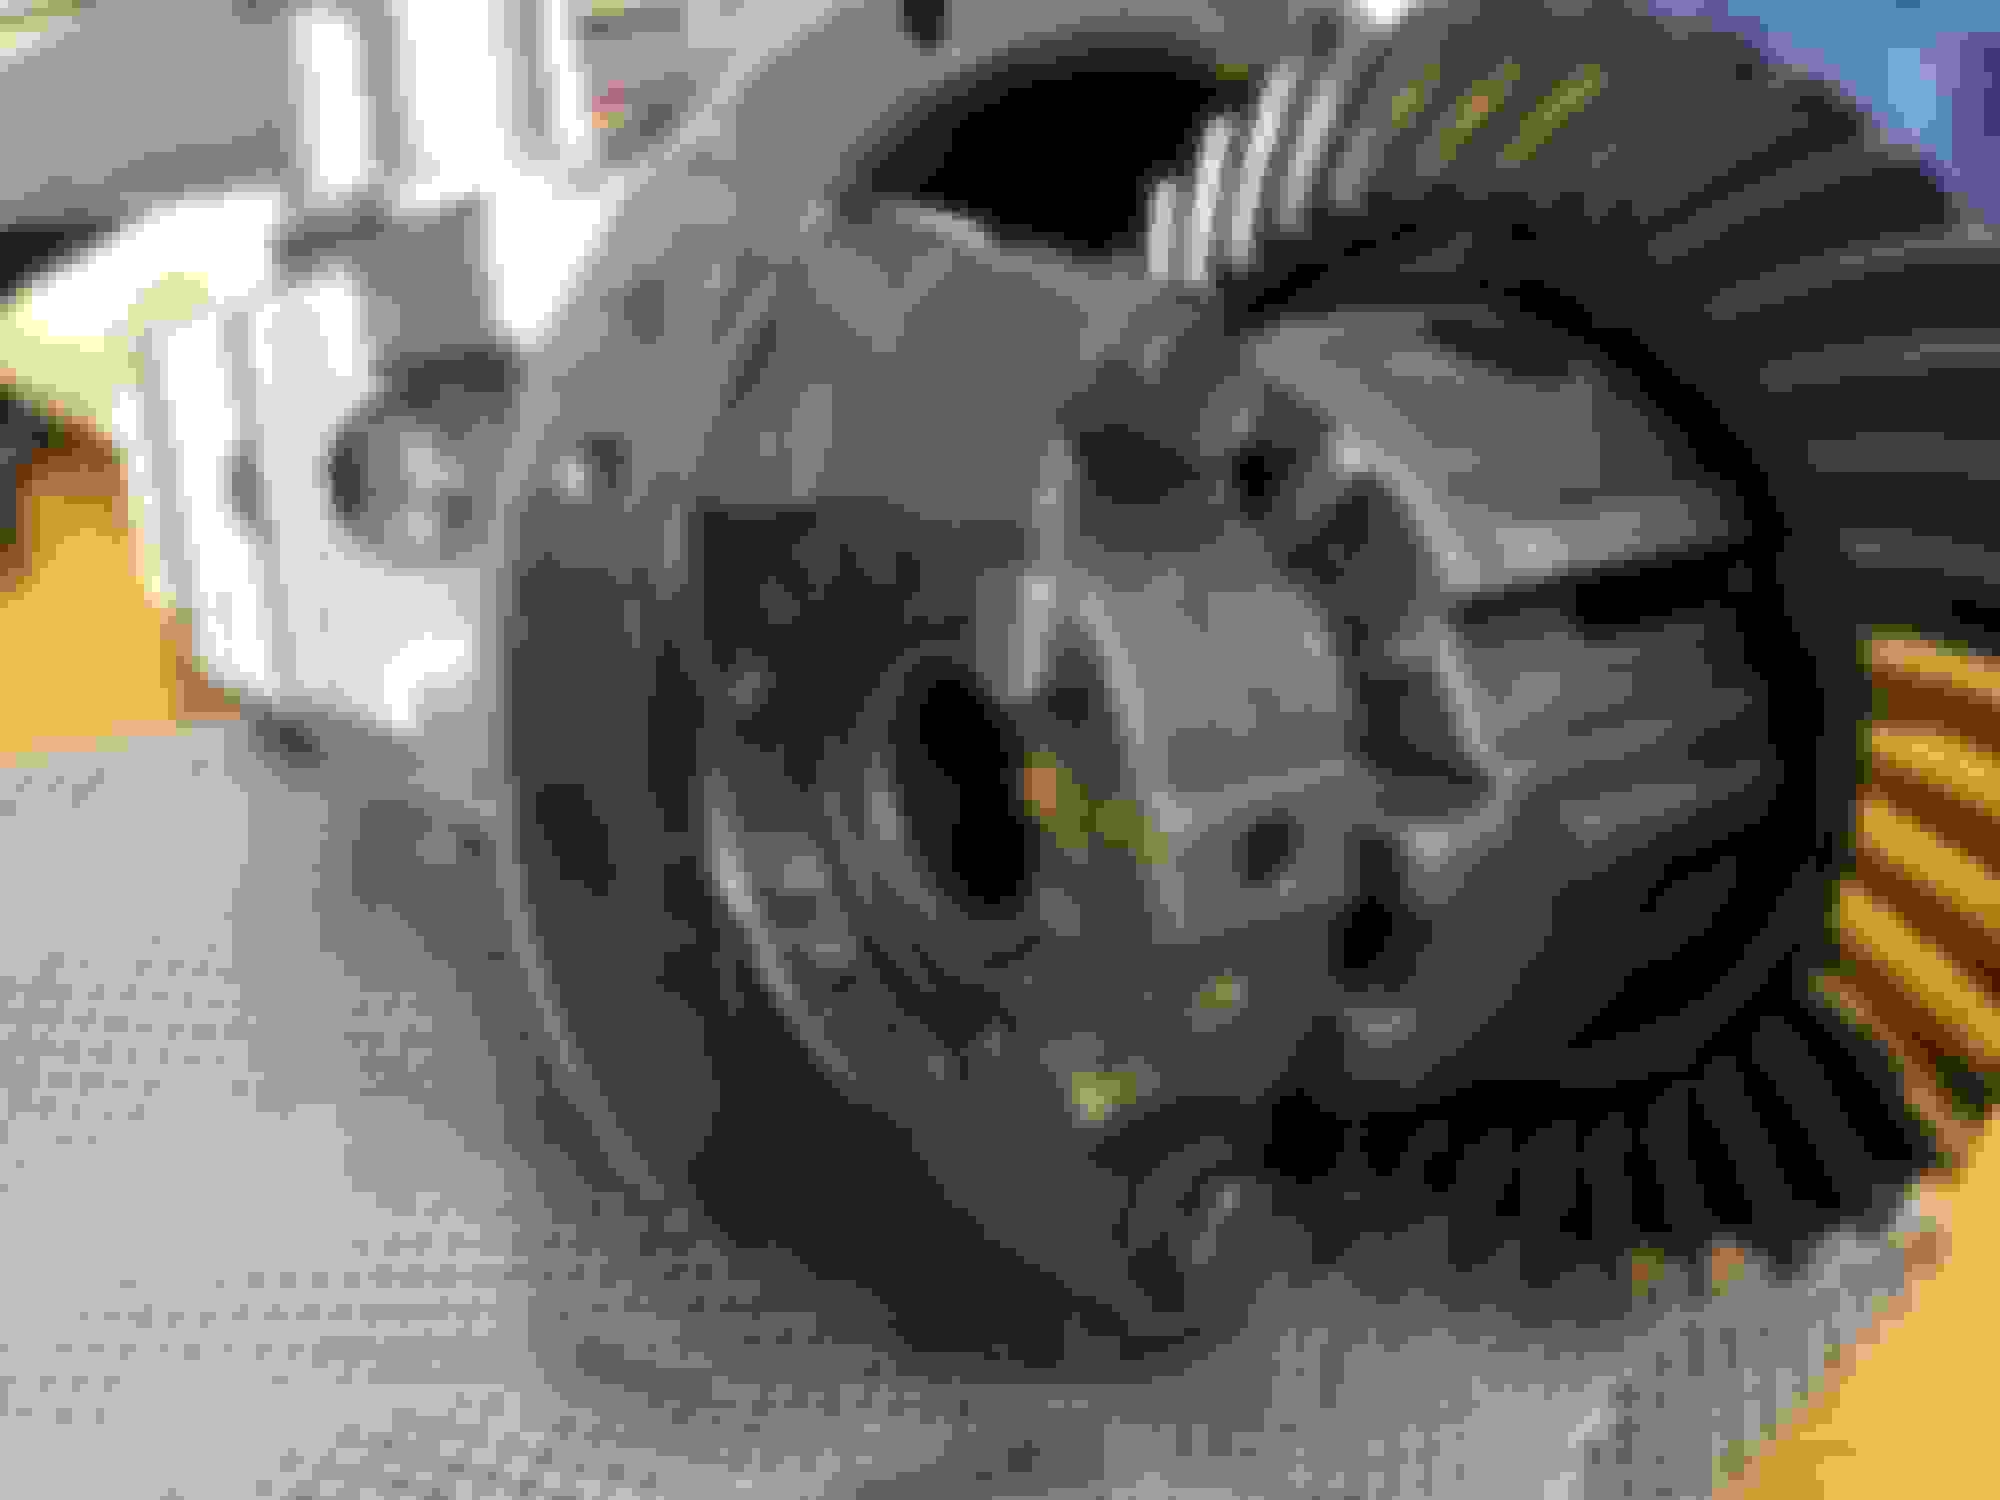
Hey guys - I�ve got 3 R&P�s to set up. One of the last project types that I�ve never done before but determined to figure it out. Pics below are of the Ford 9� on the bench right now. Gonna try to tackle the 3.9 to 3.6 swap on the Montego this weekend but understand it is more like the 9� than obviously the Dana 44 which will be the last. Yes, I did get the correct caliper to do the 3.9 swap. So I�ve had this 9� apart now so many times now that I fear I�ll just accept it rather than know it�s right and would rather have some confidence getting the Miata done next.
Backlash and all is dead nuts like I want it to spec. Drive side paint looks good to me and coast side kind of looks OK but the crummy pics in the net suck for me to compare it with. 2nd, 3rd and 4th opinions would be greatly appreciated. I�m an engineer so I have no feelings to hurt. BTW, this isn�t a do-over-your-lunch break project. I have swapped engines in a fourth of the time.
Cheers and thanks in advance!
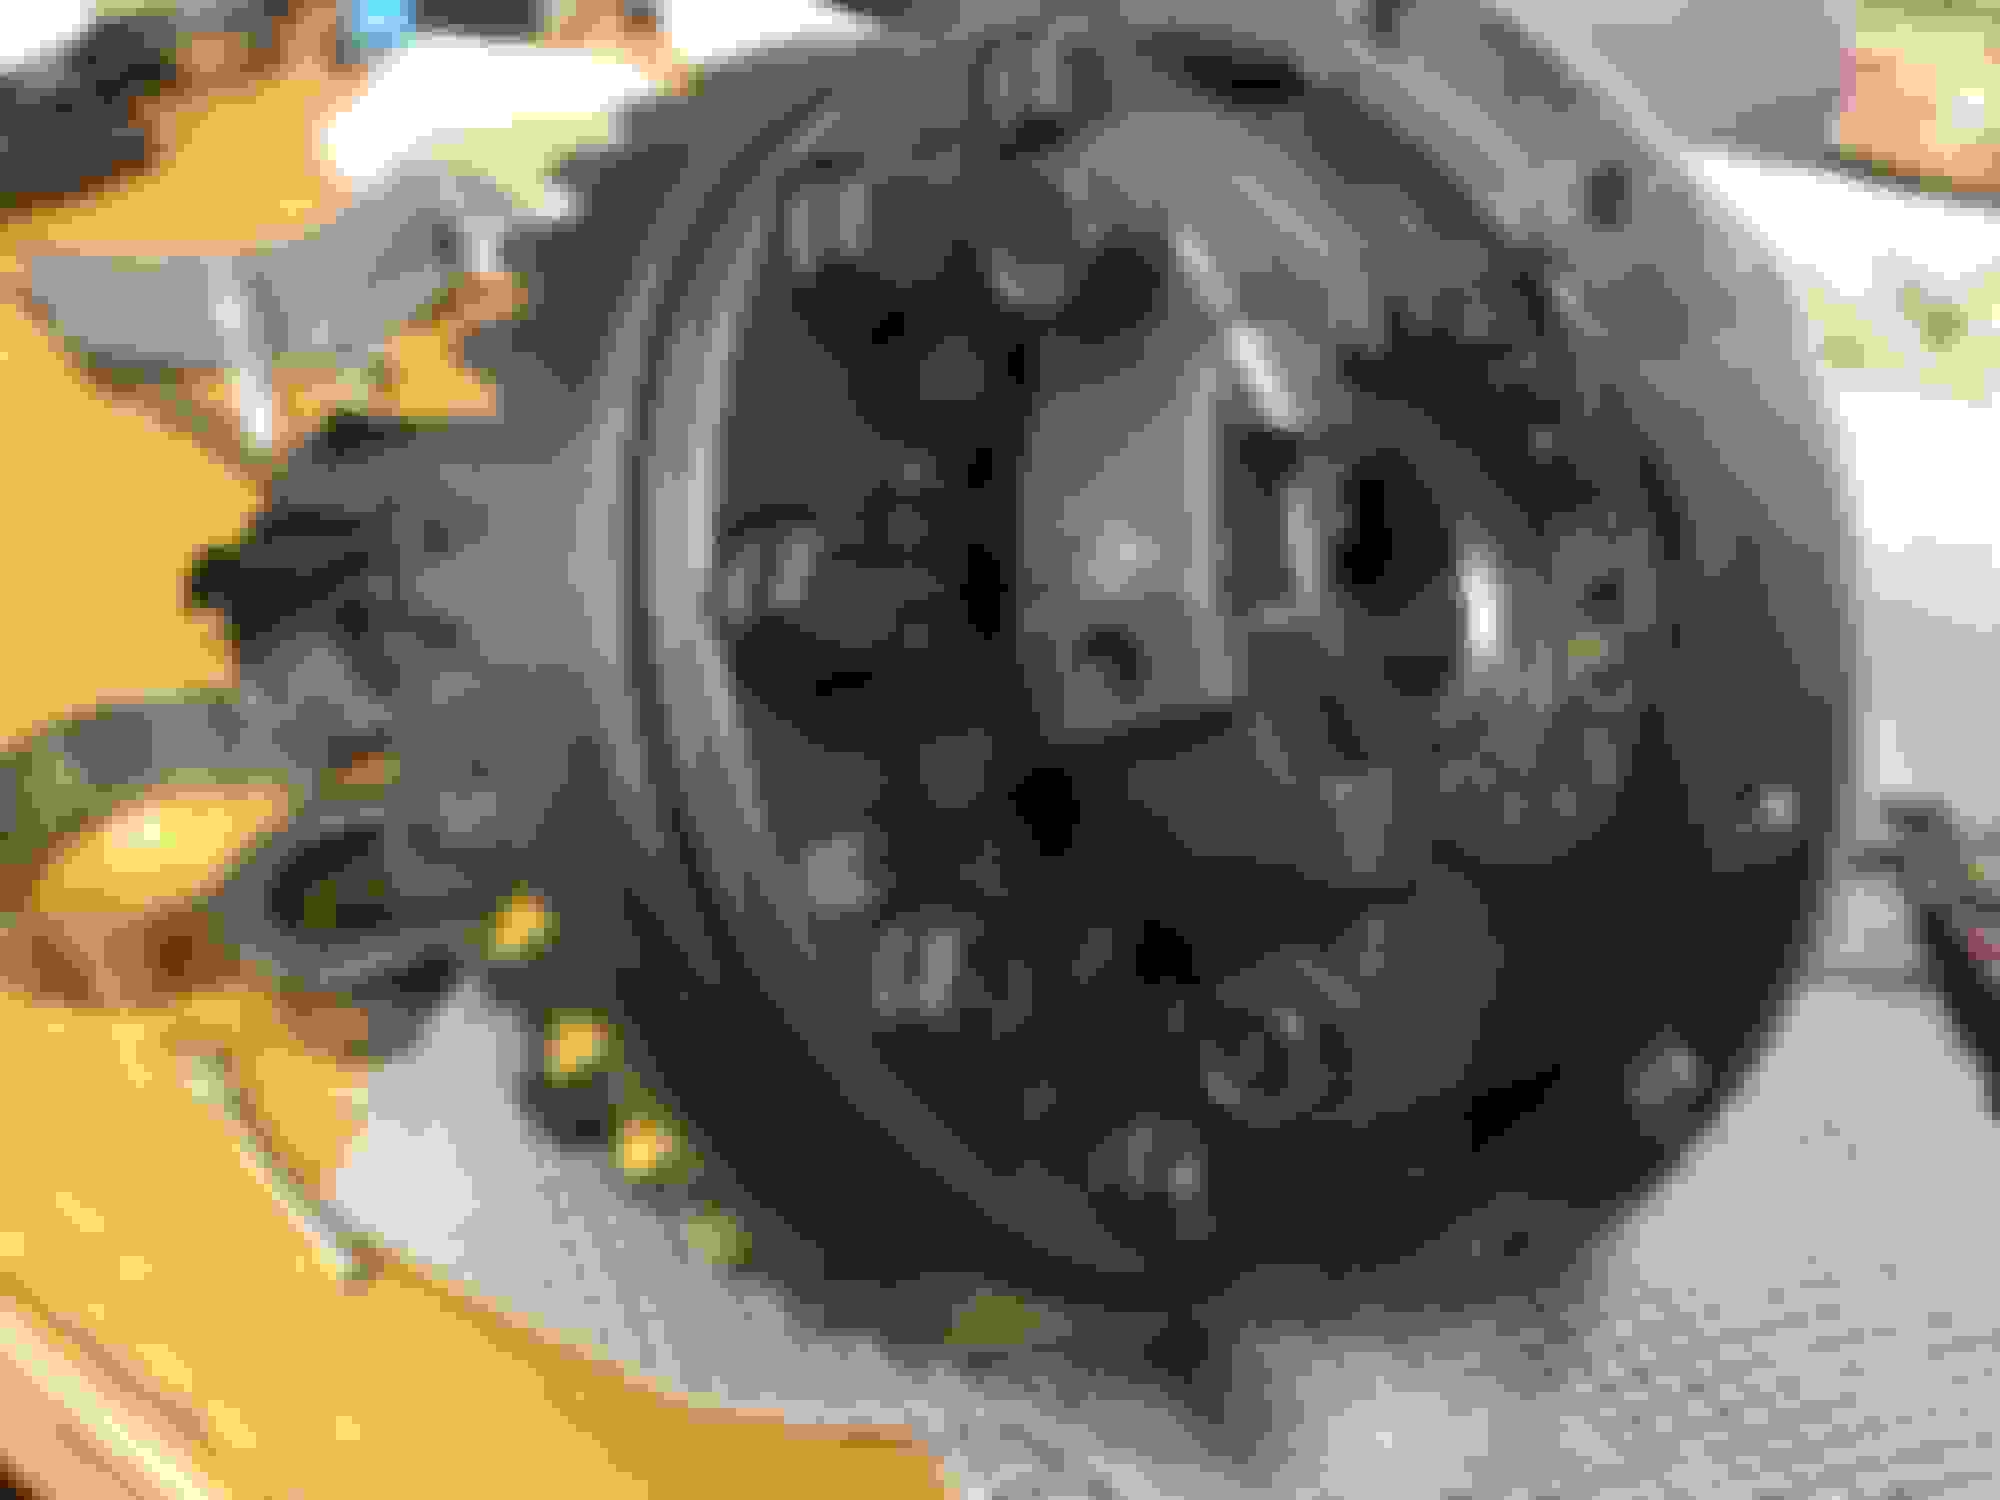
1st pic is obviously the drive side and 2nd is coast.
Looks good! Send it! I've pulled diffs apart with much worse patterns than that, that ran silent.
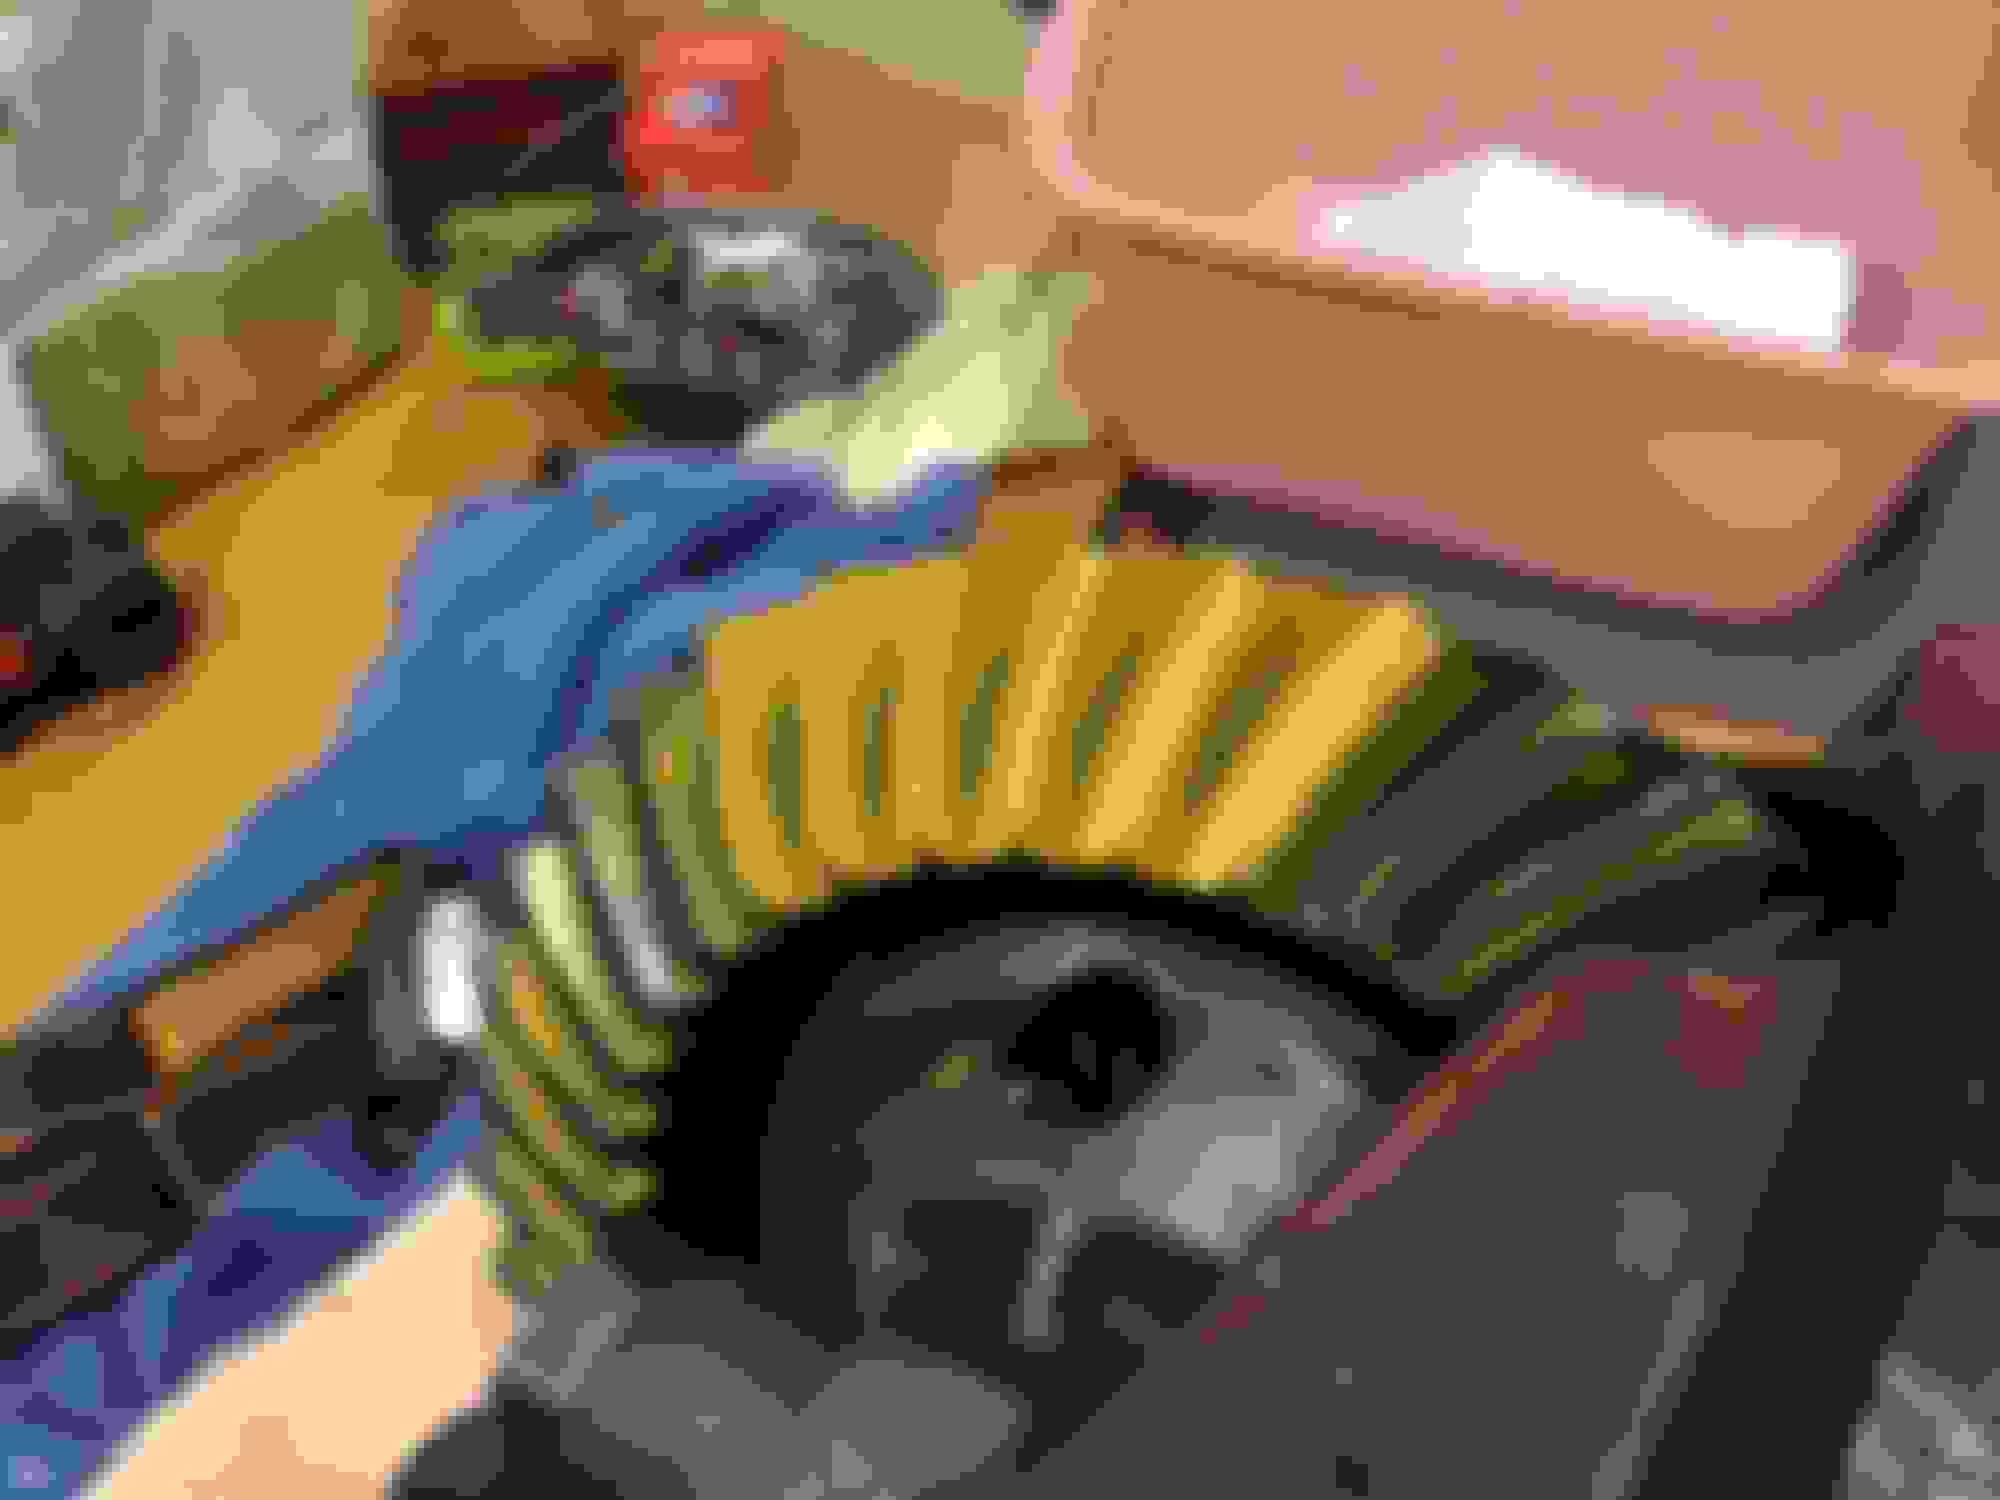
Thanks Oh4One4. Messed around with it this afternoon a little bit more trying different backlash/pinion depth combos. In the end I settled for 0.001 bigger shim than my first post pic. It is going in my 69 Bronco project. Rounded up all the seals and bearings today coupled with some confidence to do the Miata 3.6 gears on Friday or Saturday.
This was the final setup with that 0.001 bigger shim.
They look pretty darn good. I struggled with the 3.3 gear set for the miata for a very long time. So I feel your pain. It seemed more work than the engine rebuild..
Drive side looks great. Coast side is a tiny bit too deep, but I doubt you'll run into any decel whine issues.
Got the 3.9 pumpkin out of Montego yesterday afternoon and did a spec check on it with the intent of setting up the 3.6 R&P the same. Perfectly good running setup. Never noticed any unusual sounds although does have a 3” no-muffler exhaust system.
Bearing preload: 1 in-lb (torque-to-turn) ——- not in spec
Backlash: 0.004 in ——- In spec
the drive side pattern was as expected (good). I can say that now after Mudflap trained me to be an expert tarot card reader.
this Coast side pattern surprised me with so much toe contact.
The darn solid spacer and shim pack was supposed to deliver yesterday but didn’t. Love that USPS reliability. Won’t finish but can get part of the project done today.
They look pretty darn good. I struggled with the 3.3 gear set for the miata for a very long time. So I feel your pain. It seemed more work than the engine rebuild..
Good luck!
What did you end up doing with the 3.3s in the end?
Thanks Erat. I was just reading some more and came across a sentence from Differentials.com that reads “.... for used R&P’s, pay closer attention to the coast side”. This statement has me confused as I would have expected it to be the the drive side you paid more attention to. What’s up with that?
Getting to the spacer under the lower/inner pinion bearing plus neither axle bearing would come off using the splitter/puller and impact gun on kill. Bent up the splitter tool and then used the Dremel/Chisel method to get them all off successfully. New pinion bearing preload is a still little loose after 5 tries but will take it apart, remove one more shim (solid spacer setup) and try to get it all done and then installed tomorrow. Was time to pull the brisket off the smoker and shut down for the day. If the OEM spacer for pinion depth doesn’t work, it ain’t gettin’ done tomorrow because that’s all I got in hand. I already checked and neither my C3 wheel bearing shims nor Ford 9” shims are the diameter I need.
I’ll say it again, takes less time to pull a 1.8, take it apart, reassemble, install it, and then program a new ECU from scratch. There’s a reason the newly powder coated Dana 44 axle housing is still in the bed of my pickup.
Dan91. I'm running the 3.3 now. It gets a fairly bad resonance/howl at 40mph. Which is extremely annoying and yet, I don't give a ****, because I got so tired of building and re-building it. This is apparently common with these gearsets.
So my plan is simple, I'll run this until it breaks and totally swap it all out. Common enough problem with high hp builds. I should have never invested any time/money in the diff parts. I should have just gone with a stronger setup.
Thanks Erat. I was just reading some more and came across a sentence from Differentials.com that reads �.... for used R&P�s, pay closer attention to the coast side�. This statement has me confused as I would have expected it to be the the drive side you paid more attention to. What�s up with that?
I just figure that's where the load is going to be.
If you listen to the 3.636 diff whine i had, it made the most noise under light acceleration. But generally made noise all the time.
Once i took it back out and adjusted it in the garage it was fine. Let it "wear in", changed the oil a few times in a couple thousand miles and it hasn't broken yet.
I tried to find the thread where Pat and I went back and forth discussing the best measurements and adjustments that needed to be made. I can't find it.
We did discuss it briefly in my build thread a few years ago. https://www.miataturbo.net/build-thr...-62679/page44/
There are soooo many advantages to stay with about 225-250 HP (except that it’s lower than 400) and the patriarchs of this forum say it over and over. The casual builder should really pay attention to the words of Mudflap and several others about higher HP builds. Things get risky or questionable at 300+ and significantly more expensive, difficult, frustrating, etc. at 400+ (plus big $$$ and time). There is, though, an incredible experience behind the wheel of a 425 HP Miata at full boost. The truth is that I put up better AX times on WG than I do at full boost. You just wait till I get those 275 or 295’s on the back......and yet another 2 G’s for wheels and tires.
Mudflap, curiosity is getting the best of me. Does Optimus Swine come from a fly fishing interest, transformer hero or pig farming background?
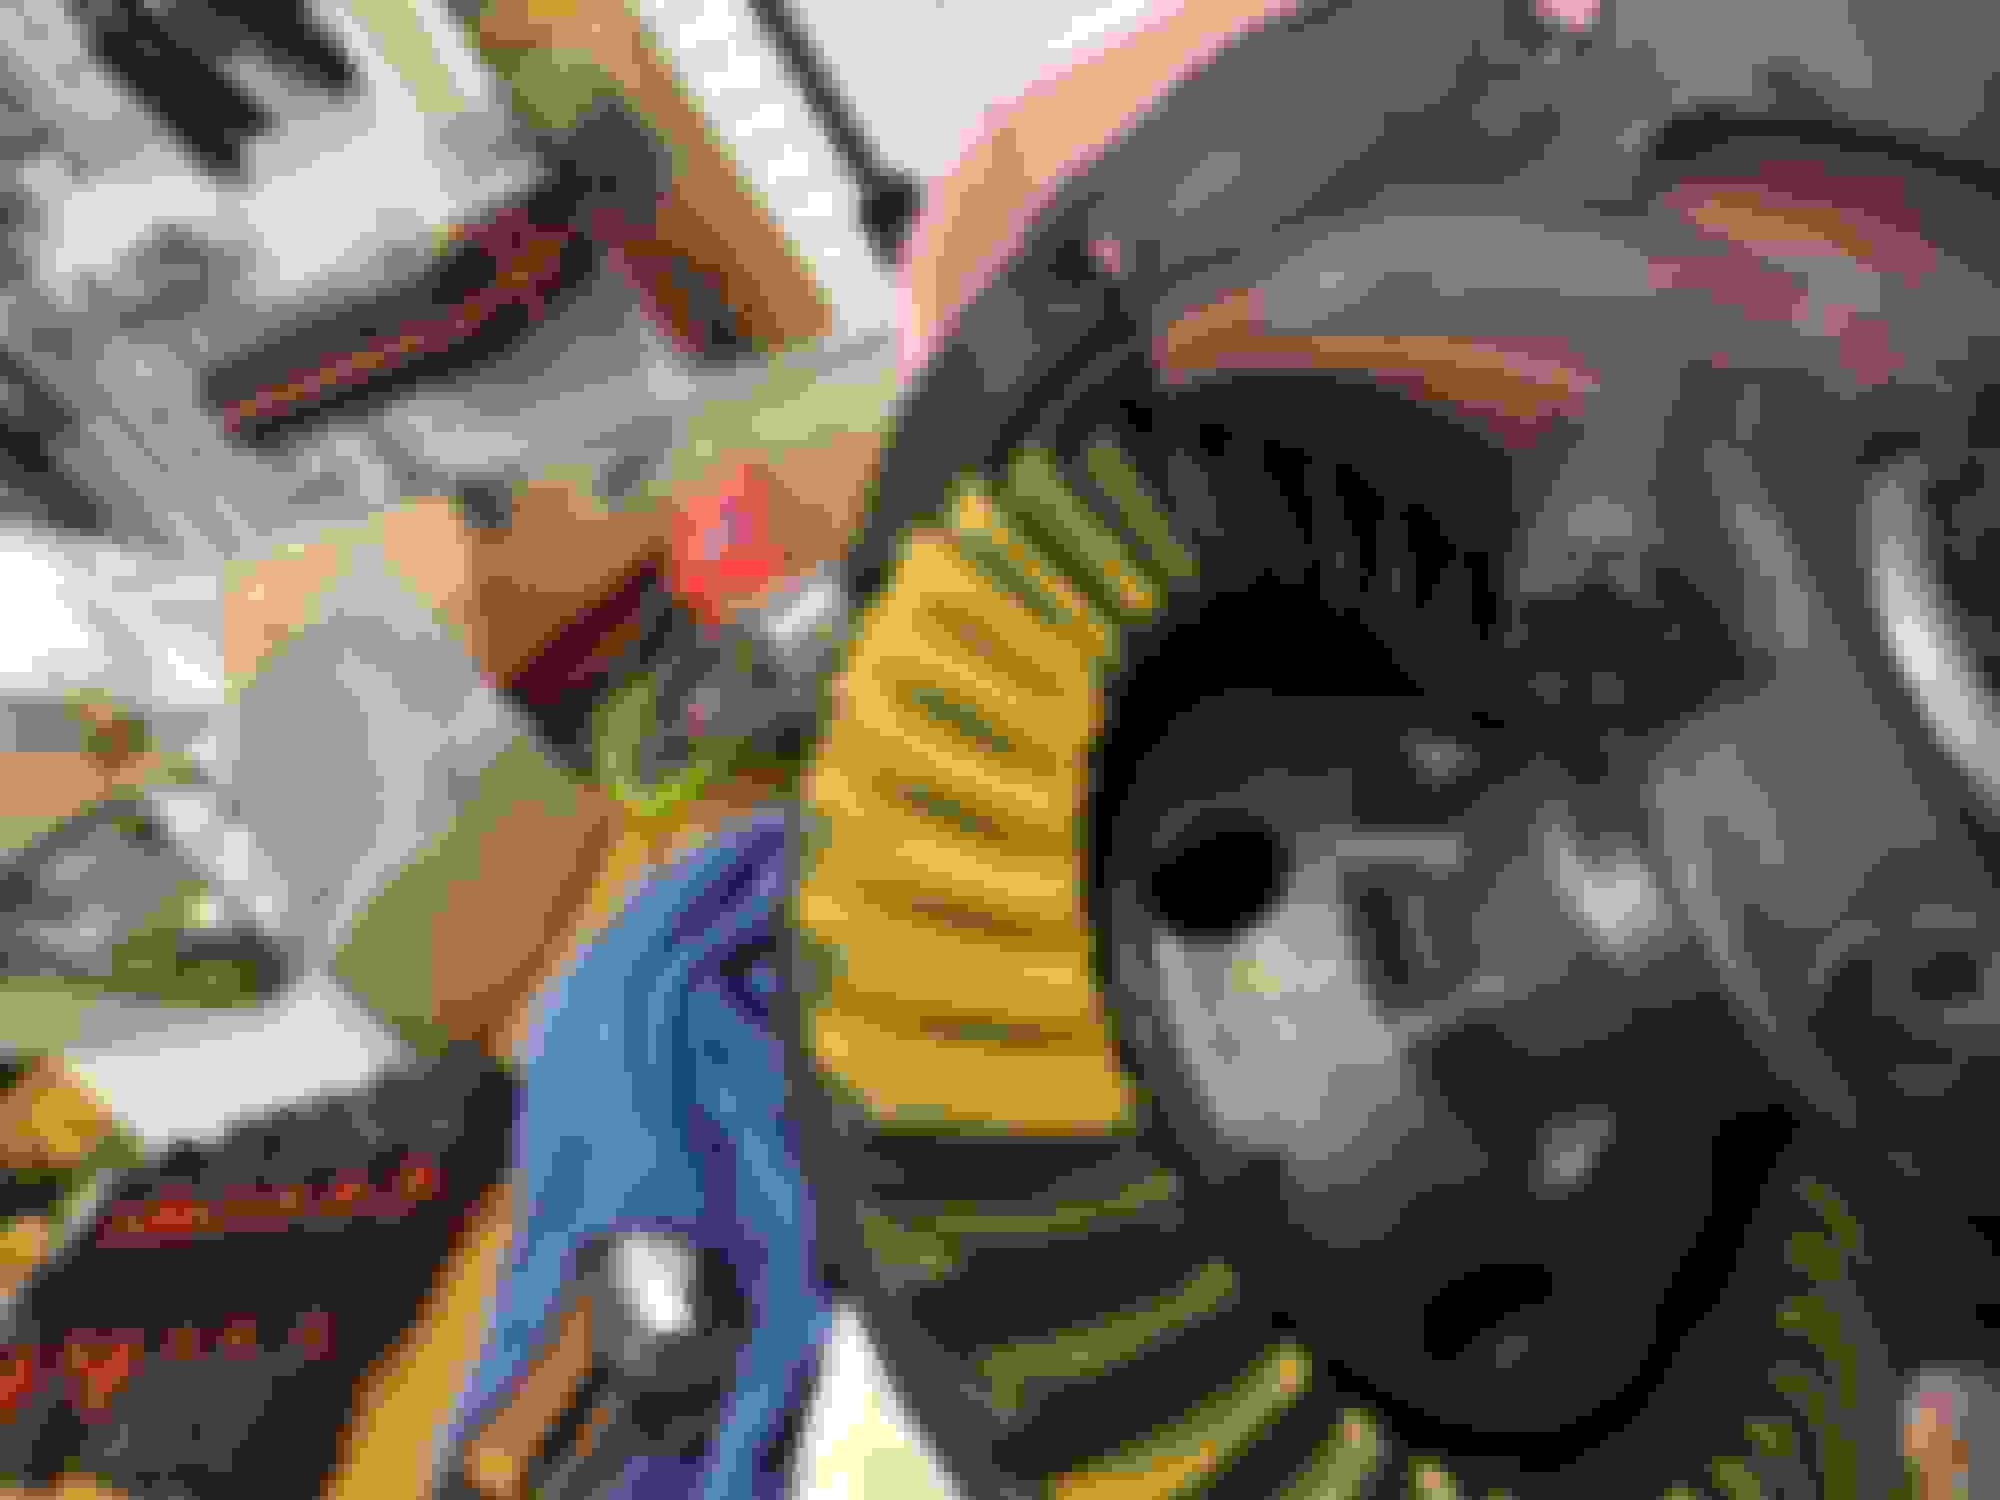
Got everything in spec (Backlash at 0.0040, pinion preload at 16 in-lb, bearing dimensions 7.3028 & 7.3029) after a whole lot of tries and 5-6 more hours. Paint pattern gives a distinct solid line across the middle of the ring gears (pic #1). The adjuster rings are quite different than the original setup whereby the left one (pic #2) is in more, and the right one (pic #3) is out much more than original. I think this all tells me that the spacer under the inner pinion bearing is too big and the pinion is too deep. Does this make any sense at all and seem like I’m on the right trail? If so, it all comes back apart to change that stupid spacer below the inner pinion bearing and start all over.
haha, Optimus Swine is the name of my BBQ team. I want to get the image blown up and put it on the back window of the car.
High hp builds like mine are really just a learning experience. This car has so little weight on the rear-end, that it is impossible to get much of the power to the road. Especially in the cold. You can go just as fast at 300hp (below 100mph) as you can at 400hp. I have to feather the throttle or just end up spinning tires. Which sounds cool, but is terribly slow.
Something is wrong with that thin line in the paint. I'd try for another run at that pattern before I sealed it up and mounted it.
Be careful with that 7.3028" measurement reference, I found that to be too loose, go look up generic differential build info and you'll find that a tight fit is more important. Don't ignore the fact that 7.3028" is for new OEM parts only.
I found it more important to setup a dial indicator and make certain you could not tap (with a mallet) the assembly back and forth and measure ZERO slack. Backlash is very important, but you also need to keep the assembly from shifting back and forth between the caps.
Hey guys - thanks for the input and support. The swap from 3.9 gears to 3.6 was successful. No unusual noises or issues. Here are the last/final gear paint pics for the record. The final paint pattern is identical to the pattern we ran on the 3.9 before dismantling them. Looking forward to the 15x10’s (and 275’s) to come in the next few days now.
@Turbomack I'll be installing a new 3.3 from Walter-motorsports in about a week. What is the rotational torque supposed to be? 16 in/lbs? Is there a +\- tolerance to that?


 0
0