11's on the Motor, 9's on the Nitrous

 01-12-2014, 11:48 PM
#222

Just opened this thread for the first time. Neat build.
Might be too late for this, but I'll say it anyway. I think I have the same hardtop as you. I can't remember the brand, but it's a lightweight FG one that came from Florida. Mine didn't take any work around the windshield frame, but the line around the rear quarters/trunk was a bitch. With 3/32 lexan, it flapped around like crazy when I only had 4 mounting points. You'll definitely want a 5th and 6th mounting point at the factory frankenstein bolt locations, and I'm even adding a 7th mounting point in the rear center. Also, make all of your mounts to the body before you drill and attach the lexan. I copied the factory hardtop window shape and mounted the lexan first, and it ended up making it a bitch to get the body gap even all the way around. It'll be a pain in the *** and will definitely require a second set of hands, but if I were doing it again I'd fully attach the hardtop first and get the gaps right, then drill and mount the lexan with the hardtop still bolted to the car.
Might be too late for this, but I'll say it anyway. I think I have the same hardtop as you. I can't remember the brand, but it's a lightweight FG one that came from Florida. Mine didn't take any work around the windshield frame, but the line around the rear quarters/trunk was a bitch. With 3/32 lexan, it flapped around like crazy when I only had 4 mounting points. You'll definitely want a 5th and 6th mounting point at the factory frankenstein bolt locations, and I'm even adding a 7th mounting point in the rear center. Also, make all of your mounts to the body before you drill and attach the lexan. I copied the factory hardtop window shape and mounted the lexan first, and it ended up making it a bitch to get the body gap even all the way around. It'll be a pain in the *** and will definitely require a second set of hands, but if I were doing it again I'd fully attach the hardtop first and get the gaps right, then drill and mount the lexan with the hardtop still bolted to the car.

Reply
 0
0

0
01-13-2014, 06:45 AM
#223

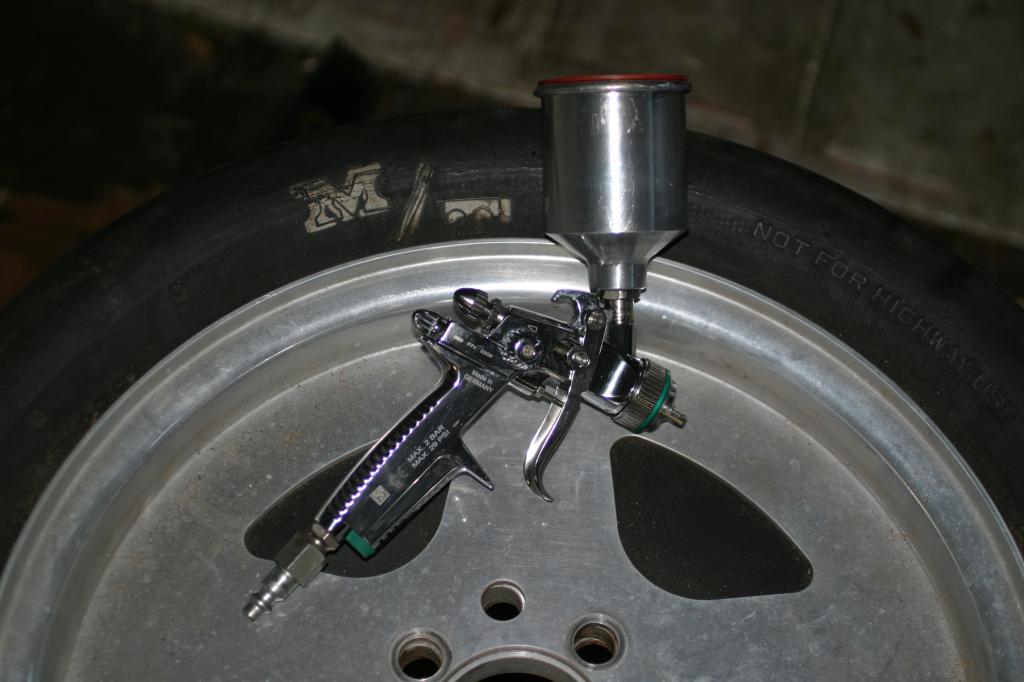
I splurged and purchased this fine German piece of craftsmanship. It is a mini gun, and it uses very little paint. It was kind of expensive, but it paints beautifully. I have been painting everything with a high quality, hardener activated, single stage urethane paint. It should make the finish on everything last much longer. No more rattle cans.

That's a cute little gun, and probably a good choice for detail work and small parts, but are you planning on shooting the whole car with it? The small cup capacity will make you old before your time, and depending on what color you shoot, can make for weird blotchy areas as the gun runs out and is reloaded.
Once again, I gotta suggest that you and Steve haul that sumbitch up here to Jax and spray it in my booth with my HVLP Turbine setup. I have everything you could possibly need in terms of ancillary supplies, the turbine will give much better results than a surging compressor full of condensation, and my booth is a much more controlled environment to work in. Do it Punk.
Reply
0
0
01-13-2014, 05:15 PM
#224
Elite Member

Thread Starter
iTrader: (2)

Join Date: Aug 2009
Location: Dover, FL
Posts: 3,143
Total Cats: 174
Just opened this thread for the first time. Neat build.
Might be too late for this, but I'll say it anyway. I think I have the same hardtop as you. I can't remember the brand, but it's a lightweight FG one that came from Florida. Mine didn't take any work around the windshield frame, but the line around the rear quarters/trunk was a bitch. With 3/32 lexan, it flapped around like crazy when I only had 4 mounting points. You'll definitely want a 5th and 6th mounting point at the factory frankenstein bolt locations, and I'm even adding a 7th mounting point in the rear center. Also, make all of your mounts to the body before you drill and attach the lexan. I copied the factory hardtop window shape and mounted the lexan first, and it ended up making it a bitch to get the body gap even all the way around. It'll be a pain in the *** and will definitely require a second set of hands, but if I were doing it again I'd fully attach the hardtop first and get the gaps right, then drill and mount the lexan with the hardtop still bolted to the car.
Might be too late for this, but I'll say it anyway. I think I have the same hardtop as you. I can't remember the brand, but it's a lightweight FG one that came from Florida. Mine didn't take any work around the windshield frame, but the line around the rear quarters/trunk was a bitch. With 3/32 lexan, it flapped around like crazy when I only had 4 mounting points. You'll definitely want a 5th and 6th mounting point at the factory frankenstein bolt locations, and I'm even adding a 7th mounting point in the rear center. Also, make all of your mounts to the body before you drill and attach the lexan. I copied the factory hardtop window shape and mounted the lexan first, and it ended up making it a bitch to get the body gap even all the way around. It'll be a pain in the *** and will definitely require a second set of hands, but if I were doing it again I'd fully attach the hardtop first and get the gaps right, then drill and mount the lexan with the hardtop still bolted to the car.
Yes, the top is retailed at Treasure Coast Miata but built somewhere in Clearwater, which is just west of me. I picked up mine at Treasure Coast because I wanted it right now to prepare the car to have a cage installed.
The folks at Treasure Coast said they were getting better results by attaching it in the middle where the soft top canvas is attached to the body. I am going to try what they suggested. I will take your advice and attach it before installing the window. I did not plan on attaching it to the Frankenstein bolts, but I may do that now. My top has no provisions to be attached like that. I will have to fiberglass in metal to both the Frankenstein areas on the middle area where you and Treasure Coast suggested.
That's a cute little gun, and probably a good choice for detail work and small parts, but are you planning on shooting the whole car with it? The small cup capacity will make you old before your time, and depending on what color you shoot, can make for weird blotchy areas as the gun runs out and is reloaded.
Once again, I gotta suggest that you and Steve haul that sumbitch up here to Jax and spray it in my booth with my HVLP Turbine setup. I have everything you could possibly need in terms of ancillary supplies, the turbine will give much better results than a surging compressor full of condensation, and my booth is a much more controlled environment to work in. Do it Punk.
Once again, I gotta suggest that you and Steve haul that sumbitch up here to Jax and spray it in my booth with my HVLP Turbine setup. I have everything you could possibly need in terms of ancillary supplies, the turbine will give much better results than a surging compressor full of condensation, and my booth is a much more controlled environment to work in. Do it Punk.
I am using the mini to do detail work and to paint small panels and parts only. I used it to paint the engine bay, and it came out pretty damn good. Only problem is I realized later that I did not apply enough paint in some areas. I (or more likely someone) will have to shoot it one more time.
I am afraid that I will not have enough time to do everything I need to do to the car if I take it up there. It is a long way away, and I know there will be a ton of work to do even if the car is where I think it is ready to shoot. I am in negotiations with someone local to finish it up. I really appreciate the offer though. It sounds like it would be fun.
Reply
0
0
 01-13-2014, 09:49 PM
#226
The folks at Treasure Coast said they were getting better results by attaching it in the middle where the soft top canvas is attached to the body. I am going to try what they suggested. I will take your advice and attach it before installing the window. I did not plan on attaching it to the Frankenstein bolts, but I may do that now. My top has no provisions to be attached like that. I will have to fiberglass in metal to both the Frankenstein areas on the middle area where you and Treasure Coast suggested.
Hope that makes sense.
Reply
0
0
01-13-2014, 10:10 PM
#229
Elite Member
Thread Starter
iTrader: (2)
Join Date: Aug 2009
Location: Dover, FL
Posts: 3,143
Total Cats: 174
One in the center might be sufficient... the point is just that the normal 4 mounting points AREN'T enough. My top didn't have provisions for attaching to the frankensteins either, but those spots made the most sense to me at the time. I just bent some 1x1/8" aluminum into the right shape and drilled a hole in the hardtop at that location. My plan for making the center mount is to just make an aluminum block with an angle cut to match the hardtop. I'll drill two M6 holes in the pinch weld flange that runs along the back to bolt the block down, drill thru the hardtop and into the block at once to make sure the holes line up, and then tap that hole to M6. If I hadn't already drilled the holes at the frankenstein location, I'd probably do all 3 rear mounts that way. Still might.
Hope that makes sense.
Hope that makes sense.
Your way would make it much easier to lift the top on and off I think. Perhaps it is possible to fiberglass/glue the block on to the underside of the top and have the block attach to the lip with screws. The block would be threaded on the bottom side facing the lip. Right?
Reply
0
0
01-13-2014, 11:39 PM
#230
Right. I might just glue the block to the hardtop too instead of drilling more holes. It isn't a critical mounting point so adhesive failing would only be an annoyance, not a safety issue. I remember seeing an FSAE team test some reasonably priced adhesives on carbon/aluminum a while back... I'll have to see if I can find that test again.
Last edited by jpreston; 01-13-2014 at 11:53 PM.
Reply
0
0
01-14-2014, 12:00 AM
#231
Ha, I had it bookmarked. Loctite hysol E120HP. About $40 with the dispenser from mcmaster. Little high but not too bad to know it's done right the first time.
http://dspace.mit.edu/bitstream/hand...pdf?sequence=1
http://dspace.mit.edu/bitstream/hand...pdf?sequence=1
Reply
0
0


 01-19-2014, 10:05 PM
#235
Elite Member
Thread Starter
iTrader: (2)
Join Date: Aug 2009
Location: Dover, FL
Posts: 3,143
Total Cats: 174
In a build like this, axles and related components are not something you want to spend too much time polishing up. There is a real good chance they will end up on a pile of scrap metal.
Reply
1
1
 02-23-2014, 07:26 PM
#237
Elite Member
Thread Starter
iTrader: (2)
Join Date: Aug 2009
Location: Dover, FL
Posts: 3,143
Total Cats: 174
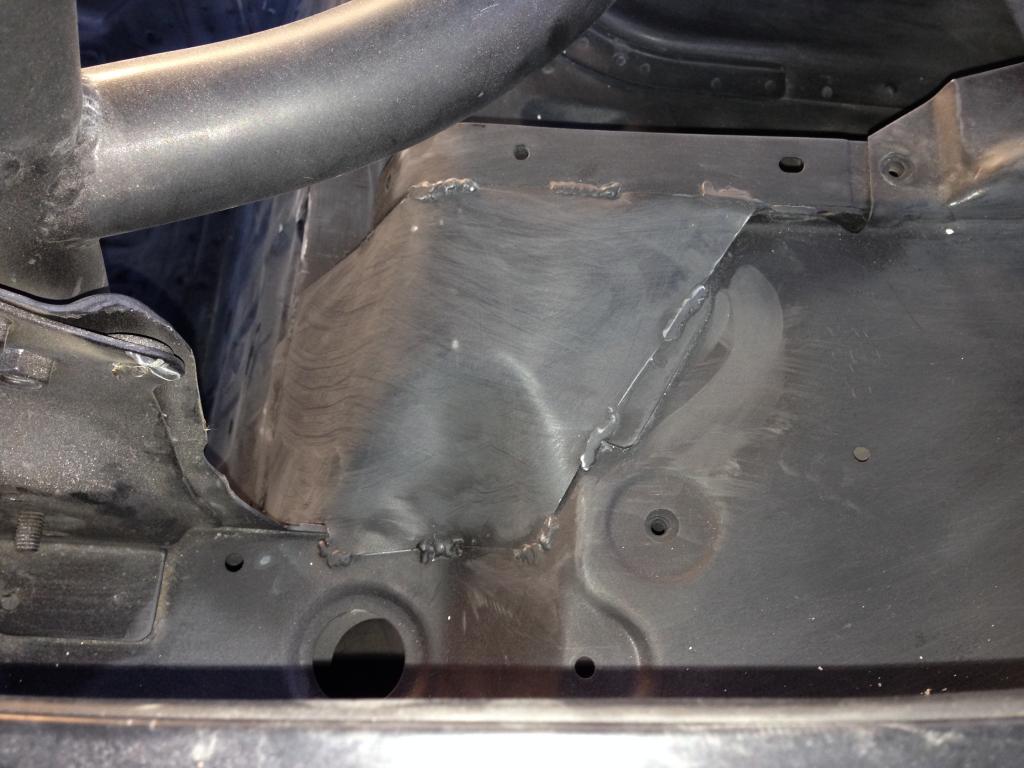
The last big piece of the body work puzzle is the hood. I took it to a welder to add some gussets underneath the hood since I removed most of the reinforcement. It has been over there for a month now, and he still has not finished it. In the meantime, I decided to tackle a few things that were bugging me.
First I cut out the emergency brake hole and welded in a piece of sheet metal. After a little bit of body work.
It needs a little more sanding and primer.
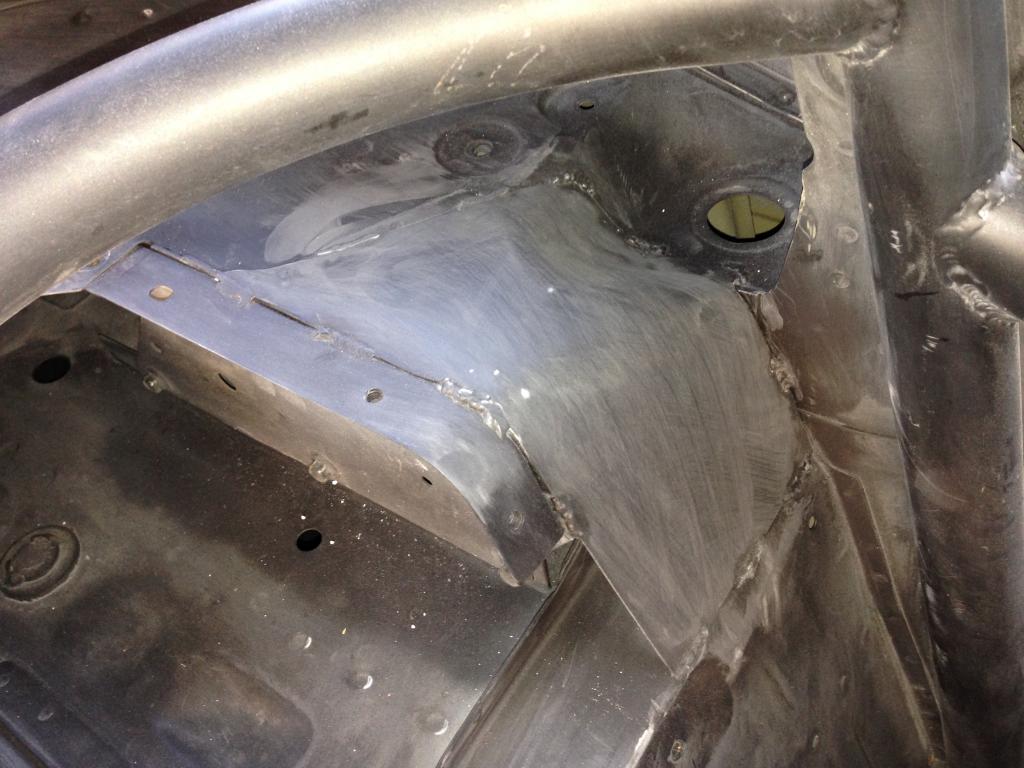
Next I filled the holes left by the factory seatbelts.
First I cut out the emergency brake hole and welded in a piece of sheet metal. After a little bit of body work.

It needs a little more sanding and primer.
Next I filled the holes left by the factory seatbelts.


Reply
0
0
02-23-2014, 09:19 PM
#238
Moderator

iTrader: (12)
Join Date: Nov 2008
Location: Tampa, Florida
Posts: 20,652
Total Cats: 3,011
Nobody is OCD here. Troy is just very, very attentive to in infinitesimally small details of little or no consequence for no good reason.
I'm going to keep saying this until I believe you really aren't OCD.
lol
I'm going to keep saying this until I believe you really aren't OCD.
lol
Reply
0
0


