Astroboy's reliability build (pic intensive)
 10-07-2011, 08:38 PM
#161
Elite Member
Thread Starter
iTrader: (18)

Join Date: Dec 2007
Location: oahu
Posts: 1,787
Total Cats: 6
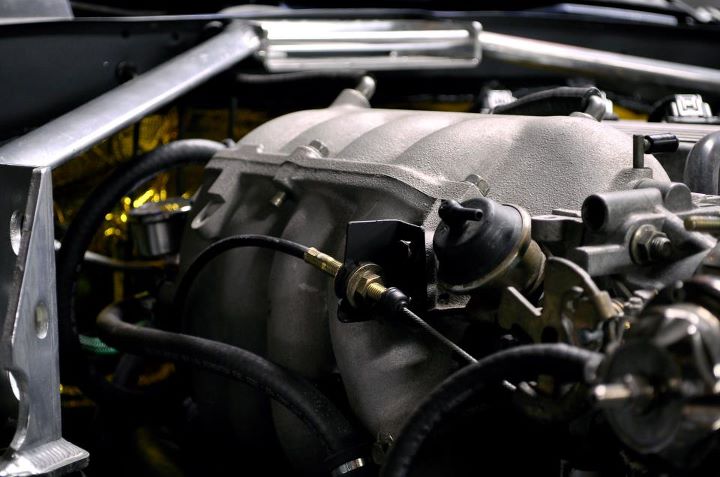
Another day has come and gone; unfortunately I have to be a responsible home owner, parent, and hubby so the car didn't get broken in. The planets are aligned though for this event though. New oil is in, new seal/o-ring is on, new filter is on, laptop is charged, and sunday's going to be a great day. Here's what the old oil and filter looked like:
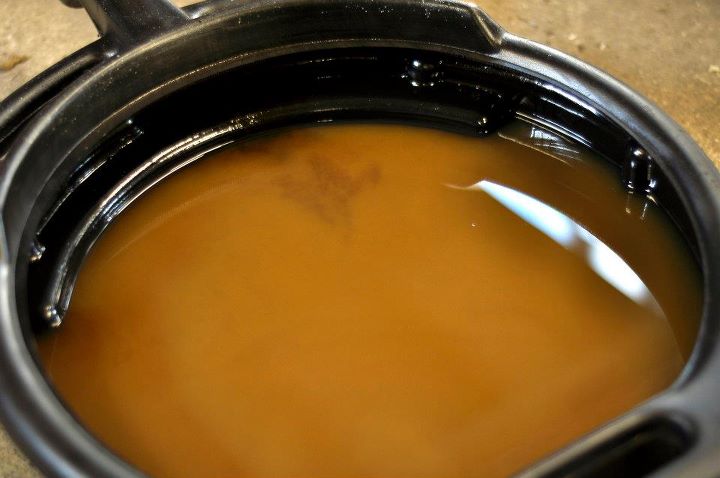
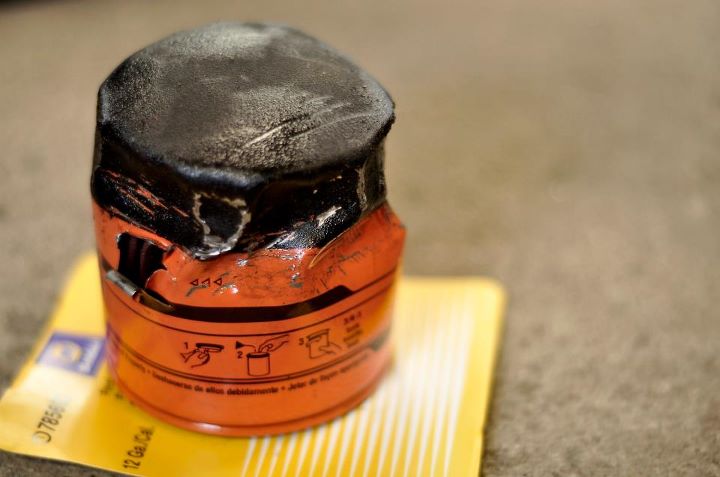
I think the oil was the only thing that was coming out of the cooler because unless there is an internal leak there shouldn't be any way for coolant to get out of the passage in/around it. also the oil looks murky like that because it is mixed with assembly lube. That was also after it sat for 24 or more hrs.
I think the oil was the only thing that was coming out of the cooler because unless there is an internal leak there shouldn't be any way for coolant to get out of the passage in/around it. also the oil looks murky like that because it is mixed with assembly lube. That was also after it sat for 24 or more hrs.

Reply
 0
0

0
10-09-2011, 06:07 PM
#162
Elite Member
Thread Starter
iTrader: (18)
Join Date: Dec 2007
Location: oahu
Posts: 1,787
Total Cats: 6
Well damnit all to hell! No break in. If you want help me with figuring this **** out here's the thread with pertinent info. I'm going to go bang my head against a wall meow.
https://www.miataturbo.net/showthrea...471#post781471
https://www.miataturbo.net/showthrea...471#post781471
Reply
0
0
10-10-2011, 08:19 PM
#163
Elite Member
Thread Starter
iTrader: (18)
Join Date: Dec 2007
Location: oahu
Posts: 1,787
Total Cats: 6
Still trying to figure this thing out. Killed the starter today so gotta figure that out quickly because my smart buddy (aka the guy who told me to unplug the iacv and where reverse is lololol aka 240 to miata) is going to come by and try to bail me out.
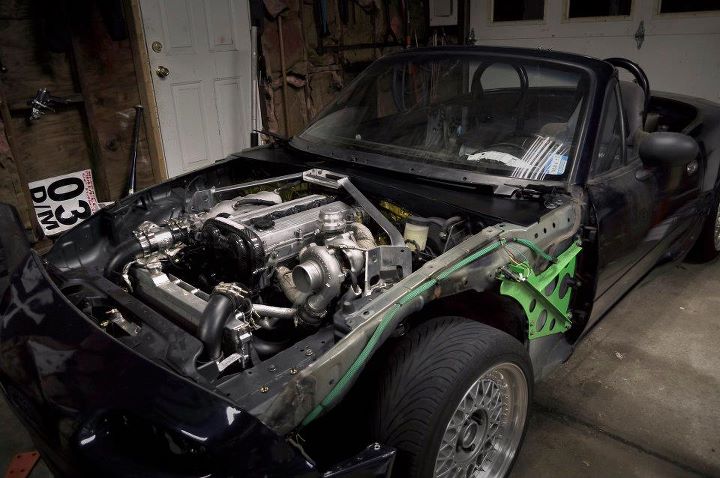
After I killed said starter I worked on the ascetics a bit. Still gotta splash some paint on the bottom part and find the cause for the poor fitment but this is about how she'll look when I'm done (minus the wheels).
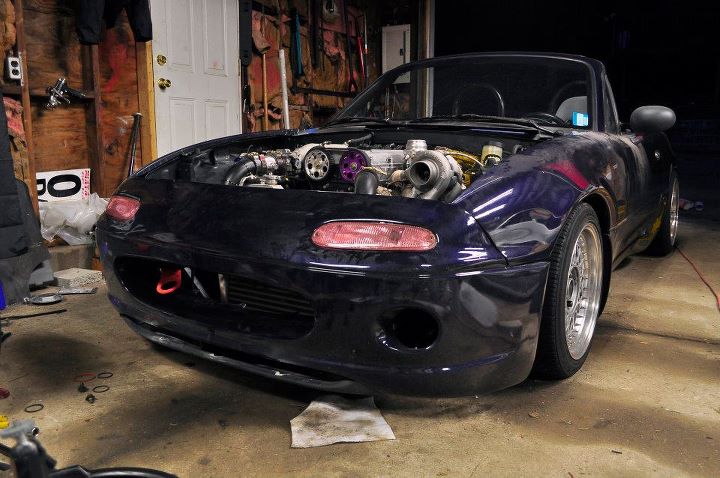
After I killed said starter I worked on the ascetics a bit. Still gotta splash some paint on the bottom part and find the cause for the poor fitment but this is about how she'll look when I'm done (minus the wheels).
Reply
0
0

 you turned my old parking lights pink

 10-12-2011, 06:53 AM
#166
Elite Member
Thread Starter
iTrader: (18)
Join Date: Dec 2007
Location: oahu
Posts: 1,787
Total Cats: 6
It was just to see how they tickled my fancy, it is not permanent 
Mine is a 1.6 one because that is what my chassis is. Less wiring that way. The only thing I had to wire up for the 99 head was the iacv (which from what I was told didn't need to be changed) and the tps. Everything else is chassis specific sensors and whatnot for the 90 (including the wiring harness).
Mine is a 1.6 one because that is what my chassis is. Less wiring that way. The only thing I had to wire up for the 99 head was the iacv (which from what I was told didn't need to be changed) and the tps. Everything else is chassis specific sensors and whatnot for the 90 (including the wiring harness).
Reply
0
0
10-12-2011, 07:01 AM
#167
Senior Member

Join Date: Oct 2007
Location: Norrahammar, Sweden
Posts: 611
Total Cats: 7
Just finished reading thru this build thread and I just want to say that you have done assume work so far. Very inspiring! Hope the second start up and break in goes well because you really deserve to drive your car now.
And as has been said before: very impressive photography.
And as has been said before: very impressive photography.
Reply
0
0
10-12-2011, 08:17 AM
#169
Elite Member
Thread Starter
iTrader: (18)
Join Date: Dec 2007
Location: oahu
Posts: 1,787
Total Cats: 6
Just finished reading thru this build thread and I just want to say that you have done assume work so far. Very inspiring! Hope the second start up and break in goes well because you really deserve to drive your car now.
And as has been said before: very impressive photography.
And as has been said before: very impressive photography.
Yeah boieeeeeeeeeee!
Reply
0
0
10-12-2011, 02:52 PM
#170
Mine is a 1.6 one because that is what my chassis is. Less wiring that way. The only thing I had to wire up for the 99 head was the iacv (which from what I was told didn't need to be changed) and the tps. Everything else is chassis specific sensors and whatnot for the 90 (including the wiring harness).
im doing it so i can run the 1.8 90-98 protoge VC. i know im lame. but i just think it looks a lot cleaner, and this thread is another good example of that!
thx for your help!
Reply
0
0
10-14-2011, 09:51 PM
#171
Elite Member
Thread Starter
iTrader: (18)
Join Date: Dec 2007
Location: oahu
Posts: 1,787
Total Cats: 6
Well many things have happened recently:
`got the 99 starter in (which has a totally different sound to it and fits muuuch better)
`put in the 99 throttle cable in, cut the stock bracket, and put it on (once again perfect fitment)
`threw the stb on but am still undecided as to how I am going to fasten it to the bottom of the cowl
`put the cam gear cover on but am not sold on keeping it on there, kinda looks out of place now because it's so bubbley
Also Dave saved my *** again and got her to go. Battery is charging for round two (now that the charger is on the 12v setting) when we'll actually make it run properly.
Reply
0
0
 10-15-2011, 04:34 PM
#173
yeah, im not going to lie. i feel kinda lame going through all that trouble, just to run a diff valve cover. but my build is going to be a ground up one, so i wont be using any parts that are already on my nb.. so its not like it really matters anyways, and then i'll get exactly what i want (providing my wallet can make it through it too.  )
)
plus everyone ive seen wants 140-170 for a damn nb1 VC!! so ill go the protoge route =)
)plus everyone ive seen wants 140-170 for a damn nb1 VC!! so ill go the protoge route =)
Reply
0
0
 10-17-2011, 08:42 PM
#175
Elite Member
Thread Starter
iTrader: (18)
Join Date: Dec 2007
Location: oahu
Posts: 1,787
Total Cats: 6
Stretching out the ase's initially got her to stay going but adding a bunch more fuel kept it going. It still needs to be tuned much more.
Not lame, but 140-170 for for a nb1 vc is crazy!
Thanks man!
yeah, im not going to lie. i feel kinda lame going through all that trouble, just to run a diff valve cover. but my build is going to be a ground up one, so i wont be using any parts that are already on my nb.. so its not like it really matters anyways, and then i'll get exactly what i want (providing my wallet can make it through it too. )
plus everyone ive seen wants 140-170 for a damn nb1 VC!! so ill go the protoge route =)
)plus everyone ive seen wants 140-170 for a damn nb1 VC!! so ill go the protoge route =)
Thanks man!
Reply
0
0
10-18-2011, 09:28 PM
#177
Elite Member
Thread Starter
iTrader: (18)
Join Date: Dec 2007
Location: oahu
Posts: 1,787
Total Cats: 6
Air filter is meh, I'll get to it but rite not it isn't a priority.
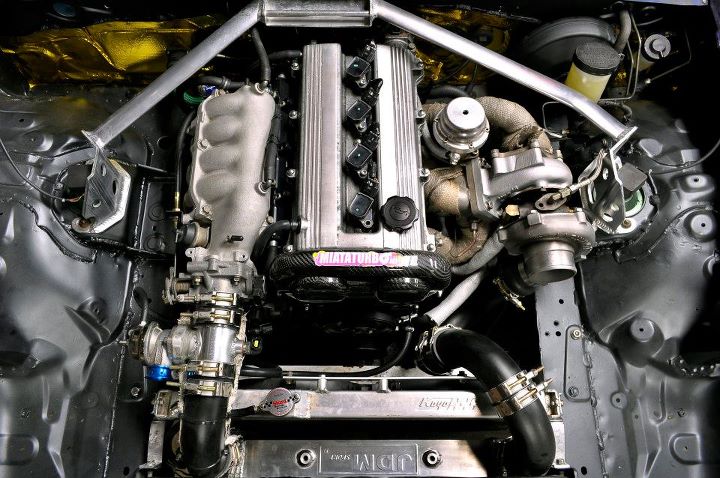
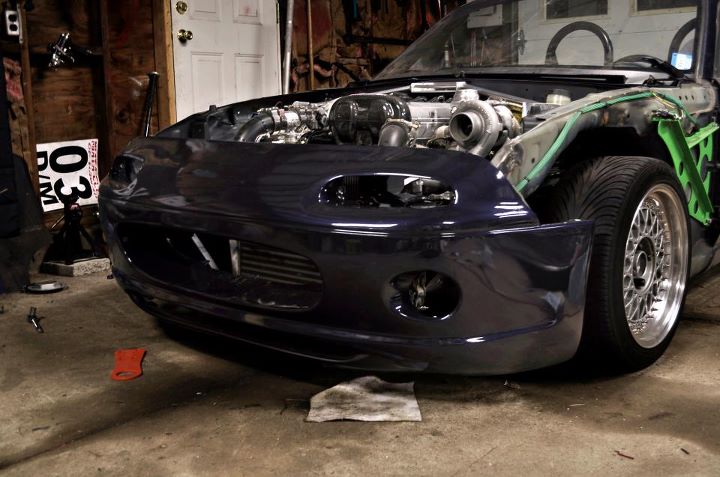
Finished up putting the bumper back together after painting the mounting bracket and the bottom lip thing (which may or may not make the final cut) and am working on getting the bumper to fit properly.
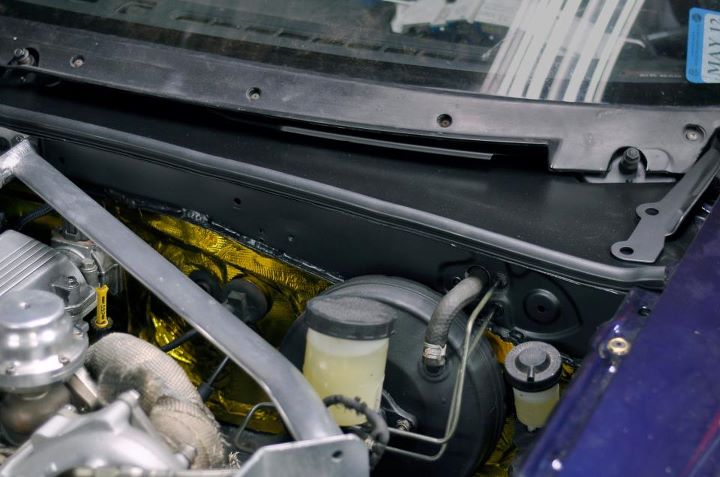
Also pulled the fenders back off so I could splash the hood hinges with some fresh paint and fab up a cowl cover.
The cowl cover is made out of some 1/32 aluminum and sprayed black with a matte clear on it.
Finished up putting the bumper back together after painting the mounting bracket and the bottom lip thing (which may or may not make the final cut) and am working on getting the bumper to fit properly.
Also pulled the fenders back off so I could splash the hood hinges with some fresh paint and fab up a cowl cover.
The cowl cover is made out of some 1/32 aluminum and sprayed black with a matte clear on it.
Reply
0
0
 10-20-2011, 09:39 PM
#180
Elite Member
Thread Starter
iTrader: (18)
Join Date: Dec 2007
Location: oahu
Posts: 1,787
Total Cats: 6
Grassy ***!
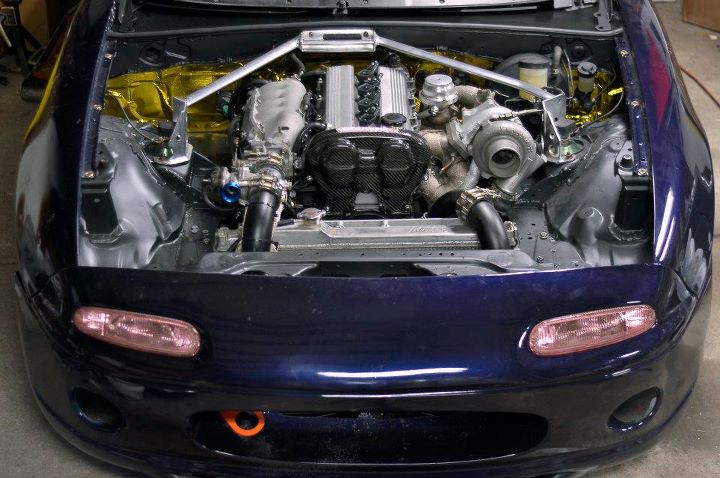
Finished the cowl cover, messed with the tune, fit/aligned the fenders and bumper, started to notch the bumper so the tow hook will work, marked the tow hook so I know where to bend it, and cracked the **** out of the bumper. Oohz wellz.
Tow hook will be painted a different color but unsure what yet...
I am waiting on a roll carbon to get here now so I can finish off the last of the details, and I need a tune damnit.
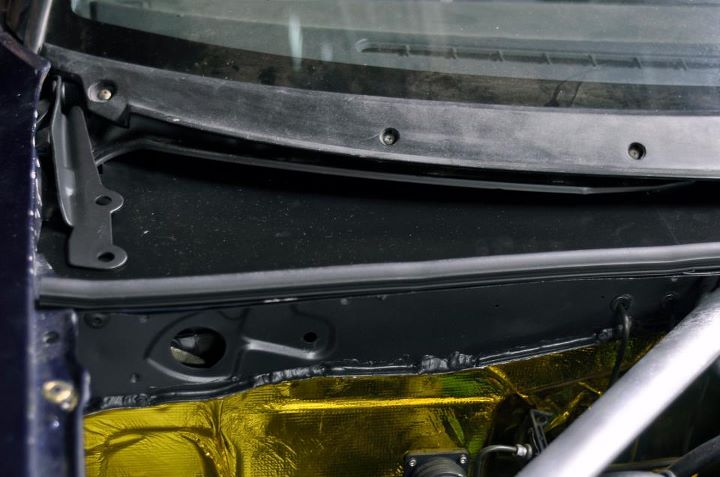
Reply
0
0


