Mazdaspeed meets EFR, ARTech, MS2E
 01-29-2014, 12:14 AM
#121
Senior Member

Thread Starter
iTrader: (4)

Join Date: May 2012
Location: Vallejo, CA
Posts: 541
Total Cats: 48
Brilliant! I need to do that with my brake ducts. Did those just ...friction fit into the fog light openings? I need to steal this. I seem to remember someone recommending something like 1/4" or 1/8" mesh over the ducts to keep out the rocks but admittedly I've been drinking this evening.
As far as the wire mesh goes, I couldn't deside what to get, where to get it and how to install it so it wouldn't look ricey so I just...didn't.

Reply
 0
0

0
01-29-2014, 12:55 AM
#122

I did almost this exact same thing with my fog light holes. The aluminum piece we used for the holes is perfectly round. The fog light holes have just the slightest oval shape to them. They are more narrower top to bottom and so I had to file down the tops and the bottom of that outer lip you can see from the front. Just a couple mm each side. They can be pressed in there, but it touches the paint a little hard and I was worried about them scratching.
I then used 3M yellow weather stripping glue to hold them in place. But I imagine any good glue would work here. I haven't had a screen on mine in 5k miles and no issues yet. Though some sort of screen wouldn't be a bad idea. I've thought about it, but just never got around to worrying about it.
I then used 3M yellow weather stripping glue to hold them in place. But I imagine any good glue would work here. I haven't had a screen on mine in 5k miles and no issues yet. Though some sort of screen wouldn't be a bad idea. I've thought about it, but just never got around to worrying about it.
Reply
0
0
 01-29-2014, 03:25 AM
#124
I went through a similar front main problem. I had an oem and a Felpro side by side and felt that the Felpro was a better quality seal. Then I checked the spring that goes around the inside and went with the better spring (I pretty sure it was the oem spring). You can also unscrew the spring and cut about 1/8" or so out of the windings and screw it back together. This will put slightly more pressure against the crank. 
Reply
0
0
01-29-2014, 10:08 AM
#125
Senior Member
Thread Starter
iTrader: (4)
Join Date: May 2012
Location: Vallejo, CA
Posts: 541
Total Cats: 48
I went through a similar front main problem. I had an oem and a Felpro side by side and felt that the Felpro was a better quality seal. Then I checked the spring that goes around the inside and went with the better spring (I pretty sure it was the oem spring). You can also unscrew the spring and cut about 1/8" or so out of the windings and screw it back together. This will put slightly more pressure against the crank.
Reply
0
0
 01-29-2014, 01:14 PM
#127
Senior Member
Thread Starter
iTrader: (4)
Join Date: May 2012
Location: Vallejo, CA
Posts: 541
Total Cats: 48
I should be able to get a mic on the crank when I tear it apart. I can just use the OD of the OEM seal since it's really nice and snug.and I don't see me mic being able to get to that with the crank in the way.
Reply
0
0
01-29-2014, 10:42 PM
#128
I didn't think about researching for you while I was at work(O'Reilly) Damn it. Sorry man.
I don't see why a direct replacement seal would do that unless it rolled while putting it in? Did you use any petroleum while putting it in? While in the Airforce we used that **** all the time on seals for the aircraft.
I don't see why a direct replacement seal would do that unless it rolled while putting it in? Did you use any petroleum while putting it in? While in the Airforce we used that **** all the time on seals for the aircraft.
Reply
0
0
01-29-2014, 11:18 PM
#129
Senior Member
Thread Starter
iTrader: (4)
Join Date: May 2012
Location: Vallejo, CA
Posts: 541
Total Cats: 48
I didn't think about researching for you while I was at work(O'Reilly) Damn it. Sorry man.
I don't see why a direct replacement seal would do that unless it rolled while putting it in? Did you use any petroleum while putting it in? While in the Airforce we used that **** all the time on seals for the aircraft.
I don't see why a direct replacement seal would do that unless it rolled while putting it in? Did you use any petroleum while putting it in? While in the Airforce we used that **** all the time on seals for the aircraft.
Reply
0
0
02-16-2014, 11:36 AM
#130
Senior Member
Thread Starter
iTrader: (4)
Join Date: May 2012
Location: Vallejo, CA
Posts: 541
Total Cats: 48
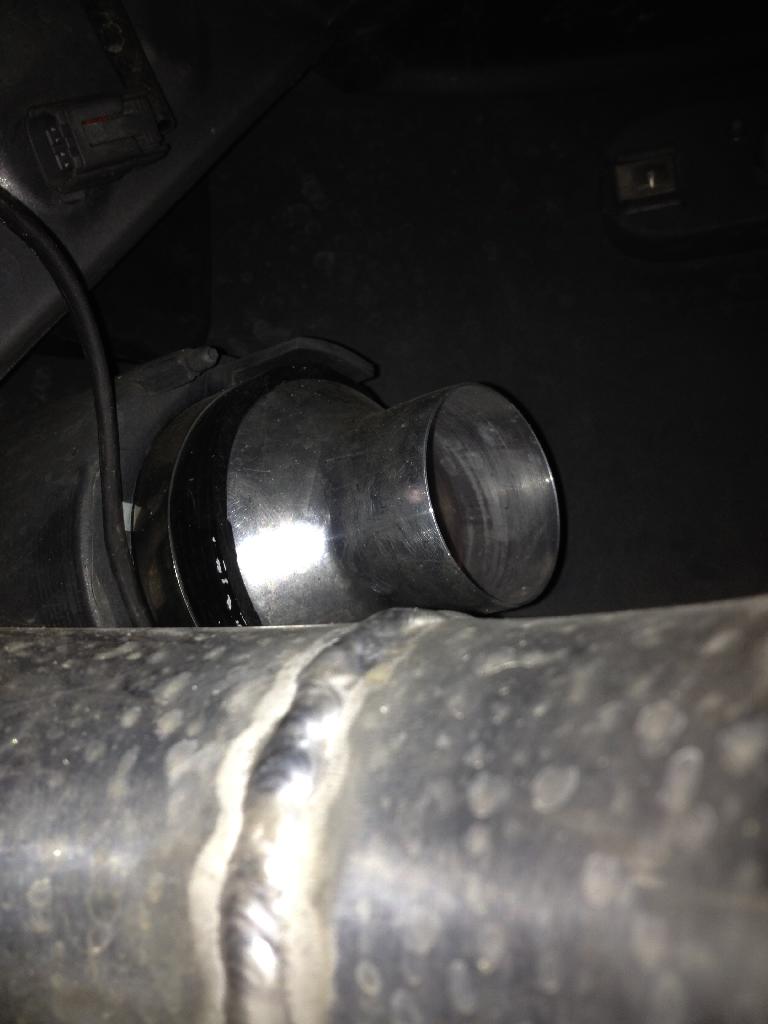
Finally got to get some more work done on the car and fixed the oil leak.
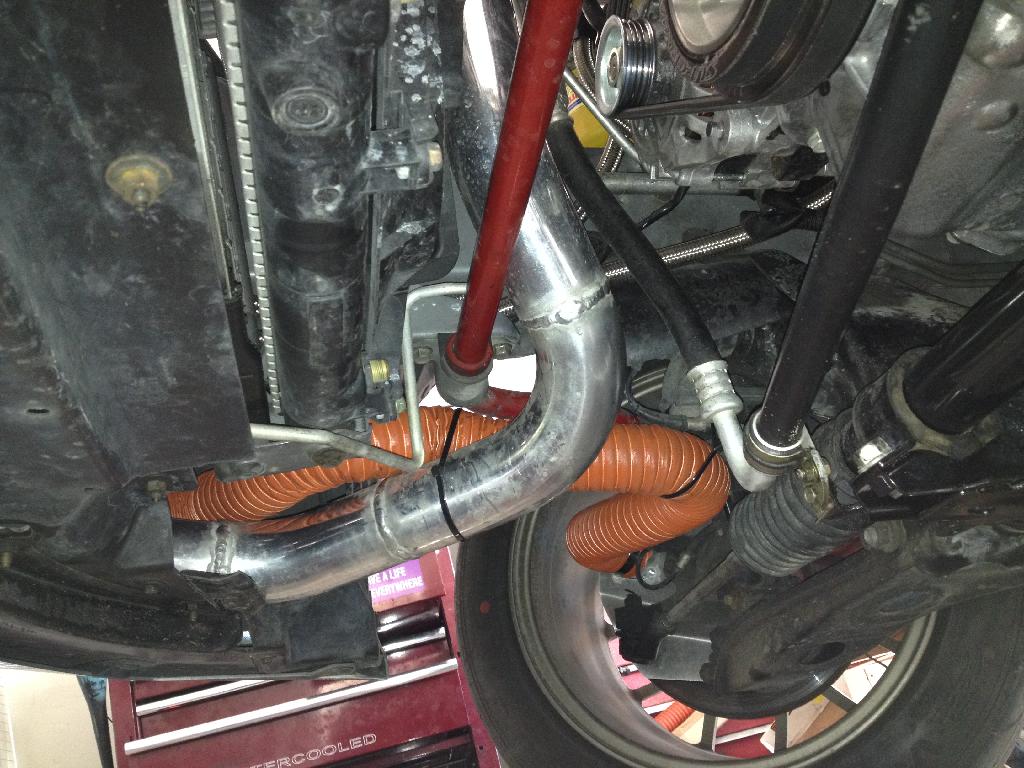
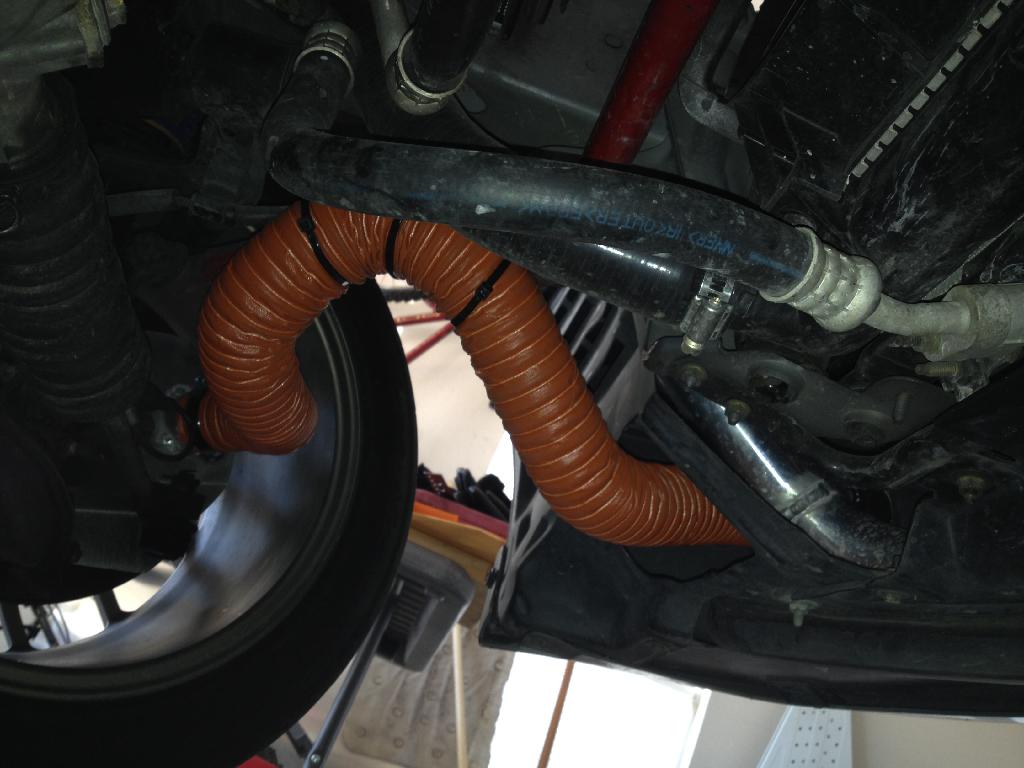
I remembered to snap a picture of the inside of the front bumper where my flanges are mounted for the brake ducts and finished the routing the hoses for the ducts.
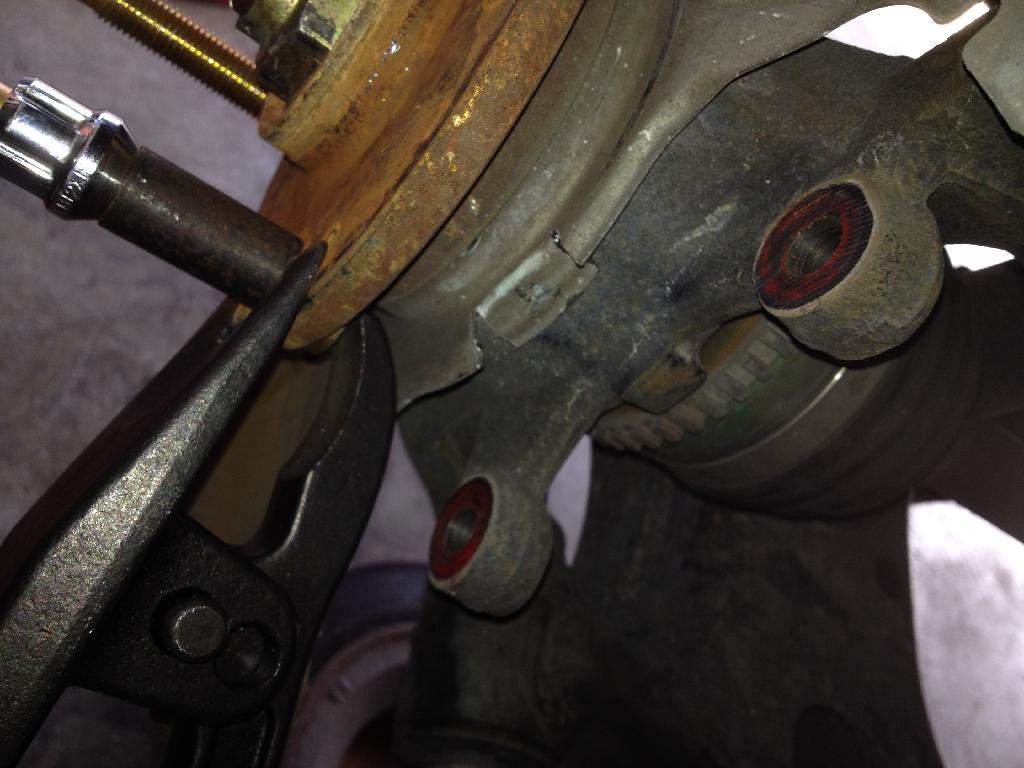
I was able to finish the install of my ARP extended wheel studs as well. To get around having to remove the rear hub I simply notched out a section of the backing plate just big enough to get the wheel studs in and out.
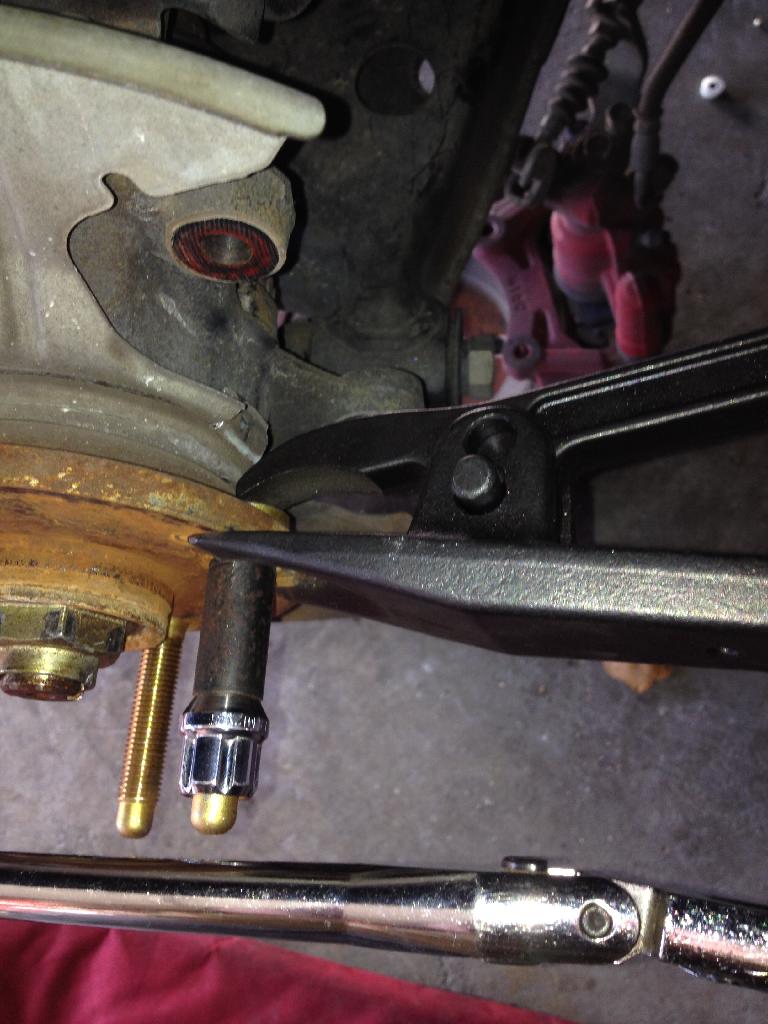
My wife surprised me by regisitering me for the next HPDE event in April so I'm definitely excited about that and I decided to go ahaed and pull the trigger on ordering a Fab9 COP kit and the 11.75" TSE BBK! More to come after the holiday...
I remembered to snap a picture of the inside of the front bumper where my flanges are mounted for the brake ducts and finished the routing the hoses for the ducts.
I was able to finish the install of my ARP extended wheel studs as well. To get around having to remove the rear hub I simply notched out a section of the backing plate just big enough to get the wheel studs in and out.
My wife surprised me by regisitering me for the next HPDE event in April so I'm definitely excited about that and I decided to go ahaed and pull the trigger on ordering a Fab9 COP kit and the 11.75" TSE BBK! More to come after the holiday...
Reply
1
1
 02-17-2014, 05:04 AM
#132
Elite Member
iTrader: (16)

Join Date: Oct 2006
Location: Las Cruces, NM
Posts: 1,647
Total Cats: 524
Great to see the progress Frank! You beat me to the wheel studs and the brake ducting. I have the same tool for the ball joints and will have to use your method of pressing the wheel studs. Keep it up!
Reply
0
0
02-17-2014, 12:02 PM
#133
Elite Member
iTrader: (37)

Join Date: Apr 2010
Location: Very NorCal
Posts: 10,441
Total Cats: 1,899
That is the scariest ball joint tool I've ever seen. I'm guessing its this guy? 3/4" Forged Ball Joint Separator. Looks like I know where I'm stopping at lunch today.
Thanks for the more pics of the duct things, more props for you! I need to order some more stuff from AircraftSpruce so I'll get the 3" duct flanges, but I'm having a problem finding the 3"-2" aluminum reducers. I see them on the F.A.S.T. website, but I'd rather not spend $50 on then
Thanks for the more pics of the duct things, more props for you! I need to order some more stuff from AircraftSpruce so I'll get the 3" duct flanges, but I'm having a problem finding the 3"-2" aluminum reducers. I see them on the F.A.S.T. website, but I'd rather not spend $50 on then
Reply
0
0
02-17-2014, 12:24 PM
#134
Senior Member
Thread Starter
iTrader: (4)
Join Date: May 2012
Location: Vallejo, CA
Posts: 541
Total Cats: 48
That is the scariest ball joint tool I've ever seen. I'm guessing its this guy? 3/4" Forged Ball Joint Separator. Looks like I know where I'm stopping at lunch today.
Thanks for the more pics of the duct things, more props for you! I need to order some more stuff from AircraftSpruce so I'll get the 3" duct flanges, but I'm having a problem finding the 3"-2" aluminum reducers. I see them on the F.A.S.T. website, but I'd rather not spend $50 on then
Thanks for the more pics of the duct things, more props for you! I need to order some more stuff from AircraftSpruce so I'll get the 3" duct flanges, but I'm having a problem finding the 3"-2" aluminum reducers. I see them on the F.A.S.T. website, but I'd rather not spend $50 on then
F.A.S.T. Was really the only place I found one that t thought had a quick enough reducer. I know they aren't cheap but I was set on going in that direction.
Reply
0
0
02-17-2014, 12:55 PM
#135
Senior Member
Thread Starter
iTrader: (4)
Join Date: May 2012
Location: Vallejo, CA
Posts: 541
Total Cats: 48
Just ordered FM's rear powerlite brake upgrade. I would have gone with a full FM kit but I feel like TSE's replacement rotor cost will eventually make up for the initial cost of buying two kits. I also have Carbotech AX6 pads on order aswell.
Reply
0
0
02-24-2014, 09:12 PM
#138
Senior Member
Thread Starter
iTrader: (4)
Join Date: May 2012
Location: Vallejo, CA
Posts: 541
Total Cats: 48
Going stir crazy waiting for all of my goodies to get here!
I did get bored one night last week and desided to put the factory strut tower brace back one after adding a home brew master cylinder brace to it.
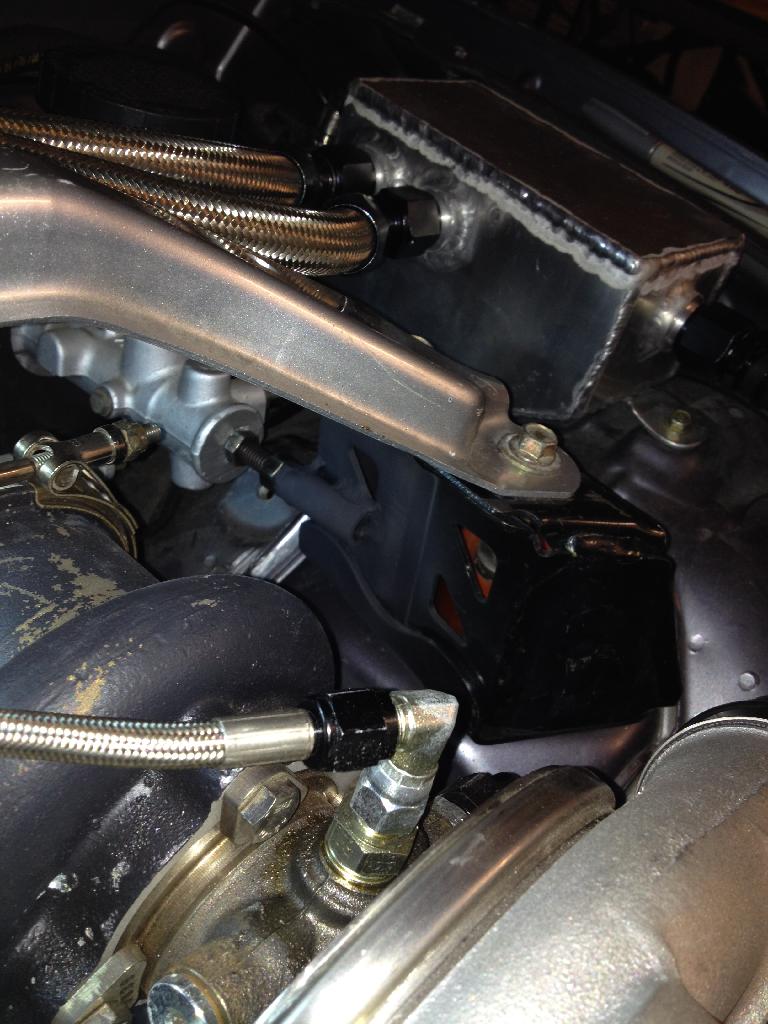
I did get bored one night last week and desided to put the factory strut tower brace back one after adding a home brew master cylinder brace to it.

Reply
1
1
02-24-2014, 09:48 PM
#140
Senior Member
Thread Starter
iTrader: (4)
Join Date: May 2012
Location: Vallejo, CA
Posts: 541
Total Cats: 48
I installed each side of the ducting individually with each wheel at full turn so there aren't any issues there.
Yes LOTS of goodies to come! Currently waiting on shipments from 5 different venders/members!
Reply
0
0


