SJP's "paint by numbers" build
 01-19-2013, 07:23 PM
#41
Junior Member
Thread Starter
iTrader: (7)

Join Date: Mar 2012
Location: Gilbert, Az
Posts: 356
Total Cats: 31
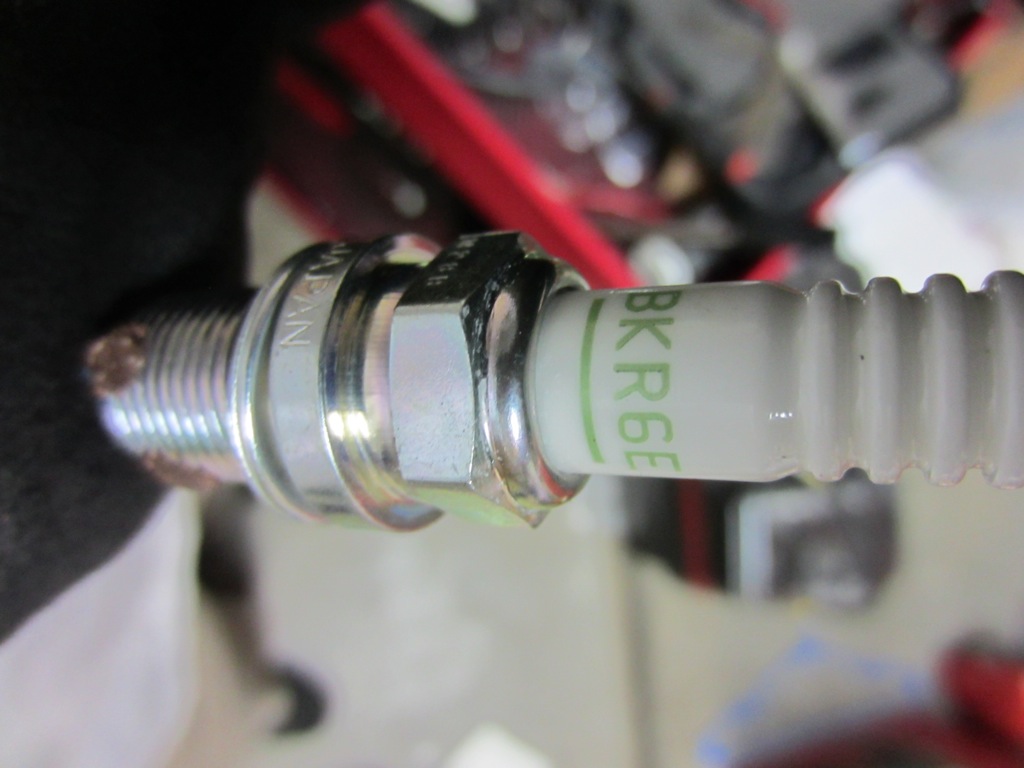
In other much less aggravating news, I changed out my plugs for some colder BKR6E's:
and while there I went ahead & did a compression test with a little help from ceiling cat (who was indeed watching me test compression):
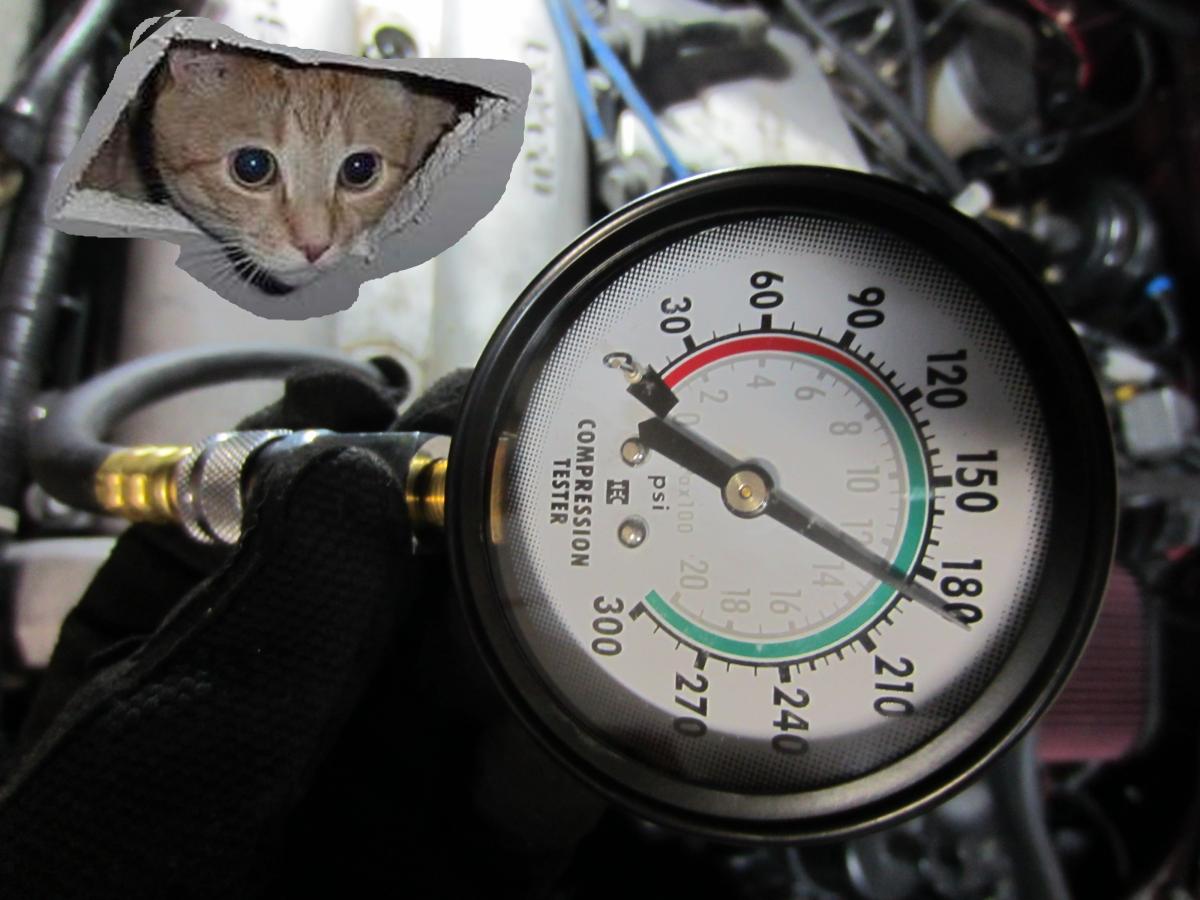
Final results were (from 1 through 4): 188, 189, 172, 185
Not too bad overall, I'll have to try it again next time I change the plugs to see if that 3rd cylinder # changes at all.
and while there I went ahead & did a compression test with a little help from ceiling cat (who was indeed watching me test compression):
Final results were (from 1 through 4): 188, 189, 172, 185
Not too bad overall, I'll have to try it again next time I change the plugs to see if that 3rd cylinder # changes at all.

Reply
 0
0

0
01-19-2013, 10:21 PM
#42
Elite Member
iTrader: (37)

Join Date: Apr 2010
Location: Very NorCal
Posts: 10,441
Total Cats: 1,899
This build is everything my car should have been. Kudos to you man, keep up the good work!
I also wanted to thank you for posting pics of the Glowshift spacer installed, and a link to the item. Ordered it tonight!
I also wanted to thank you for posting pics of the Glowshift spacer installed, and a link to the item. Ordered it tonight!
Reply
0
0
01-19-2013, 11:49 PM
#43
Junior Member
Thread Starter
iTrader: (7)
Join Date: Mar 2012
Location: Gilbert, Az
Posts: 356
Total Cats: 31
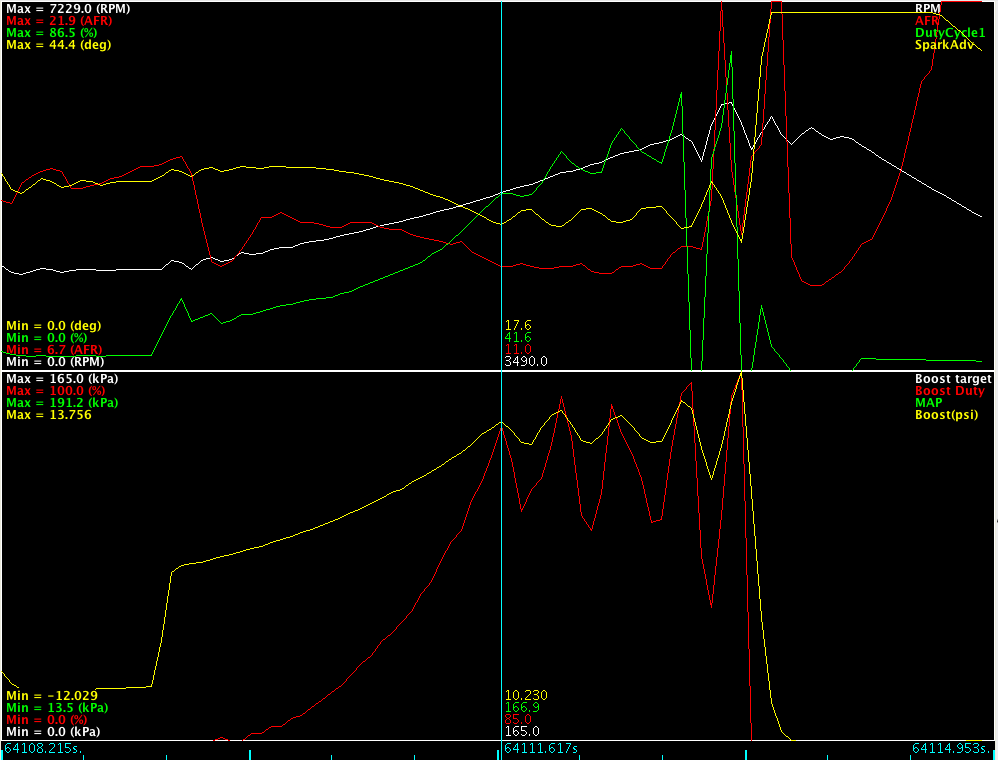
A little more playing around:
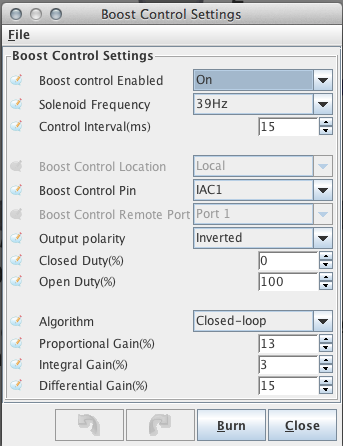
A little more I term. I was mistaken on my earlier settings: I was running 14P not 13.
So with a decrease to 13p, and increase to 3-I, and a little bit of D to dampen it down I get this. The initial onset is good, but the 2.5psi & increasing oscillations are far from ideal.
Not sure what would help with the oscillations. Higher P will dampen them, but then I'll be back to undershooting my target boost by 2-3 psi.
Debating just going MBC and calling it good at this point.
Reply
0
0
01-19-2013, 11:53 PM
#44
Junior Member
Thread Starter
iTrader: (7)
Join Date: Mar 2012
Location: Gilbert, Az
Posts: 356
Total Cats: 31

Just treat the threads like the cheap Chinese pot metal they probably are, and you'll do fine.
Reply
0
0
01-20-2013, 03:37 PM
#45
Junior Member
Thread Starter
iTrader: (7)
Join Date: Mar 2012
Location: Gilbert, Az
Posts: 356
Total Cats: 31
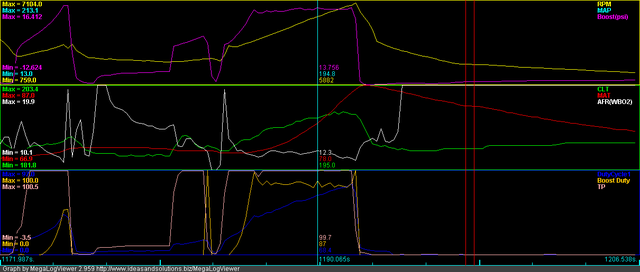
Thinking maybe the vac/boost source for my Megasquirt/Boost gauge might have been problematic, I moved from T-ing off the cruise feed:
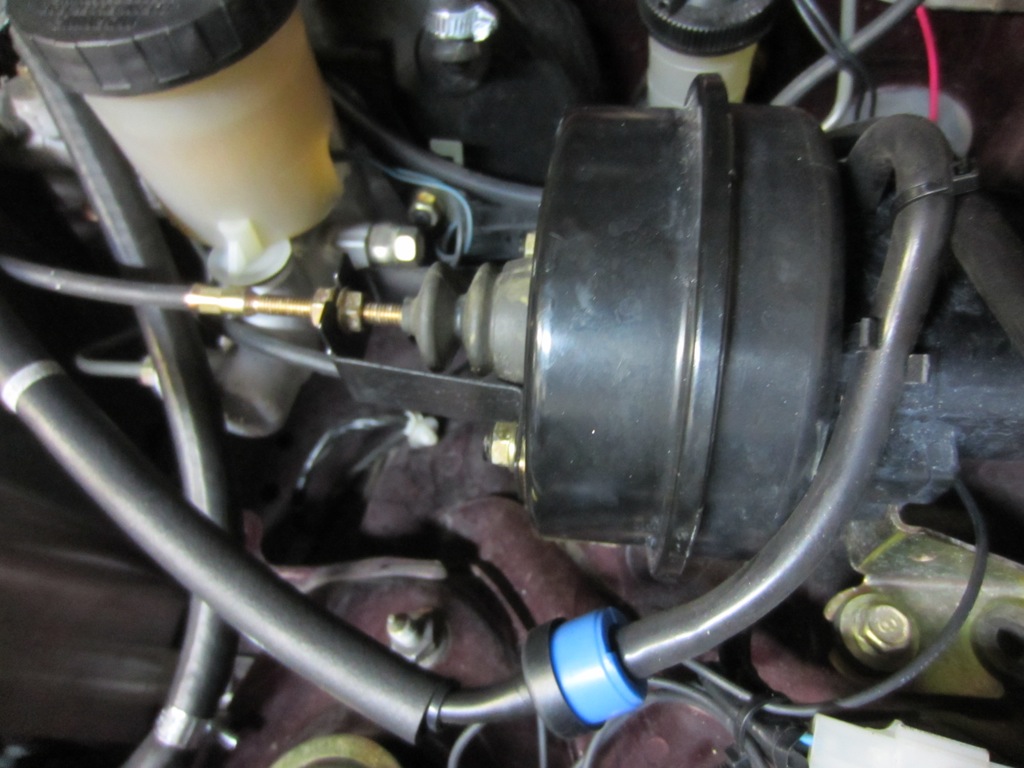
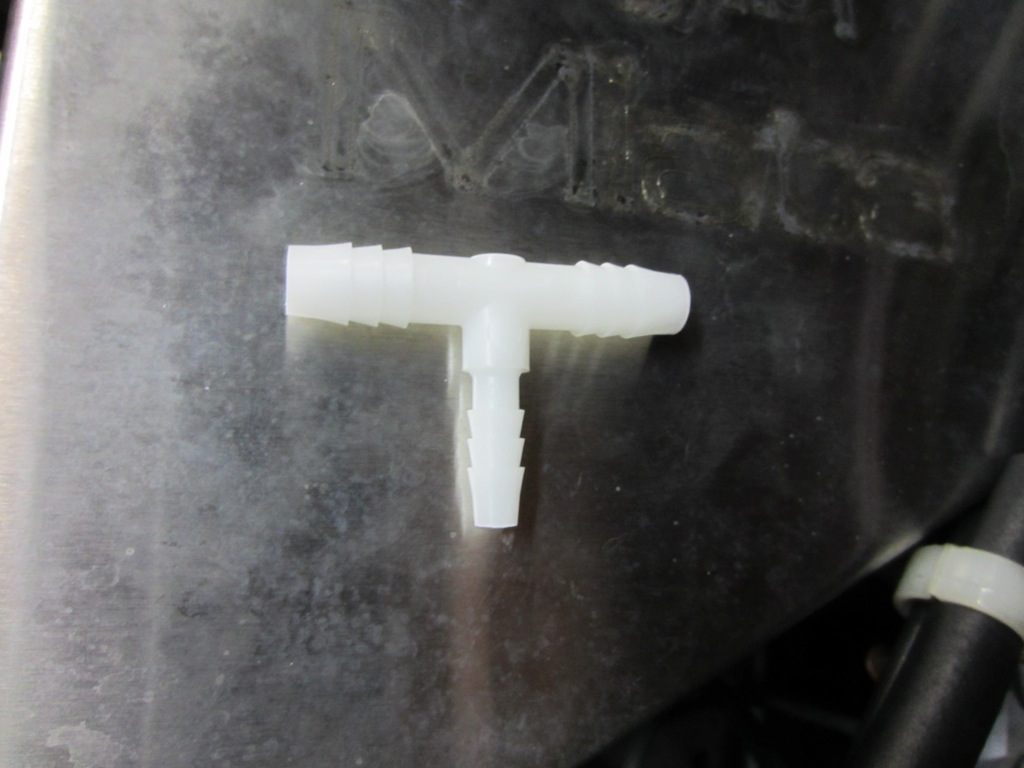
To using a larger T-fitting (Believe this one is 3/8ths on the main legs, and 1/4in on the side leg):
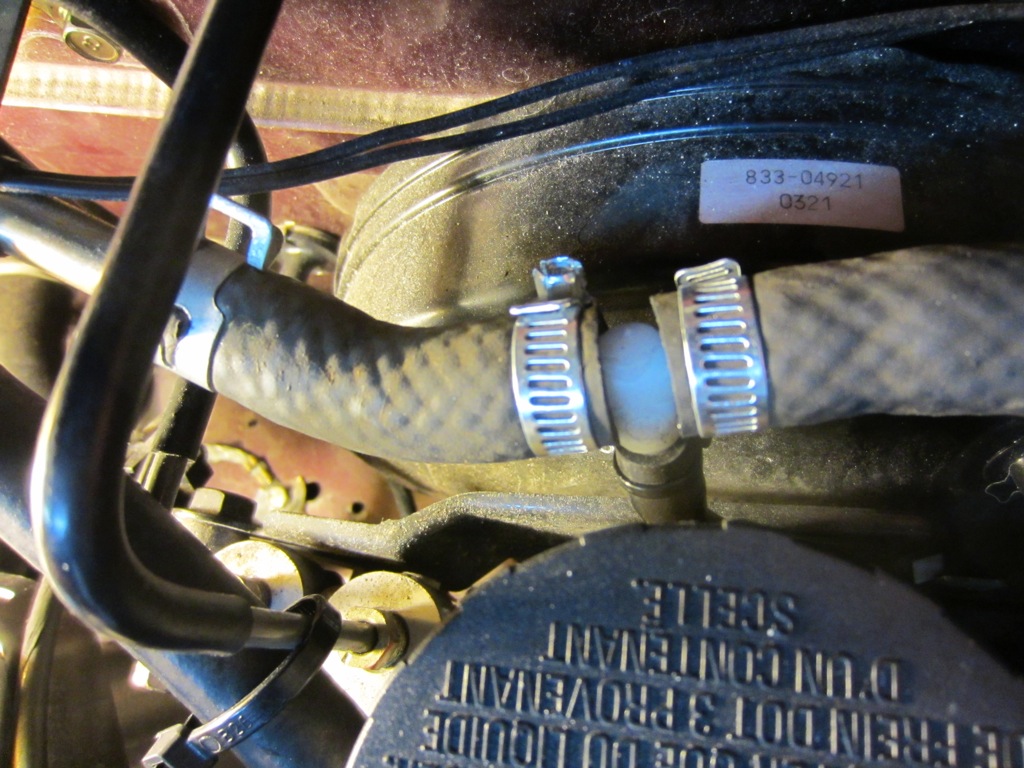
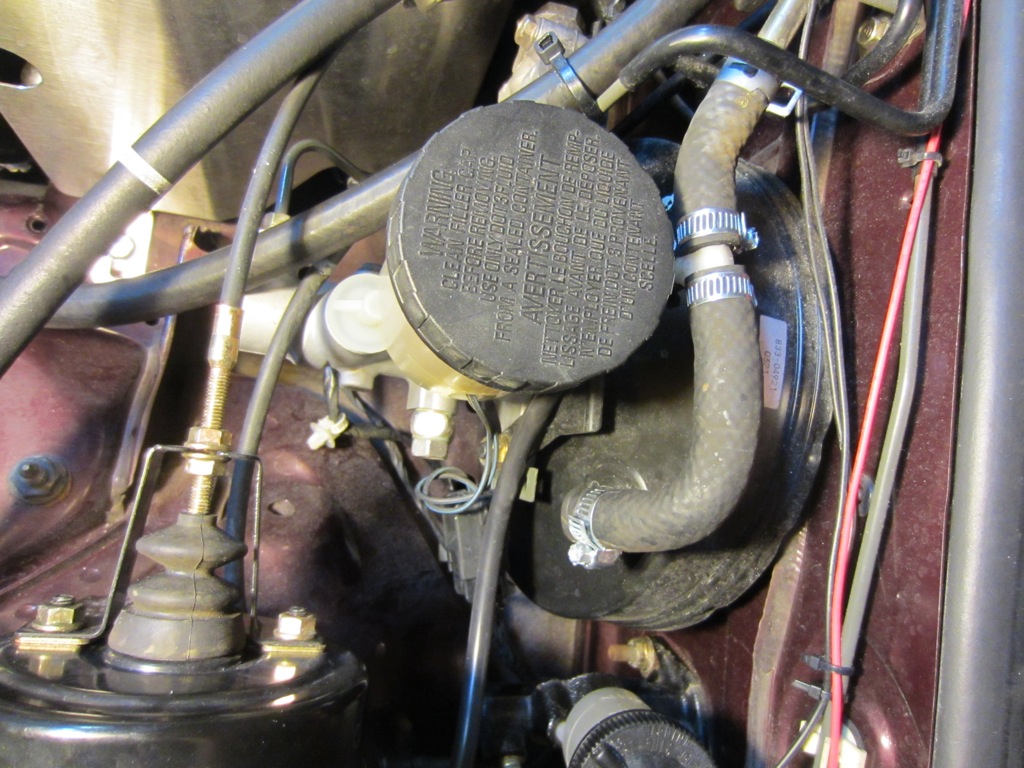
And tapping into the brake booster line before the internal check-valve:
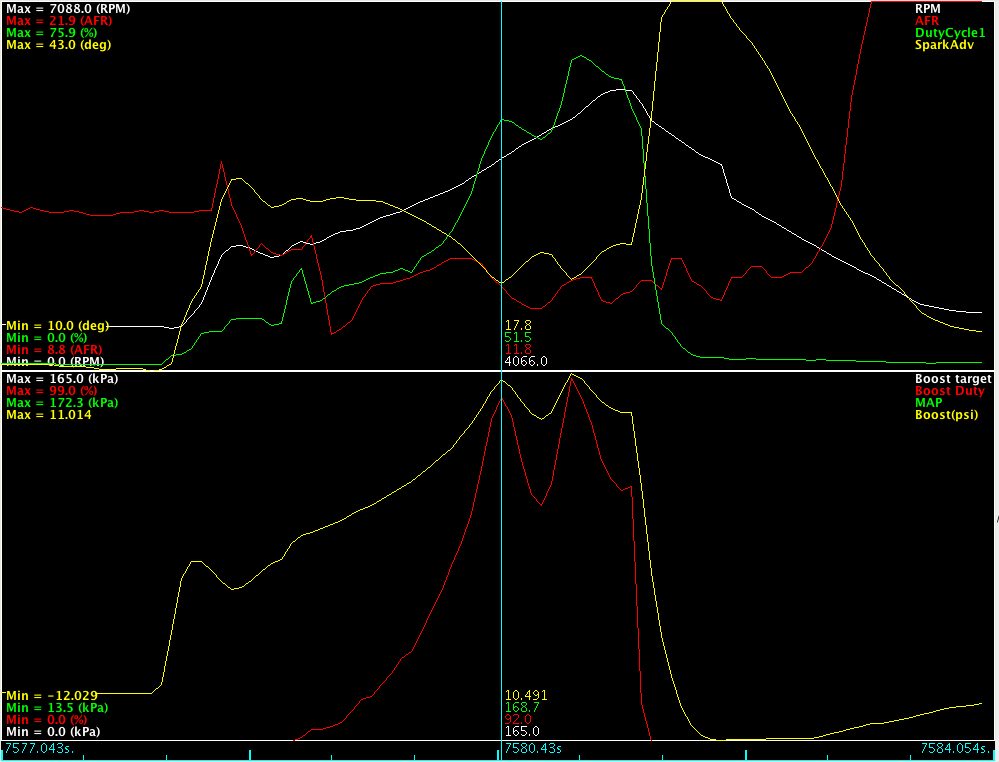
Unfortunately it didn't have much effect on my boost weirdness (same settings as previous):
Based on these results, it looks like my P term is nearly perfect (167 kPa), but the EBC overcorrects, which starts the oscillation it chases its own tail over and can't recover from.
To using a larger T-fitting (Believe this one is 3/8ths on the main legs, and 1/4in on the side leg):
And tapping into the brake booster line before the internal check-valve:
Unfortunately it didn't have much effect on my boost weirdness (same settings as previous):
Based on these results, it looks like my P term is nearly perfect (167 kPa), but the EBC overcorrects, which starts the oscillation it chases its own tail over and can't recover from.
Reply
0
0


 01-20-2013, 04:50 PM
#47
Junior Member
Thread Starter
iTrader: (7)
Join Date: Mar 2012
Location: Gilbert, Az
Posts: 356
Total Cats: 31
That's pretty damn solid.
Out of curiosity: Where is the source of your wastegate actuator? I know with an MBC it's best to have it just before the throttle body, but I've read with EBC it doesn't matter as long as it sees boost and no vacuum. Based on this I've left mine fed off the turbo outlet housing.
Maybe I'll try moving the source to the throttle body and see if I get differing results.
Reply
0
0
01-26-2013, 08:56 AM
#48
Junior Member
Thread Starter
iTrader: (7)
Join Date: Mar 2012
Location: Gilbert, Az
Posts: 356
Total Cats: 31
Well, I fought with EBC for another week or so. I ran across an interesting post on msextra.com, where someone had a similar control problem with their EBC, that switching the solenoid frequency to 19.5 Hz seemed to fix: Megasquirt MSEXTRA / MS3EFI • MS2 Boost control tuning (View topic)
This did seem to help to some degree, and got me a little closer to my goal, but I still couldn't get rid of the +- 1.5psi oscillation under every condition. I could get the 1st/2nd gear pulls where I wanted & smooth, but then 3rd/4th gear pulls would oscillate wildly. Getting 3rd/4th sorted, 1st and 2nd would undershoot my target boost goal by 2-3 psi.
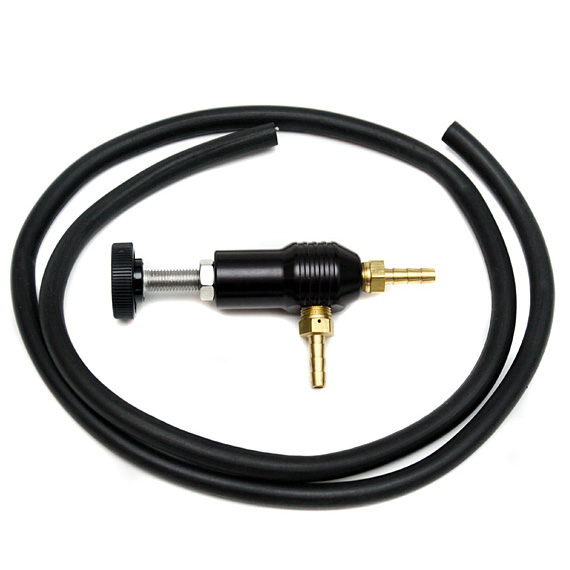
So I bought one of these instead:
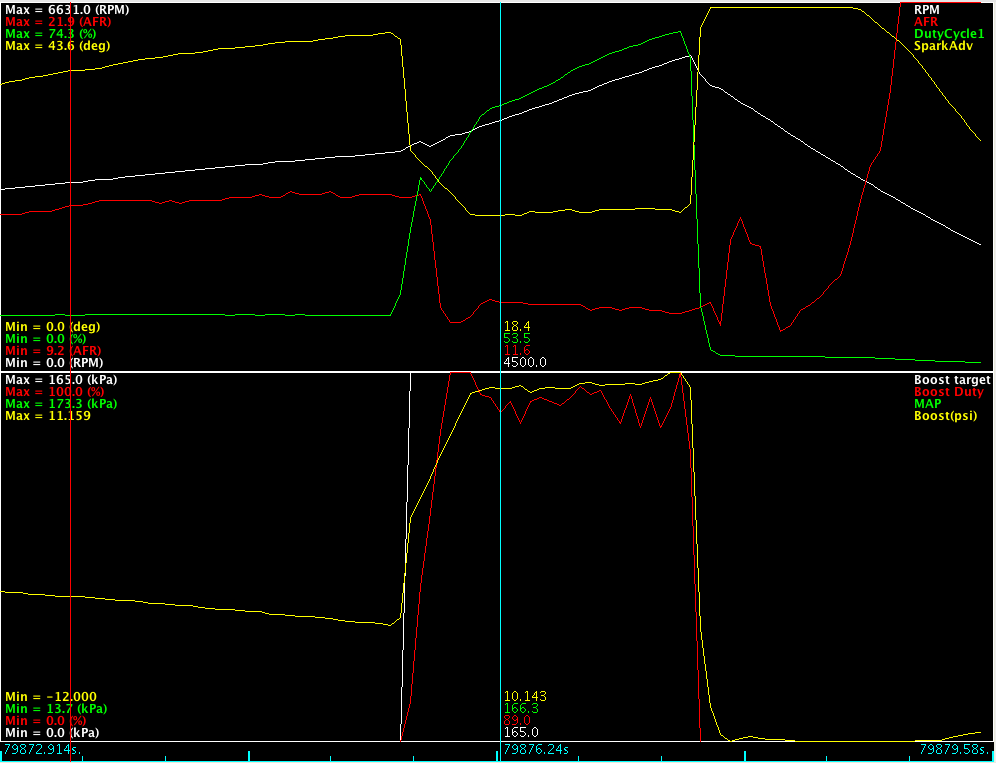
So far so good, there's a little bit of creep around ~0.5psi from 5k->7k rpms, but nothing too bad overall. Ignore wastegate duty, it's disconnected/turned off for this run. 100% MBC:
This did seem to help to some degree, and got me a little closer to my goal, but I still couldn't get rid of the +- 1.5psi oscillation under every condition. I could get the 1st/2nd gear pulls where I wanted & smooth, but then 3rd/4th gear pulls would oscillate wildly. Getting 3rd/4th sorted, 1st and 2nd would undershoot my target boost goal by 2-3 psi.
So I bought one of these instead:
So far so good, there's a little bit of creep around ~0.5psi from 5k->7k rpms, but nothing too bad overall. Ignore wastegate duty, it's disconnected/turned off for this run. 100% MBC:
Reply
0
0
01-26-2013, 09:02 AM
#49
Junior Member
Thread Starter
iTrader: (7)
Join Date: Mar 2012
Location: Gilbert, Az
Posts: 356
Total Cats: 31
After reading a couple other posts, and eventually this one:
https://www.miataturbo.net/megasquir...-module-70090/
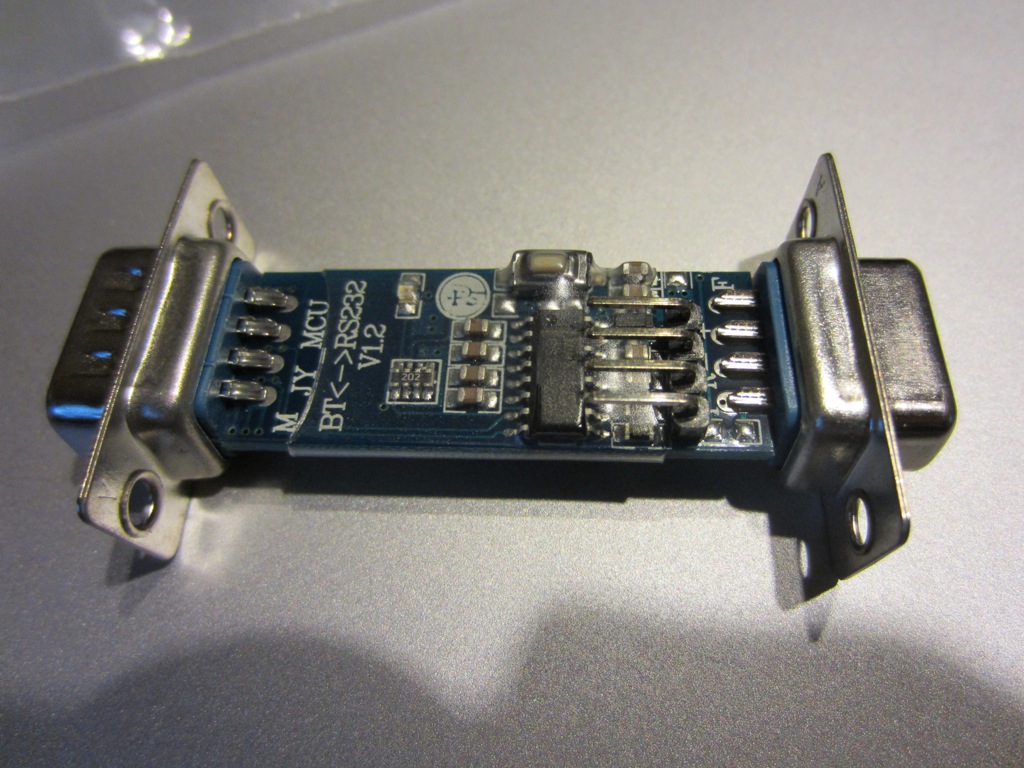
I decided to try and get a bluetooth module working with my MS2.
So I ran off to ebay, picked up one for $14, and got it setup with a little help from mrpham's instructions: https://www.miataturbo.net/megasquir...90/#post971909
Here's the board itself:
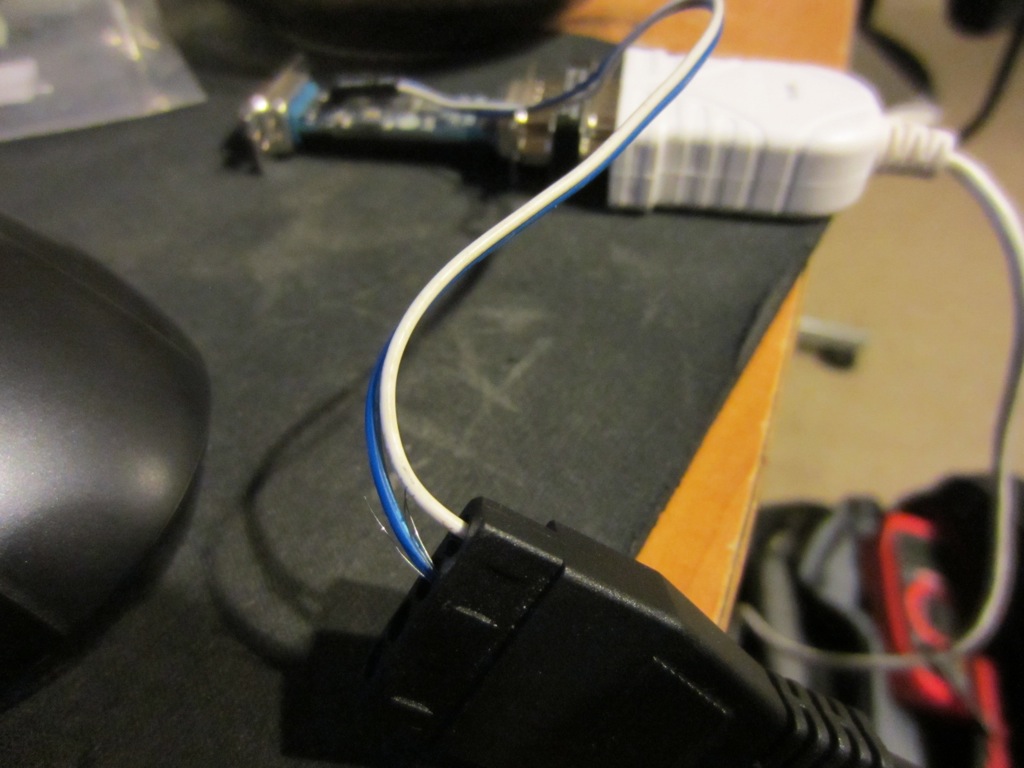
I used an old mobo harness to provide power/ground for the configuration process:
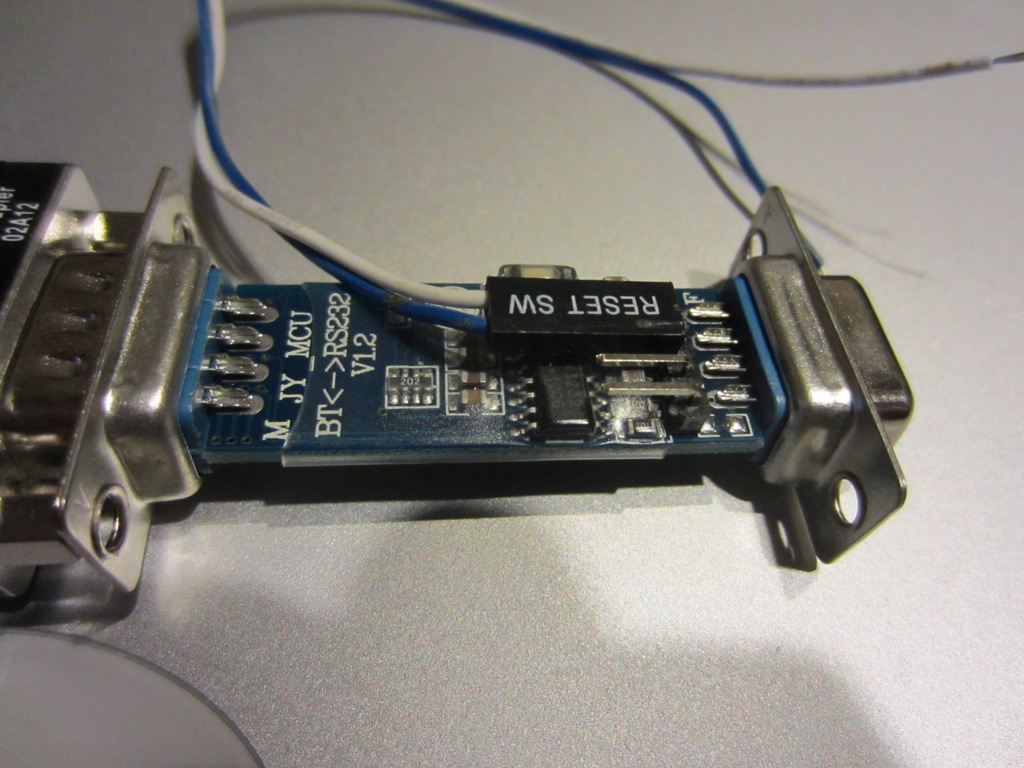
And used a HDD molex connector for the +5v:
After setting everything up, both the laptop and the Shadowdash in Android work great. I don't know if I'll use it for auto-tune based on Jeff_Ciesielski's post, it's mostly nice for those times where you'd like to see what the MS is doing, or if you need to make a quick change and dont have a laptop around.
https://www.miataturbo.net/megasquir...-module-70090/
I decided to try and get a bluetooth module working with my MS2.
So I ran off to ebay, picked up one for $14, and got it setup with a little help from mrpham's instructions: https://www.miataturbo.net/megasquir...90/#post971909
Here's the board itself:
I used an old mobo harness to provide power/ground for the configuration process:
And used a HDD molex connector for the +5v:
After setting everything up, both the laptop and the Shadowdash in Android work great. I don't know if I'll use it for auto-tune based on Jeff_Ciesielski's post, it's mostly nice for those times where you'd like to see what the MS is doing, or if you need to make a quick change and dont have a laptop around.
Reply
0
0
03-24-2013, 10:44 AM
#50
Junior Member
Thread Starter
iTrader: (7)
Join Date: Mar 2012
Location: Gilbert, Az
Posts: 356
Total Cats: 31
It's been awhile, no real updates. Just wanted to post for anyone who follows this:
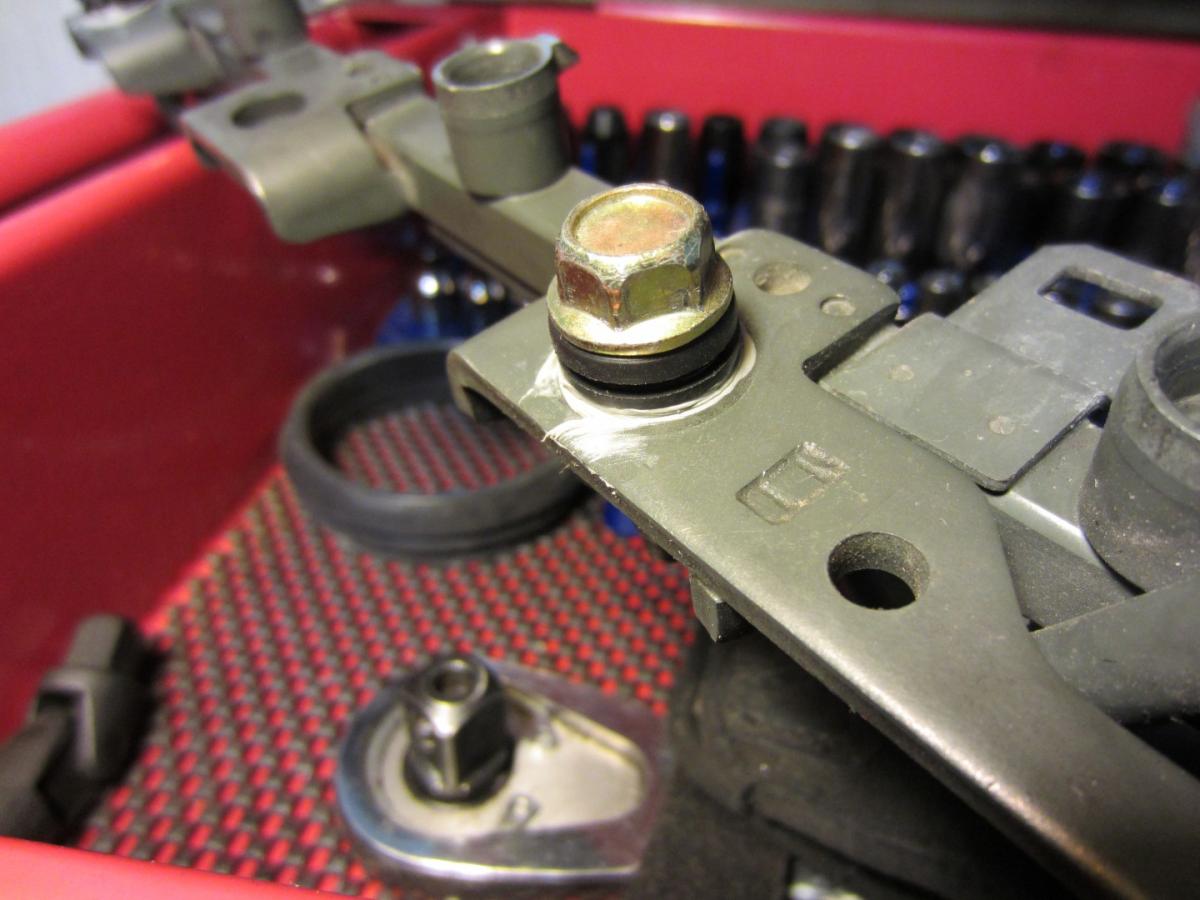
If you decide to use the same sandwich plate & hang your oil pressure sensor on the bottom like I did, rotate the whole thing clockwise about 3-4 degrees away from the sensor hanging straight down.
If you leave it pointing straight down, it's perfectly enough to keep the alternator long bolt from coming out by about 2-3mm. Rotating it just a bit is enough to allow the bolt to slip in/out in the extra space provided.
Not like this:
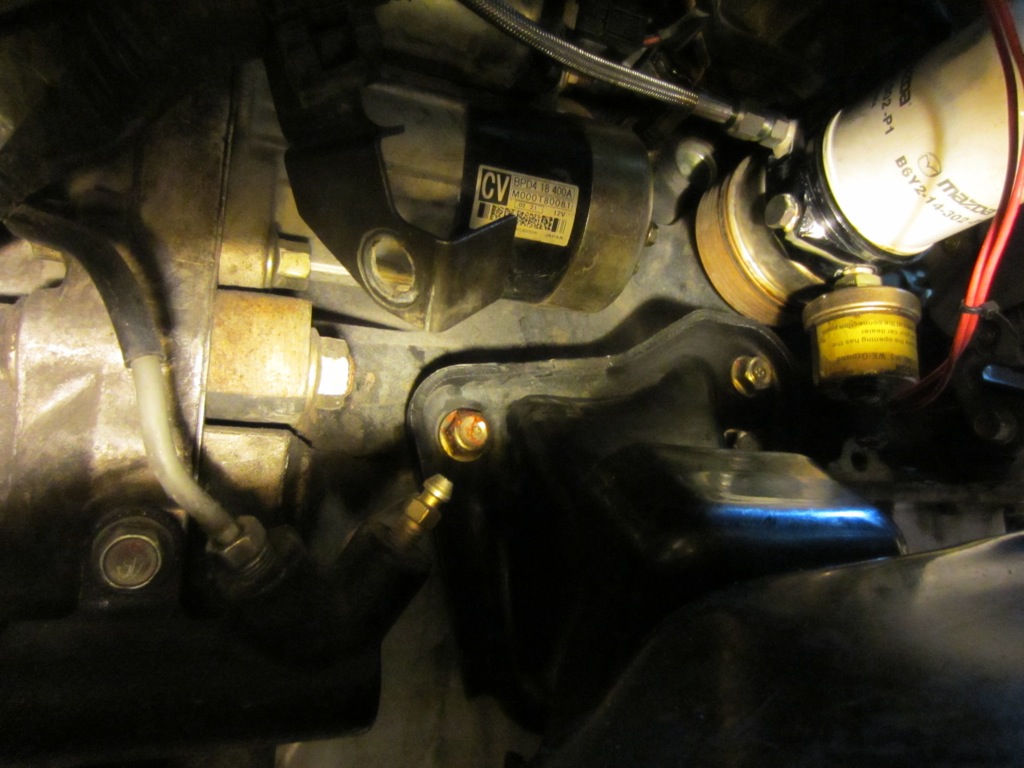
Reply
0
0
05-11-2013, 11:50 AM
#51
Junior Member
Thread Starter
iTrader: (7)
Join Date: Mar 2012
Location: Gilbert, Az
Posts: 356
Total Cats: 31
A few months ago by... then I get the:
"blah blah, your registration needs to be renewed after complying with emissions requirements."
sigh...
So, I put back the stock MAF + AIT:
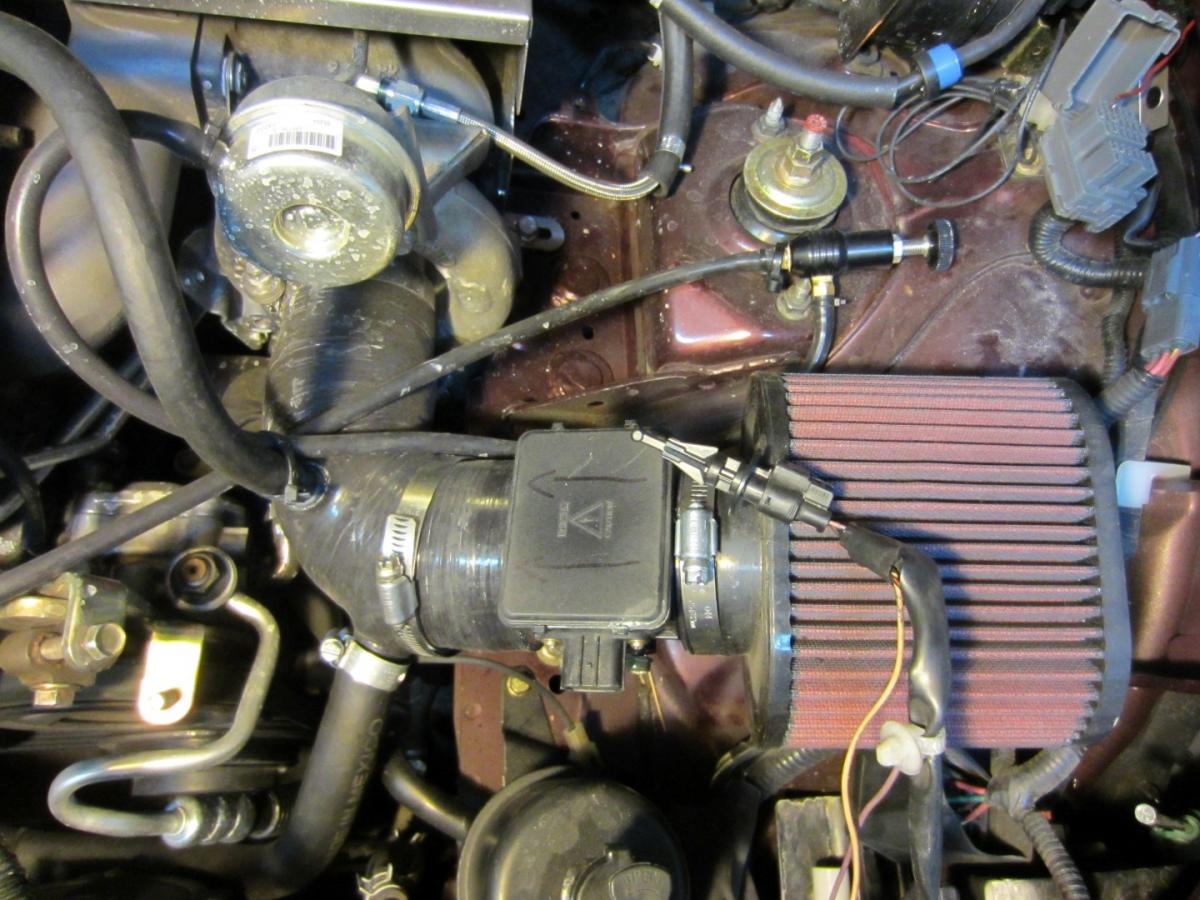
plus the stock ECU, fuel injectors, front o2 sensor, unclip the boost actuator, and get that pesky rear o2 sensor bung welded in the exhaust & rear o2 installed (it's kinda just been wrapped in foil & ziptied up under the car for awhile).
After all this I fire up my OBD2 bluetooth reader to monitor the status and..... nothing. Wait wtf, why can't I get a reading from the ECU? This thing worked great 8-9 months ago, what happened?
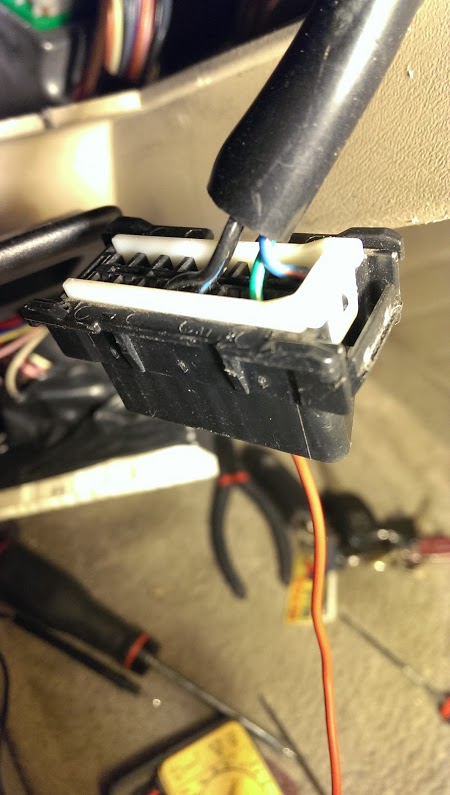
Long story short, the data line from the ecu to the OBD2 port under the dash isn't working. To fix it I wound up jamming a wire into the under-hood diagnostics port and running it into the back of the OBD2 port (more details here: https://www.miataturbo.net/megasquir...3/#post1008676).
After all this mess, and many miles of driving trying to complete a few OBD-2 "drive cycles", I passed!
"blah blah, your registration needs to be renewed after complying with emissions requirements."
sigh...
So, I put back the stock MAF + AIT:
plus the stock ECU, fuel injectors, front o2 sensor, unclip the boost actuator, and get that pesky rear o2 sensor bung welded in the exhaust & rear o2 installed (it's kinda just been wrapped in foil & ziptied up under the car for awhile).
After all this I fire up my OBD2 bluetooth reader to monitor the status and..... nothing. Wait wtf, why can't I get a reading from the ECU? This thing worked great 8-9 months ago, what happened?
Long story short, the data line from the ecu to the OBD2 port under the dash isn't working. To fix it I wound up jamming a wire into the under-hood diagnostics port and running it into the back of the OBD2 port (more details here: https://www.miataturbo.net/megasquir...3/#post1008676).
After all this mess, and many miles of driving trying to complete a few OBD-2 "drive cycles", I passed!
Reply
0
0
05-11-2013, 11:55 AM
#52
Junior Member
Thread Starter
iTrader: (7)
Join Date: Mar 2012
Location: Gilbert, Az
Posts: 356
Total Cats: 31
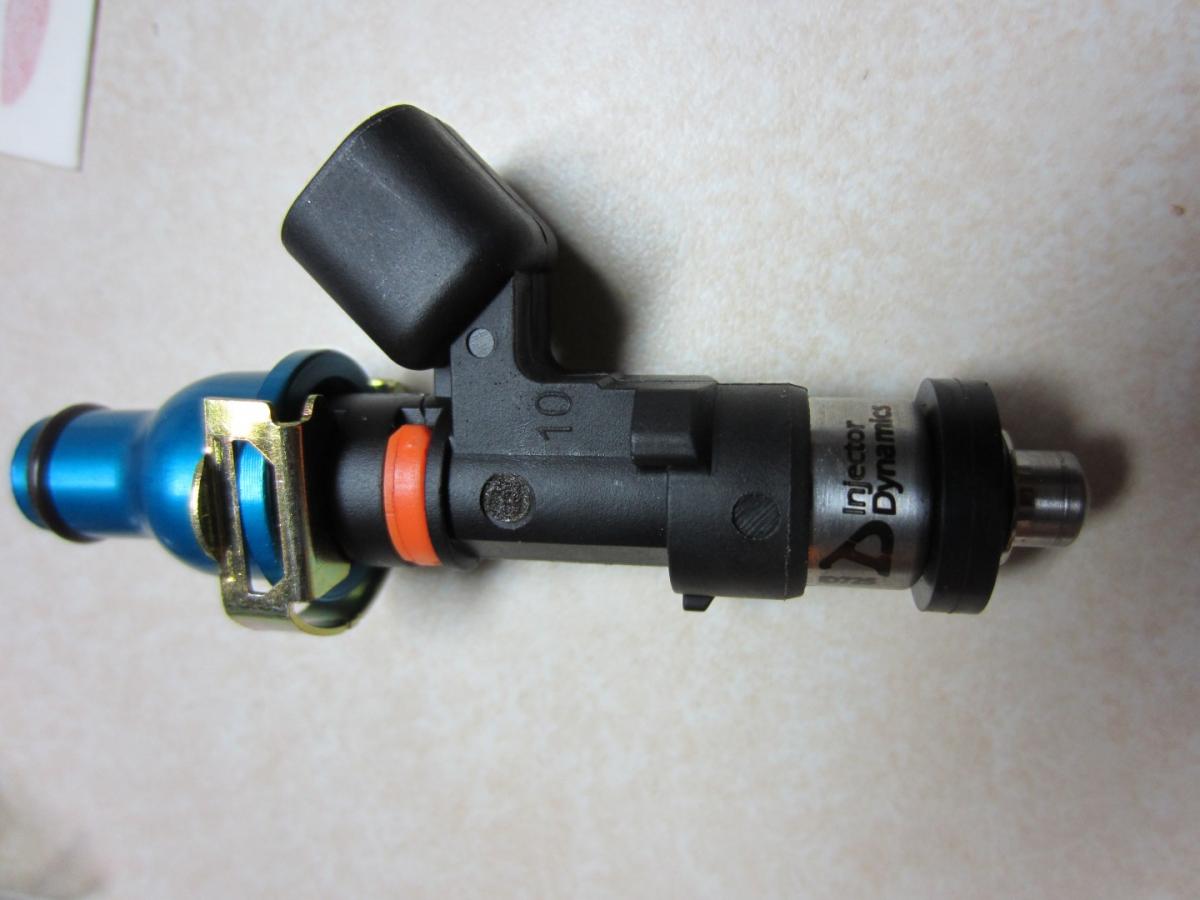
So I figured after going through all that mess, I thought I deserved a reward. So why re-install the RX8 injectors when there's perfectly good Injector Dynamics ones available?
So I ordered up a set, along with a coolant re-route kit from the guys at 949:
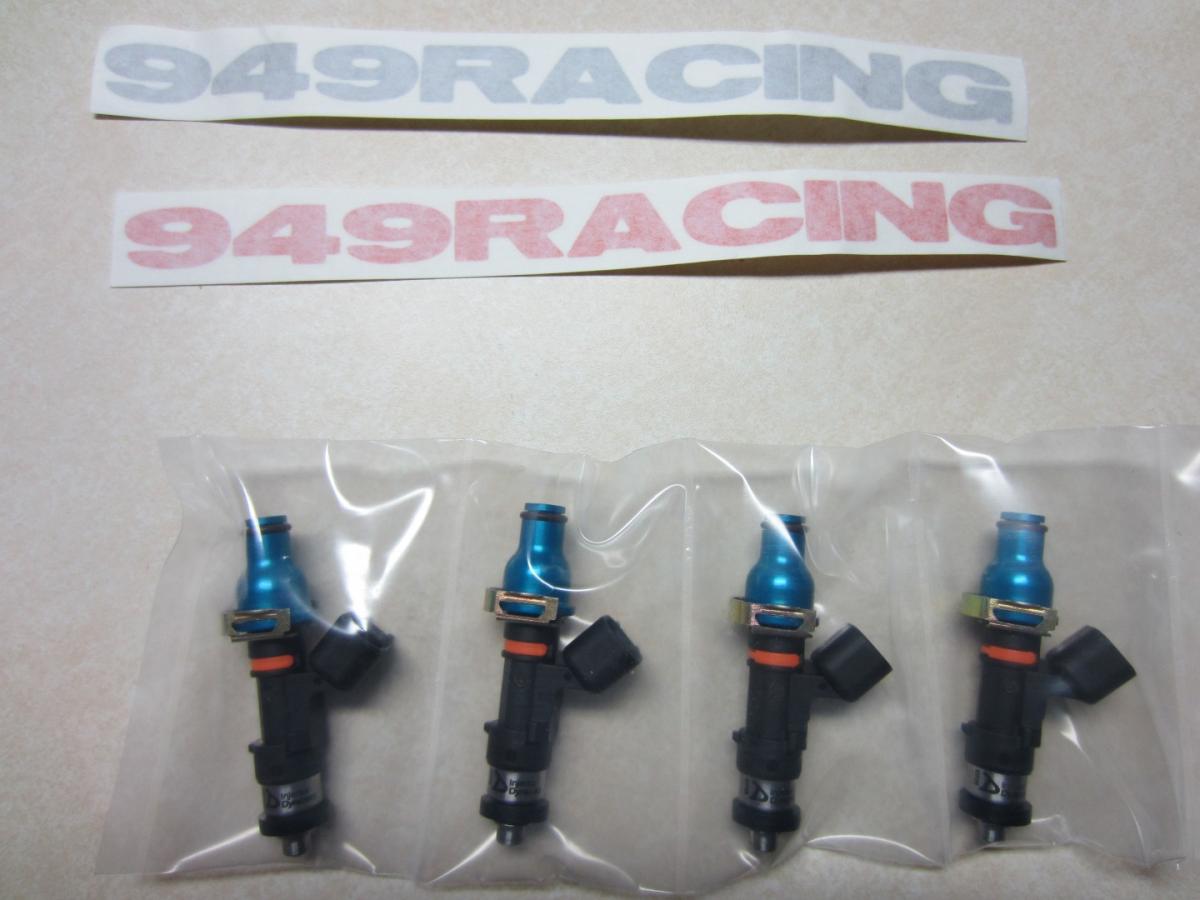
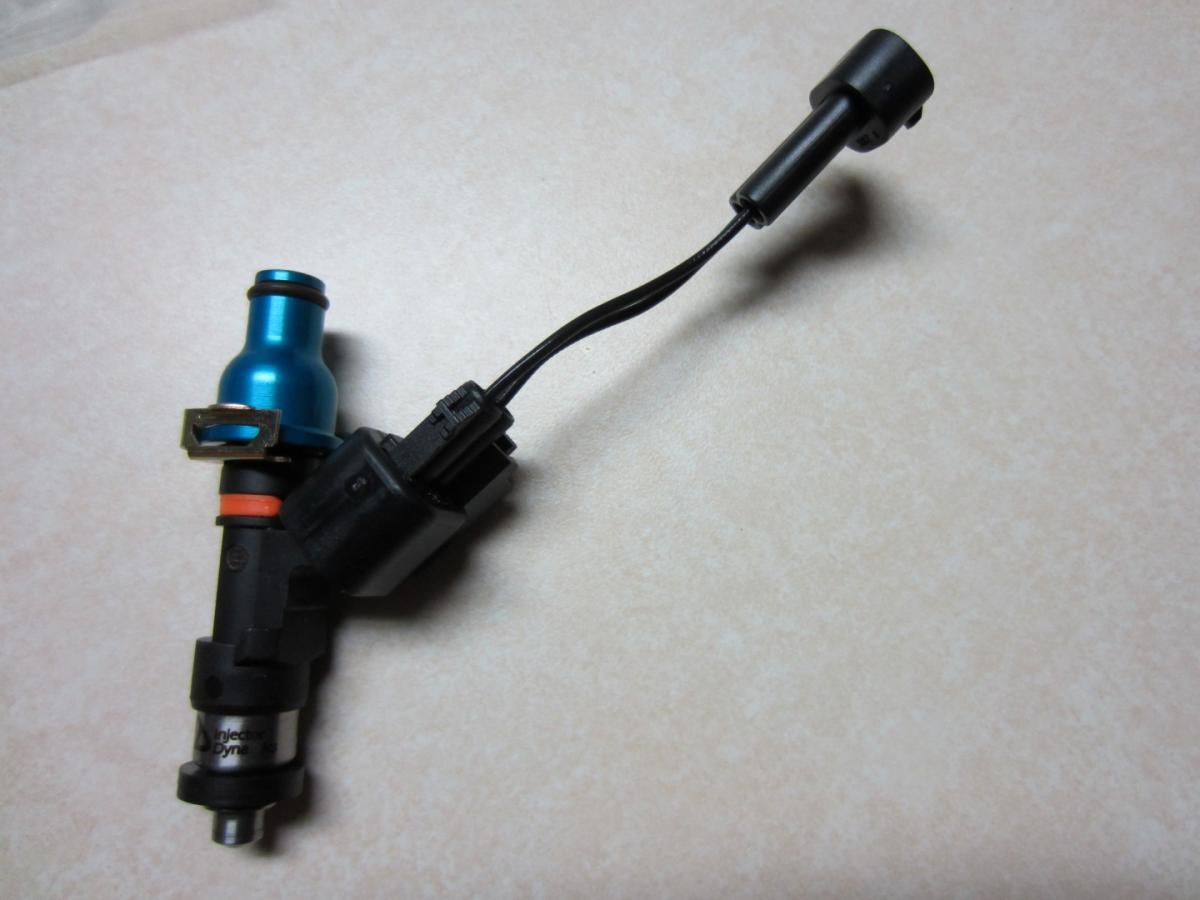
So I ordered up a set, along with a coolant re-route kit from the guys at 949:
Reply
0
0
05-11-2013, 12:02 PM
#53
Junior Member
Thread Starter
iTrader: (7)
Join Date: Mar 2012
Location: Gilbert, Az
Posts: 356
Total Cats: 31
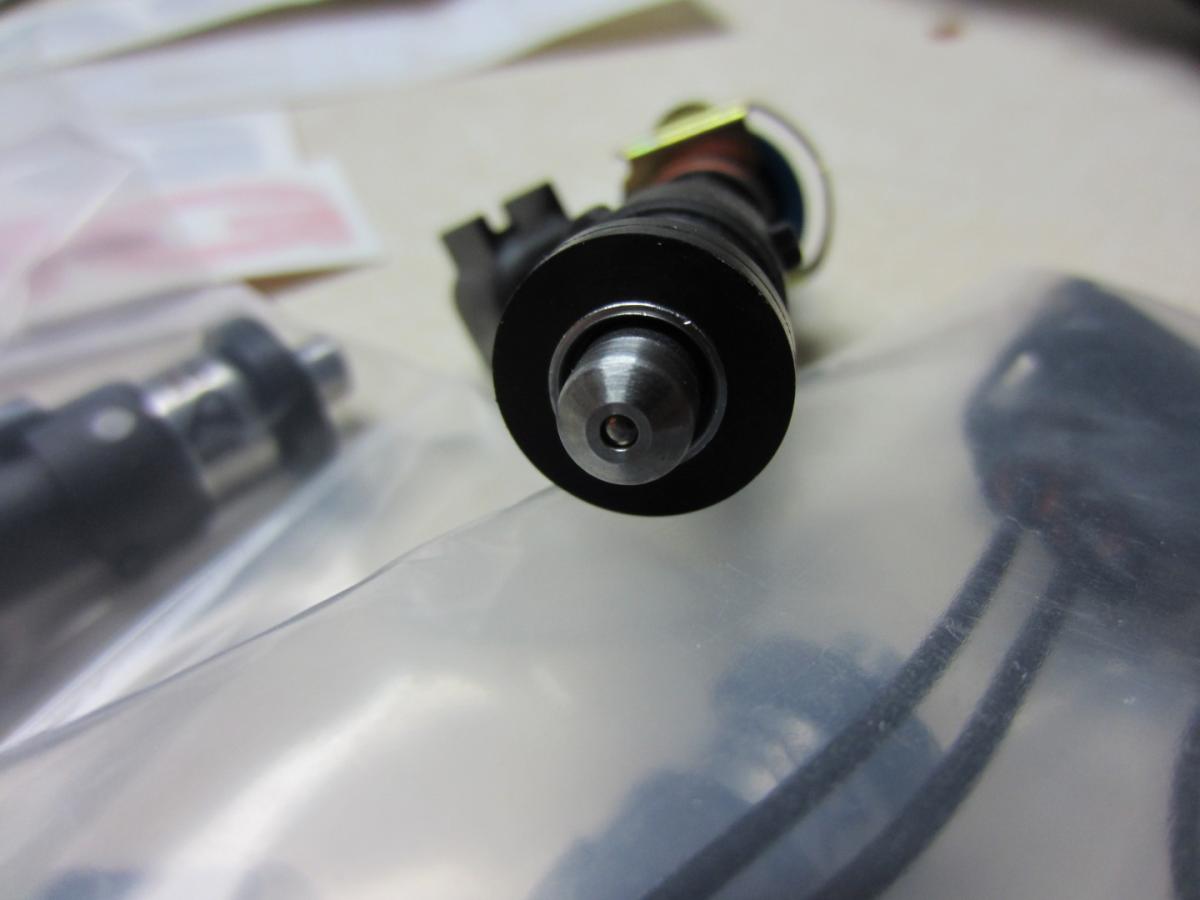
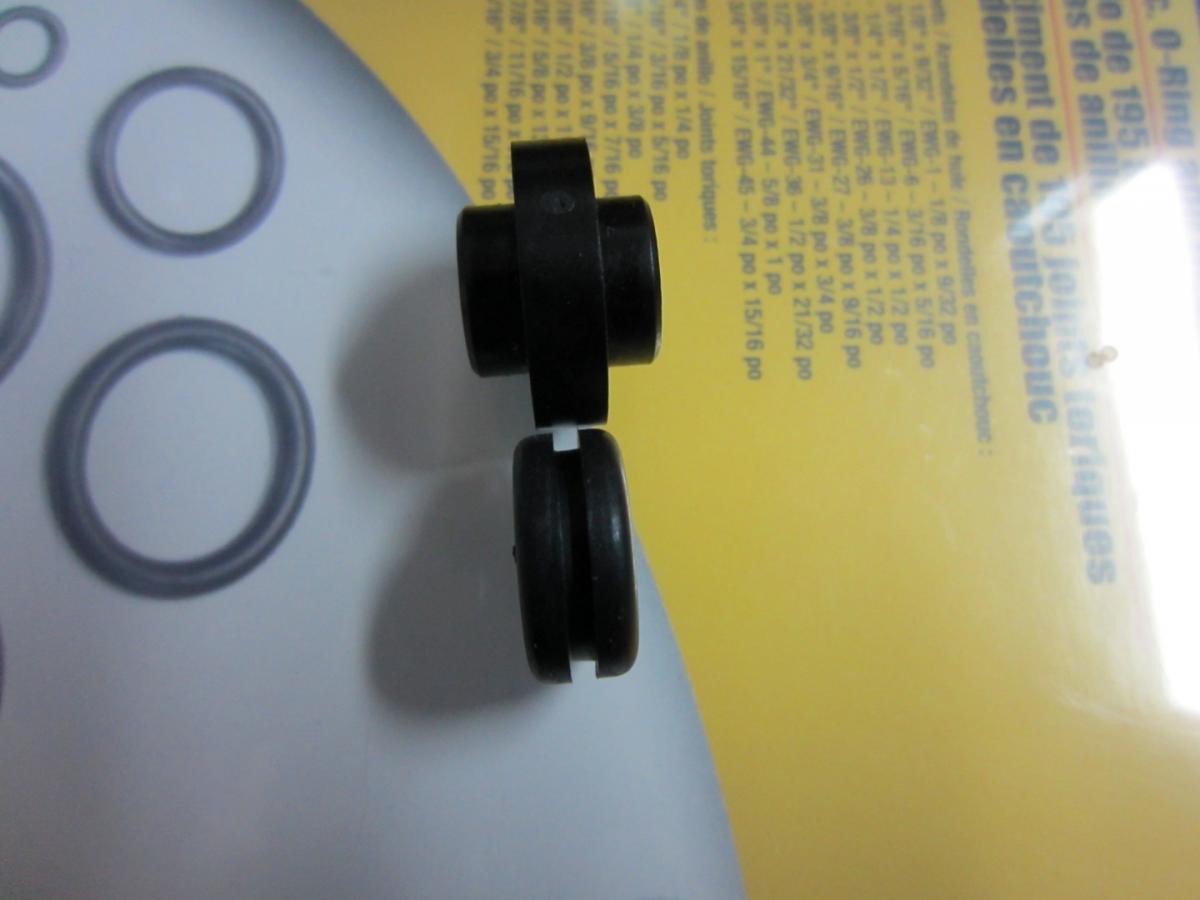
Oh, while you're changing out the injectors, DO NOT lose any of these stupid little things (like I did):
Arlington Mazda has 'em (INSULATOR, FUEL (B675-13-158)) for $5.58 apiece. I didn't want to wait that long, so I checked with my local dealership who told me they didn't have them in stock. Turns out nobody in the state of Arizona has them in stock, but "maybe" they could get them by Monday. F-that, so I got creative:
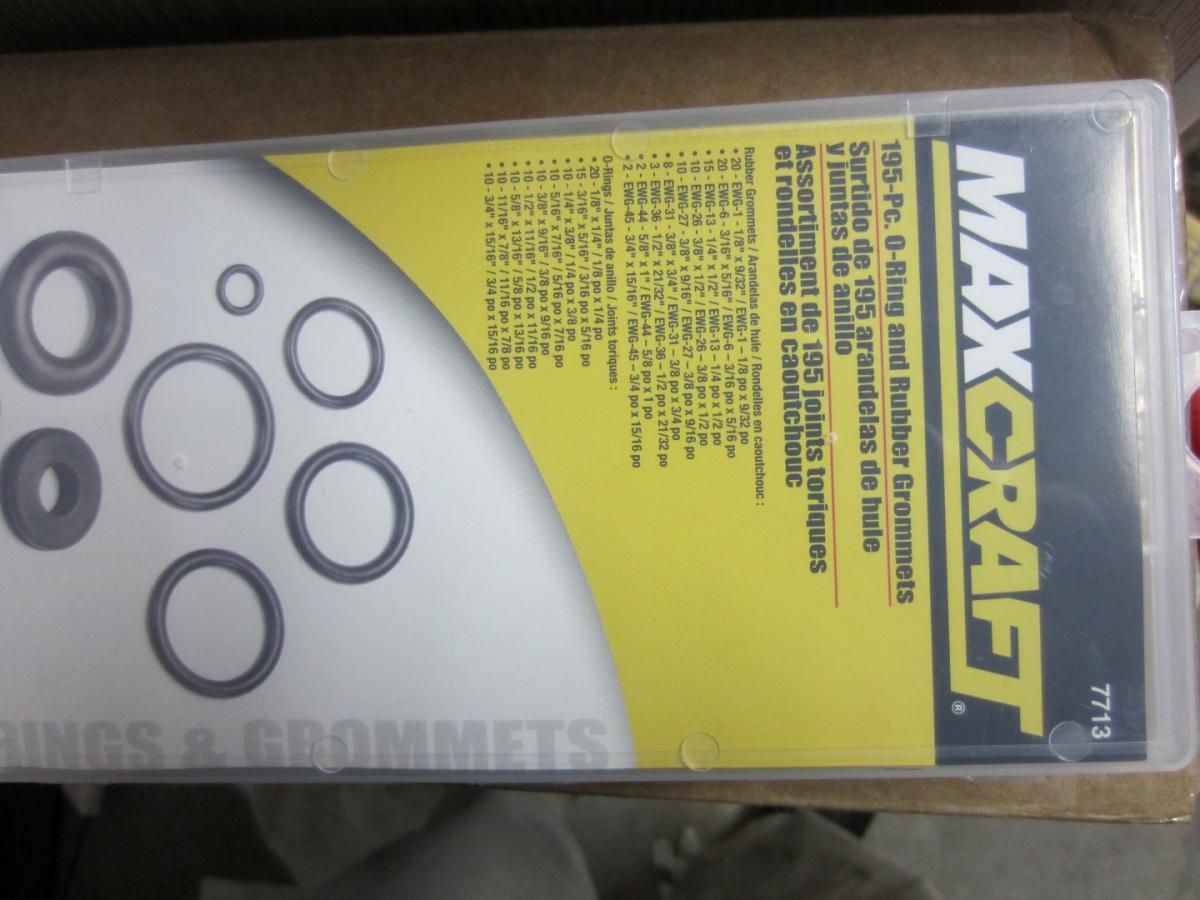
Looking around for a substitute, I saw this box of rubber washers I'd bought from Harbor Freight months ago (for probably $1.25 or something) & promptly jammed into a faraway corner of the garage:
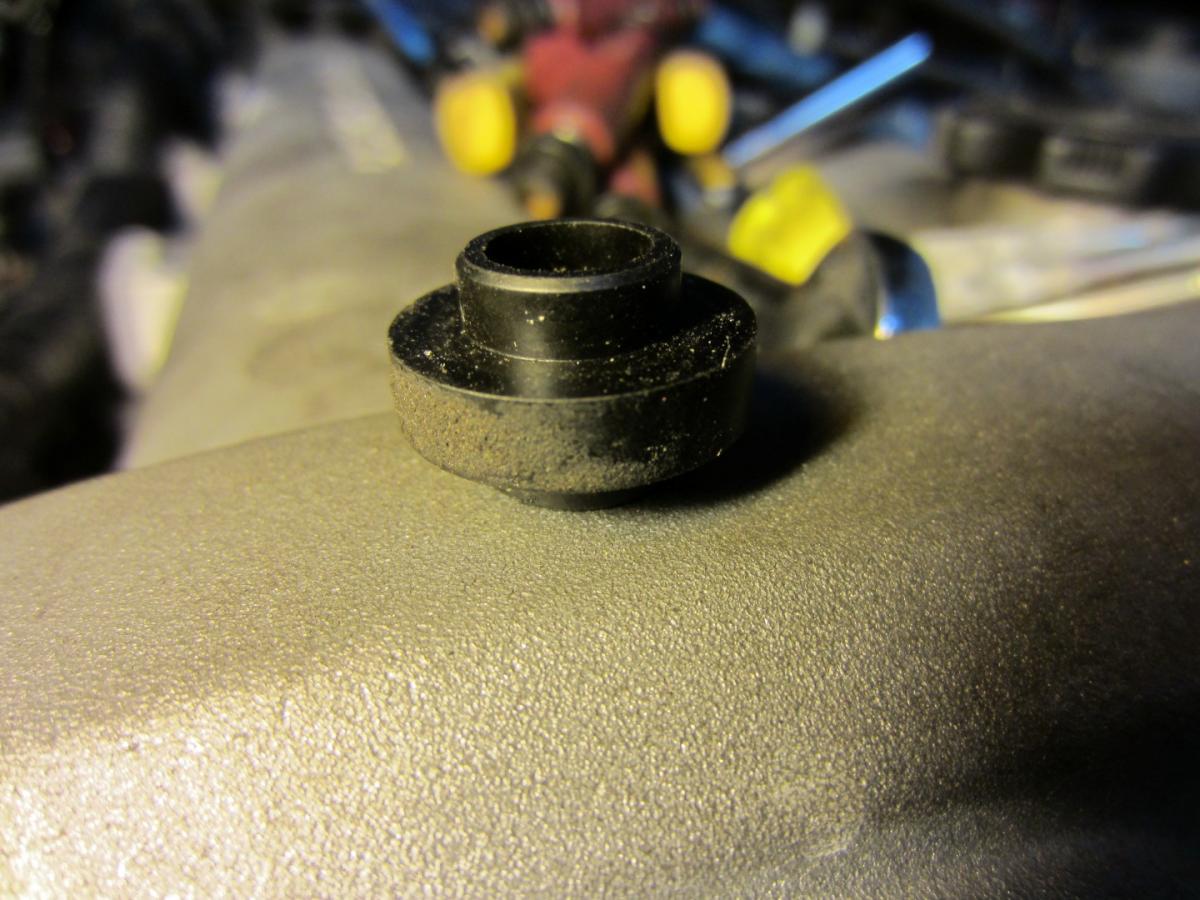
Looking inside, there's one that looks like a possible candidate:

Let's see how it looks:
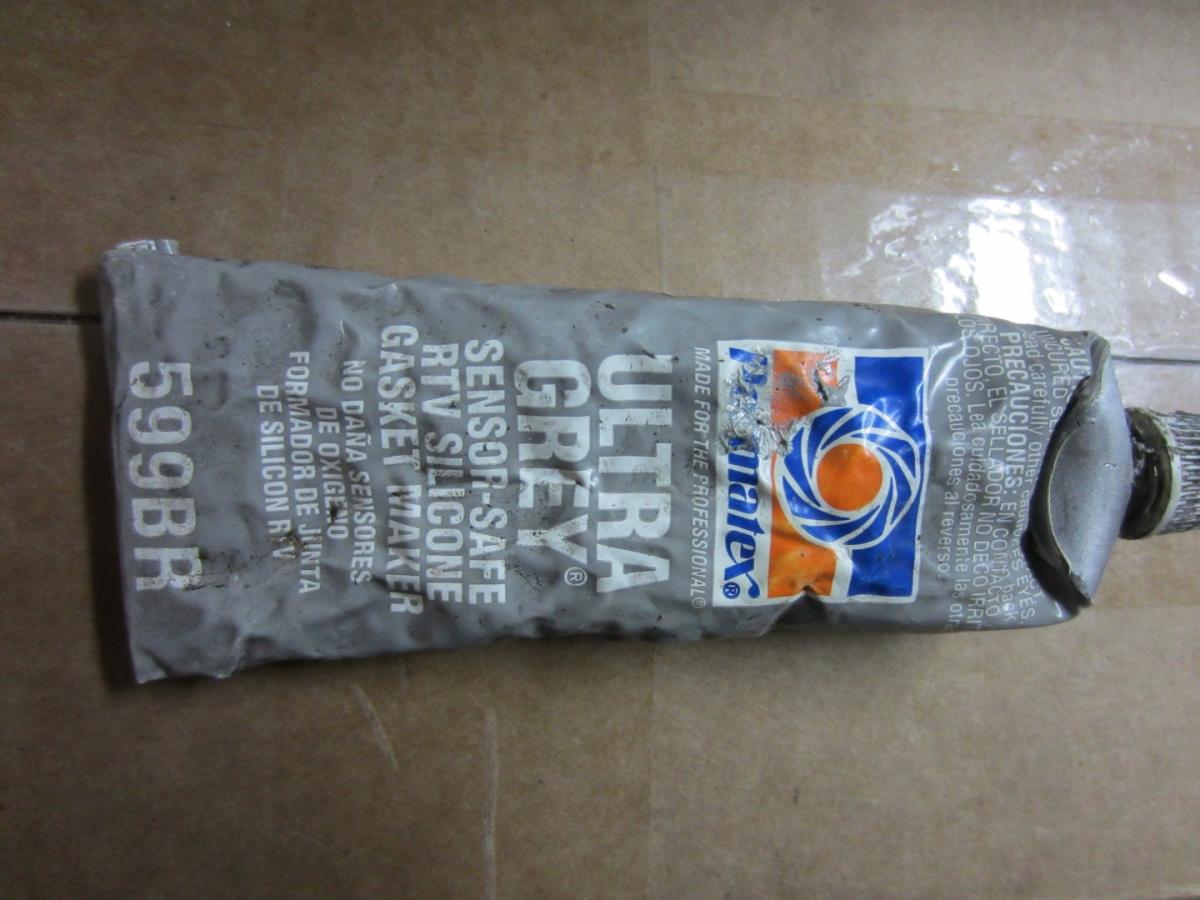
Yeah, I think that'll work. I figure the rubber can compress some until it's near the thickness of the original spacers. Now for some Permatex Grey to hold 'em onto the rail:
Here they are with the bolts to help center them while they dry:
After it dried they stuck to the rail great. I put the stock spacer in the middle, and the rubber ones on the outer edges. I got all the bolts finger tight, and just alternated tightening the 3 fuel rail bolts to "snug". "Seems" to work pretty well, I'm pretty sure they're just to keep from over-tightening the rail into the injectors & messing up the seals.
Arlington Mazda has 'em (INSULATOR, FUEL (B675-13-158)) for $5.58 apiece. I didn't want to wait that long, so I checked with my local dealership who told me they didn't have them in stock. Turns out nobody in the state of Arizona has them in stock, but "maybe" they could get them by Monday. F-that, so I got creative:
Looking around for a substitute, I saw this box of rubber washers I'd bought from Harbor Freight months ago (for probably $1.25 or something) & promptly jammed into a faraway corner of the garage:
Looking inside, there's one that looks like a possible candidate:
Let's see how it looks:
Yeah, I think that'll work. I figure the rubber can compress some until it's near the thickness of the original spacers. Now for some Permatex Grey to hold 'em onto the rail:
Here they are with the bolts to help center them while they dry:
After it dried they stuck to the rail great. I put the stock spacer in the middle, and the rubber ones on the outer edges. I got all the bolts finger tight, and just alternated tightening the 3 fuel rail bolts to "snug". "Seems" to work pretty well, I'm pretty sure they're just to keep from over-tightening the rail into the injectors & messing up the seals.
Reply
0
0
05-11-2013, 12:08 PM
#54
Junior Member
Thread Starter
iTrader: (7)
Join Date: Mar 2012
Location: Gilbert, Az
Posts: 356
Total Cats: 31
After all this nonsense I got the ID725's in there:

During the test drive afterwards, going through a neighborhood to get the low rpm, low load cells to auto-tune these guys came out & wanted to know what I was doing in their 'hood:

Luckily I was able to fight them off & get out of there before they called in their friends.
In the end I wound up using 4.5 req_fuel, 0.983 for dead times, and 0.110 for voltage correction.
My overall impression is things seem just a bit smoother/even, especially under transition from idle and light throttle inputs. It's the kind of difference going from a standalone/hack to MS gives, just a little bit more refined. I probably need another hour or two of auto-tune, but so far they're working out great. The idle is less jumpy, I think I'll need to re-tune the PID values to reflect the better responsiveness of the ID's.
More detail on my settings here: https://www.miataturbo.net/megasquir...6/#post1010845
During the test drive afterwards, going through a neighborhood to get the low rpm, low load cells to auto-tune these guys came out & wanted to know what I was doing in their 'hood:
Luckily I was able to fight them off & get out of there before they called in their friends.
In the end I wound up using 4.5 req_fuel, 0.983 for dead times, and 0.110 for voltage correction.
My overall impression is things seem just a bit smoother/even, especially under transition from idle and light throttle inputs. It's the kind of difference going from a standalone/hack to MS gives, just a little bit more refined. I probably need another hour or two of auto-tune, but so far they're working out great. The idle is less jumpy, I think I'll need to re-tune the PID values to reflect the better responsiveness of the ID's.
More detail on my settings here: https://www.miataturbo.net/megasquir...6/#post1010845
Reply
0
0
 05-13-2013, 02:03 PM
#58
Elite Member
iTrader: (13)

Join Date: Dec 2006
Location: Taos, New mexico
Posts: 6,612
Total Cats: 567
I "lost" one of those tiny spacers too when installing my injectors. It fell down into the intake manifold gully, not IN the actual runners, but still was hard to find for a while. I must have spend 15 mins searching the floor before realizing it was right there.
Reply
0
0
05-19-2013, 05:14 PM
#59
Junior Member
Thread Starter
iTrader: (7)
Join Date: Mar 2012
Location: Gilbert, Az
Posts: 356
Total Cats: 31
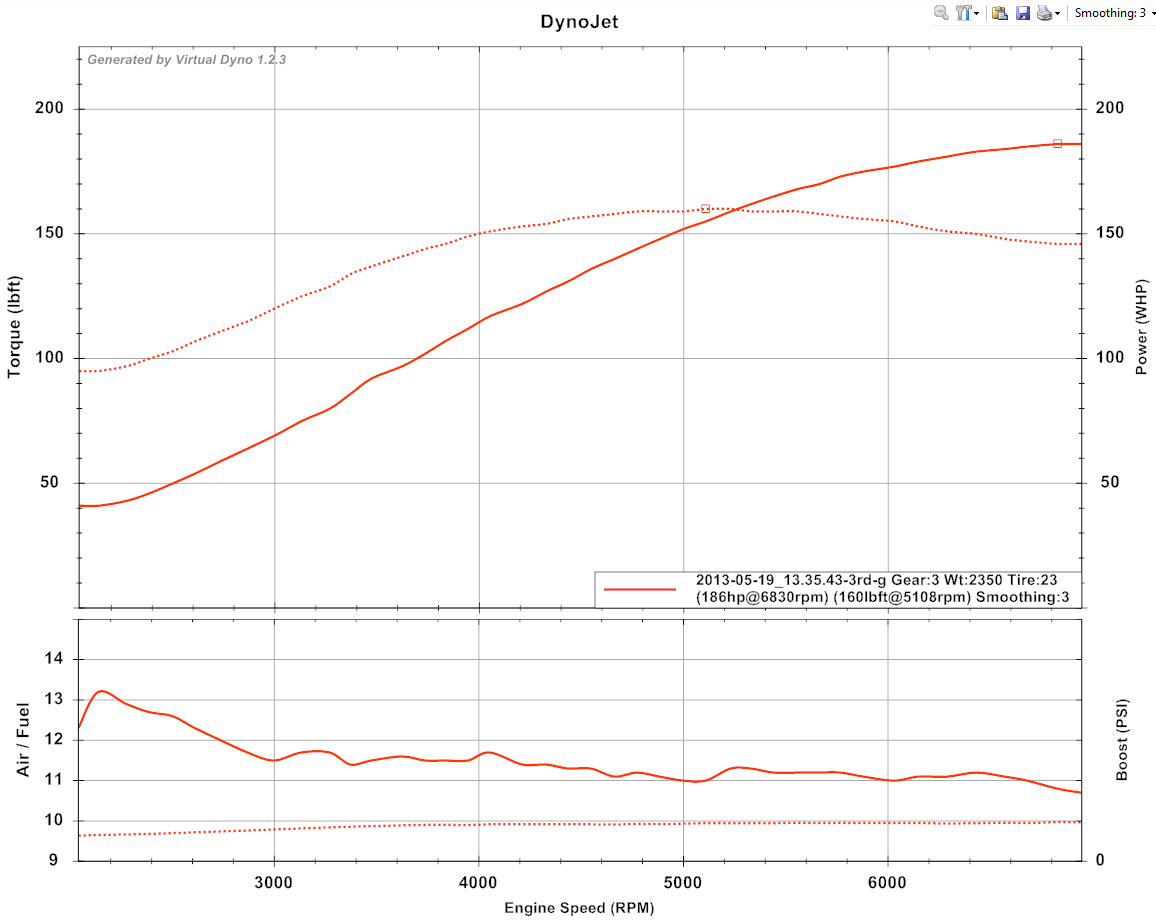
Just for funsies did a 3rd gear pull today. Pretty warm in the mid 90's, so power is down a bit. Need to get things leaned up in the upper RPM range too, but I'm pretty okay with this at ~9psi. I should probably turn the boost up a lil more, but I get worried about detonation with the hotter ambient temps.
Reply
0
0

Thread
Thread Starter
Forum
Replies
Last Post


