Stein's Frame Rail Install Tips
 12-23-2008, 06:13 PM
#22

I second that. I installed my passenger side first and couldn't get one of the bolts tightened at all. So when I put the drivers side on, I just slid the whole thing forward about 1/2". Much better.
I also completely agree with the impact. The car just feels solid now. Big bumps that used to make the car bounce all over the road now barely affect it. It feels a lot more confident going into corners too. Overall great buy!!
I also completely agree with the impact. The car just feels solid now. Big bumps that used to make the car bounce all over the road now barely affect it. It feels a lot more confident going into corners too. Overall great buy!!

Reply
 0
0

0
12-23-2008, 06:32 PM
#23

This is used in the industry for joining unibody vehicle panels. The adhesive will give you additional strength and moisture protection.
Tony
Reply
0
0
 12-24-2008, 02:25 AM
#25
Elite Member
iTrader: (1)
Join Date: Feb 2008
Location: Birmingham Alabama
Posts: 7,930
Total Cats: 45
I thought the new rail design was the one with triangle holes like the one I have. Saves weight and gives PLENTY of room for drainage.
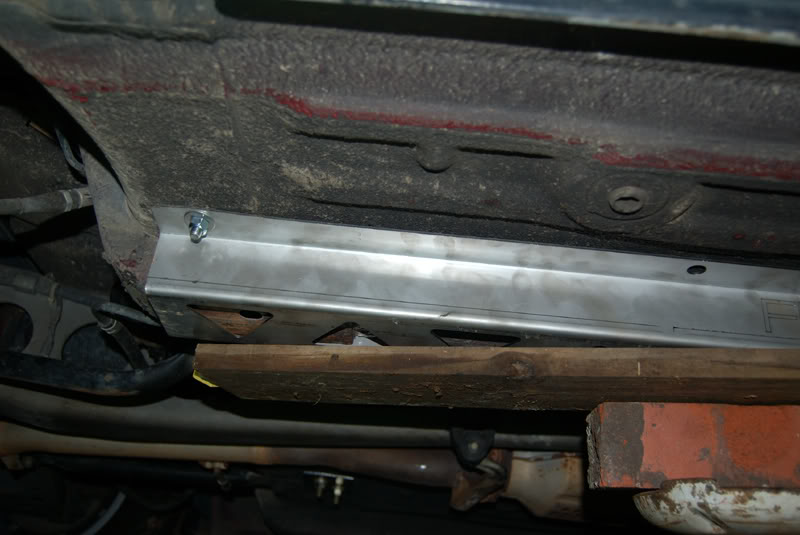
My install was a fair bit more bullshitty. Had to crush my "frame rails" back into shape with a 50lb bench vice, laying on my back in the dirt. They were all flattened out and had a slight curve to them. Looks nice now though. I bought a flawed set of braces for a discount, they only had some long marks on them from what I guess is laser etching done on the FM logo. Looks like the laser went crazy and left a few long lines down them. They are under the car, so who cares. I also had to use short pieces of hose and zip ties to secure my hard lines. Just split the hose and zip tied them to the lines where they got close to bolts. I think FM also decided to go with shorter bolts on the newest models, since the ones they supplied for me were like 1'' too long.
Here are a few of my pictures if you guys dont mind. Might help someone. I moved my rearmost bolt a bit forward like sugested above ^
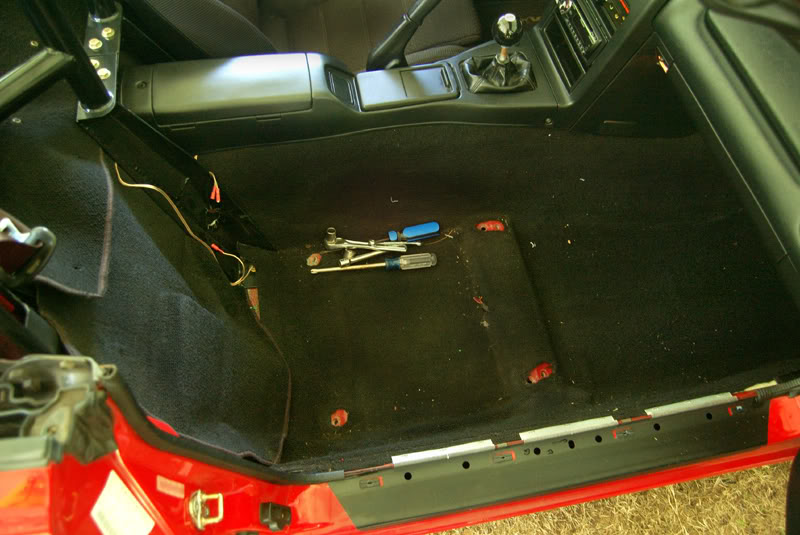

Fit was a bit tight. First bolt came through right at the... thing, cant think of what its called right now.

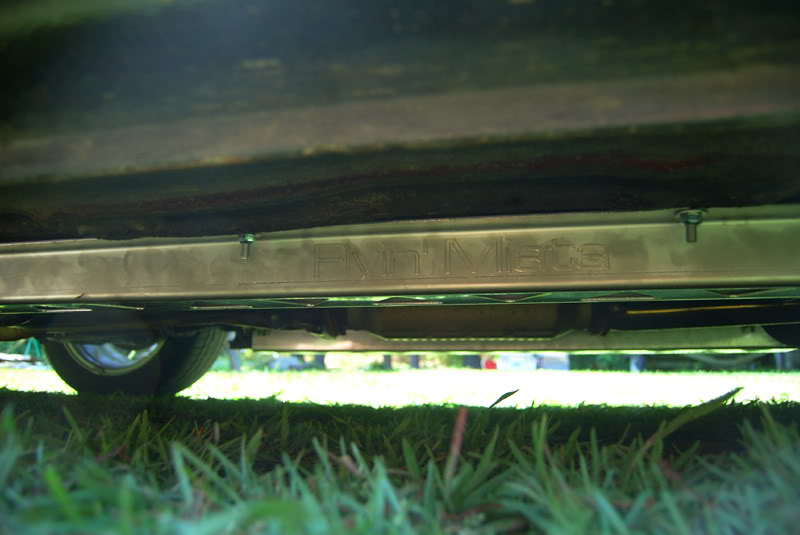
My install was a fair bit more bullshitty. Had to crush my "frame rails" back into shape with a 50lb bench vice, laying on my back in the dirt. They were all flattened out and had a slight curve to them. Looks nice now though. I bought a flawed set of braces for a discount, they only had some long marks on them from what I guess is laser etching done on the FM logo. Looks like the laser went crazy and left a few long lines down them. They are under the car, so who cares. I also had to use short pieces of hose and zip ties to secure my hard lines. Just split the hose and zip tied them to the lines where they got close to bolts. I think FM also decided to go with shorter bolts on the newest models, since the ones they supplied for me were like 1'' too long.
Here are a few of my pictures if you guys dont mind. Might help someone. I moved my rearmost bolt a bit forward like sugested above ^
Fit was a bit tight. First bolt came through right at the... thing, cant think of what its called right now.
Reply
0
0
01-05-2009, 11:43 AM
#27

I've been thinking about doing the same, I might spot weld it then run beads backwards. I haven't had any "miata time" lately and haven't gotten a chance to do any work on anything. If anyone ends up doing this please share your welder settings and what wire you're using.
Reply
0
0
01-05-2009, 11:49 AM
#28
And ideas for approaching it. I was thinking of leaving the ends open, but if you've got to grind off undercoating to weld it up, there wouldn't be any way to seal up the inner "seam" that runs next to the OE frame rail. That'd be major rust opportunity.
Maybe run the autobody adhesive/sealer on the inner bend since the weld bead will be on the outer edge. But will the sealer be up to resisting the weld heat? The flange area is fairly broad so it might stand a chance. Thoughts?
Maybe run the autobody adhesive/sealer on the inner bend since the weld bead will be on the outer edge. But will the sealer be up to resisting the weld heat? The flange area is fairly broad so it might stand a chance. Thoughts?
Reply
0
0
01-05-2009, 11:50 AM
#29
Elite Member
iTrader: (1)
Join Date: Feb 2008
Location: Birmingham Alabama
Posts: 7,930
Total Cats: 45
Only thing I can see wrong with that is what happens if in the future, these get messed up? Youd pretty much have to cut them off with a torch. I cant see welding them on being much more effective than just bolting them. I guess it would be ok though.
Reply
0
0
 01-05-2009, 11:58 AM
#31

installed mine last week... man they are GREAT! Car REALLY does feel like new! Seems to be sharper turn in, much more confident in cornering (flatter?) and lots of rattles have disappeared!
Picasa Web Albums - Stevo11 - Frame rails
Steve
Picasa Web Albums - Stevo11 - Frame rails
Steve
Reply
0
0
01-05-2009, 12:01 PM
#32
Elite Member
iTrader: (1)
Join Date: Feb 2008
Location: Birmingham Alabama
Posts: 7,930
Total Cats: 45
Well what in the hell did I get!? Every picture Ive seen of recent installs show solid rails, I thought they went to the triangle cut out version like mine a few posts up, several months ago? Wasnt the solid version an older piece?
Reply
0
0
01-05-2009, 12:04 PM
#33
Reply
0
0
 01-05-2009, 12:31 PM
#36
I may do that. Bolt it up and then use a stiff wire wheel to remove the undercoating with the stiffener bolted up.
 The area behind the tear is offset about 3" towards the drive shaft. Poor car.
Reply
0
0
01-05-2009, 12:59 PM
#37
Elite Member
iTrader: (1)
Join Date: Feb 2008
Location: Birmingham Alabama
Posts: 7,930
Total Cats: 45
I meant not enough of a difference to warrent all of the welding. Though I guess it wouldnt be that much harder to weld, than to remove part of the interior and drill how ever many holes. The change using the rails bolted up was minimal, I cant imagine being able to tell the difference between bolted and welded.
Reply
0
0
01-05-2009, 01:35 PM
#38
this may seem stupid, but would there be a way to add bracing to adjacent screws or is the muffler, ect, in the way? Its hard to tell from the pics
Edit: before I get flamed and linked to the fm butterfly. I mean like a flat piece with a bead. Not something intricate like the FM butterfly.
Edit: before I get flamed and linked to the fm butterfly. I mean like a flat piece with a bead. Not something intricate like the FM butterfly.
Reply
0
0
01-05-2009, 02:20 PM
#39
I think the welding would be in the spirit of adding this stiffeners - IOW the Miata is OK w/o them, but they do make a difference. In my case, welding was in the interest for obvious reconstructive reasons.
No- not straight across, the ppf is in the way too. You can see that exhaust hanger in my photo clears the ppf by about 1/4" and it's hanging with stock hanger in the stock location. That said, you could definitely build some that stepped up enough to clear the ppf. The bigger hurdle is exhaust for those that have gone big or have some kind of resonator in the way.
No- not straight across, the ppf is in the way too. You can see that exhaust hanger in my photo clears the ppf by about 1/4" and it's hanging with stock hanger in the stock location. That said, you could definitely build some that stepped up enough to clear the ppf. The bigger hurdle is exhaust for those that have gone big or have some kind of resonator in the way.
Reply
0
0
01-06-2009, 12:55 AM
#40
No- not straight across, the ppf is in the way too. You can see that exhaust hanger in my photo clears the ppf by about 1/4" and it's hanging with stock hanger in the stock location. That said, you could definitely build some that stepped up enough to clear the ppf. The bigger hurdle is exhaust for those that have gone big or have some kind of resonator in the way.
Reply
0
0


