aaron's build thread - more fail to come
 08-11-2013, 11:43 PM
#181
Senior Member
Thread Starter
iTrader: (8)

Join Date: Jun 2010
Location: Florida
Posts: 1,116
Total Cats: 43
Been sitting around and thinking about how I want to go forward with this all..... 1.) Install this new head as is, short term, until my original "built up" head is done... or 2.) Forget about the original built head more or less, and just plan to use this VVT head long-term. I'm leaning towards option 2 more at the moment, because I have a feeling my original head is still going to take awhile to finish up... there's just issues that I don't quite know how they will be solved yet.
The new head I purchased looks pretty good all-around, had around 60-70k on it, which is nothing on these motors. Still, now thinking that I may end up using this head more long-term, I want to check out a few things before I bolt it on. Started tearing it apart (removing the cams), so I can check the cam lobe/bucket surfaces and plastigauge the cam journals. Hit a snag and called it quits for the night, but everything looks good so far. I will probably just clean up the carbon buildup on the head, and check the deck for flatness and if it all checks out- call it good. Part of me wants to totally take it apart, clean it up really well, do a full fresh (deck, resurface, lap the valves, mild port/polish, check rest of components out to make sure in spec), but I don't want this to turn into another thing that causes lots of downtime.... ugh.
Will probably start soldering up the wiring for the VVT controller tomorrow.
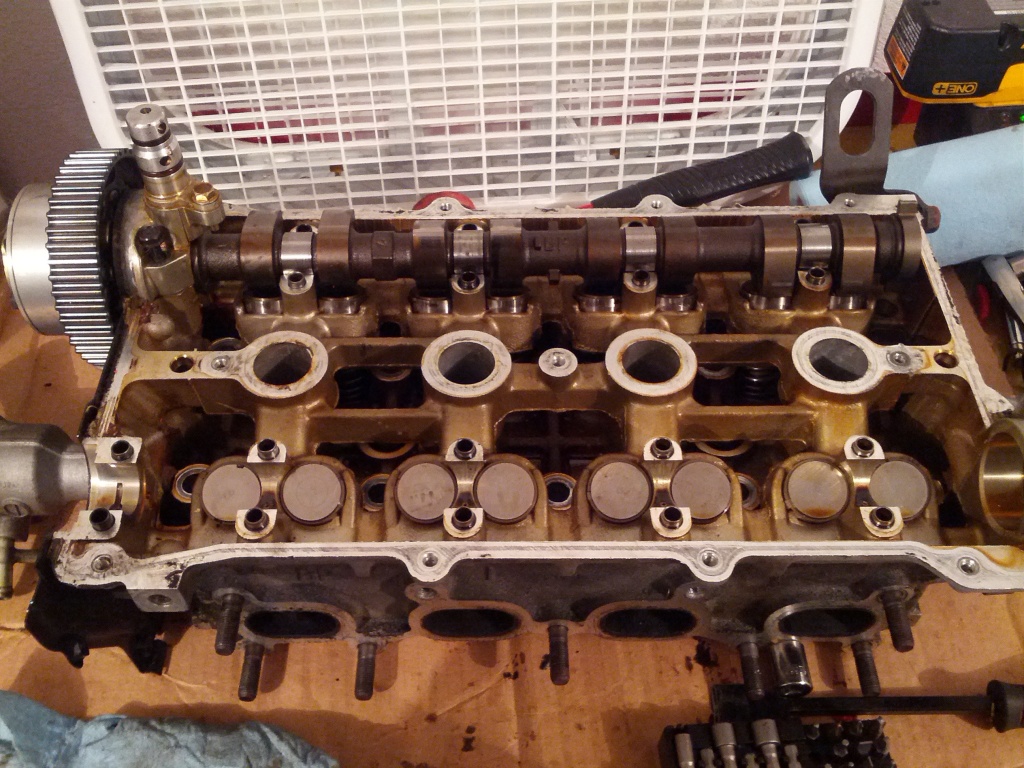

Reply
 0
0

0
08-12-2013, 08:04 AM
#182


I would say that it depends on what you do with the car. If you want a street set up with good manners all around, I would say the VVT is the better way to go.
If you want a fire breathing monster that has all out full throttle acceleration, the other head with monster cam will suit you better. You will be limited with how radical you can go with the VVT cam.
Two different animals. I would go with the VVT for now since you have it, and run it with the stock cam and see how you like it. If you do, go from there.
Reply
0
0
08-14-2013, 11:05 PM
#183
Senior Member
Thread Starter
iTrader: (8)
Join Date: Jun 2010
Location: Florida
Posts: 1,116
Total Cats: 43
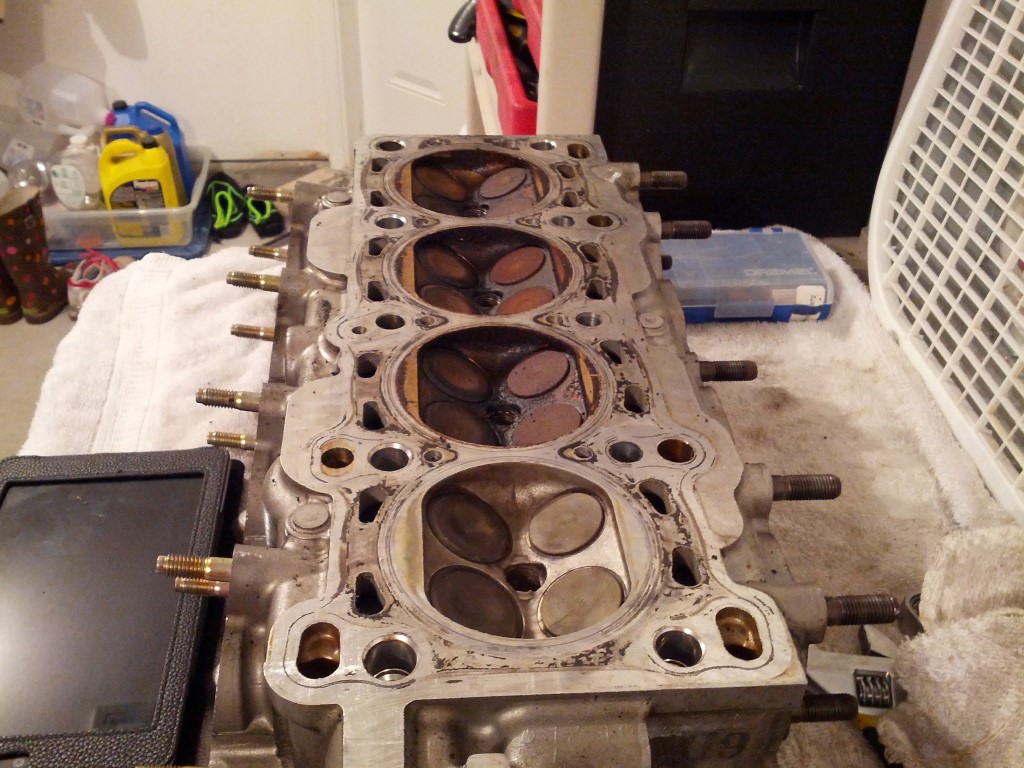
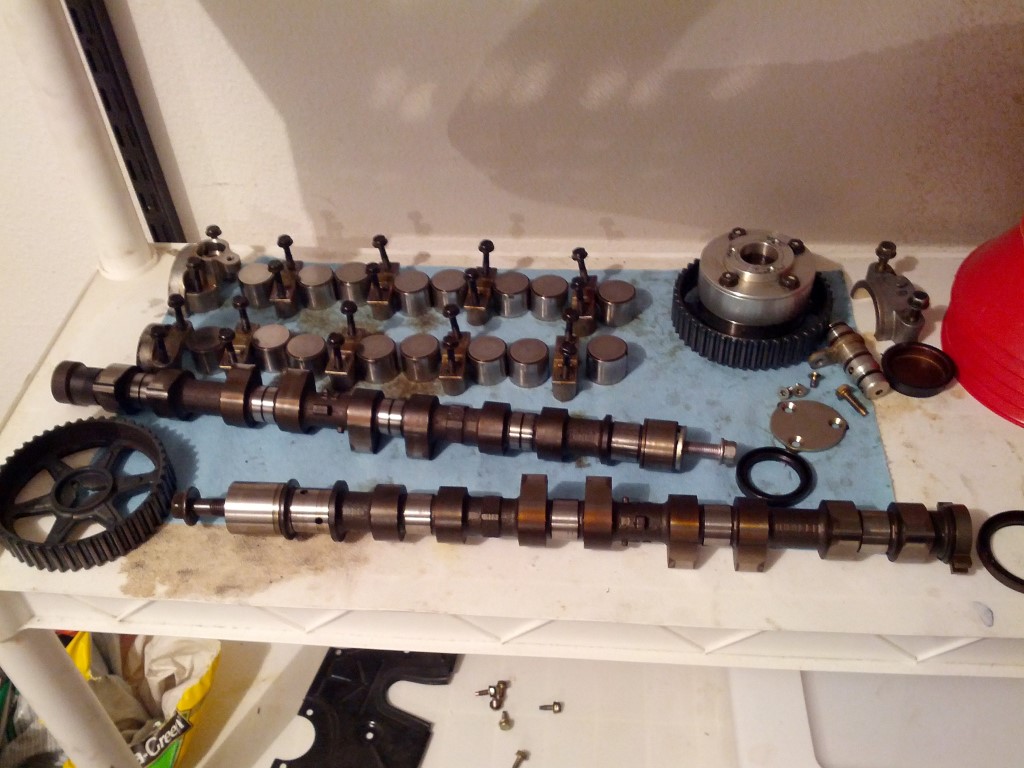
All cams, buckets removed. Everything looks good so far. Plastigage later this week and going to check the deck with a straight edge. Started cleaning up the combustion chambers with a brass brush.. Got 1 basically done, then the dremel decided to die. Got a new one, gonna finish it up tonight and clean up the runners as well..... Followed up with a quick water leak test on the valves.
Hopefully it all comes together for an engine assembly this weekend.
Hopefully it all comes together for an engine assembly this weekend.
Reply
0
0
08-14-2013, 11:05 PM
#184
Senior Member
Thread Starter
iTrader: (8)
Join Date: Jun 2010
Location: Florida
Posts: 1,116
Total Cats: 43
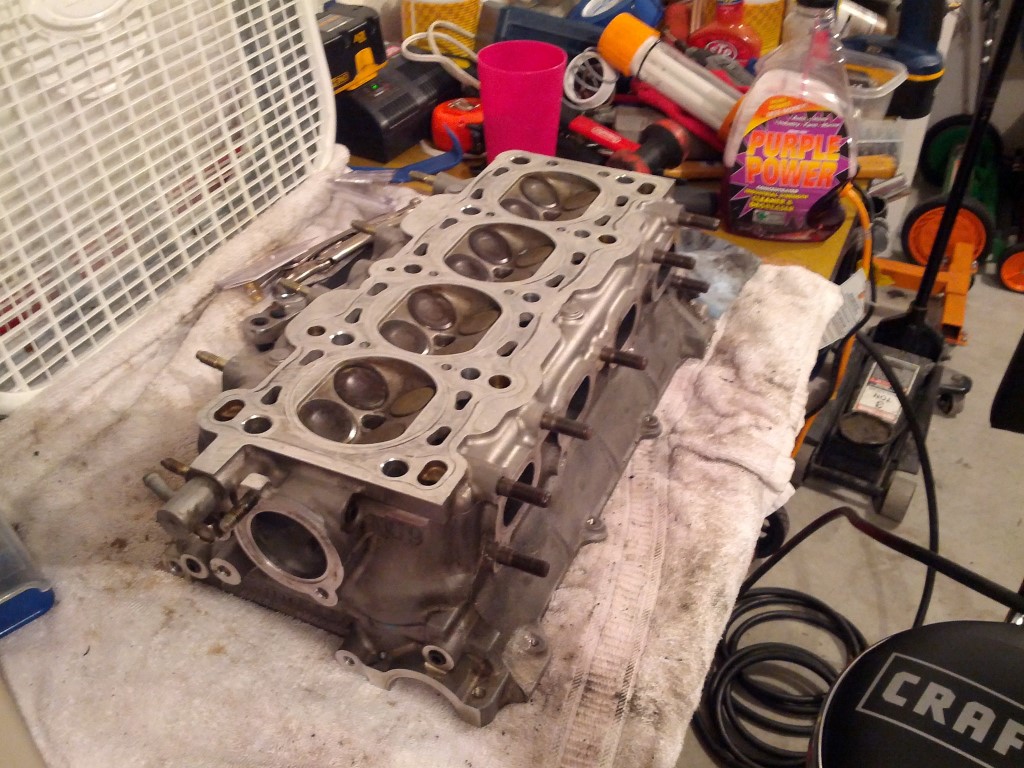
Well, time for another daily update. These small useless updates should tell you how anxious I am to get this thing up and running. Finished cleaning up the rest of the head for the most part... I'll attack the head gasket surface a few more times and give the outside a bit more of a clean I think tomorrow. Plastigage is here... but I don't have a torque wrench at the moment. Loning friends tools and taking a year/never getting them back ftl.
Having some issues getting the computer and VVTuner box to communicate. Not sure if I wired up something wrong.... LED light on the side comes on.... checking wiring now. Software is finicky though, so who knows.
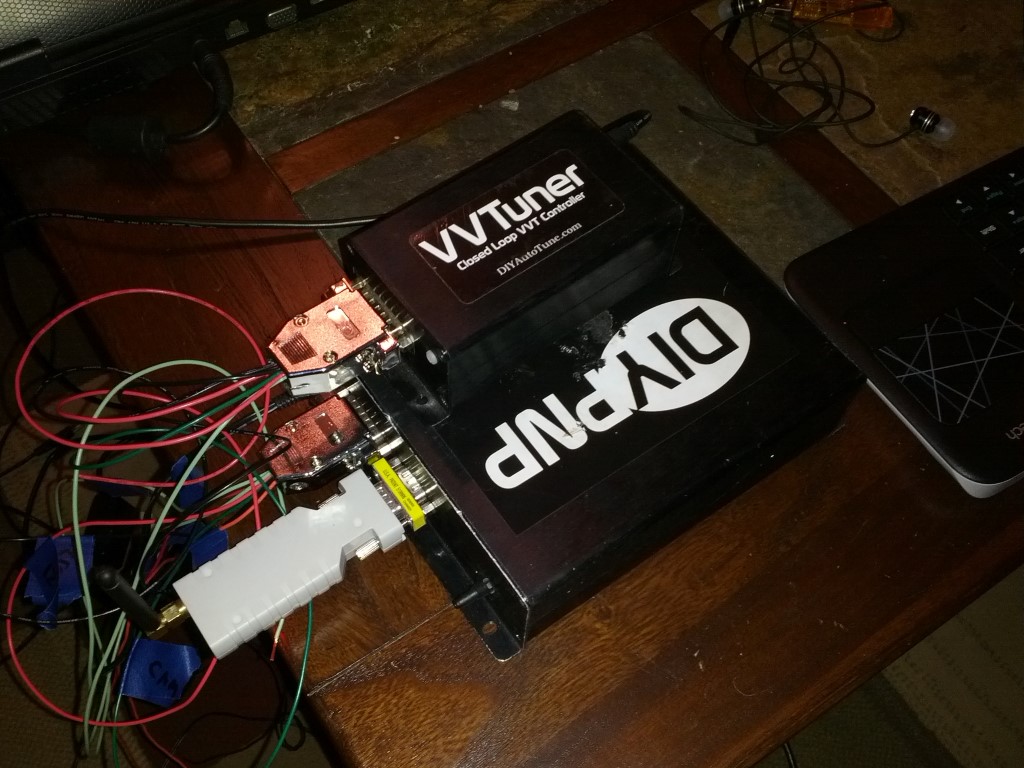
Having some issues getting the computer and VVTuner box to communicate. Not sure if I wired up something wrong.... LED light on the side comes on.... checking wiring now. Software is finicky though, so who knows.
Reply
0
0
 08-14-2013, 11:49 PM
#186
Senior Member
Thread Starter
iTrader: (8)
Join Date: Jun 2010
Location: Florida
Posts: 1,116
Total Cats: 43
Yep, wiring issue. All working well now (minus the normal VVTuner software quirks). Apparently pin 9 needs grounded as well, even though I believe the instructions say it is only needed if you're outputting the crank/cam signals to the EMS after it's read by VVTuner. Found some random blog on the interwebs saying both need to be grounded either way.....that fixed it. I will be sharing the cam/crank signals with VVTuner and MS, as was discussed in the most recent "I can't get VVtuner to work" thread.
Reply
0
0
 08-21-2013, 09:46 PM
#188
Senior Member
Thread Starter
iTrader: (8)
Join Date: Jun 2010
Location: Florida
Posts: 1,116
Total Cats: 43
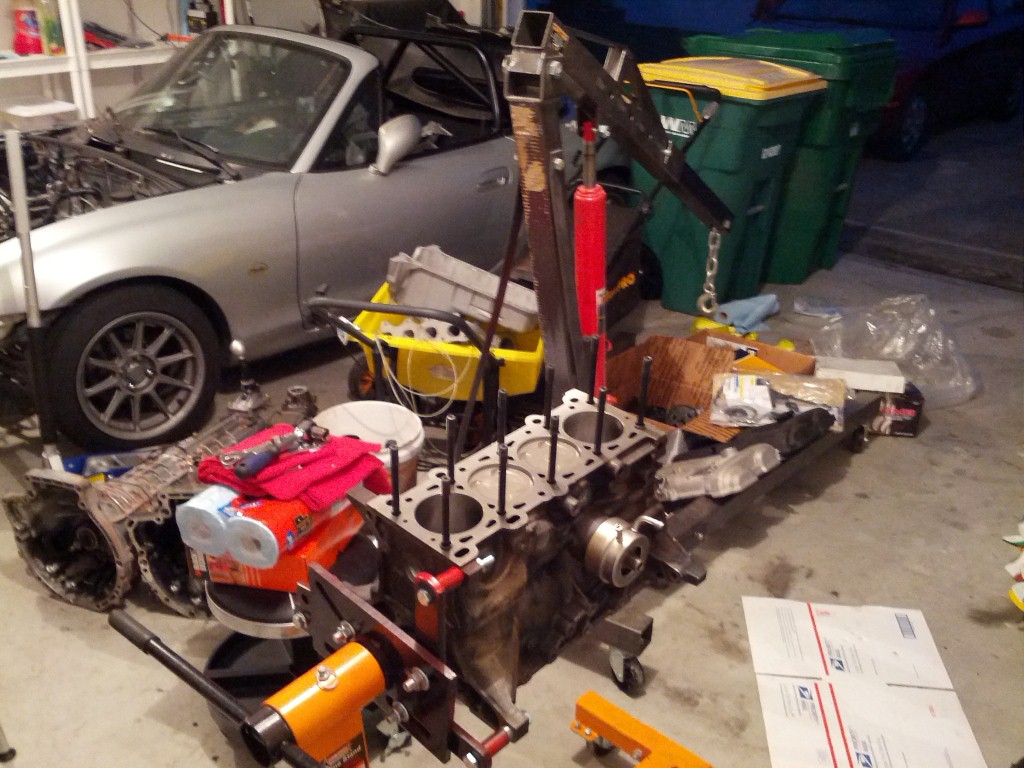
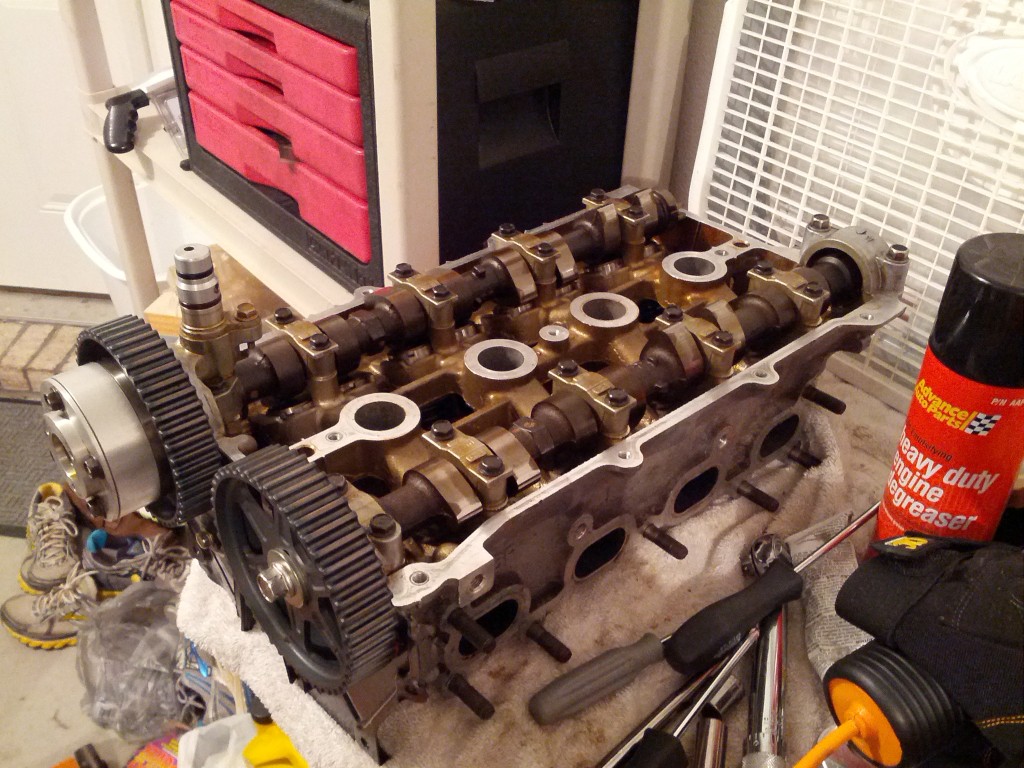
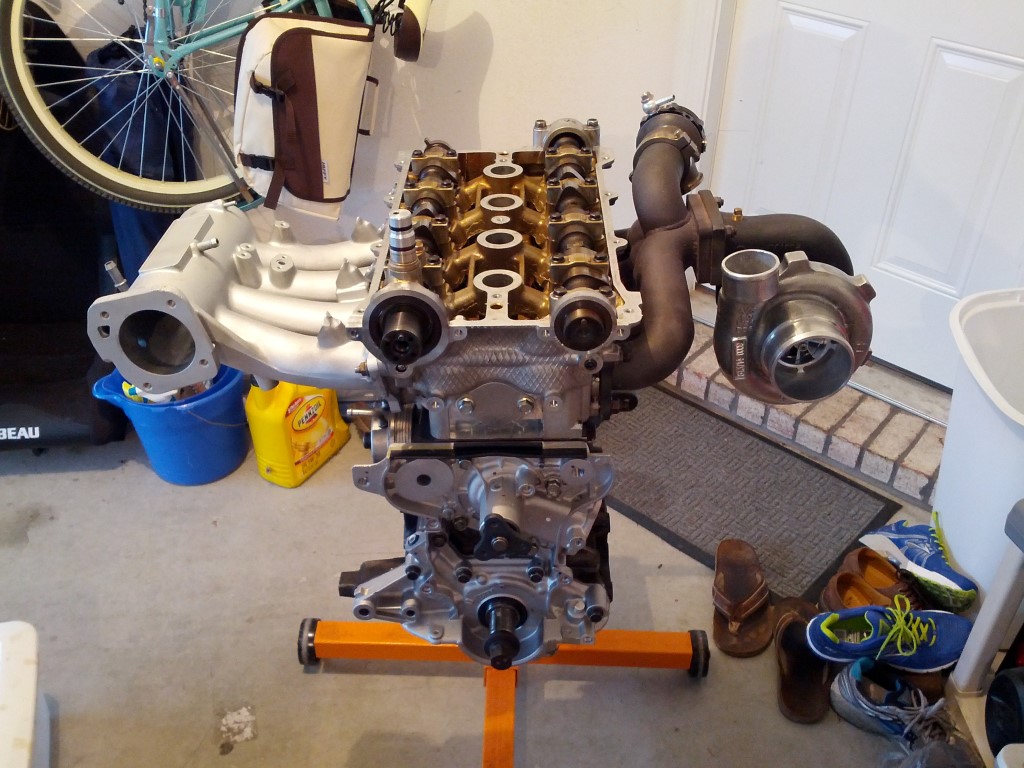
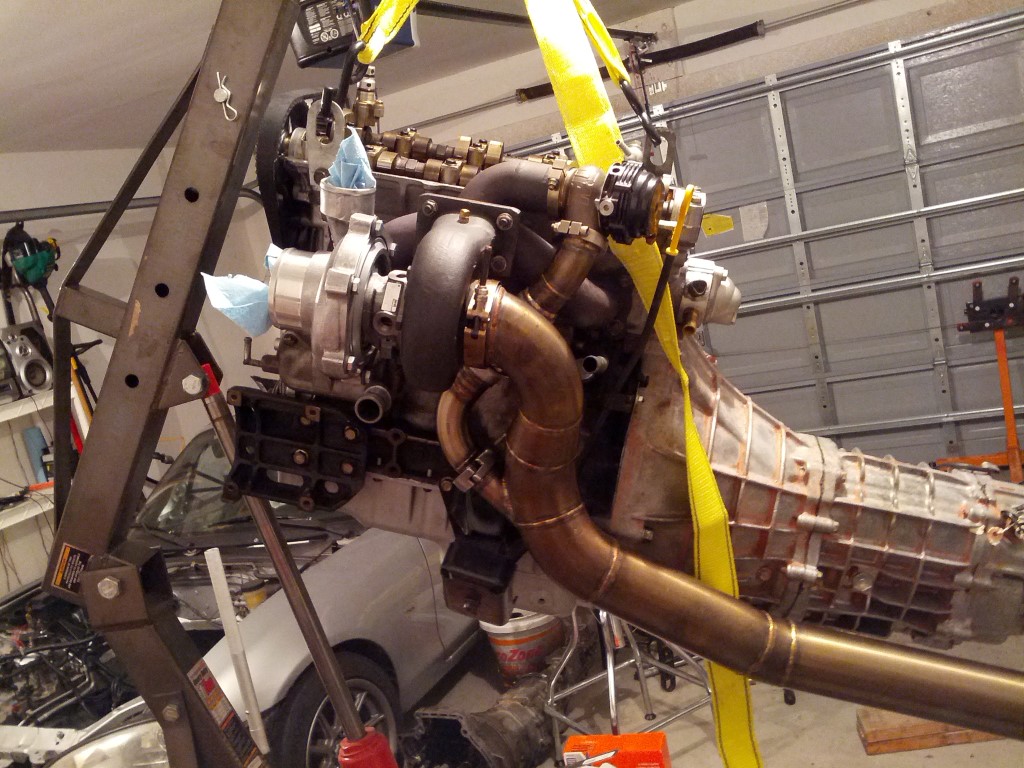
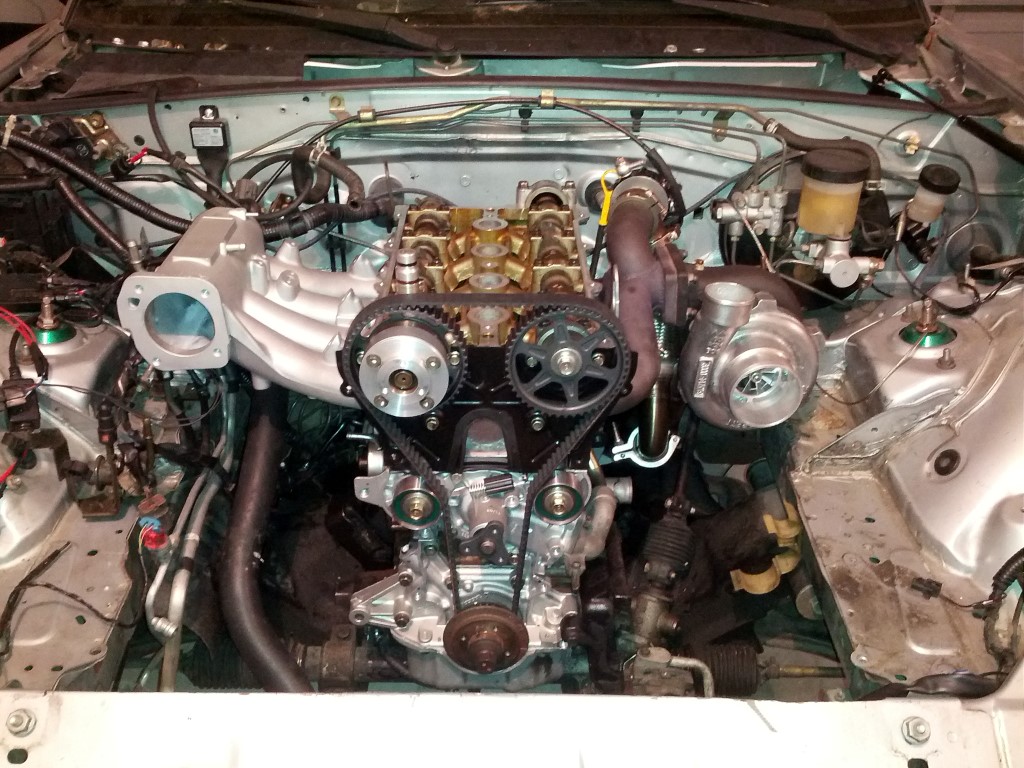
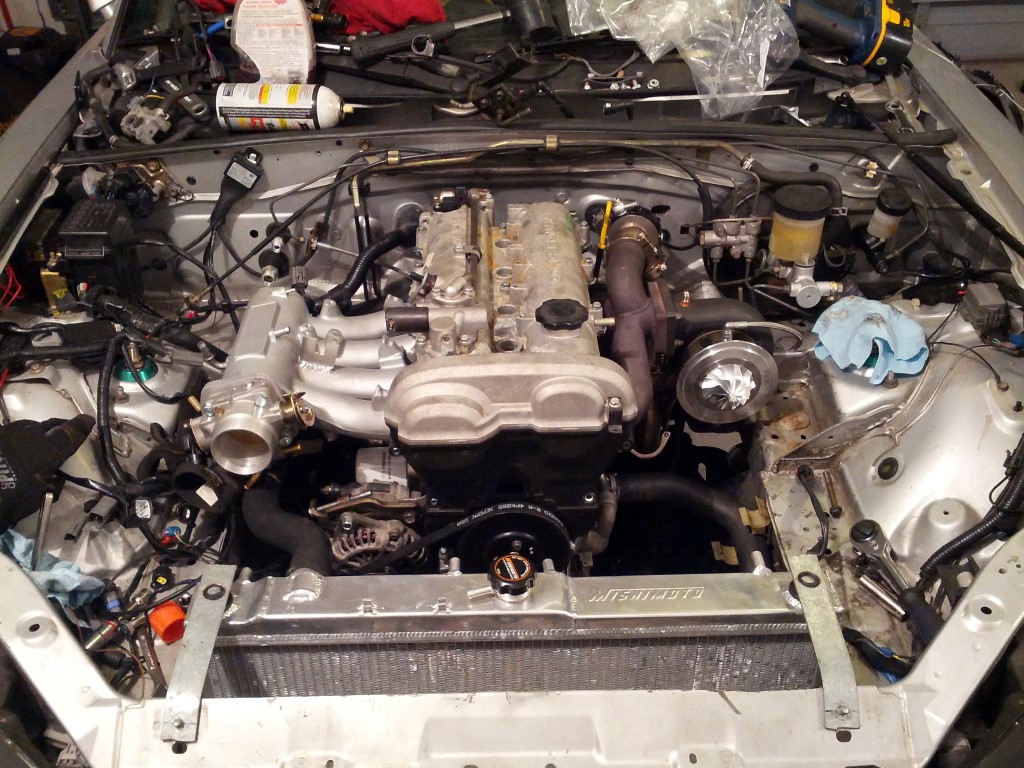
Got everything back, minus my original head (have the VVT head for now). Got the short block back on the stand tonight.... will start putting more stuff back on it here the next few days and weekend. Put the VVT head back together a few days ago, just need to throw the valve cover on it.
For VVT head oil line, I suppose I can just run another T somewhere off the oil port on the intake side of the block?
For VVT head oil line, I suppose I can just run another T somewhere off the oil port on the intake side of the block?
Reply
0
0
08-21-2013, 11:01 PM
#189
Senior Member
Thread Starter
iTrader: (8)
Join Date: Jun 2010
Location: Florida
Posts: 1,116
Total Cats: 43
VVT head all cleaned up, new seals, reassembled.
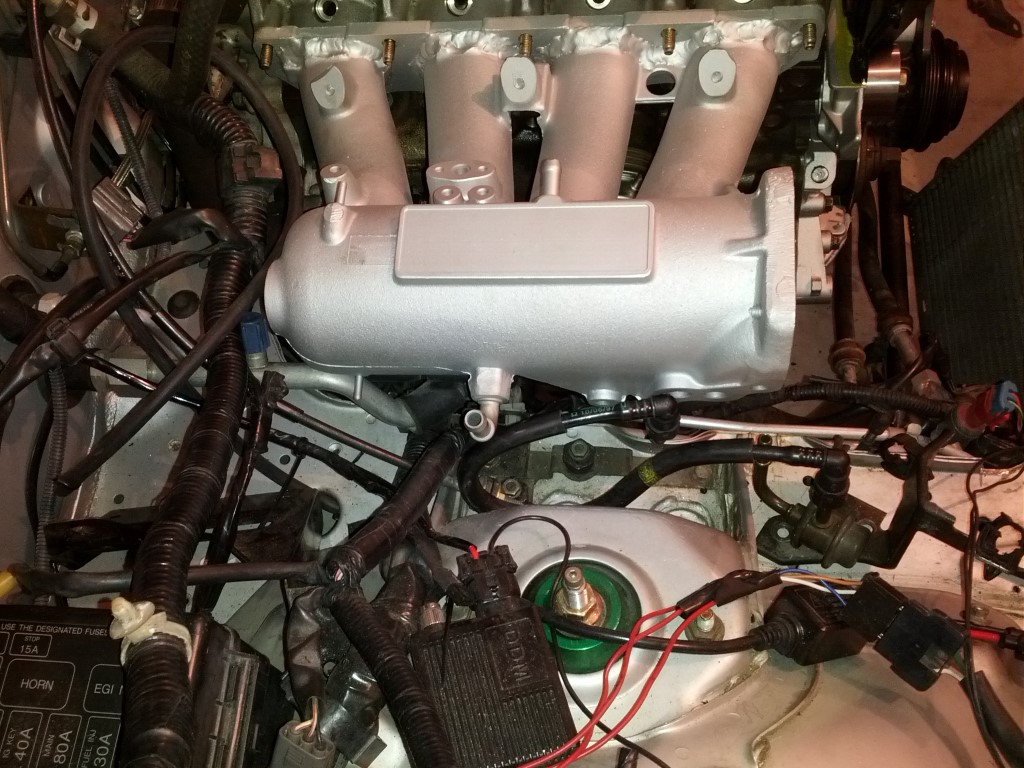
Better late than never for this thing.... hondafold. Godspeed intake manifold for B18 GSR (blox/skunk2 knockoff), with water-jet cut flange based off the original intake mani flange. Have a Godspeed/blox TB for it.
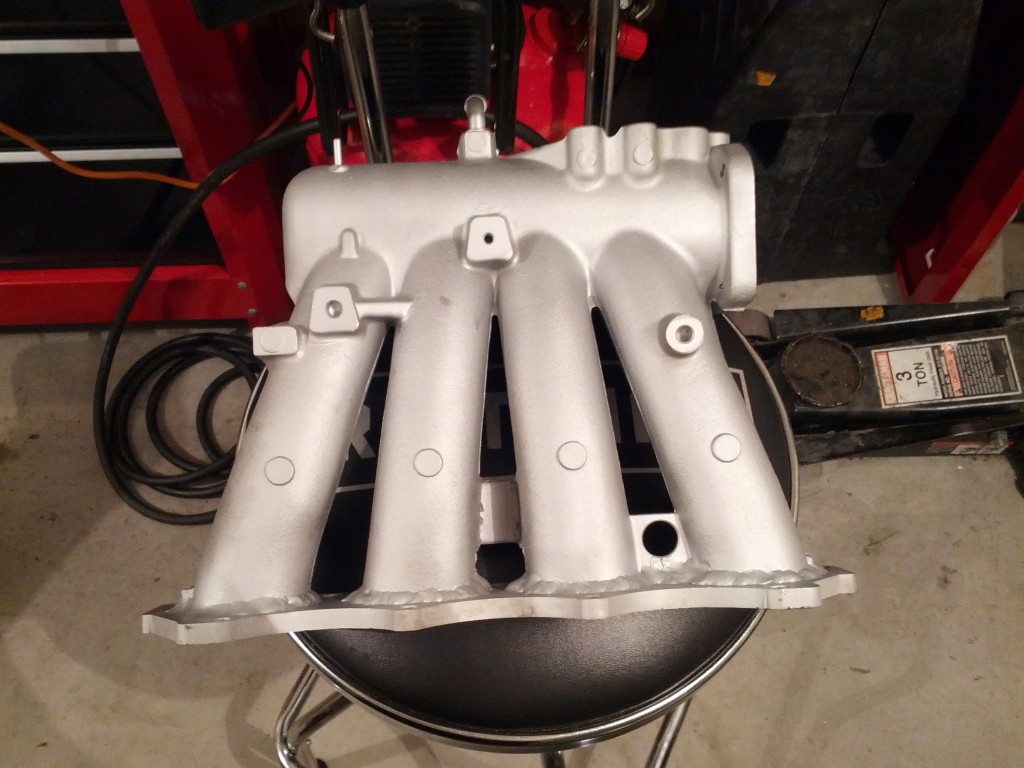
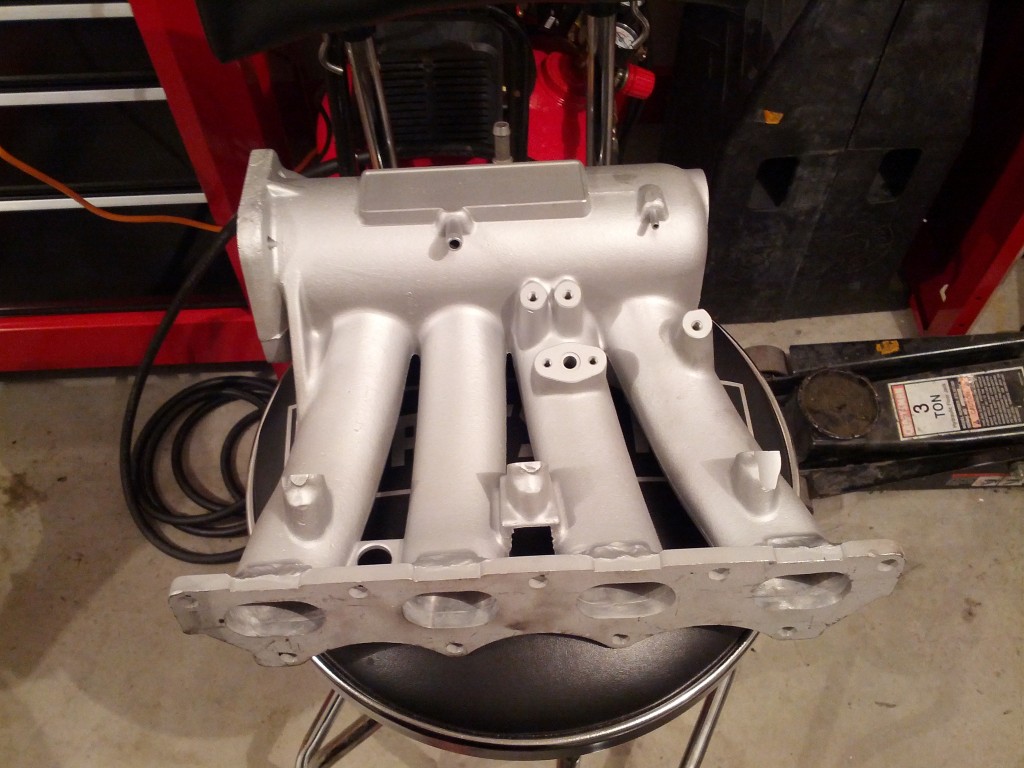
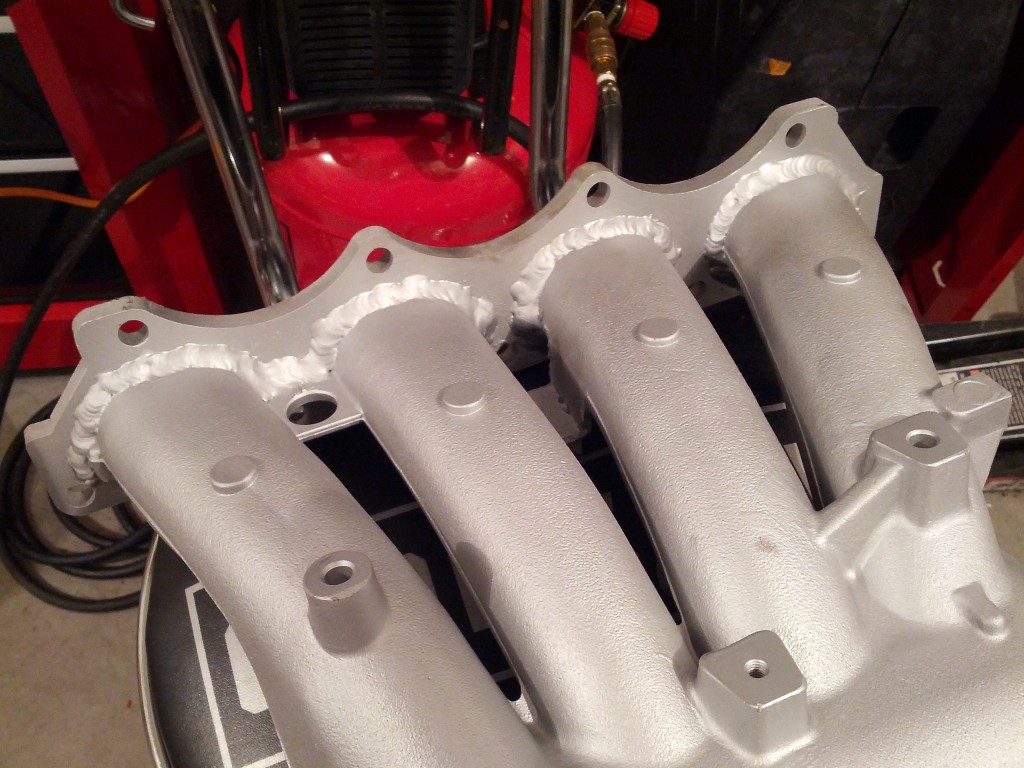

Better late than never for this thing.... hondafold. Godspeed intake manifold for B18 GSR (blox/skunk2 knockoff), with water-jet cut flange based off the original intake mani flange. Have a Godspeed/blox TB for it.
Reply
0
0
 08-26-2013, 12:41 PM
#191
Get a good pair of Heim joints and run one from the stock brace location to the underside of the plenum, and either another underneath to the other side (one to tbody one to firewall side) or one from the valve cover bolts and one from underneath. I'd hate to hear about that weld cracking like so many others..
Edit; Does that intake sit further back (towards the firewall/away from the radiator) than the factory intake? It would make doing a coolant reroute much easier if so. Could even run the piping under (or over) the manifold's runners.. And are you going to try to make an IAC fit somehow?
Edit; Does that intake sit further back (towards the firewall/away from the radiator) than the factory intake? It would make doing a coolant reroute much easier if so. Could even run the piping under (or over) the manifold's runners.. And are you going to try to make an IAC fit somehow?
Last edited by Der_Idiot; 08-26-2013 at 01:14 PM.
Reply
0
0
08-26-2013, 02:44 PM
#192
Senior Member
Thread Starter
iTrader: (8)
Join Date: Jun 2010
Location: Florida
Posts: 1,116
Total Cats: 43
Der-
Thanks for the tips on the bracing. I have a local friend with a welder, will go to work on it sooner rather than later. I need a bracket welded on anyways for the throttle cable. Might wait until the block is back in the car for bracing, just to make sure there's no clearance issues.
Just eyeballing it, looks like the throttle body will sit a few inches "back" compared to stock 99 IM/TB.
I have the stock honda 2-wire IAC. It bolts directly to the manifold, definitely will be looking to get that working with Megasquirt. Mazda 99 valve is 2 wire as well, and both operate at ~500hz stock, so it should be fairly straightforward in getting it working and wired up.
Going back to Dale's today to get more parts that I left there... such is the joys of a long-term build I guess. Once I get the missing oil pan stuff there, motor will be 'ready' to put back in the car.
Reply
0
0
 08-31-2013, 01:31 AM
#194
Senior Member
Thread Starter
iTrader: (8)
Join Date: Jun 2010
Location: Florida
Posts: 1,116
Total Cats: 43
woot woot
next weekend on the road I'm hoping. Need an oil banjo bolt, which won't get here till mid next week, hopefully.
Don't know what it was, but I had the hardest time getting the engine in this time around.... lining up the damn motor mount bolts. Oh well, calling it quits for the night now.
next weekend on the road I'm hoping. Need an oil banjo bolt, which won't get here till mid next week, hopefully.
Don't know what it was, but I had the hardest time getting the engine in this time around.... lining up the damn motor mount bolts. Oh well, calling it quits for the night now.
Reply
0
0
 08-31-2013, 01:06 PM
#197
Senior Member
Thread Starter
iTrader: (8)
Join Date: Jun 2010
Location: Florida
Posts: 1,116
Total Cats: 43
Woke up this morning and realized the honda intake mani fitment is a little tighter than I thought. When I placed it on there last night (not bolted down), it wasn't even really close to being flush with the head. Putting it into the correct position it starts to hit some stuff.
First thing is the hard line coming from the fuel tank- this will get in the way of the idle valve. But, cut it a little short and using some soft fuel line should be an easy fix- I already have a bunch extra lying around from the Mtuned fuel rail.
Second thing is the big AC hard line hits the back/bottom of the plenum. It looks like it can be bent out of the way with enough clearance to account for engine movement etc.... might get a little sketchy though lol. Removing AC in Florida is almost not an option though, for me at least.
I've read through a few threads but no real conclusive info on the pulsation dampers on the NB fuel system. I've read FM usually removes the one right off the tank line (the one in the picture below)... I believe 18psi removed his on the rail itself with no issues. What about removing both? I will try to retain both for now-- but eventually I will be adding a return line, so it won't really matter then.
Reply
0
0
09-04-2013, 11:55 PM
#198
Senior Member
Thread Starter
iTrader: (8)
Join Date: Jun 2010
Location: Florida
Posts: 1,116
Total Cats: 43
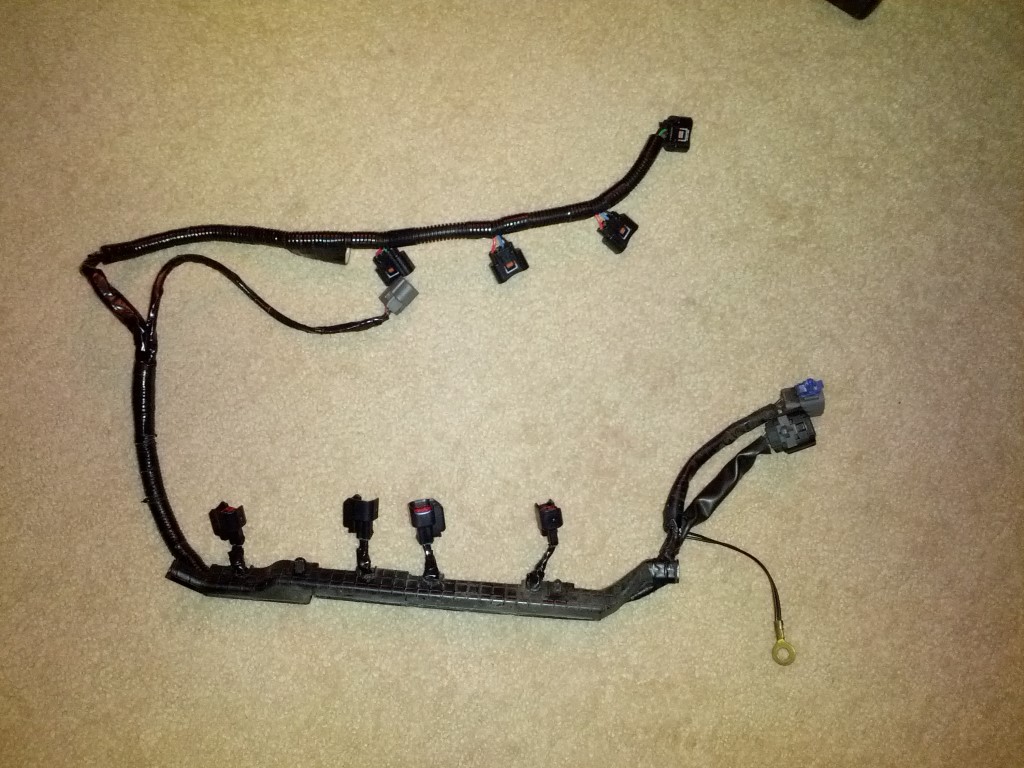
Small update. Did all the wiring junk for the ID1000s and COP conversion. Pretty tedious, but I think it turned out pretty well, everything checks out with the multimeter.
All the odds and ends parts are in the mail and should be here for the weekend- looking good for a start up this weekend. As long as I have the time (Masters work like to eat up my weekends now...)
All the odds and ends parts are in the mail and should be here for the weekend- looking good for a start up this weekend. As long as I have the time (Masters work like to eat up my weekends now...)
Reply
0
0
09-07-2013, 08:48 PM
#199
Senior Member
Thread Starter
iTrader: (8)
Join Date: Jun 2010
Location: Florida
Posts: 1,116
Total Cats: 43
Making progress, but not going to have the time to get it all wrapped up this weekend, sadly. Plus, everything has been going pretty well, I don't want to rush into any of this. I did experience some fail today, I punched a hole a AC line, so I just pulled it all out-because racecar, I guess. Calling it quits for the night, almost there.
Reply
0
0


