Aidan's loose oily bunghole actually runs a track lap
 04-04-2017, 10:11 AM
#9001
Junior Member

Join Date: Apr 2015
Location: Tampa, FL
Posts: 200
Total Cats: 22
Oh I forgot, you cant use google, or amazon, or any search bar for that matter.
https://www.amazon.com/Saint-Gobain-...bain+foam+tape
https://www.amazon.com/Saint-Gobain-...bain+foam+tape

Reply
 0
0

0
 04-10-2017, 09:54 PM
#9003
SADFab Destructive Testing Engineer


Thread Starter
iTrader: (5)
Join Date: Apr 2014
Location: Beaverton, USA
Posts: 18,642
Total Cats: 1,866
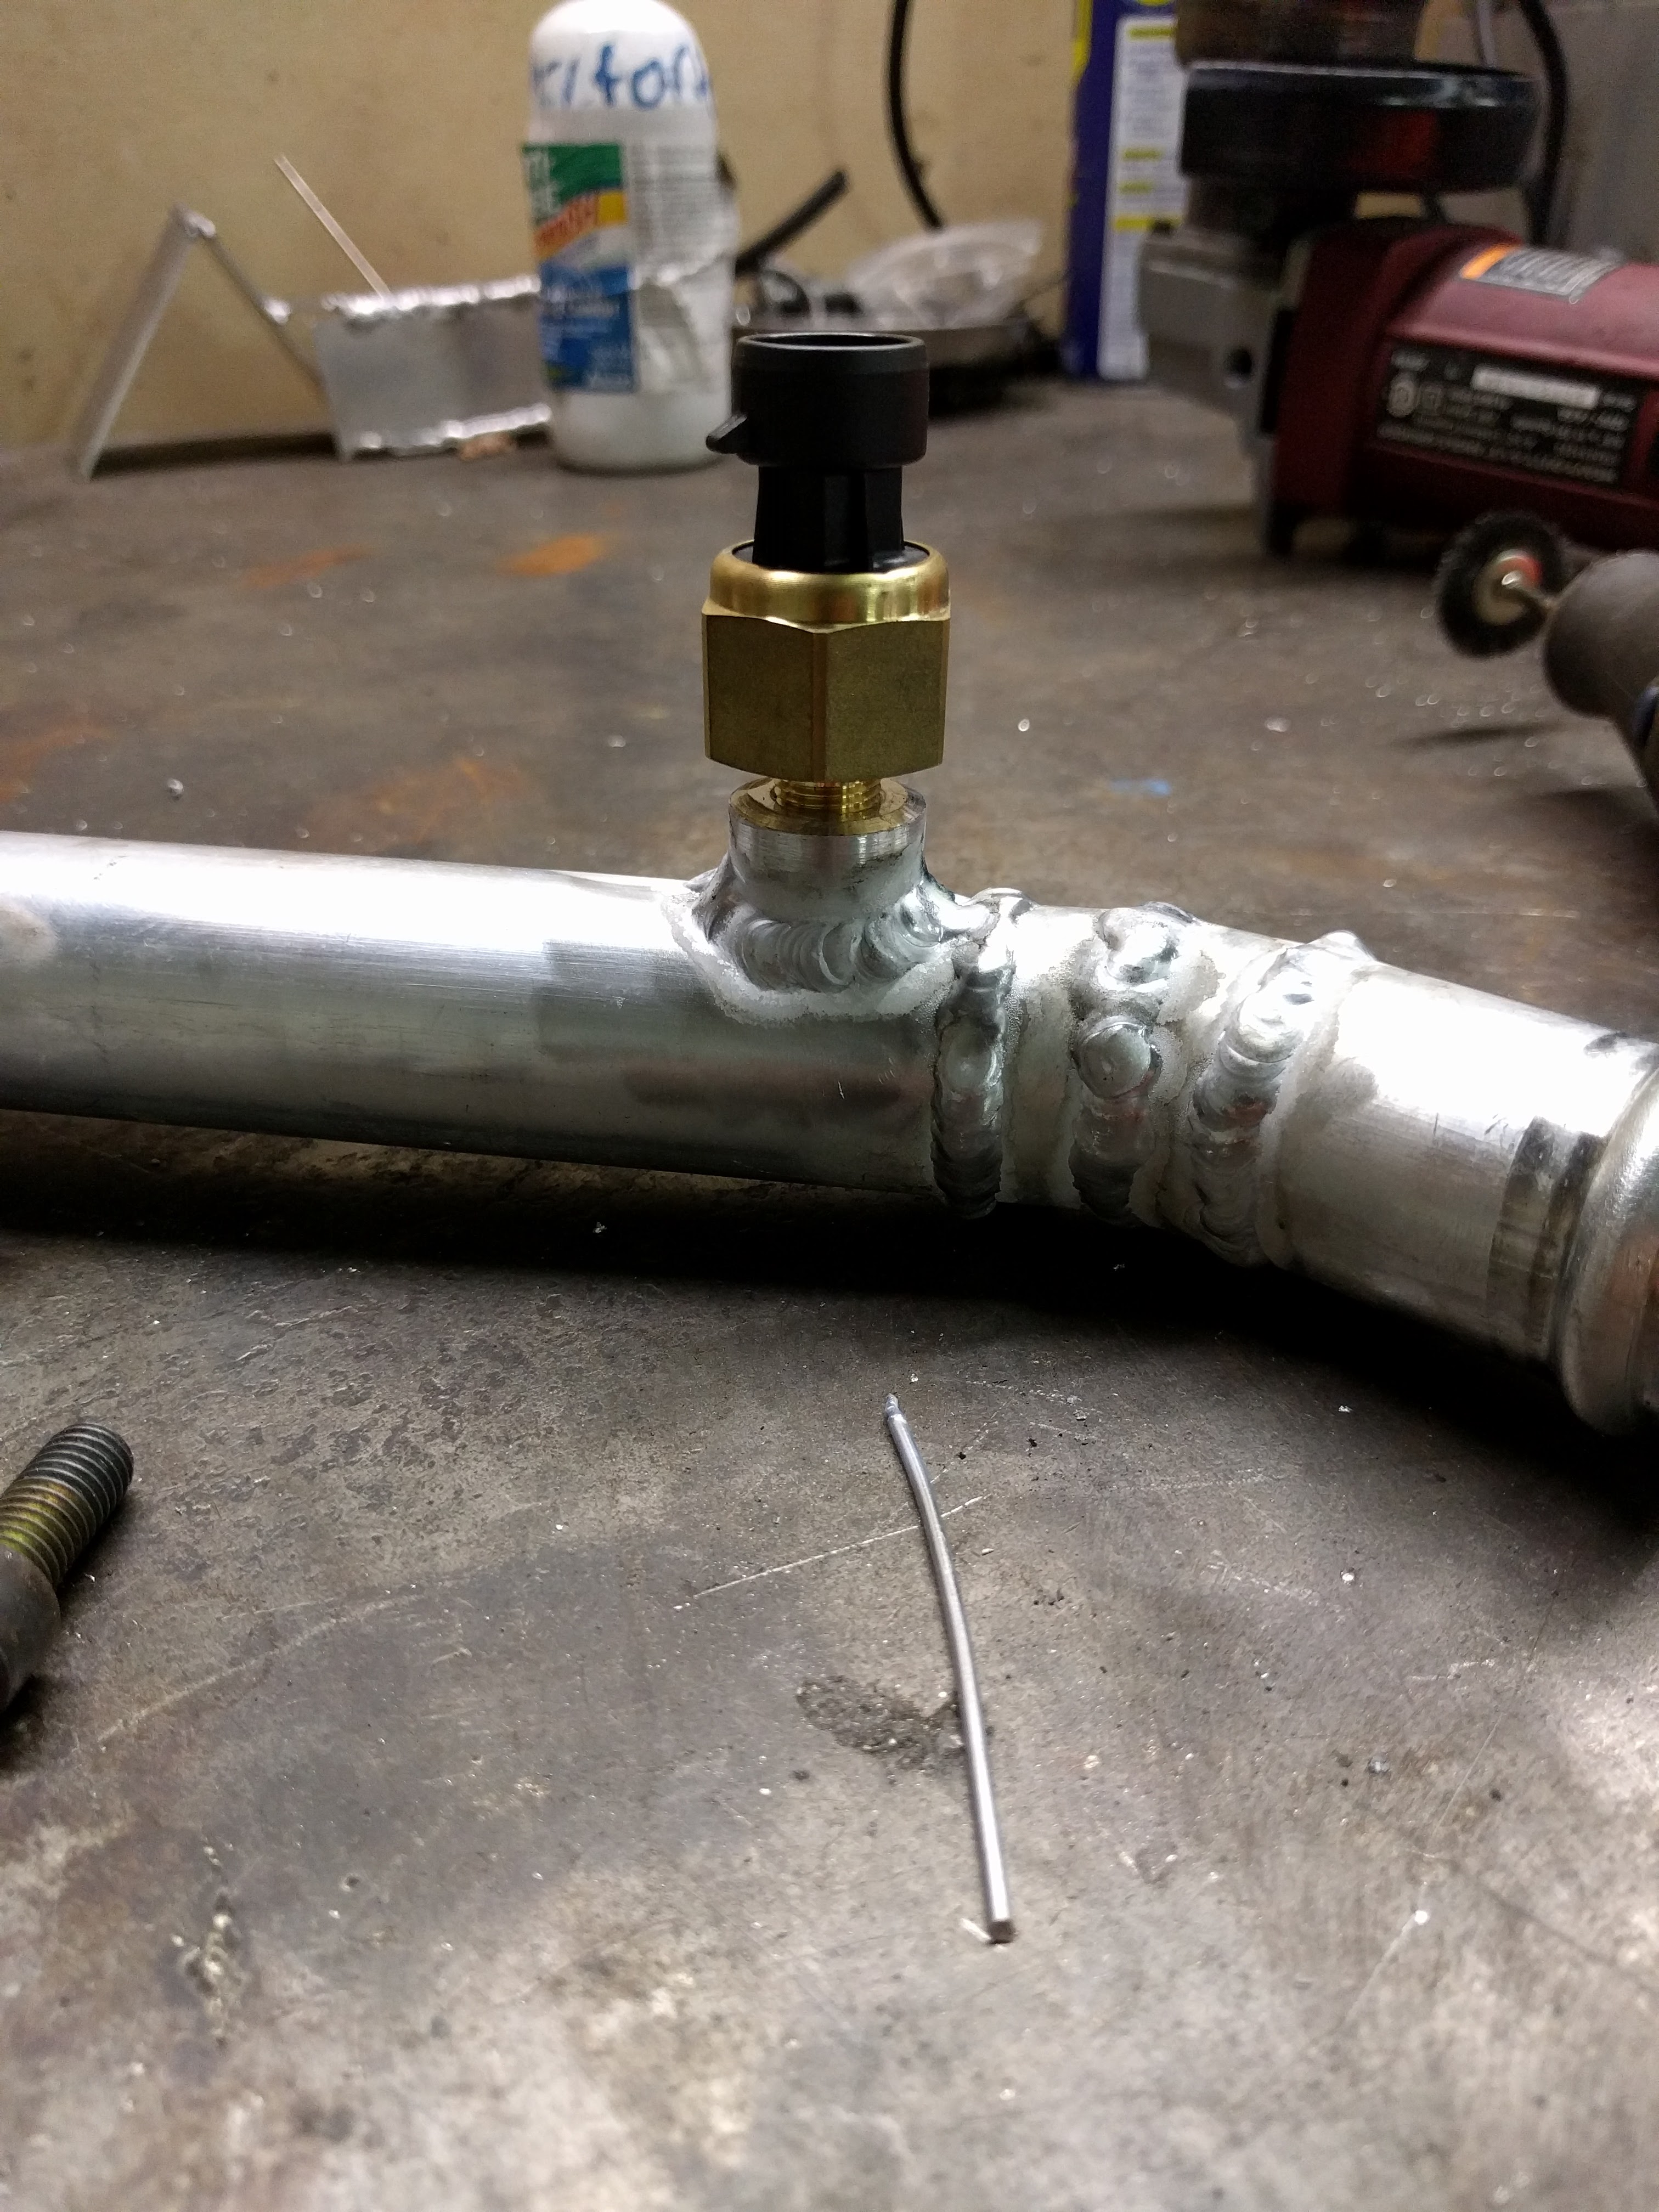
Talking **** with @afm got me thinking that I wanted a coolant pressure sensor. Just another idiot light in case something goes wrong. So I got out the JB weld and made something happen
Reply
1
1

 04-12-2017, 05:47 PM
#9007
SADFab Destructive Testing Engineer
Thread Starter
iTrader: (5)
Join Date: Apr 2014
Location: Beaverton, USA
Posts: 18,642
Total Cats: 1,866
Machine shop says they should be done next Wednesday. I'll probably take Thursday/Friday off work. And try and have it running by the end of the weekend.
Reply
0
0
04-12-2017, 06:18 PM
#9008
All-round "Good Guy"
Join Date: Dec 2009
Location: Brisbane, AUSTRALIA
Posts: 993
Total Cats: 245
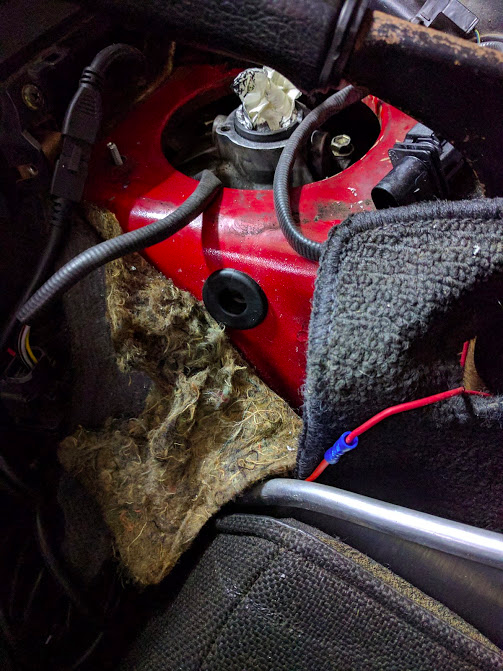
Curious - why drill a dedicated O2 sensor wiring hole when you have a huge gaping hole above it with plenty or room?
Was it a spur of the moment thing?
Were you caught up in a "drilling frenzy" once you had a power tool in your hands?
Did you just want to protect the wires with a rubber grommet?
Also, does it allow the centre console to fit back in place? (or don't you use it so don't care?)

Was it a spur of the moment thing?
Were you caught up in a "drilling frenzy" once you had a power tool in your hands?
Did you just want to protect the wires with a rubber grommet?
Also, does it allow the centre console to fit back in place? (or don't you use it so don't care?)
Reply
0
0
04-12-2017, 06:22 PM
#9009
SADFab Destructive Testing Engineer
Thread Starter
iTrader: (5)
Join Date: Apr 2014
Location: Beaverton, USA
Posts: 18,642
Total Cats: 1,866
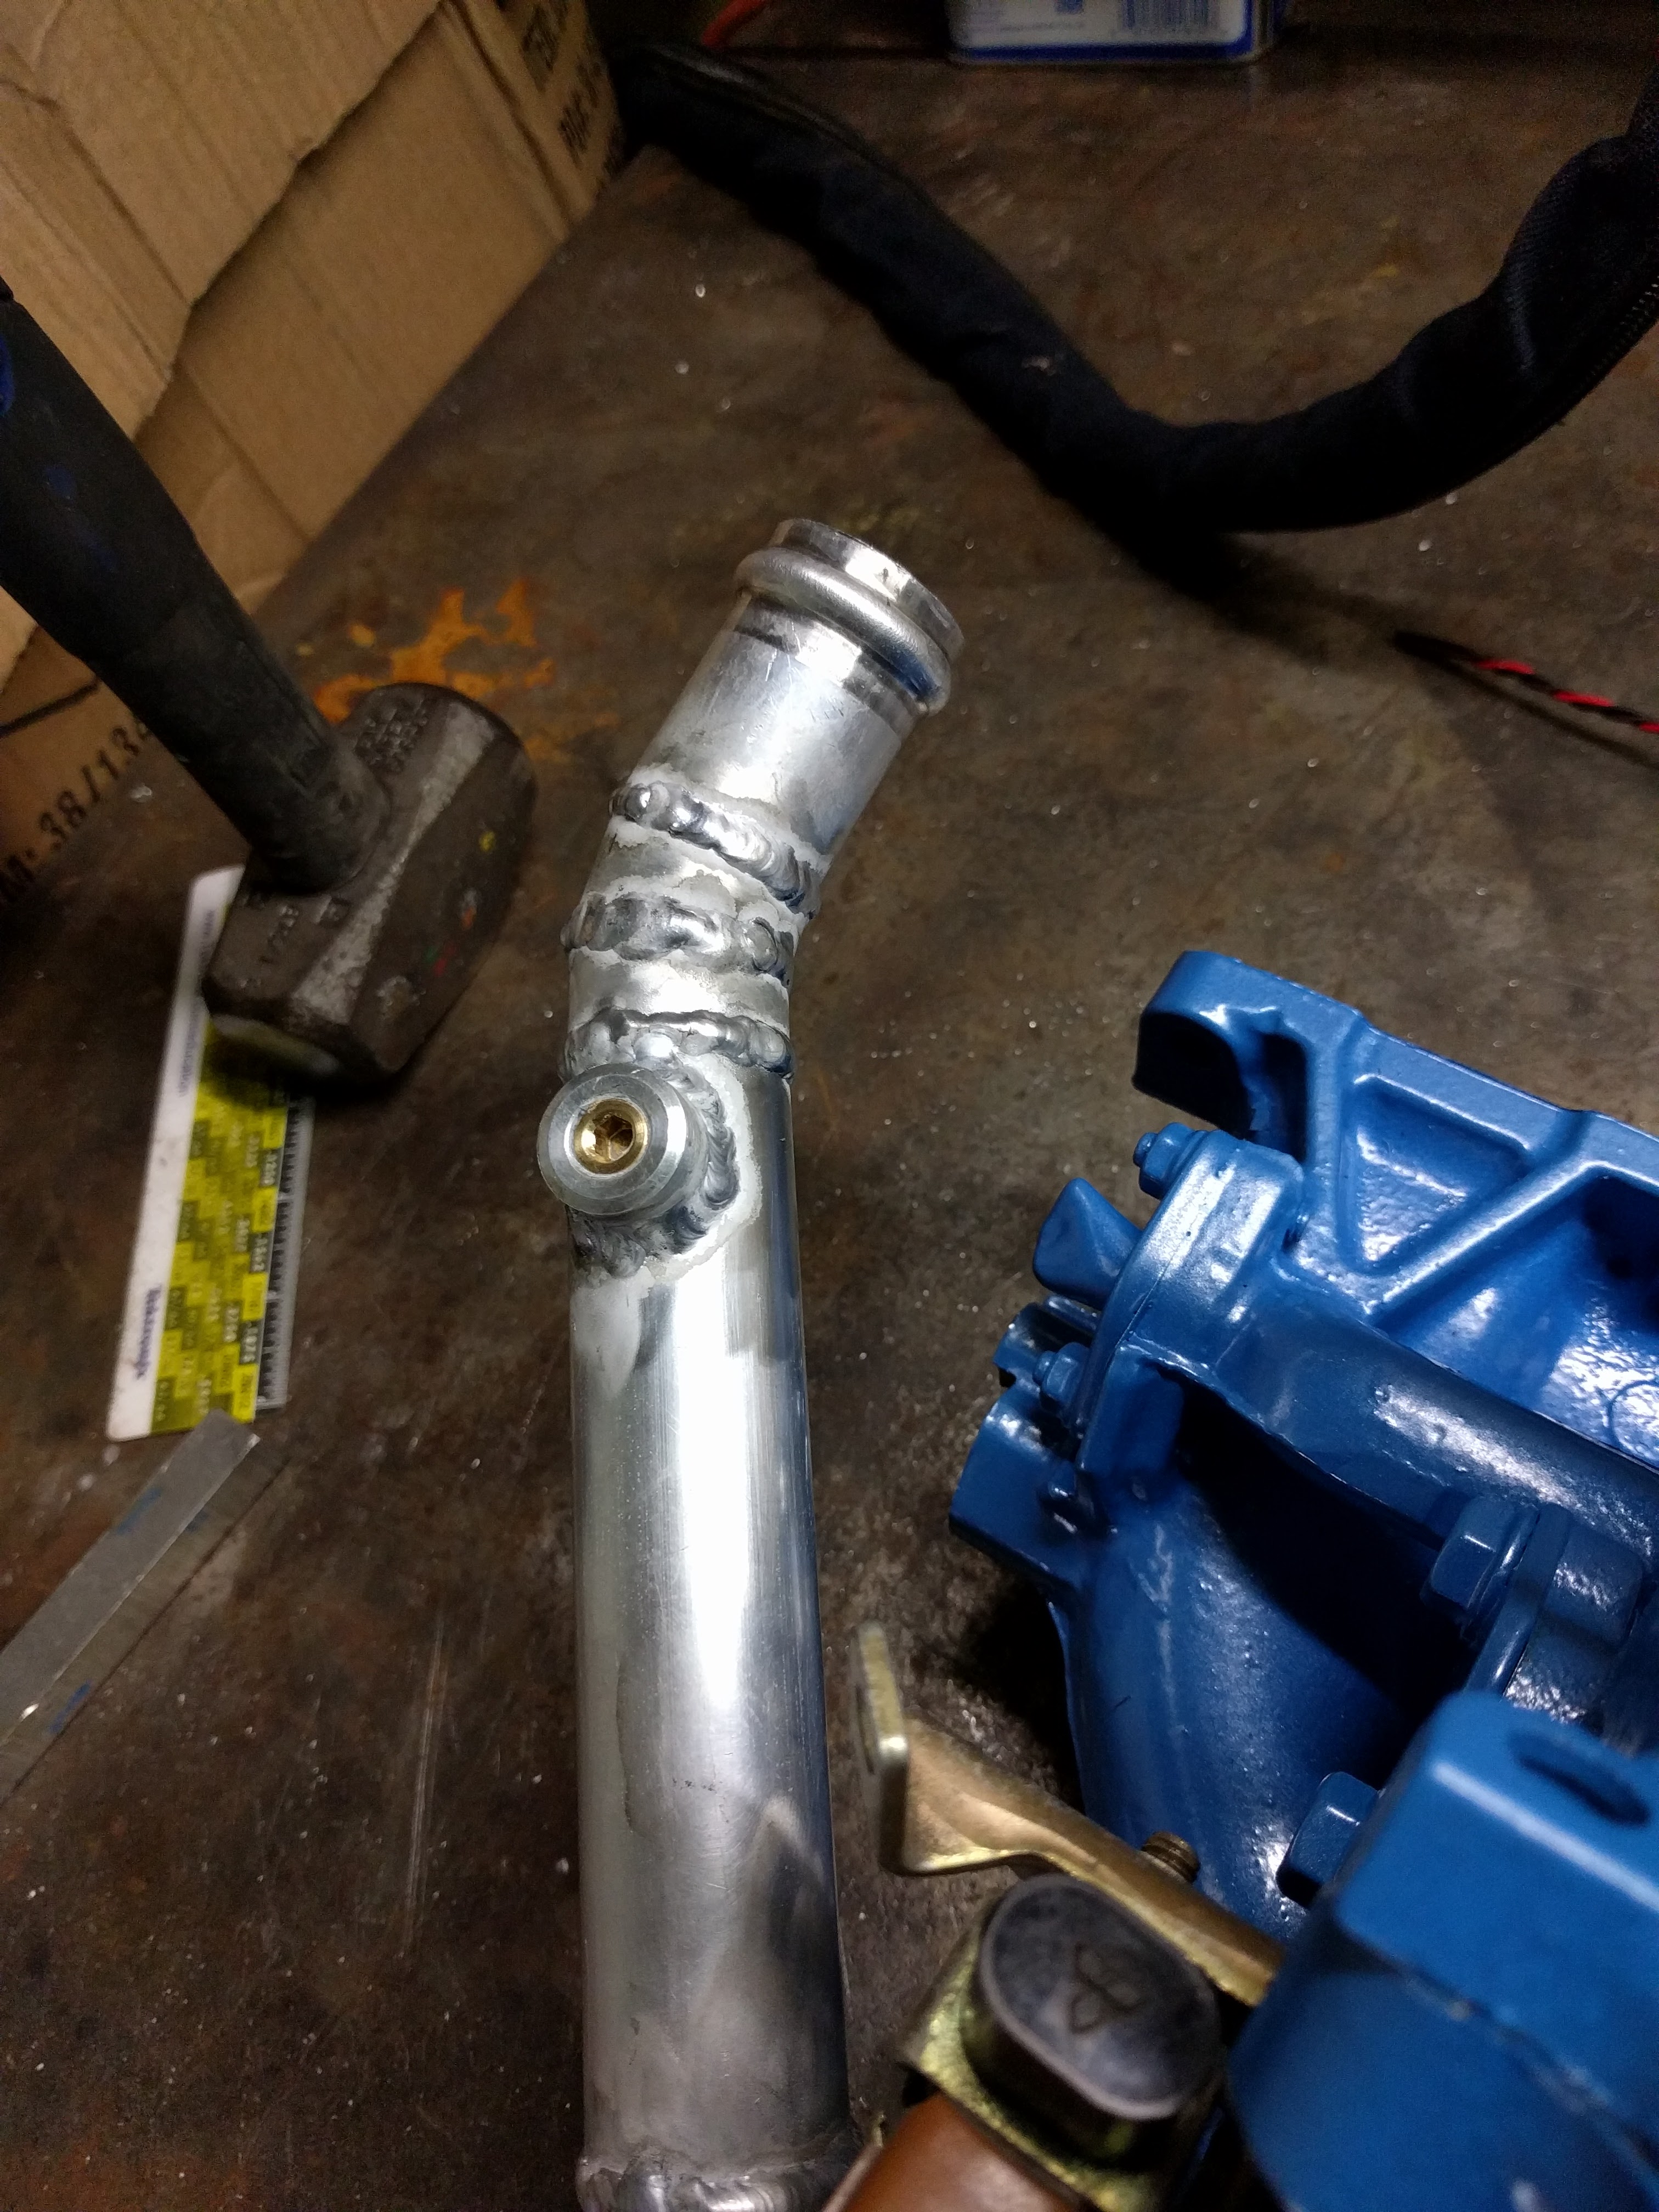
I actually meticulously planned that hole. I used to run it through the other hole. And bolting the rubber boot back down would put a nice kink in the wire. It actually even broke a wire on my first o2 sensor. I then wrapped it in a bunch more electrical tape and it kind of worked.
I like this way a lot more. And yes, the center console fits.
I like this way a lot more. And yes, the center console fits.
Reply
0
0
04-12-2017, 06:35 PM
#9010

I actually meticulously planned that hole. I used to run it through the other hole. And bolting the rubber boot back down would put a nice kink in the wire. It actually even broke a wire on my first o2 sensor. I then wrapped it in a bunch more electrical tape and it kind of worked.
I like this way a lot more. And yes, the center console fits.
I like this way a lot more. And yes, the center console fits.
Reply
0
0
04-12-2017, 06:43 PM
#9011
SADFab Destructive Testing Engineer
Thread Starter
iTrader: (5)
Join Date: Apr 2014
Location: Beaverton, USA
Posts: 18,642
Total Cats: 1,866
Considered that. Didn't like it.
I actually bought a step drill specifically large enough for that hole so I did think about it. This was cleaner imo.
I actually bought a step drill specifically large enough for that hole so I did think about it. This was cleaner imo.
Reply
0
0
 04-16-2017, 12:24 PM
#9013
SADFab Destructive Testing Engineer
Thread Starter
iTrader: (5)
Join Date: Apr 2014
Location: Beaverton, USA
Posts: 18,642
Total Cats: 1,866
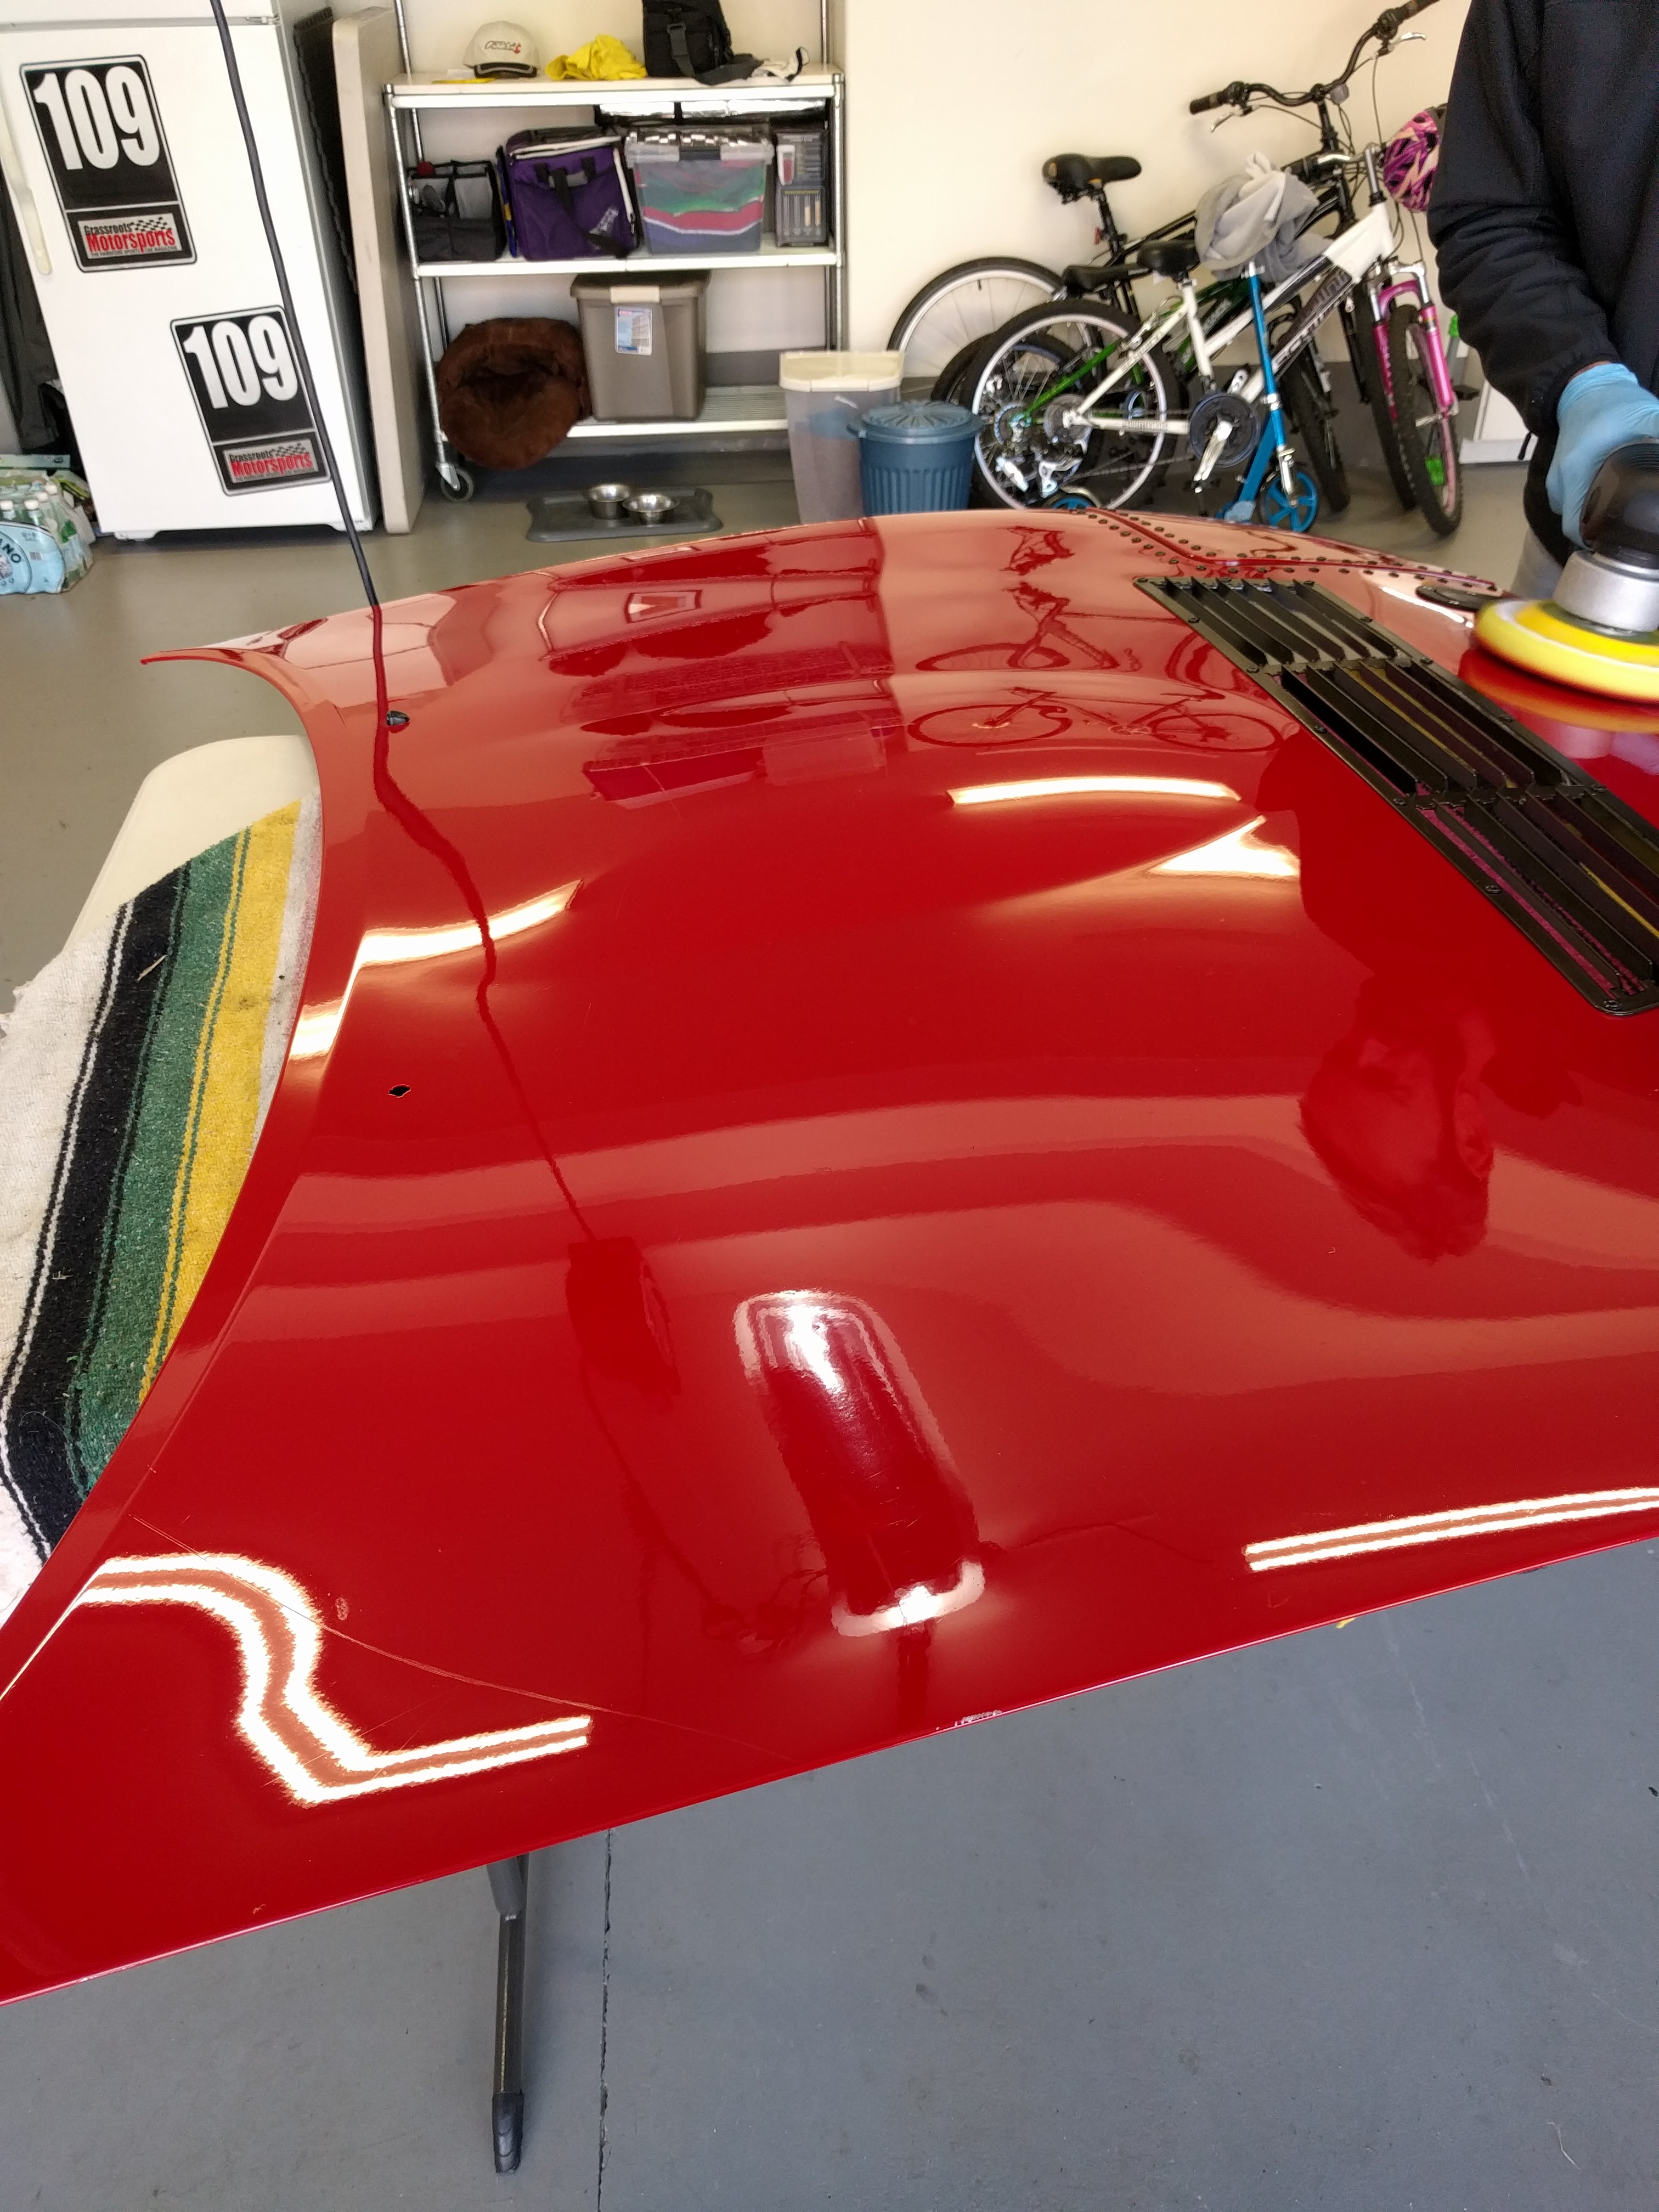
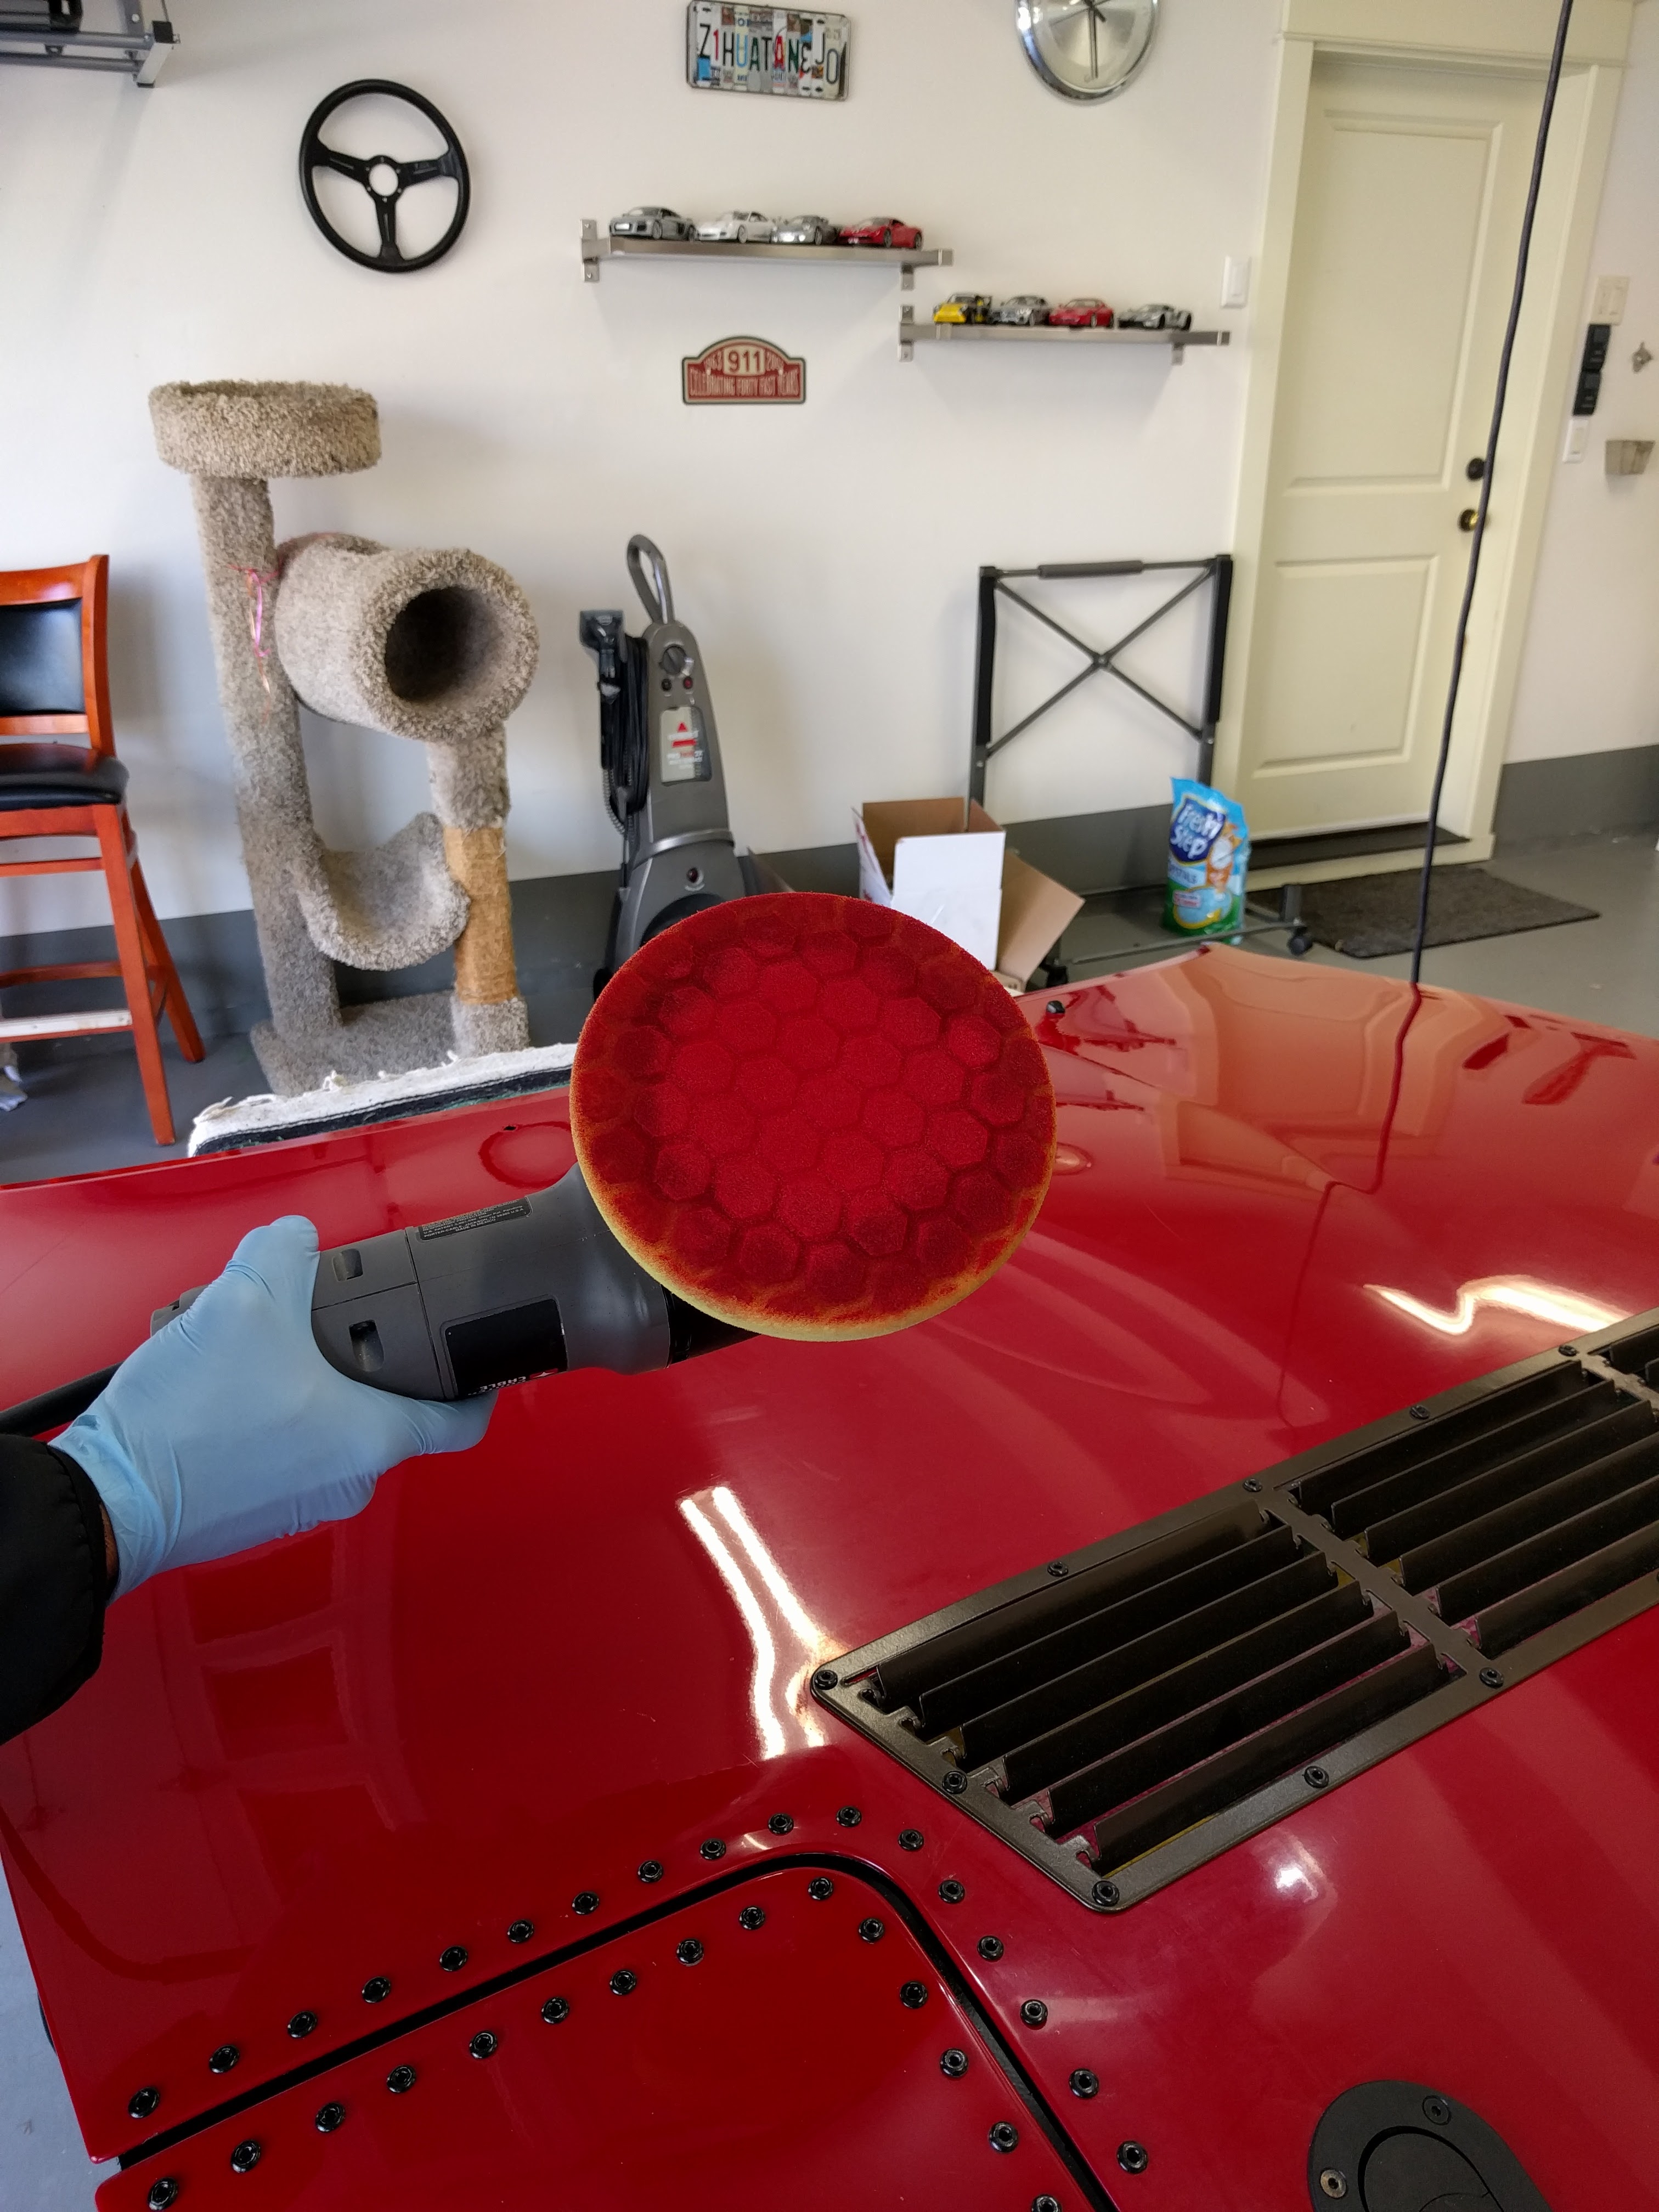
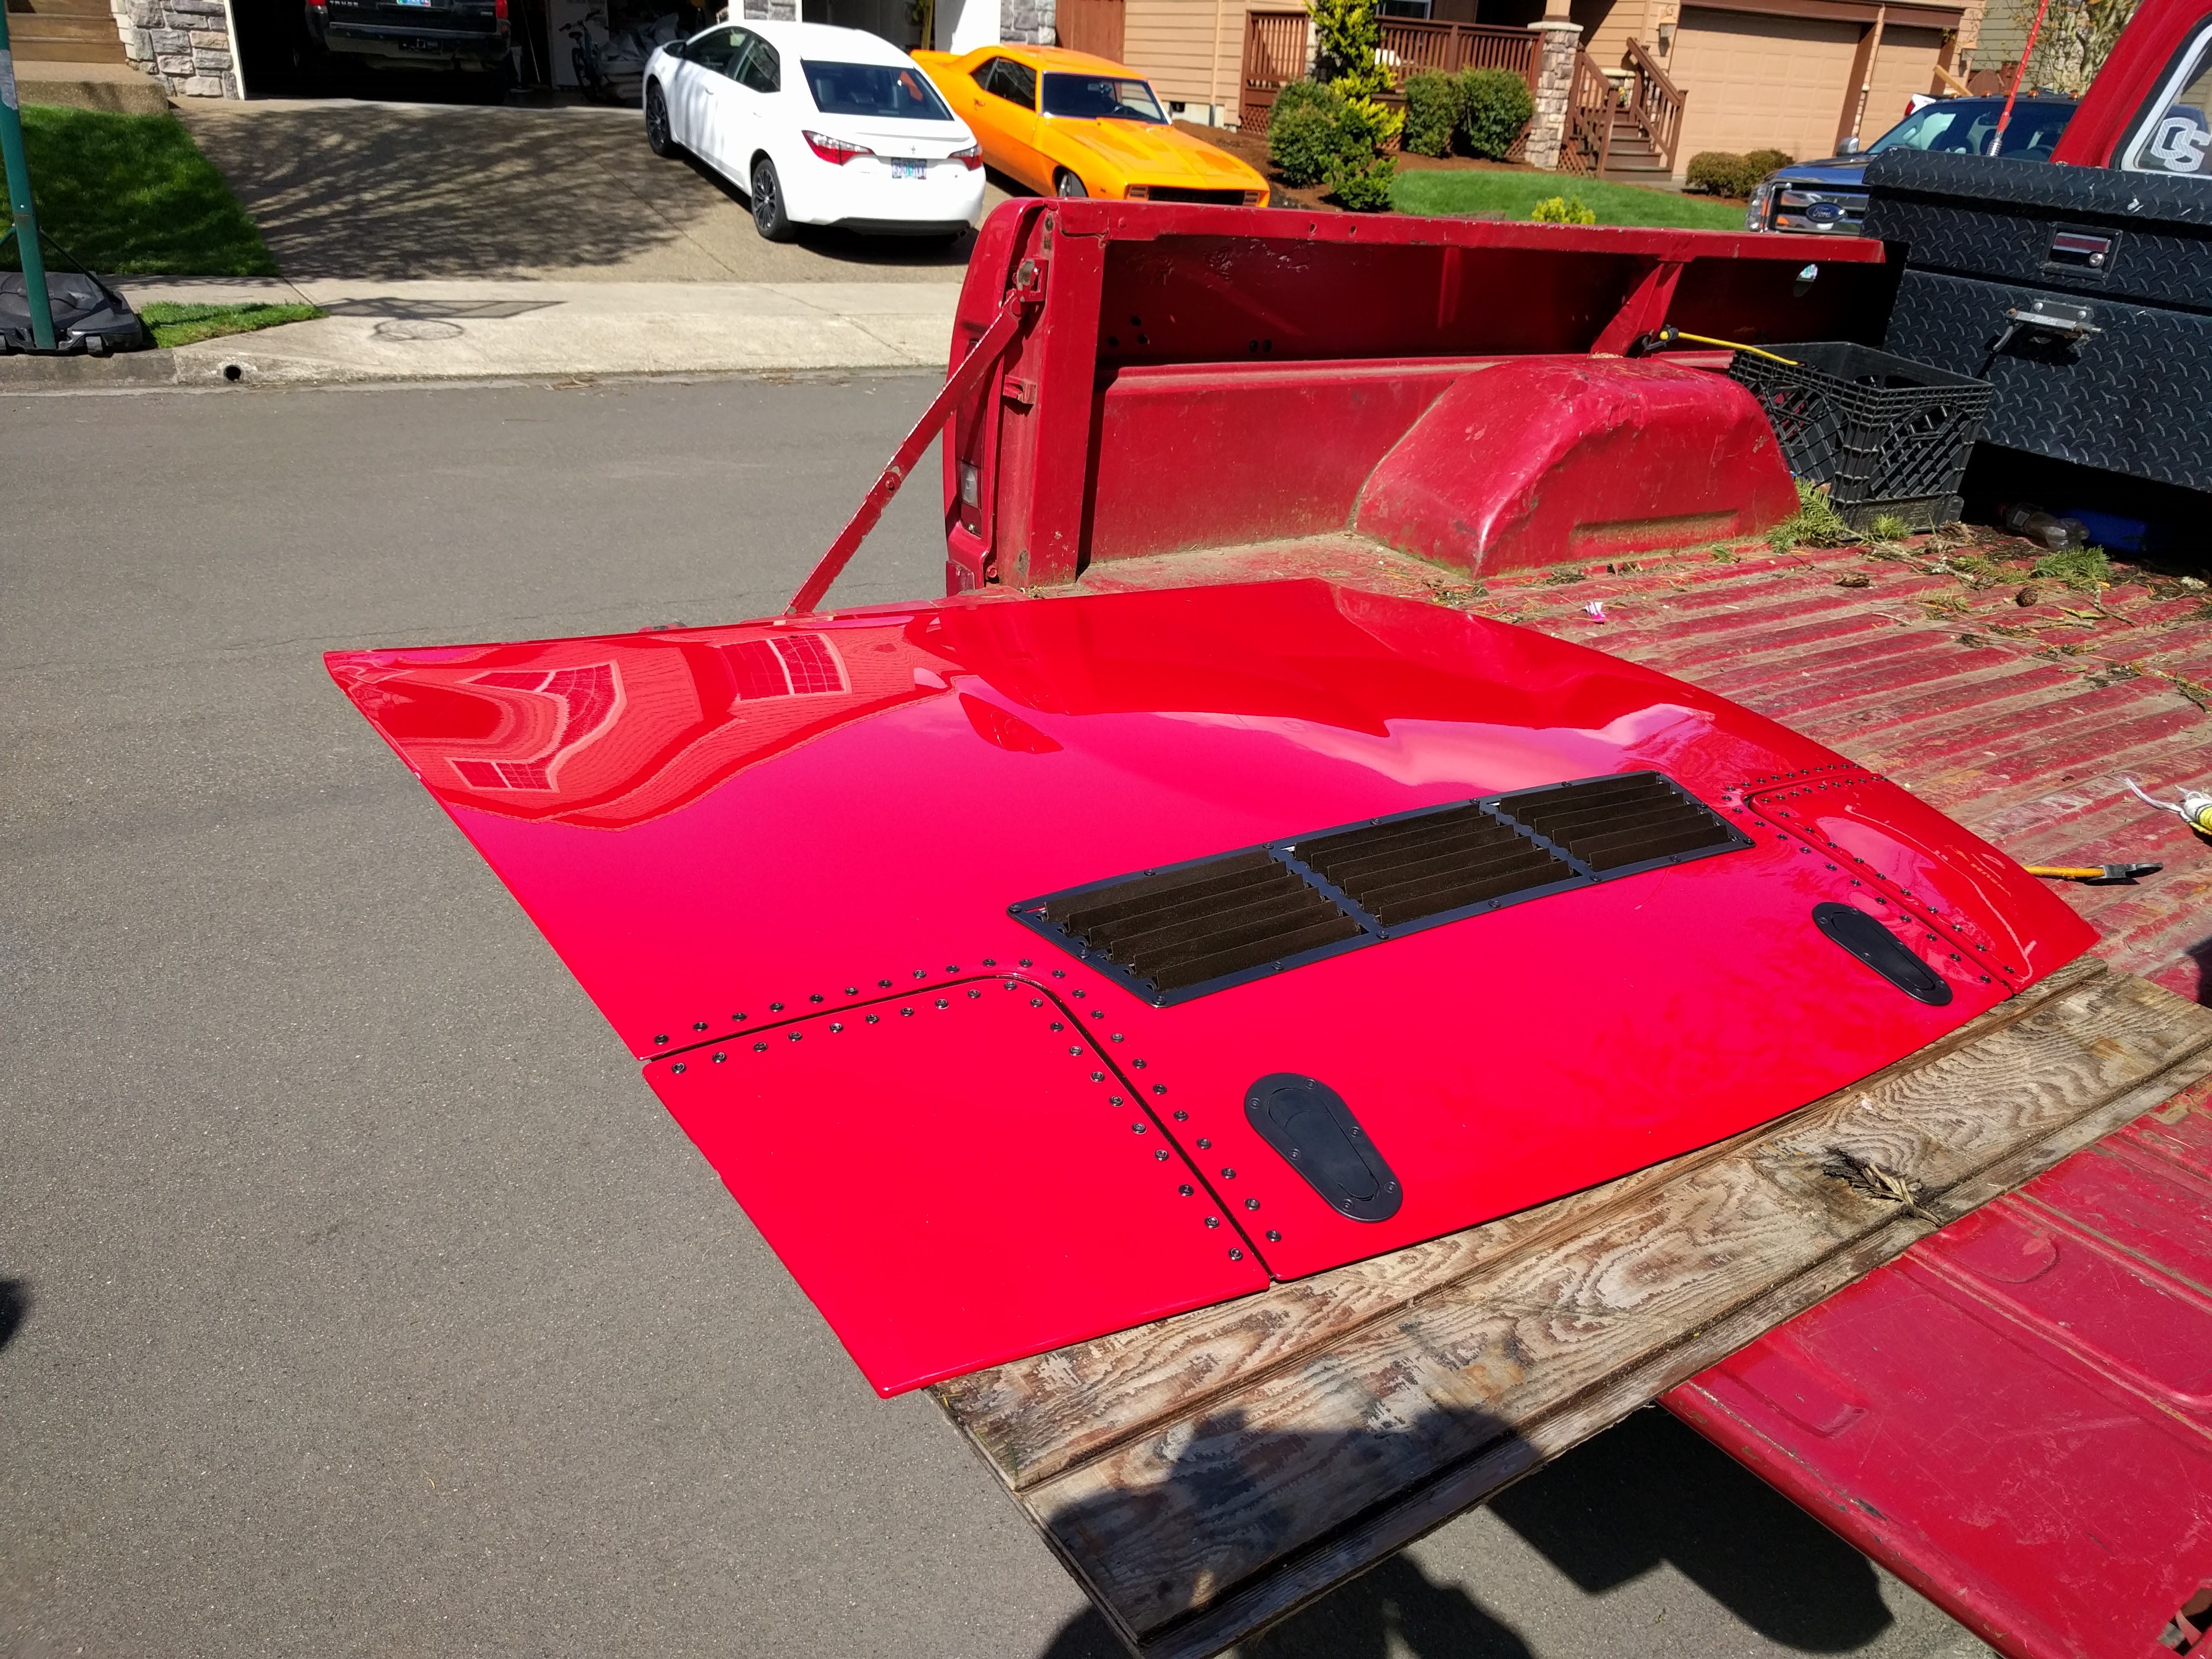
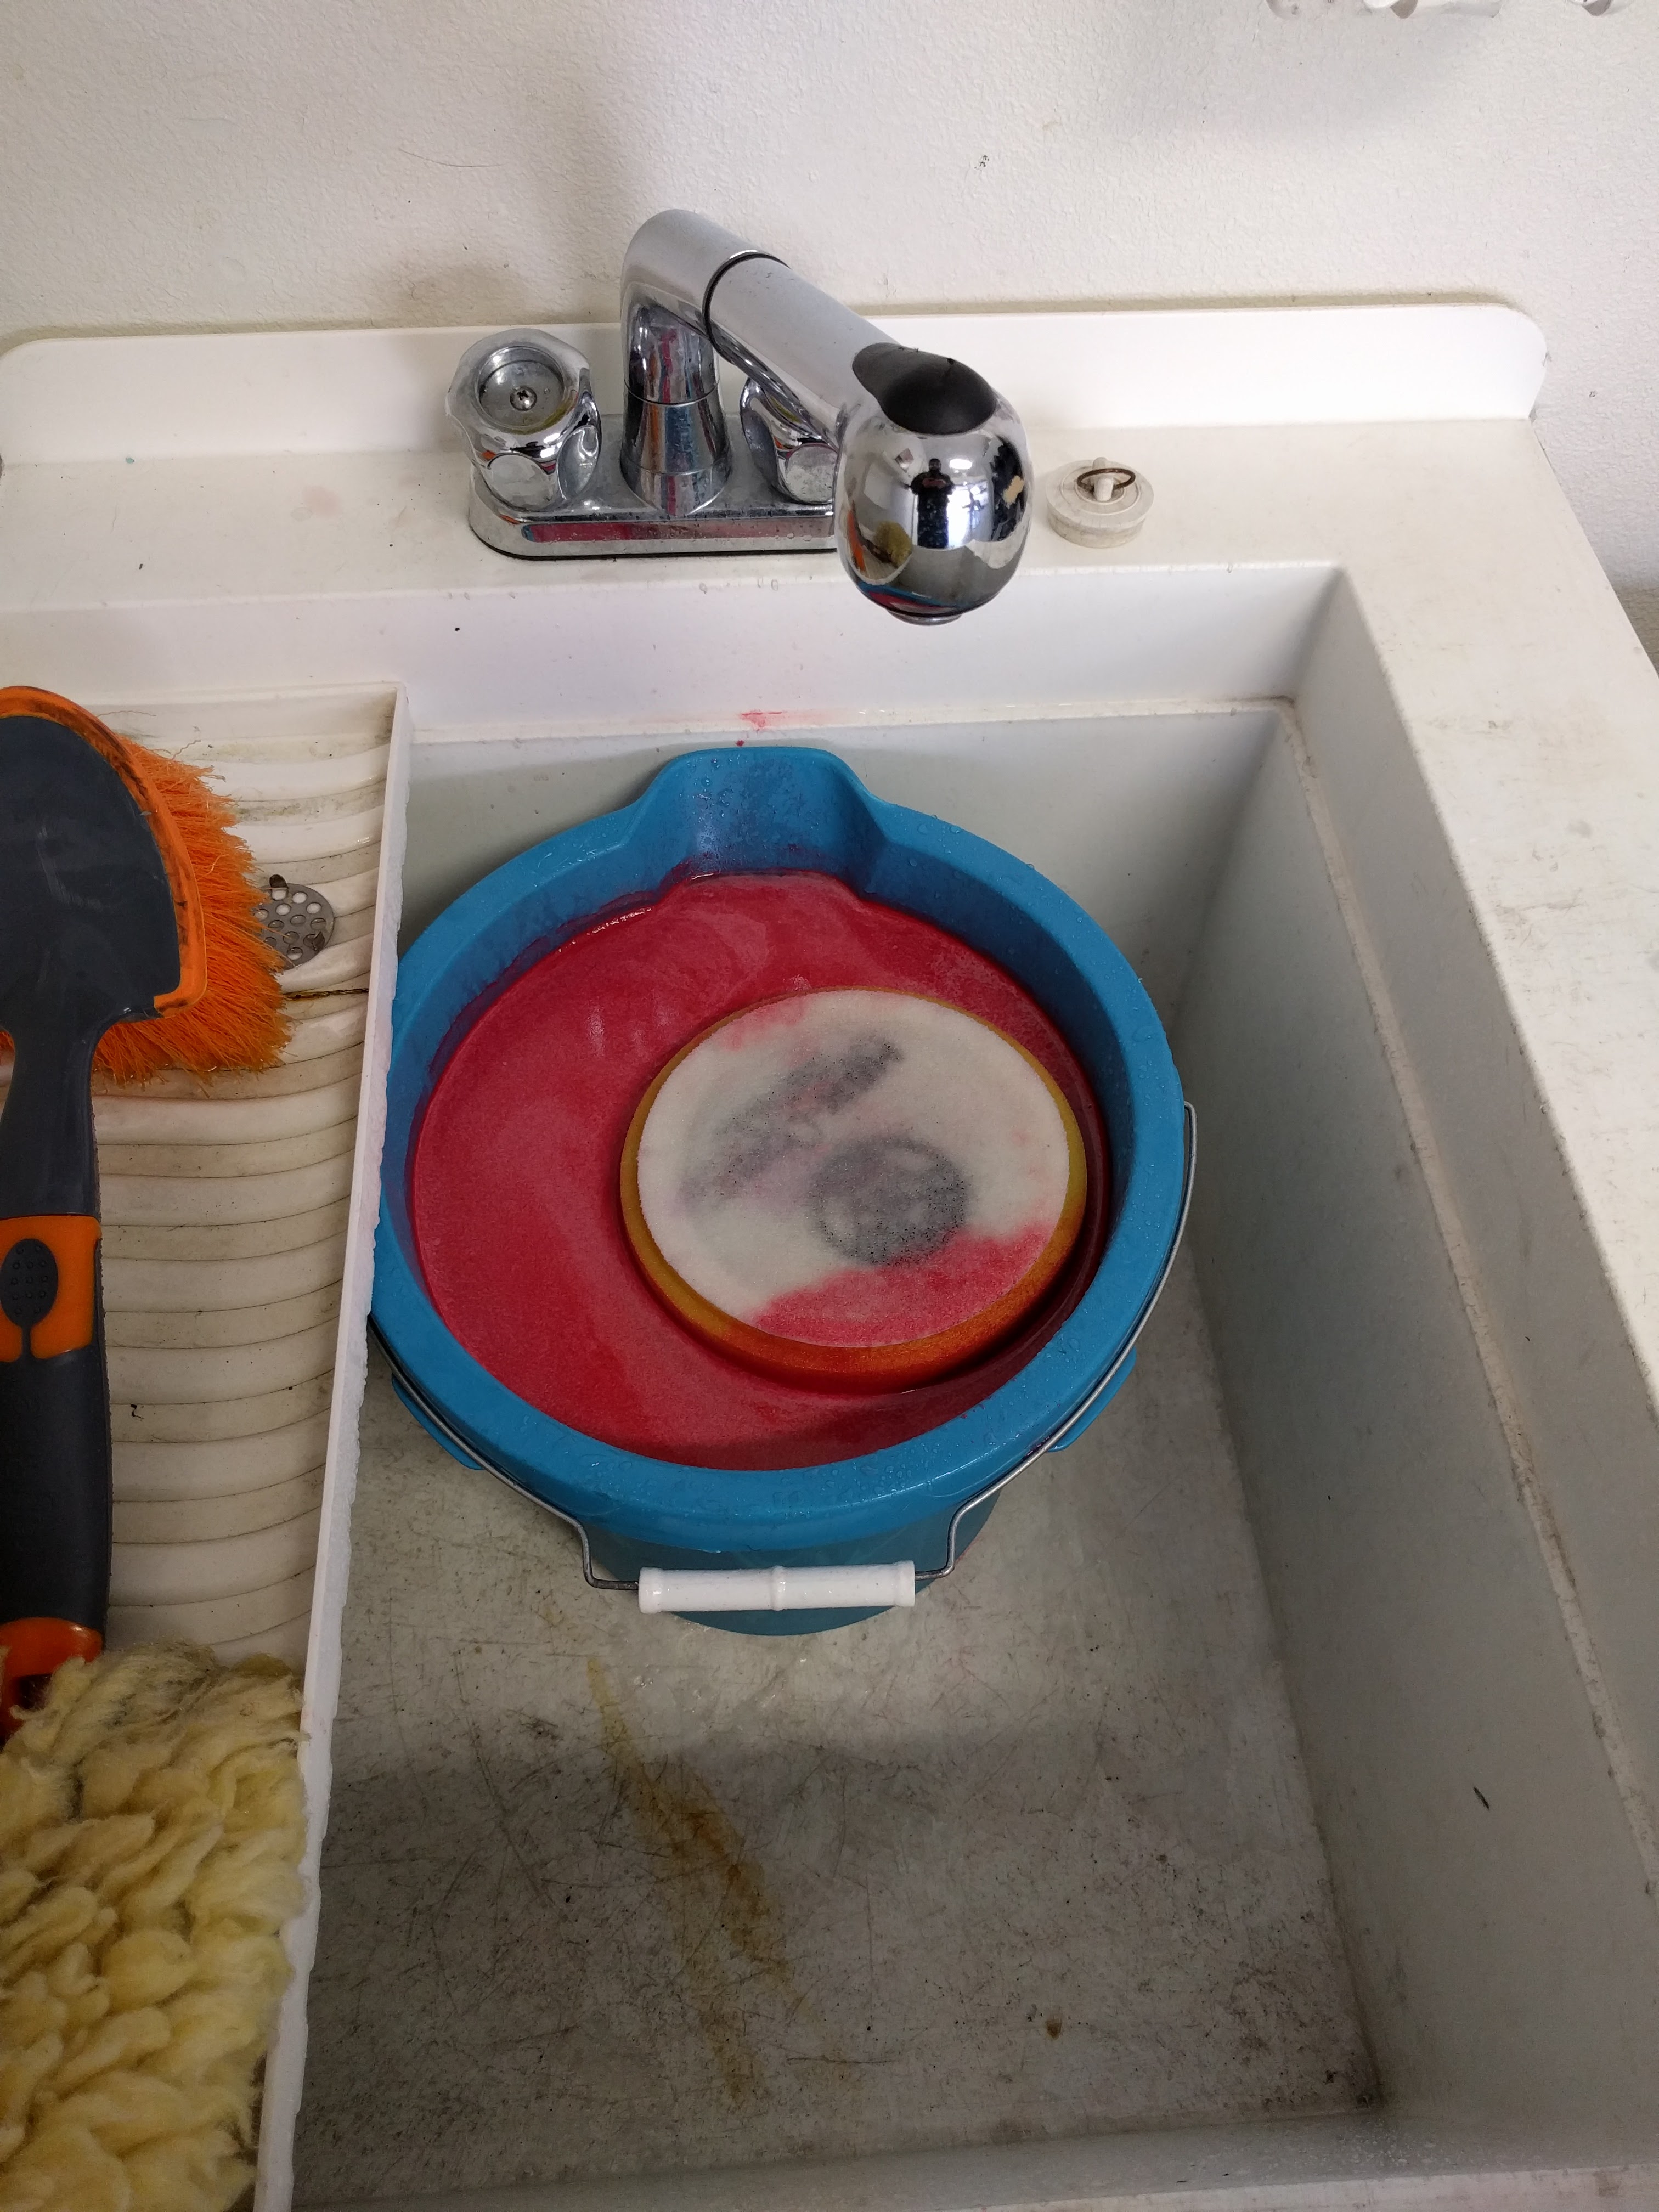
Went over to @oregonmon's place so he could work some magic on my new hood. Single stage paint can shine. Too bad the rest of the paint looks like ***. Maybe i'll try and make it over when the car is running.
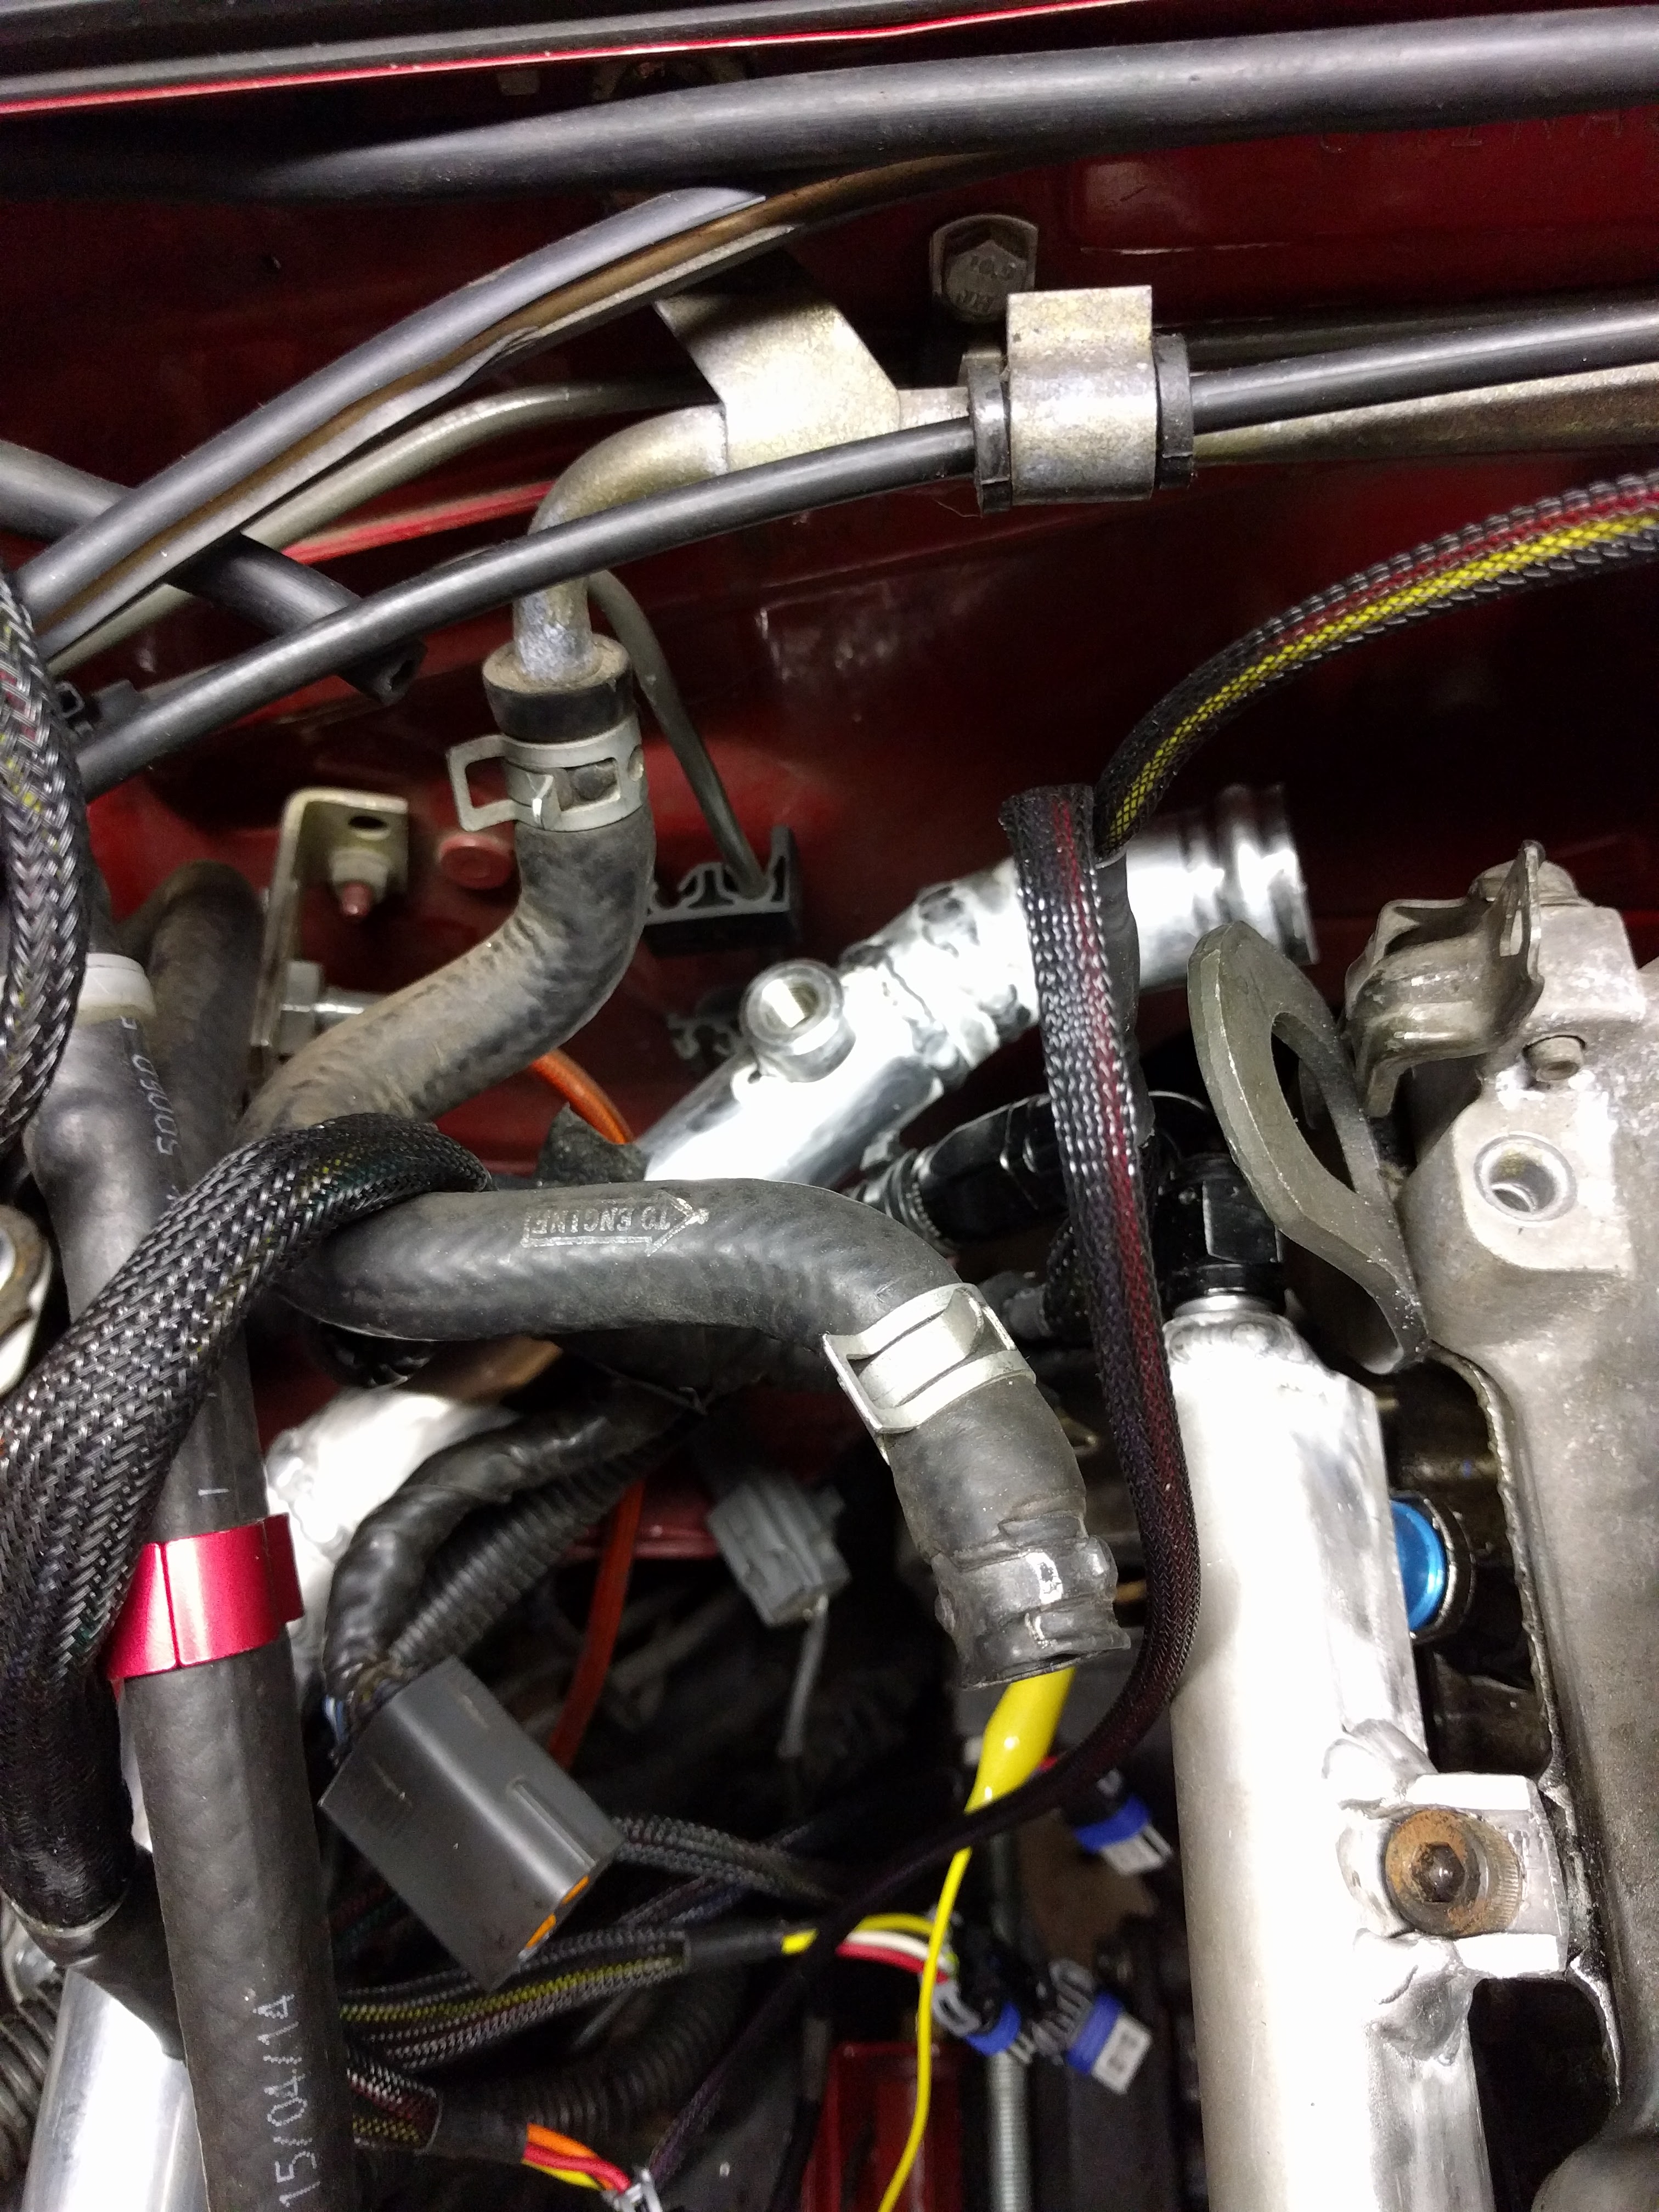
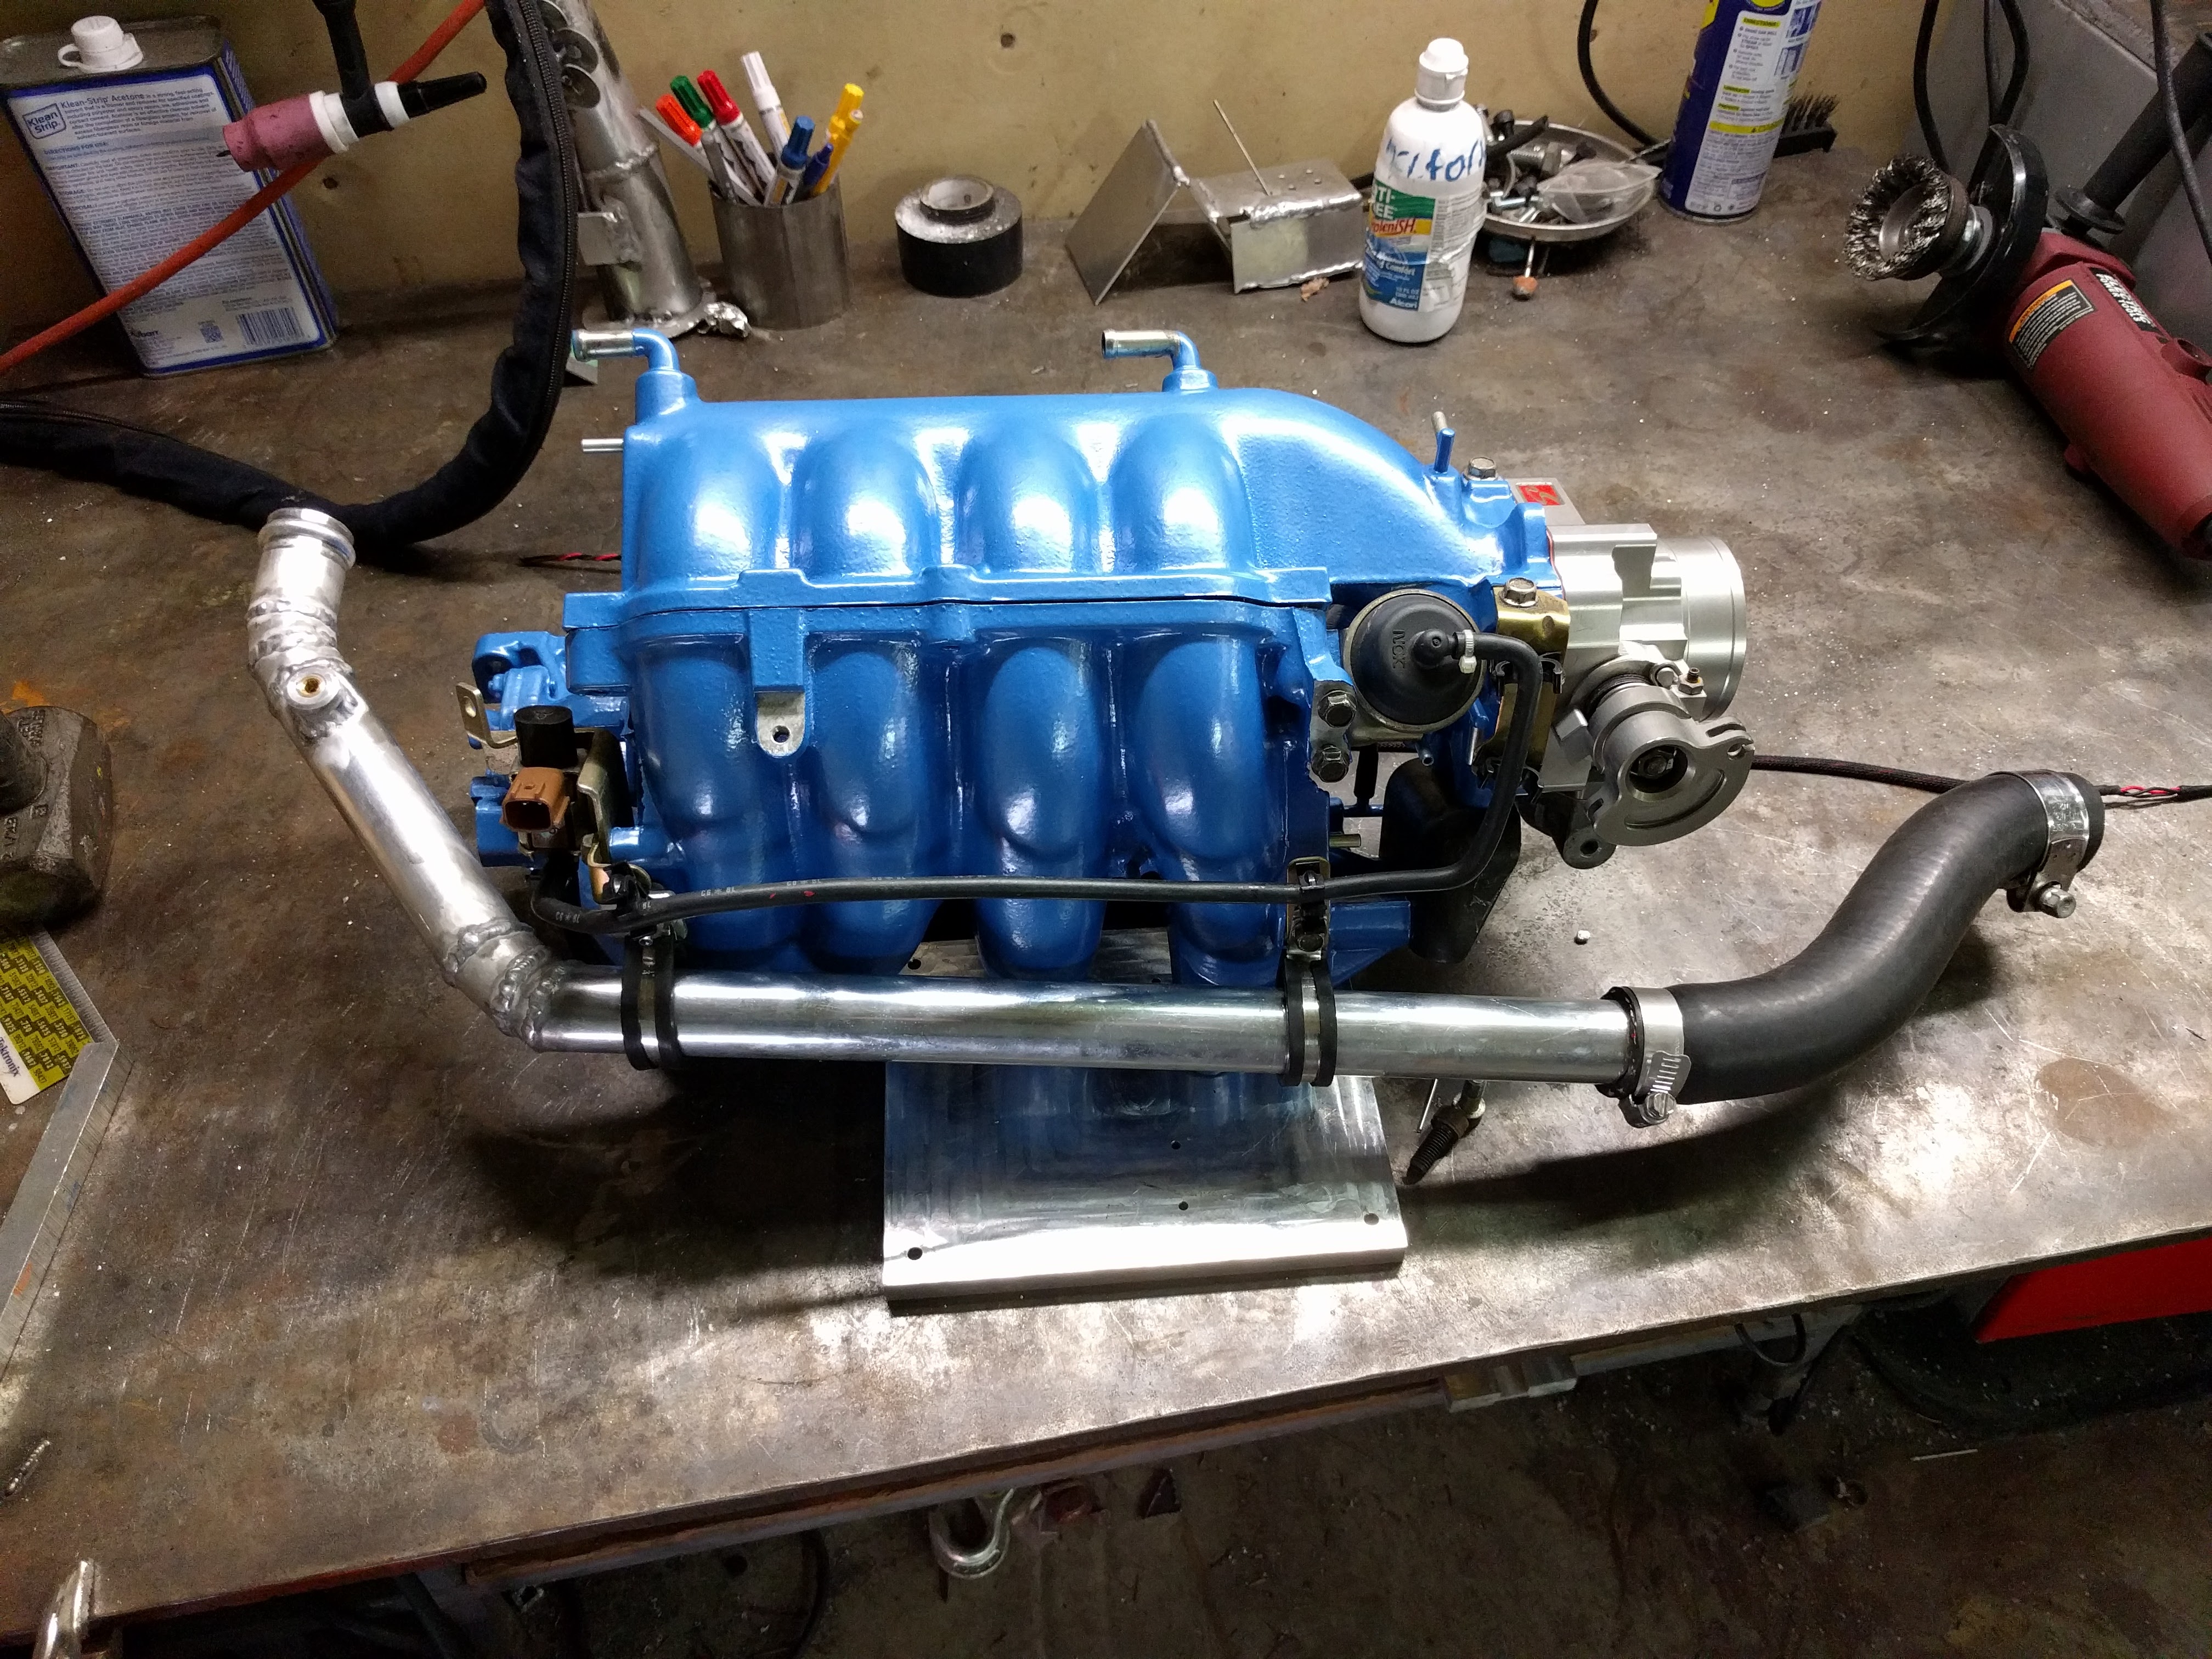
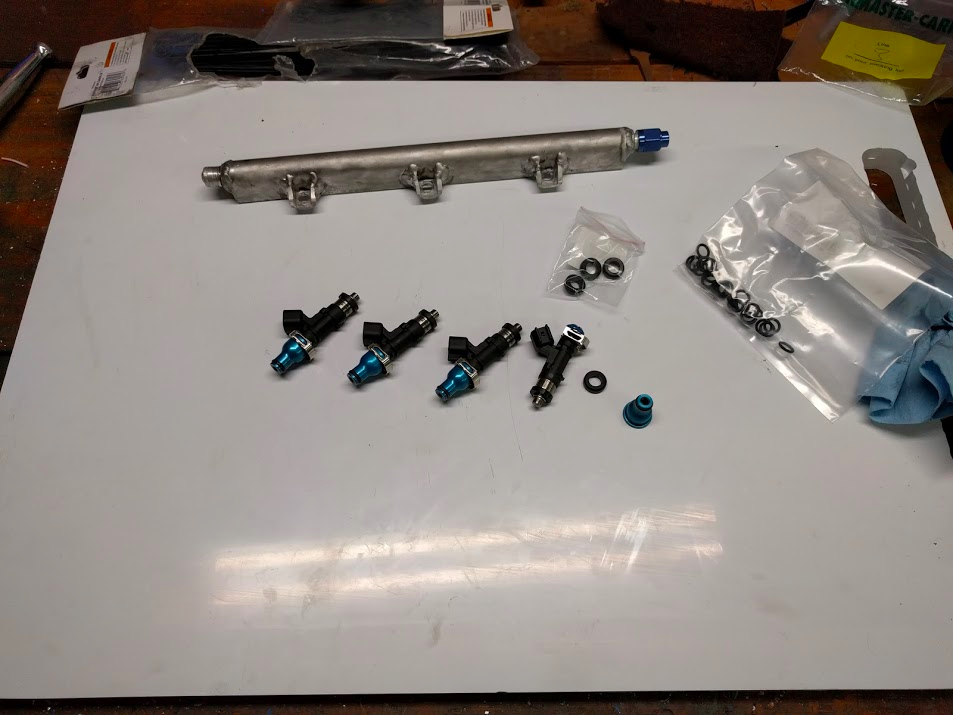
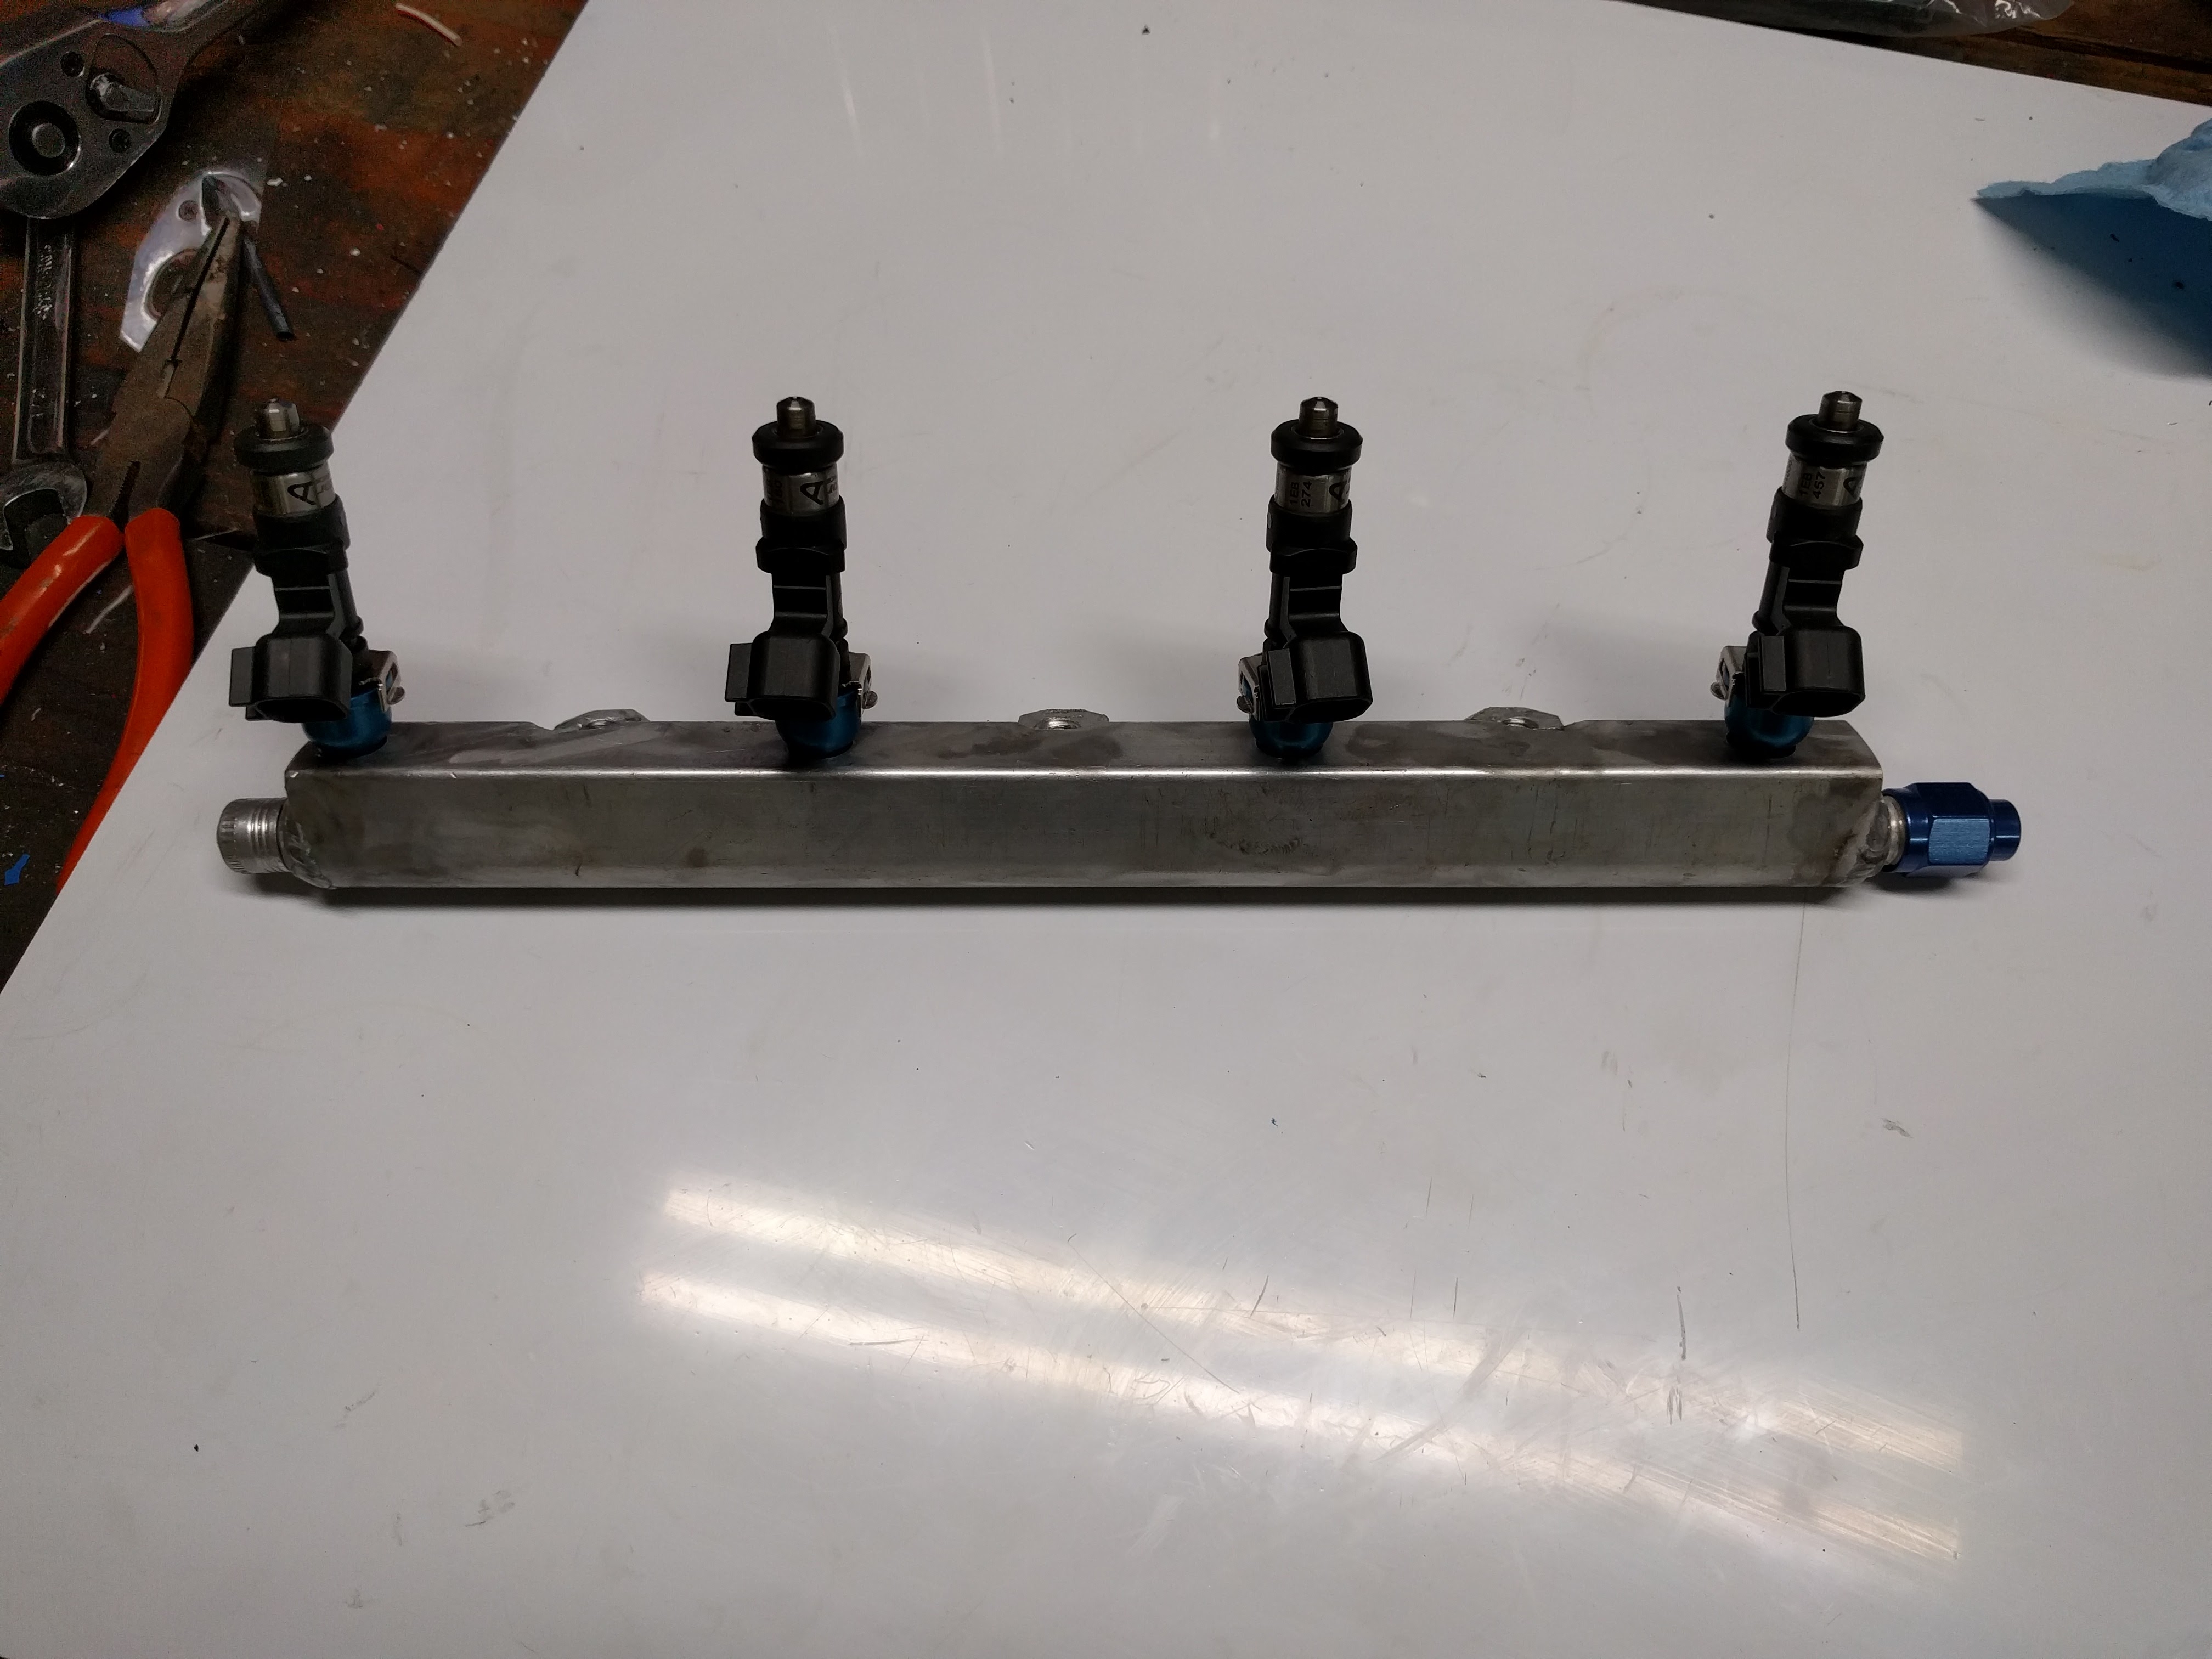
Did some injector rehab
Question time. Can anybody learn me some valve clearances. I know how to check them, but what should I be shooting for? Middle of the factory spec, tight? Loose?
Did some injector rehab
Question time. Can anybody learn me some valve clearances. I know how to check them, but what should I be shooting for? Middle of the factory spec, tight? Loose?
Reply
0
0
04-16-2017, 12:35 PM
#9014
Elite Member
Join Date: Mar 2007
Location: Santa Clara, CA
Posts: 5,166
Total Cats: 855
I typically go for the tight end of the spec on the theory that as long as it's within the spec it's fine, and the tight end is slightly more valve lift thus slightly more power.
--Ian
--Ian
Reply
0
0

 04-16-2017, 03:01 PM
#9019
Oops, forgot, you're starting from scratch... I stuck with SOB instead so needed to measure current shims.
EDIT: Never having done the swap over, I'd think you'd need to measure your current setup, by valve and compare the stock measurements against the Supertech setup (I don't have the stock length for the buckets) and order the applicable Supertech lash caps for each valve (assuming you aren't going to touch up the stem ends). So, my original mention of having a good set of gauges or micrometer is the same.
EDIT: Never having done the swap over, I'd think you'd need to measure your current setup, by valve and compare the stock measurements against the Supertech setup (I don't have the stock length for the buckets) and order the applicable Supertech lash caps for each valve (assuming you aren't going to touch up the stem ends). So, my original mention of having a good set of gauges or micrometer is the same.
Last edited by bahurd; 04-16-2017 at 03:20 PM.
Reply
0
0
04-16-2017, 09:30 PM
#9020
SADFab Destructive Testing Engineer
Thread Starter
iTrader: (5)
Join Date: Apr 2014
Location: Beaverton, USA
Posts: 18,642
Total Cats: 1,866
I'm starting from complete scratch. So valves+subs. Nothing else. I'll measure clearance without any shim, and see what I need. Then order 16 shims.
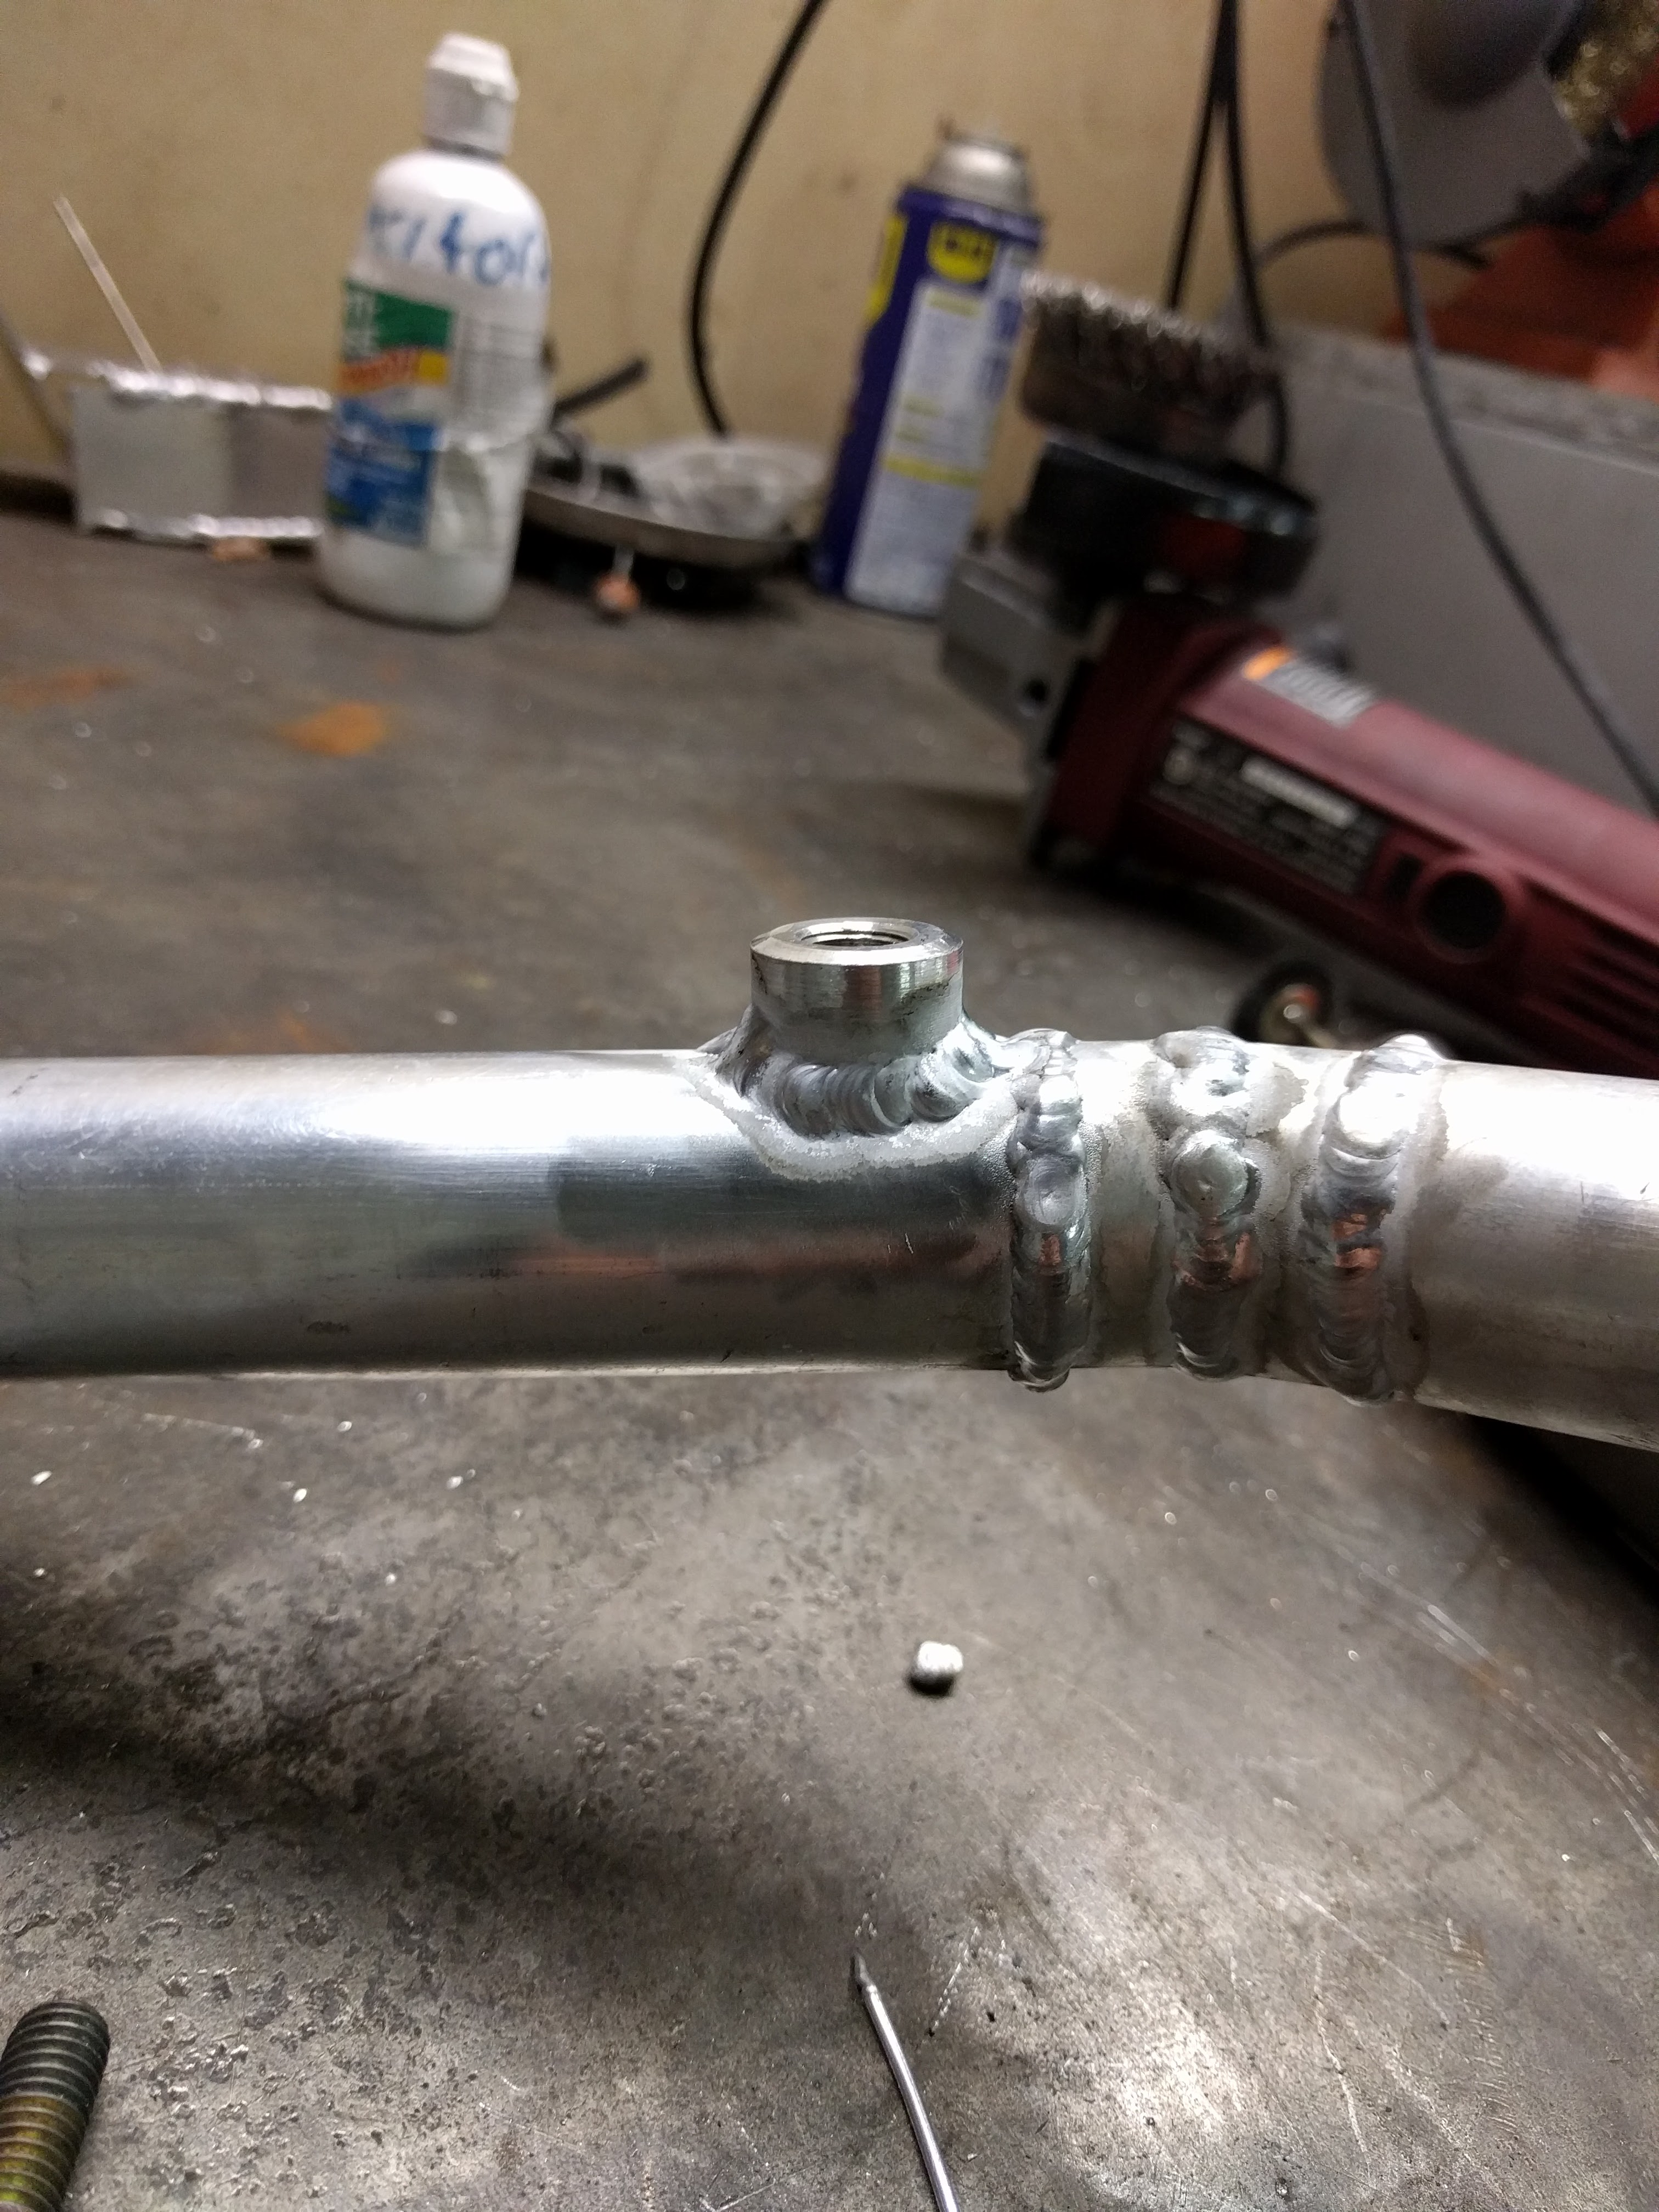
I really need the motor back. I'm starting to make up projects. Found a place for a trans temp sensor on the second try. This is my spare trans, so it got plugged for now.

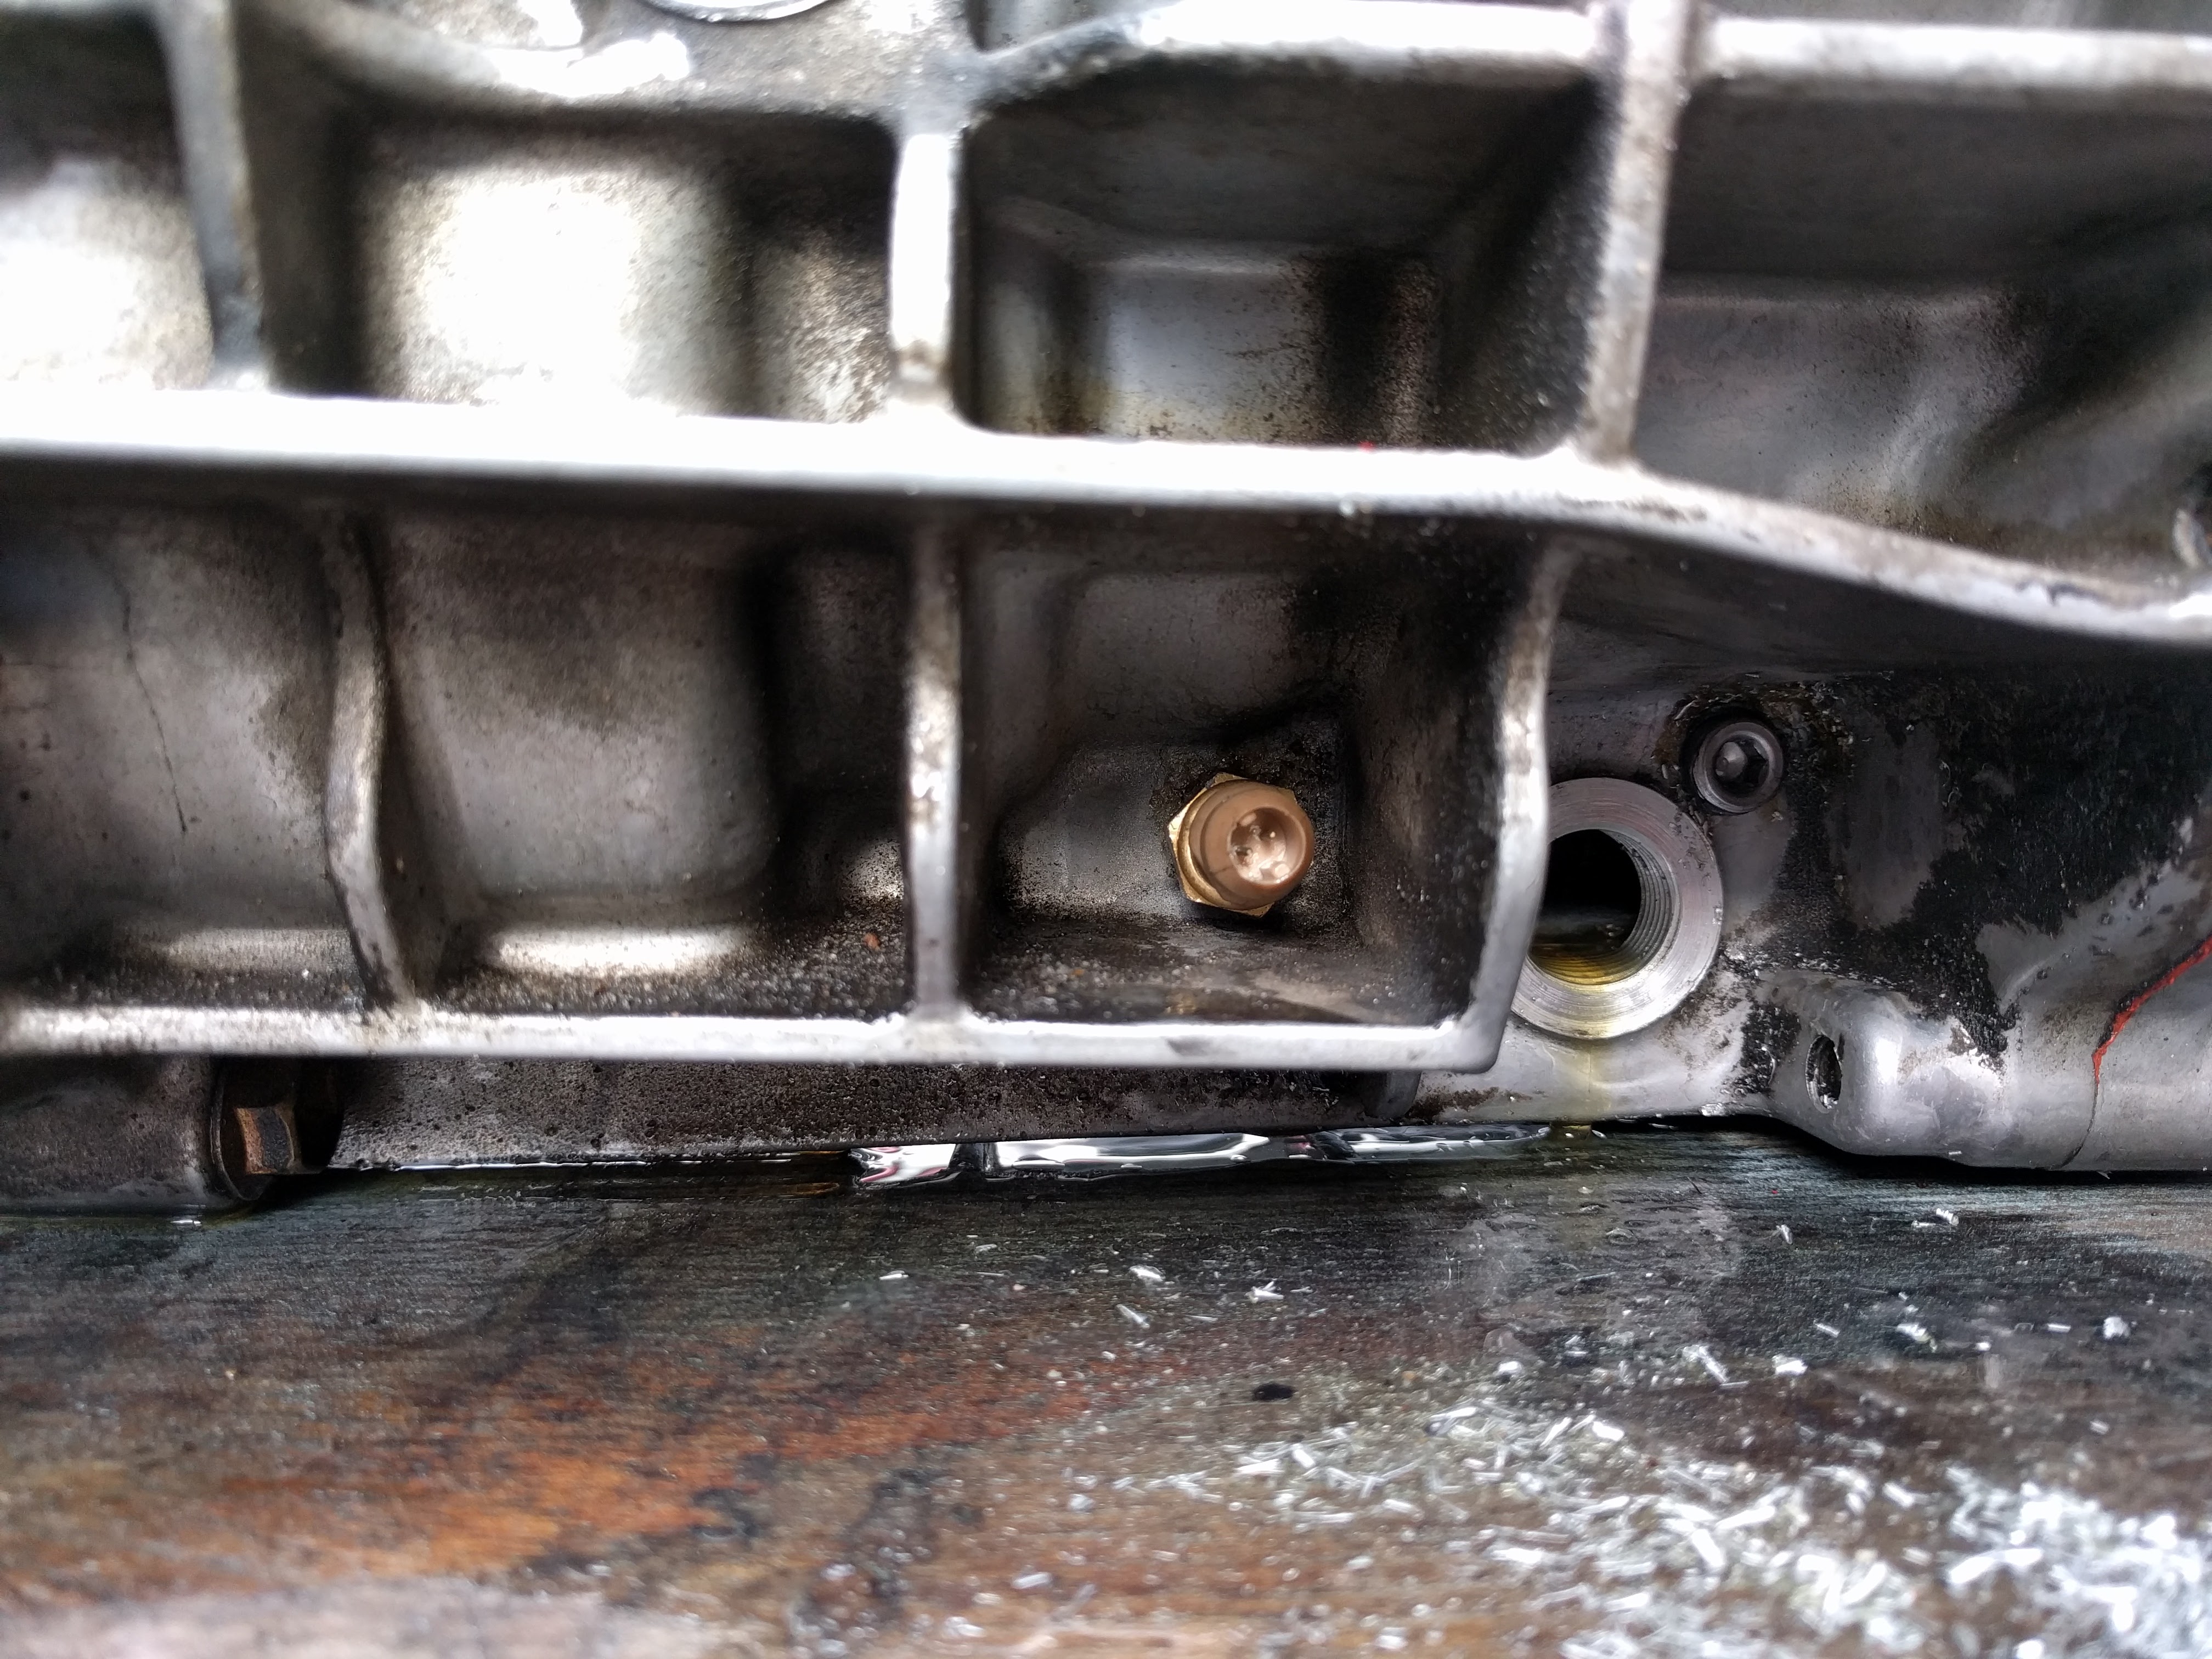
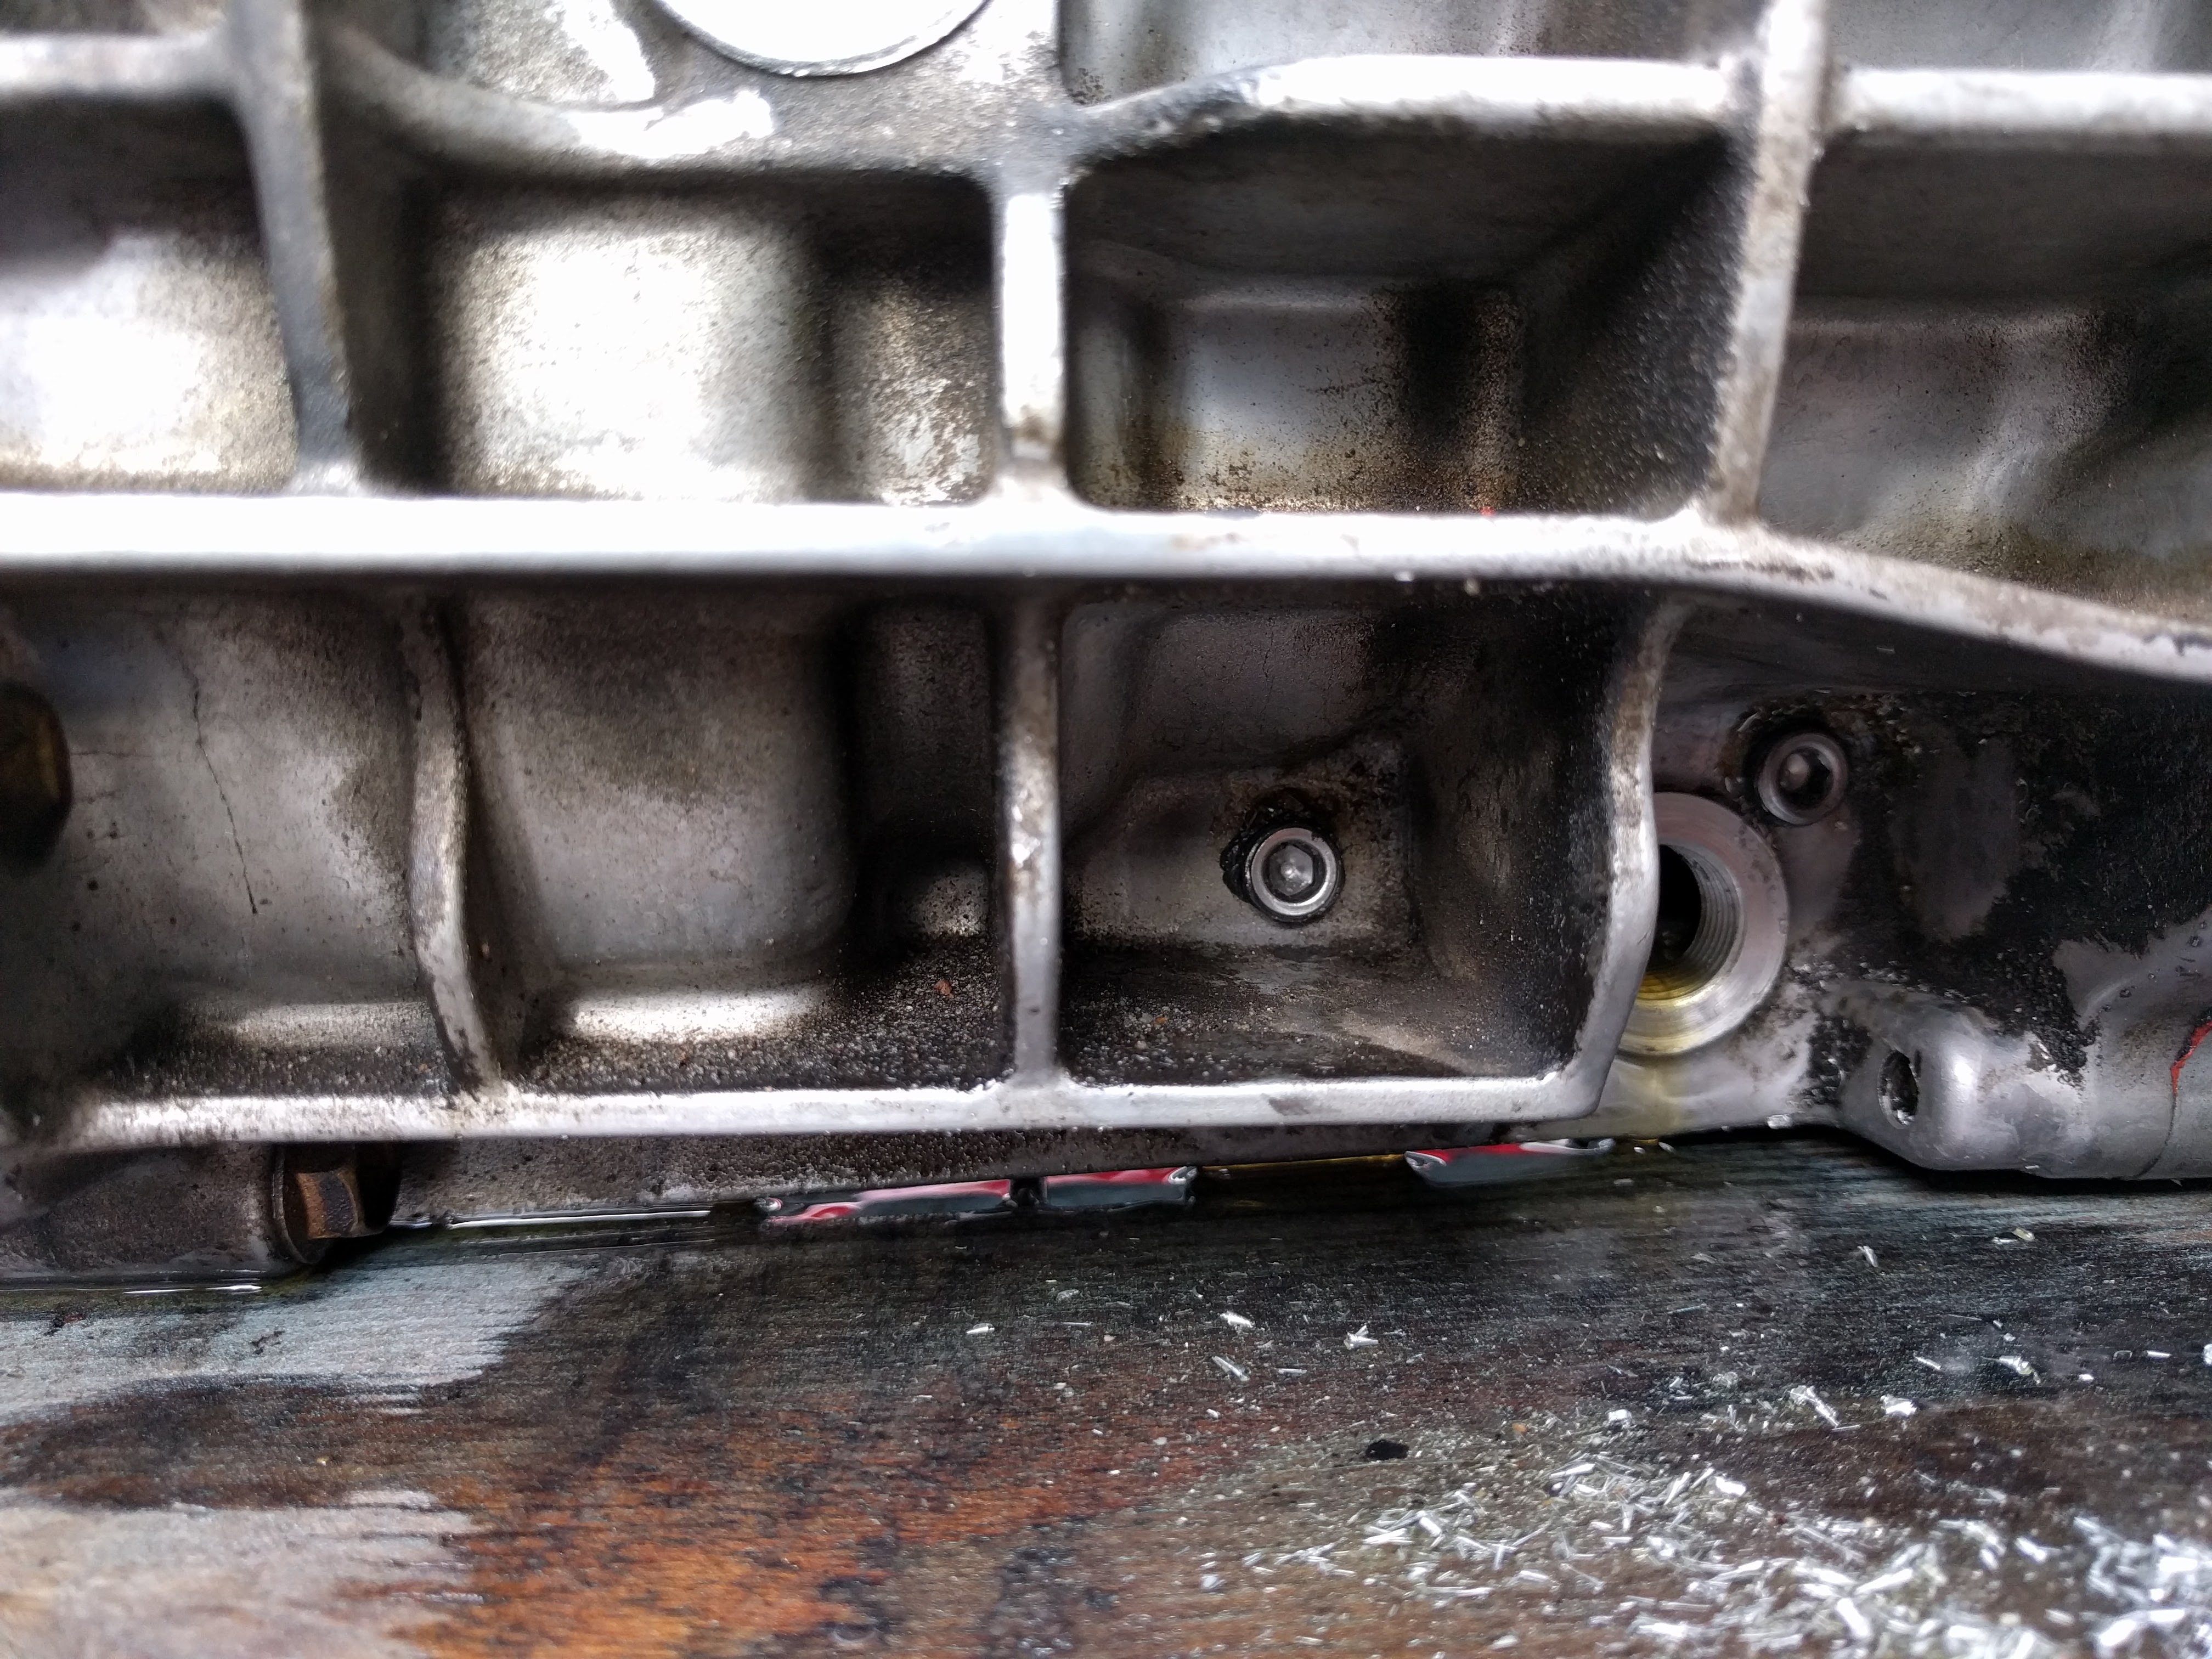
I really need the motor back. I'm starting to make up projects. Found a place for a trans temp sensor on the second try. This is my spare trans, so it got plugged for now.
Reply
0
0


