
BEAVIS' White NB Turbo Track Car


Thread Starter
Junior Member
Joined: Mar 2011
Posts: 212
Total Cats: 68
From: Melbourne, Australia
Went to a Sunday morning car meet a few weeks ago which was down the road from home.
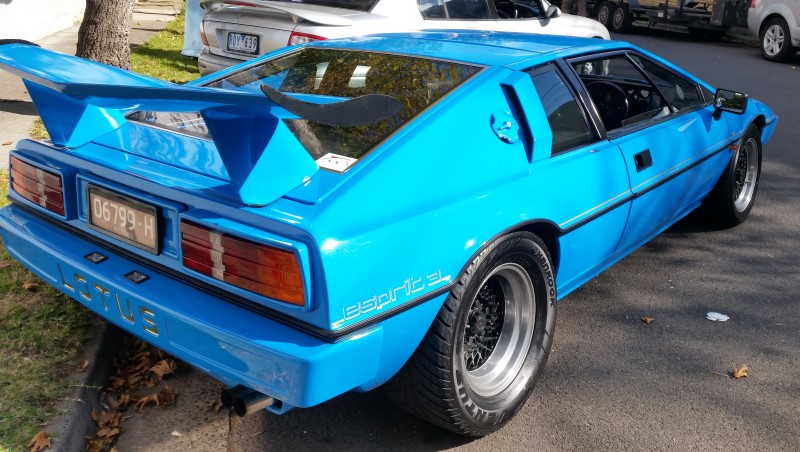
Was impressed with how 'lamborghini-like' this Lotus was with the wild wing and the huge tyres.... the colour was pretty awesome also.
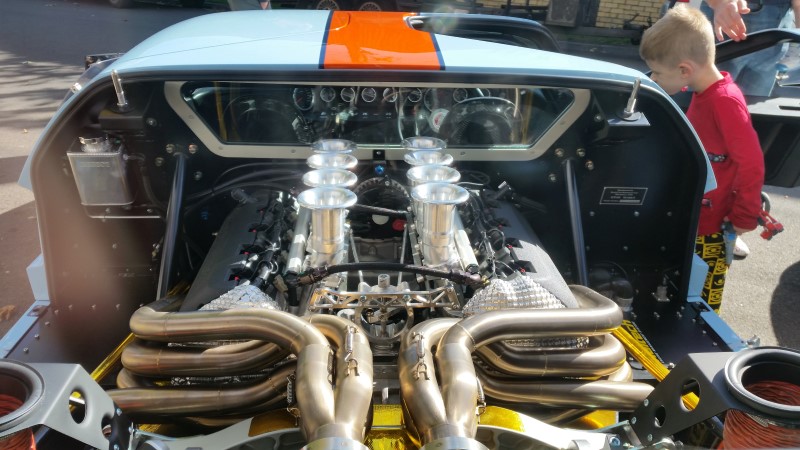
This thing was also very impressive, a mostly home built GT40 replica. Everything was very neat and meticulously built.
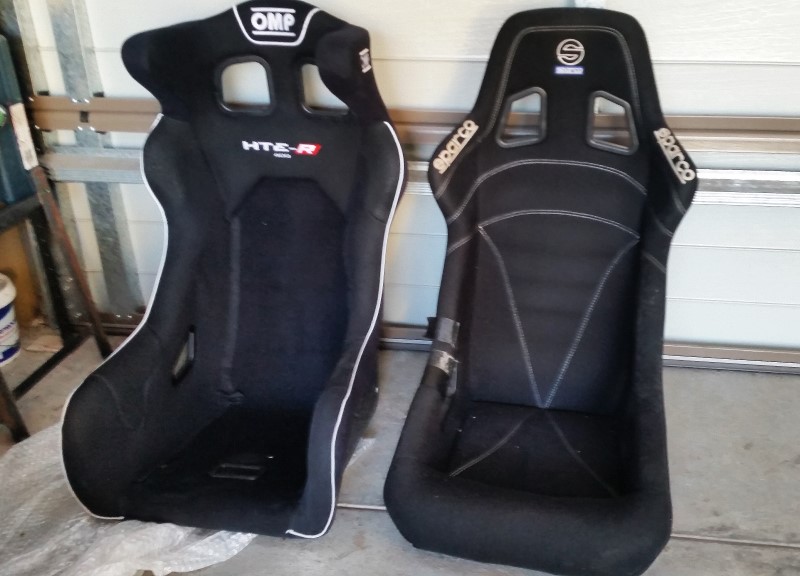
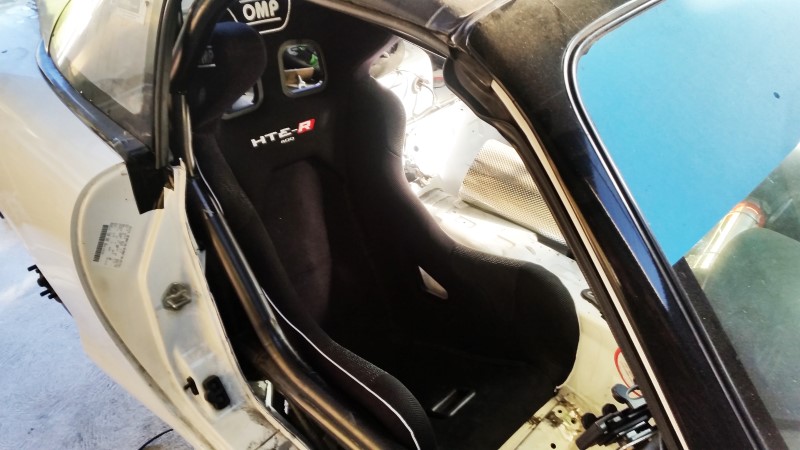
Bought a new (proper) seat for the track car. It's not easy finding a seat that will fit properly in an MX-5, particularly given I'm over 6ft.
This OMP showed promise with dimensions not too much larger than the old Sparco.
Making the seat fit, with half decent headroom, I decided to cut the floor.... sooo it doesn't look so neat, but trust me on this.
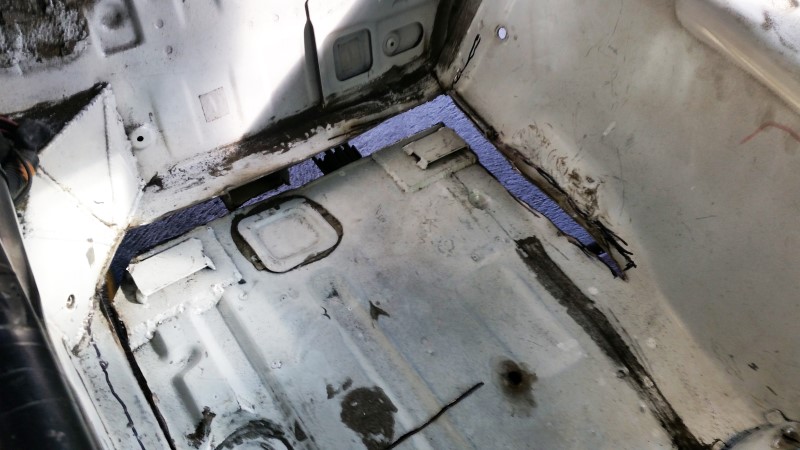
Seat goes in nice and snug. I haven't yet finished mounting it up, but its pleasing to finally have a seat thats actually got some comfort
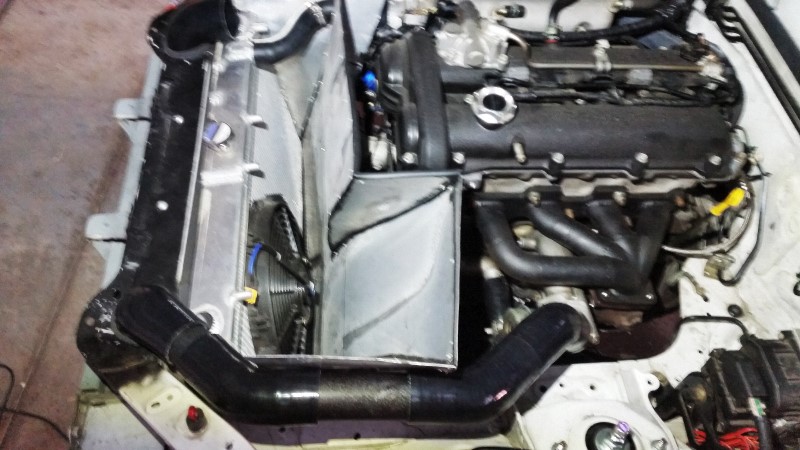
I've now mocked up the pipe work to the intercooler. (please excuse the horrid photo)
I'm running 2" tubing from the turbo the the cooler. And 2.5" from the cooler to the throttle body.
For the hoses on the exhaust side of the motor, I've purposefully gone around the radiator duct as much as I could. The the hose to the throttle body however will run a directly through the duct.
We picked up a new car....
So, despite what I mentioned in a previous post about the no obligation test drive of the ND, here's our new White 2.0l ND for my number 1 lady to daily drive.
I promise it's for her and not me.
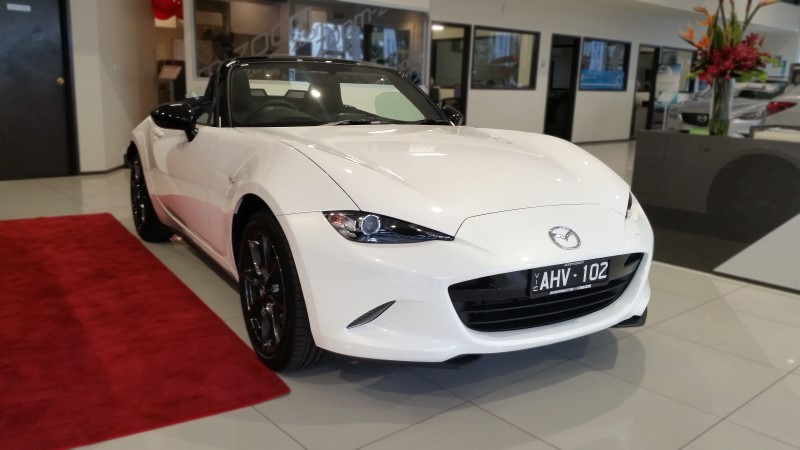
Oh and them feels when you come back to your car to find an SP parked next to it.
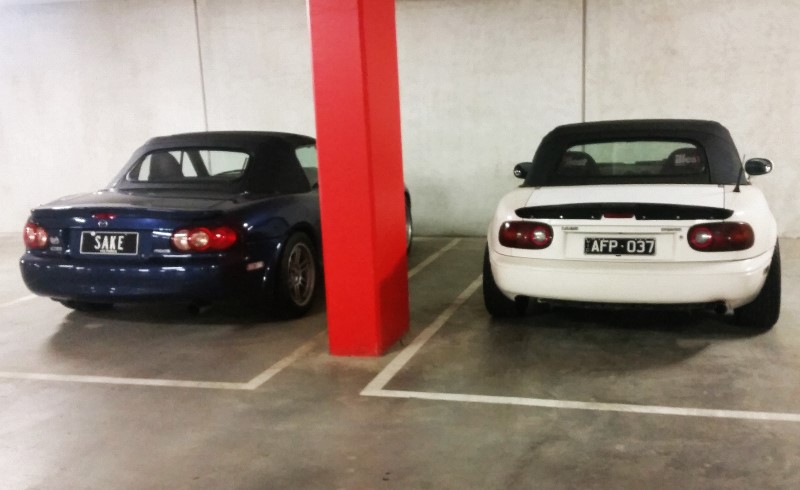
......so yeah, 3 white MX-5's in the garage now.
Was impressed with how 'lamborghini-like' this Lotus was with the wild wing and the huge tyres.... the colour was pretty awesome also.
This thing was also very impressive, a mostly home built GT40 replica. Everything was very neat and meticulously built.
Bought a new (proper) seat for the track car. It's not easy finding a seat that will fit properly in an MX-5, particularly given I'm over 6ft.
This OMP showed promise with dimensions not too much larger than the old Sparco.
Making the seat fit, with half decent headroom, I decided to cut the floor.... sooo it doesn't look so neat, but trust me on this.
Seat goes in nice and snug. I haven't yet finished mounting it up, but its pleasing to finally have a seat thats actually got some comfort
I've now mocked up the pipe work to the intercooler. (please excuse the horrid photo)
I'm running 2" tubing from the turbo the the cooler. And 2.5" from the cooler to the throttle body.
For the hoses on the exhaust side of the motor, I've purposefully gone around the radiator duct as much as I could. The the hose to the throttle body however will run a directly through the duct.
We picked up a new car....
So, despite what I mentioned in a previous post about the no obligation test drive of the ND, here's our new White 2.0l ND for my number 1 lady to daily drive.
I promise it's for her and not me.
Oh and them feels when you come back to your car to find an SP parked next to it.
......so yeah, 3 white MX-5's in the garage now.
Reply
 0
0

0
Thread Starter
Junior Member
Joined: Mar 2011
Posts: 212
Total Cats: 68
From: Melbourne, Australia
Decided to supercharge my street car....
Took a weekend to do the bulk of the work and a couple of days here and there afterward to clean up the details.
Please enjoy my attempt at a snazzy video.
Took a weekend to do the bulk of the work and a couple of days here and there afterward to clean up the details.
Please enjoy my attempt at a snazzy video.
Reply
1
1


 Good video though very snazzy
Thread Starter
Junior Member
Joined: Mar 2011
Posts: 212
Total Cats: 68
From: Melbourne, Australia
So we had our first trial with making the new wing.
The alloy plate is used for mounting the wing to the car, and for the wing endplates to attach to. However for this first test we decided to use some plywood as the plates cost about $50.

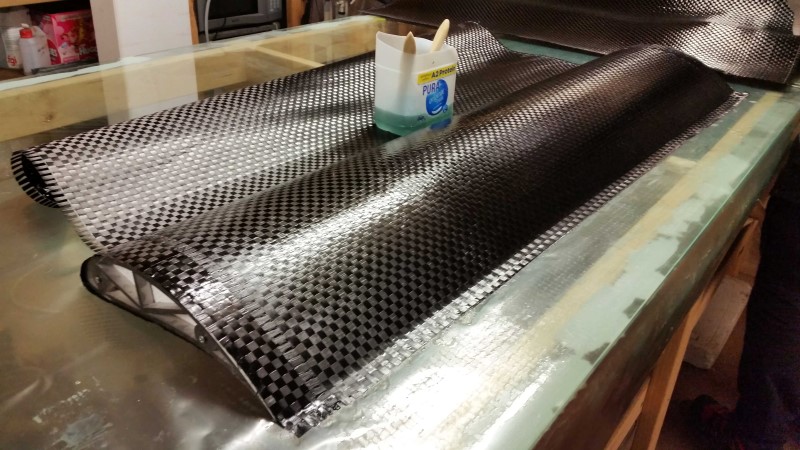
Weighing the foam core, it was under 290grams. (0.6pounds). We also used about 1.5kg of resin. The wing was cut to 1.4m span to match the car it will bolt to.
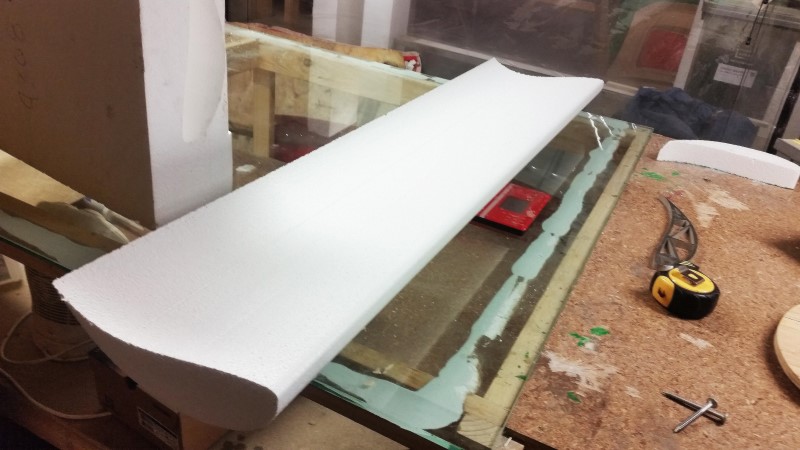
For this test piece, we opted for a few layers of fibreglass, a layer of plain weave carbon fibre and some strategically placed carbon offcuts for strengthening.
You can see our plywood end pieces in place
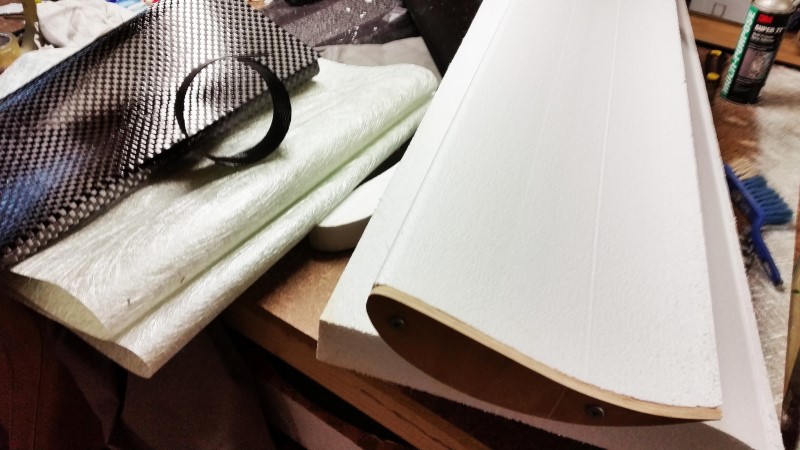
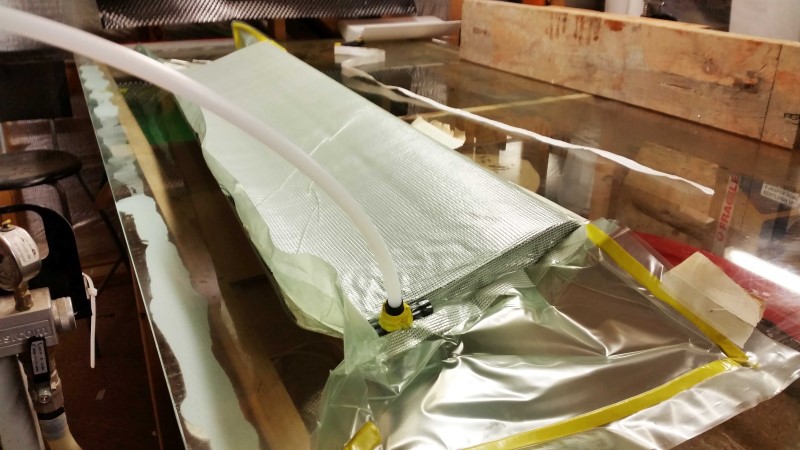
After layup, the wing was wrapped in plastic and returned to its original block to help with holding shape.
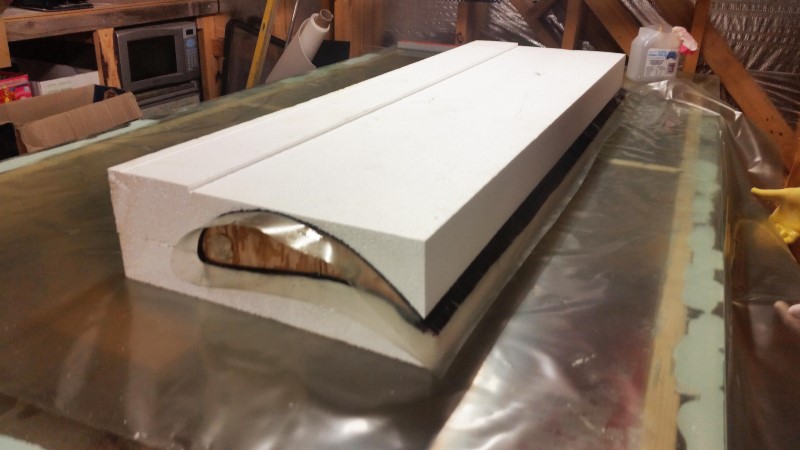
The whole block was placed in a bag. Vacuum pump hooked up. Start sucking.
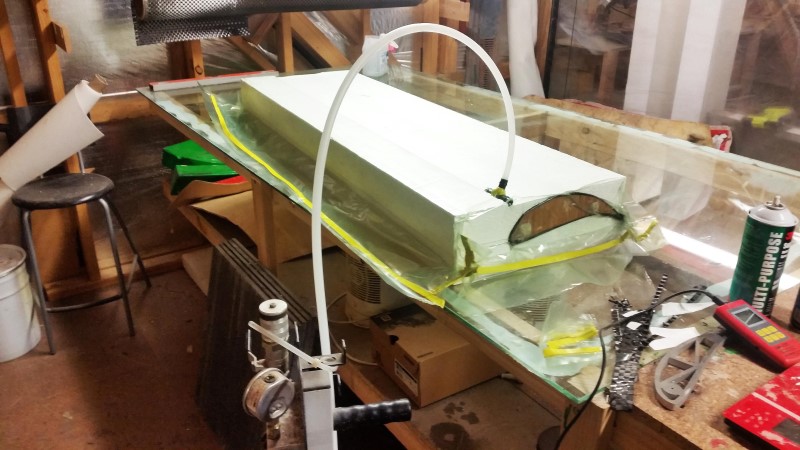
After a few hours, we went to check the progress only to discover that the heat of the curing epoxy had exceeded the limits of the polystyerene. The end result was a very warped part.
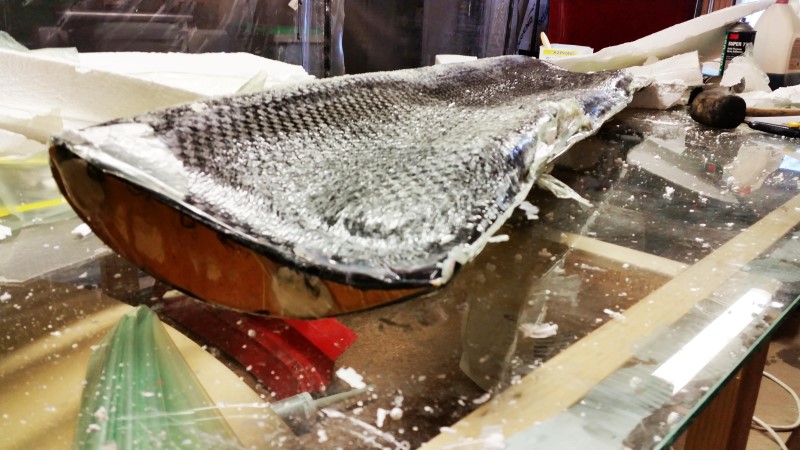
So we need to find an alternative foam, or change the choice of resin, or change the process to reduce the heating effects... or some other alternatives which we have not pondered up yet.
We trialed the strength of the wing even in its deformed state. With near 200kg static weight in the centre of the wing, it did not flex, however any more than that and the wing started to fail.
Nonetheless, it was a good test.
The alloy plate is used for mounting the wing to the car, and for the wing endplates to attach to. However for this first test we decided to use some plywood as the plates cost about $50.
Weighing the foam core, it was under 290grams. (0.6pounds). We also used about 1.5kg of resin. The wing was cut to 1.4m span to match the car it will bolt to.
For this test piece, we opted for a few layers of fibreglass, a layer of plain weave carbon fibre and some strategically placed carbon offcuts for strengthening.
You can see our plywood end pieces in place
After layup, the wing was wrapped in plastic and returned to its original block to help with holding shape.
The whole block was placed in a bag. Vacuum pump hooked up. Start sucking.
After a few hours, we went to check the progress only to discover that the heat of the curing epoxy had exceeded the limits of the polystyerene. The end result was a very warped part.
So we need to find an alternative foam, or change the choice of resin, or change the process to reduce the heating effects... or some other alternatives which we have not pondered up yet.
We trialed the strength of the wing even in its deformed state. With near 200kg static weight in the centre of the wing, it did not flex, however any more than that and the wing started to fail.
Nonetheless, it was a good test.
Reply
1
1

Junior Member
Joined: Mar 2015
Posts: 179
Total Cats: 74
From: Columbus Indiana
When I did Formula SAE wings in college, we made our wings the same way, and used this for cores, can't recall which weight, I know we played with a lot of different ones.
Urethane Foam , Expanding Marine Polyurethane Foam
We would just pour it in a mold, pop it out after a few hours. Then sand the core, wrap it in carbon, put back in mold and cure. The problems we ran into, came from having too thick of molds made from MDF, and we couldn't get things to cure in the middle.
Reply
0
0
Thread Starter
Junior Member
Joined: Mar 2011
Posts: 212
Total Cats: 68
From: Melbourne, Australia
We spent some time trying to find a foam supplier that would cut the shape for us. We were trying to avoid having to make our own hot-wire cutter.
Even with a CAD drawing supplied, many foam suppliers were incapable of cutting to our desired shape.
One supplier wanted over $400AUD for a pair of wings. However I think they priced it because they didn't want the work. Communication with them was atrocious.
In the end we found this guy who supplied us with cut to spec polystyrene for under $100 per raw wing foam. However his results were initially not very precise. In fact the first cuts we got from him were nothing like the supplied CAD, it's almost like he looked at the picture, and just randomly cut a roughly similar shape. We gave him a second chance and the results improved.
I think we can all agree that polystyrene is not the best choice of foam, but it is cheap and readily available.
Reply
0
0
Thread Starter
Junior Member
Joined: Mar 2011
Posts: 212
Total Cats: 68
From: Melbourne, Australia
Just a small update on things that aren't my car.
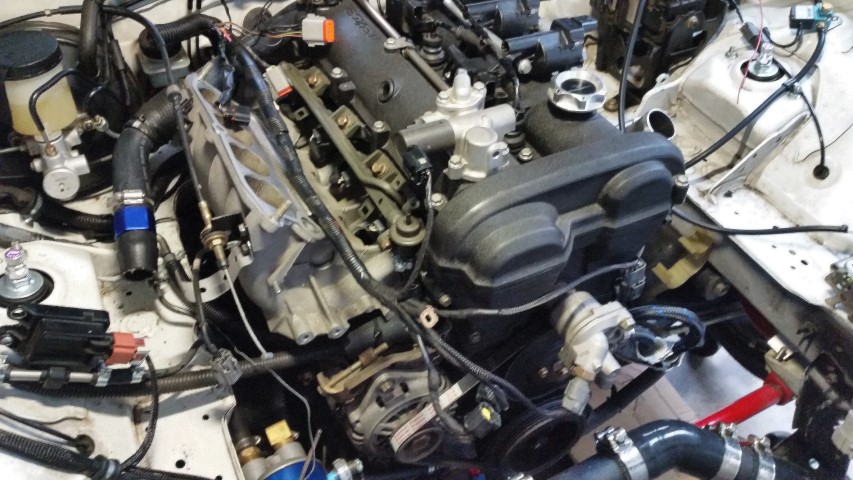
Had a visit from a 300+hp NB recently to help make an airbox and bracket for the COPs.
It was certainly interesting to get up close to a car running a turbo setup not too dissimilar to what I plan on using. Albeit this car is a little more beefy in the engine department.

Also visited Sandown raceway with the lightyear for a weekend of the state championships to enjoy the smell of fuel and rubber in the air and for an opportunity to get some inspiration and ideas on how to change/improve my own car.
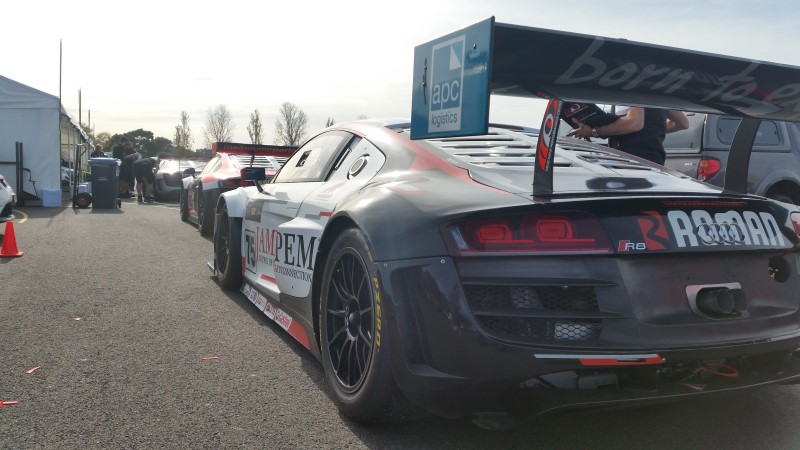
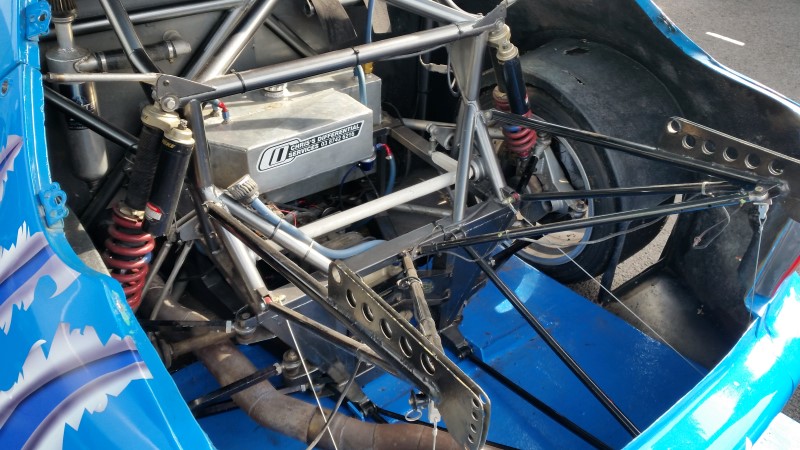
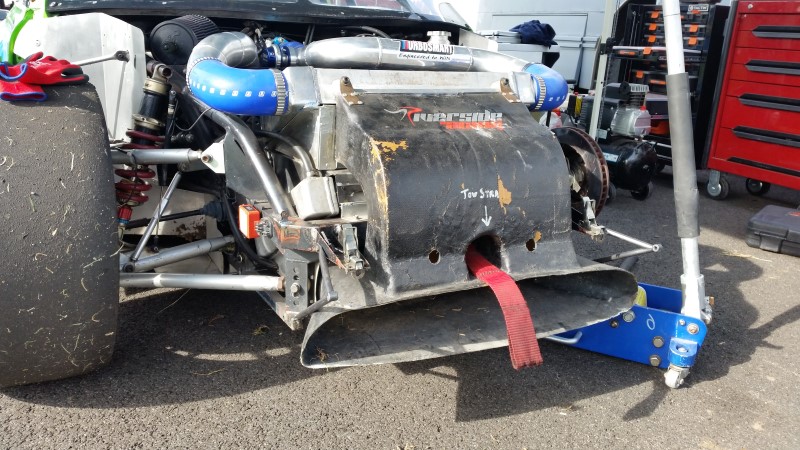
With aero always on the mind, I really liked the many details of the Audi R8's. The design of the front end was awesome. One of these was for sale for only $150,000aud.
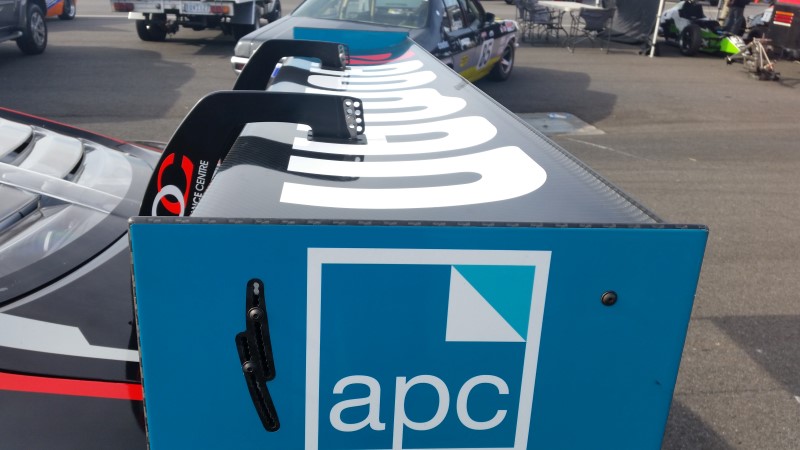
This sports sedan with its body removed offered a close up view of some sexy details not normally seen.
Had a visit from a 300+hp NB recently to help make an airbox and bracket for the COPs.
It was certainly interesting to get up close to a car running a turbo setup not too dissimilar to what I plan on using. Albeit this car is a little more beefy in the engine department.
Also visited Sandown raceway with the lightyear for a weekend of the state championships to enjoy the smell of fuel and rubber in the air and for an opportunity to get some inspiration and ideas on how to change/improve my own car.
With aero always on the mind, I really liked the many details of the Audi R8's. The design of the front end was awesome. One of these was for sale for only $150,000aud.
This sports sedan with its body removed offered a close up view of some sexy details not normally seen.
Reply
0
0
Thread Starter
Junior Member
Joined: Mar 2011
Posts: 212
Total Cats: 68
From: Melbourne, Australia
I forgot to post up the video i made of the wing.
https://www.youtube.com/watch?v=z00jNeLnx7U&ab_channel=BEAVISHSV

So needless to say, attempt 2 was much better than attempt 1.
This wing is strong, weighs about 2.7kg (~6lbs) and works well on the silver NB.
The gurney flap was cut down to about 4 or 5mm.
We will hopefully make another wing soon, however there is a good chance we may try a different method again.... and make a wider wing.
https://www.youtube.com/watch?v=z00jNeLnx7U&ab_channel=BEAVISHSV
So needless to say, attempt 2 was much better than attempt 1.
This wing is strong, weighs about 2.7kg (~6lbs) and works well on the silver NB.
The gurney flap was cut down to about 4 or 5mm.
We will hopefully make another wing soon, however there is a good chance we may try a different method again.... and make a wider wing.
Reply
1
1
Thread Starter
Junior Member
Joined: Mar 2011
Posts: 212
Total Cats: 68
From: Melbourne, Australia
So here are some pics of us making the second wing.
Laying up the wing, some 3 or 4 layers of carbon weave, waterjet cut 12mm alloy end plate mounts. The shape was designed by lightyear and myself, and then drawn in CAD by yours truly.
Vacuum bagging the whole lot because wings love pressure differentials.
Makeshift autoclave to aid with post curing, $12 heater and some old blankies to keep 'er warm.
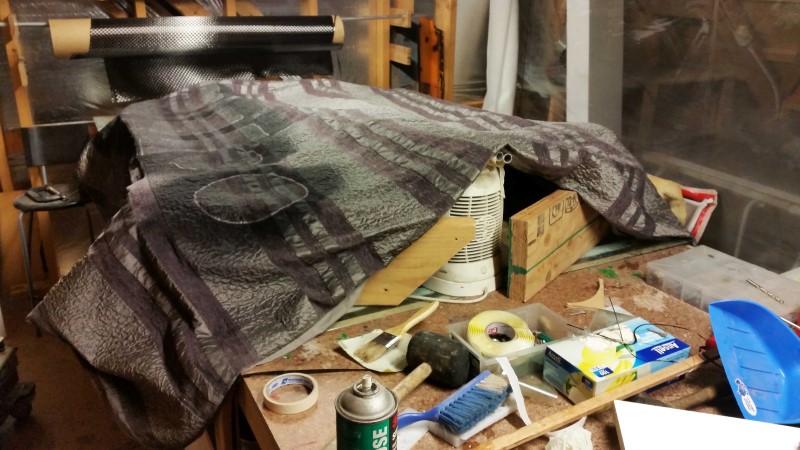
Straight out of the bag, needs a few hours of sanding and cleaning up.
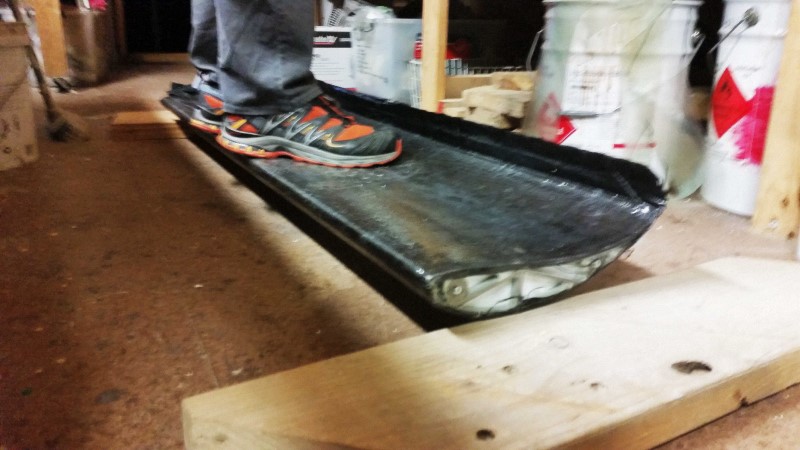
Strength test, after this photo was taken we had a go at standing on the wing at the same time. The wing didn't bat an eyelid.
Sanded, trimmed, holes tapped for mounting to the wing endplates. Not 100% finished in this pic, but almost....
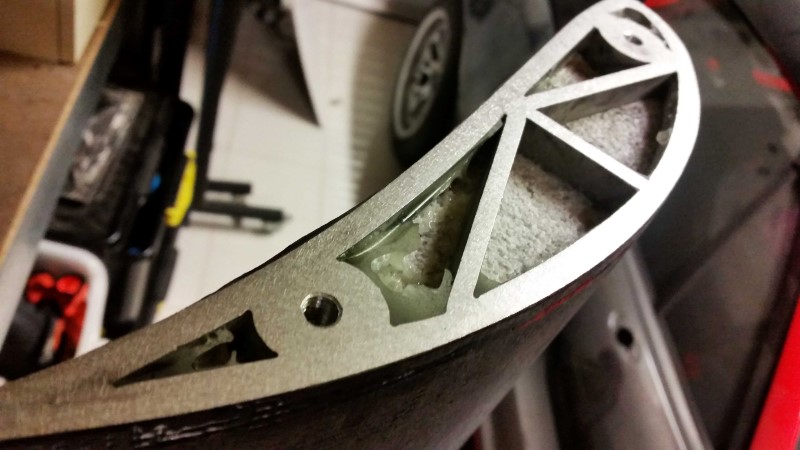
Laying up the wing, some 3 or 4 layers of carbon weave, waterjet cut 12mm alloy end plate mounts. The shape was designed by lightyear and myself, and then drawn in CAD by yours truly.
Vacuum bagging the whole lot because wings love pressure differentials.
Makeshift autoclave to aid with post curing, $12 heater and some old blankies to keep 'er warm.
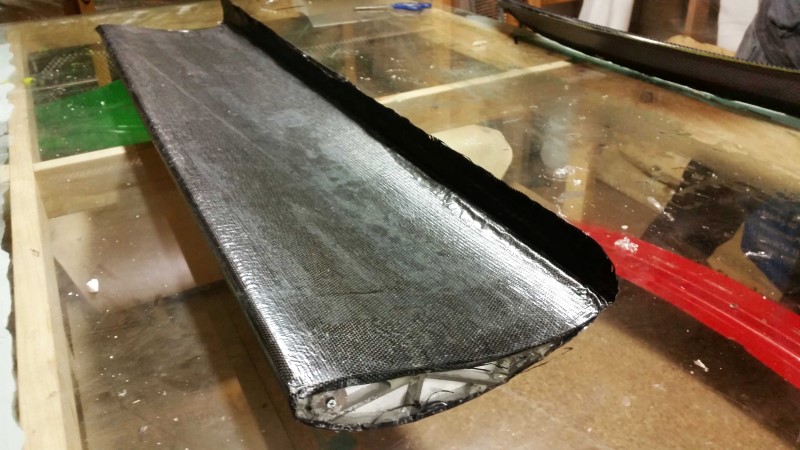
Straight out of the bag, needs a few hours of sanding and cleaning up.
Strength test, after this photo was taken we had a go at standing on the wing at the same time. The wing didn't bat an eyelid.
Sanded, trimmed, holes tapped for mounting to the wing endplates. Not 100% finished in this pic, but almost....
Reply
2
2
Thread Starter
Junior Member
Joined: Mar 2011
Posts: 212
Total Cats: 68
From: Melbourne, Australia
I'm overdue for an update.
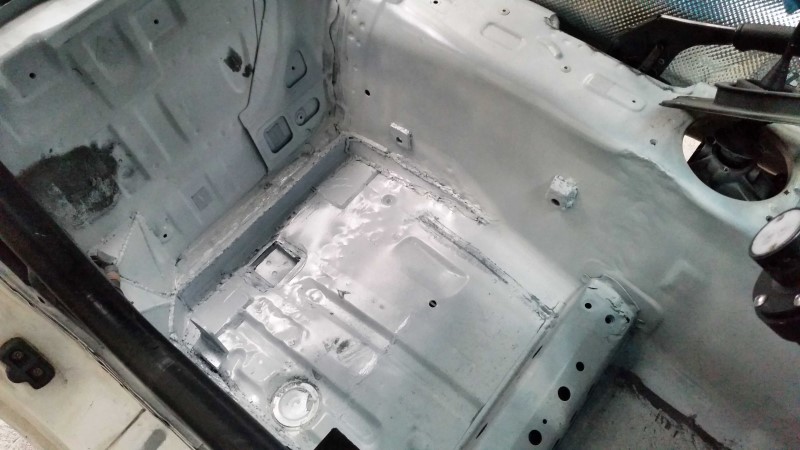
Floor cut is done, the OMP seat can bolt in and STAY in now, and it is actually reasonably low...... Have I mentioned how much I hate MX-5's and their lack of room for seats?
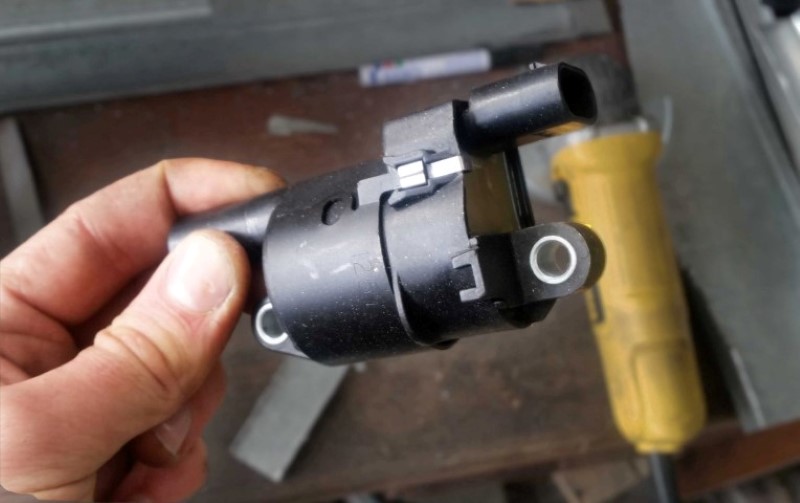
Anyway.... onto something different. LS2 Corvette Coils.
Thankfully, these are easily available in Australia because every second V8 Holden runs the LS motor.
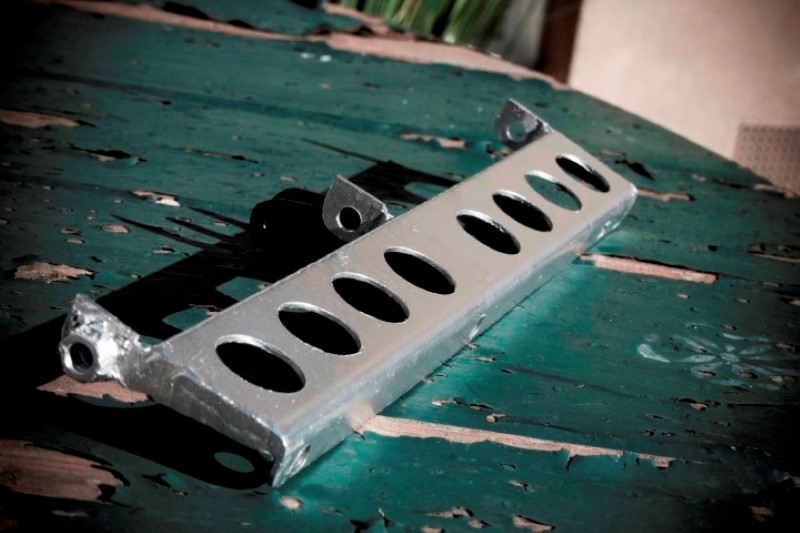
Well I need to find a nice and neat way to mount these, so, bust out my low spec 'fabrication' tools. Angle grinder, hammer, some bits of steel.
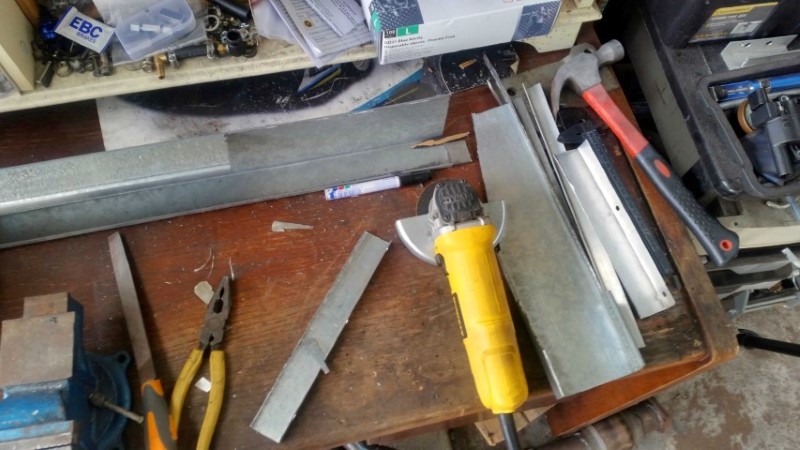
So, after an hour or two of work, this was the mockup of what I had in mind.
I then cut down the M6 rod, welded a nut to the end of it to make a 200mm long bolt.
And cut up some alloy tube for spacers between the coil packs.

With the main bracket now done. I added some very necessary speed holes and gave it a shot of silver paint.
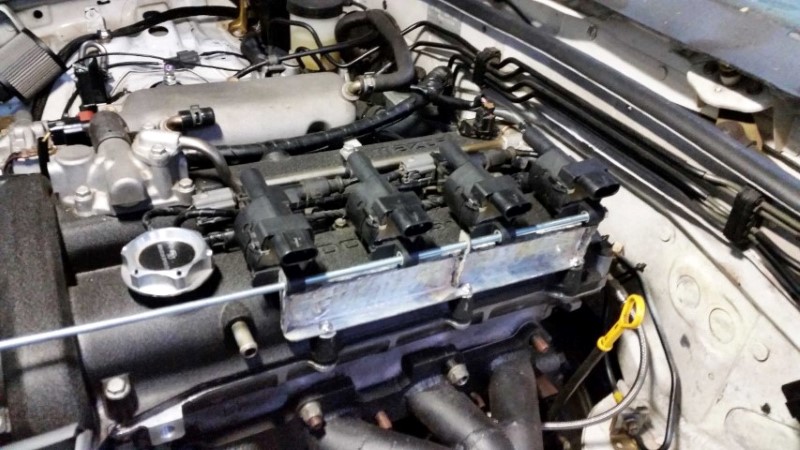
All Bolted up to the motor.
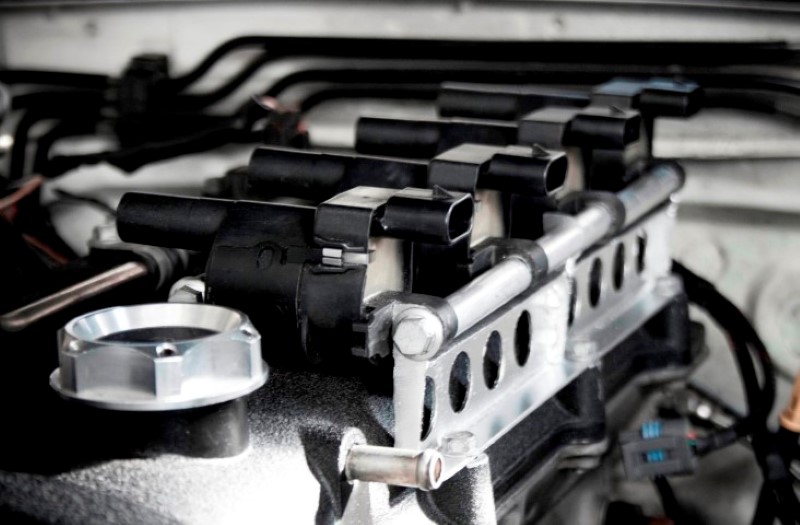
There is also a length of M6 rod on the other side of the coil packs with alloy tube spaced between them and a small steel brace to keep them supported. I tried to make it subtle on that side and I think I succeeded.
Lastly, wiring..... a work in progress at the moment. Thanks to Alex 'bartune' Barton for the help with this.
Floor cut is done, the OMP seat can bolt in and STAY in now, and it is actually reasonably low...... Have I mentioned how much I hate MX-5's and their lack of room for seats?
Anyway.... onto something different. LS2 Corvette Coils.
Thankfully, these are easily available in Australia because every second V8 Holden runs the LS motor.
Well I need to find a nice and neat way to mount these, so, bust out my low spec 'fabrication' tools. Angle grinder, hammer, some bits of steel.
So, after an hour or two of work, this was the mockup of what I had in mind.
I then cut down the M6 rod, welded a nut to the end of it to make a 200mm long bolt.
And cut up some alloy tube for spacers between the coil packs.
With the main bracket now done. I added some very necessary speed holes and gave it a shot of silver paint.
All Bolted up to the motor.
There is also a length of M6 rod on the other side of the coil packs with alloy tube spaced between them and a small steel brace to keep them supported. I tried to make it subtle on that side and I think I succeeded.
Lastly, wiring..... a work in progress at the moment. Thanks to Alex 'bartune' Barton for the help with this.
Reply
0
0
Thread Starter
Junior Member
Joined: Mar 2011
Posts: 212
Total Cats: 68
From: Melbourne, Australia
I took the Supercharged street car for a drive to Phillip Island.
While I was not competing in the track sprint day, I did get a chance to do a few slow laps around the track at lunch time...
Video of the day:
While I was not competing in the track sprint day, I did get a chance to do a few slow laps around the track at lunch time...
Video of the day:
Reply
0
0
Thread Starter
Junior Member
Joined: Mar 2011
Posts: 212
Total Cats: 68
From: Melbourne, Australia
I was very satisfied when I fired up the ECU last weekend and everything seems to be working well.
After all the:
We tested injectors, checked the LS2 coil packs, configured the oil temp and oil pressure sensors, setup the MAC valve..... and everything was working as expected. The MS3 was happy and so am I.
Next thing to do is update the ECU firmware, and get the flex fuel sensor working.
The docco I've looked at suggests I need to be using the 'clutch switch' input to the ecu, and it appears the firmware the ECU is currently running is missing the flex sensor functionality.
While there is a very good chance I will run the car on dedicated E85, I might as well set the flex sensor up if I can.
After all the:
- rewiring of sensors
- new injector and coil pack looms
- deletion of all the unnecessary dash wiring
- hefty wire cleanup from many of the wires in the engine bay
We tested injectors, checked the LS2 coil packs, configured the oil temp and oil pressure sensors, setup the MAC valve..... and everything was working as expected. The MS3 was happy and so am I.
Next thing to do is update the ECU firmware, and get the flex fuel sensor working.
The docco I've looked at suggests I need to be using the 'clutch switch' input to the ecu, and it appears the firmware the ECU is currently running is missing the flex sensor functionality.
While there is a very good chance I will run the car on dedicated E85, I might as well set the flex sensor up if I can.
Reply
0
0

Thread Starter
Junior Member
Joined: Mar 2011
Posts: 212
Total Cats: 68
From: Melbourne, Australia
I've always found getting seats in an mx5/miata a painful experience.
They are never low enough and there's never enough head room.
If you have a cage, or If you're tall (6ft or more) ... you're going to have a bad time
They are never low enough and there's never enough head room.
If you have a cage, or If you're tall (6ft or more) ... you're going to have a bad time
Reply
0
0
Thread Starter
Junior Member
Joined: Mar 2011
Posts: 212
Total Cats: 68
From: Melbourne, Australia
Update time!
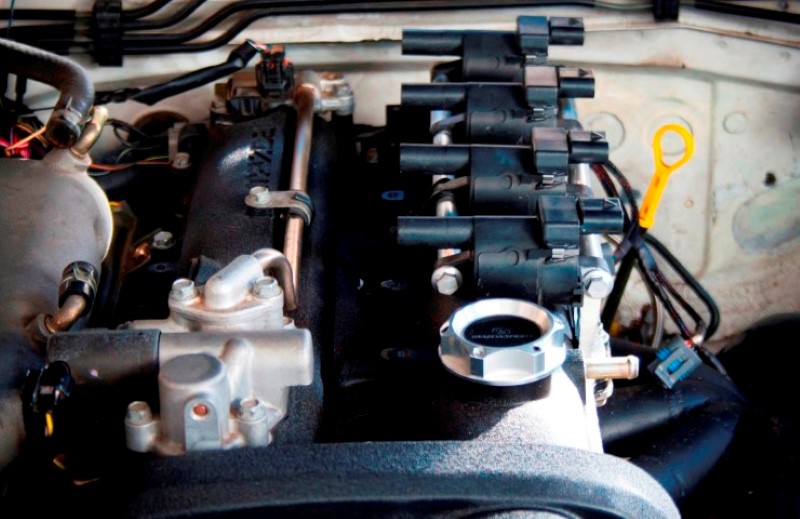
While reworking the wiring for the coil packs, things got a little out of hand and all the wires from the engine loom have now been trimmed and rewrapped.(As I mentioned in an earlier post)
You can see the two Deutsch plugs for the injectors and coil packs. And all the front wires now run down the middle of the intake manifold, no more unsightly wires along the motor and out the front like you see on a stock NB.
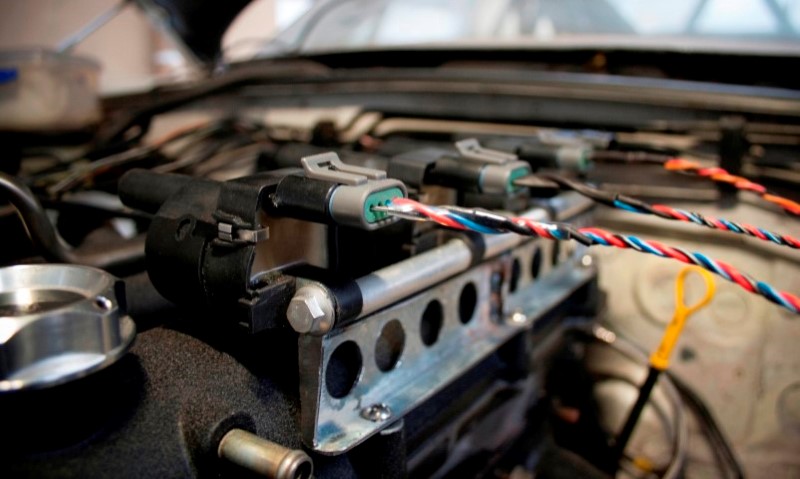
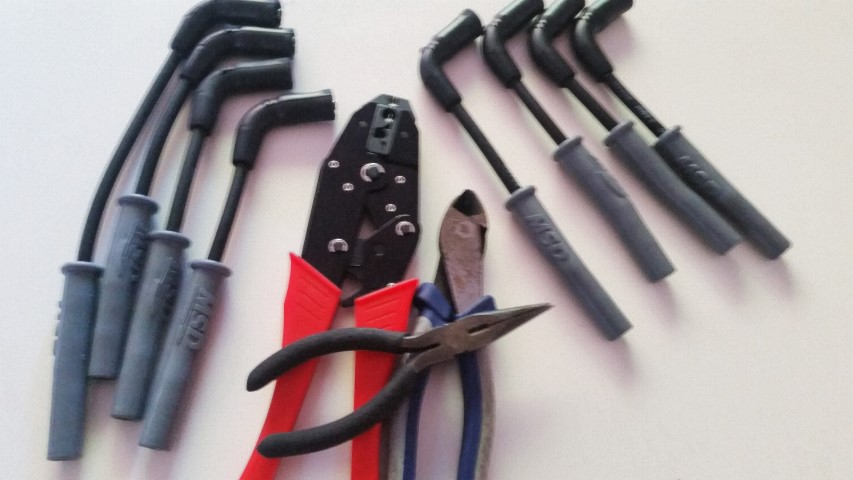
New coil packs needed new plug leads.
So I got myself some fat wire, boots and crimpers.

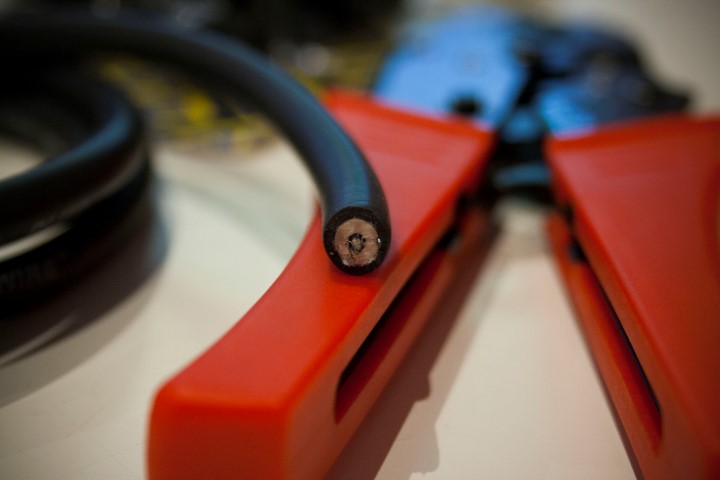
After a few hours one evening in front of the telly.... 4 leads for me and 4 spares in the event of an issue in the future.
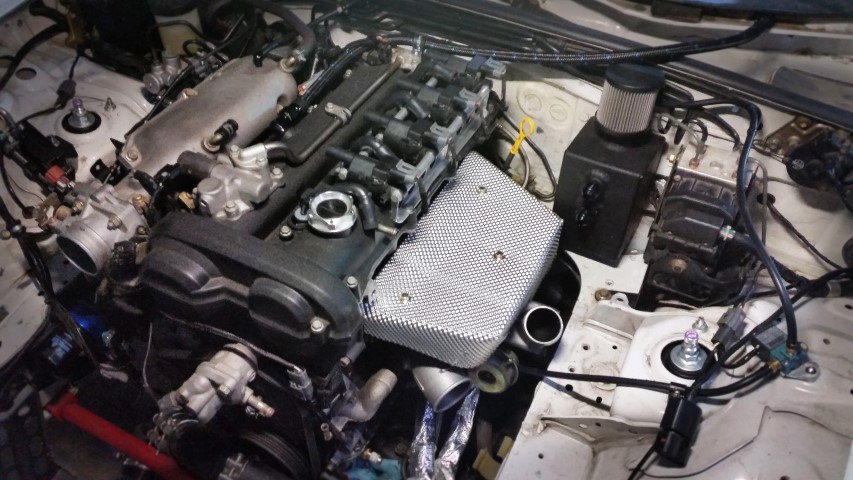
I need to be sure to manage temperatures, so I've made a heatshield for the exhaust manifld/turbo.
Designed and folded from CAD, the mockup worked well because the end result looks quite reasonable.
I made it extra deep on the rear/turbine side.
Welded some studs to the manifold and it now bolts on quite happily.
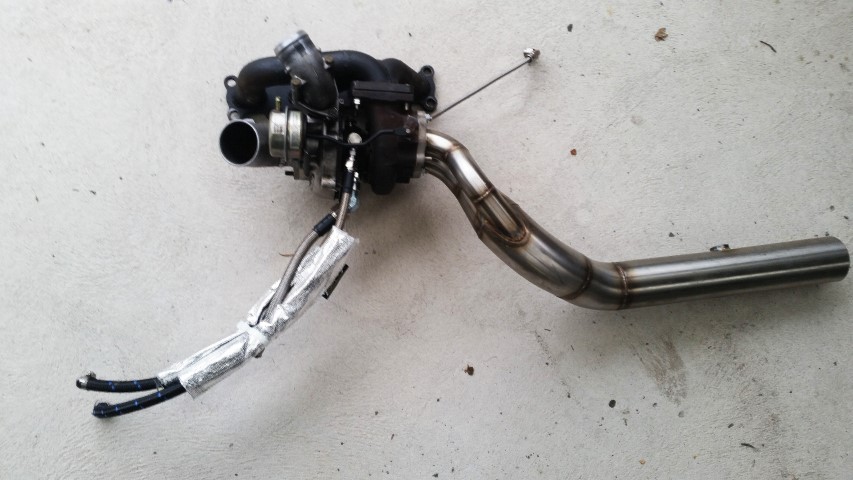
Had to pull the manifold off the car to weld the studs on, so here's the neat little package with turbo, lines and downpipe all together.
It's tricky, but this whole lot can be installed onto the car assembled as is.
While reworking the wiring for the coil packs, things got a little out of hand and all the wires from the engine loom have now been trimmed and rewrapped.(As I mentioned in an earlier post)
You can see the two Deutsch plugs for the injectors and coil packs. And all the front wires now run down the middle of the intake manifold, no more unsightly wires along the motor and out the front like you see on a stock NB.
New coil packs needed new plug leads.
So I got myself some fat wire, boots and crimpers.
After a few hours one evening in front of the telly.... 4 leads for me and 4 spares in the event of an issue in the future.
I need to be sure to manage temperatures, so I've made a heatshield for the exhaust manifld/turbo.
Designed and folded from CAD, the mockup worked well because the end result looks quite reasonable.
I made it extra deep on the rear/turbine side.
Welded some studs to the manifold and it now bolts on quite happily.
Had to pull the manifold off the car to weld the studs on, so here's the neat little package with turbo, lines and downpipe all together.
It's tricky, but this whole lot can be installed onto the car assembled as is.
Reply
1
1
Thread Starter
Junior Member
Joined: Mar 2011
Posts: 212
Total Cats: 68
From: Melbourne, Australia
Sorry for keeping you all in the dark lately. Life gets in the way sometimes.
After some 3 or more years in use, I've removed the fastback from the track car.....
It's being demoted, but thankfully it has been replaced by a newer, lighter version, kindly donated by the Lightyear.
So I have started work on mounting the new roof. It will then need to be prepped, painted and windows installed.
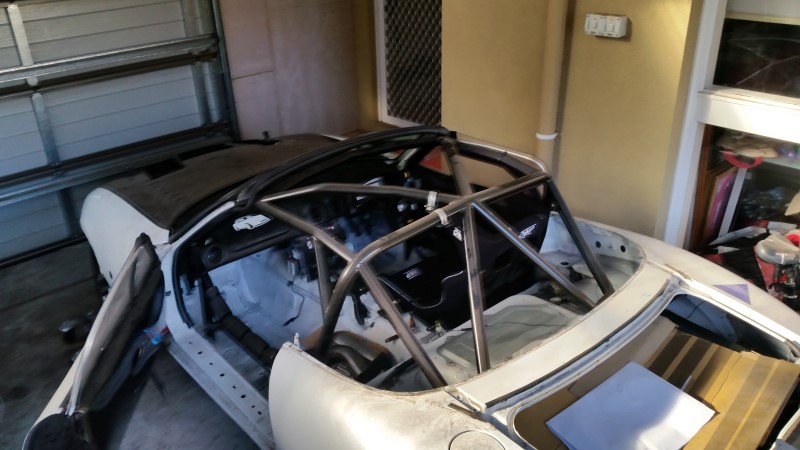
But the roof hasn't gone far. At least not for the moment.
Speaking of the NA, I put it on the dyno recently to see just whether or not the supercharger was running everything ok and not going result in a surprise kaboom.
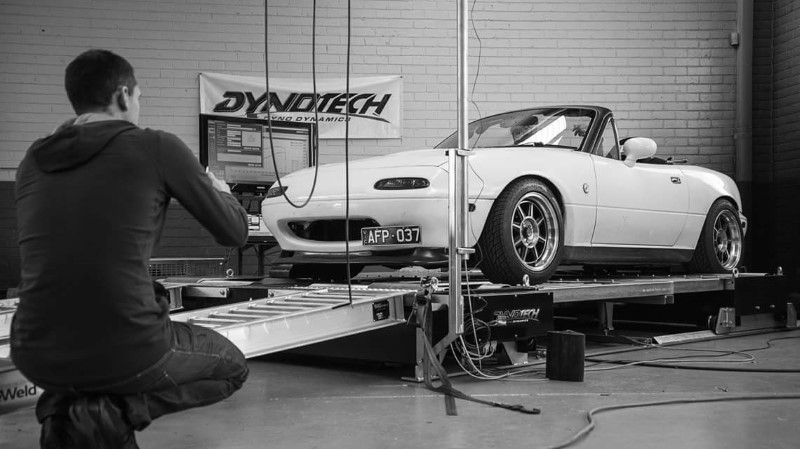
The results:
After some 3 or more years in use, I've removed the fastback from the track car.....
It's being demoted, but thankfully it has been replaced by a newer, lighter version, kindly donated by the Lightyear.
So I have started work on mounting the new roof. It will then need to be prepped, painted and windows installed.
But the roof hasn't gone far. At least not for the moment.
Speaking of the NA, I put it on the dyno recently to see just whether or not the supercharger was running everything ok and not going result in a surprise kaboom.
The results:
Reply
0
0
Thread Starter
Junior Member
Joined: Mar 2011
Posts: 212
Total Cats: 68
From: Melbourne, Australia
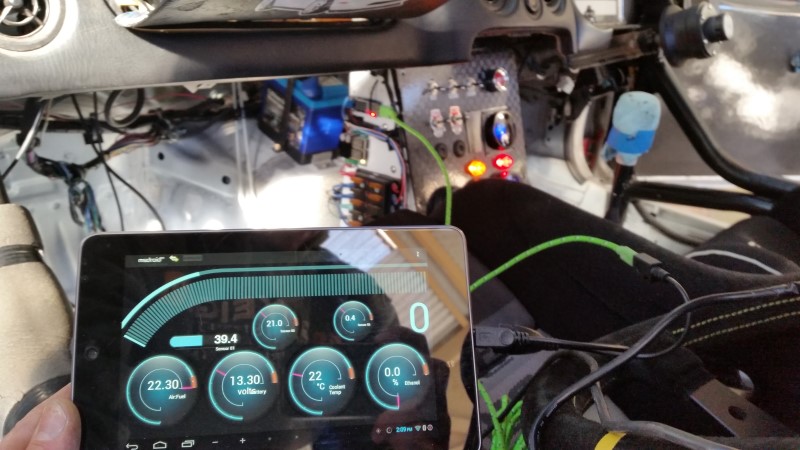
I've also managed to get the Nexus Tablet working with the 'OTG' USB cable, so it can now charge while connected to a USB device. (such as the ECU)
If you're not familiar with these gizmos, basically the USB port in a phone or tablet which most people only know of as a charge port can in fact also be used to connect other devices like a keyboard, mouse or usb thumb drive.
However, what if you want to charge the device while also connecting another device? Well you need a 'OTG' USB cable.
Here's me taking a photo because I was so happy that I got it working with MSdroid talking to the MS3.
While I am using MSdroid above, I am actually thinking of moving to ShadowDash for more customisation.
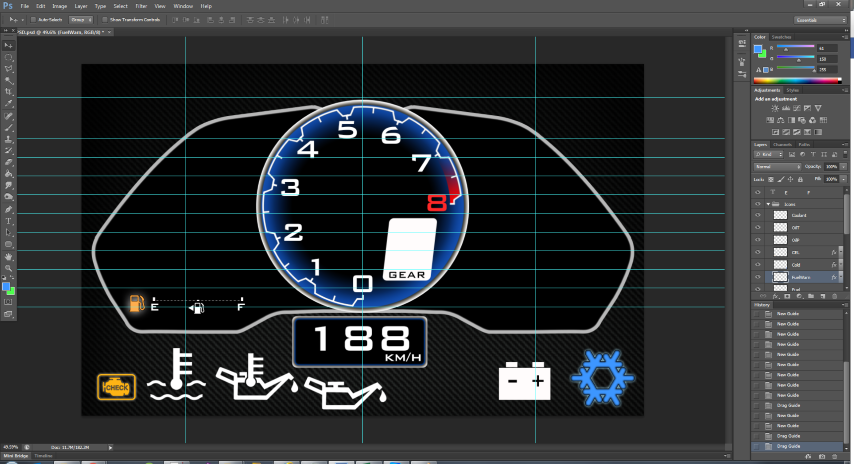
So I started on a custom dashboard to run in the car whilst out on track. After a few nights after work doing the designs.... I went from this:
To something more like this...
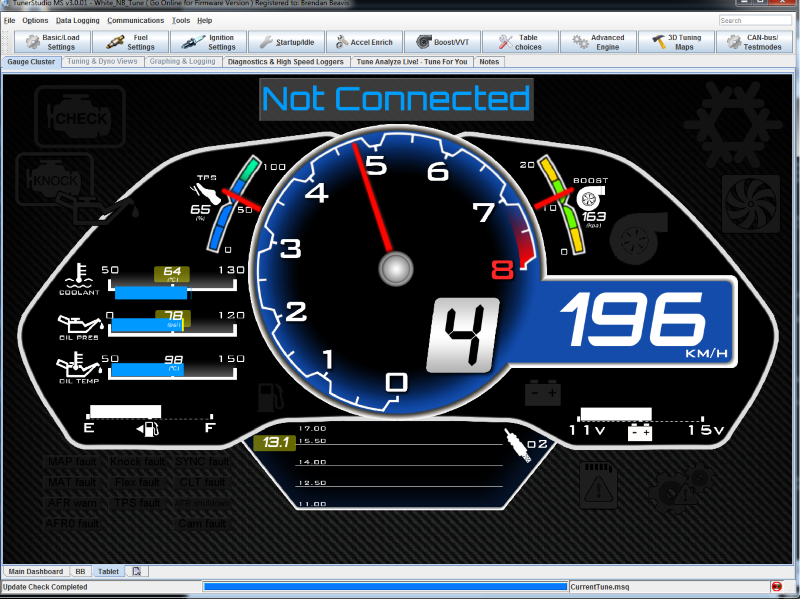
And so I''ve pretty much finished the Dash for now, and quite chuffed with the result.
Created images for all the indicators I want to use, so things like overboost, CEL, and FanOn now display with stylish icons.
Once I start using it in the car, I may need to make some adjustments
VIDEO:
If you're not familiar with these gizmos, basically the USB port in a phone or tablet which most people only know of as a charge port can in fact also be used to connect other devices like a keyboard, mouse or usb thumb drive.
However, what if you want to charge the device while also connecting another device? Well you need a 'OTG' USB cable.
Here's me taking a photo because I was so happy that I got it working with MSdroid talking to the MS3.
While I am using MSdroid above, I am actually thinking of moving to ShadowDash for more customisation.
So I started on a custom dashboard to run in the car whilst out on track. After a few nights after work doing the designs.... I went from this:
To something more like this...
And so I''ve pretty much finished the Dash for now, and quite chuffed with the result.
Created images for all the indicators I want to use, so things like overboost, CEL, and FanOn now display with stylish icons.
Once I start using it in the car, I may need to make some adjustments
VIDEO:
Last edited by BEAVIS; Jul 10, 2025 at 08:17 AM.
Reply
1
1


