
Brap-Brap's Miata (Mis)Adventures


Eh. The night is still young. He's atleast somewhat self aware. Lets see what happens!
DONT FAIL ME NOW YOUNG PADAWAN!!!
Signed,
Sleep deprived + over caffeinated med student RTC.
DONT FAIL ME NOW YOUNG PADAWAN!!!
Signed,
Sleep deprived + over caffeinated med student RTC.
Reply
 0
0

0

Thread Starter
Junior Member
Joined: Jul 2017
Posts: 174
Total Cats: 28
From: Columbus, Ohio
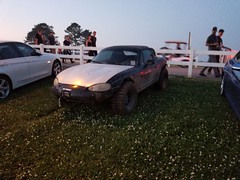
Lol, it's my only car and so I try to do everything. AutoX, Track days, groceries, car meets. Also all the parts I get and or make i've seen on other Miatas and then I want them on my car. Now that I have access to OSU's machine shop I can start making some more parts. Plus the parts are cliche for a reason... Because they're the best and the get me the most scene points. For every 10 scene points I get, that's an extra horsepower added. With all my scene points and the hella sick stickers I probably have at least 500HP by now. 500HP in a car that is sub 2500 pounds, guaranteed I can beat some Mustangs. I think this weekend i'm going to race for pinks to afford some more parts.
I feel you man, I'm a mechanical engineering student myself.
I feel you man, I'm a mechanical engineering student myself.
Reply
0
0
Thread Starter
Junior Member
Joined: Jul 2017
Posts: 174
Total Cats: 28
From: Columbus, Ohio
More quick updates!
I did a full exterior LED conversion for safety. Diode Dynamics was running a Black Friday deal and I had to jump on it.
It had the usual stuff, LED brake lights, reverse lights, etc.
But for the front turn signals I decided to go with the Switchback version of the 1157 Bulb:
Thats a quick YT vid I made showing off the switchback feature. It's awesome for early morning when its light enough you don't need your full headlights but dark enough you want some form of illumination.
The LED conversion required me to modify the stock flasher relay to prevent the dreaded "Hyberblink" that usually arises with LED conversions.
You *can* use those load resistors but they add massive amounts of weight and radiate a lot of head and also draw a lot of power. All things you do not want in your little roadster.
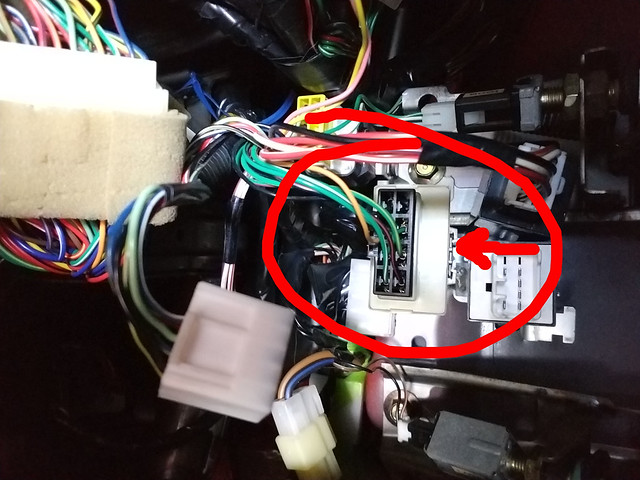
Step 1 was finding the flasher relay under the dash, and its this rather large beige box with the large connector going to it. It's not like the other relays under the dash, it just pulls straight down. I found it easier to take the box off the mounting clip and then pulling the connector off.
Once you have it off the car and onto a work bench its just 2 clips to take the cover off and pull the circuit board.
The resistor you're looking for is labeled R1 but the label is hard to see as a coil is in the way.
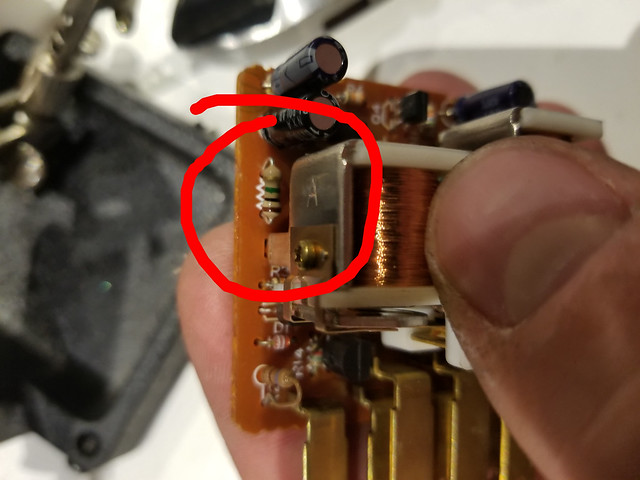
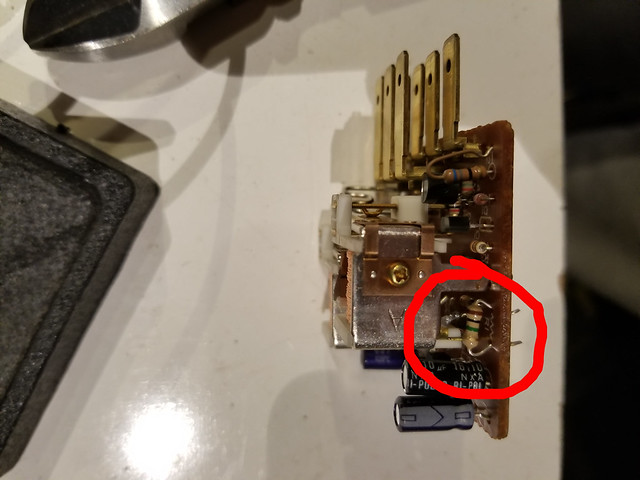
That's what you're looking for, and my shots are post-mod. Stock I think its a 6.5ohm?
You want to replace it with a 1Meg Ohm, or 1 million ohm resistor. 1/4 watt is fine (that what the stock one is rated for), but I used 1/2 watt just to be safe.
Next up was LED headlights. I originally wanted GE Nighthawks or TruckLites but I wasn't willing to pay $400 for a pair.

My friend showed me this company on amazon called OPT7, and he installed a set of their bulbs on his 350Z and I quite like how bright and crisp they are.
So along with them I bought the Hella H4 Conversion and set to replace the stock sealed beams.
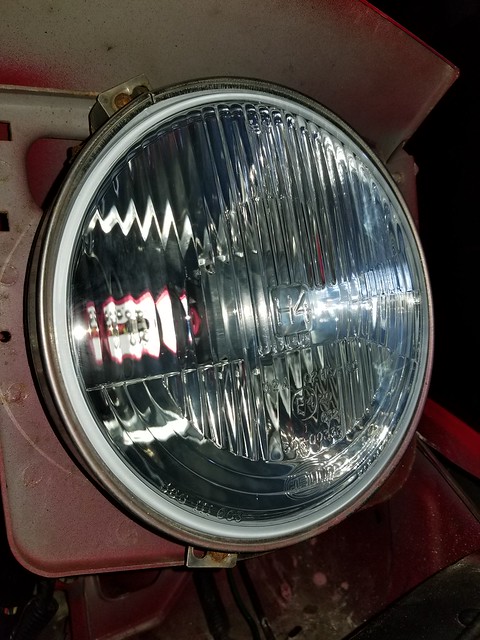
The great thing about the OPT7's is the COB LED is at the correct height, similar to an H4 halogen and so the projector and reflector pattern matches perfectly. They also have a fan on the back that keeps everything cool.
I left the rubber cover off the back of the Hella housings as the LED's have an o-ring seal on the face and on the tube of the LED
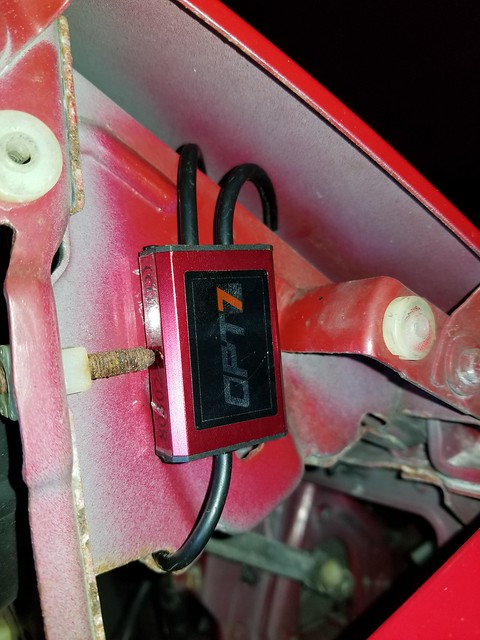
They come with these ballast/ controllers that really have no space inside the housing without pinching something, so I took an idea from a Ken Auto YT video and mounted them to the outside with some 3M double sided tape.
But, whatever you do DO NOT MOUNT IT TO THE OUTSIDE OF THE HOUSING!!!!
Mount it to the side that is inside, closer to the radiator. Ask me how I know. The limiting beams on the interior of the housing are on the outside, and if you mount it to the outer side of the housing, the beam will grab the connector and crush it. I crushed my H4 connector and fought for like an hour trying to figure out why the driver's side light won't move all the way up. Luckily I had a spare connector, and 20 minutes later and I had a new H4 connector on it and it was all fine.
I have to say, it's bright as floodlights for soccer/ football fields. But its a very good beam pattern, throwing a ton of light down the road but also having a good pattern to the side of the car. I can finally see more than 50 feet in front of me! Its also a nice, cool white hue versus an amber of a normal Halogen.
I did a full exterior LED conversion for safety. Diode Dynamics was running a Black Friday deal and I had to jump on it.
It had the usual stuff, LED brake lights, reverse lights, etc.
But for the front turn signals I decided to go with the Switchback version of the 1157 Bulb:
Thats a quick YT vid I made showing off the switchback feature. It's awesome for early morning when its light enough you don't need your full headlights but dark enough you want some form of illumination.
The LED conversion required me to modify the stock flasher relay to prevent the dreaded "Hyberblink" that usually arises with LED conversions.
You *can* use those load resistors but they add massive amounts of weight and radiate a lot of head and also draw a lot of power. All things you do not want in your little roadster.
Step 1 was finding the flasher relay under the dash, and its this rather large beige box with the large connector going to it. It's not like the other relays under the dash, it just pulls straight down. I found it easier to take the box off the mounting clip and then pulling the connector off.
Once you have it off the car and onto a work bench its just 2 clips to take the cover off and pull the circuit board.
The resistor you're looking for is labeled R1 but the label is hard to see as a coil is in the way.
That's what you're looking for, and my shots are post-mod. Stock I think its a 6.5ohm?
You want to replace it with a 1Meg Ohm, or 1 million ohm resistor. 1/4 watt is fine (that what the stock one is rated for), but I used 1/2 watt just to be safe.
Next up was LED headlights. I originally wanted GE Nighthawks or TruckLites but I wasn't willing to pay $400 for a pair.
My friend showed me this company on amazon called OPT7, and he installed a set of their bulbs on his 350Z and I quite like how bright and crisp they are.
So along with them I bought the Hella H4 Conversion and set to replace the stock sealed beams.
The great thing about the OPT7's is the COB LED is at the correct height, similar to an H4 halogen and so the projector and reflector pattern matches perfectly. They also have a fan on the back that keeps everything cool.
I left the rubber cover off the back of the Hella housings as the LED's have an o-ring seal on the face and on the tube of the LED
They come with these ballast/ controllers that really have no space inside the housing without pinching something, so I took an idea from a Ken Auto YT video and mounted them to the outside with some 3M double sided tape.
But, whatever you do DO NOT MOUNT IT TO THE OUTSIDE OF THE HOUSING!!!!
Mount it to the side that is inside, closer to the radiator. Ask me how I know. The limiting beams on the interior of the housing are on the outside, and if you mount it to the outer side of the housing, the beam will grab the connector and crush it. I crushed my H4 connector and fought for like an hour trying to figure out why the driver's side light won't move all the way up. Luckily I had a spare connector, and 20 minutes later and I had a new H4 connector on it and it was all fine.
I have to say, it's bright as floodlights for soccer/ football fields. But its a very good beam pattern, throwing a ton of light down the road but also having a good pattern to the side of the car. I can finally see more than 50 feet in front of me! Its also a nice, cool white hue versus an amber of a normal Halogen.
Reply
1
1
Thread Starter
Junior Member
Joined: Jul 2017
Posts: 174
Total Cats: 28
From: Columbus, Ohio
Quick update guys. It's been a while. College takes up most of my time. I've managed to amass a large amount of parts that need to go on but I don't have the time to do much...
But I got a proper radio to replace my janky 12v amp setup. 10 minutes on the soldering bench and I had a nice patch harness.

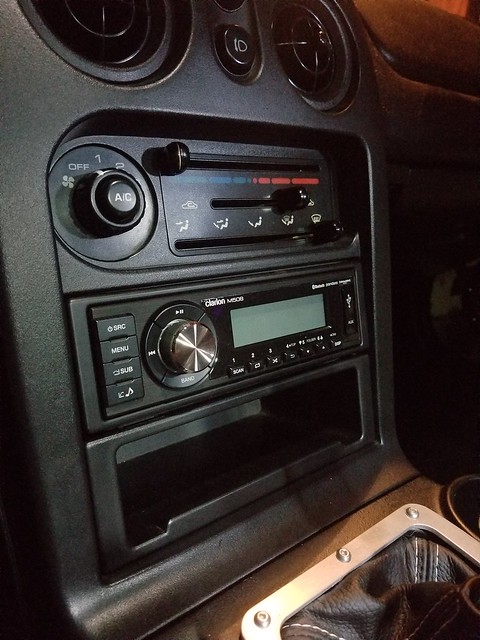
And the finished radio all bolted in. It's a Clarion M508. Super clean looking radio, doesn't look like a Transformers abortion like other radios. Wasn't too bad at $150.
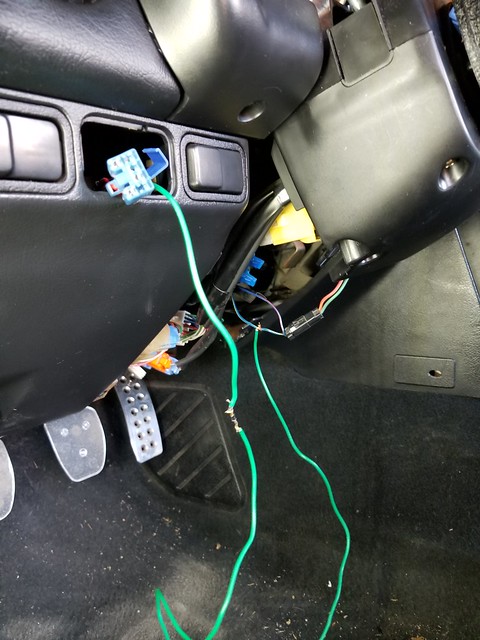
And since I was in a wiring kind of mood I whipped up the quick "light Minder" mod. "Input" on the dimmer connector goes to the Blue/Yellow wire, with a diode in-between to keep the key-minder functional.
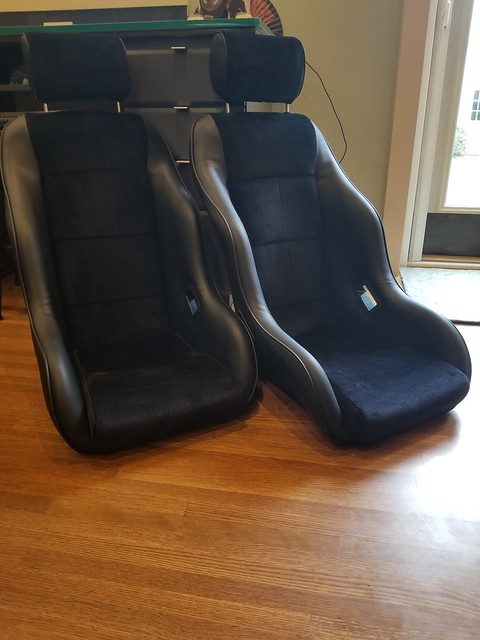
Also these babies showed up a while ago... Cobra Classic RSR's. I just got the brackets back from powdercoating and hopefully over spring break I can get them in... These seats are so comfortable I nearly fell asleep just sitting in them the day they showed up.
Until next time.
But I got a proper radio to replace my janky 12v amp setup. 10 minutes on the soldering bench and I had a nice patch harness.
And the finished radio all bolted in. It's a Clarion M508. Super clean looking radio, doesn't look like a Transformers abortion like other radios. Wasn't too bad at $150.
And since I was in a wiring kind of mood I whipped up the quick "light Minder" mod. "Input" on the dimmer connector goes to the Blue/Yellow wire, with a diode in-between to keep the key-minder functional.
Also these babies showed up a while ago... Cobra Classic RSR's. I just got the brackets back from powdercoating and hopefully over spring break I can get them in... These seats are so comfortable I nearly fell asleep just sitting in them the day they showed up.
Until next time.
Reply
0
0
Thread Starter
Junior Member
Joined: Jul 2017
Posts: 174
Total Cats: 28
From: Columbus, Ohio
MASSIVE UPDATE TIME!!!!
So over spring break I installed my new seats.
The brackets I had made up sucked. Way too high, even though they were thin. This is what I get for buying bottom-mount seats...
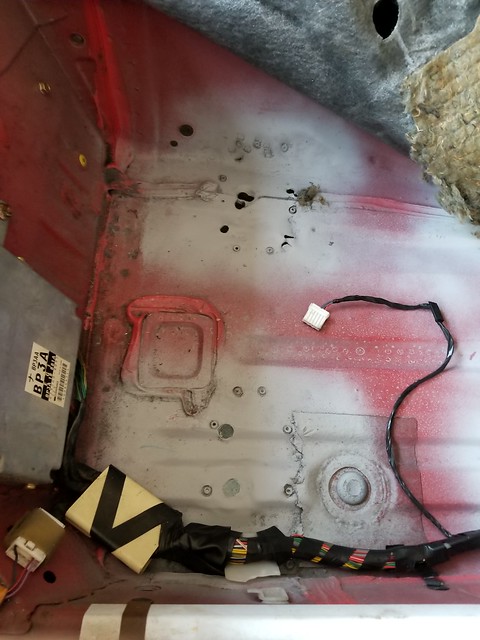
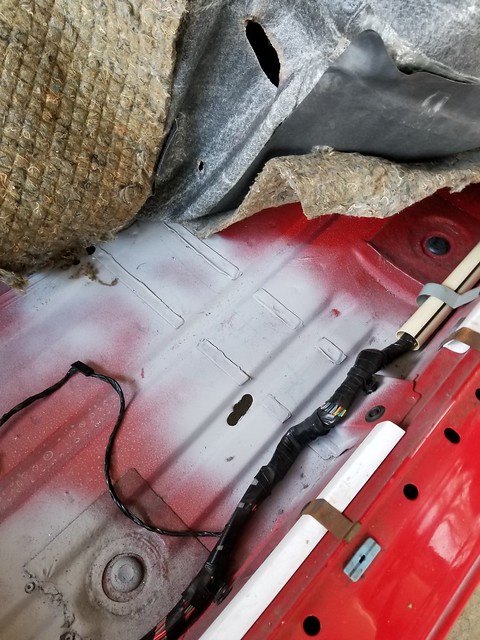
So out came all of the seat mounting brackets. A lot of work with an angle grinder, a sanding wheel and a hammer and I made some room.
I beat the **** out of the drivers side trans tunnel to get the seat to fit decently.
I also broke a couple drill bits and so I had to run to Ace...

It was surprisingly comfortable. Until I hit a speedbump.
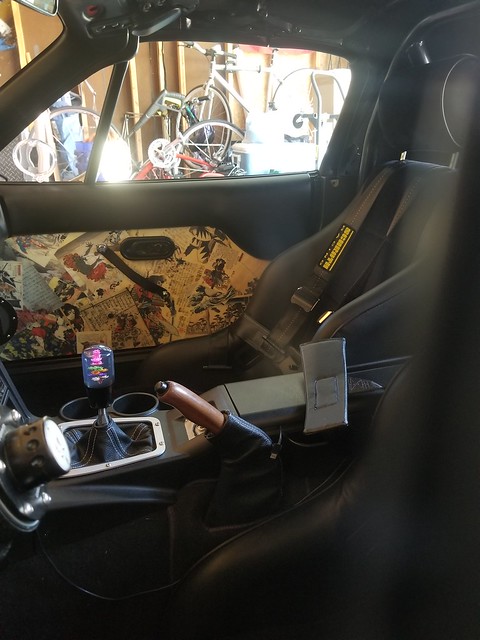
Everything all in! Ill get more pics next weekend maybe.
I also installed the Project G quarter windows.
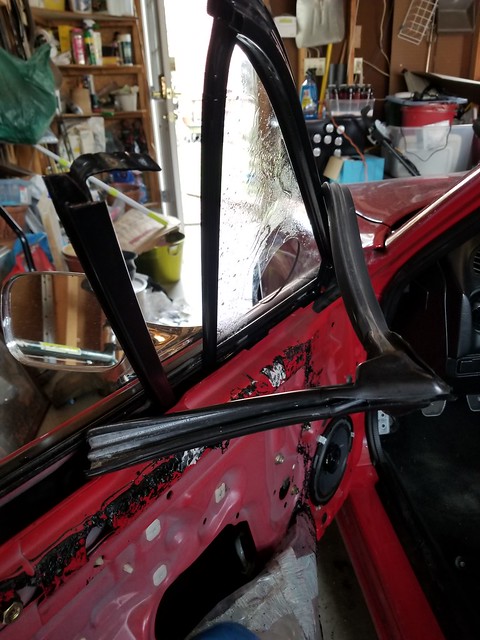
Super simple removal of the stock glass, mine was just a bit stuck after 20 years of being together...
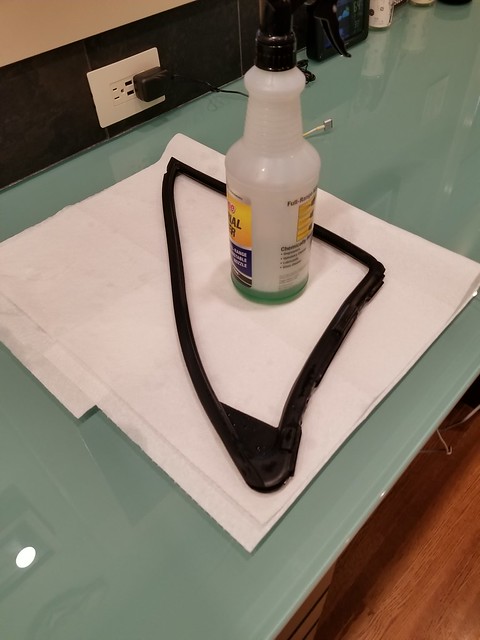
Simple Green and hot water cleans up the old schmoo and really re-freshes the rubber.
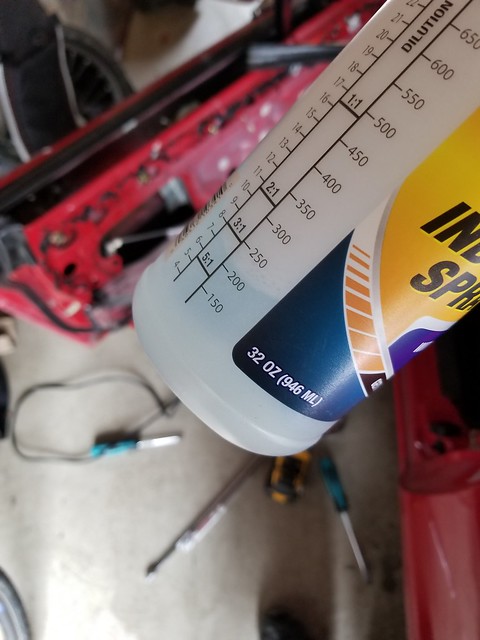
Sliding in the new window is a royal PITA, but using a little wash and wax helps the rubber slide in real easy. If you don't get it in all the way you wont be able to bolt the rail up, and your windows will be super slow from the drag.
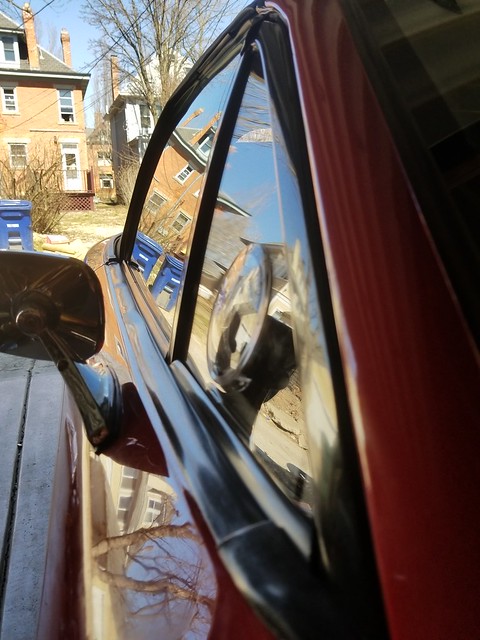

And everything all in. The vent adds a nice fresh air intake. It's really nice on like 40-50 degree days because you can have the top up and the heat on to keep your feet warm but the vent open for some fresh air.
Also I didn't cover my door speakers when grinding the floorpan metal and I messed up my driver's side speaker... But that's just an excuse to upgrade the audio system right?
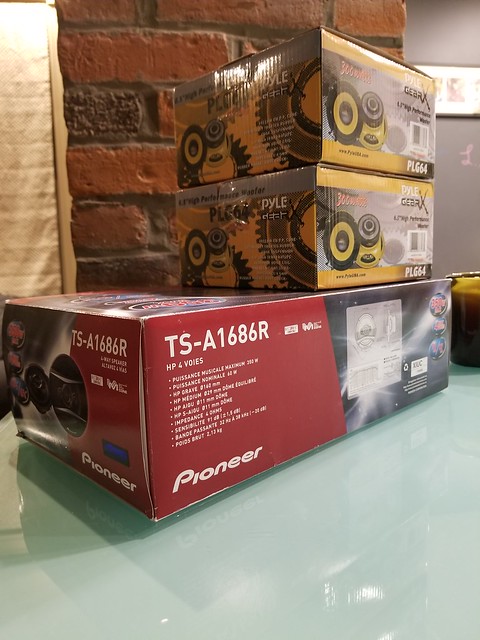
2 Pioneer 4 ways and a couple of subs for the parcel shelf.
And that's about it for now.
So over spring break I installed my new seats.
The brackets I had made up sucked. Way too high, even though they were thin. This is what I get for buying bottom-mount seats...
So out came all of the seat mounting brackets. A lot of work with an angle grinder, a sanding wheel and a hammer and I made some room.
I beat the **** out of the drivers side trans tunnel to get the seat to fit decently.
I also broke a couple drill bits and so I had to run to Ace...
It was surprisingly comfortable. Until I hit a speedbump.
Everything all in! Ill get more pics next weekend maybe.
I also installed the Project G quarter windows.
Super simple removal of the stock glass, mine was just a bit stuck after 20 years of being together...
Simple Green and hot water cleans up the old schmoo and really re-freshes the rubber.
Sliding in the new window is a royal PITA, but using a little wash and wax helps the rubber slide in real easy. If you don't get it in all the way you wont be able to bolt the rail up, and your windows will be super slow from the drag.
And everything all in. The vent adds a nice fresh air intake. It's really nice on like 40-50 degree days because you can have the top up and the heat on to keep your feet warm but the vent open for some fresh air.
Also I didn't cover my door speakers when grinding the floorpan metal and I messed up my driver's side speaker... But that's just an excuse to upgrade the audio system right?
2 Pioneer 4 ways and a couple of subs for the parcel shelf.
And that's about it for now.
Reply
0
0

Thread Starter
Junior Member
Joined: Jul 2017
Posts: 174
Total Cats: 28
From: Columbus, Ohio
More goodies!!!!
HUGE thanks to Greasemokey2000 for helping me source some ZOOM engineering stuff:
ZOOM "M" size mirror, the mount is part number G03.
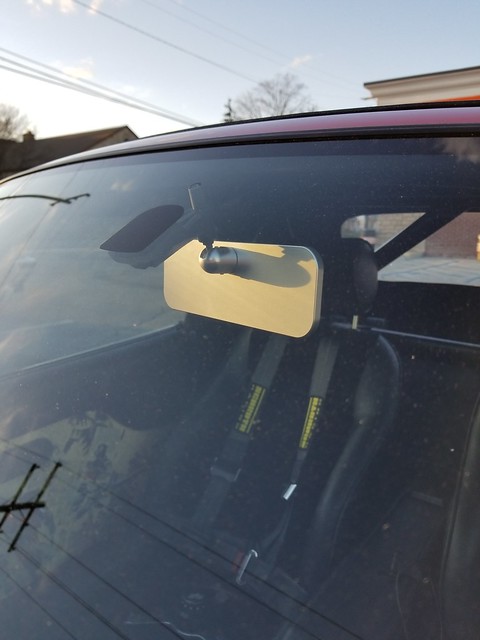
The convex and tinted mirror is SUPERB. I can see so much more, to where I can see the edge of the headrests. And now I don't get blinded by people behind me. Because unfortunately when you have a lowered car all beams are high beams.
If you want one for your car at a really good price (much cheaper than Rev9): read this thread:
NA A few Rear View Mirror questions - ClubRoadster.net
And now for more beauty shots of the seats:
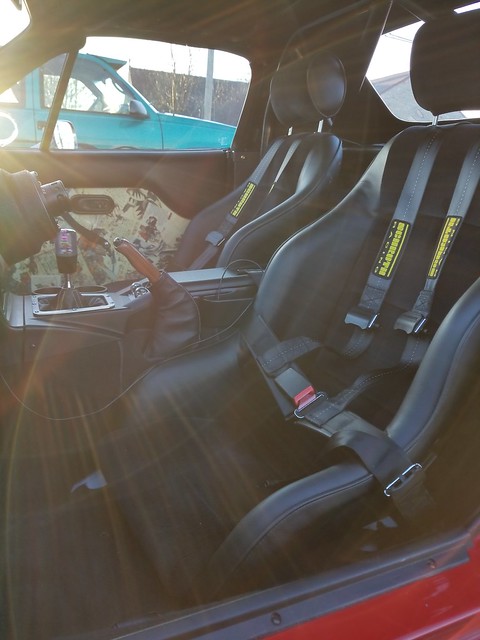
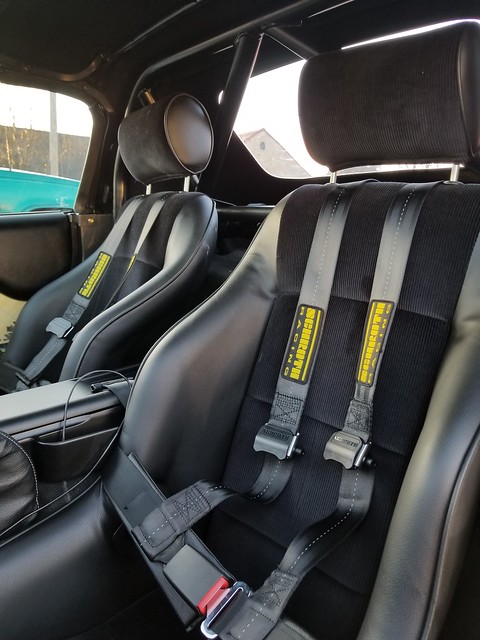
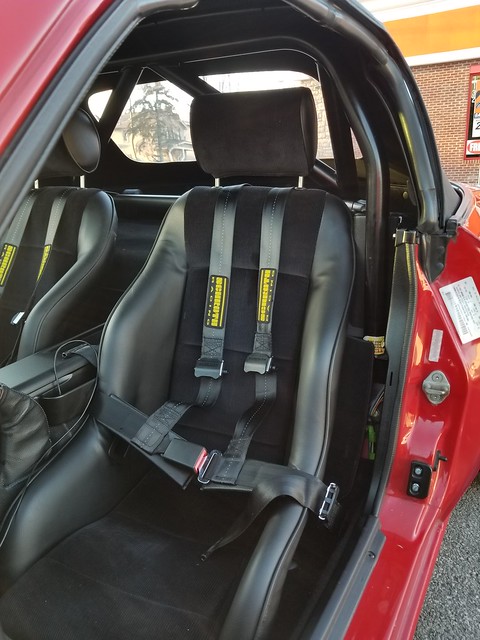
It looked too good to not take a pic of while I was on lunch break
HUGE thanks to Greasemokey2000 for helping me source some ZOOM engineering stuff:
ZOOM "M" size mirror, the mount is part number G03.
The convex and tinted mirror is SUPERB. I can see so much more, to where I can see the edge of the headrests. And now I don't get blinded by people behind me. Because unfortunately when you have a lowered car all beams are high beams.
If you want one for your car at a really good price (much cheaper than Rev9): read this thread:
NA A few Rear View Mirror questions - ClubRoadster.net
And now for more beauty shots of the seats:
It looked too good to not take a pic of while I was on lunch break
Reply
0
0
Thread Starter
Junior Member
Joined: Jul 2017
Posts: 174
Total Cats: 28
From: Columbus, Ohio
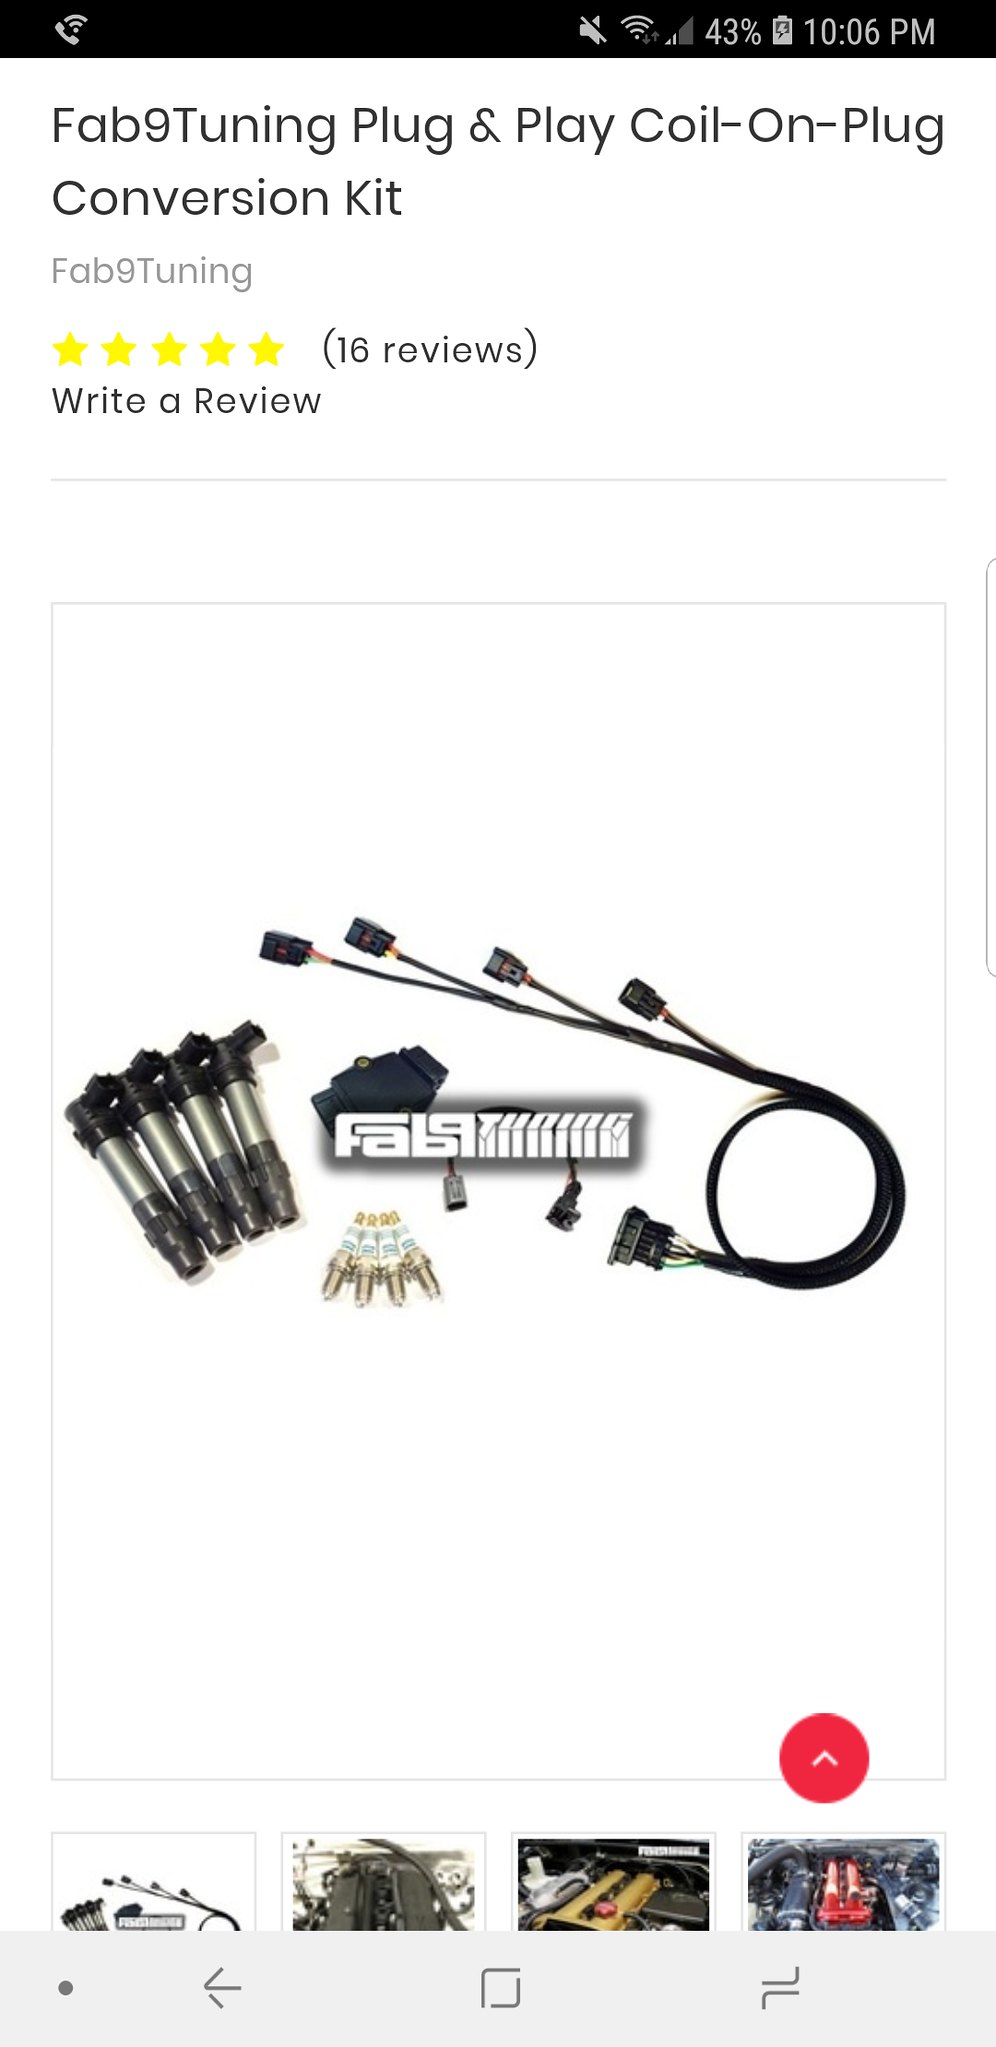
Decided to cop (hehehe get it?) one of these the other day. I was changing lanes on the freeway and I popped it down to 4th and laid into her a bit and she started to break up, ended up throwing a P0300 as well. Since the plugs and wires are less than a year old, I figured it might be the coil. Pulled it off and sure enough there's a couple of hairline cracks in the epoxy and the plastic housing. I'm borrowing a friends Coil for the moment until the kit comes in.
Fab9 is using CBR1000 coils (or the RR coils, can't remember which) and I think an AEM or Bosch module on a custom harness. There's a ton of info on here about it if ya'll want to learn more. I'll share as much as I can when I get the kit.
Reply
0
0
Reply
0
0
Thread Starter
Junior Member
Joined: Jul 2017
Posts: 174
Total Cats: 28
From: Columbus, Ohio
I figured someone would reply about that soon enough lol.
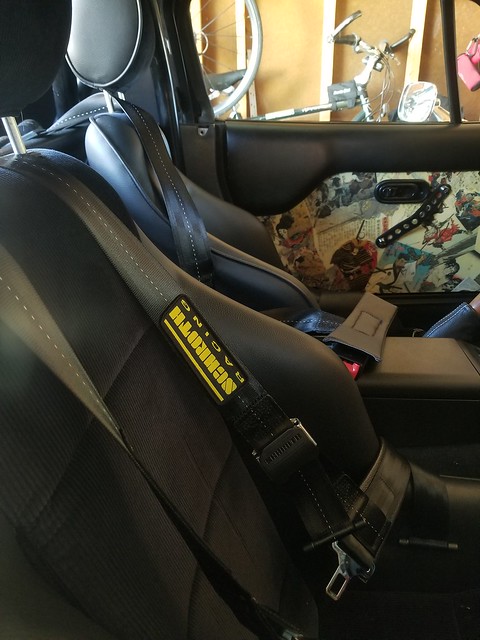
initially I contacted Cobra and they said due to how large I am, routing it over should be fine. But I talked to a bunch of my friends and after I got home from work that day I fixed it, both seats now have the lap belts routed through the holes.
EDIT: I guess for some context I should explain a little more. I'm 6'2" 250lbs, and I powerlift. a 365 pound Squat and a 400 pound deadlift means I have massive thighs. AKA I'm a Thicc Boi. I contacted Cobra when I ordered the seats and explained this to them and they said routing over the seat should be perfectly fine, especially since they're ASM harnesses.
With the lap belt routed through the passages its certainly tighter and a little less comfortable. Maybe for long drives I'll swap back to the over the seat routing. If Cobra says it's ok, i'm inclined to trust their judgement.
Last edited by Brap-Brap; Mar 25, 2018 at 02:33 PM.
Reply
0
0
Thread Starter
Junior Member
Joined: Jul 2017
Posts: 174
Total Cats: 28
From: Columbus, Ohio
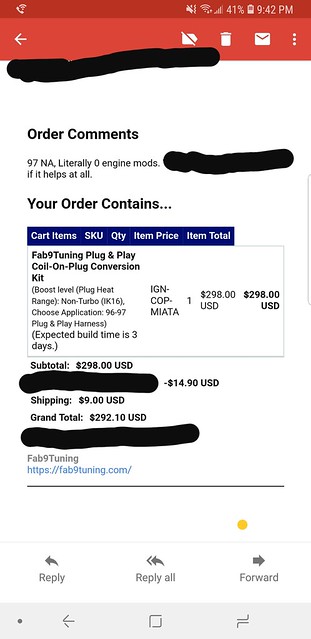
Update on the COP kit from Fab9:
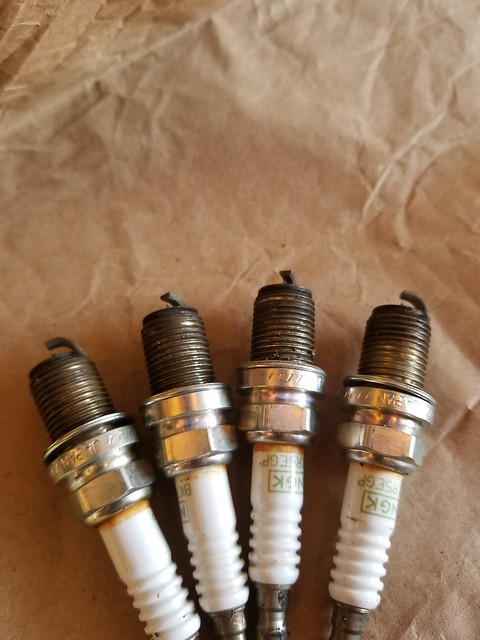
Simple as old wires and plugs out, new plugs and wiring in.
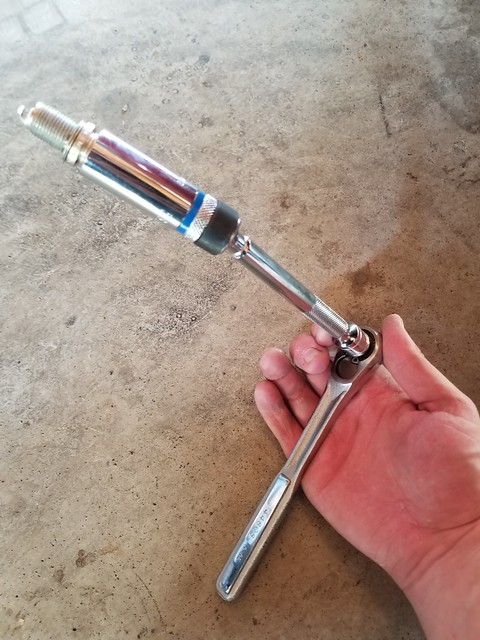
If you guys don't have one of these fancy spark plug sockets, you're missing out. Magnetic, swivel end and with a built-in extension. And it's a thin-wall socket so you have room.
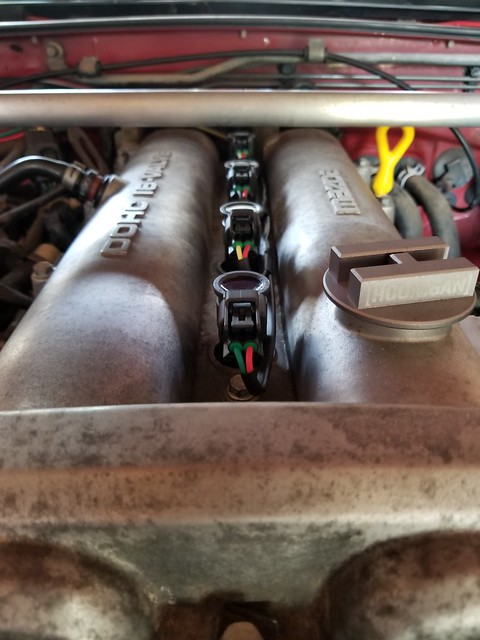
Aaaand all in and tucked up nicely.

And with another part comes another sticker on in the collection.
I have to say it makes the car idle so much nicer. Everything is just a little smoother.
More coming soon!
Simple as old wires and plugs out, new plugs and wiring in.
If you guys don't have one of these fancy spark plug sockets, you're missing out. Magnetic, swivel end and with a built-in extension. And it's a thin-wall socket so you have room.
Aaaand all in and tucked up nicely.
And with another part comes another sticker on in the collection.
I have to say it makes the car idle so much nicer. Everything is just a little smoother.
More coming soon!
Reply
0
0


Thread Starter
Junior Member
Joined: Jul 2017
Posts: 174
Total Cats: 28
From: Columbus, Ohio
Oh lord here we go...
The ol' girl decided she didn't like me today. I came out this morning to not 1 but 2 puddles under her...
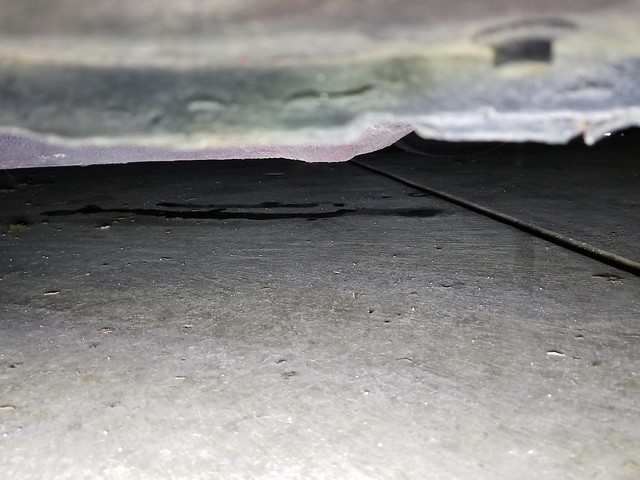
One tasted sweet so it was for sure coolant, and considering the radiator looked like this, I think it was safe to say I needed a new rad.
The other puddle was indeterminate though...
But as I pulled the car out of the garage to back her in for easier maintenance, I tasted the second puddle and it was acrid and bitter. AKA brake fluid. Time for a new slave cylinder!
Then as I was backing the car into the garage the radiator decided it had enough and the lower tank blew a crack and started spewing coolant. Shut her off and pushed her the rest of the way in.
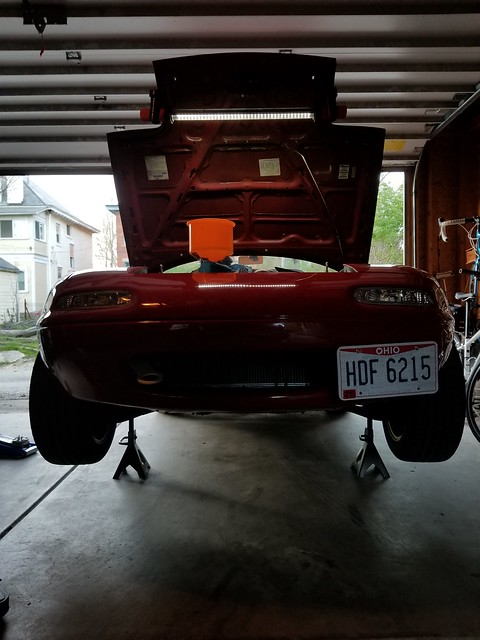
So step 1 was to break everything down and make room for the work to come. Passenger side wheel off, LRB tray off, etc.
New master and slave cylinder went in, along with a 949 clutch line.
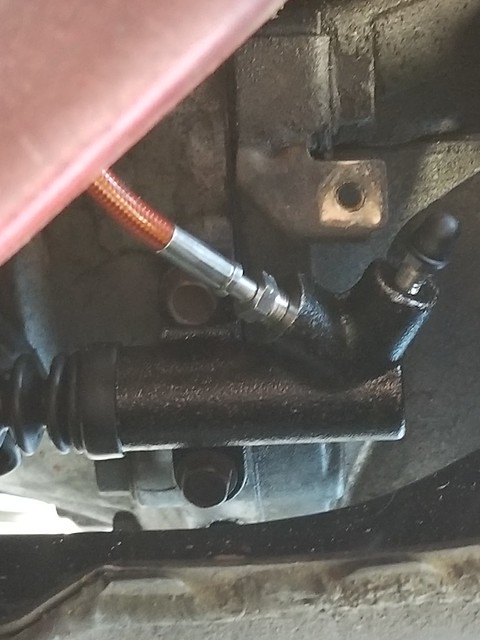
I have to say bleeding the clutch took longer than the install. The most frustrating part was getting the old clutch line out.
The new stuff feels slightly lighter than before but smoother, with better control. No idea why though.
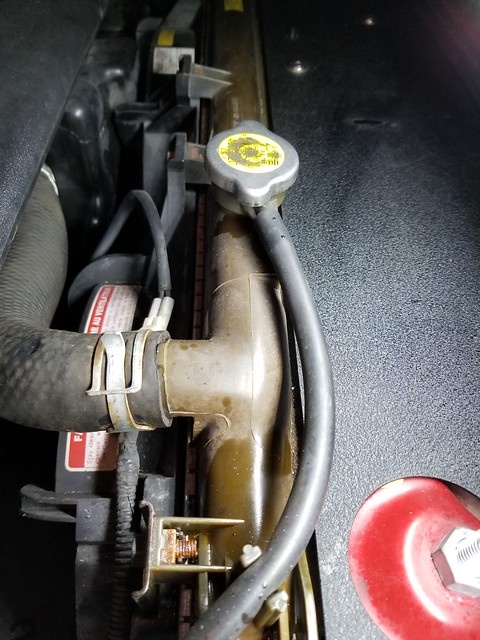
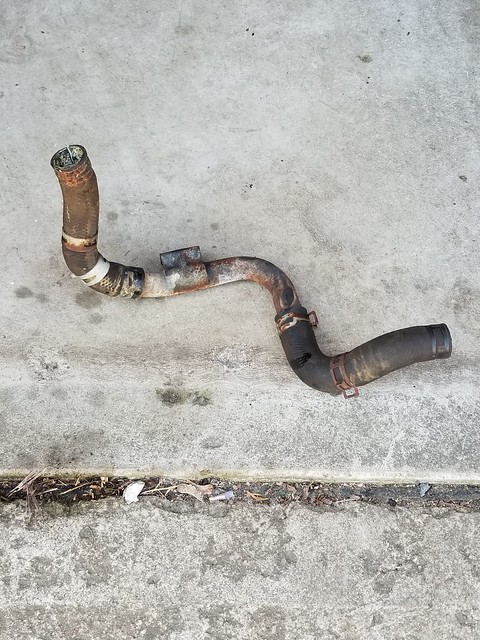
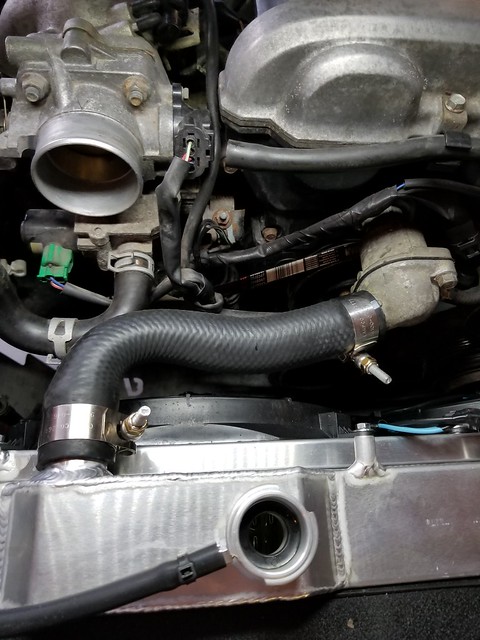
Aaaand since my AC never worked I pulled out the lines and the condenser. with the AC lines removed it gave me a lot of room for a FM lower rad hose.

Pulling this abomination out was certainly fun:
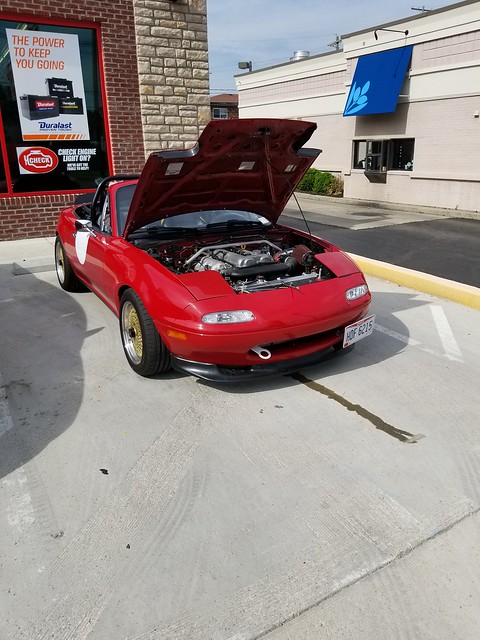
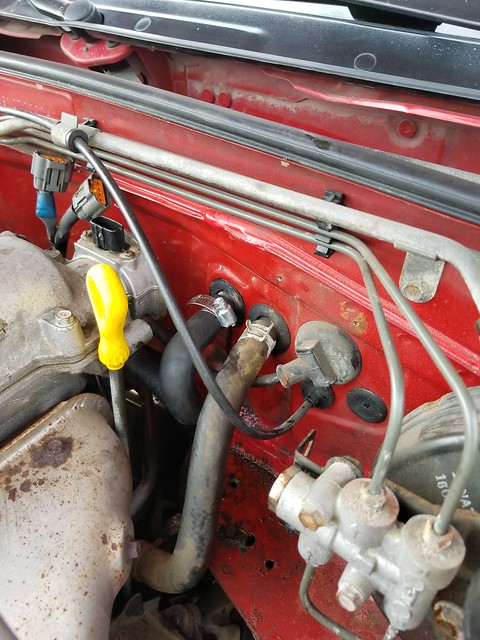
And since everything was going very nicely I decided to do a little nip and tuck on the engine bay. Old washer bottle was cracked so I pulled it and put my Mishimoto coolant res back there, charcoal canister delete and I moved the MAP sensor and evap solenoid to more discrete locations versus the bracket previously there.
I swapped the Rad with an aluminum Yonaka unit, and because it had no weatherstripping on the fan shroud I used some basic stuff from Autozone.

If you need a new upper rad hose, don't go to the parts store for it. The Dayco hose listed is too big of an ID, order one from your dealer or from your favorite online retailer.
As I took her through a heat cycle though I found a leak dripping from the trans tunnel... Definitely coolant. Turns out the oil cooler line on the back of the head was weeping. So I pulled the clamp, pulled the hose and cut the damaged end off and put on a constant tension clamp.
On a long drive today I was blessed with these temperatures:
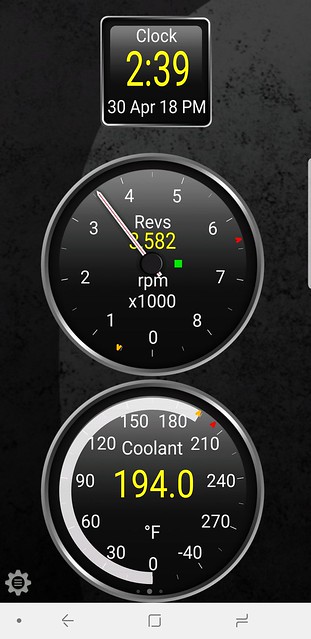
Previously I was looking at cruising temps of 205*F-210*F Now with the condenser out of the way and a more efficient rad she's running ice cold.
And thanks to the cramped space behind the head not only did this cost me the money for the parts but also the skin on my hands...

I'm heading to Formula Drift Atlanta in 2 weeks, I wanted to swap the rad anyway before she sees 100 degree heat just to be safe.
Until next time!
The ol' girl decided she didn't like me today. I came out this morning to not 1 but 2 puddles under her...
One tasted sweet so it was for sure coolant, and considering the radiator looked like this, I think it was safe to say I needed a new rad.
The other puddle was indeterminate though...
But as I pulled the car out of the garage to back her in for easier maintenance, I tasted the second puddle and it was acrid and bitter. AKA brake fluid. Time for a new slave cylinder!
Then as I was backing the car into the garage the radiator decided it had enough and the lower tank blew a crack and started spewing coolant. Shut her off and pushed her the rest of the way in.
So step 1 was to break everything down and make room for the work to come. Passenger side wheel off, LRB tray off, etc.
New master and slave cylinder went in, along with a 949 clutch line.
I have to say bleeding the clutch took longer than the install. The most frustrating part was getting the old clutch line out.
The new stuff feels slightly lighter than before but smoother, with better control. No idea why though.
Aaaand since my AC never worked I pulled out the lines and the condenser. with the AC lines removed it gave me a lot of room for a FM lower rad hose.
Pulling this abomination out was certainly fun:
And since everything was going very nicely I decided to do a little nip and tuck on the engine bay. Old washer bottle was cracked so I pulled it and put my Mishimoto coolant res back there, charcoal canister delete and I moved the MAP sensor and evap solenoid to more discrete locations versus the bracket previously there.
I swapped the Rad with an aluminum Yonaka unit, and because it had no weatherstripping on the fan shroud I used some basic stuff from Autozone.
If you need a new upper rad hose, don't go to the parts store for it. The Dayco hose listed is too big of an ID, order one from your dealer or from your favorite online retailer.
As I took her through a heat cycle though I found a leak dripping from the trans tunnel... Definitely coolant. Turns out the oil cooler line on the back of the head was weeping. So I pulled the clamp, pulled the hose and cut the damaged end off and put on a constant tension clamp.
On a long drive today I was blessed with these temperatures:
Previously I was looking at cruising temps of 205*F-210*F Now with the condenser out of the way and a more efficient rad she's running ice cold.
And thanks to the cramped space behind the head not only did this cost me the money for the parts but also the skin on my hands...
I'm heading to Formula Drift Atlanta in 2 weeks, I wanted to swap the rad anyway before she sees 100 degree heat just to be safe.
Until next time!
Reply
0
0
Thread Starter
Junior Member
Joined: Jul 2017
Posts: 174
Total Cats: 28
From: Columbus, Ohio
A little quick update,
The Dayco B71638 that AutoZone, Advance, etc will sell you doesn't fit very well. The ID is too big.
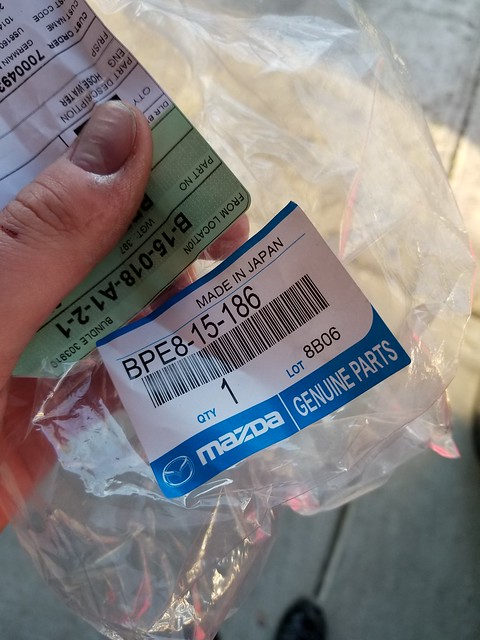
Ended up ordering a OEM hose from my local Mazda Dealer
Part number for those who want it:
Aaaand one last bleed before she's ready to go for good.
If you don't have a spillproof funnel, get one. I'll wait.
The Dayco B71638 that AutoZone, Advance, etc will sell you doesn't fit very well. The ID is too big.
Ended up ordering a OEM hose from my local Mazda Dealer
Part number for those who want it:
Aaaand one last bleed before she's ready to go for good.
If you don't have a spillproof funnel, get one. I'll wait.
Reply
0
0
Thread Starter
Junior Member
Joined: Jul 2017
Posts: 174
Total Cats: 28
From: Columbus, Ohio
Truly MASSIVE update time.
I missed a couple of things before FDATL, mainly putting on the GV lip I bought and cleaning the car. Little odds and ends you know.
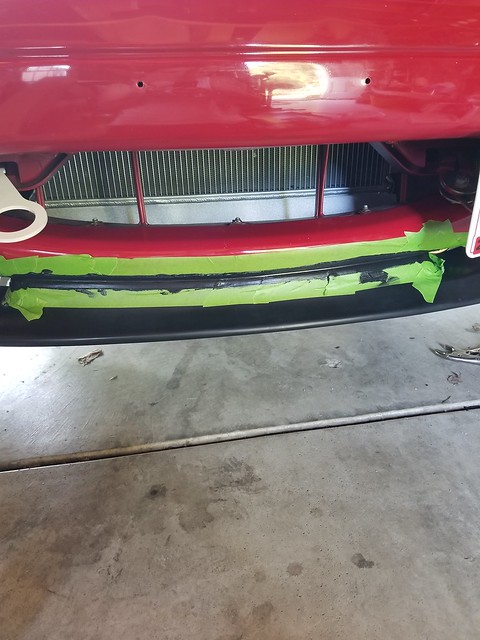
If you've ever seen Akira Nakai-san install an RWB kit, you know he uses black silicone to seal the kit to the car. I took a page out of his book and did the same for my GV lip. The GV lip is from RSpeed, it fits infinitely better than the eBay reps.
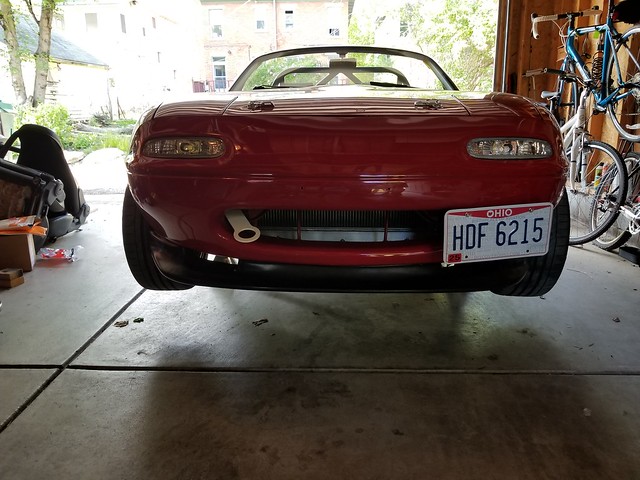
All cleaned up and ready to go.
I also hit the headlight bezels with a quick spray of black paint to clean them up and hide the red overspray from the POs paint job.
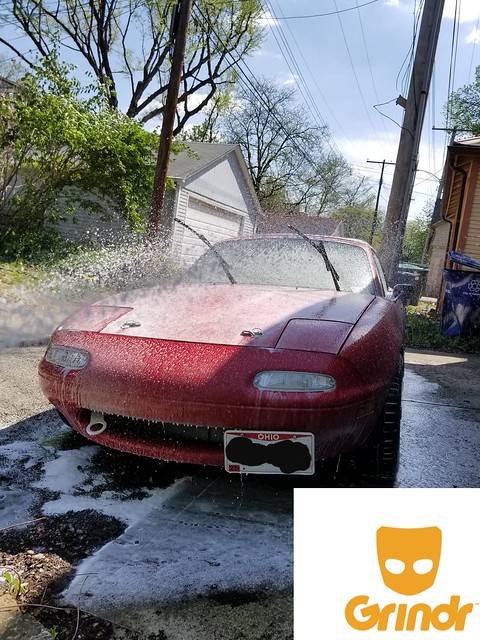
And a good wash and wax the night before we hit the road.
Formula Drift Atlanta was an absolute blast.
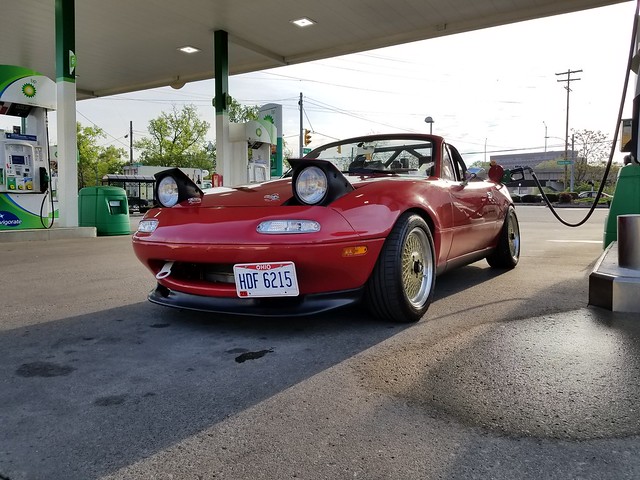
First fillup back in CBUS, right before we hit the road for the long haul. We ended up zip-tieing a bluetooth speaker to the roll bar and daisy chained it with my radio. It worked quite nicely, the door speakers gave us the bass we wanted and the roll bar speaker made it so we could actually hear the music with the top down.
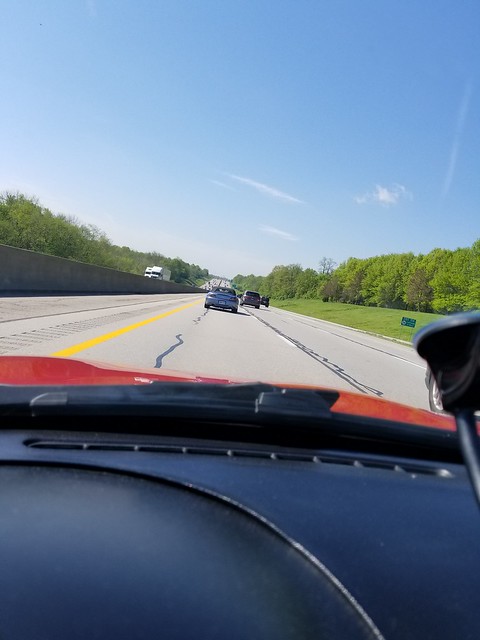
Ended up catching this guy in a S2000 at the Kentucky Border, we convoyed all the way to the Georgia border. He just got back from a race event and was heading down to FDATL as well. It was fun trading drafts and talking at the gas stations.
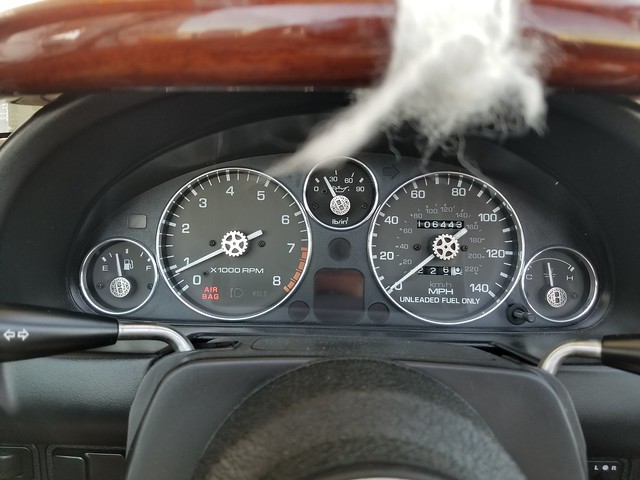
Ended up averaging around 30MPG even going 80MPH. That's a Miata for ya, and I blame the efficiency on the cooler running temps. I never let her get under 1/4 tank but I suspect she could have done 340 miles to a single tank.
And now I present: the Miatas of FDATL.

This guy came from Texas. He picked up this car in Oklahoma and then drove it all the way to FDATL. Oh, and his grandma drove the GT500 behind it.
Nice little Silverstone
Epic rally NB build

This dude in the NB had a FM2 kit under the hood. Really nice sound.
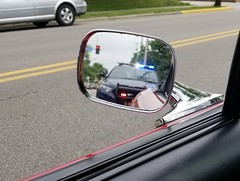
Back in CBUS, I got my first speeding ticket, 45 in a 35. Super stingy cop.

I started the process of wrapping the car, fuel lid was first. Ended up turning out horribly because I couldn't get it to tuck on the hinge side. I ended up ordering a different lid.

Also started shaving the lights of their lettering. Just cleans up the look.
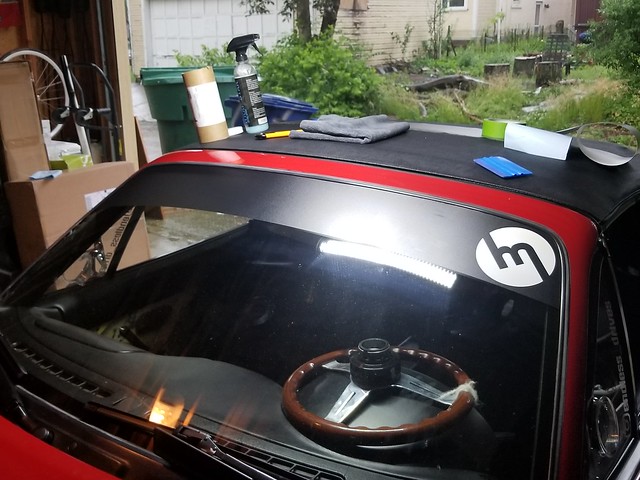
Sunshade was also a quick and easy thing.
AAAnd at work my heater core hose blew up...
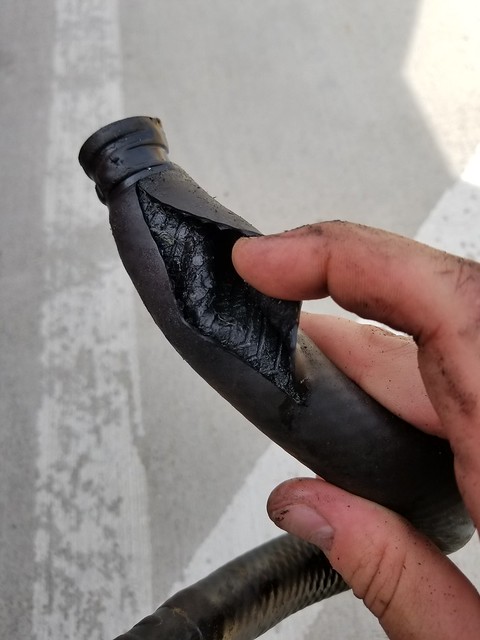
Luckily working at AutoZone we had everything there and I could fix it quickly and easily.

I got the door wrapped and applied the Meatball that morning.
Until next time!
I missed a couple of things before FDATL, mainly putting on the GV lip I bought and cleaning the car. Little odds and ends you know.
If you've ever seen Akira Nakai-san install an RWB kit, you know he uses black silicone to seal the kit to the car. I took a page out of his book and did the same for my GV lip. The GV lip is from RSpeed, it fits infinitely better than the eBay reps.
All cleaned up and ready to go.
I also hit the headlight bezels with a quick spray of black paint to clean them up and hide the red overspray from the POs paint job.
And a good wash and wax the night before we hit the road.
Formula Drift Atlanta was an absolute blast.
First fillup back in CBUS, right before we hit the road for the long haul. We ended up zip-tieing a bluetooth speaker to the roll bar and daisy chained it with my radio. It worked quite nicely, the door speakers gave us the bass we wanted and the roll bar speaker made it so we could actually hear the music with the top down.
Ended up catching this guy in a S2000 at the Kentucky Border, we convoyed all the way to the Georgia border. He just got back from a race event and was heading down to FDATL as well. It was fun trading drafts and talking at the gas stations.
Ended up averaging around 30MPG even going 80MPH. That's a Miata for ya, and I blame the efficiency on the cooler running temps. I never let her get under 1/4 tank but I suspect she could have done 340 miles to a single tank.
And now I present: the Miatas of FDATL.
This guy came from Texas. He picked up this car in Oklahoma and then drove it all the way to FDATL. Oh, and his grandma drove the GT500 behind it.
Nice little Silverstone
Epic rally NB build
This dude in the NB had a FM2 kit under the hood. Really nice sound.
Back in CBUS, I got my first speeding ticket, 45 in a 35. Super stingy cop.
I started the process of wrapping the car, fuel lid was first. Ended up turning out horribly because I couldn't get it to tuck on the hinge side. I ended up ordering a different lid.
Also started shaving the lights of their lettering. Just cleans up the look.
Sunshade was also a quick and easy thing.
AAAnd at work my heater core hose blew up...
Luckily working at AutoZone we had everything there and I could fix it quickly and easily.
I got the door wrapped and applied the Meatball that morning.
Until next time!
Reply
0
0


