Building a blonde young beefcake wearing nothing but skimpy shorts named Rocky

 03-28-2012, 11:18 AM
#302

Did you leave your number so you can run him sometime?! ahahahha!!! From a roll it MAY be interesting for a few seconds (Im probably under-estimating the GT-R)...from a dig, though....He would probably embarrass you with his fancy automatic transmission and all-wheel drive lol

Reply
 0
0

0


 03-29-2012, 03:16 PM
#307
Senior Member
Thread Starter
iTrader: (7)

Join Date: Sep 2009
Location: Royal Oak Michigan
Posts: 754
Total Cats: 68
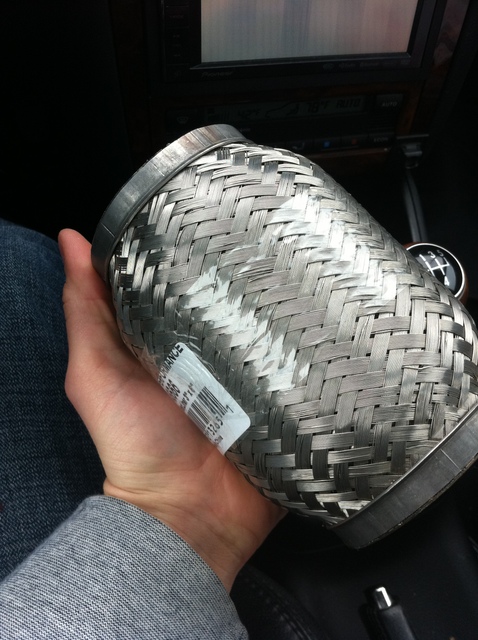
Flex pipe on my BEGi Downpipe also started to leak.. picked up this guy.
I'll likely end up snagging the FM downpipe brace because it's sexy. Anyone know if it works with the BEGI pipe?
I'll likely end up snagging the FM downpipe brace because it's sexy. Anyone know if it works with the BEGI pipe?

Reply
0
0
03-30-2012, 10:00 AM
#308
Senior Member
Thread Starter
iTrader: (7)
Join Date: Sep 2009
Location: Royal Oak Michigan
Posts: 754
Total Cats: 68
Needed to knock the dust off my old friend here.. Time to get some work done.
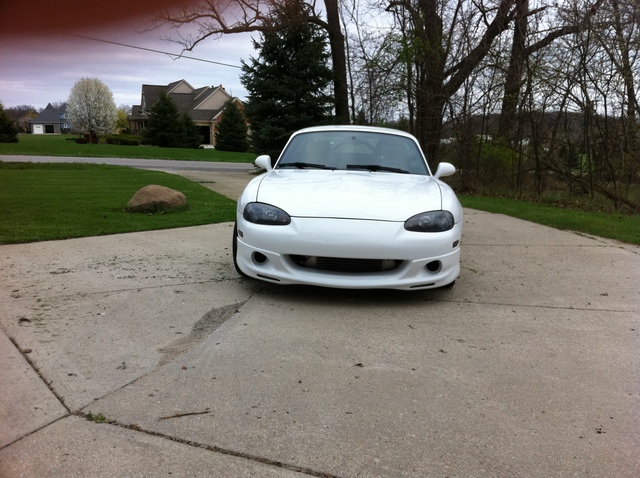
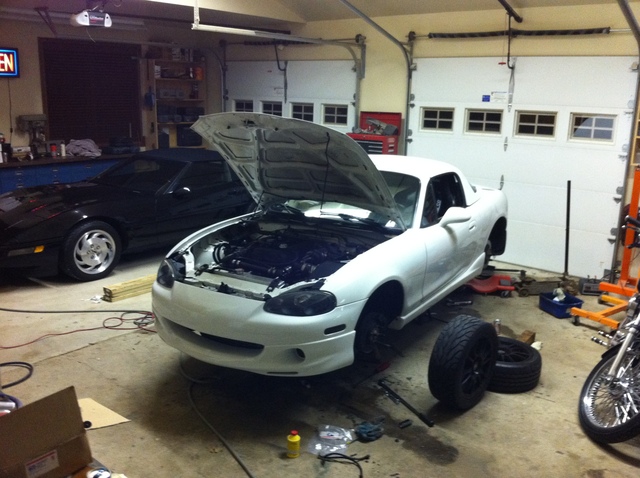
Car looked cute pre-surgery.
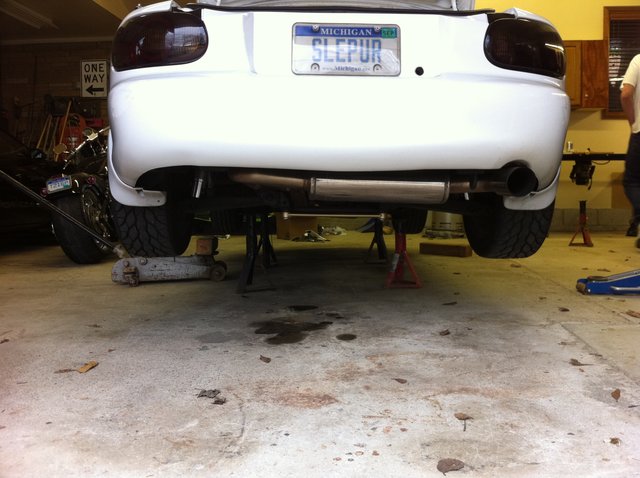
All out with the jack stands. Come on differential.. come here..

Car looked cute pre-surgery.

All out with the jack stands. Come on differential.. come here..

Reply
0
0

 03-30-2012, 05:40 PM
#311
[QUOTE=Dem768;854911]Turbo plans are on hold.. Undecided as of now.
I did just purchase a 3.636 rear end though.

Bryan, do you happen to know what tire size the gear ratios were based on?
I just put mine in a few weeks ago. Do you know if the speedo gear can be changed or do you have to buy the Ausse speedo sender from MiataRoadster?
I did just purchase a 3.636 rear end though.

Bryan, do you happen to know what tire size the gear ratios were based on?
I just put mine in a few weeks ago. Do you know if the speedo gear can be changed or do you have to buy the Ausse speedo sender from MiataRoadster?
Reply
0
0
 04-02-2012, 11:05 AM
#313
Senior Member
Thread Starter
iTrader: (7)
Join Date: Sep 2009
Location: Royal Oak Michigan
Posts: 754
Total Cats: 68
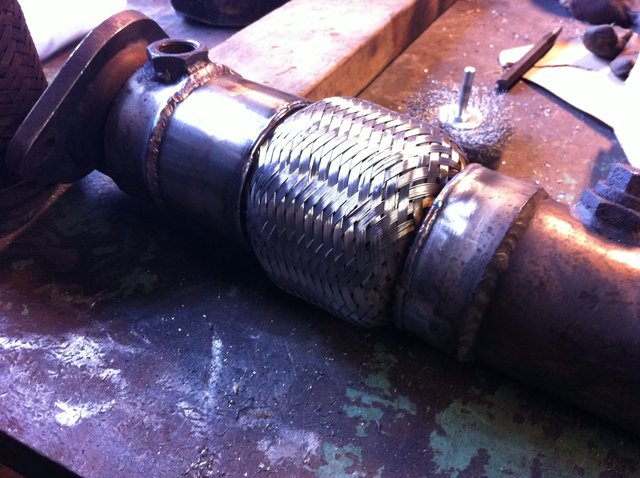
My BEGi downpipe was leaking beyond the point of me dealing with it. The flexpipe was blown out so I picked up a replacement piece from Vibrant. The job was a bit tedious with the position of everything and I was not 100% confident that I could pull it off in one go. Luckily I have a friend who is likely one of the best welders I'll ever meet.
He was happy to help out.
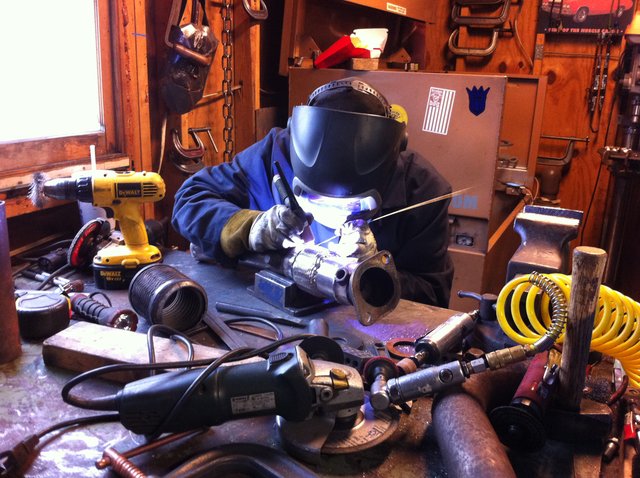
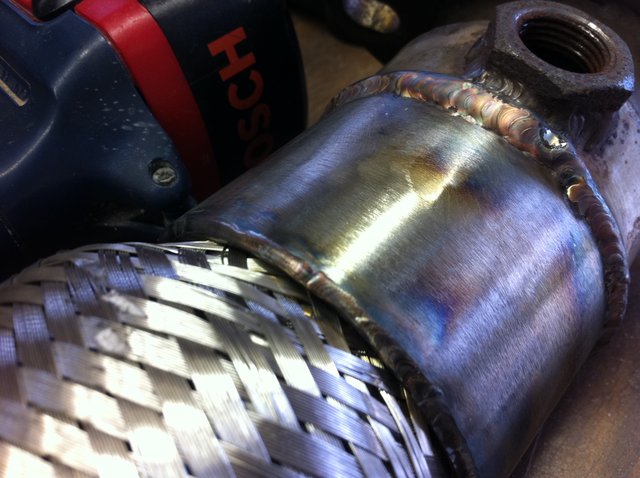
And as expected- it looks like jewelry. His welds are both the ones immediately next to the flex material and the one that meets my downpipe.
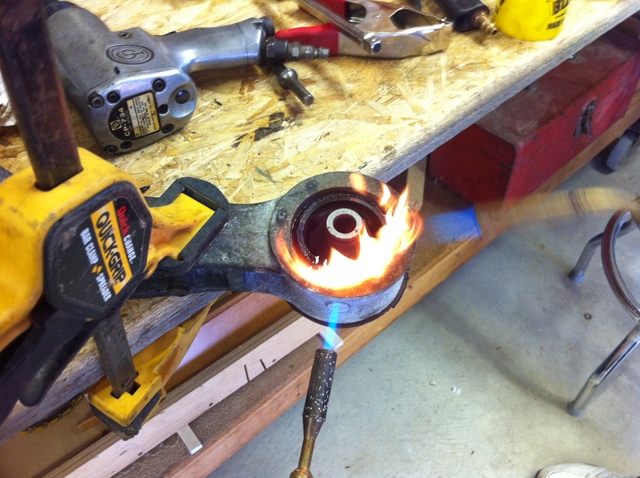
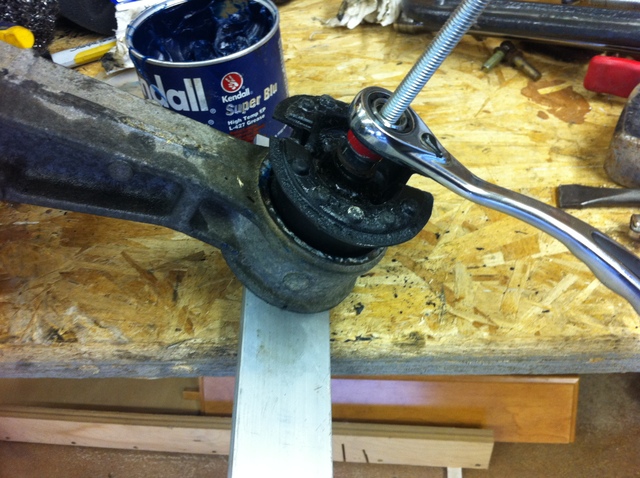
I pulled the diff and knew the bushings were bad so out they came. Heated it up and pounded it out with my bawse-***-air-hammer.
The new mounts obviously didn't want to slide in so I drilled a hole in a piece of aluminum and ran a bolt through it with my fancy ratchet.
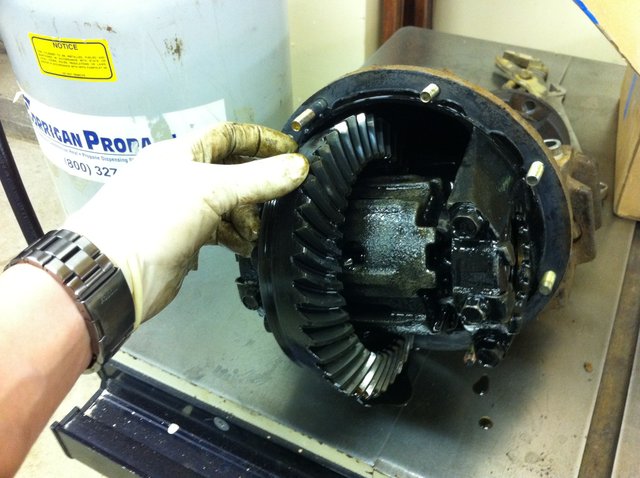
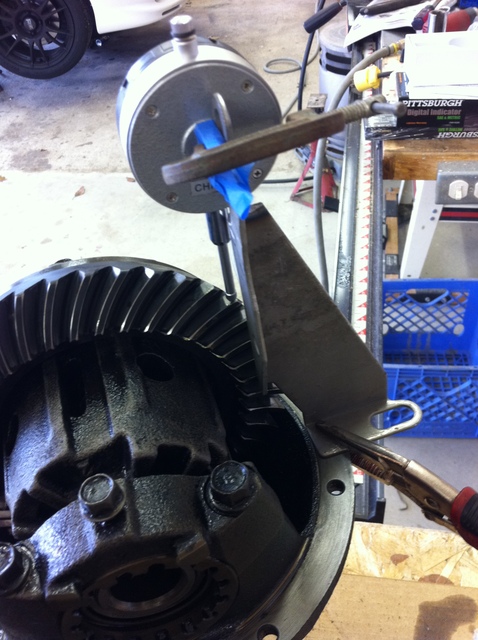
Now it was time to get to the fancy stuff. I pulled the diff apart and started to disassemble it. Everything looked pretty clean.
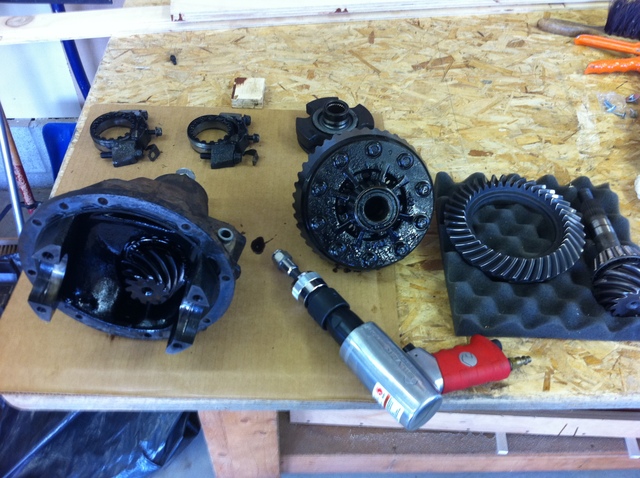
New gears and old gears. The new ring got the old better safe than sorry treatment with some loctite.
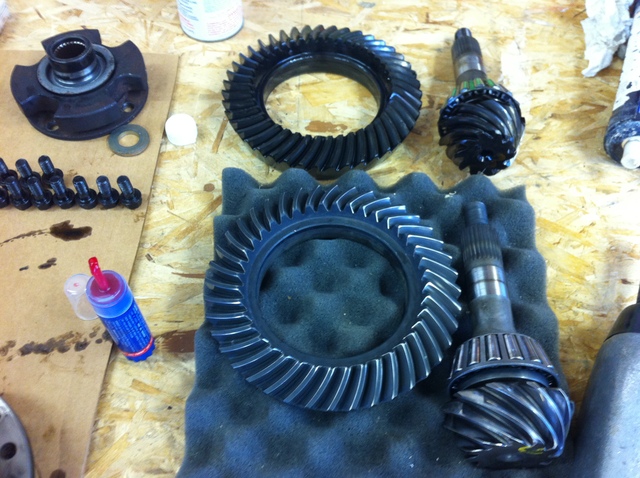
The new pinion installed. The old one was a bit of a tough one to get out. Required some rather serious pounding.
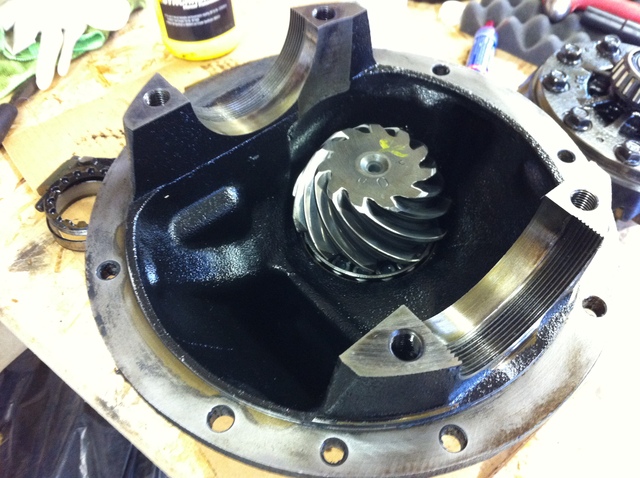
Ring gear torqued on. (51-61 ft-lb)
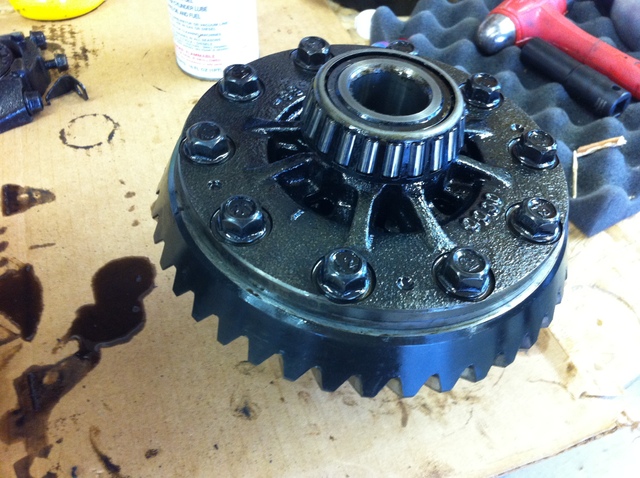
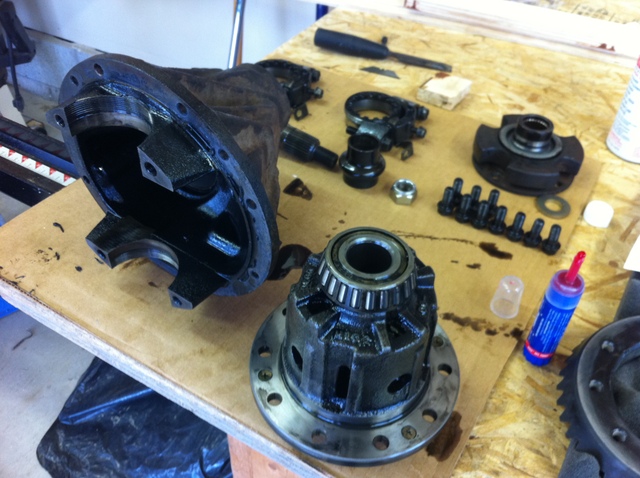
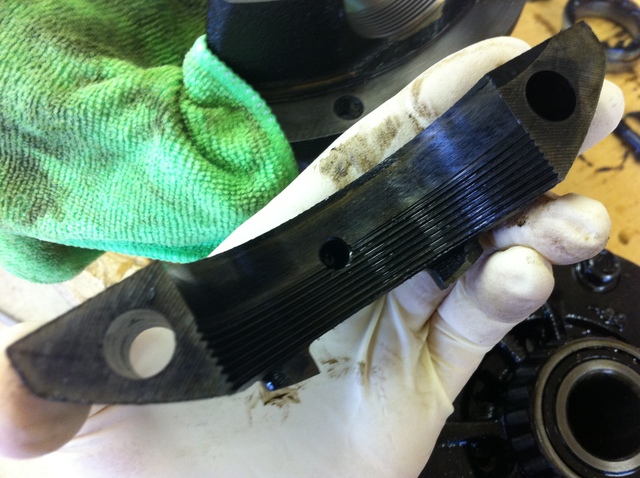
The bearing caps didn't look very clean so I got them back in shape with some light scuffing.
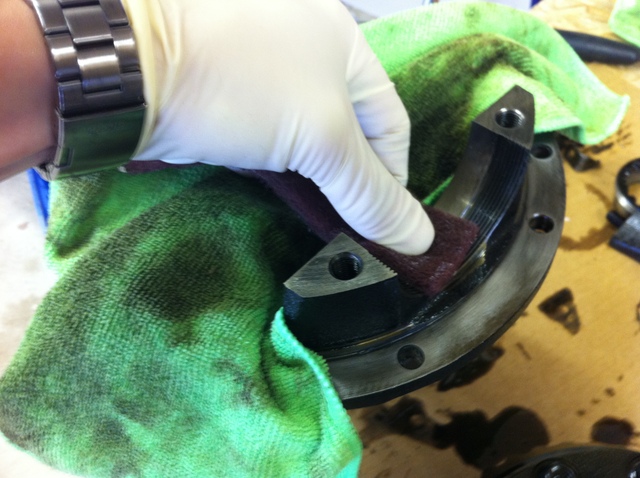
Dropped the caps on and installed the bearing adjusting rings. These are used when setting up the diff. They basically allow adjustment of preload and the position of the ring gear against the pinion for setting the proper backlash clearances.
To move the diff right- loosen the right ring and tighten the left ring... Simple.
To adjust preload- Tighten them both or loosen them both.
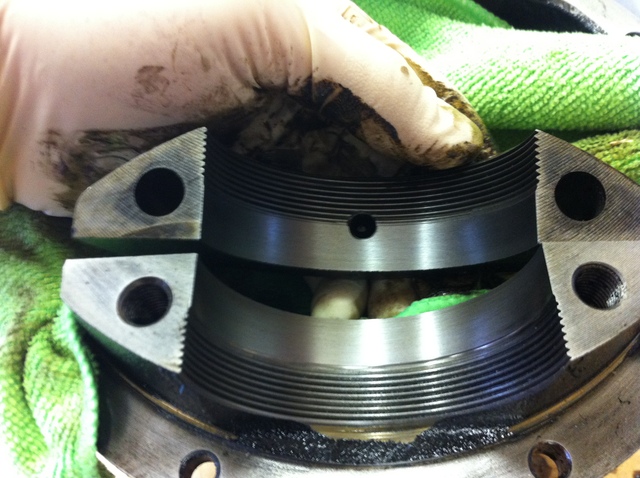
Next it was time to setup the dial indicator. I used a random transmission line hanger from a small block chevy to mount my Dial Indicator. I made some adjustments after this picture in order to make the measurement at the 90 degree marks but you can get the idea.
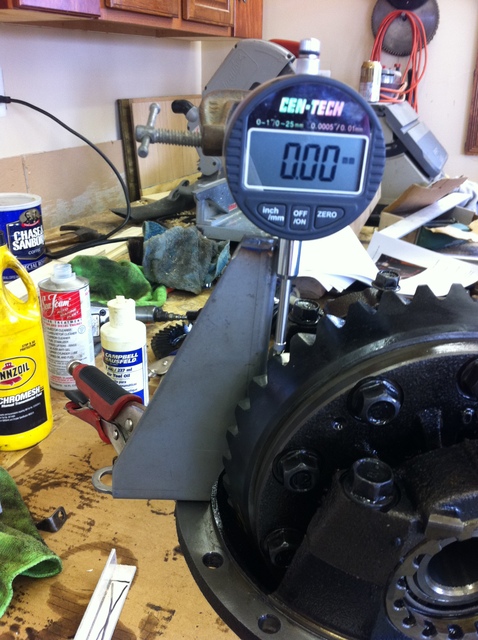
The ring gear backlash needed to fall between (0.0036-0.0043) so I set it to 0.0038 and checked the measurement at 4 points on the gear.
Then you must check the bearing preload. There are four points on the bearing caps and the preload is measured between these points. You measure the tabs diagonal from each other. The preload must be (7.3004-7.3031). I aimed for 7.3025.
You can see that my digital micrometer didn't have big enough arms on it so I used some aluminum angle to extend the range. I was super careful and extremely precise with this.
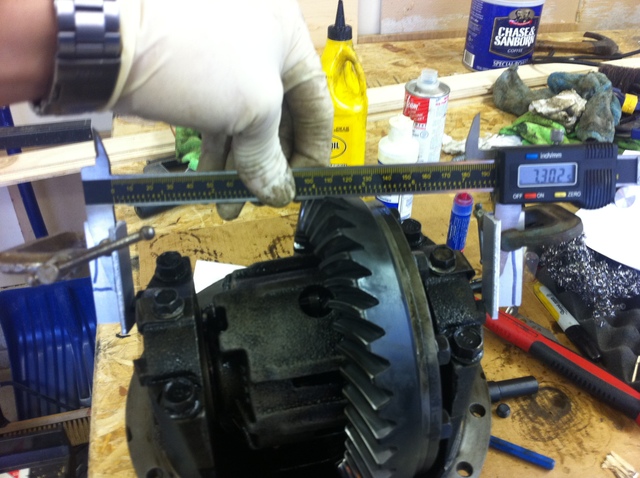
Again these adjustments are done by rotating the bearing rings so you should try to move them both equally to not mess up your already set backlash. Once you are happy with the preload numbers, recheck the backlash and install your adjuster locks.
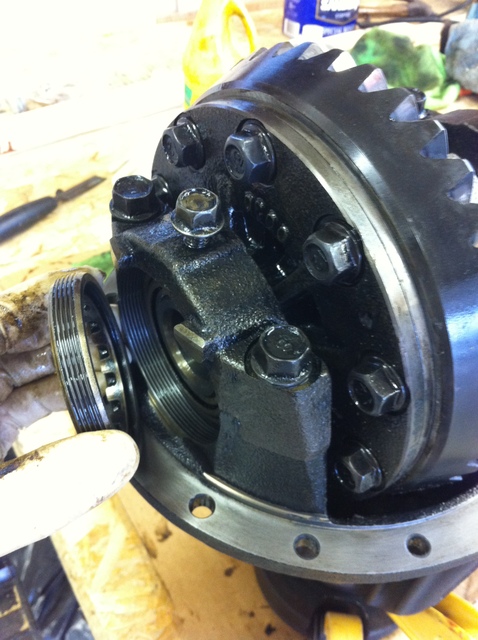
I cleaned up the gasket surface and applied RTV silicone. Then I dropped the assembly back into the casing. Installing the diff back in the car was a snap. Everything went together nicely.
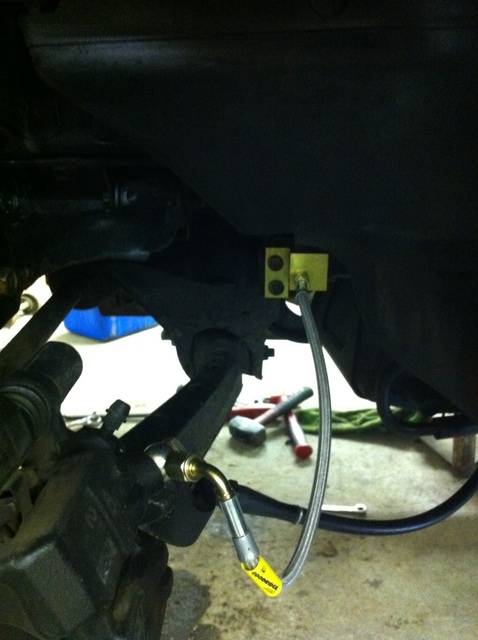
Then I moved on to the braided brake lines. These went as expected. The NB has a splitter block built into the passenger rear side from the factory and my Goodridge lines had a nice fancy replacement part. These lines look awesome.
The night had turned into morning and I was out of brake fluid anyways. I'll finish her up tonight after work.
He was happy to help out.

And as expected- it looks like jewelry. His welds are both the ones immediately next to the flex material and the one that meets my downpipe.


I pulled the diff and knew the bushings were bad so out they came. Heated it up and pounded it out with my bawse-***-air-hammer.

The new mounts obviously didn't want to slide in so I drilled a hole in a piece of aluminum and ran a bolt through it with my fancy ratchet.

Now it was time to get to the fancy stuff. I pulled the diff apart and started to disassemble it. Everything looked pretty clean.


New gears and old gears. The new ring got the old better safe than sorry treatment with some loctite.

The new pinion installed. The old one was a bit of a tough one to get out. Required some rather serious pounding.

Ring gear torqued on. (51-61 ft-lb)

The bearing caps didn't look very clean so I got them back in shape with some light scuffing.


Dropped the caps on and installed the bearing adjusting rings. These are used when setting up the diff. They basically allow adjustment of preload and the position of the ring gear against the pinion for setting the proper backlash clearances.
To move the diff right- loosen the right ring and tighten the left ring... Simple.
To adjust preload- Tighten them both or loosen them both.

Next it was time to setup the dial indicator. I used a random transmission line hanger from a small block chevy to mount my Dial Indicator. I made some adjustments after this picture in order to make the measurement at the 90 degree marks but you can get the idea.


The ring gear backlash needed to fall between (0.0036-0.0043) so I set it to 0.0038 and checked the measurement at 4 points on the gear.
Then you must check the bearing preload. There are four points on the bearing caps and the preload is measured between these points. You measure the tabs diagonal from each other. The preload must be (7.3004-7.3031). I aimed for 7.3025.
You can see that my digital micrometer didn't have big enough arms on it so I used some aluminum angle to extend the range. I was super careful and extremely precise with this.

Again these adjustments are done by rotating the bearing rings so you should try to move them both equally to not mess up your already set backlash. Once you are happy with the preload numbers, recheck the backlash and install your adjuster locks.
I cleaned up the gasket surface and applied RTV silicone. Then I dropped the assembly back into the casing. Installing the diff back in the car was a snap. Everything went together nicely.
Then I moved on to the braided brake lines. These went as expected. The NB has a splitter block built into the passenger rear side from the factory and my Goodridge lines had a nice fancy replacement part. These lines look awesome.

The night had turned into morning and I was out of brake fluid anyways. I'll finish her up tonight after work.

Reply
0
0


 04-03-2012, 11:30 AM
#320
My car felt surprisingly civilized on stock suspension and 205/40/16 at 130. Probably coulda taken a hand off just fine; it went quickly across 3 lanes just fine...but in this beast, with the 3.6 and huge power, musta felt like a boring cruise. The only CARS I've ever done that speed in were a '90 300ZXtt (driving), Porsche 997 gt3rs, 997s, 997turbo (driving)...these cars are all on a very different level than a Miata, so this is an impressive feat. What speed did you actually reach? Beyond burying the needle, or just 150-ish for the sake of a pic?
Reply
0
0


