Building the boosted smurf

 05-02-2015, 01:01 PM
#302
Elite Member

Join Date: Oct 2013
Location: Cedar City, UT
Posts: 2,764
Total Cats: 951
Boosted too funny you were doing your AN line solution at the same time I was putting together my list for it as well, great minds think alike. Took some serious thought to get every single fitting correct!

Reply
 0
0

0
05-03-2015, 10:41 PM
#304
Junior Member
Thread Starter
iTrader: (1)

Join Date: Feb 2013
Location: Windsor, Ontario
Posts: 403
Total Cats: 65
Haven't had a chance to get back on here since the weather was so nice this weekend that I kind of took it as a chance to take a break from the car for a couple days and actually have a social life lol. Thanks for all the feedback!
There's a bunch of little things to wrap up and still figure out. And then after all the parts are there and installed its still going to be a bit because I need an engine harness built and need to figure out what I'm doing about that. Don't know if I'm going to try to teach myself how to do it or pay someone to build me a harness.
It's actually just the eBay rad I was running last time. I'd like to upgrade to something "better" but the money just isn't there right now. It is near the top of the list of things to upgrade over the next few months after the car is running.
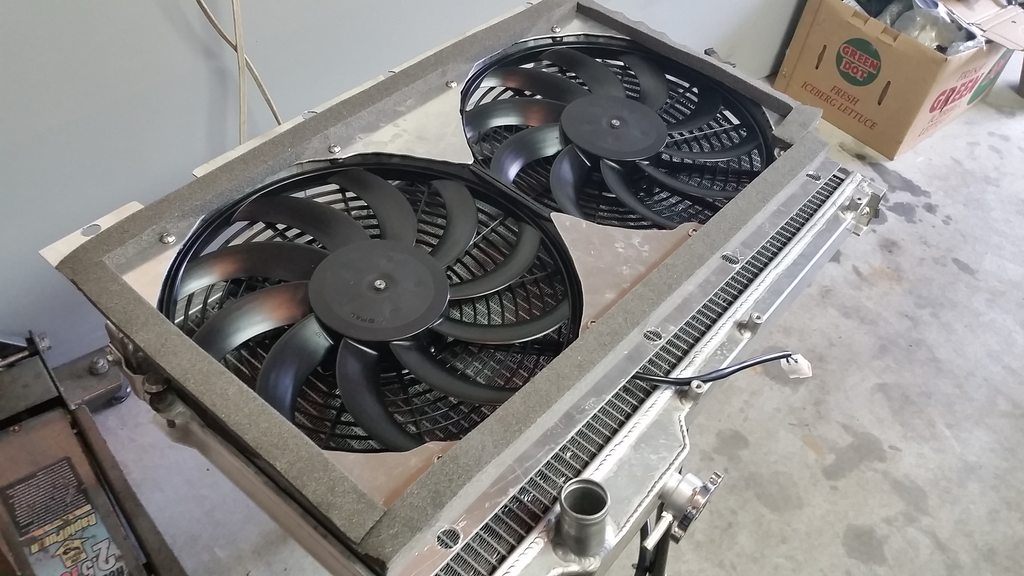
For the fans I just asked Bryan if he could get me some slim fans and next thing I knew they were ready to be picked up. That's one of the reasons I keep going back to him for parts lol. But yea, Fab9 can get SPAL slim fans, just send him a message and I'm sure he'd be glad to help you out.
I do need to get my hands on some thermal sleeving though.
Good to know about the drain, I was a bit unsure but from the little bit of reading I did it seemed like it would work.
I'm with you on all the planning for different fittings, can't believe all the different fittings and adapters that could be easily overlooked. Still waiting on some fittings for my fuel setup and my -4AN line for the oil feed but hopefully those will be in this week sometime.
Thanks Vlad! It means a lot to me when my car can be compared to Jeff's in any way. It is not nearly as close to perfection as Jeff's but I'm trying to do a lot of learning as I go to keep making it better and better.
----------
Something I completely overlooked due to the overwhelming amount of work going on and feel like an idiot for doing so is that I'm only setup for using the stock CAS right now. I haven't had a chance to look into it much more but I feel like I should be doing something more like a crank sensor w/ trigger wheel which sucks because my ATI damper is already on and I really don't want to take it off again. But at the same time, I don't know how well the CAS will do on a 4-500+whp car. Thoughts?
As I get closer to firing this thing up I'm getting some terrible anxiety that I overlooked something while putting it together and I really don't like that feeling.
Did you end up using the Koyo Hyper V rad? I'm debating between that and the FM crossflow. Were the fans a special order from Bryan? I didn't see them on his site.
I'm sure you have this covered, but I'd suggest some thermal sleeving over the heater lines. They'll get pretty toasty back there.
I'm sure you have this covered, but I'd suggest some thermal sleeving over the heater lines. They'll get pretty toasty back there.
For the fans I just asked Bryan if he could get me some slim fans and next thing I knew they were ready to be picked up. That's one of the reasons I keep going back to him for parts lol. But yea, Fab9 can get SPAL slim fans, just send him a message and I'm sure he'd be glad to help you out.
I do need to get my hands on some thermal sleeving though.
He won't have issues. I have no fire sleeve on mine and it doesn't show even a hint of melting the nylon braiding.
Boosted too funny you were doing your AN line solution at the same time I was putting together my list for it as well, great minds think alike. Took some serious thought to get every single fitting correct!
Boosted too funny you were doing your AN line solution at the same time I was putting together my list for it as well, great minds think alike. Took some serious thought to get every single fitting correct!
I'm with you on all the planning for different fittings, can't believe all the different fittings and adapters that could be easily overlooked. Still waiting on some fittings for my fuel setup and my -4AN line for the oil feed but hopefully those will be in this week sometime.
----------
Something I completely overlooked due to the overwhelming amount of work going on and feel like an idiot for doing so is that I'm only setup for using the stock CAS right now. I haven't had a chance to look into it much more but I feel like I should be doing something more like a crank sensor w/ trigger wheel which sucks because my ATI damper is already on and I really don't want to take it off again. But at the same time, I don't know how well the CAS will do on a 4-500+whp car. Thoughts?
As I get closer to firing this thing up I'm getting some terrible anxiety that I overlooked something while putting it together and I really don't like that feeling.
Reply
0
0
05-04-2015, 01:07 PM
#306
Junior Member
Thread Starter
iTrader: (1)
Join Date: Feb 2013
Location: Windsor, Ontario
Posts: 403
Total Cats: 65
Yea, I mean the CAS could work but wouldn't be the best option. I just really do not want to take that harmonic balancer off with how hard it was to put on.
Reply
0
0
05-05-2015, 01:15 AM
#307
Junior Member
Thread Starter
iTrader: (1)
Join Date: Feb 2013
Location: Windsor, Ontario
Posts: 403
Total Cats: 65
Today was terrible. I was on track to have the car ready for wiring Friday until I went to get ready to do my oil feed. When I pulled the bolt out of the block it fell behind the flywheel. Tried to get a magnet in there. No luck. Tried harder, magnet got stuck. Pulled turbo to try to get different angles and better leverage, still stuck. had to pull the driveshaft, exhaust, trans, and adaptor plate. Fml. Got it out around 11:30 and called it a night. This thing is never going to run.
Reply
0
0
05-05-2015, 09:37 PM
#308
Junior Member
Thread Starter
iTrader: (1)
Join Date: Feb 2013
Location: Windsor, Ontario
Posts: 403
Total Cats: 65
Got the car back to the point it was at yesterday before my stupid mistake. Went to pull the ATI damper off but the pulley puller I had only had one bolt that is the right thread for the ATI damper. Will go out tomorrow morning to pick up the right bolts and hopefully get this thing off. I just keep telling myself this set back of adding a trigger wheel will be worth it for the reliability. If it wasn't for this I'd probably be ready to start wiring this weekend.
To do list looks something like this before I can start on wiring:
- Trigger wheel
- Crank sensor
- Brake lines
- Clutch line
- Fuel line from rail to regulator (waiting on AN fittings)
- Mount fuel pump, in pump line, bulkhead, and fitting on the feed line (waiting on fittings)
- Mount FPR (waiting on fittings so I can make the line and know where it'll work well)
- Turbo oil feed (waiting on -4 line) and water lines (waiting on banjo bolts)
- Seal fan shroud and install the rad
- Intercooler piping (waiting on couplers)
- Catch can lines
- Make a mount for LS coils
- Mount the battery
So I guess I'm not too far away, just need to finally pick up all the little things I need to finish this.
Last edited by BoostedSmurf; 05-05-2015 at 10:34 PM.
Reply
0
0
 05-07-2015, 03:26 PM
#310
Junior Member
Thread Starter
iTrader: (1)
Join Date: Feb 2013
Location: Windsor, Ontario
Posts: 403
Total Cats: 65
So with how stressful wrapping up a giant build like this has been I've totally lost any excitement for this car. Part of me wanted to just tone it down a lot and go for smaller goals while another part of me wanted to just part out and start fresh with a nice and simple build. Before making any decisions I'll regret I think I'm just going to take a step back from the car for a bit, build my bank account back up a bit and maybe come back to it a bit later. With everything that has been going wrong for me while working on the car lately I just don't feel like dealing with it for a while.
Reply
0
0
05-07-2015, 03:31 PM
#311
SADFab Destructive Testing Engineer


iTrader: (5)
Join Date: Apr 2014
Location: Beaverton, USA
Posts: 18,642
Total Cats: 1,866
Way to keep your head about this man. Stay sensible, no need to part out or do anything crazy. A break now won't hurt in the long run at all.
Reply
0
0
05-07-2015, 03:40 PM
#312
Elite Member
Join Date: Oct 2013
Location: Cedar City, UT
Posts: 2,764
Total Cats: 951
Paul, take a break man, trust me, it will be really healthy for you when you hit the "**** it" zone of working on the car.
Just step away and don't even look at the project for a couple days/week and I guarantee you will feel differently afterwards.
Trust me man, you will regret it. I had similar thoughts before I got Bryan's manifold and turbo all running, and after I tuned it I literally can't imagine selling the car. The best part of my day is going for a small cruise around town in the afternoon.
Reply
0
0
05-07-2015, 04:56 PM
#313

What's the rush? And what's the point in hobbying if you're not enjoying it?
In any hobby I try to get to the shop for 1 hour per day during the work week and probably 5-10 hours during the weekend.
I've found that as long as I'm making progress, I stay content.
I've done marathon weekends to get my DD back on the road, but that's not a hobby, it's something that I need to get me to work.
Reply
0
0
05-07-2015, 06:13 PM
#315
Junior Member
Thread Starter
iTrader: (1)
Join Date: Feb 2013
Location: Windsor, Ontario
Posts: 403
Total Cats: 65
Thanks guys. The rush is that the nice weather is here, I haven't driven my car in 11 months and I really just want a car to drive again. Plus there are more and more car events coming up that I want to be able to drive my own car to for a change.
I might pick at it here and there a couple nights over the next few weeks but probably won't dedicate full days to it for a while.
I've had the past two weeks off work as an opportunity to finish the car and they just weren't productive days because of things going wrong.
There was also a rush when it was at the other garage since it wasn't my space it was taking up. Now that it's home I can leave it on jack stands in my garage forever lol
Reply
0
0
05-07-2015, 09:41 PM
#316
Former Vendor
iTrader: (8)

Join Date: Mar 2005
Location: Broken Arrow,Ok
Posts: 1,185
Total Cats: 57
I'm with you. Just getting my engine back together has taken longer than I anticipated the whole process taking. Slow it down for a bit and get back into it gradually. It's going to be genuinely epic!
Reply
0
0
05-14-2015, 11:44 PM
#317
Junior Member
Thread Starter
iTrader: (1)
Join Date: Feb 2013
Location: Windsor, Ontario
Posts: 403
Total Cats: 65
Well after taking pretty much a week off from the car and all car related things for the first time in a long time I decided to start picking away at it again. Except that the picking away at it turned out to be super productive.
Got the trigger wheel from Bryan, pulled the Ati pulley, mounted the trigger wheel, and got the pulley back on. Reset timing but didn't have an extra pair of hands/eyes so I think I may be 1 tooth off on the belt but I'll redo that later.
Made my oil feed line.
In my last update I started mocking up intercooler piping while I waited for a coupler. Well that was a waste of time because after I got the coupler on there the pipe I made up didn't work, but the same general idea would work so I made a few more cuts and got a new pipe mocked up. Seemed to work out alright.
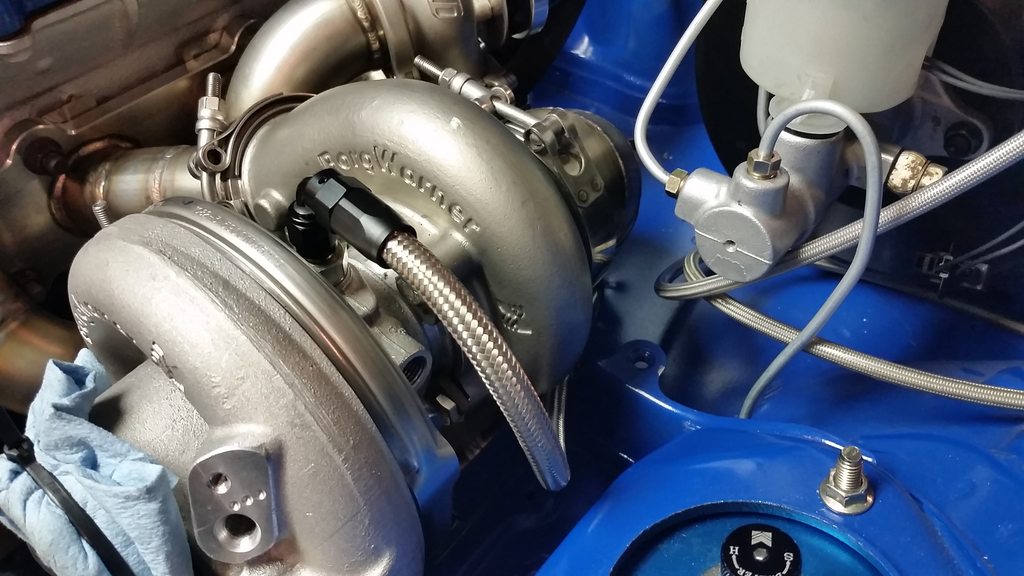
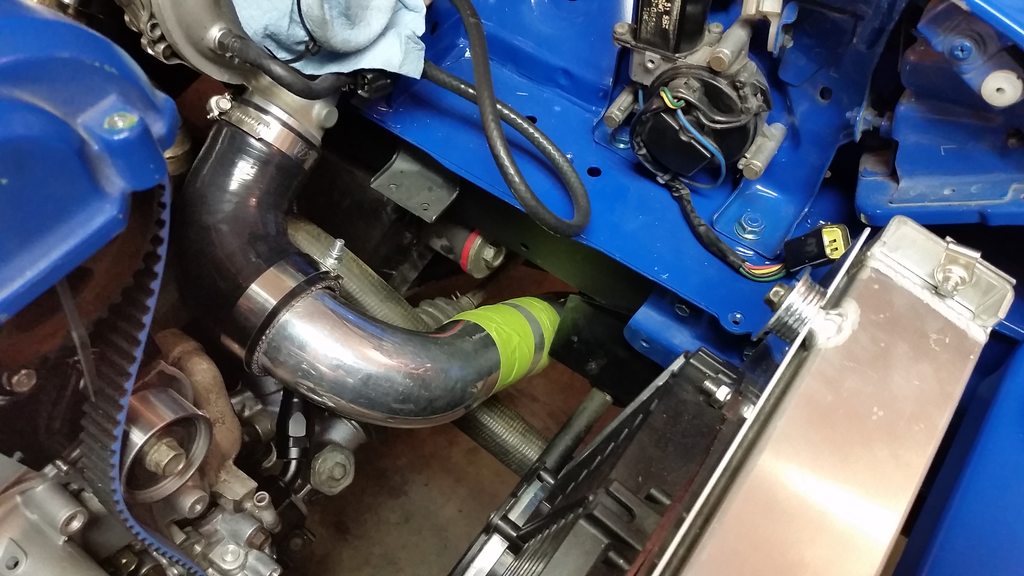
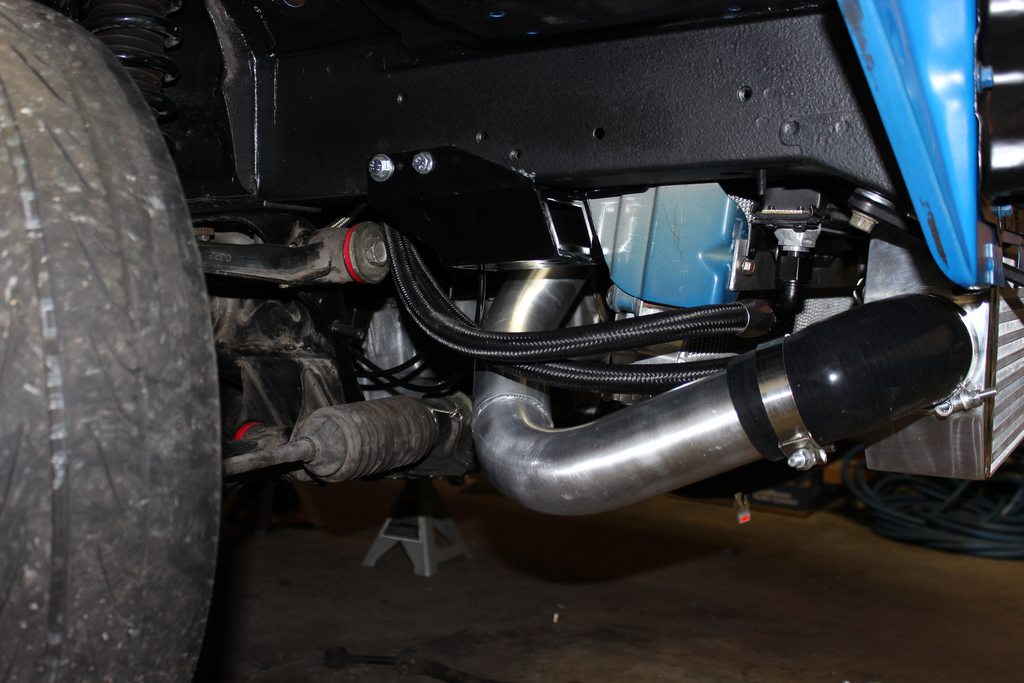
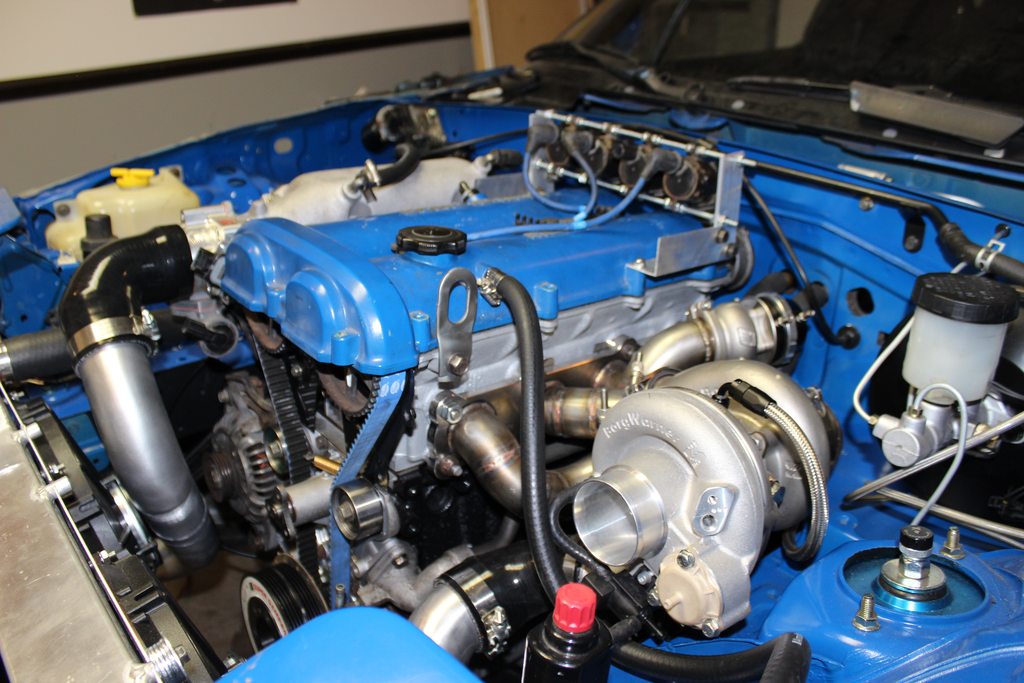
Next up was the hot side intercooler pipe. This one was kind of a pain because of how tight everything is. I thought the cold side pipe was going to be the hard one but I was wrong. Still, got it all figured out. I ended up getting a 2" to 2.5" transitioning 90* coupler to come off the turbo to make the tight bend away from the manifold. Never realized how expensive quality couplers were until putting this stuff together!
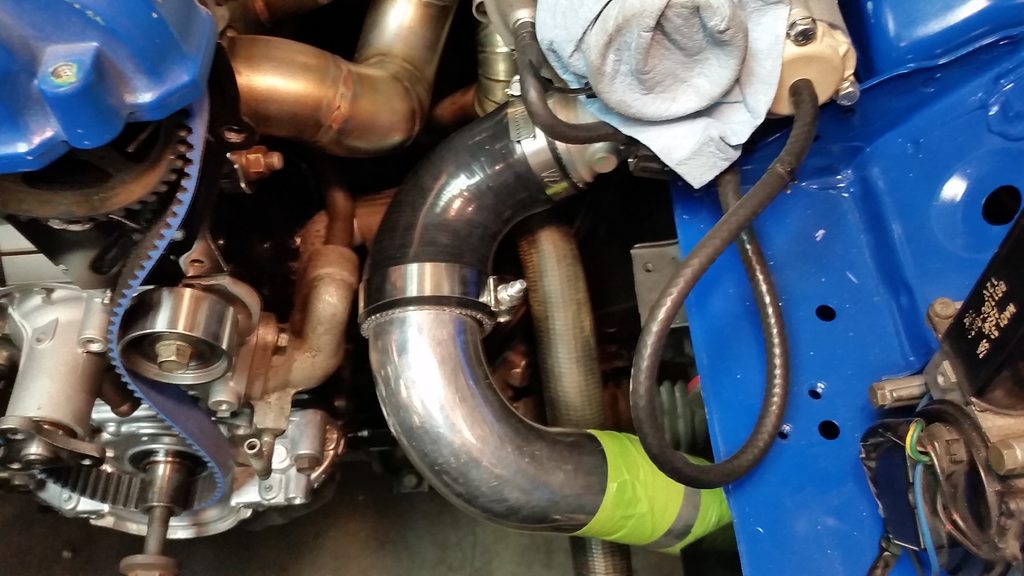
Used all new bends I bought rather than the black piping I had but needed one straight so you can see where i was in the process of cleaning off the black coating on the one straight section in this pic.
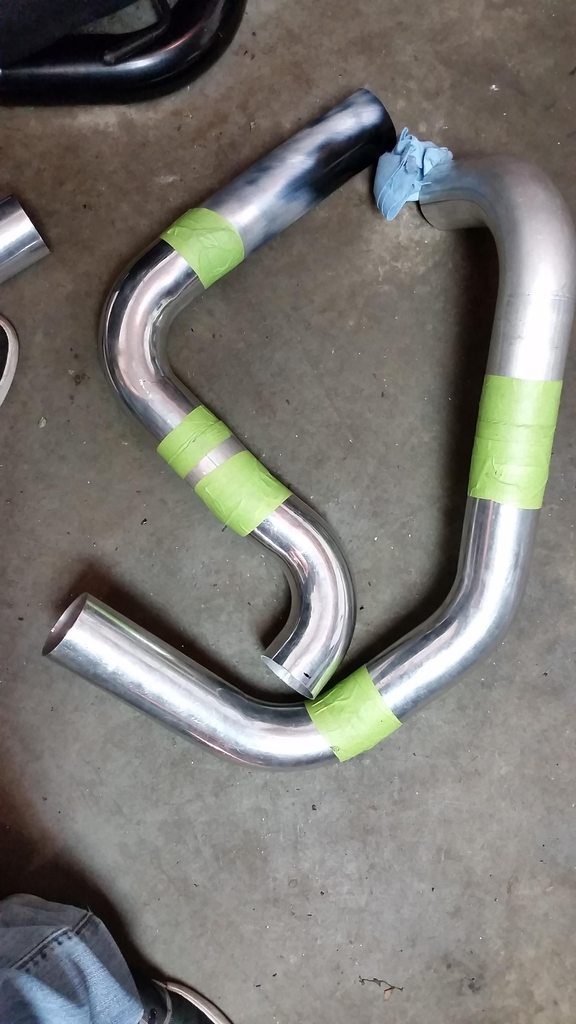
Dropped the pipes off and had them welded up followed by some scotchbrite to clean them up a bit. I'm really pleased with how this all turned out, especially for my first time doing something like this and how nervous I was going in to it.
Next up was finding a way to mount my LS coils. I originally wanted to mount them along the intake side of the valve cover but didn't have the tools to make a mount like that look as good as I would have wanted. Decided to go with this setup. I'm still kind of on the fence about it but it seems to do the job pretty well so I might stick with it. Any comments/suggestions welcomed on this mount. It cost me under $10 since the girl working at the store forgot to scan out a bunch of the aluminum and threaded rod I got.
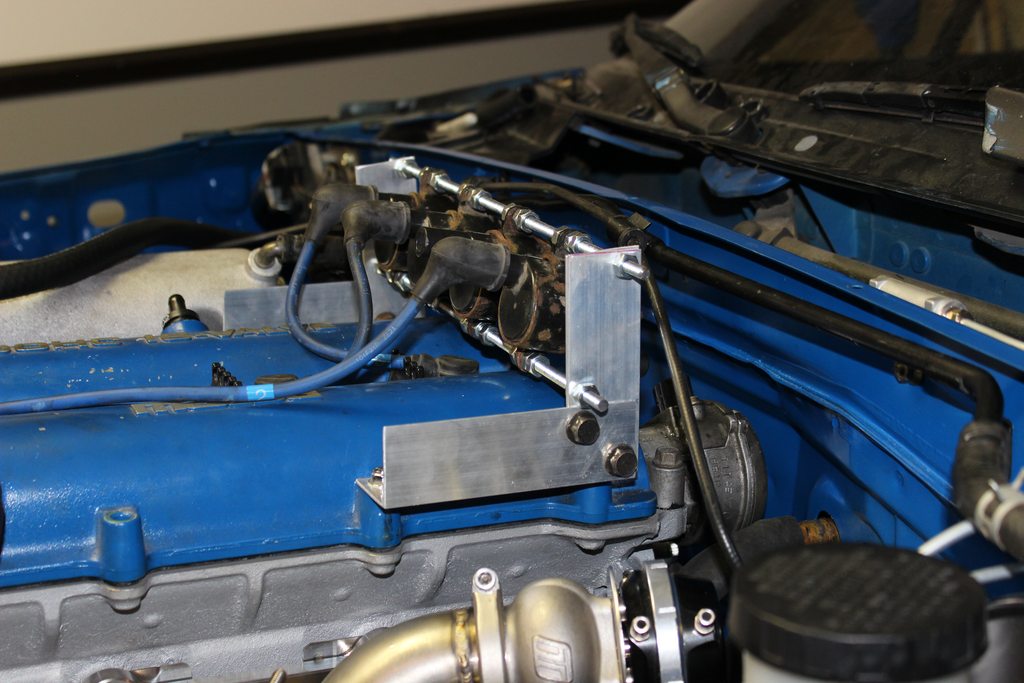
The metal brackets that hold the coils still need to be cleaned up and repainted.
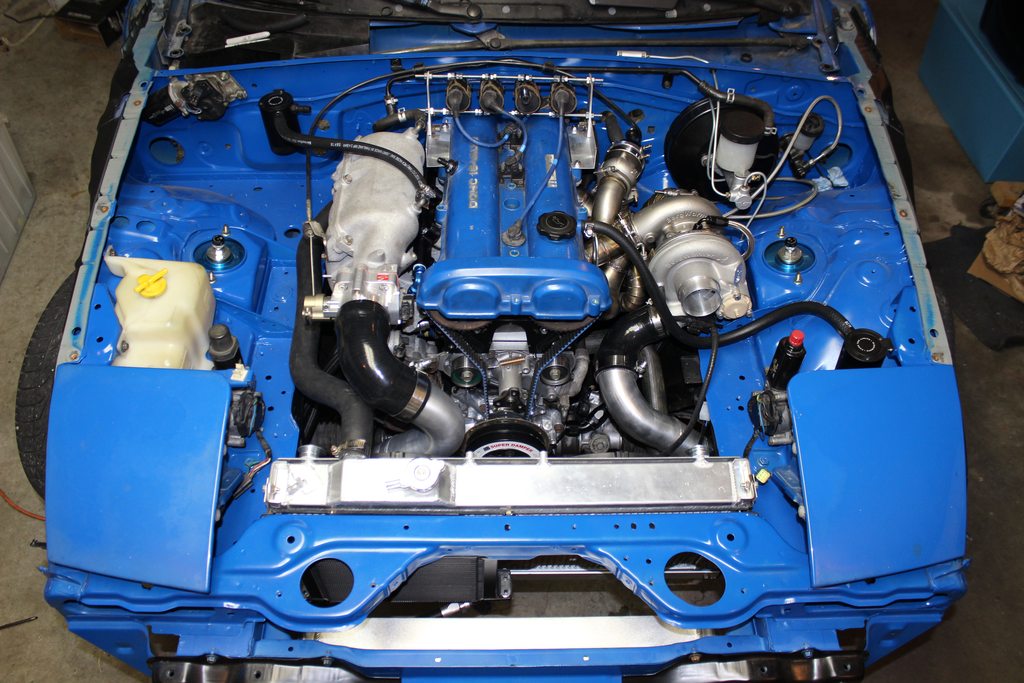
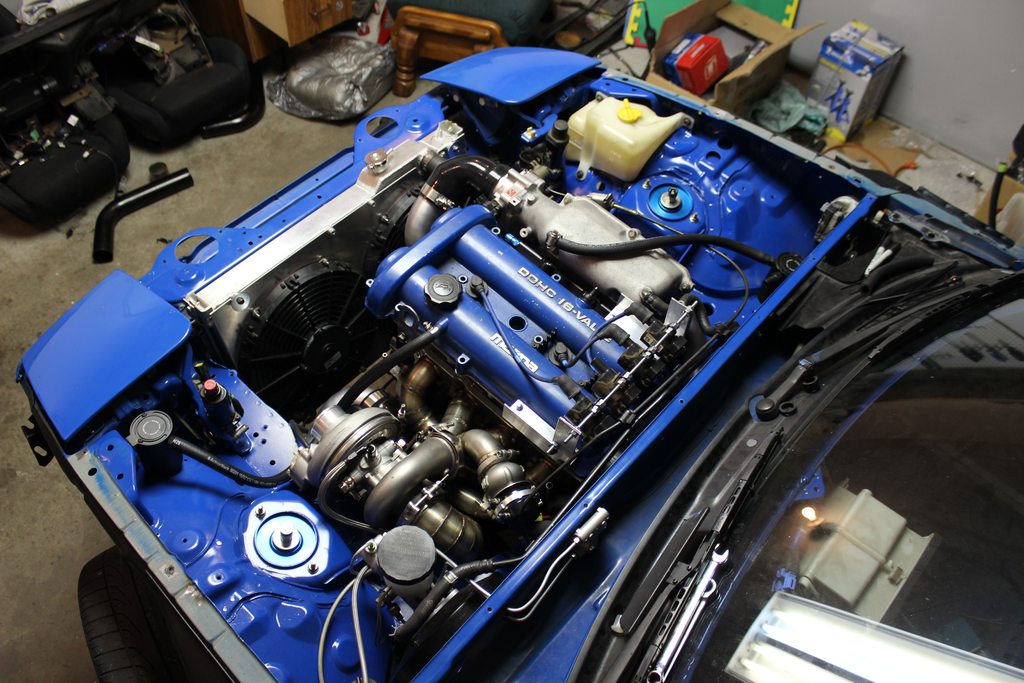
Started doing catch can lines and other small things in the engine bay too as I try to wrap things up. Brought the camera out and took some pics of how it looks now.
Still need to
- respray and actually install VC
- brake lines
- clutch line
- fuel pressure regulator & lines from rail and to return
- turbo water lines
- seal the fan shroud
- finish up catch can lines
- fire sleeve heater core lines
- mount battery
- mount meth pump/run meth line
- crank sensor & modify CAS
- spark plugs & wires
At this point I'm leaning towards teaching myself how to properly do wiring and doing that myself as well. I've managed to figure out how to do everything else on the car, may as well learn how to do that too.
Got the trigger wheel from Bryan, pulled the Ati pulley, mounted the trigger wheel, and got the pulley back on. Reset timing but didn't have an extra pair of hands/eyes so I think I may be 1 tooth off on the belt but I'll redo that later.
Made my oil feed line.
In my last update I started mocking up intercooler piping while I waited for a coupler. Well that was a waste of time because after I got the coupler on there the pipe I made up didn't work, but the same general idea would work so I made a few more cuts and got a new pipe mocked up. Seemed to work out alright.
Next up was the hot side intercooler pipe. This one was kind of a pain because of how tight everything is. I thought the cold side pipe was going to be the hard one but I was wrong. Still, got it all figured out. I ended up getting a 2" to 2.5" transitioning 90* coupler to come off the turbo to make the tight bend away from the manifold. Never realized how expensive quality couplers were until putting this stuff together!
Used all new bends I bought rather than the black piping I had but needed one straight so you can see where i was in the process of cleaning off the black coating on the one straight section in this pic.
Dropped the pipes off and had them welded up followed by some scotchbrite to clean them up a bit. I'm really pleased with how this all turned out, especially for my first time doing something like this and how nervous I was going in to it.
Next up was finding a way to mount my LS coils. I originally wanted to mount them along the intake side of the valve cover but didn't have the tools to make a mount like that look as good as I would have wanted. Decided to go with this setup. I'm still kind of on the fence about it but it seems to do the job pretty well so I might stick with it. Any comments/suggestions welcomed on this mount. It cost me under $10 since the girl working at the store forgot to scan out a bunch of the aluminum and threaded rod I got.
The metal brackets that hold the coils still need to be cleaned up and repainted.
Started doing catch can lines and other small things in the engine bay too as I try to wrap things up. Brought the camera out and took some pics of how it looks now.
Still need to
- respray and actually install VC
- brake lines
- clutch line
- fuel pressure regulator & lines from rail and to return
- turbo water lines
- seal the fan shroud
- finish up catch can lines
- fire sleeve heater core lines
- mount battery
- mount meth pump/run meth line
- crank sensor & modify CAS
- spark plugs & wires
At this point I'm leaning towards teaching myself how to properly do wiring and doing that myself as well. I've managed to figure out how to do everything else on the car, may as well learn how to do that too.
Reply
0
0
05-16-2015, 12:24 PM
#318
Junior Member
Thread Starter
iTrader: (1)
Join Date: Feb 2013
Location: Windsor, Ontario
Posts: 403
Total Cats: 65
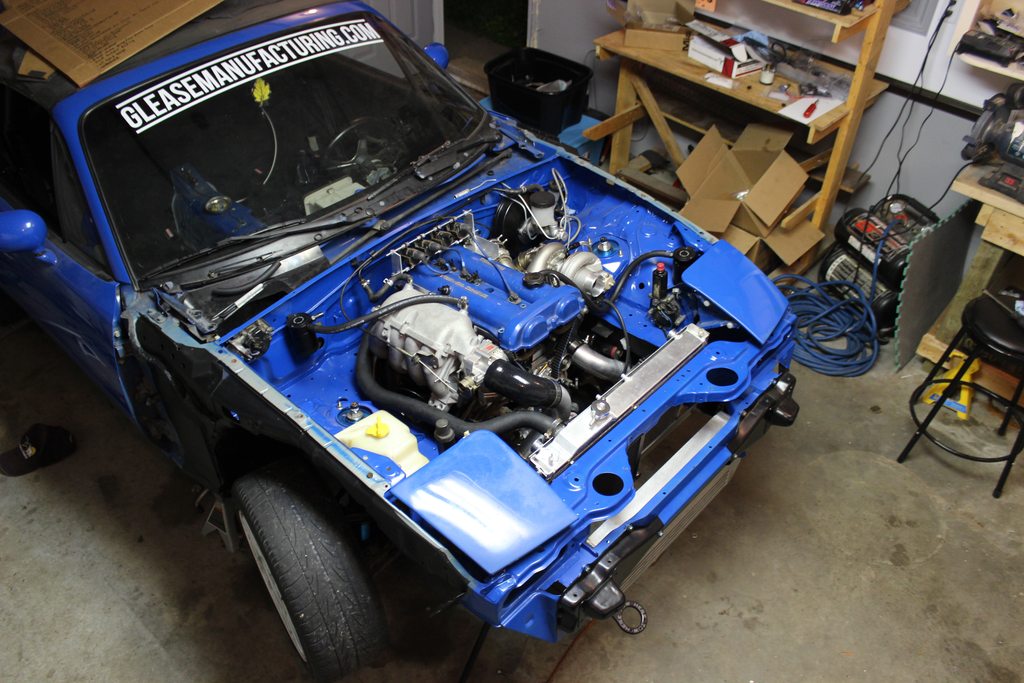
Small update since Friday was more of a garage cleaning day. Pushed the car out to clean the garage up since it looked like a bomb went off in there since the car was originally pushed in
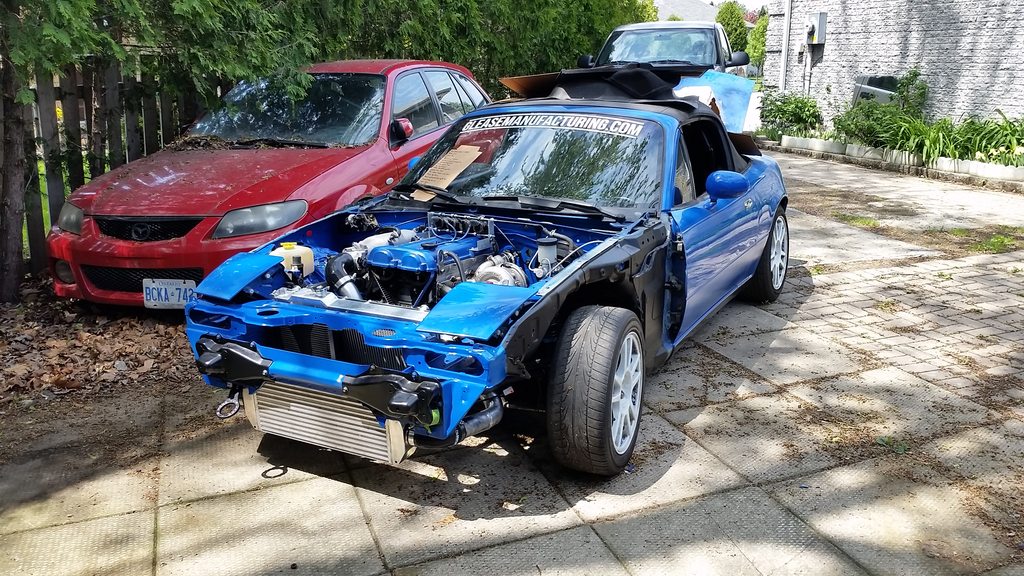
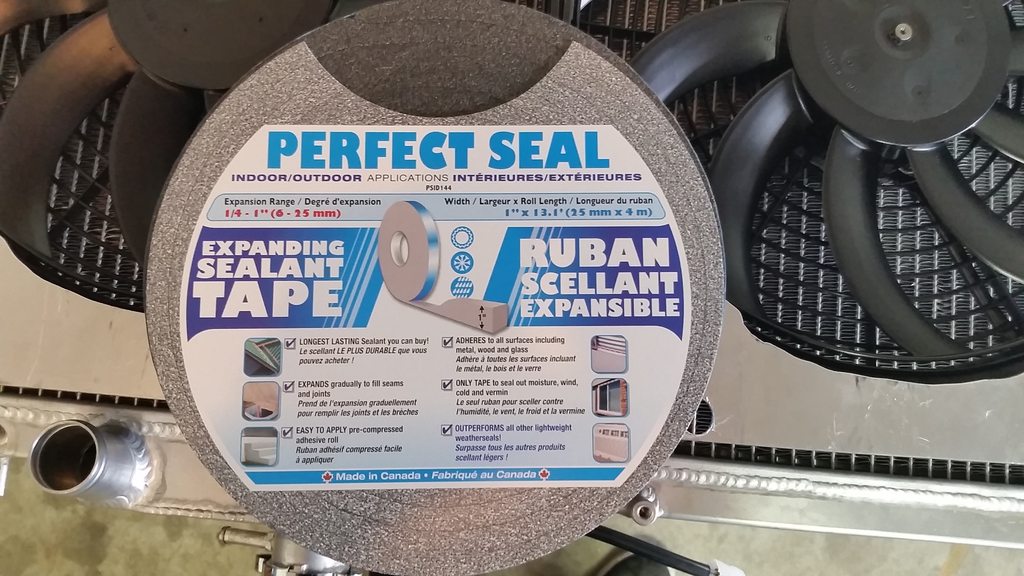
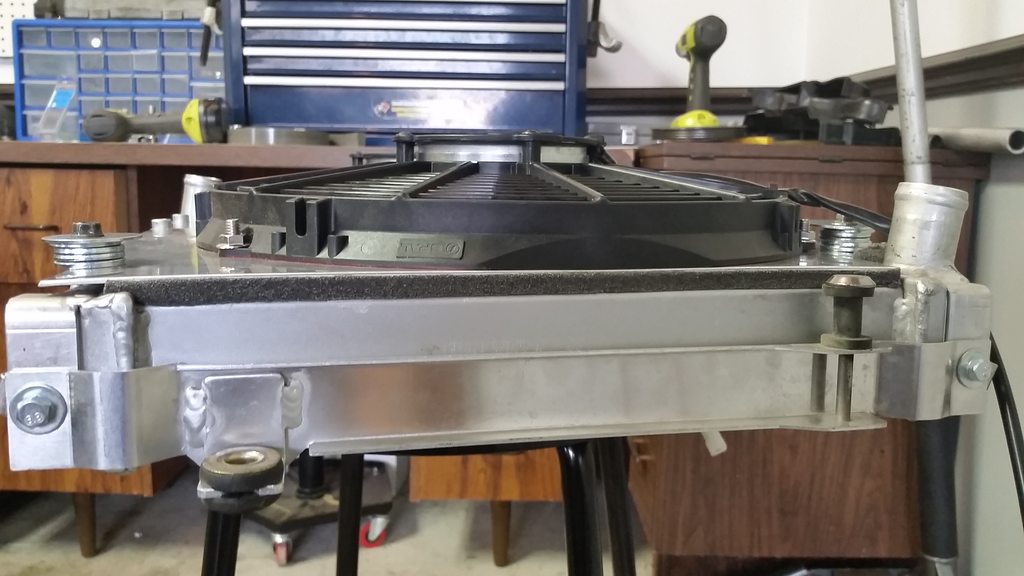
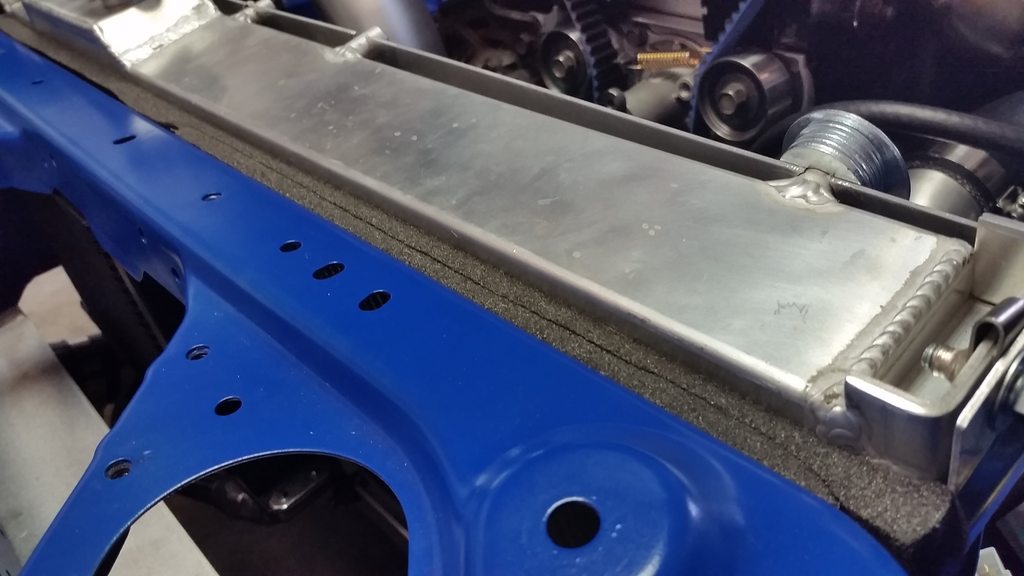
Got the car back in and sealed up the fan shroud with some self-adhesive and expanding weatherstripping. I hope the adhesive on here will hold up to heat, it was super sticky so I'm not too concerned but it'll be something I keep an eye on as time goes by. Also did a strip at the top of the rad and rad support to seal that up. Need to work on sealing everything else up between the bumper, intercooler, oil cooler, and radiator.
After today I'll hopefully have my meth line figured out and meth pump mounted as well as figure out how I'm going to mount my battery.
Still need to
- respray and actually install VC
- brake lines
- clutch line
- fuel pressure regulator & lines from rail and to return - all fittings ordered
-turbo water lines
-seal the fan shroud
- finish up catch can lines
- fire sleeve heater core lines - DEI fire sleeve ordered
- mount battery
- mount meth pump/run meth line
-crank sensor & modify CAS
- spark plugs & wires
- respray and actually install VC
- brake lines
- clutch line
- fuel pressure regulator & lines from rail and to return - all fittings ordered
-
-
- finish up catch can lines
- fire sleeve heater core lines - DEI fire sleeve ordered
- mount battery
- mount meth pump/run meth line
-
- spark plugs & wires
Reply
0
0
05-16-2015, 10:56 PM
#319
Junior Member
Thread Starter
iTrader: (1)
Join Date: Feb 2013
Location: Windsor, Ontario
Posts: 403
Total Cats: 65
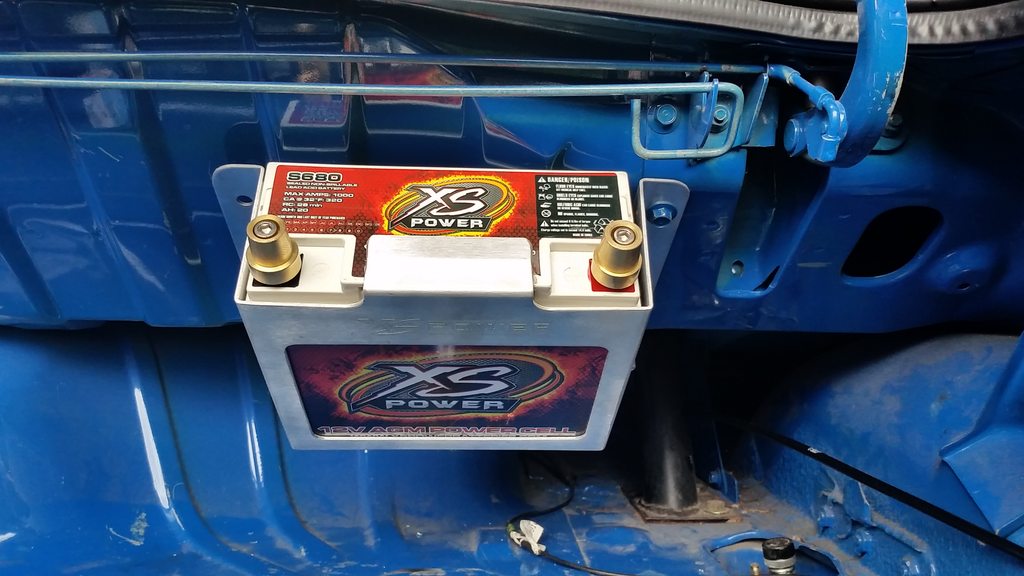
Battery and meth pump mounted.
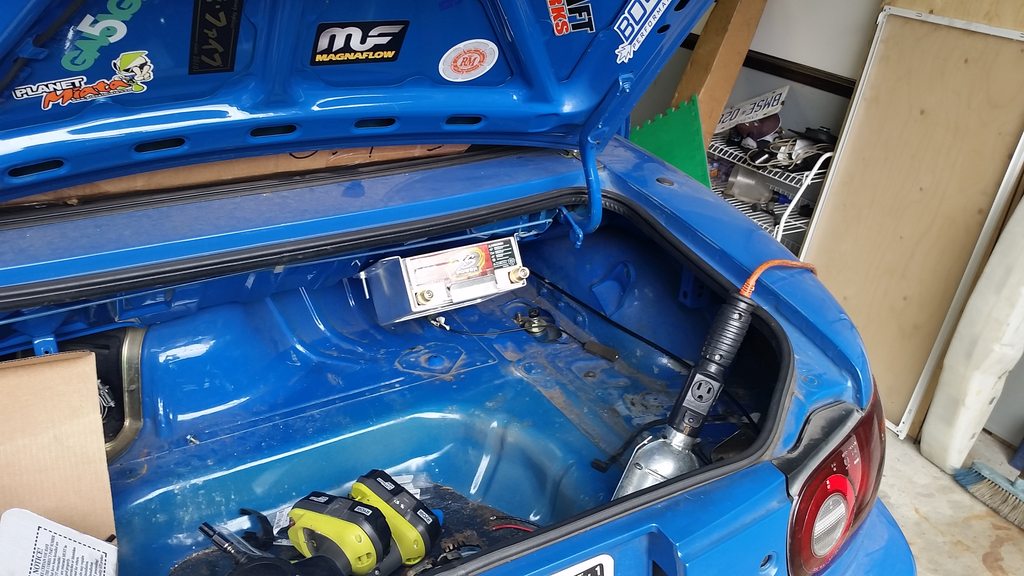
Started going through the old harness labeling all the connectors and started peeling back the old loom and electrical tape.
I've been trying to decide the best way to do this harness. The fact that our cars don't have a separate engine harness is kind of annoying because I really don't see a need in messing with the chassis harness, it's just my engine harness I wasn't happy with because of how many times it's been spliced into and the unreliable signals I was getting (like my super noisy TPS that couldn't be fixed before).
I also do not need any of the airbag wiring which runs through the entire harness so that's another thing.
Now I'm not even going to try to hide the fact that I'm new to wiring. I've done little things here and there but I've never done anything this major. But what I'd like to do is run all new wiring for everything from the firewall forward and then obviously wire up gauges and switches on the interior on a separate sub-harness. Basically I want to end up with a separate engine harness if possible, or as close to that as I can get.
This will also let me delete any unnecessary wiring and hide/cleanly run any wires that I actually need.
I have no idea how long I should expect this project to take me but it is the last step in this entire build so I'm really excited about that.
Reply
0
0
05-17-2015, 06:32 PM
#320
Junior Member
Thread Starter
iTrader: (1)
Join Date: Feb 2013
Location: Windsor, Ontario
Posts: 403
Total Cats: 65
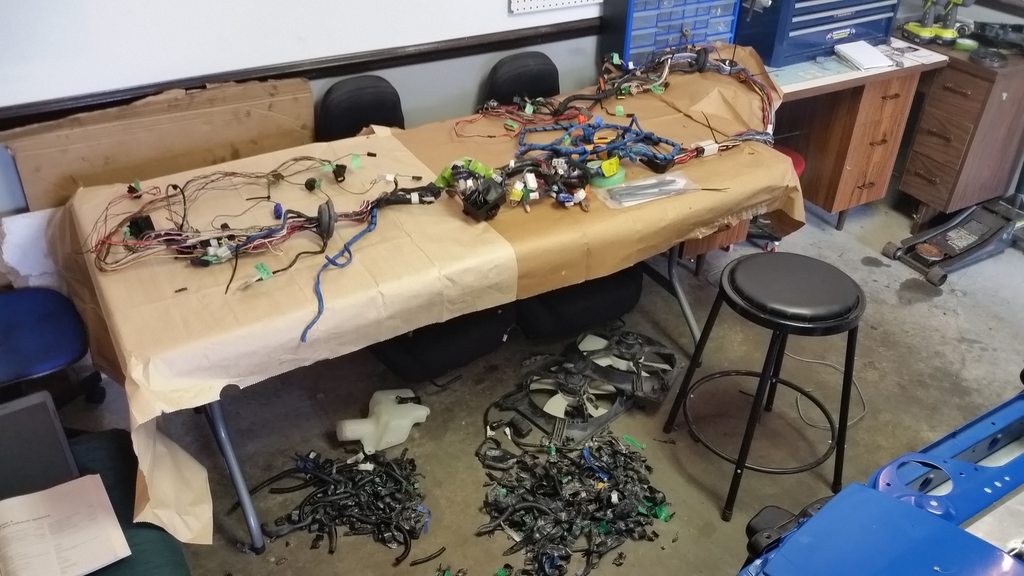
Got the harness all labeled, peeled back the old tape and loom, and took out all the airbag wiring. Tomorrow I'll probably start de-pinning the connectors I'll be using and maybe start running the new wires.
My "workbench" for this entire process. Would be nice to have something a bit bigger but it'll do
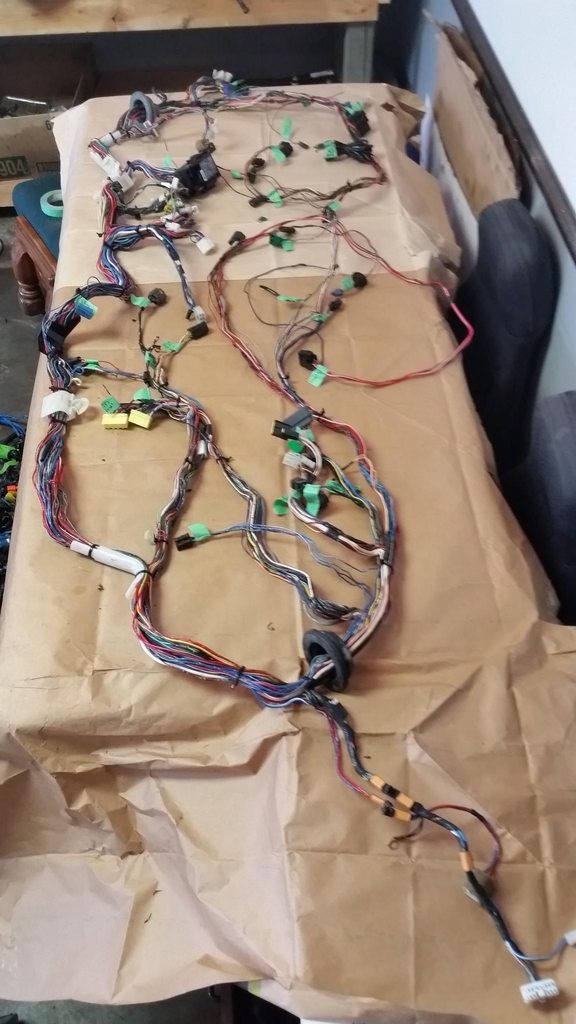
Stripped down OEM harness w/ out airbag wiring
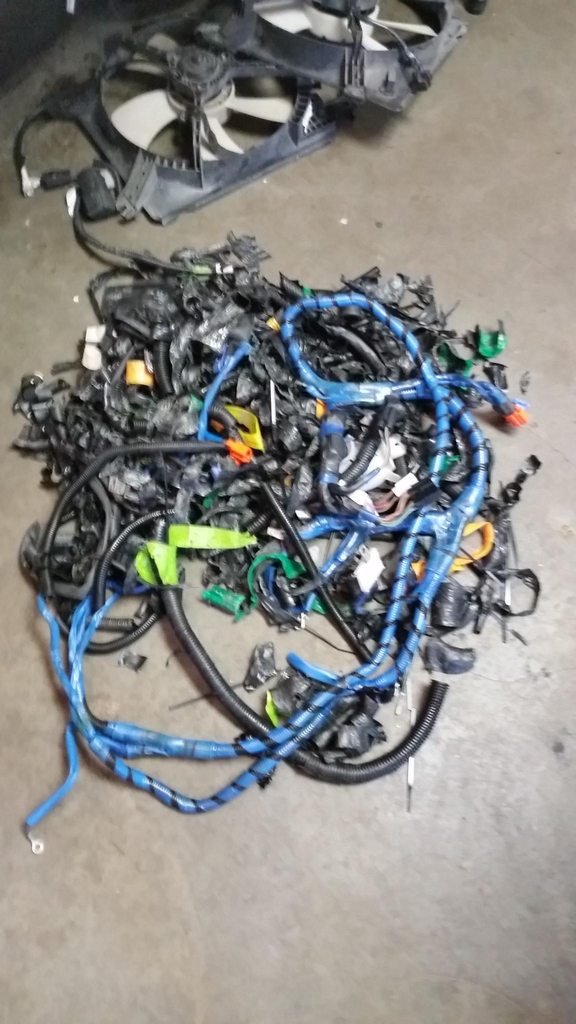
The pile of garbage that came off the old harness. This is just the tape, loom, and airbag wiring. There will still be a bunch of wiring that'll get deleted since I don't need it anymore. (potatocam)
My "workbench" for this entire process. Would be nice to have something a bit bigger but it'll do
Stripped down OEM harness w/ out airbag wiring
The pile of garbage that came off the old harness. This is just the tape, loom, and airbag wiring. There will still be a bunch of wiring that'll get deleted since I don't need it anymore. (potatocam)
Reply
0
0


