Bulbasaur, evolve to Ivysaur! (budget turbo build content inside)


Thread Starter
Senior Member
iTrader: (8)
Joined: Jan 2012
Posts: 1,407
Total Cats: 117
From: Azusa, CA
EBC ordered and should be installed in the next few days. Then dyno tune at the end of the week. So excited.
 Hi Matt
^ Credit goes to this guy. He helped with alot of this build and many of my misc miata adventures. This build would not have been possible without him. He should be boosted too real soon.
Hi Matt ^ Credit goes to this guy. He helped with alot of this build and many of my misc miata adventures. This build would not have been possible without him. He should be boosted too real soon.
Reply
 0
0

0

Newb
Joined: Dec 2010
Posts: 6
Total Cats: 0
Hi Matt ^ Credit goes to this guy. He helped with alot of this build and many of my misc miata adventures. This build would not have been possible without him. He should be boosted too real soon.[/QUOTE]
Brings a tear to my eye...Thanks Chris. Finally getting around to making my "noob" posts and actually use the forum. I hope to see your car dyno tuned very soon and running ALL the boost

Reply
0
0

Sometimes I feel like the emphasis on padding kids' self esteems has worked too well, resulting in unapologetic Pokemon and Brony man-boys.
On the other hand, kudos for the progress and the marathon.
On the other hand, kudos for the progress and the marathon.
Reply
0
0


Thread Starter
Senior Member
iTrader: (8)
Joined: Jan 2012
Posts: 1,407
Total Cats: 117
From: Azusa, CA
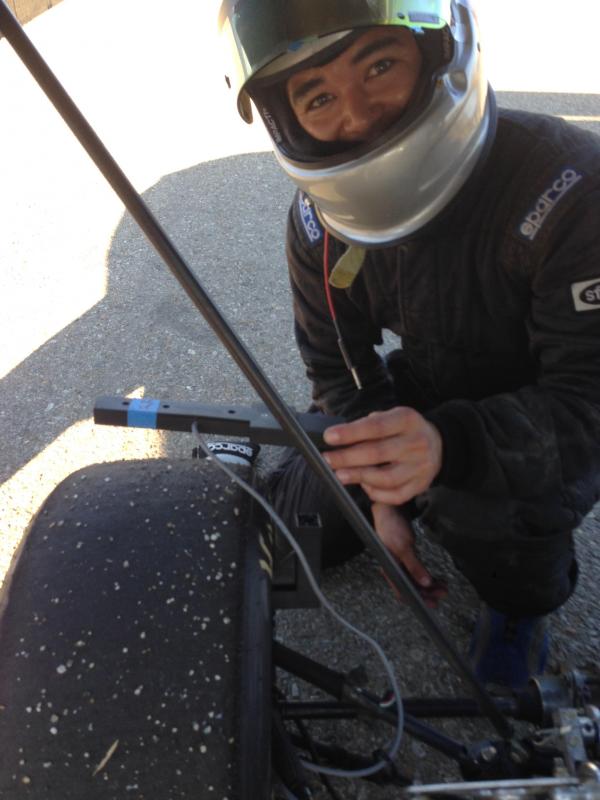
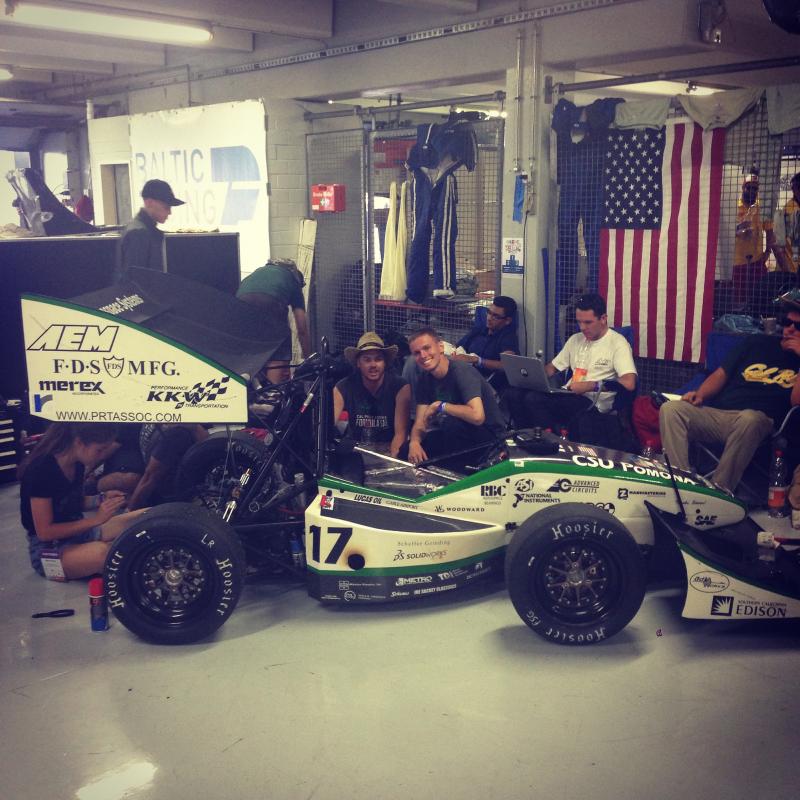
It's been a while since an update. The miata didn't get worked on much during my senior year of school due to my work, schooling but mostly FSAE  Even after graduating most of my time was spent in the school shop till we completed our three comps. Here's some off topic pics from tire temp testing and the Germany competition.
I'm still considering if I want to build an IR tire temp Array system for the miata. I have the DAQ and programing all done. I just need to figure out a bracket system and wiring which is easier said than done.
We should have made it one PCB board to start off with
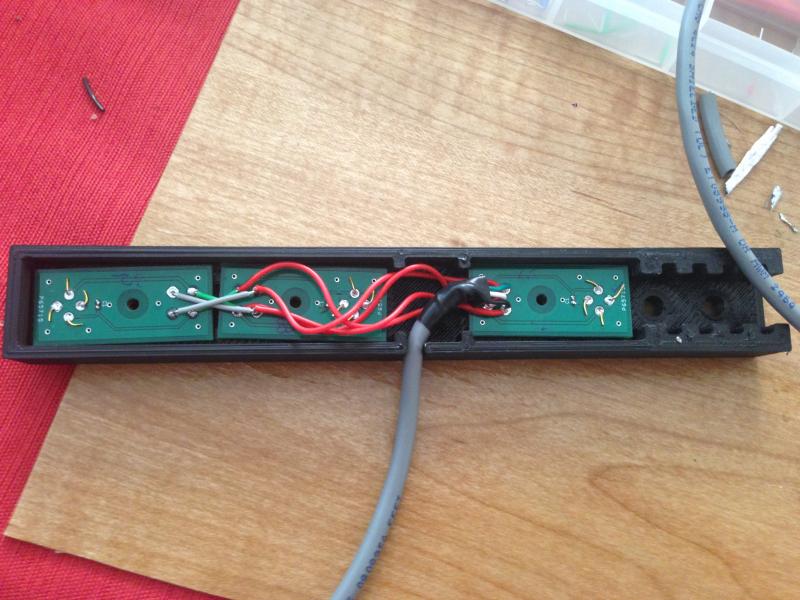
3D printed the brackets at home
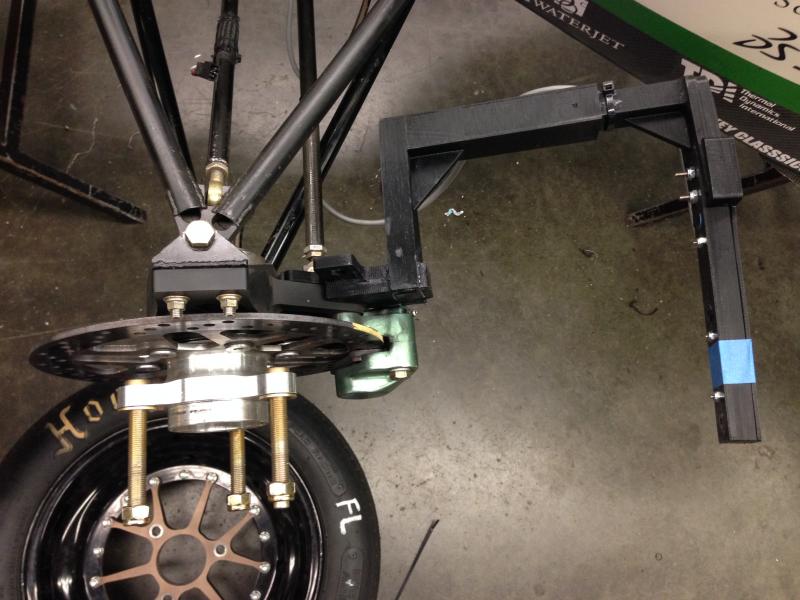
Our driver drifted into a cone braking a bracket. I should have reinforced it with bracing. We got some good test data before hand at least.
 \
\
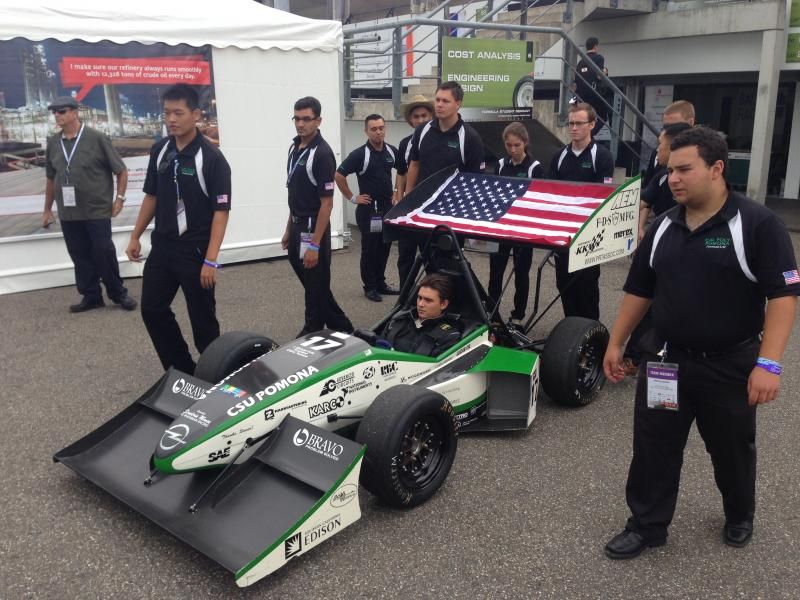
Germany was an amazing experience. It was my first time out of the country and I couldn't have asked for a better trip. Competing in the Hockenheimring and sharing pits where F1 cars was neat. The team placed 9th overall and 1st in cost. We were surprisingly competitive with the cost of our car we beat many teams with budget 8x our own.
We had the most bare and empty pit of all teams there.
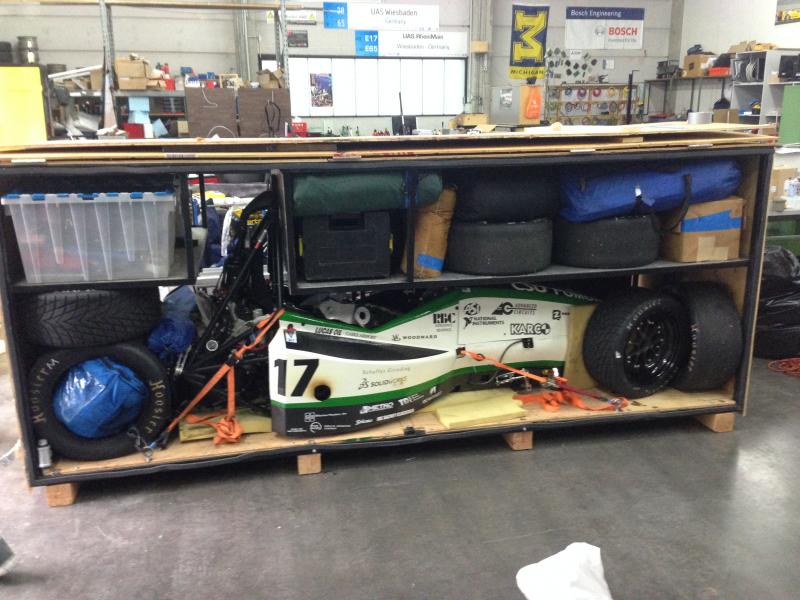
This is how you get a car from California to Germany. #Tetris
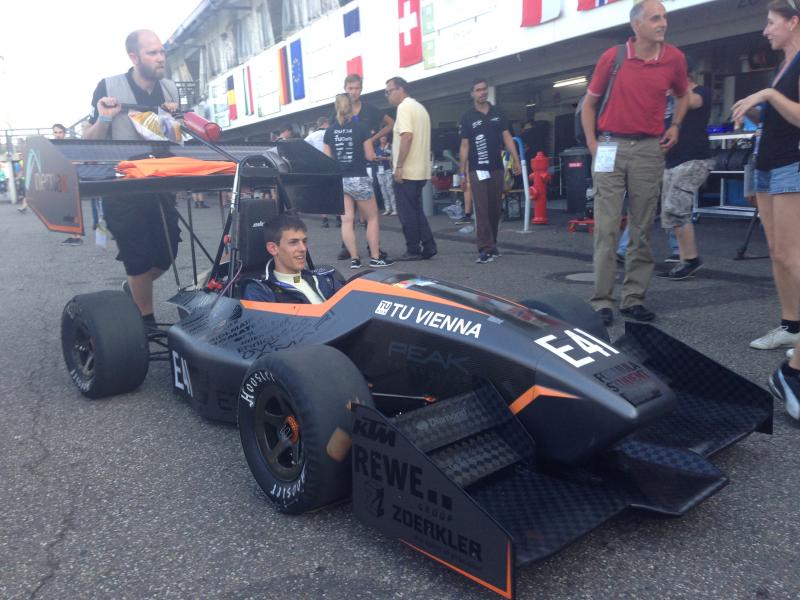
This is just one of the amazing cars at comp. The level of worksmanship it amazing that a group of college kids could build such a machine.
Even after graduating most of my time was spent in the school shop till we completed our three comps. Here's some off topic pics from tire temp testing and the Germany competition. I'm still considering if I want to build an IR tire temp Array system for the miata. I have the DAQ and programing all done. I just need to figure out a bracket system and wiring which is easier said than done.
We should have made it one PCB board to start off with
3D printed the brackets at home
Our driver drifted into a cone braking a bracket. I should have reinforced it with bracing. We got some good test data before hand at least.
\Germany was an amazing experience. It was my first time out of the country and I couldn't have asked for a better trip. Competing in the Hockenheimring and sharing pits where F1 cars was neat. The team placed 9th overall and 1st in cost. We were surprisingly competitive with the cost of our car we beat many teams with budget 8x our own.
We had the most bare and empty pit of all teams there.
This is how you get a car from California to Germany. #Tetris
This is just one of the amazing cars at comp. The level of worksmanship it amazing that a group of college kids could build such a machine.
Last edited by cyotani; Sep 19, 2014 at 01:19 AM.
Reply
1
1
Thread Starter
Senior Member
iTrader: (8)
Joined: Jan 2012
Posts: 1,407
Total Cats: 117
From: Azusa, CA
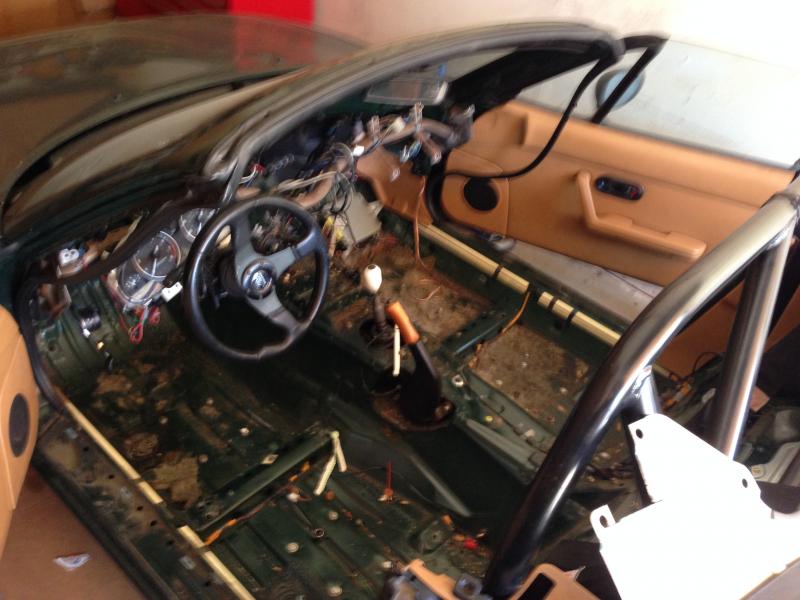
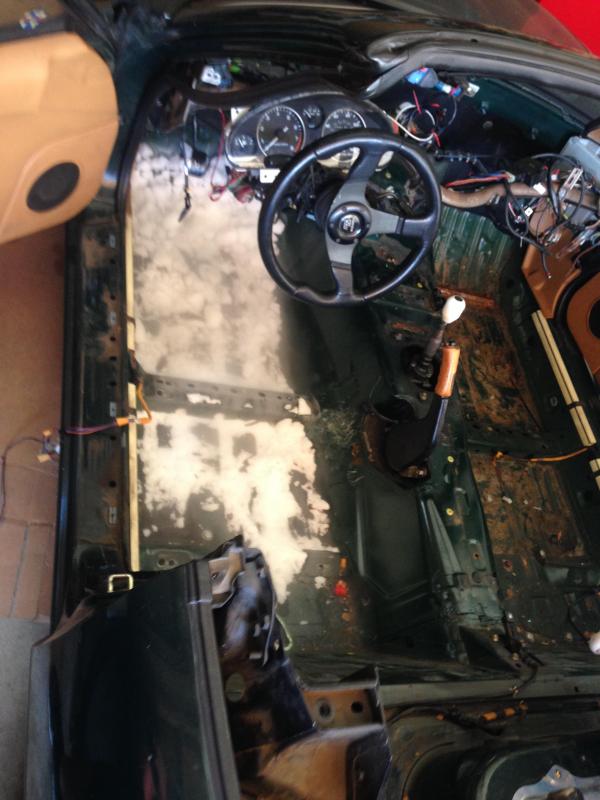
Okay, on to the relevant stuff. I have decided to switch this car to a weekend car with the occasional tack event, to a more dedicated track car that can still be driven on the street. I started with the easy stuff. Some weight savings. Gutted the AC, heat core, blower, cut the dash, pulled carpets and painted the interior.
Stupid sound tarr crap
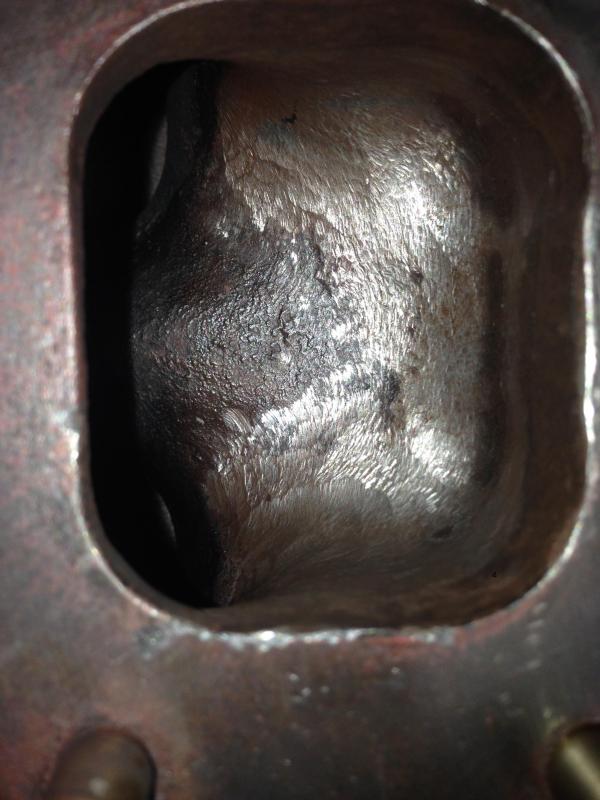
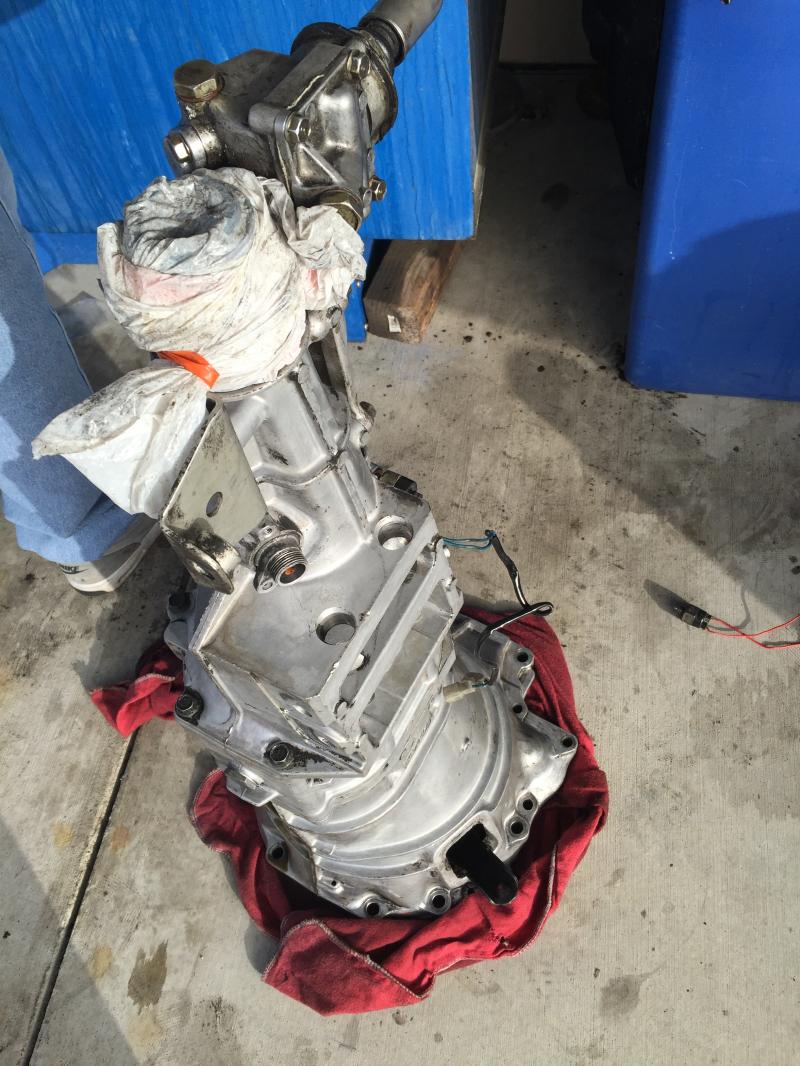
Currently the car has the turbo kit removed to pass smog so I decided to reclock the turbo outlet down for more efficient piping routing. While I was at it I ported the wastegate and cleaned up a rough section of the manifold.
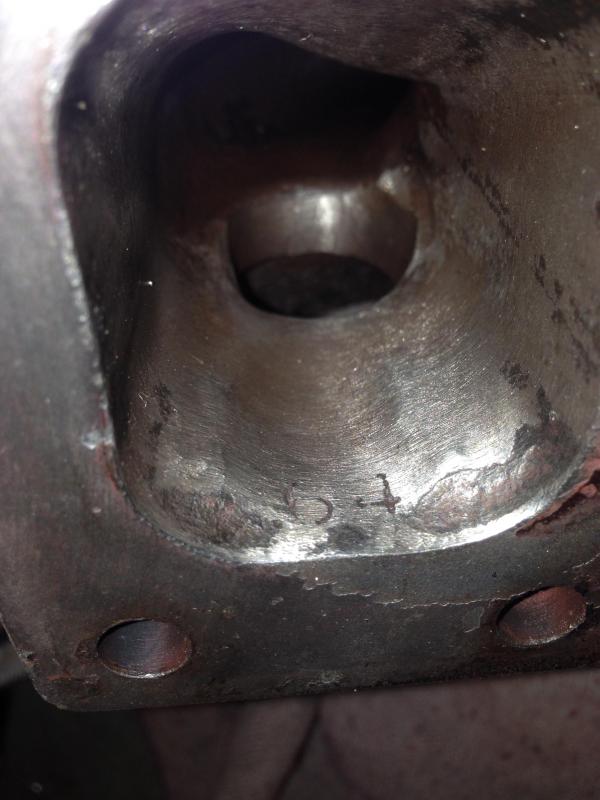
Before (sharp corner)
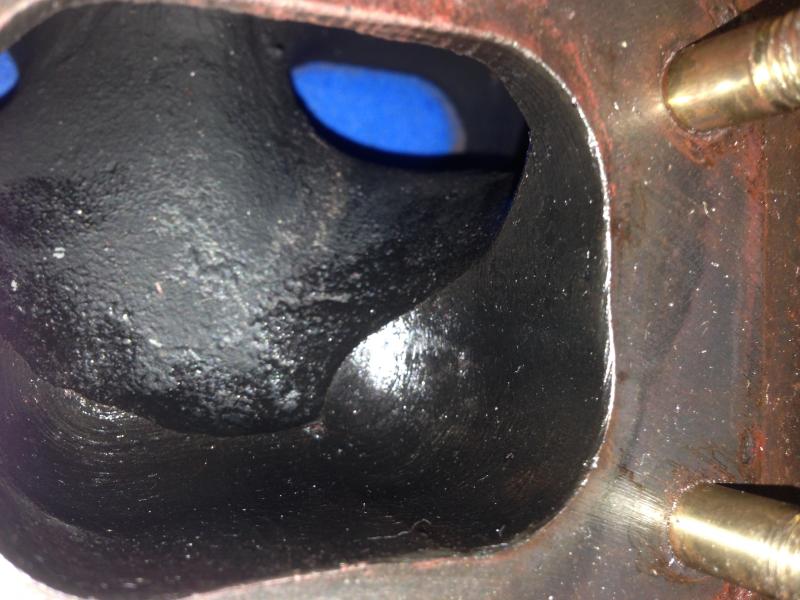
After (probably didn't help much but couldn't have hurt)
Fabed this up real quick. Hopefully aluminum doen't fatigue to quickly

Checked my injectors at my work place. looks like they check out okay.
Slowly tackling a list of projects I have planned for this car. I hope to get it running again really soon.
Stupid sound tarr crap
Currently the car has the turbo kit removed to pass smog so I decided to reclock the turbo outlet down for more efficient piping routing. While I was at it I ported the wastegate and cleaned up a rough section of the manifold.
Before (sharp corner)
After (probably didn't help much but couldn't have hurt)
Fabed this up real quick. Hopefully aluminum doen't fatigue to quickly
Checked my injectors at my work place. looks like they check out okay.
Slowly tackling a list of projects I have planned for this car. I hope to get it running again really soon.
Reply
0
0

Curious about how that bracket holds up.
I'm sure there's a reason no one makes them in aluminum for any turbo.
I'm considering making one just like that out of steel
good to see you progressing btw - and those FSAE cars look crazy fun
I'm sure there's a reason no one makes them in aluminum for any turbo.
I'm considering making one just like that out of steel
good to see you progressing btw - and those FSAE cars look crazy fun
Reply
0
0
Thread Starter
Senior Member
iTrader: (8)
Joined: Jan 2012
Posts: 1,407
Total Cats: 117
From: Azusa, CA
I have seen aluminum brackets used before and this is a decent gauge material so I'm crossing my fingers and will be keeping a close eye on this. It was made from a piece of scrap lying around so it was free. If I find an equivalent steel scrap maybe I will duplicate it and replace it. My last one was a welded steel one and that cracked right at the weld
Reply
0
0
Thread Starter
Senior Member
iTrader: (8)
Joined: Jan 2012
Posts: 1,407
Total Cats: 117
From: Azusa, CA
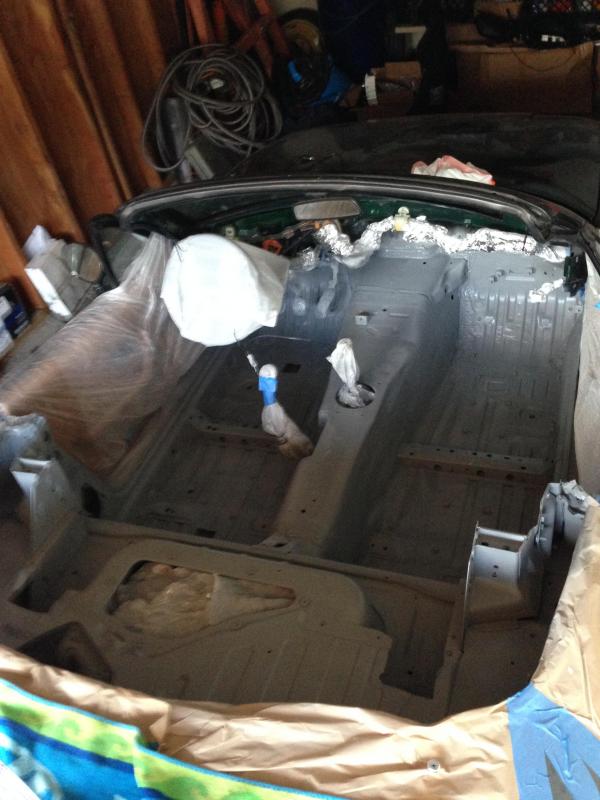
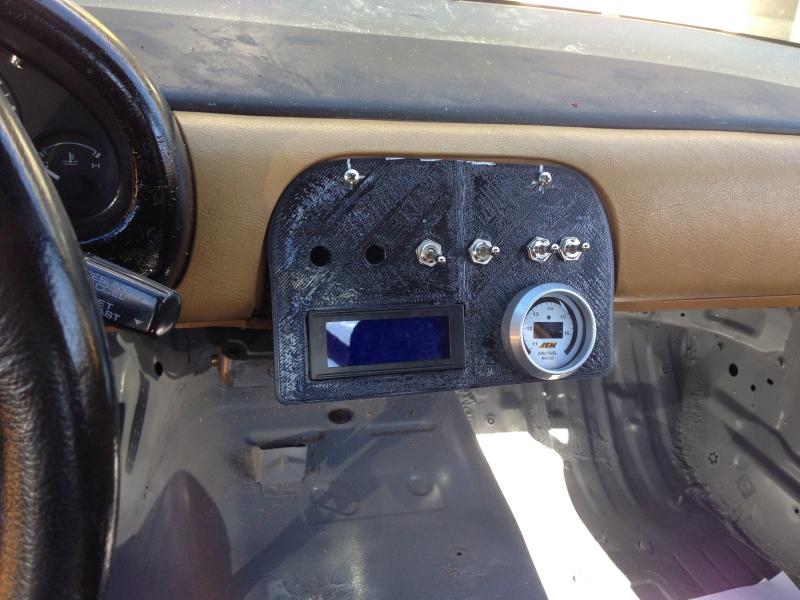
Interior all finished

roll bar painted as well

$40 hard top paint job with this funky color using a foam roller
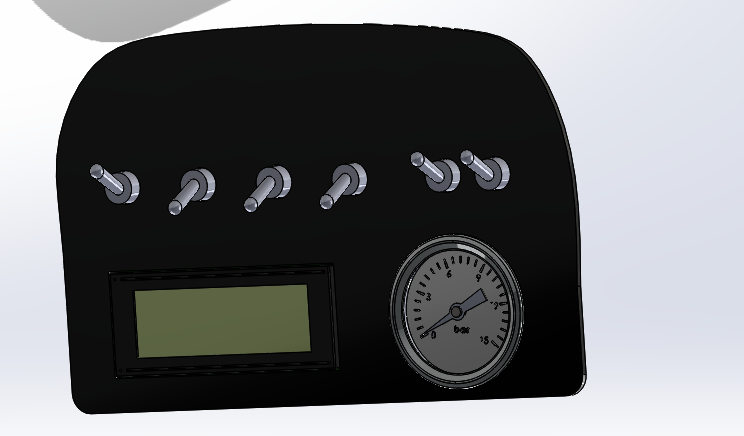
Used a digitizing arm to get CAD data of the radio bezel
sketched this out to 3D print (very rough first pass just to get something functional)
Plug and play headlight motor and hazard switchs
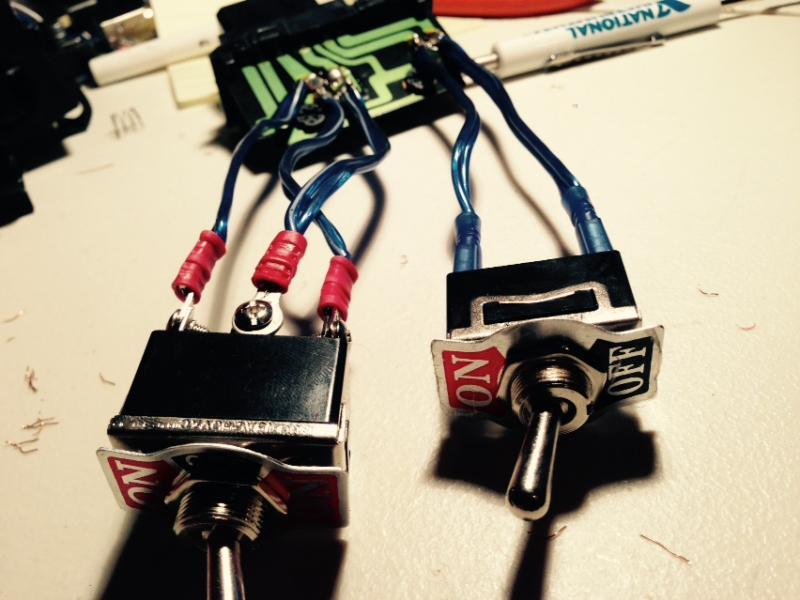
new switch bezel wired up
Don't mind the funny texture and poor fitment. This is just a temporary to get something functional in there. switch are power windows, hazzards and flip light. two extra switches for whatever my imagination comes up with in the future... ejector seat, NOS activator like that jdm fast in the furisous thing, banana trap release like mario kart. the possibilities are unlimitless
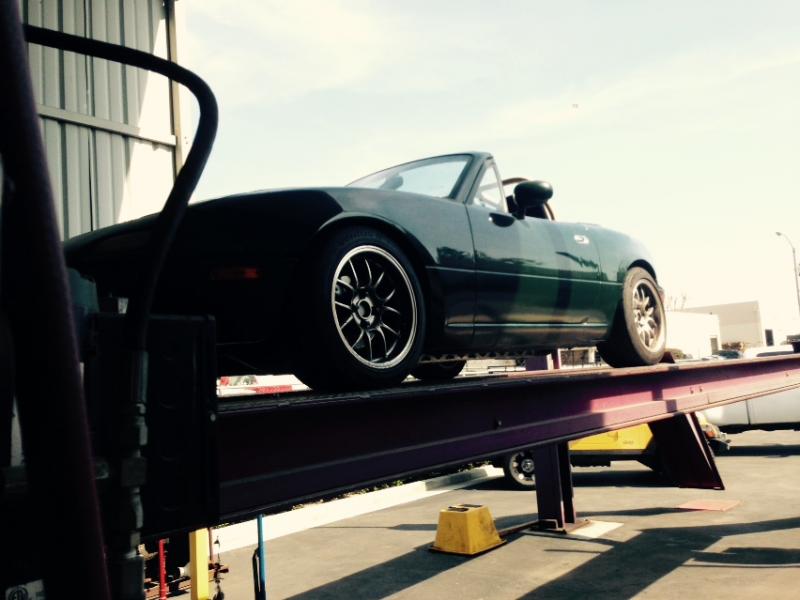
I got to use a lift for the miata for the first time ever Installed some adjustable end links
new bushings
roll bar painted as well
$40 hard top paint job with this funky color using a foam roller
Used a digitizing arm to get CAD data of the radio bezel
sketched this out to 3D print (very rough first pass just to get something functional)
Plug and play headlight motor and hazard switchs
new switch bezel wired up
Don't mind the funny texture and poor fitment. This is just a temporary to get something functional in there. switch are power windows, hazzards and flip light. two extra switches for whatever my imagination comes up with in the future... ejector seat, NOS activator like that jdm fast in the furisous thing, banana trap release like mario kart. the possibilities are unlimitless
I got to use a lift for the miata for the first time ever
Installed some adjustable end linksnew bushings
Reply
0
0
Thread Starter
Senior Member
iTrader: (8)
Joined: Jan 2012
Posts: 1,407
Total Cats: 117
From: Azusa, CA
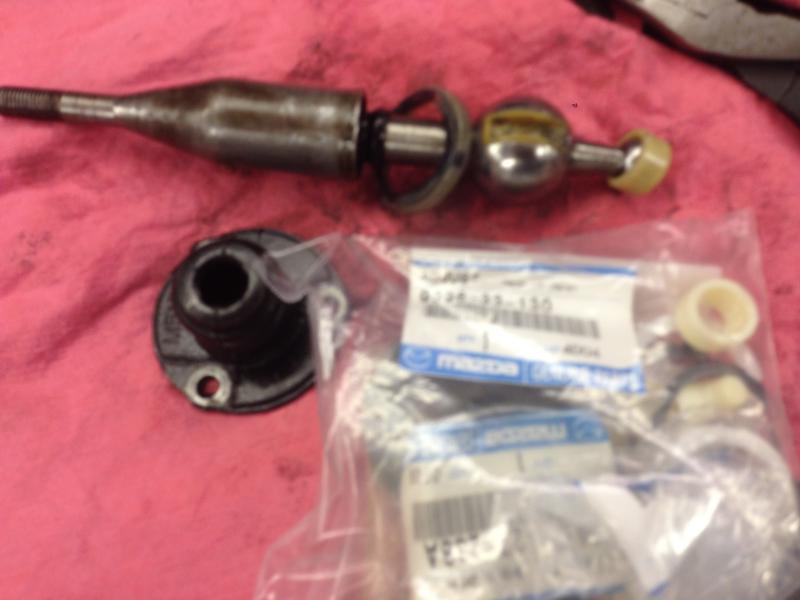
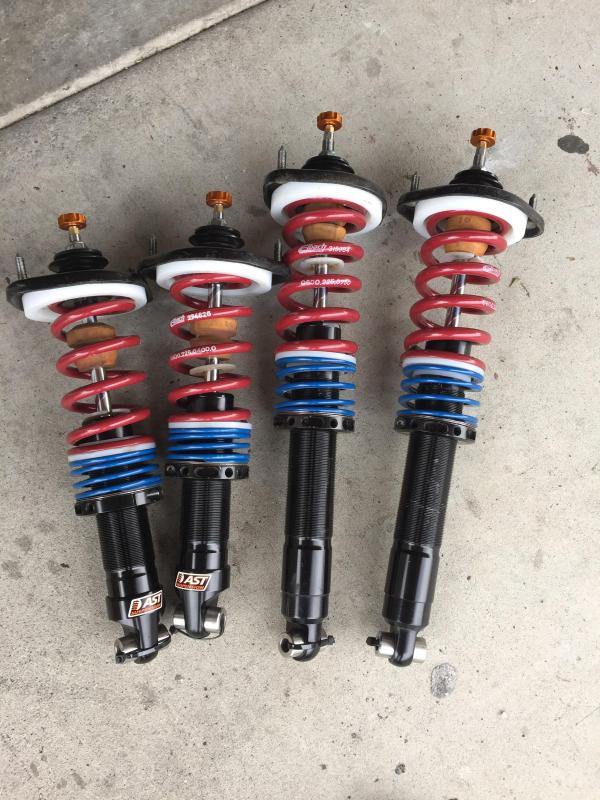
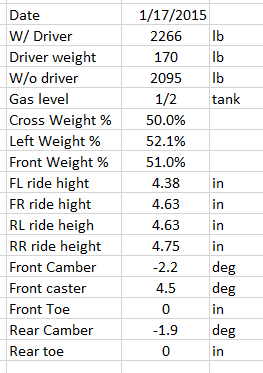
Getting the car set up to be a track rat ***** for 2015. New used xidas 750/400 w/ helpers. Corner weighed and aligned. Fixed my clutch leak issue that was the cause of my tow of shame from my last track day. New Exedy master, slave and SS line should do the trick.
with driver and 1/2 tank gas
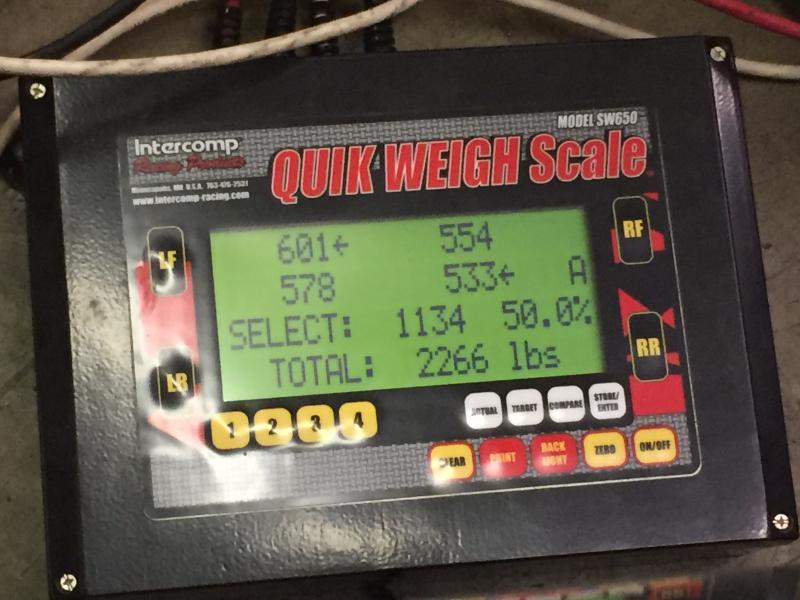
w/o driver and 1/2 tank gas
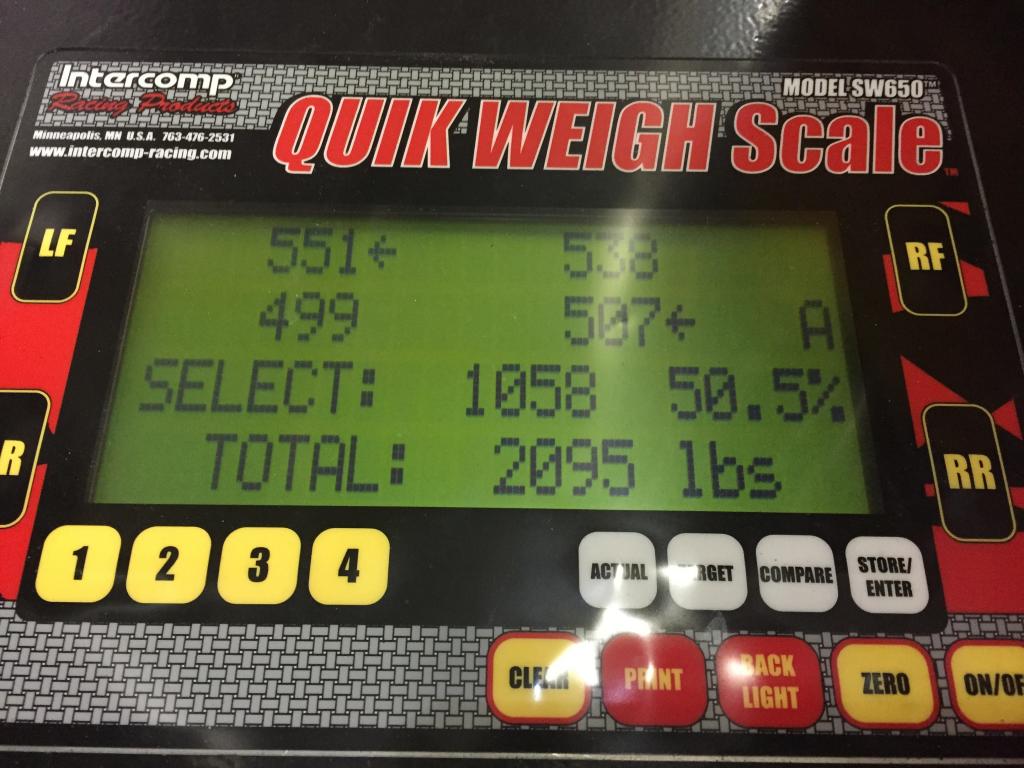
Leaving this here for easy reference for myself since I tend to loose and forget things.
with driver and 1/2 tank gas
w/o driver and 1/2 tank gas
Leaving this here for easy reference for myself since I tend to loose and forget things.
Reply
0
0
Thread Starter
Senior Member
iTrader: (8)
Joined: Jan 2012
Posts: 1,407
Total Cats: 117
From: Azusa, CA
A random assortment of pictures. Not in chronological order.
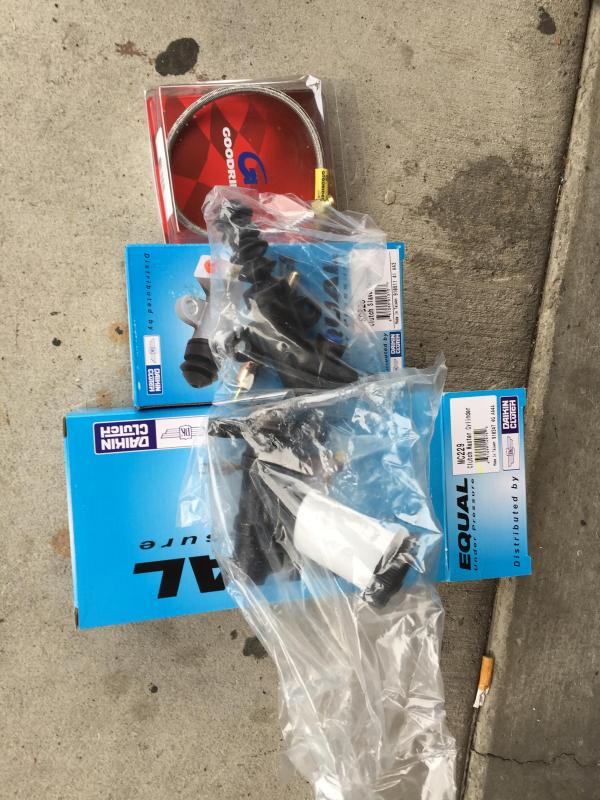
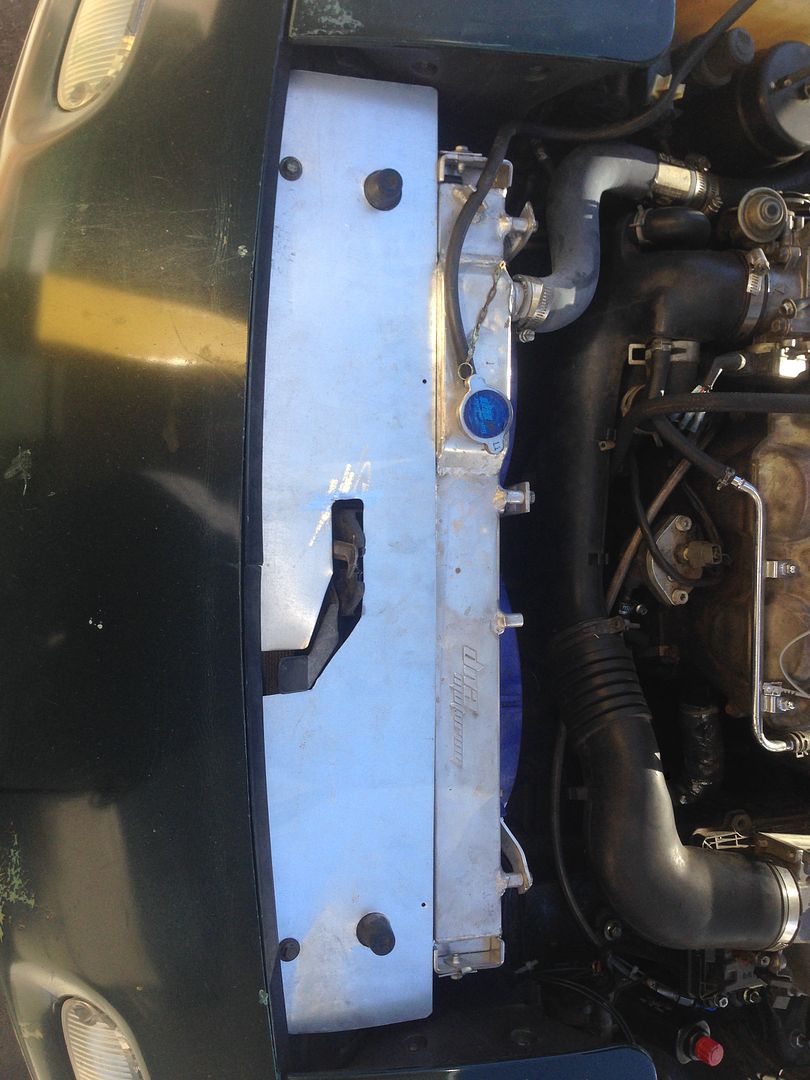
Tow of Shame from streets of willow in december (a hose joint from the coolant reroute rubbed through my clutch soft line). Replaced it with a stainless line
DIY radiator thingy
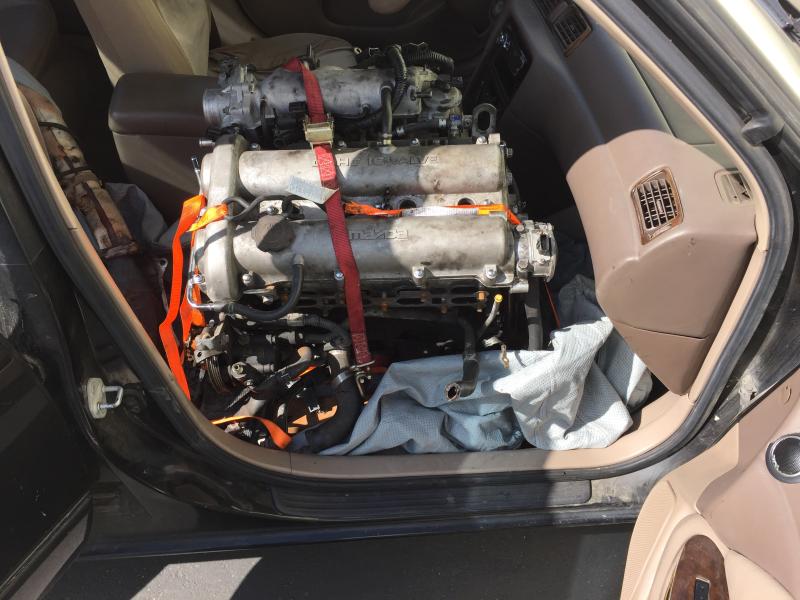
Who needs a pickup truck for engine transport when you have a toyota camry?
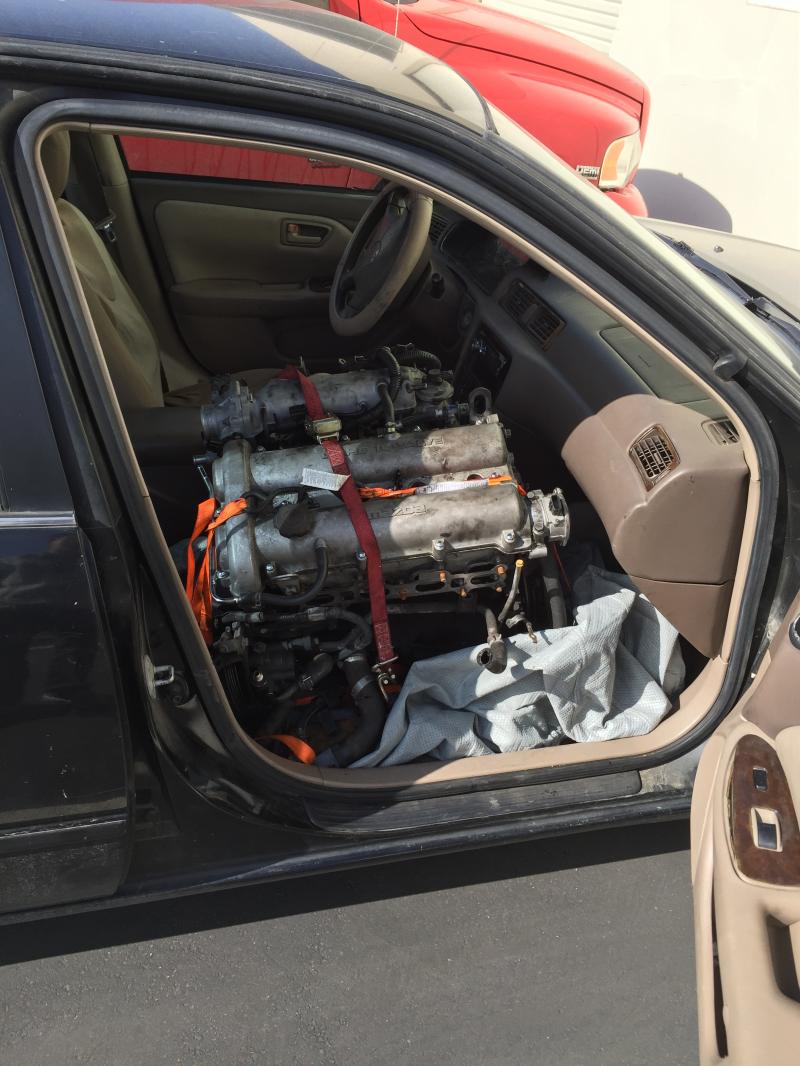
Fits like a glove
first time using the solevant cleaning tank at work
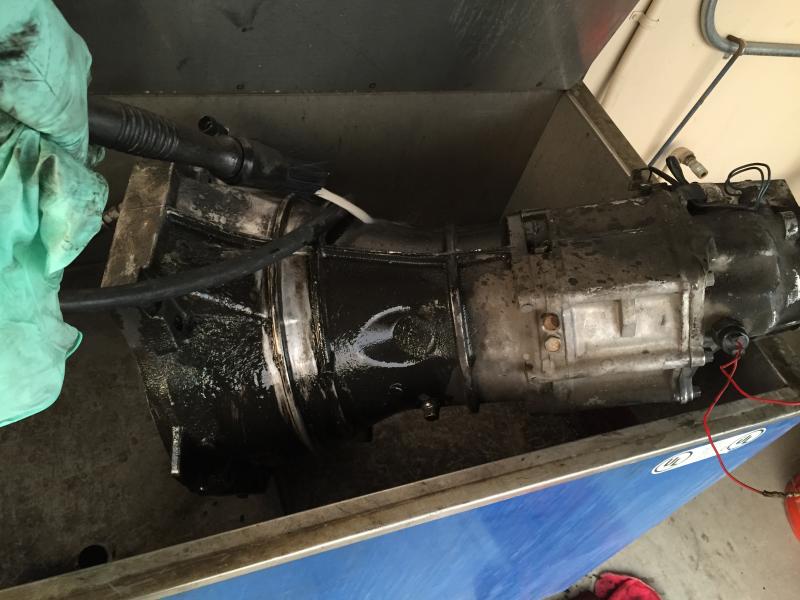
Much better...
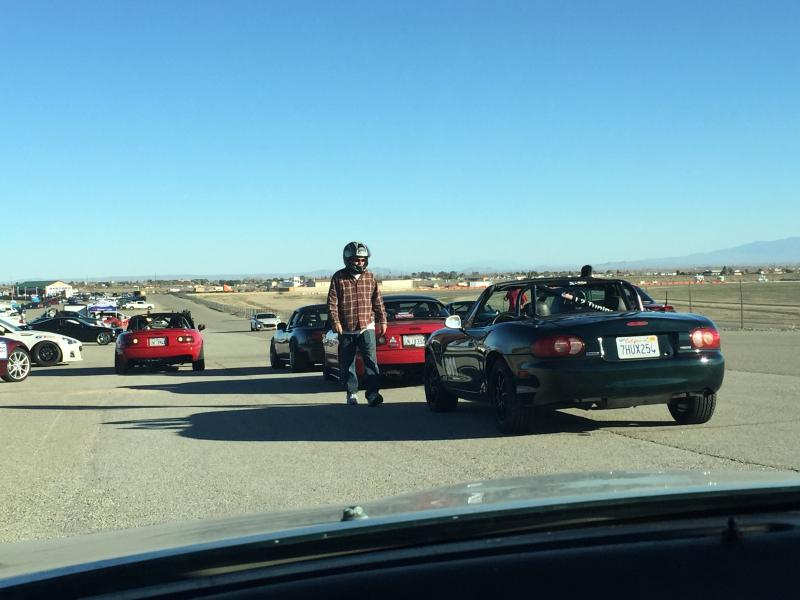
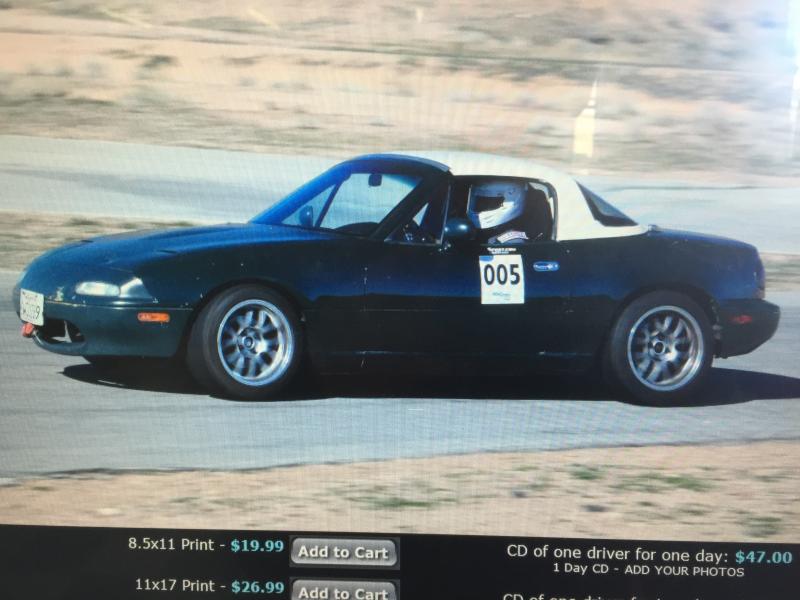
Roadster Cup at Streets of Willow on 1/24/15
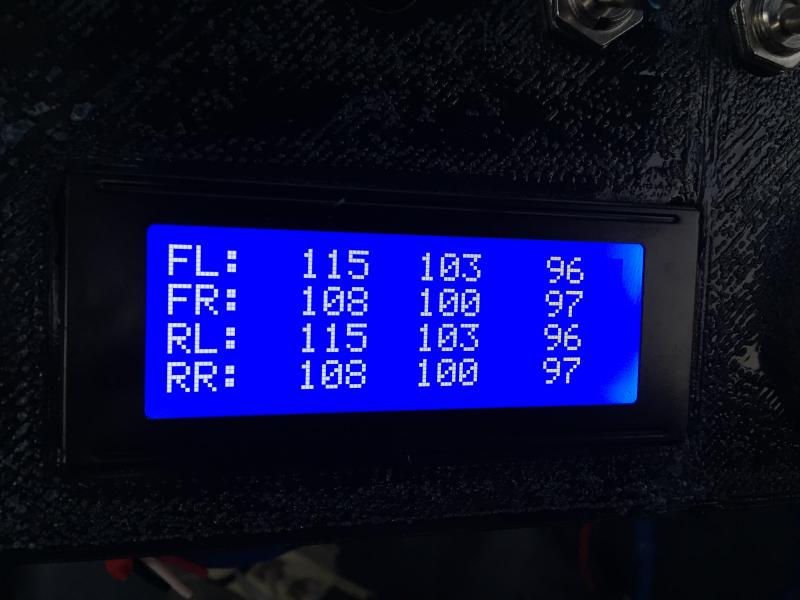
Did some IR tire temp testing. I had connectivity issues due to bad wiring and only had the rear sensors installed. This is what temps looked like after the cool down lap and car parked.
No video from the track day, but this DIY sequential shift light worked better than expected. It was clearly visible with peripheral vision. I never had to look directly at my Tach the entire day. Last time at the track I bounced off the rev limiter here and there. With this I don't think I hit it at all.

Tow of Shame from streets of willow in december (a hose joint from the coolant reroute rubbed through my clutch soft line). Replaced it with a stainless line
DIY radiator thingy
Who needs a pickup truck for engine transport when you have a toyota camry?
Fits like a glove
first time using the solevant cleaning tank at work
Much better...
Roadster Cup at Streets of Willow on 1/24/15
Did some IR tire temp testing. I had connectivity issues due to bad wiring and only had the rear sensors installed. This is what temps looked like after the cool down lap and car parked.
No video from the track day, but this DIY sequential shift light worked better than expected. It was clearly visible with peripheral vision. I never had to look directly at my Tach the entire day. Last time at the track I bounced off the rev limiter here and there. With this I don't think I hit it at all.
Reply
0
0
Thread Starter
Senior Member
iTrader: (8)
Joined: Jan 2012
Posts: 1,407
Total Cats: 117
From: Azusa, CA
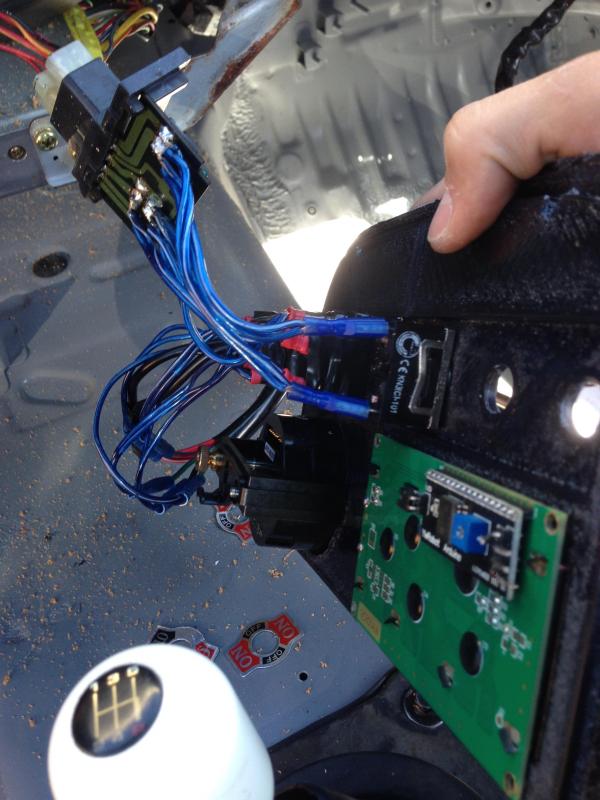
I finally got around to installing my DIYPNP back on my stock motor. I'm hopefully going to get a chance to run it on the dyno at work and learn me a little tuning. In prep for that. Heres some random pics from the last week.
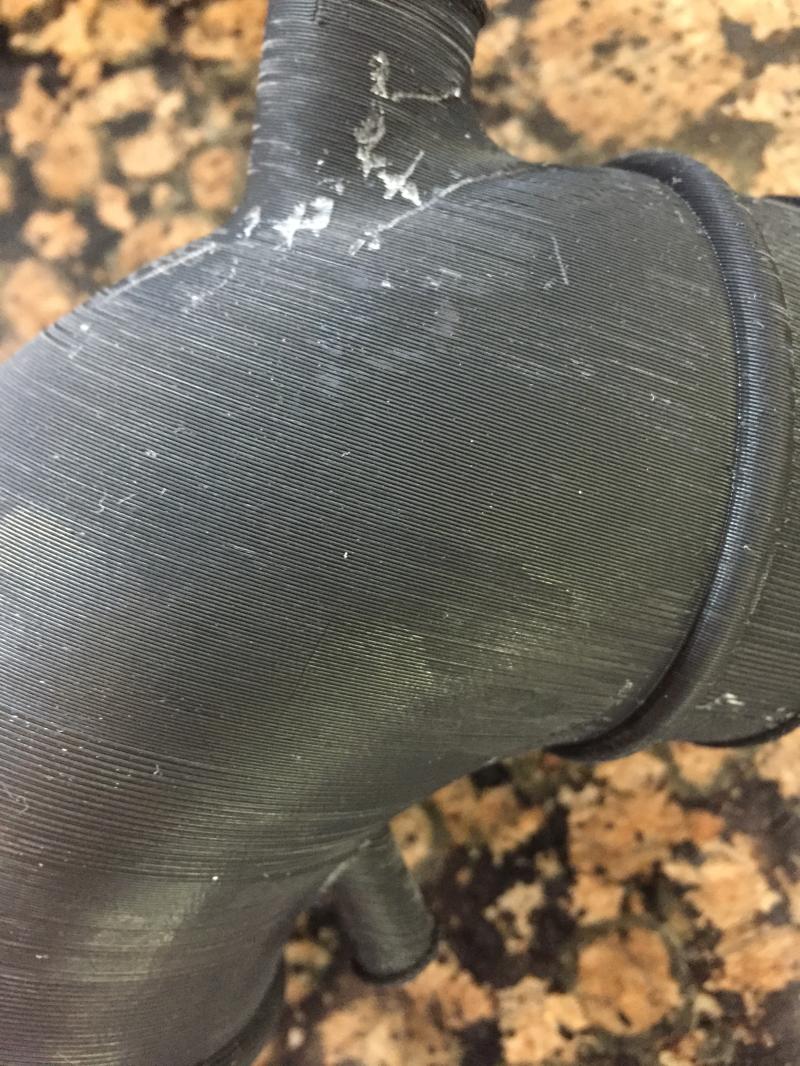
3D printed TB elbow piece to run a pipe and filter to driver side head light

before acetone vapor smoothing (.013 layer height)
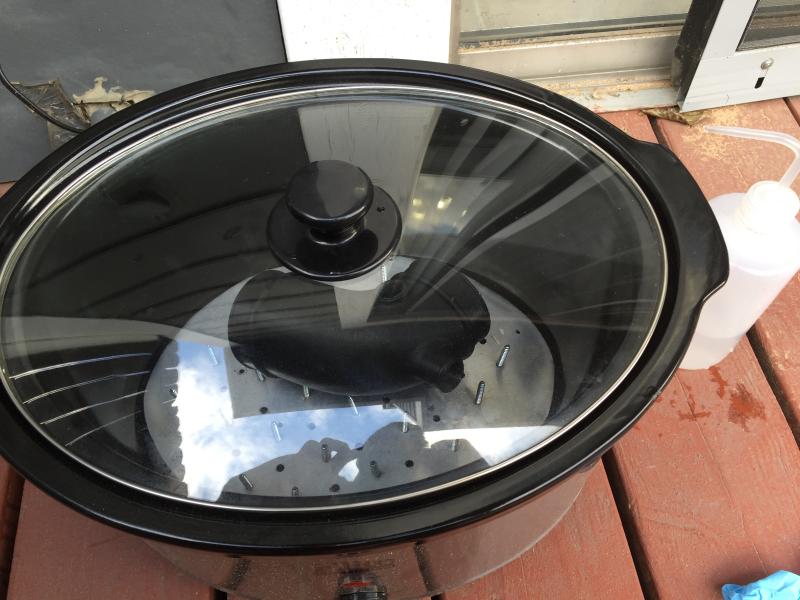
my crock pot rig (ceramic takes way to long to heat up, I should have went with a rice cooker)
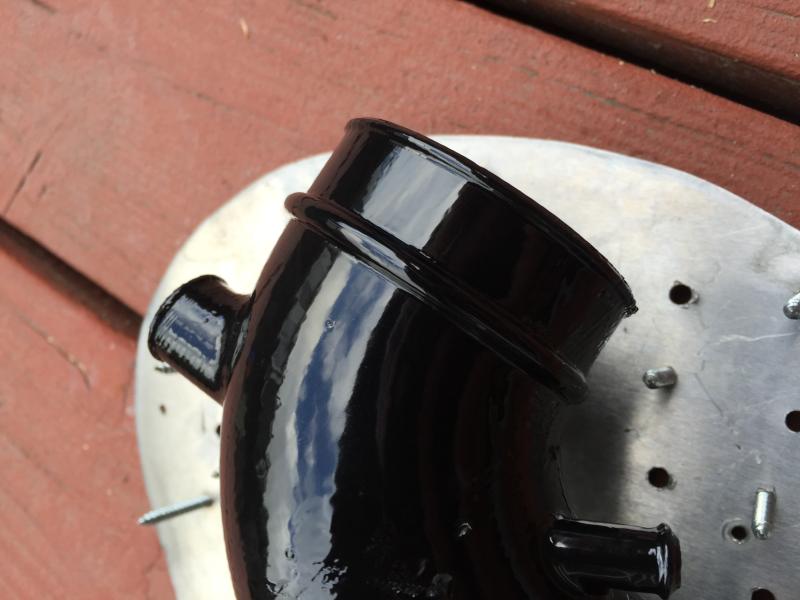
After: Smooths out the layers and helps seal the part. (smudge marks are from me touching it before it fully cured)
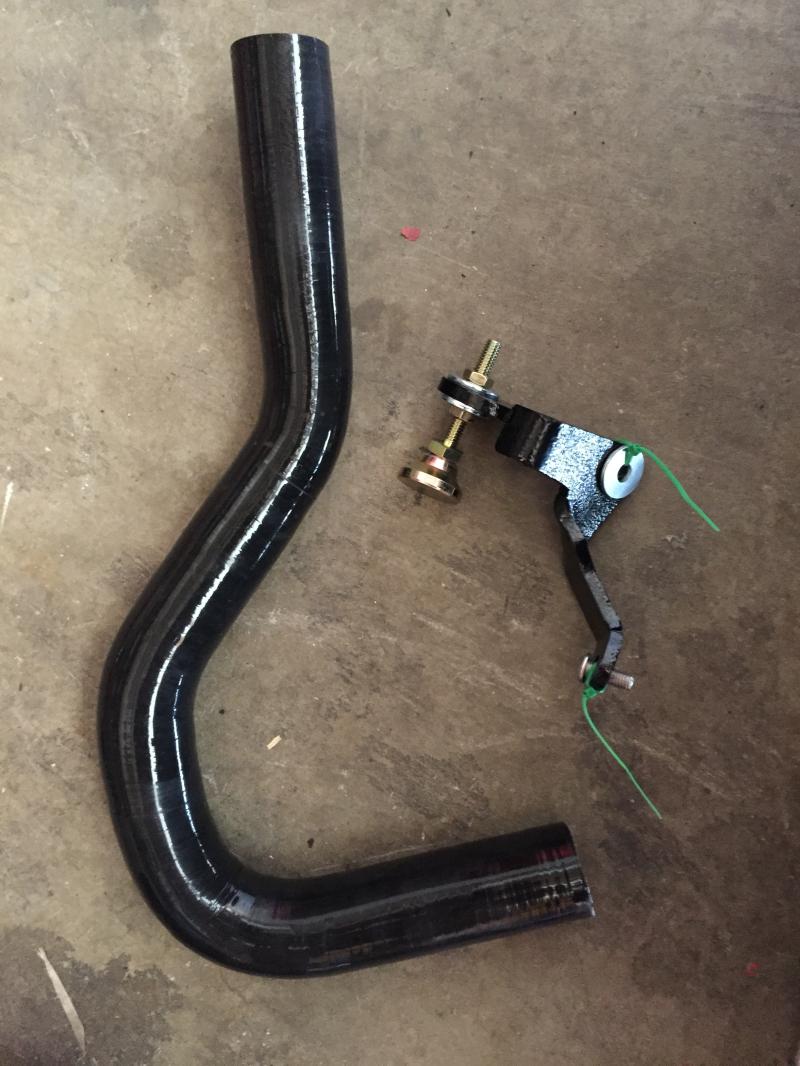
Some flyin miata goodies went in
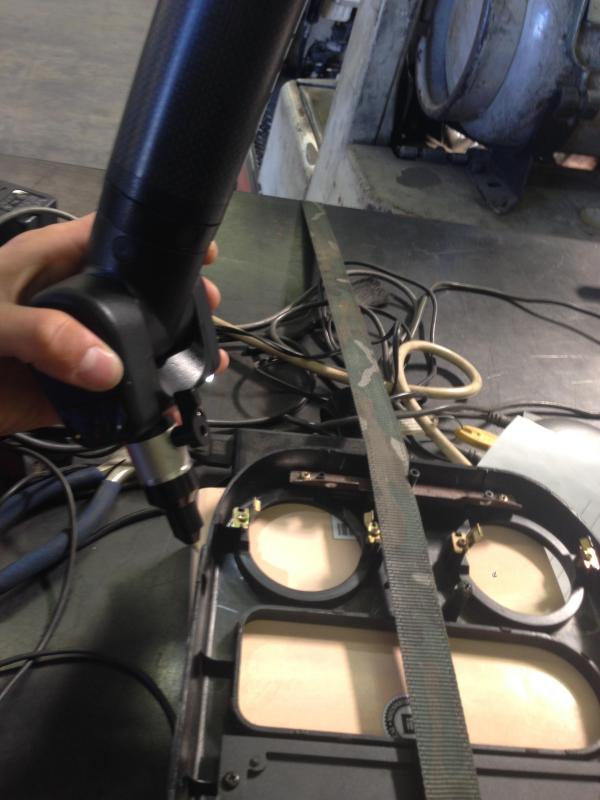
DIY electric Det Can from another thread on here. ($12 in materials. Thanks Radioshack for the 25% off going out of business sell!)
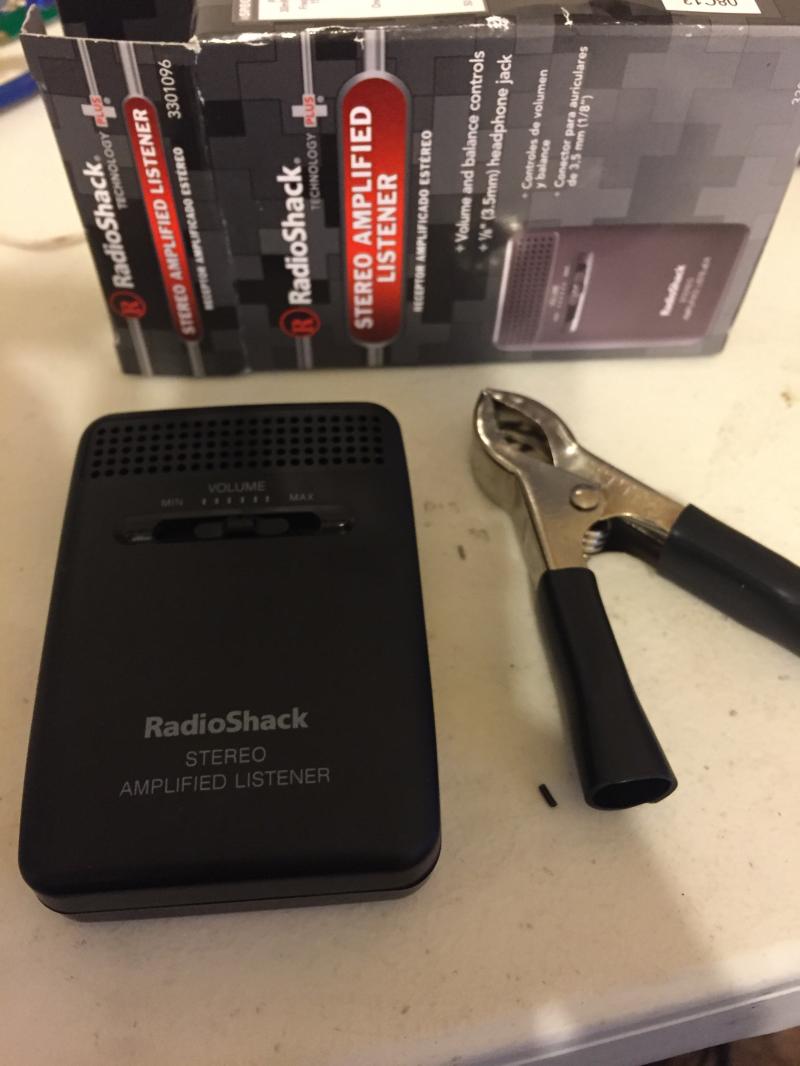
This one has two mics. Makes for good redundancy or to use on both sides of a V8
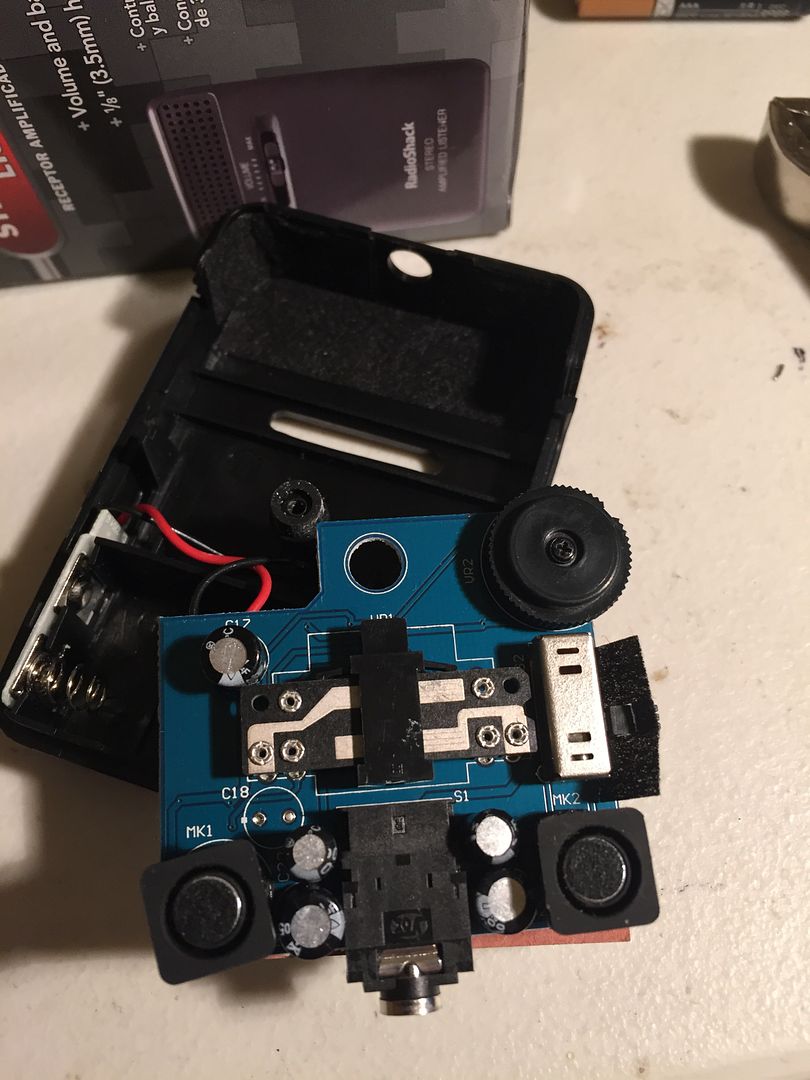
Arts and crafts
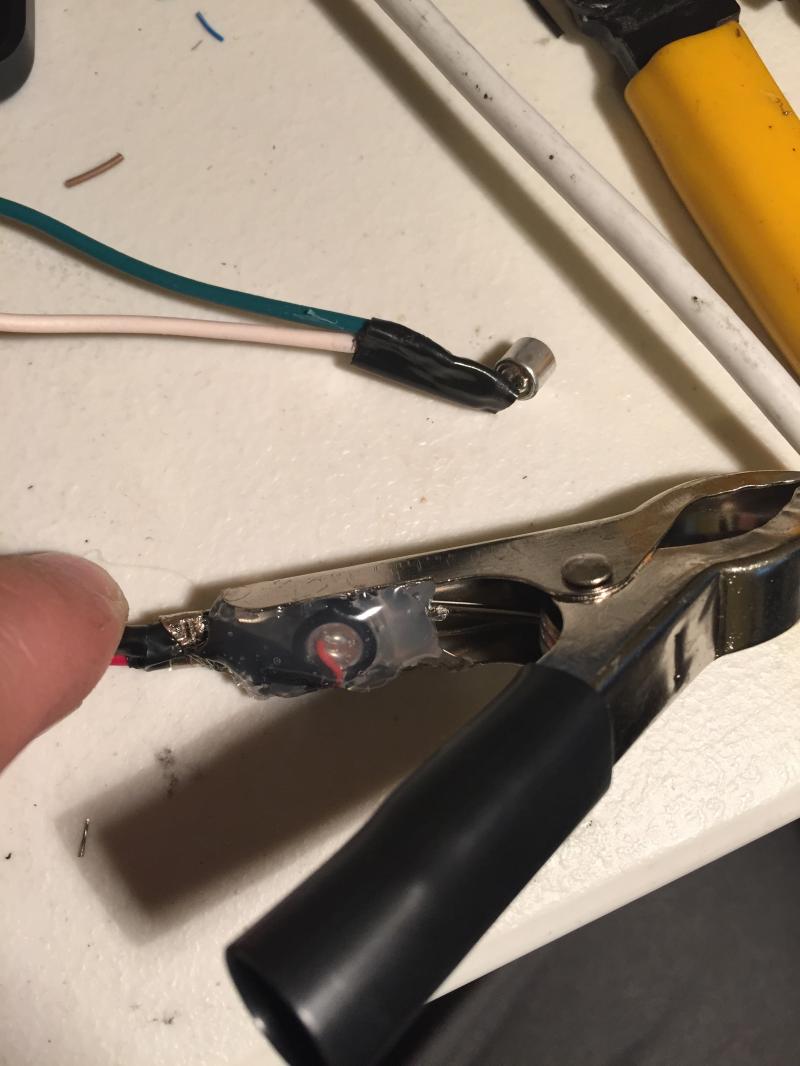
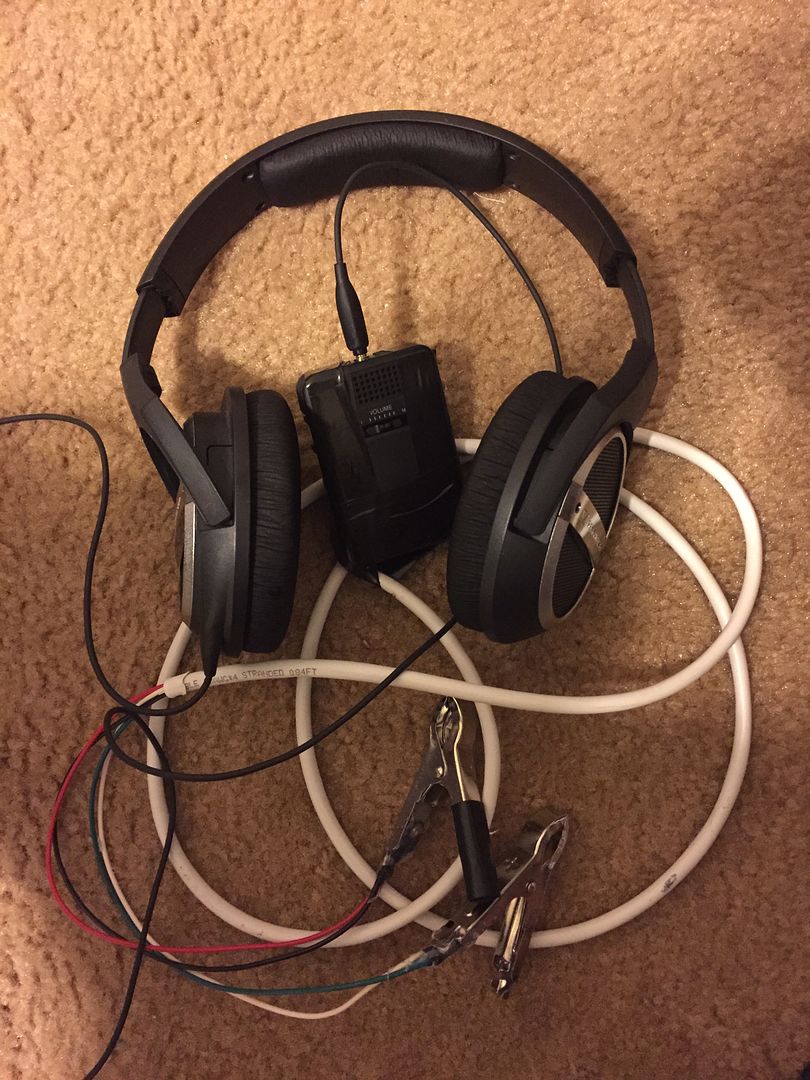
Finished Product! I accidentally ripper a soldered joint on the second mic so I only have one functional mic now
3D printed TB elbow piece to run a pipe and filter to driver side head light
before acetone vapor smoothing (.013 layer height)
my crock pot rig (ceramic takes way to long to heat up, I should have went with a rice cooker)
After: Smooths out the layers and helps seal the part. (smudge marks are from me touching it before it fully cured)
Some flyin miata goodies went in
DIY electric Det Can from another thread on here. ($12 in materials. Thanks Radioshack for the 25% off going out of business sell!)
This one has two mics. Makes for good redundancy or to use on both sides of a V8
Arts and crafts
Finished Product! I accidentally ripper a soldered joint on the second mic so I only have one functional mic now
Reply
0
0

Elite Member
Joined: Oct 2013
Posts: 2,764
Total Cats: 951
From: Cedar City, UT
Looking good man, glad you are getting in the game! I really really want a 3d printer after seeing your(awesome) throttle body elbow. I could make so many parts with it.
Your fab skills are crazy good, wiring too.
Your fab skills are crazy good, wiring too.
Reply
0
0
Thread Starter
Senior Member
iTrader: (8)
Joined: Jan 2012
Posts: 1,407
Total Cats: 117
From: Azusa, CA
I ended up using my BEGI elbow from my turbo kit and mounted my filter closer near the bumper opening rather than the driver side headlight so this most likely will never get used. I used my work's printer for that one. My 3D printer kind of sucks at support features for complicated overhangs.
Reply
0
0