
Bulbasaur, evolve to Ivysaur! (budget turbo build content inside)


Thread Starter
Senior Member
iTrader: (8)
Joined: Jan 2012
Posts: 1,407
Total Cats: 117
From: Azusa, CA
Been busy these past few weeks getting some work done to the miata.
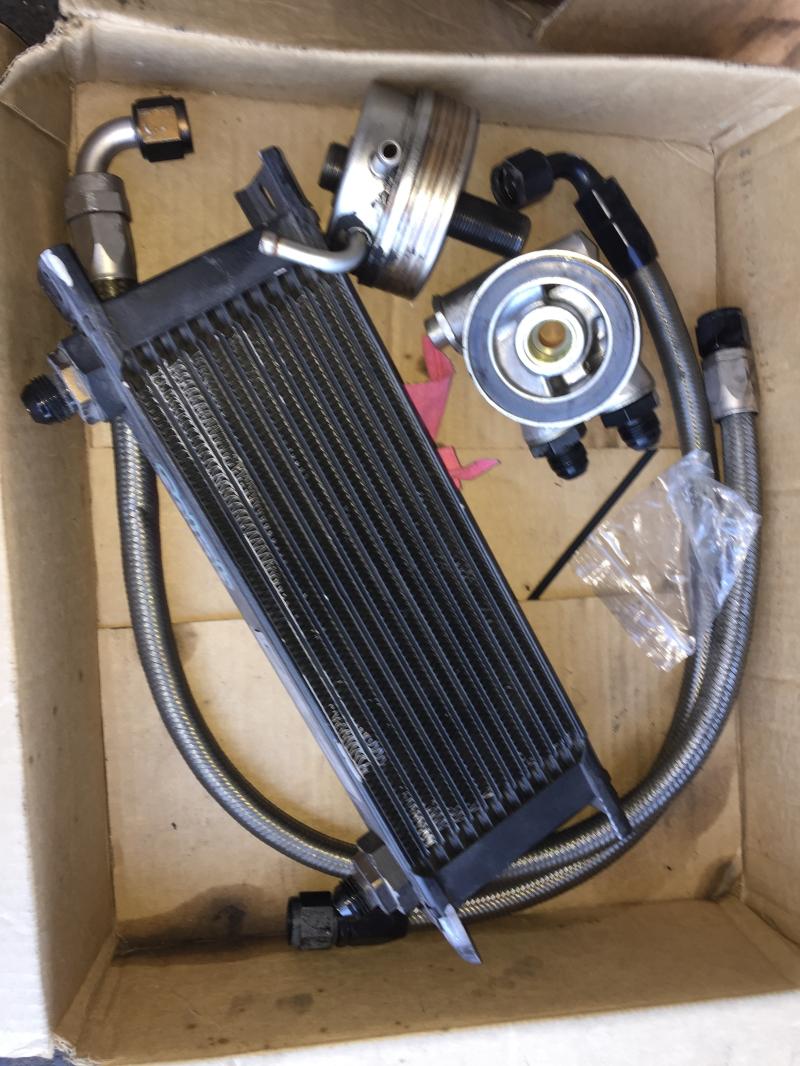
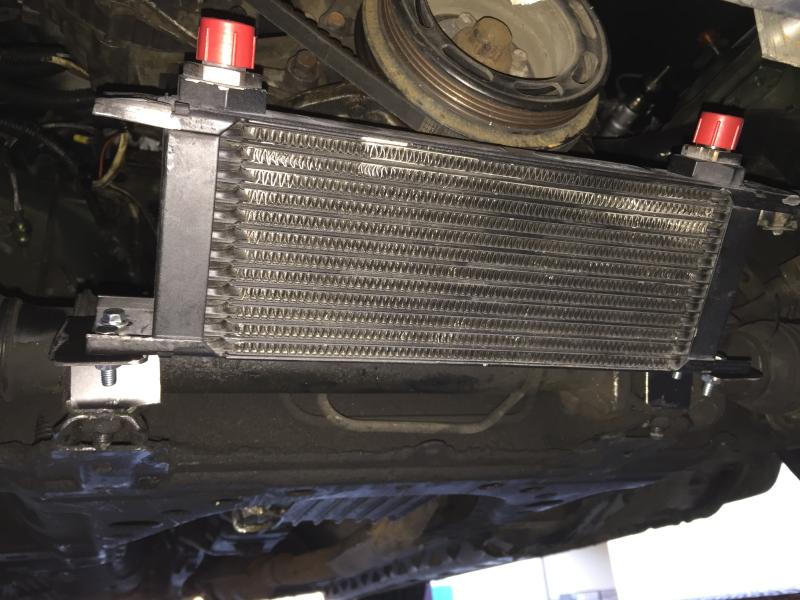
Installed FM oil cooler kit. Sourced a 1.8 oil warmer for the spacer.
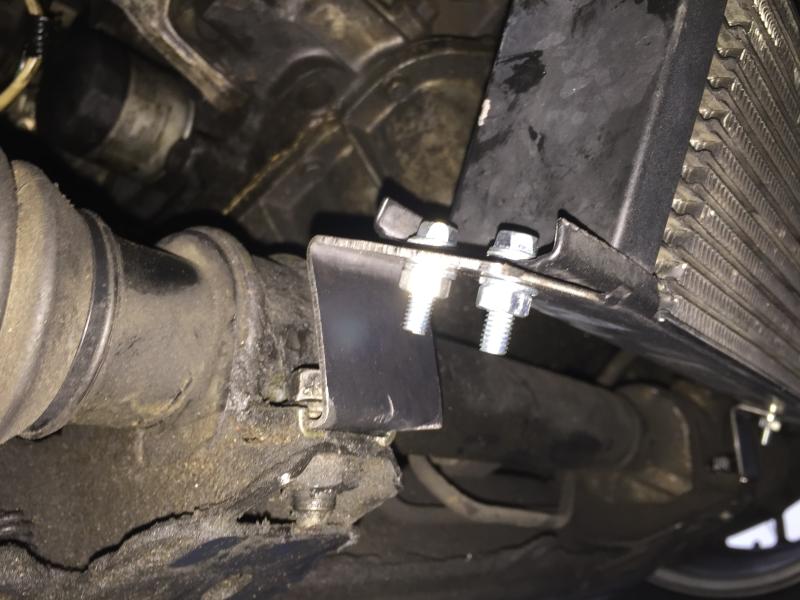
Ghetto fabricated some brackets. I need to figure out some ducting.
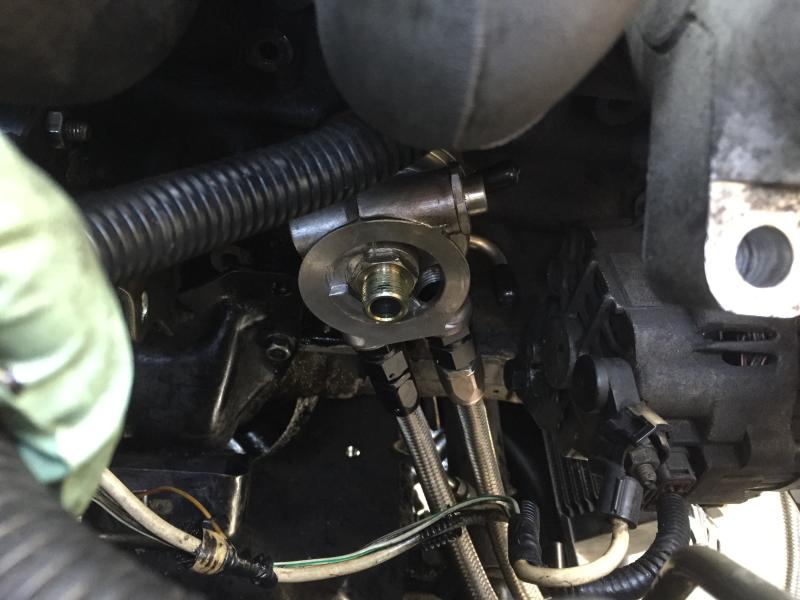
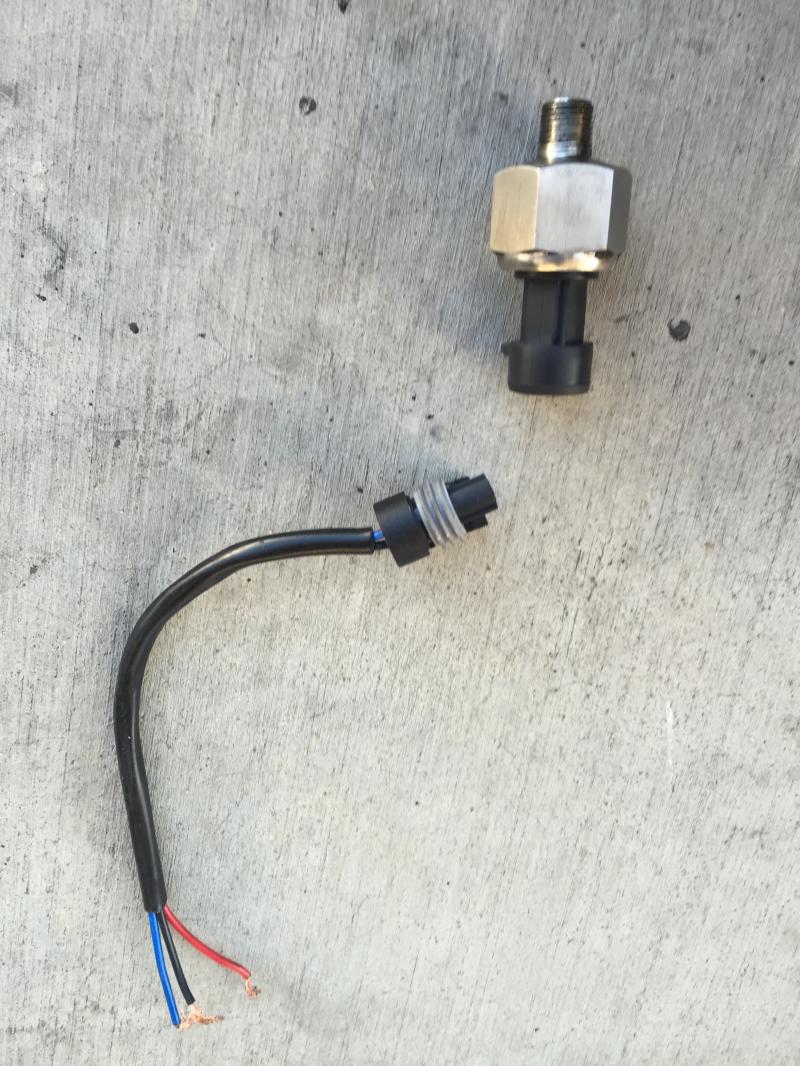
$25 100 psi transducer to data log oil pressure. I wonder how accurate it is and how it holds up.
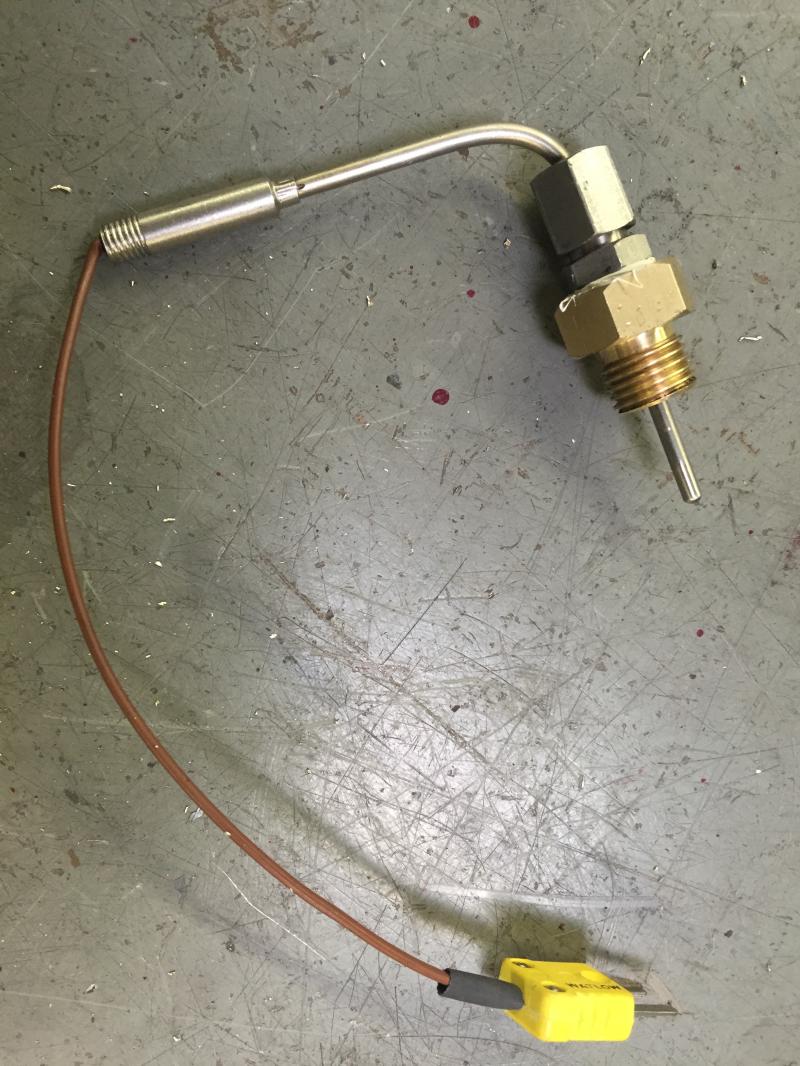
Thermocouple added to an oil plug adapter for some oil temp logging and warning system.
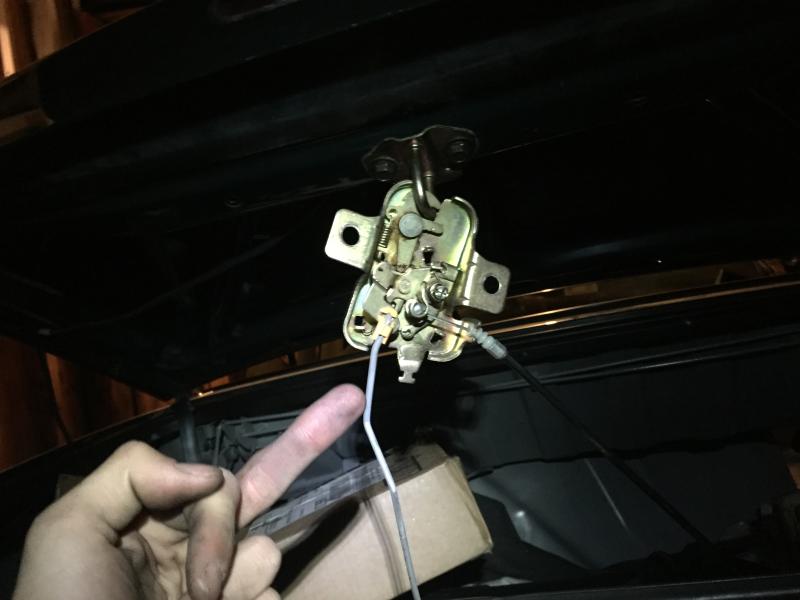
My trunk decided to lock me out... ******* annoying. It took 12 extensions to reach to two 10mm bolts though the rear parcel shelf area.
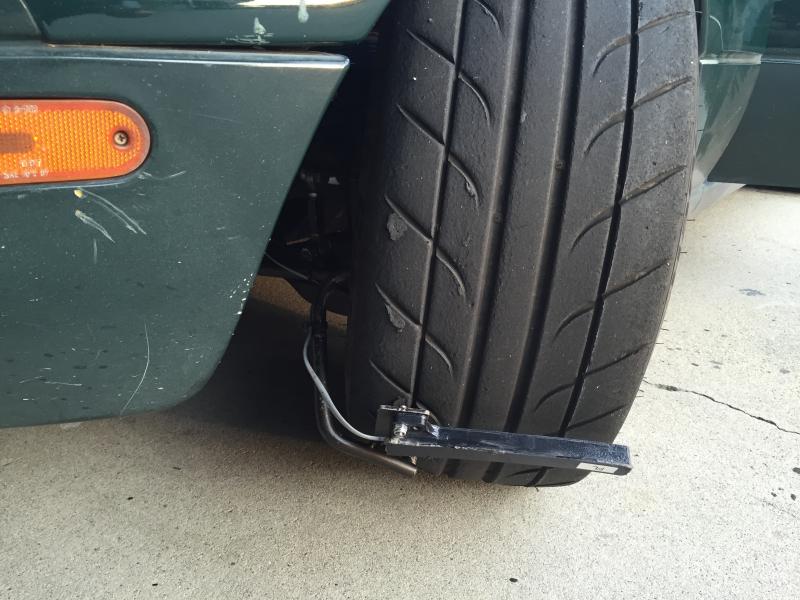
Tire temp brackets were a headache. This will do for now. I need to shift the sensors over an inch to the left still. Hopefully i don't hit any curbs.
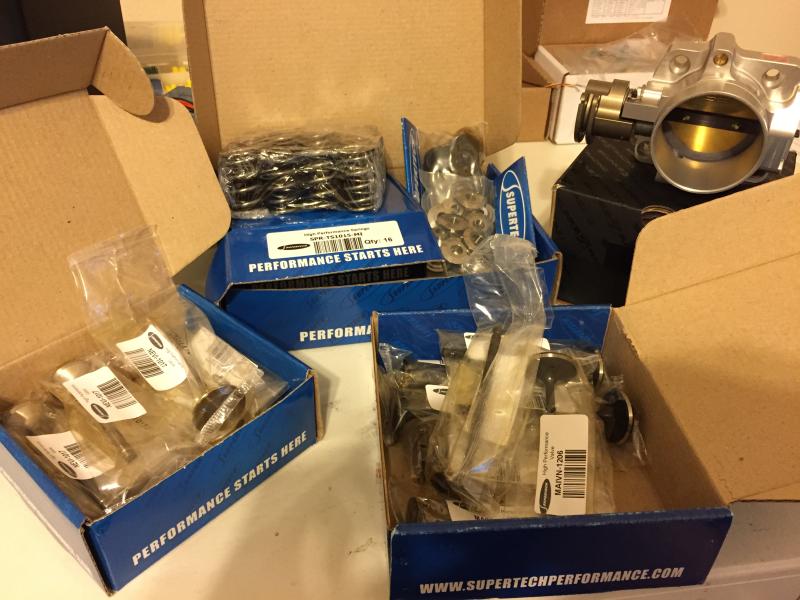
And finally... got some shinny expensive parts! officially no longer a budget build. I'm taking a head porting/building class and will be building a 1.8 motor to upgrade my 1.6. I found a 99-00 head to use for the build. So far I have purchased the following:
+1mm intake valves
+2mm inconel exhaust valves
supertech heavy double valve springs.
skunk2 throttle body
Is there anything else I should be replacing while I'm at it?

Installed FM oil cooler kit. Sourced a 1.8 oil warmer for the spacer.
Ghetto fabricated some brackets. I need to figure out some ducting.
$25 100 psi transducer to data log oil pressure. I wonder how accurate it is and how it holds up.
Thermocouple added to an oil plug adapter for some oil temp logging and warning system.
My trunk decided to lock me out... ******* annoying. It took 12 extensions to reach to two 10mm bolts though the rear parcel shelf area.
Tire temp brackets were a headache. This will do for now. I need to shift the sensors over an inch to the left still. Hopefully i don't hit any curbs.
And finally... got some shinny expensive parts! officially no longer a budget build. I'm taking a head porting/building class and will be building a 1.8 motor to upgrade my 1.6. I found a 99-00 head to use for the build. So far I have purchased the following:
+1mm intake valves
+2mm inconel exhaust valves
supertech heavy double valve springs.
skunk2 throttle body
Is there anything else I should be replacing while I'm at it?
Reply
 0
0

0
Thread Starter
Senior Member
iTrader: (8)
Joined: Jan 2012
Posts: 1,407
Total Cats: 117
From: Azusa, CA
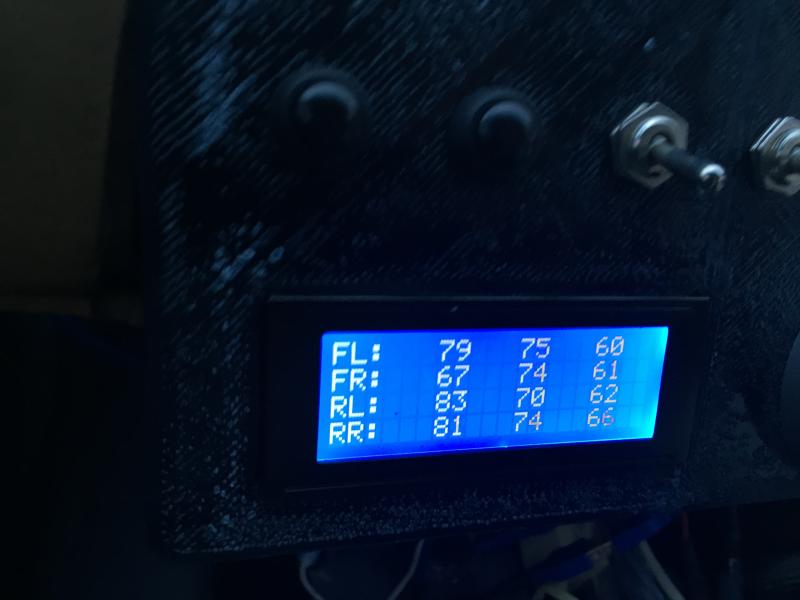
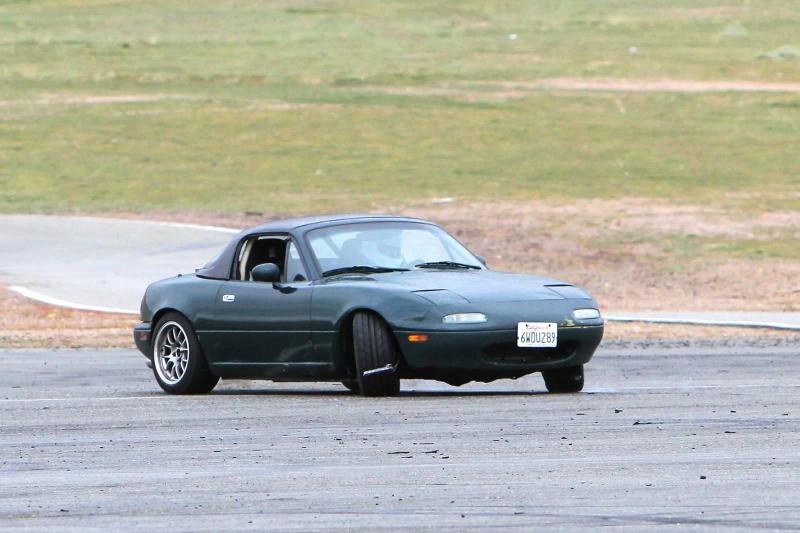
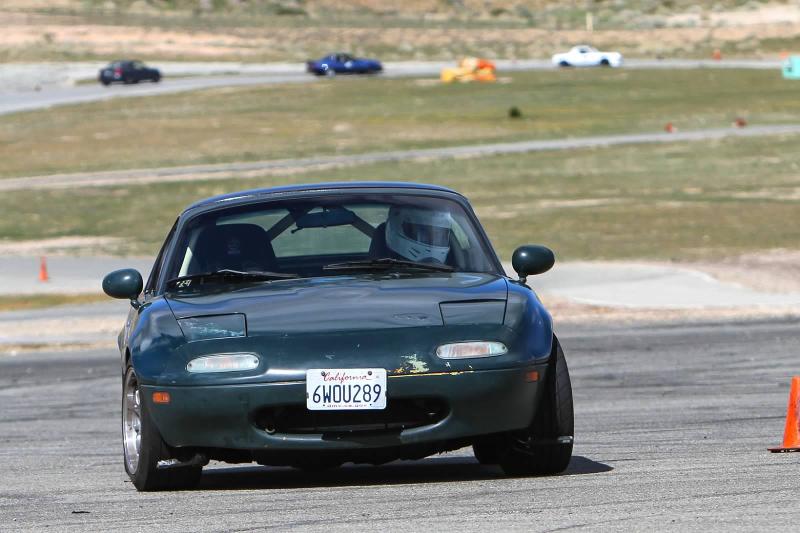
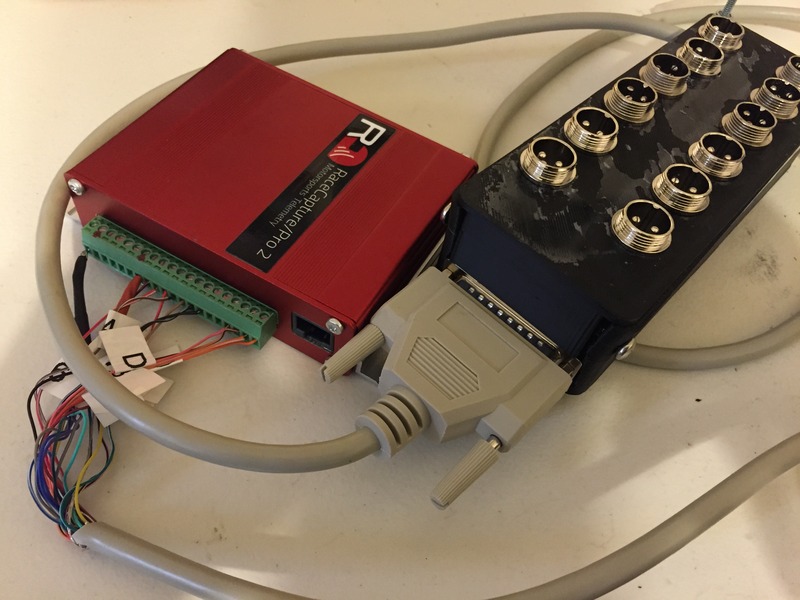
Tire temp testing a sucess! I'm working on the next revision with waterproof enclosures and CAN integration with my new RaceCapture Pro 2
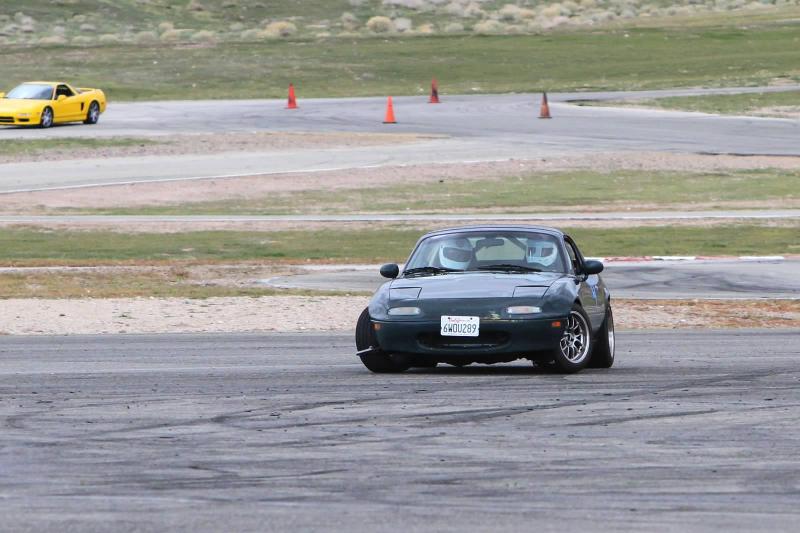
skidpad.... not drifting.
Temp sensors in prime location for curb breakage.
I ran at fontana 2 weeks ago sunday and it poured in the afternoon. Which made me second guess my heater core removal... With chance or rain at the streets of willow event the following weekend I went to work gheto rigging a defroster. It work, but I need shrouding for the fan to force more air through the core. I'll revist this project later to improve it.
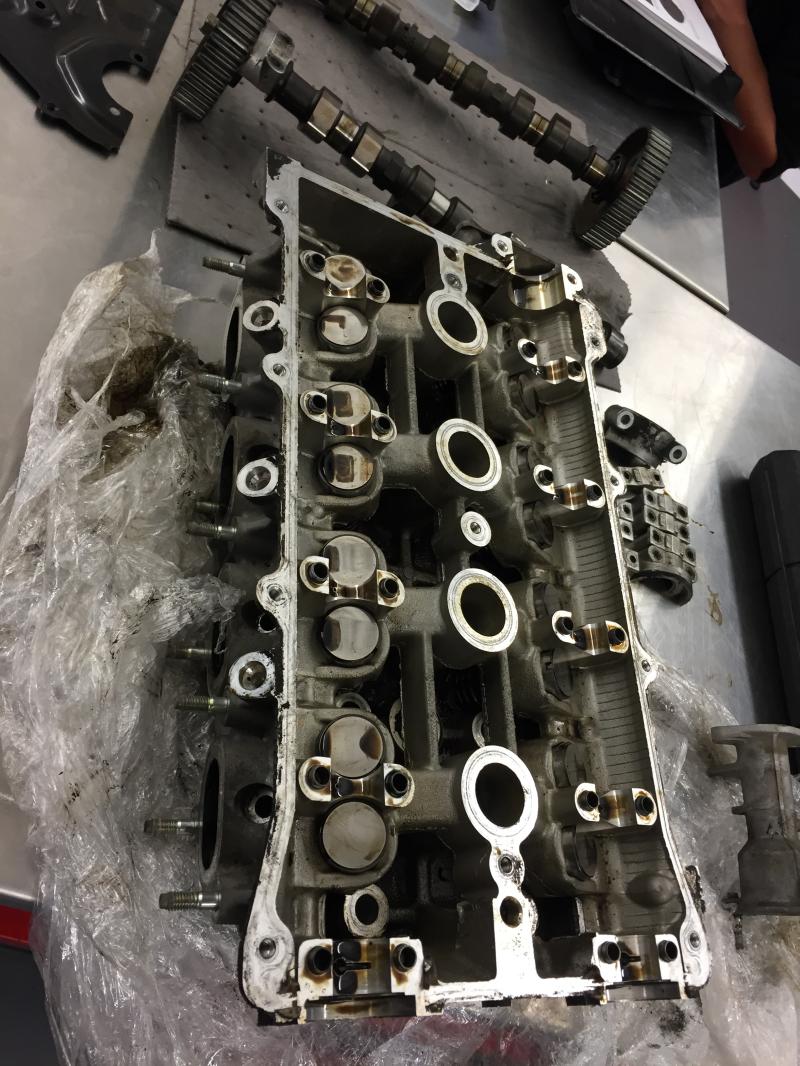
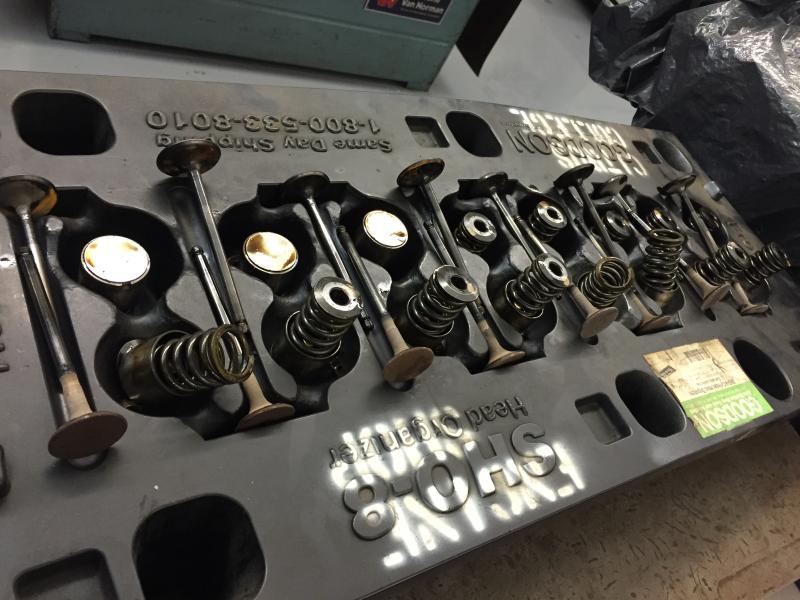
Cylinder head rebuild has begun!

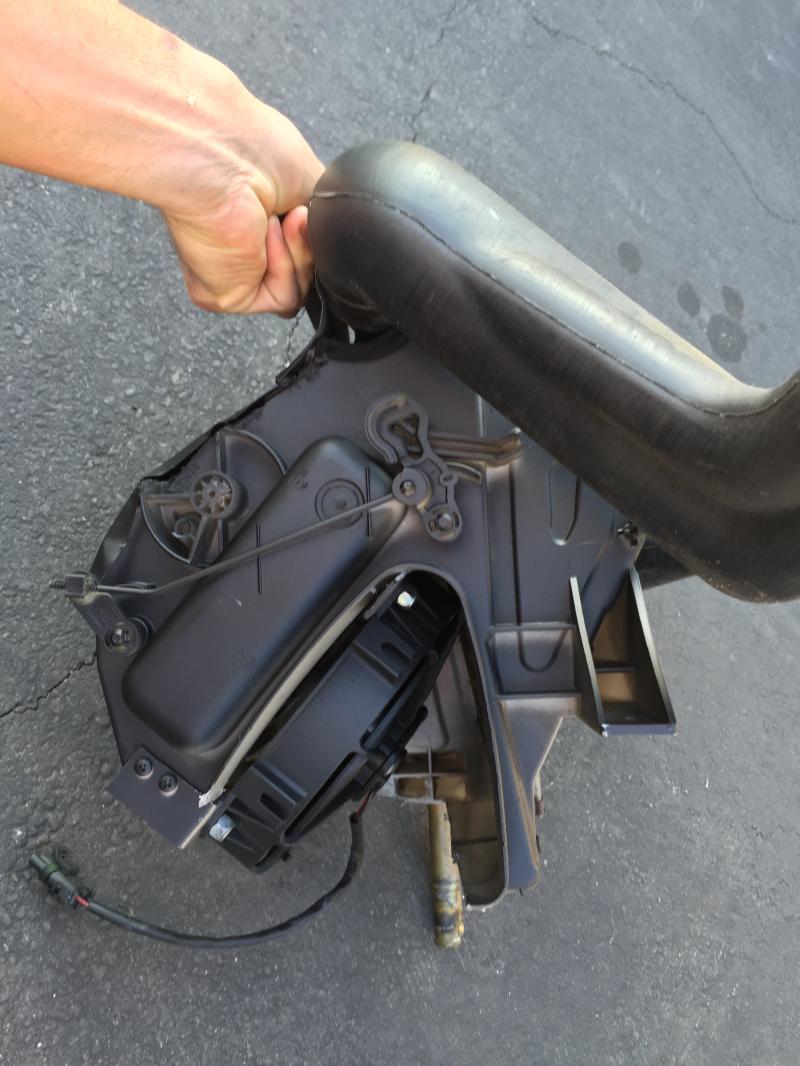
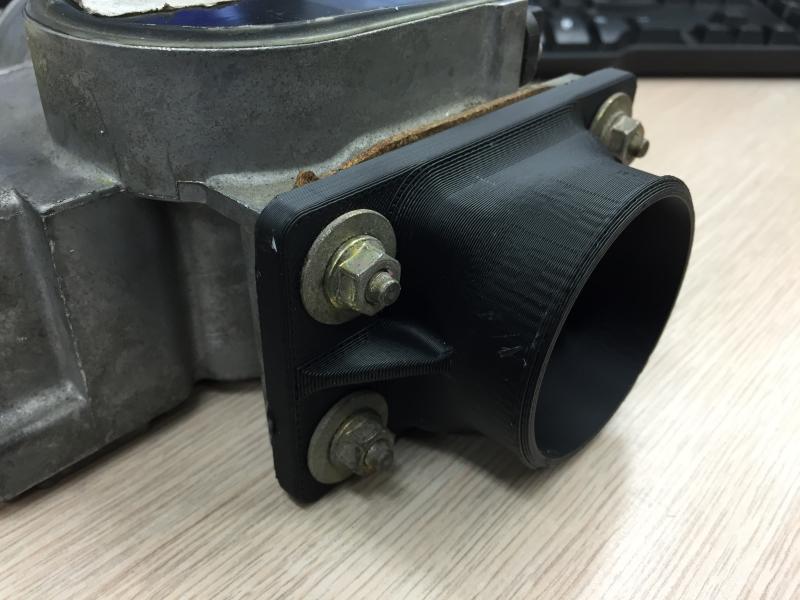
I think I'm going to run my stock ECU for a little while longer since I won't get to tune it for a while. So I decided to make a new intake and ditch the factory airbox. I'll make these files available for other's to 3D print or I can make one for you for cheap if anyone's interested.
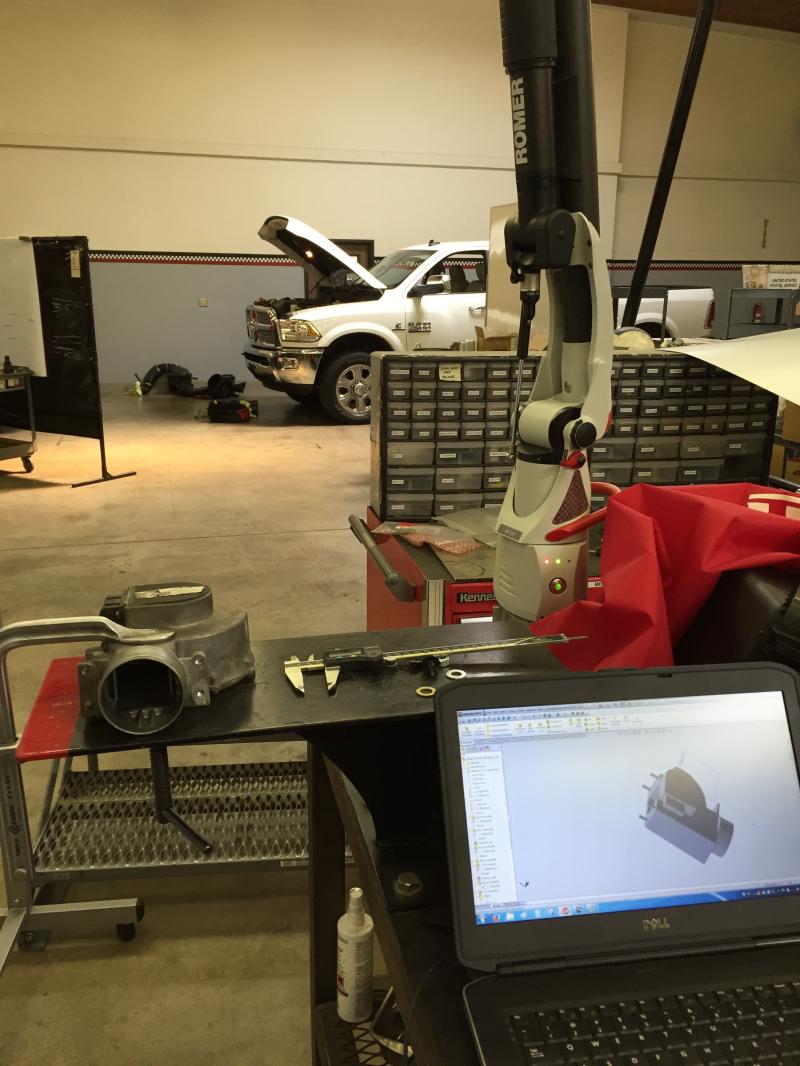

Dat port math doh:
2.25" outlet for my K&N. I can provide STL files in other OD as well.
skidpad.... not drifting.
Temp sensors in prime location for curb breakage.
I ran at fontana 2 weeks ago sunday and it poured in the afternoon. Which made me second guess my heater core removal... With chance or rain at the streets of willow event the following weekend I went to work gheto rigging a defroster. It work, but I need shrouding for the fan to force more air through the core. I'll revist this project later to improve it.
Cylinder head rebuild has begun!
I think I'm going to run my stock ECU for a little while longer since I won't get to tune it for a while. So I decided to make a new intake and ditch the factory airbox. I'll make these files available for other's to 3D print or I can make one for you for cheap if anyone's interested.
Dat port math doh:
2.25" outlet for my K&N. I can provide STL files in other OD as well.
Reply
0
0
Thread Starter
Senior Member
iTrader: (8)
Joined: Jan 2012
Posts: 1,407
Total Cats: 117
From: Azusa, CA
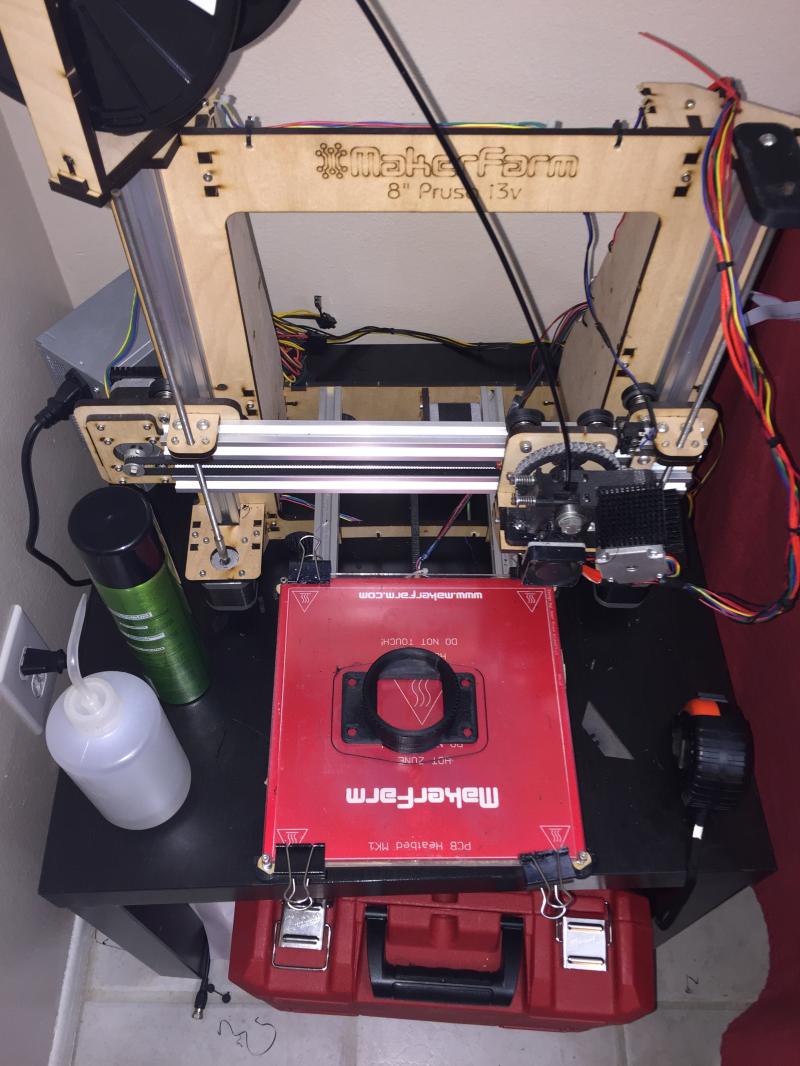
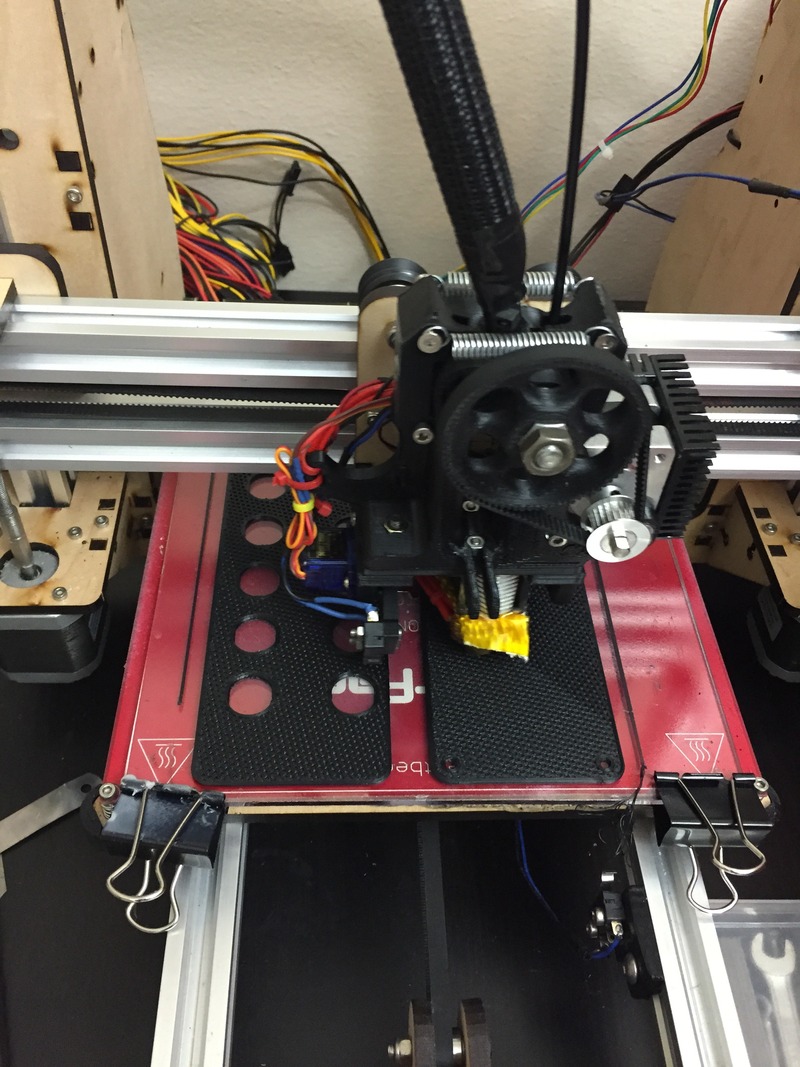
Upgraded the 3D printer. Auto bed leveling is amazing. Seriously made me fall in love with 3D printing all over again. I no longer have to calibrate the bed for each print. Just hit play and walk away.
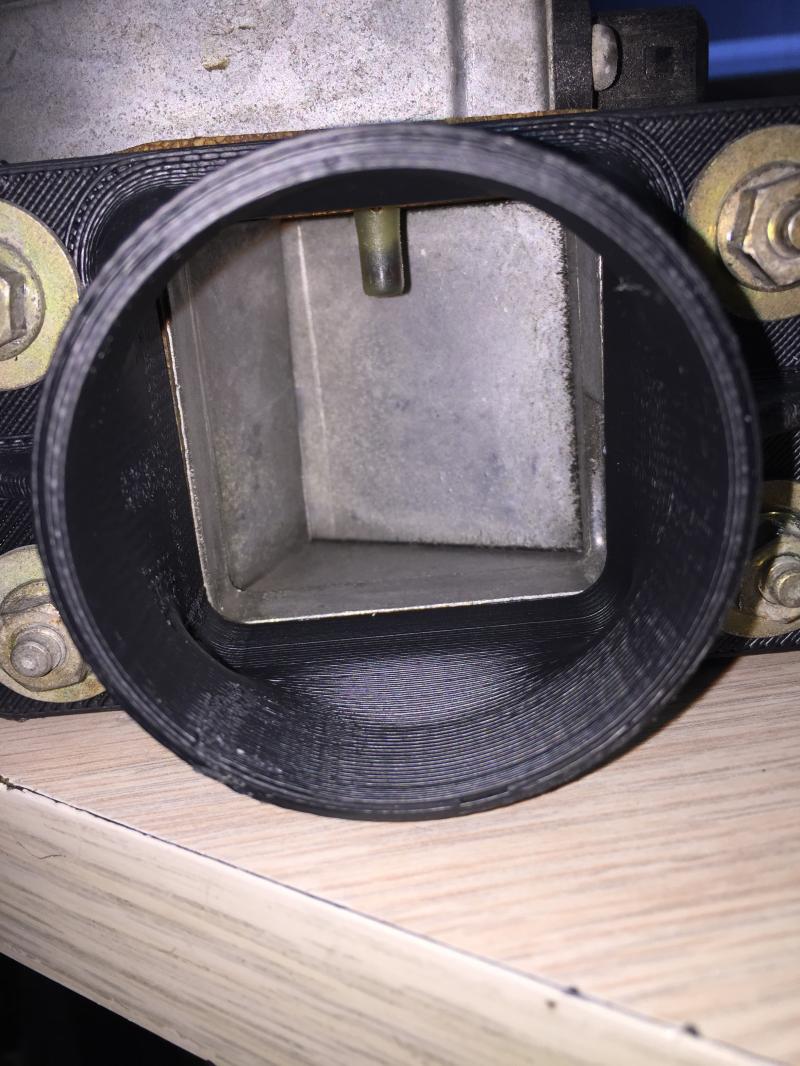
Made this intake elbow with IAT sensor port and oem hoses barbs
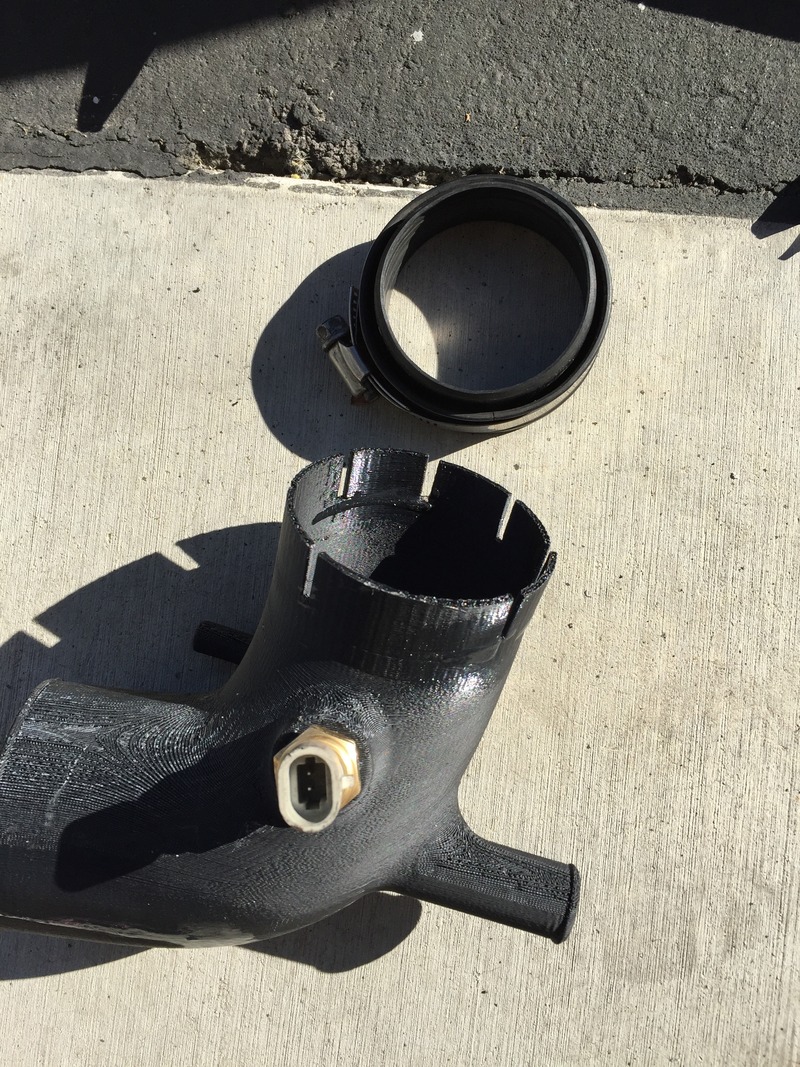
custom intake. Using the stock ECU at the moment hence that damn MAF
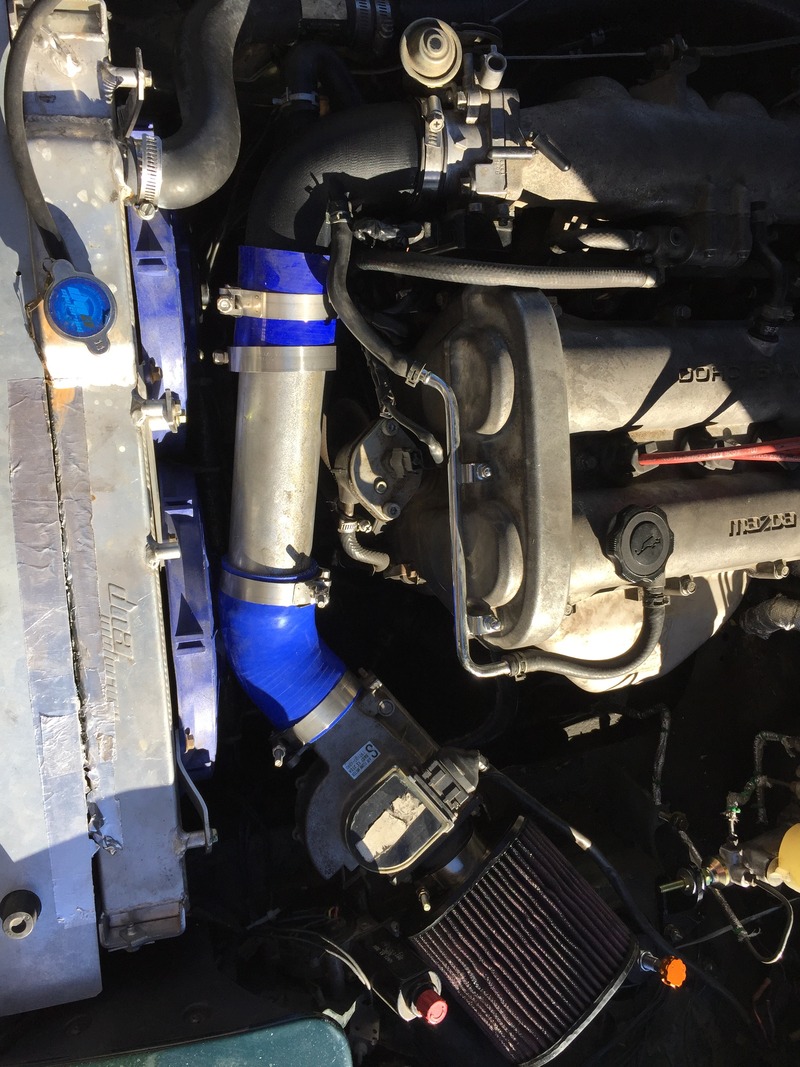
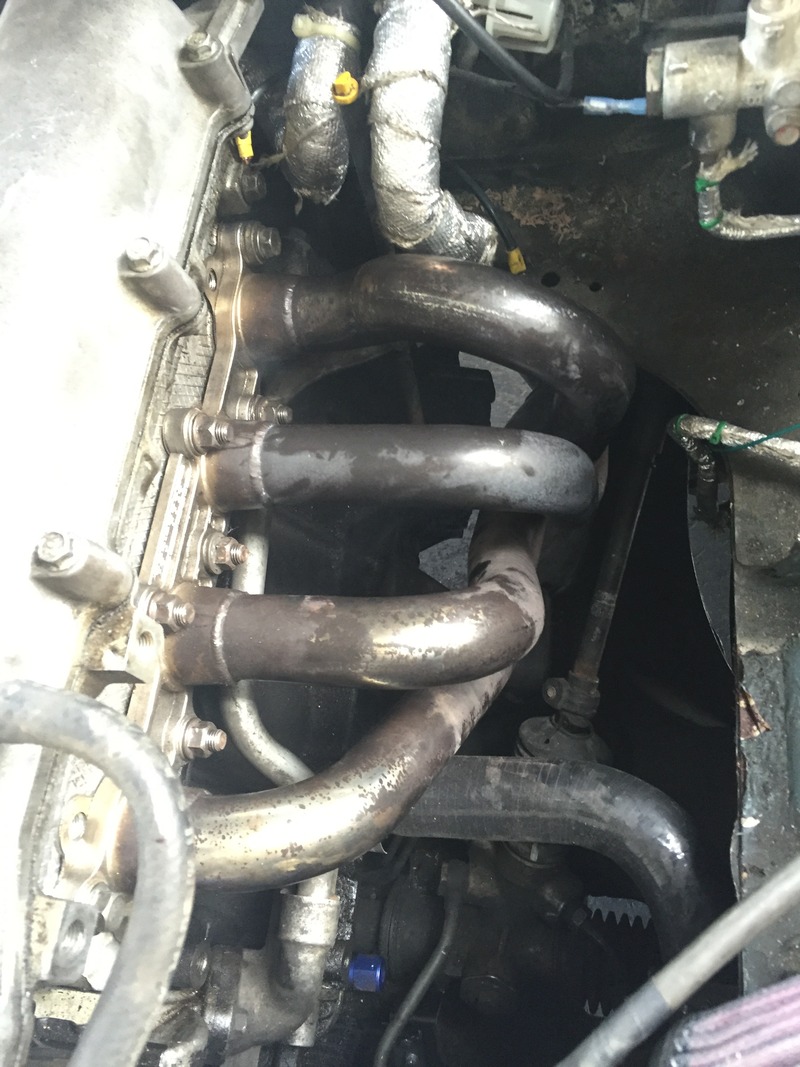
Added a racing beat header.
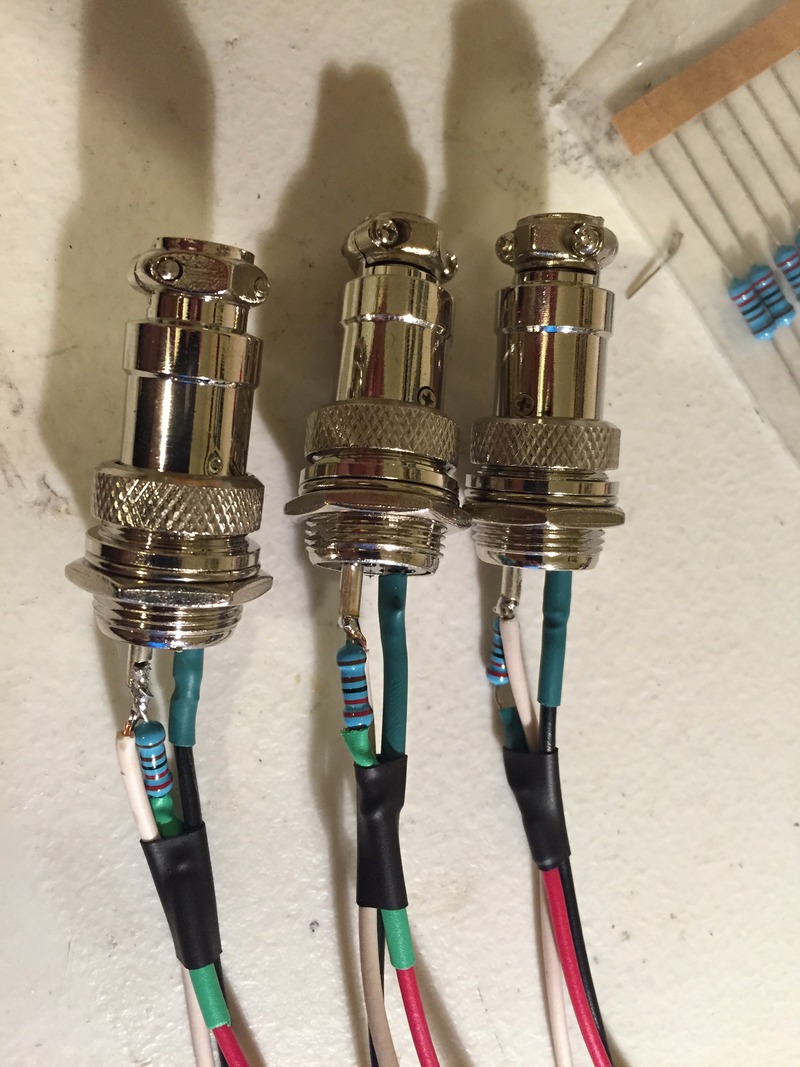
Pull up resistors for the new sensor breakout box for my racecapture
enclosure printing
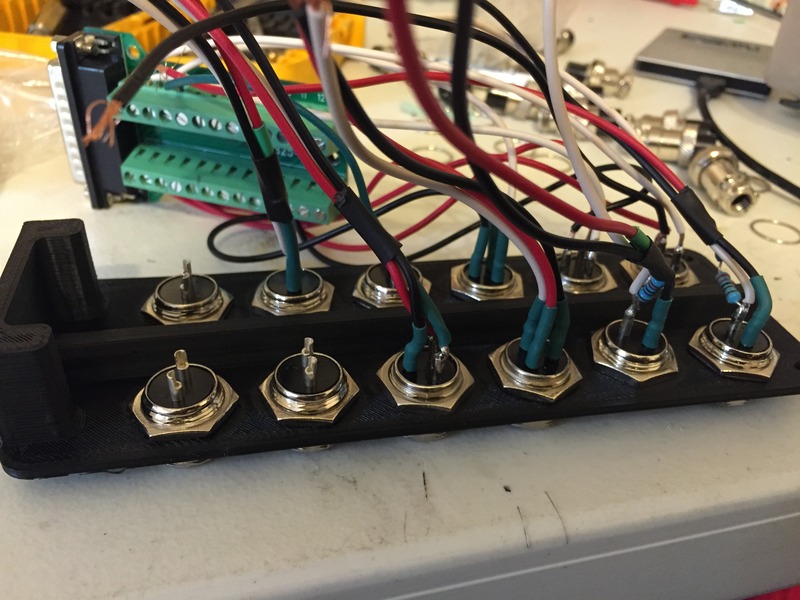
All wired up, This makes it much easier to add new sensors and pass everything through the firewall with a single cable.
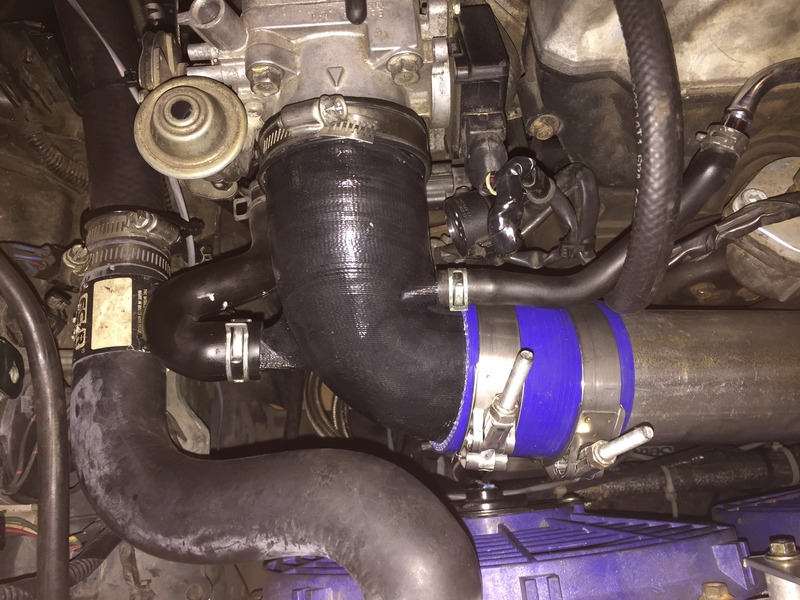
Messy engine bay

Finished the install just in time for a Chuckwalla track day
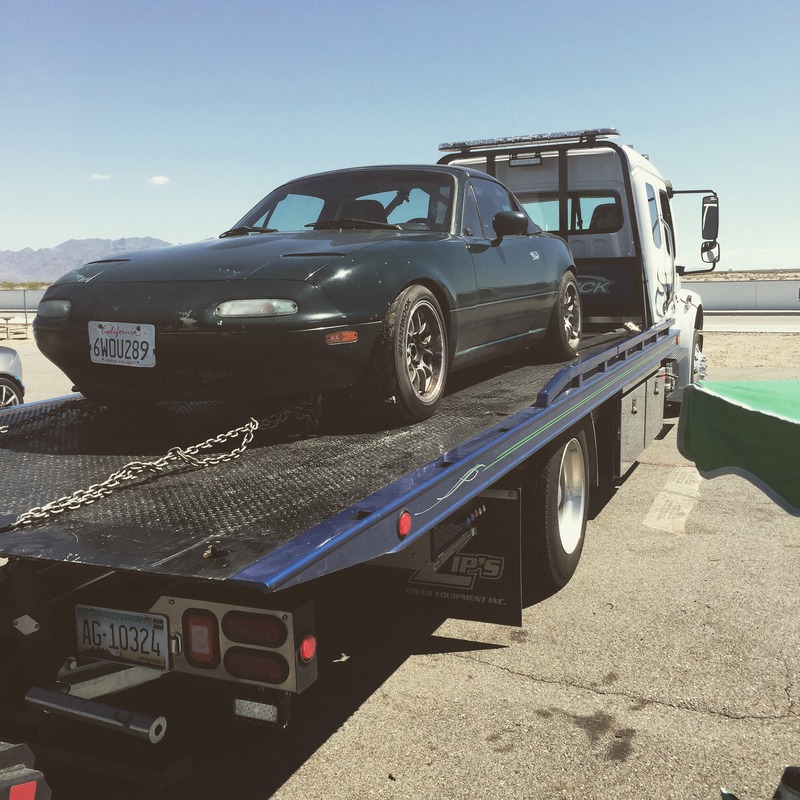
Then this happened..... Engine went Kaput on the 3rd session. I have no idea why but it sounds awful. I guess this is an excuse to upgrade to a 1.8
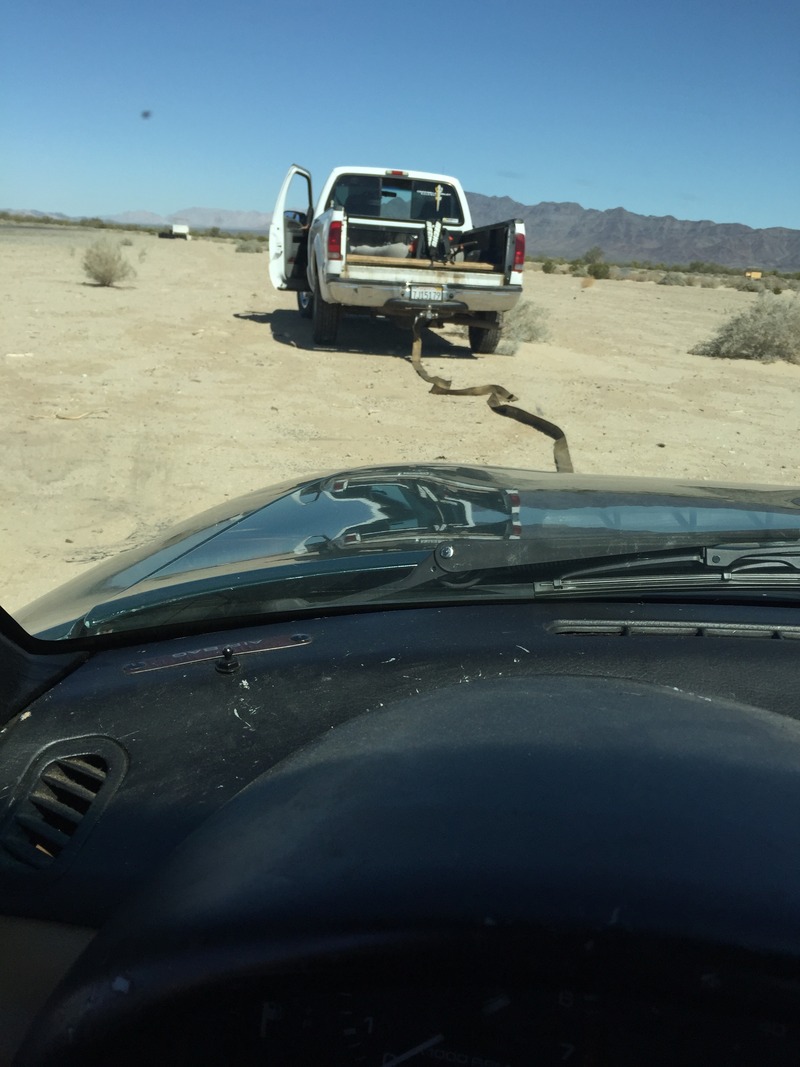
170 mile tow of shame home. Thank god for AAA
Good thing I have this spare for the engine building class. It looks like it will need to be used much sooner than I had hoped. God this thing was a mess. Oil gunk EVERYWHERE!!!
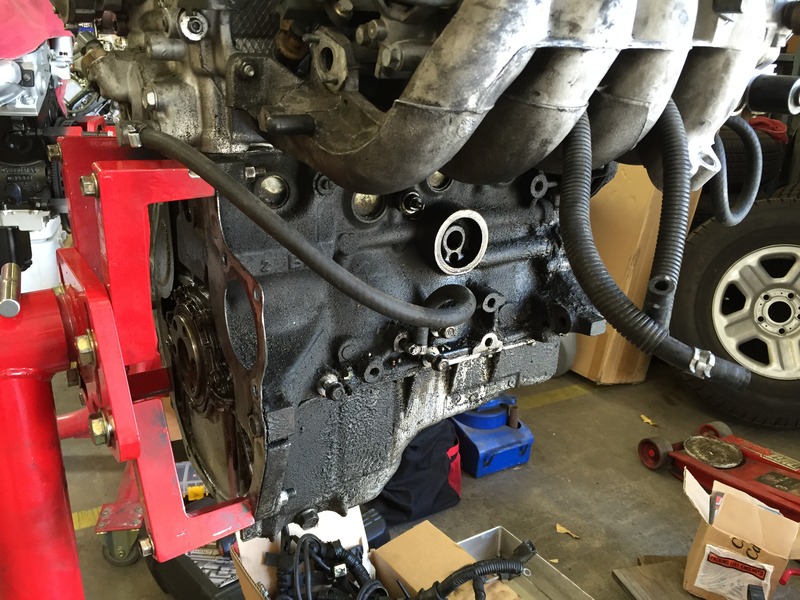
2 hours of cleaning later...
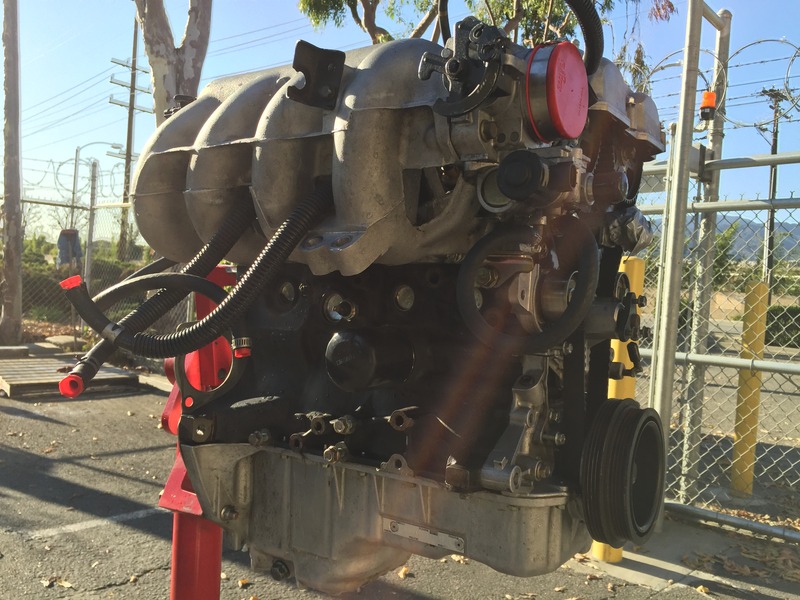
Just placed an order for seals and timing belt kit to freshen this engine up. The leakdown test results were mediocre but I'm hoping it's from sitting for so long and they will be better once warmed up. This engine just needs to last me till the end of this year so I can finished the forged internal engine build.
.
Made this intake elbow with IAT sensor port and oem hoses barbs
custom intake. Using the stock ECU at the moment hence that damn MAF
Added a racing beat header.
Pull up resistors for the new sensor breakout box for my racecapture
enclosure printing
All wired up, This makes it much easier to add new sensors and pass everything through the firewall with a single cable.
Messy engine bay
Finished the install just in time for a Chuckwalla track day
Then this happened..... Engine went Kaput on the 3rd session. I have no idea why but it sounds awful. I guess this is an excuse to upgrade to a 1.8
170 mile tow of shame home. Thank god for AAA
Good thing I have this spare for the engine building class. It looks like it will need to be used much sooner than I had hoped. God this thing was a mess. Oil gunk EVERYWHERE!!!
2 hours of cleaning later...
Just placed an order for seals and timing belt kit to freshen this engine up. The leakdown test results were mediocre but I'm hoping it's from sitting for so long and they will be better once warmed up. This engine just needs to last me till the end of this year so I can finished the forged internal engine build.
.
Last edited by cyotani; Mar 27, 2015 at 12:10 AM.
Reply
0
0

Thread Starter
Senior Member
iTrader: (8)
Joined: Jan 2012
Posts: 1,407
Total Cats: 117
From: Azusa, CA
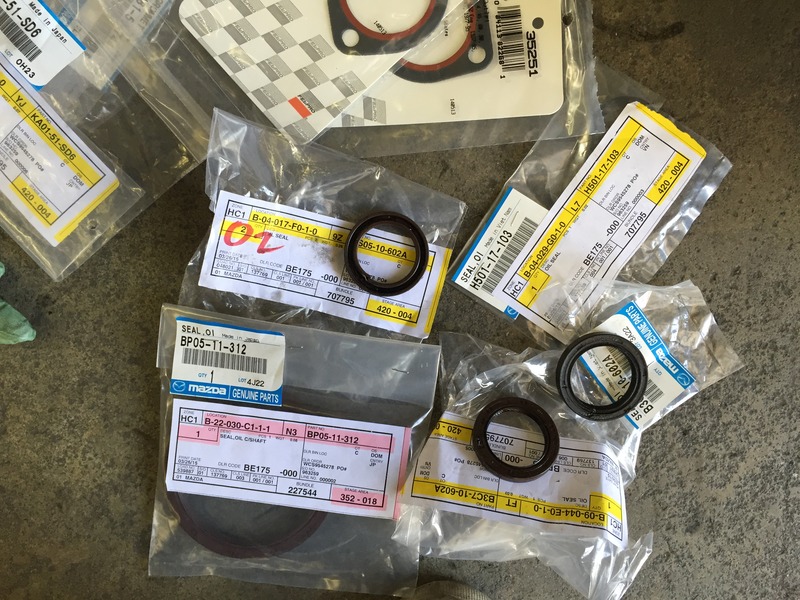
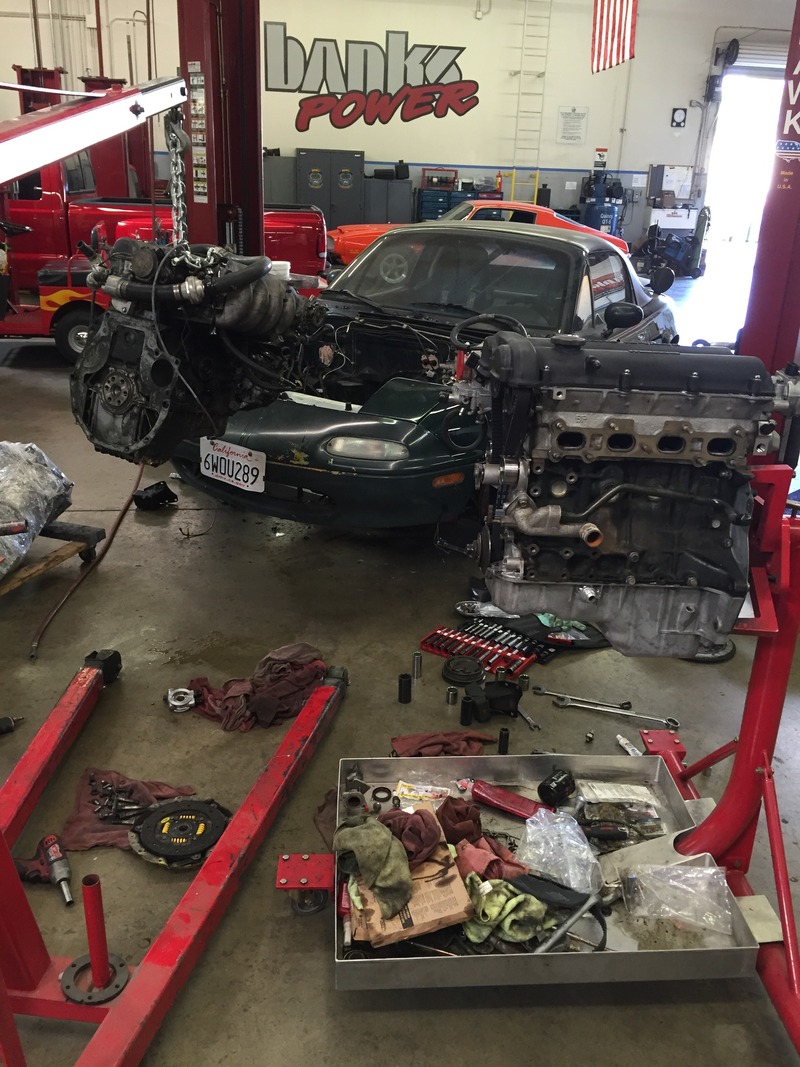
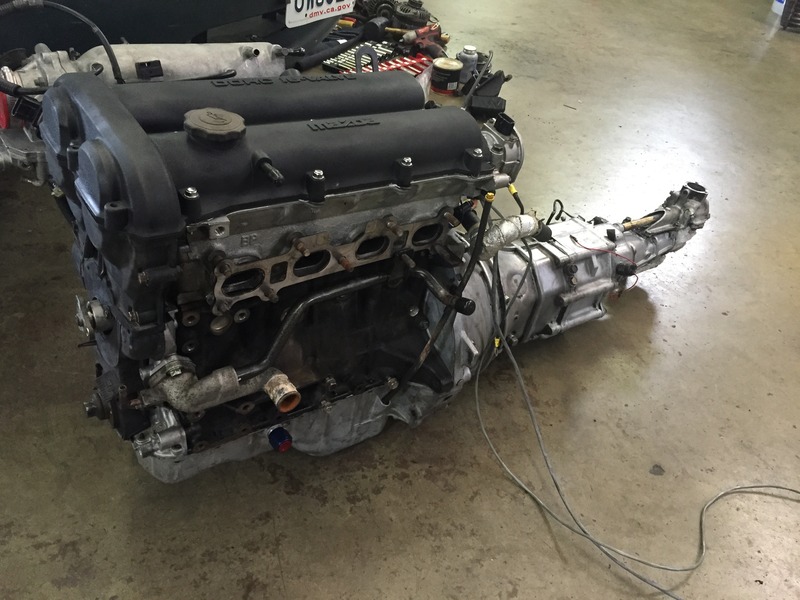
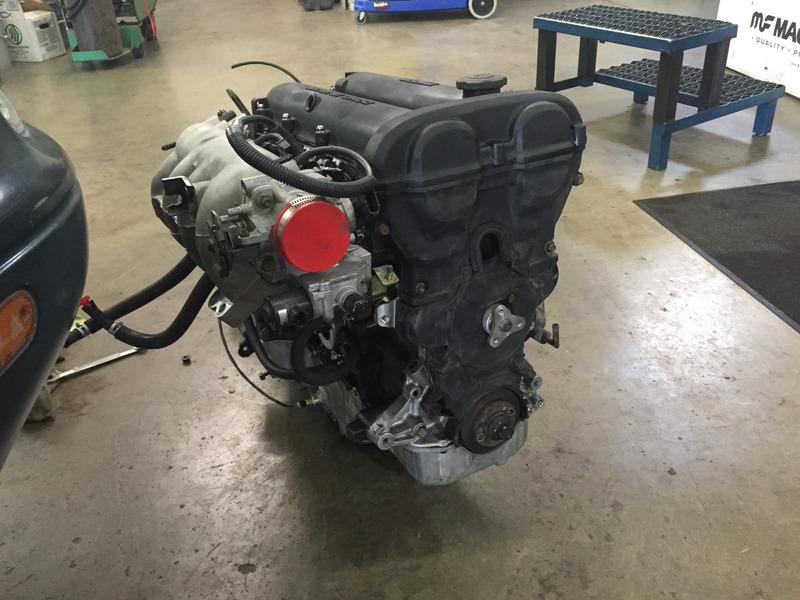
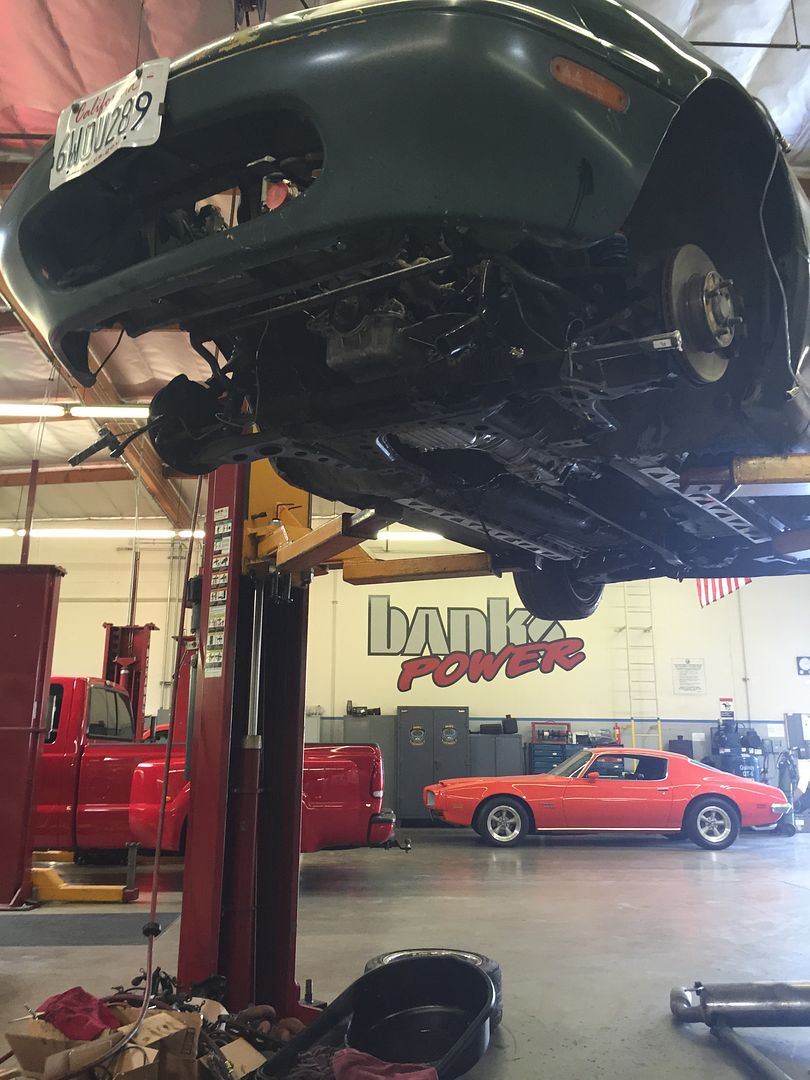
Spent the last few weeks preparing the 1.8L to drop in my car. The engine was covered in gunk and I couldn't tell exactly what was leaking so I decided to just replace all the seals while I had it out. This was my first time using the mazdamotorsports discount which was very helpful. I threw in a gates water pump (3D cast impeller) and timing belt kit too while I was at it.
of course, the only seal I didn't order ended up needing to be replaced (Transmission output shaft)
thanks youtube for all the miata timing belt videos. Made this easy
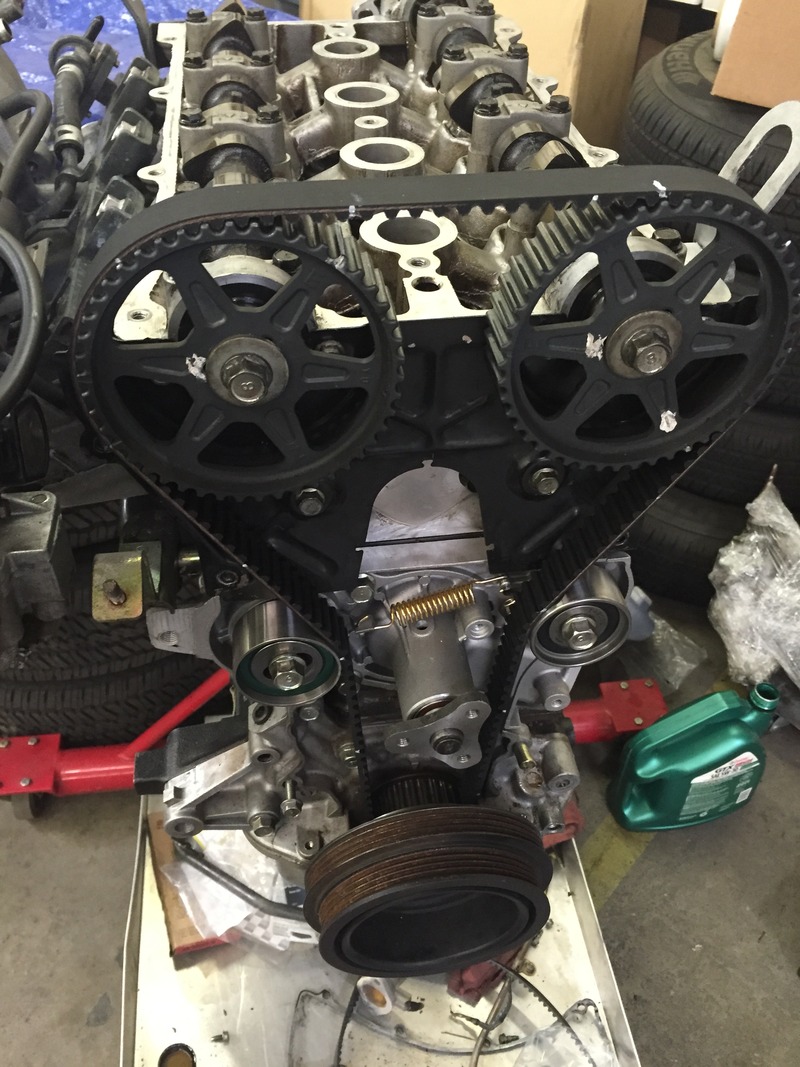
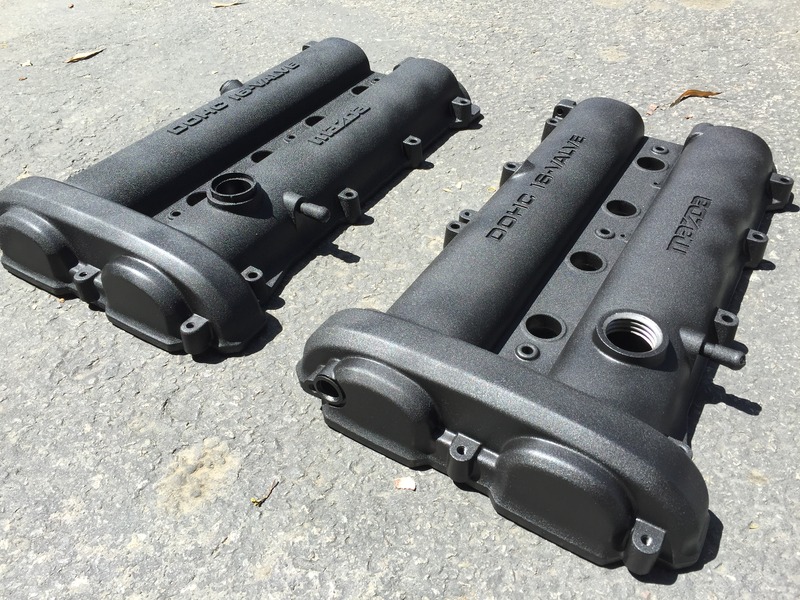
wrinkle paint is some cool stuff
out with the old.
Skou's coolant reroute kit installed with coolant pressure transducer
By far the cleanest engine I have ever installed.
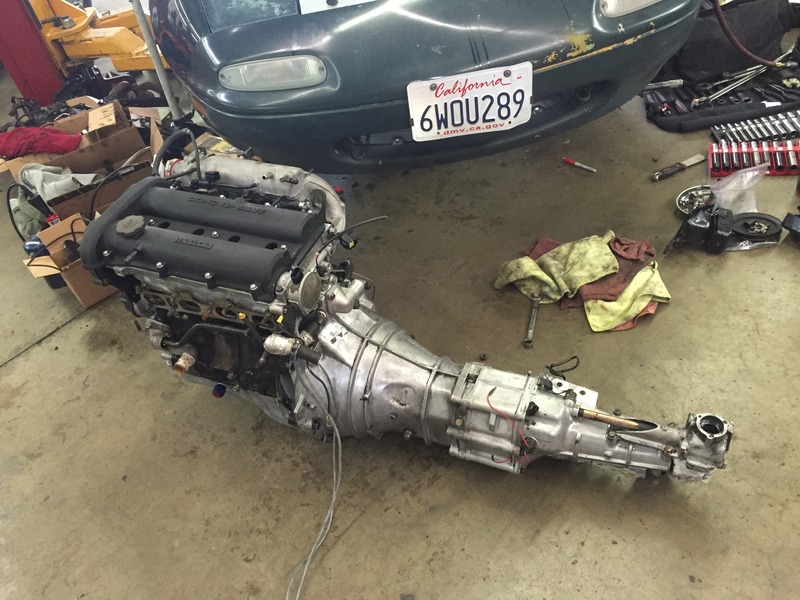
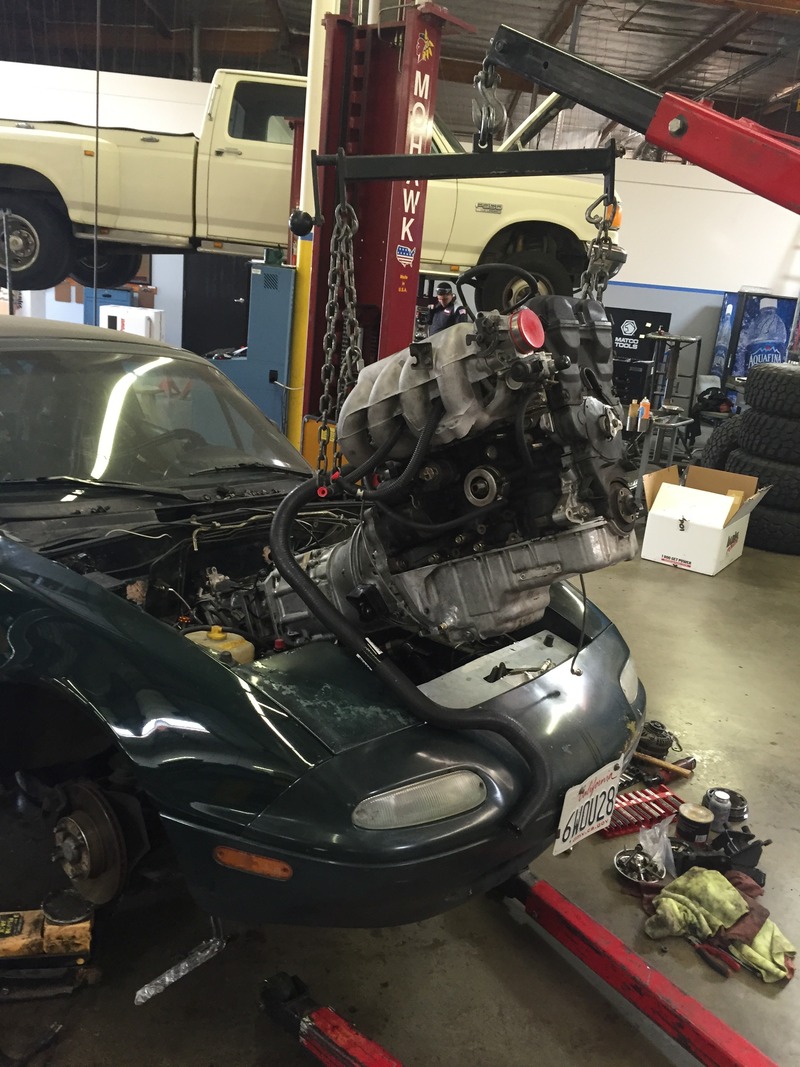
This must have been my 6th engine swap but my first using a lift. I don't think I can ever go back now.
I picked up a Rev basic MS3 to run this 1.8 so it will still need some wiring, a throttle bracket and other small things done before I can get it started and back on the track.
of course, the only seal I didn't order ended up needing to be replaced (Transmission output shaft)
thanks youtube for all the miata timing belt videos. Made this easy
wrinkle paint is some cool stuff
out with the old.
Skou's coolant reroute kit installed with coolant pressure transducer
By far the cleanest engine I have ever installed.
This must have been my 6th engine swap but my first using a lift. I don't think I can ever go back now.
I picked up a Rev basic MS3 to run this 1.8 so it will still need some wiring, a throttle bracket and other small things done before I can get it started and back on the track.
Reply
1
1

Thread Starter
Senior Member
iTrader: (8)
Joined: Jan 2012
Posts: 1,407
Total Cats: 117
From: Azusa, CA
thanks. There's a couple spots that did not wrinkle as much and were a little shinier but overall I'm happy with it. It's VHT wrinkle plus paint. Just make sure you clean the part well with proper prep work. Spray it in heavy layers (thickest you can without running). A heat gun will help wrinkle it more or throwing it in the oven.
Reply
0
0
Thread Starter
Senior Member
iTrader: (8)
Joined: Jan 2012
Posts: 1,407
Total Cats: 117
From: Azusa, CA
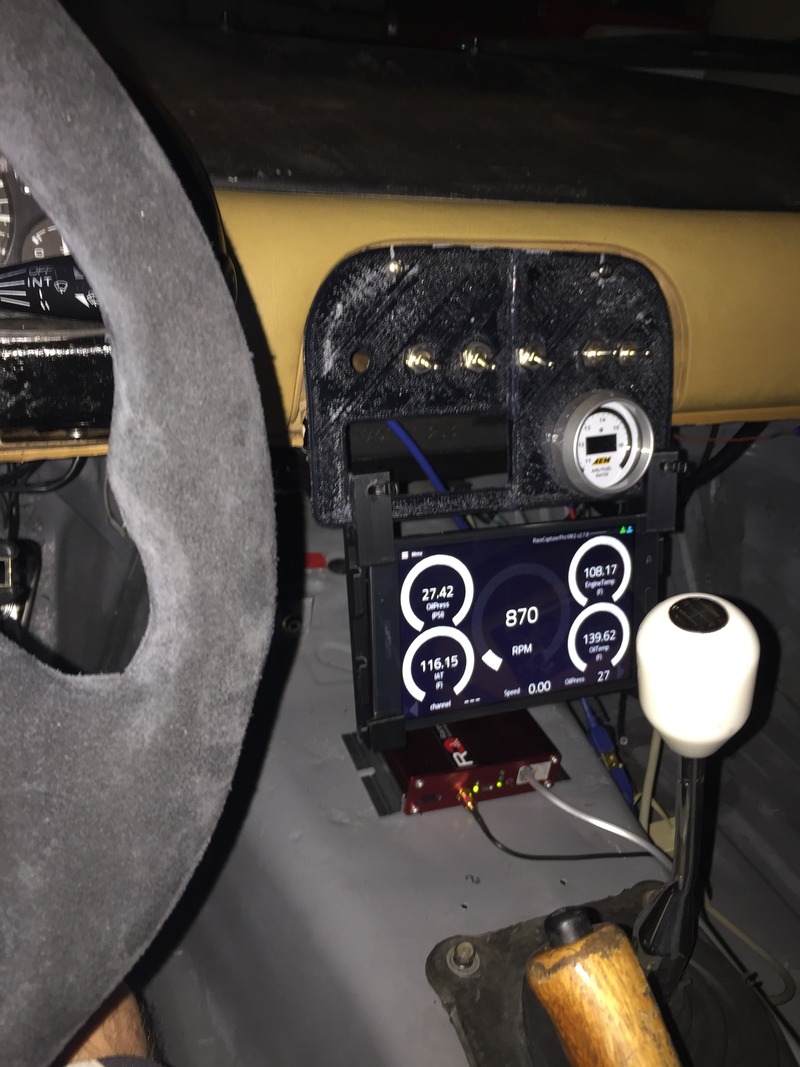
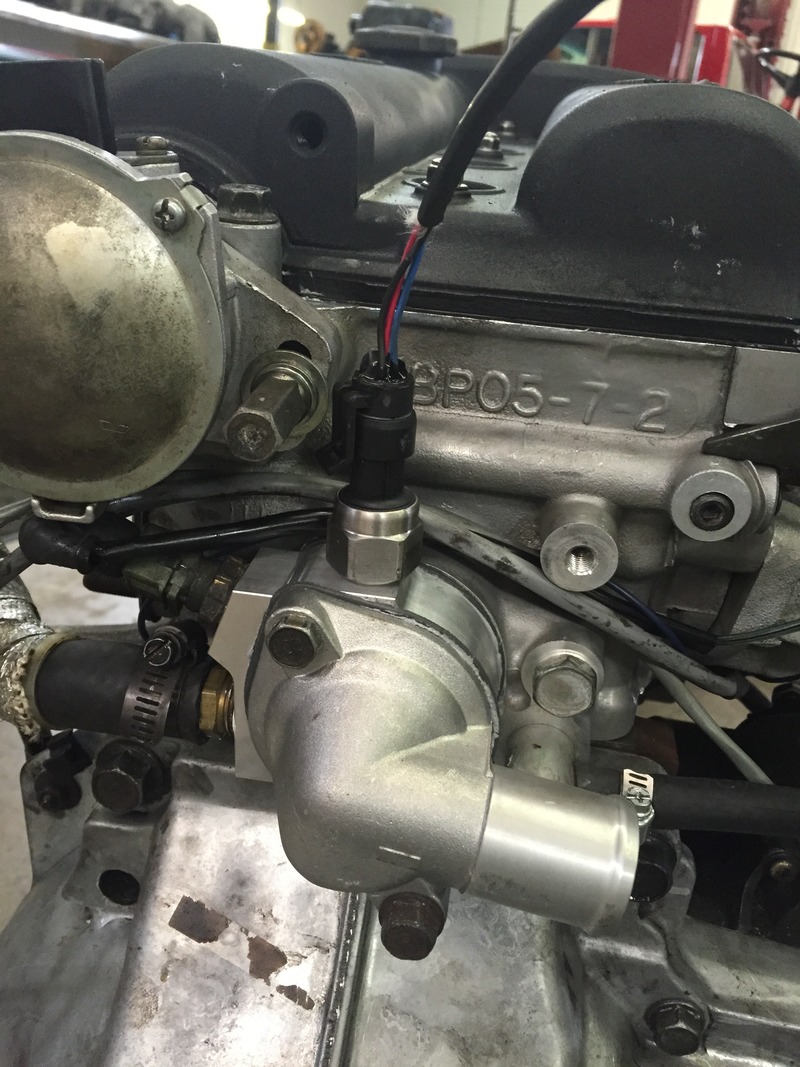
<p>So the new 1.8 has been in and running for a little while now. It seemed to be blowing some smoke early on but that seemed to be mostly gone now. Compression tested a perfect 180 PSI across the board so I have high hopes for this engine. </p><p>I upgraded the old DIYPNP to an older REV MS3 basic unit to get the datlogging and Knock sensor input functionality. The basemap seemed to be a pretty good starting point. I did one session of dyno tuning but was only able to mess with the fueling. It was my first time operating a dyno and I was just trying to get familiar with the contols and multitasking all the little things you need to watch over while tunning. I'll post up a dyno once I get the spark tables tuned. </p><p>Other than that I made this ghetto rigged cold air box out of some scrap sheet metal and a random scrap boost tube that was laying around the shop over a couple lunch breaks. Filter was a freebie sample and I 3D printed a 4" to 3" reducer piece with an bung for the IAT. I plan to just remove the driver side turn signal indicator while at the track as the air inlet source. </p><p><img src="http://cimg3.ibsrv.net/gimg/www.miataturbo.net-vbulletin/800x600/80-img_7772_f6c6e33c24312e8dd2aa38234be594443db51ac2. jpg" title="" /><br /><br /><img src="https://cimg4.ibsrv.net/gimg/www.miataturbo.net-vbulletin/800x600/80-img_7775_e6208ee46e38267306206bc8bf4ff2a978b34cac. jpg" title="" /><br /><br /> </p><p> </p><p>I also finally got the racecapture talking to the MS3. I can't praise this data logger enough. Custom code scripting is an amazing feature. The new Dashboard Broadcaster feature on the latest MS3 firmware makes setting this up a breeze. I now have the following ECU inputs logged and synced with my other data. Also I can set custom warning to display on the tablet for any parameter.</p><p> </p><p><strong>VIDEO:</strong><u><strong> https://www.youtube.com/watch?v=7a2YXBh8mG0&feature=youtu.be</strong></u></p><p>How the hell do we embed this now?</p><p> </p><p><strong>Channels Logged from the ECU:</strong><br />MAP<br />RPM<br />Coolant temp<br />TPS<br />IAT<br />Spark Advance<br />AFR Tagret<br />AFR<br />EGO correction<br />Knock Retard</p><p><strong>Channels logged via analog input:</strong><br />Brake Pressure<br />Oil Pressure<br />Coolant Pressure <br />Oil Temp</p><p><strong>Channels planned on adding:</strong></p><p>Steering angle</p><p>12 IR tire temp array via CAN bus</p><p><br /><img src="http://cimg1.ibsrv.net/gimg/www.miataturbo.net-vbulletin/800x600/80-img_7720_2909ee45be48215914c69f1dd9dbcda9395eb3be. jpg" title="" /><br /><br /><br /> </p>
Reply
0
0

Thread
Thread Starter
Forum
Replies
Last Post
Frank_and_Beans
Supercharger Discussion
13
Sep 12, 2016 08:17 PM


