
Corifto's LoBo


Thread Starter
Junior Member
iTrader: (1)
Joined: Jun 2010
Posts: 408
Total Cats: 21
From: Bradenton, FL
Friend of mine took some pics at my drift event the other night. (I organize/host, not drifting the Miata.)


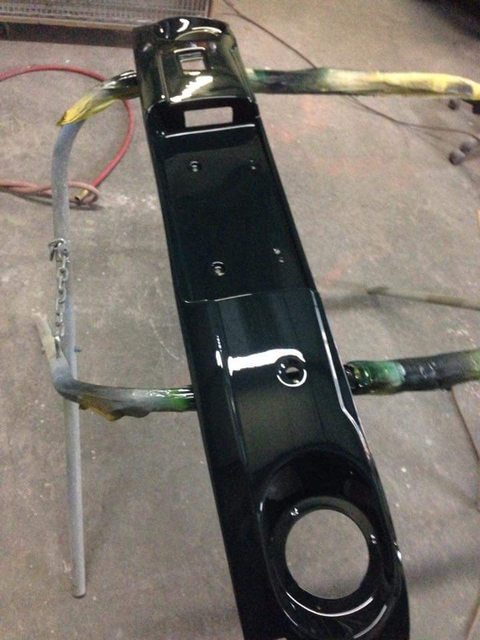
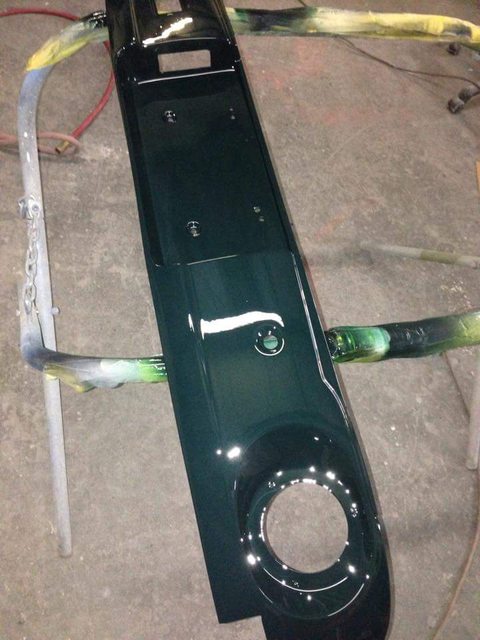
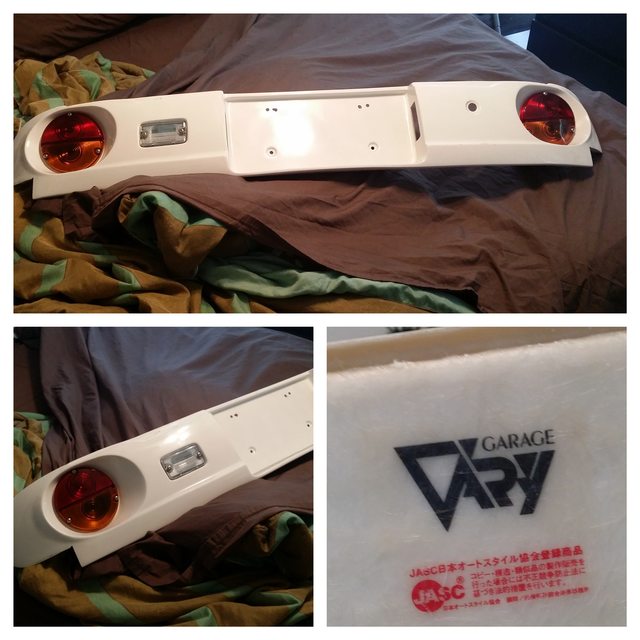
The other day I relieved Matt Man of his GV panel.

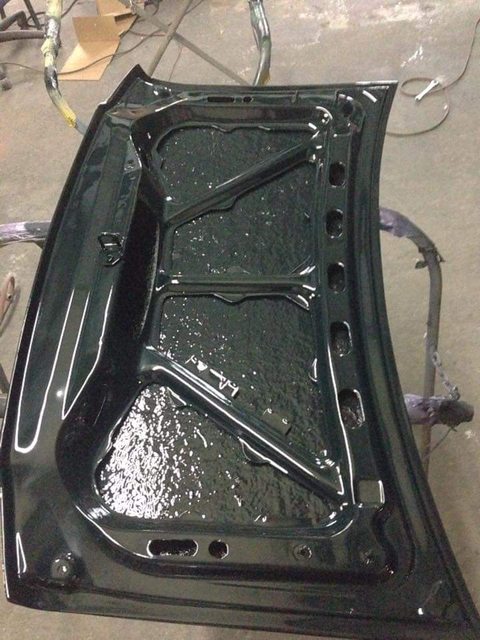
Yesterday I dropped the GV panel off to paint, along with the trunk lid I picked up. Should be done this week.
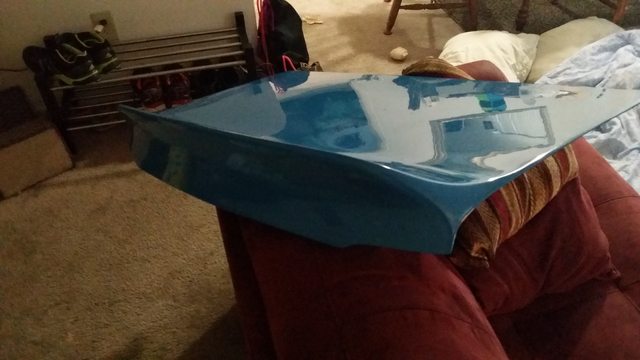
Snagged an AutoKonexion Ver. 2 trunk lid from a friend.

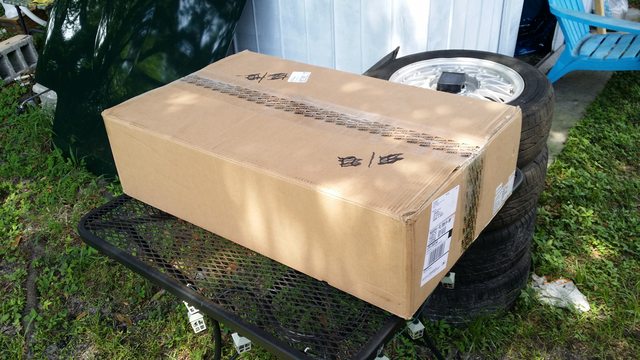
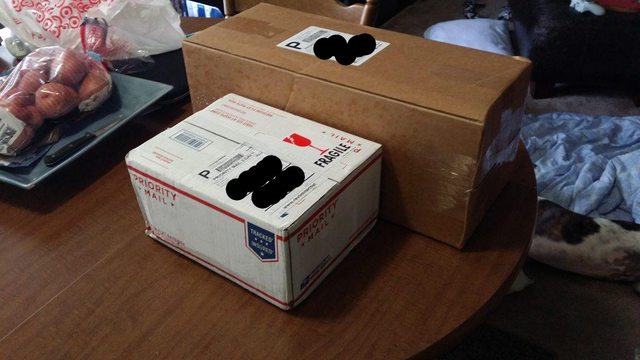
Also got this today.

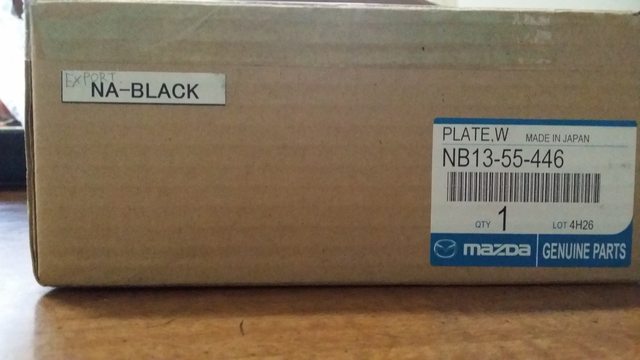
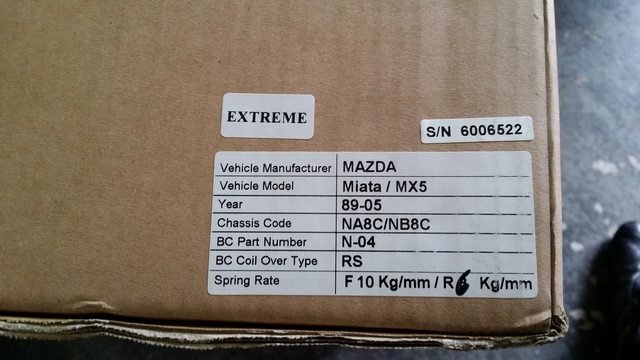
Second box had this odd sticker combo.
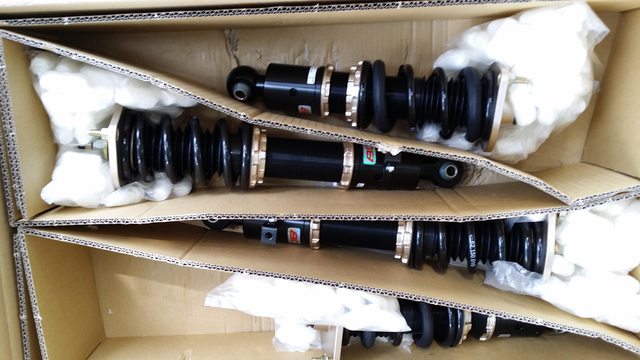
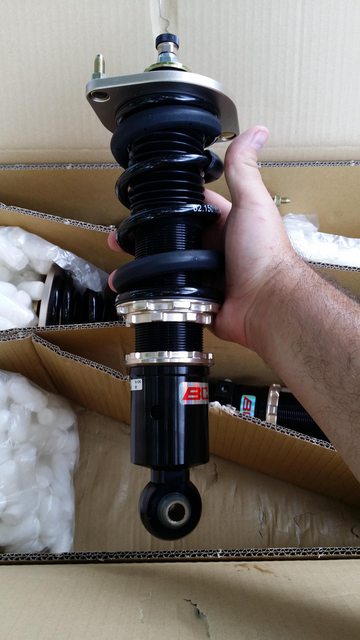
Hello Shirley

Finally, I got my hands on a KG panel. I passed up at least 3 for sale in the last 6 months or so, and then a few told me the RSpeed shipment was coming in September. I called a few weeks ago to be added to a backup list, as all were spoken for. Then last week I got a call that they had one they could set aside. Few days later, it's in my hands. The quality is outstanding, and even more than I could have imagined.
The other day I relieved Matt Man of his GV panel.
Yesterday I dropped the GV panel off to paint, along with the trunk lid I picked up. Should be done this week.
Snagged an AutoKonexion Ver. 2 trunk lid from a friend.
Also got this today.
Second box had this odd sticker combo.
Hello Shirley
Finally, I got my hands on a KG panel. I passed up at least 3 for sale in the last 6 months or so, and then a few told me the RSpeed shipment was coming in September. I called a few weeks ago to be added to a backup list, as all were spoken for. Then last week I got a call that they had one they could set aside. Few days later, it's in my hands. The quality is outstanding, and even more than I could have imagined.
Reply
 0
0

0
Thread Starter
Junior Member
iTrader: (1)
Joined: Jun 2010
Posts: 408
Total Cats: 21
From: Bradenton, FL
So I went to install Adam's KG lenses today, and things got interesting. As I was removing the 4 buttonhead screws holding the panel together, I started to fear the very last one was stripping. It did. I then resorted to trying a torx bit shoved in to no avail. I conferred with Adam, and he suggested something that scared the hell out of me.

"Try using a Dremel to cut a slot in it."
I was pretty nervous, as it was a brand new panel, and I have never actually used my dremel except for maybe one time on a wood project. Needless to say, I was terrified.
I took it to the kitchen counter, made sure I had safety glasses, and could sit down and have better control of the Dremel. I set it at full speed, and took it slow, just barely touching the screw. I'd cut for a second or two, then let off and check with a flathead. After the first two tries, I was unsuccessful and began to worry. But in the words of Aaliyah(RIP),
"If at first you don't succeed
Dust yourself off and try it again
You can dust it off and try again"
I tried a third time, and when I put a flathead in I put a lot of pressure on the back and tried to slowly turn it. Miraculously, it turned, and a few seconds later it was out and I could breathe again.
Reply
0
0
Thread Starter
Junior Member
iTrader: (1)
Joined: Jun 2010
Posts: 408
Total Cats: 21
From: Bradenton, FL
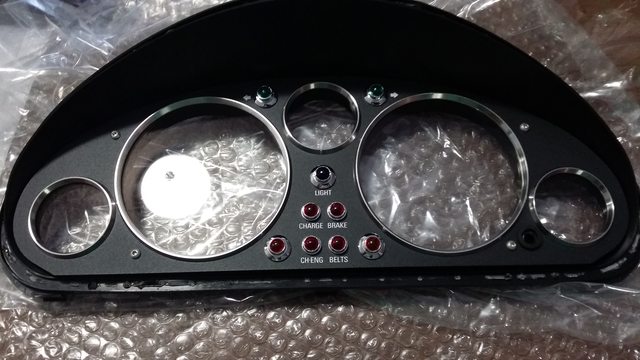
So, for those of you looking to install Adam's lenses, if you've got a newer panel, you might run into a few snags. As the writeup on Adam's page shows, the panel is held together by the jeweled indicator lights, which are retained by jam nuts. That's not the case anymore. I did my best to make a writeup.
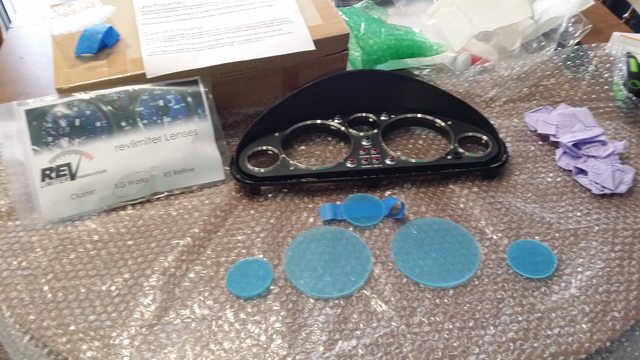
Supplies:
KG Works Cluster
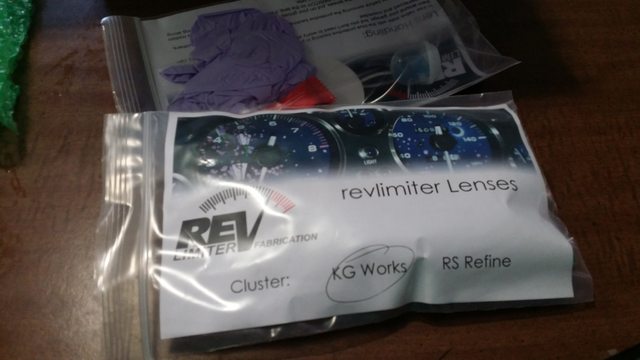
RevLimiter Lenses
2mm allen/hex key
Gloves
Xacto knife
Super Glue
Hair Dryer
Patience
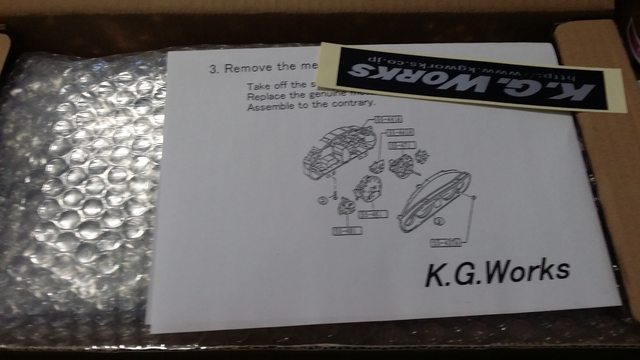
Cluster and lenses

Begin as usual by removing the four buttonhead screws around the panel. They take a 2mm Allen key. Be careful not to strip them, but if you do, don't worry. It can be fixed, and you can buy the 4 screws for the total price of one dollar.
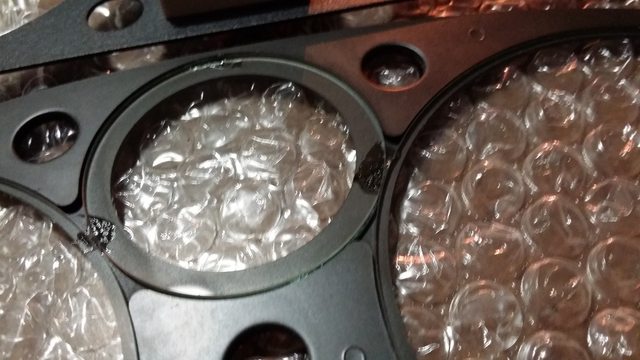
Once you have the screws out, remove it from the plastic and set the plastic aside. Turn it over and set it on something that won't damage the indicators. I used the bubble wrap that came with the panel. You'll see this before you.
The newer panels are held on by plastic retainers that are glued to the panel and jeweled indicators.
An example of the glue
Now, the retainers are not threaded at all. They are entirely held on by glue and a small amount of friction depending on the fit. Put your glasses on and get ready to use your Xacto knife.
Carefully put the Xacto knife along the glued sections and slice through the glue. You may scratch the back of the panel, but nobody will know but you. Or in my case anyone who sees these pictures will know mine is.
Beginning to cut the glue.
Once you cut through the glue, the indicators should free spin, but they may not be ready to come off. You'll see that the turn signal retainers are much larger than those for the others. We'll get to those in a second, but for now focus on the other smaller ones.
Using your Xacto knife, or a smaller screwdriver if you have one that will work, slowly pry up at different spots of the retainer. It will begin to come up and then off of the indicator, allowing it to slide out of the panel. If your retainers are giving you trouble, you may need to run the knife around the base some more for excess glue.
Retainer removed

Now, for the larger ones, they may not pry as easily. For these I used a set of channel locks and lightly gripped the outer edges and wiggled back and forth once all the glue was cut. They were hesitant, but after a little work, they too came out.
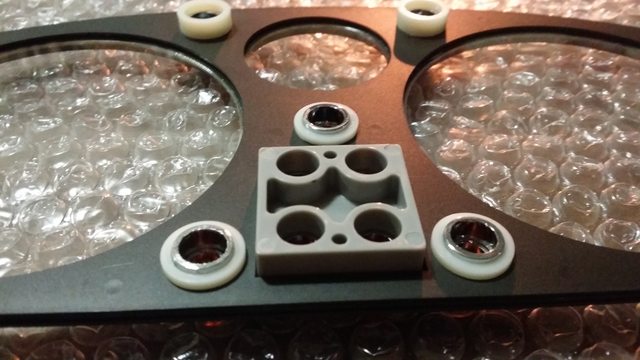
Larger retainer, showing that they are not threaded.

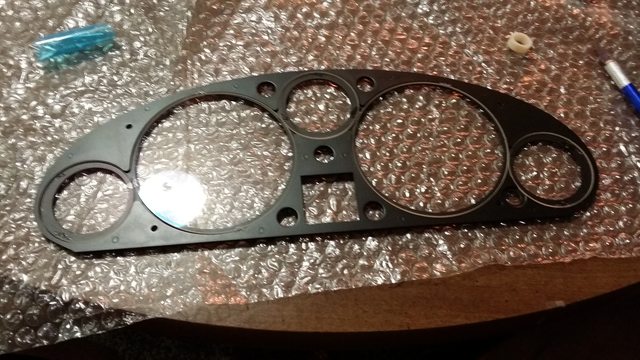
Panel with all the necessary indicators removed. Don't worry about the 4 in the center, they stay in.
Now, the panel may not just come apart, as there is some adhesive and pressure holding it together. When you look at the sides, you'll see what appears to be 3 layers, but only worry about the top one Shown here.
Slowly work the edges and pull the top of the panel away all around the panel. It will take some work, but will come apart. Just take your time.
Panel separated

Supplies:
KG Works Cluster
RevLimiter Lenses
2mm allen/hex key
Gloves
Xacto knife
Super Glue
Hair Dryer
Patience
Cluster and lenses
Begin as usual by removing the four buttonhead screws around the panel. They take a 2mm Allen key. Be careful not to strip them, but if you do, don't worry. It can be fixed, and you can buy the 4 screws for the total price of one dollar.
Once you have the screws out, remove it from the plastic and set the plastic aside. Turn it over and set it on something that won't damage the indicators. I used the bubble wrap that came with the panel. You'll see this before you.
The newer panels are held on by plastic retainers that are glued to the panel and jeweled indicators.
An example of the glue
Now, the retainers are not threaded at all. They are entirely held on by glue and a small amount of friction depending on the fit. Put your glasses on and get ready to use your Xacto knife.
Carefully put the Xacto knife along the glued sections and slice through the glue. You may scratch the back of the panel, but nobody will know but you. Or in my case anyone who sees these pictures will know mine is.
Beginning to cut the glue.
Once you cut through the glue, the indicators should free spin, but they may not be ready to come off. You'll see that the turn signal retainers are much larger than those for the others. We'll get to those in a second, but for now focus on the other smaller ones.
Using your Xacto knife, or a smaller screwdriver if you have one that will work, slowly pry up at different spots of the retainer. It will begin to come up and then off of the indicator, allowing it to slide out of the panel. If your retainers are giving you trouble, you may need to run the knife around the base some more for excess glue.
Retainer removed
Now, for the larger ones, they may not pry as easily. For these I used a set of channel locks and lightly gripped the outer edges and wiggled back and forth once all the glue was cut. They were hesitant, but after a little work, they too came out.
Larger retainer, showing that they are not threaded.
Panel with all the necessary indicators removed. Don't worry about the 4 in the center, they stay in.
Now, the panel may not just come apart, as there is some adhesive and pressure holding it together. When you look at the sides, you'll see what appears to be 3 layers, but only worry about the top one Shown here.
Slowly work the edges and pull the top of the panel away all around the panel. It will take some work, but will come apart. Just take your time.
Panel separated
Reply
0
0
Thread Starter
Junior Member
iTrader: (1)
Joined: Jun 2010
Posts: 408
Total Cats: 21
From: Bradenton, FL
Now, once you have it apart, you will see that the lenses are actually held in by glue in various spots.
Now you can try to just push the glass out, but I didn't want to take any chances. I went and grabbed a hair dryer. If you don't have a hair dryer handy, find a girlfriend, as they are likely to have one as mine does.
I then applied high heat around the panel in slow circles making sure to cover all the adhesive spots.

Warning:This will make the panel very hot. I used a paper towel to handle the panel in this stage.
After this step, the glass pops out fairly easily. Hold the panel firmly with one hand, and apply pressure near the glue spots to remove the glass.
Glass removed

Now when installing the new lenses, as you remove the protective film, you may see a bit of orange/yellowish residue around the edges. This will not be seen, but if you want to remove it, use the plastic film adhesive side to wipe it away or set it and pull it back. It will come off.
Also, I used the blow dryer again for this step, applying it to the glue areas of each lens before I set them.
Lenses set
Now, to begin reassembly. It works best if you push the panel together some, and then one at a time, put the indicators in, and lightly push the retainers on, this way you can set the panel upside down without them falling out. Once it's upside down, remove the retainers, and grab your glue.
I used a Gorilla Glue variant, but any number of products will work.
Set the nozzle of the glue at a diagonal angle along the edge of the indicator until you have enough to work with.

Put the retainer on, and apply pressure for 10-30 seconds or until you feel it's secure. Repeat for each retainer.
Indicators installed

Once you're sure they are set, flip it back over and set it on the plastic piece and tighten down. I screwed in a diagonal pattern a bit at a time for each screw, just to be safe. Be careful to not overtighten or risk stripping the screws.

Enjoy your panel with less glare, and pat yourself on the back. Maybe buy yourself a beer.
Now you can try to just push the glass out, but I didn't want to take any chances. I went and grabbed a hair dryer. If you don't have a hair dryer handy, find a girlfriend, as they are likely to have one as mine does.
I then applied high heat around the panel in slow circles making sure to cover all the adhesive spots.
Warning:This will make the panel very hot. I used a paper towel to handle the panel in this stage.
After this step, the glass pops out fairly easily. Hold the panel firmly with one hand, and apply pressure near the glue spots to remove the glass.
Glass removed
Now when installing the new lenses, as you remove the protective film, you may see a bit of orange/yellowish residue around the edges. This will not be seen, but if you want to remove it, use the plastic film adhesive side to wipe it away or set it and pull it back. It will come off.
Also, I used the blow dryer again for this step, applying it to the glue areas of each lens before I set them.
Lenses set
Now, to begin reassembly. It works best if you push the panel together some, and then one at a time, put the indicators in, and lightly push the retainers on, this way you can set the panel upside down without them falling out. Once it's upside down, remove the retainers, and grab your glue.
I used a Gorilla Glue variant, but any number of products will work.
Set the nozzle of the glue at a diagonal angle along the edge of the indicator until you have enough to work with.
Put the retainer on, and apply pressure for 10-30 seconds or until you feel it's secure. Repeat for each retainer.
Indicators installed
Once you're sure they are set, flip it back over and set it on the plastic piece and tighten down. I screwed in a diagonal pattern a bit at a time for each screw, just to be safe. Be careful to not overtighten or risk stripping the screws.
Enjoy your panel with less glare, and pat yourself on the back. Maybe buy yourself a beer.
Reply
0
0

Thread Starter
Junior Member
iTrader: (1)
Joined: Jun 2010
Posts: 408
Total Cats: 21
From: Bradenton, FL
So a few things have changed haha. I just haven't been on in a while. I'm just gonna dump a bunch of stuff on you.
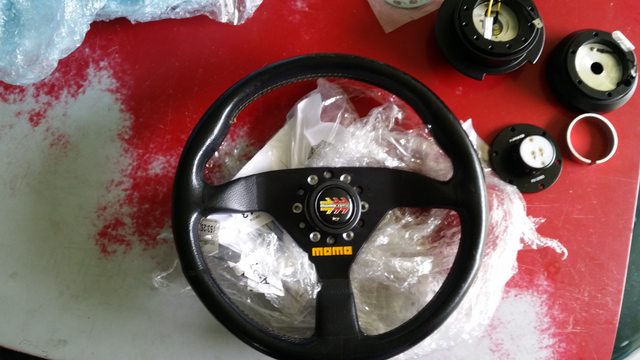
So this odd shaped package showed up at my door.

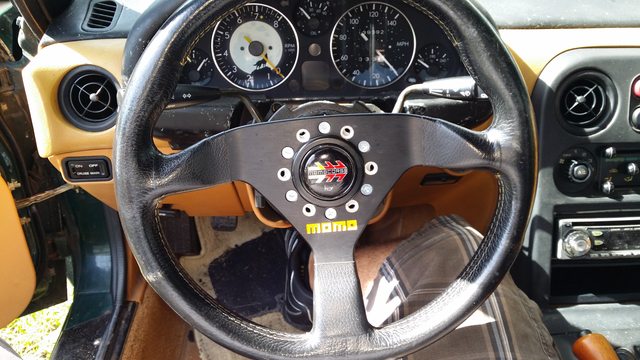
Oh look, a Momo. And conveniently placed short hub and quick release.
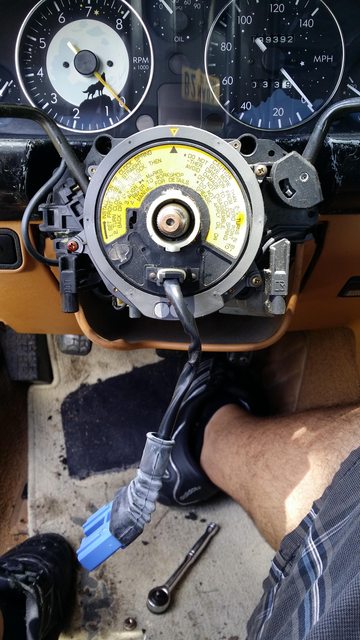
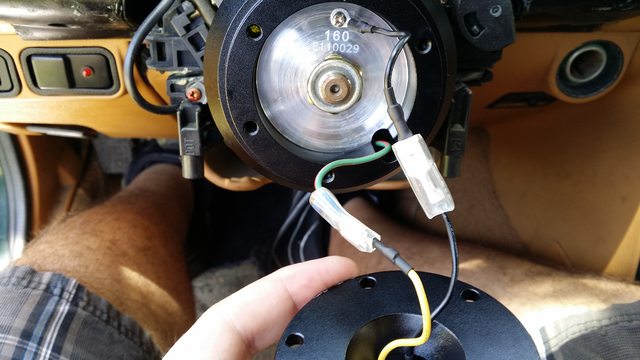
Down to the clockspring.
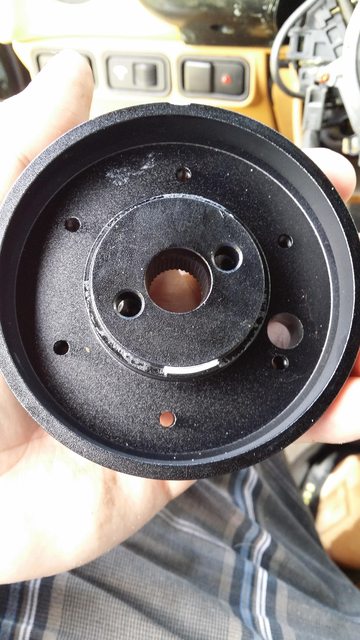
So I don't have the before picture, but I removed the brass(?) grounding ring in the back of the hub, in order to not delete the clockspring, and I decided to route the horn wire through the hole of the hub. Poke a small screwdriver or pick through the wheel holes, apply pressure, and it will pop off.
Pic of the hub attached with the horn wire coming through. Attach a female blade connector, and attach it to the quick release side that gets bolted down.
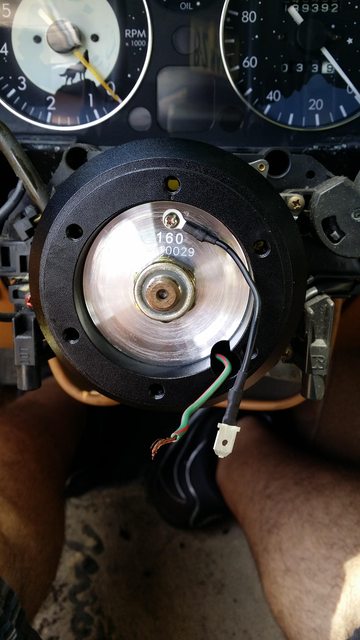
Connected like so.
Short hub attached. Don't mind the alignment. It's turned all to the right from tightening the hub bolt.
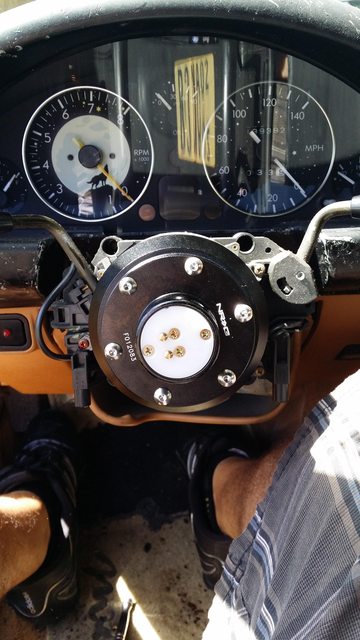
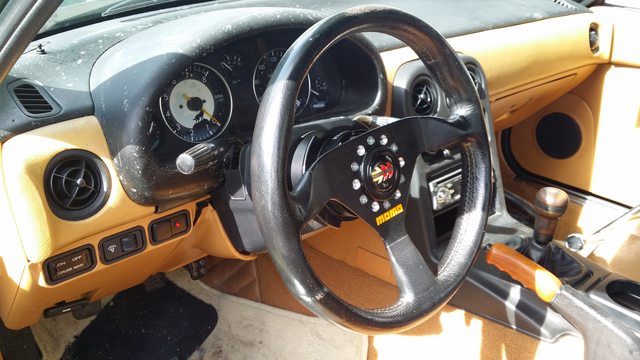
And done! Unfortunately I didn't take pictures of the grounding ring and hooking up the horn to work, but the horn does work. Any questions, feel free to ask. When I get my Nardi, I will take pictures.
So this odd shaped package showed up at my door.
Oh look, a Momo. And conveniently placed short hub and quick release.
Down to the clockspring.
So I don't have the before picture, but I removed the brass(?) grounding ring in the back of the hub, in order to not delete the clockspring, and I decided to route the horn wire through the hole of the hub. Poke a small screwdriver or pick through the wheel holes, apply pressure, and it will pop off.
Pic of the hub attached with the horn wire coming through. Attach a female blade connector, and attach it to the quick release side that gets bolted down.
Connected like so.
Short hub attached. Don't mind the alignment. It's turned all to the right from tightening the hub bolt.
And done! Unfortunately I didn't take pictures of the grounding ring and hooking up the horn to work, but the horn does work. Any questions, feel free to ask. When I get my Nardi, I will take pictures.
Reply
0
0
Thread Starter
Junior Member
iTrader: (1)
Joined: Jun 2010
Posts: 408
Total Cats: 21
From: Bradenton, FL
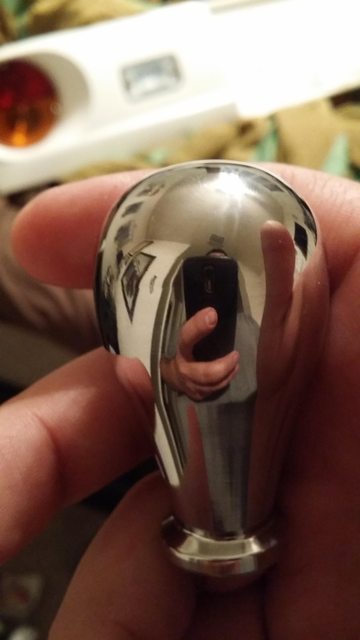
So, a while back I had a great day. I felt like a kid on Christmas Morning. I received two tremendous packages in the mail.
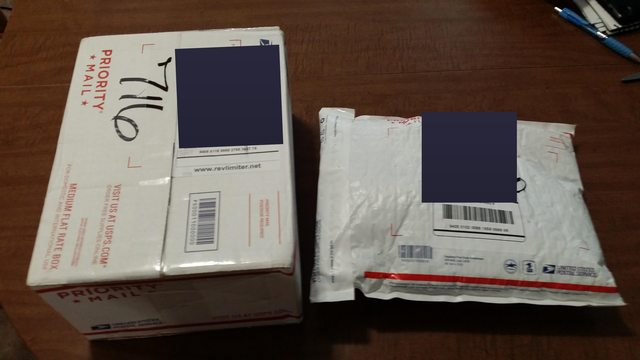
The smaller package is from Bill at MiataRoadster. The second is from Adam/Revlimiter. We'll get to it in a minute. Save the best for last, right? Now that's not saying the MR package isn't noteworthy, because it's a great package in itself.
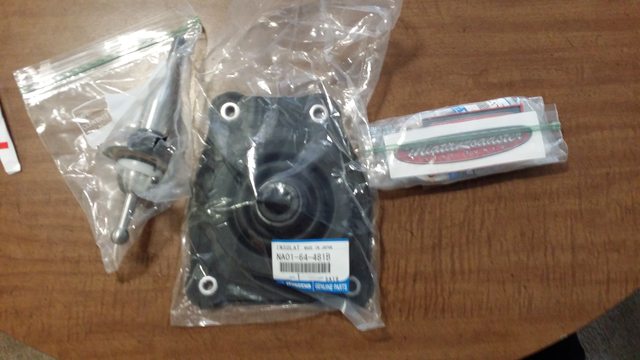
Now, the shifter in the BRG is probably one of the sloppiest shifters I've ever had. 13 cars, 10 manual, and it takes the cake. I knew I needed a MR kit to solve that. Unfortunately, I had missed out on the last Group Buy by a week or two. I messaged Bill to let me know if there were any leftovers once hte shipment came in, but began to look elsewhere, as the shifter was desperately in need of replacing.
Two/three days ago I was at a Mazda dealership visiting a friend and pricing out all of the shifter accessories. I got a text from Bill telling me there was one 5-spd stock height kit left. I paid immediately, and he shipped same day. Amazing service from Bill. And now I can hardly wait to put this on my car and feel the difference it makes.(I finally put it on the other day)
The smaller package is from Bill at MiataRoadster. The second is from Adam/Revlimiter. We'll get to it in a minute. Save the best for last, right? Now that's not saying the MR package isn't noteworthy, because it's a great package in itself.
Now, the shifter in the BRG is probably one of the sloppiest shifters I've ever had. 13 cars, 10 manual, and it takes the cake. I knew I needed a MR kit to solve that. Unfortunately, I had missed out on the last Group Buy by a week or two. I messaged Bill to let me know if there were any leftovers once hte shipment came in, but began to look elsewhere, as the shifter was desperately in need of replacing.
Two/three days ago I was at a Mazda dealership visiting a friend and pricing out all of the shifter accessories. I got a text from Bill telling me there was one 5-spd stock height kit left. I paid immediately, and he shipped same day. Amazing service from Bill. And now I can hardly wait to put this on my car and feel the difference it makes.(I finally put it on the other day)
Reply
0
0
Thread Starter
Junior Member
iTrader: (1)
Joined: Jun 2010
Posts: 408
Total Cats: 21
From: Bradenton, FL
Now the package from Adam. I felt it deserved a post of its own.
Now since I have got back into Miatas, and started being a regular again, Adam and I have become friends. Great friends. That's saying something, because when I was younger, and was around the first time, Adam actually banned me from CR for a short period of time. I totally deserved it, but I just think it's a funny little addition to this.
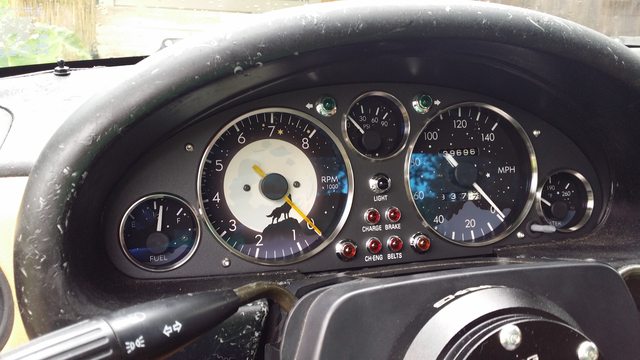
Back when I ordered my gauge set, Adam went crazy and made the Lobo gauges for me. Today's package might even come close to topping receiving that package.
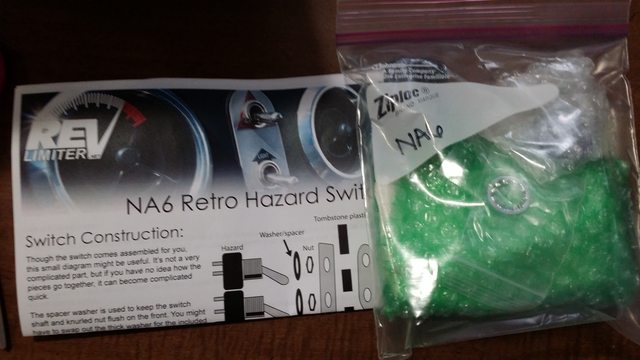
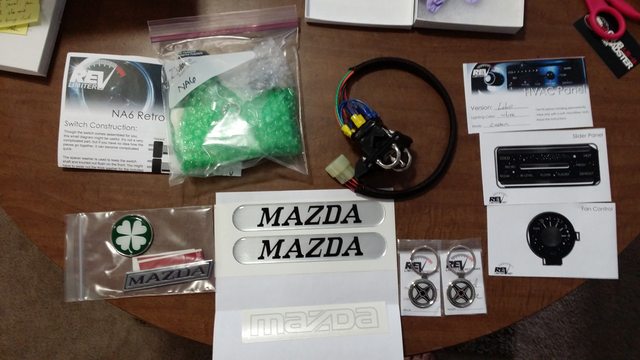
First up is a black retro window switch. Even I was surprised by the quality and heft of this piece. It's solid, and I can't wait to install it.
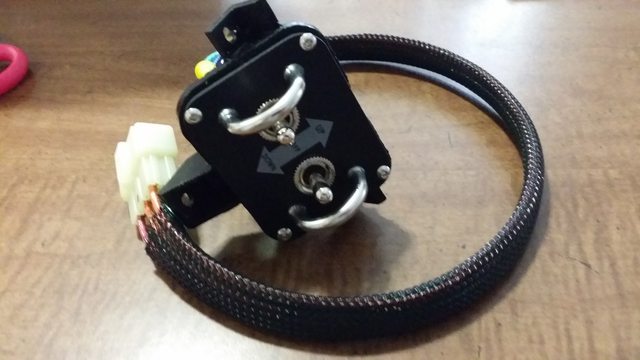
Next up is a black hazard switch. I didn't want to take it out of the package and assemble it just yet.
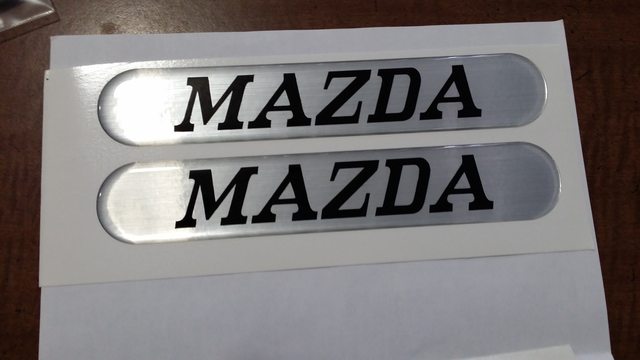
The Miata logos on the sill plates aren't terrible, but they're worn. I needed new ones. I was stuck briefly with the decision of which way to go for the new ones. I believe it was Roadster, RX2 and the Type 60. For some reason, Adam slightly nudged me in the RX2 direction, which I was actually leaning towards. But we'll retouch on that a little later.
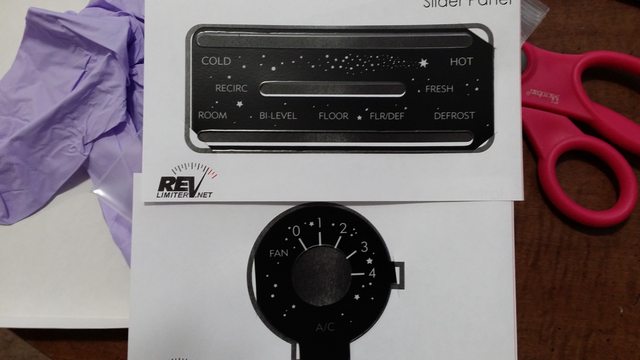
Now with the Lobo gauges, I couldn't stand having a normal HVAC panel, so I commissioned Adam to make something that will tie in with the Lobos. He did what Adam does.
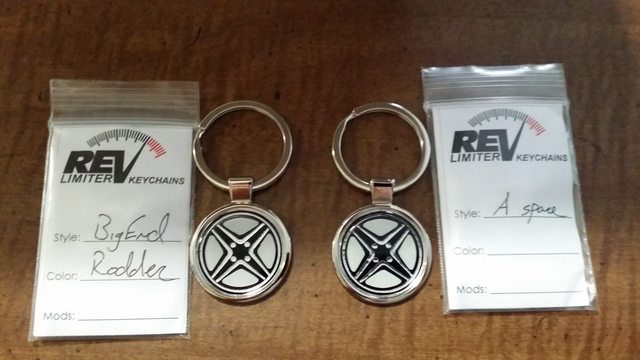
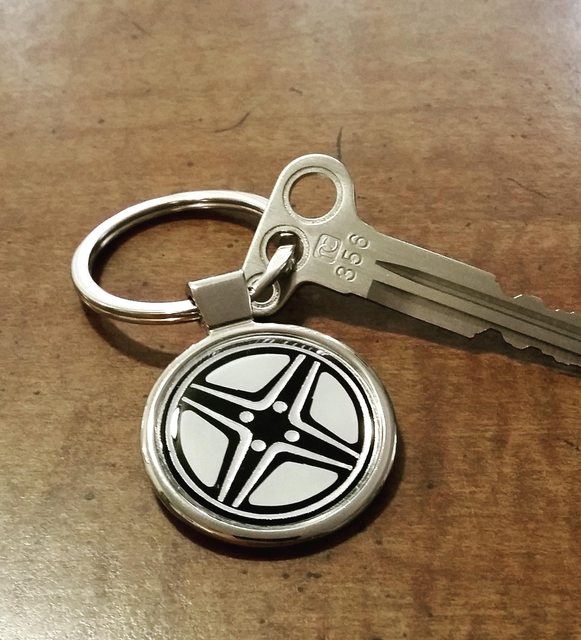
My daily keychain is heavy and bulky. It's got doodads and doohickeys. And a few keys. The Miata deserves better. The Pole Position key deserves much better. I took some inspiration from Adam's SSR keychain and asked if he could make a Big End Rodder keychain. Adam once again did a thing.
Now, this next piece of the package is what makes this package so amazing. Not that the items up to this point were rubbish, but this just takes it higher. While ordering these items, Adam told me he had a gift for the back of my car. He told me it was something I needed, and it once belonged to Scrat. This was huge to me. Although I never mentioned it, two Miatas were my biggest muses both now and back when I was around the first time. Scrat and Sharka. I read and read, lusted over their build quality. When I left the "scene", Scrat wasn't finished. When I came back, Scrat had been sold and parted. Since then I had been trying to find a piece to have for myself, without luck. Hell, I almost bought the GV Trim Rings a few months ago just because.
Now a few emails later, Adam mentioned he had an idea for a small Sharka gift as well. Now that just took me into a full stupor. I was getting pieces of my two favorite cars.
I saved this box for last when it came to opening my package.
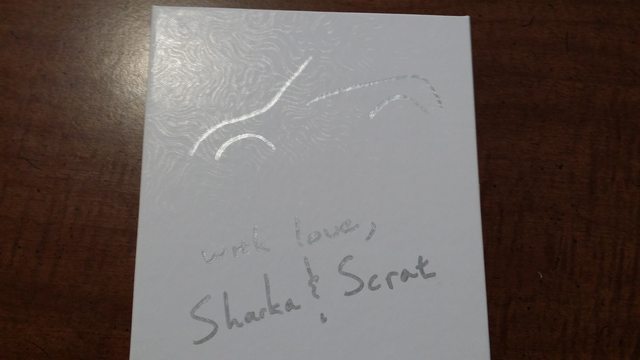
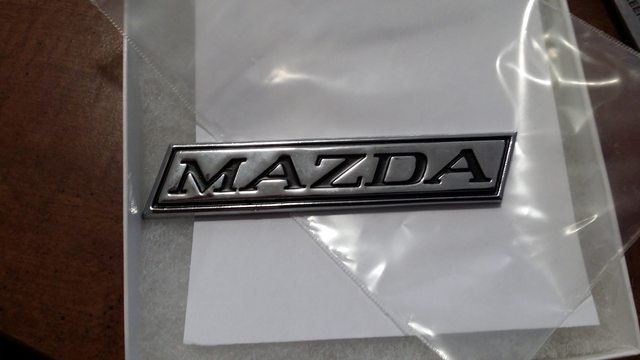
First up is Scrat's badge, that Geoff was never able to use. Geoff sent it back after Scrat was sold, and Adam thought it needed a good home, and surprisingly, he chose my car to be that home. Now I see why Adam was pushing in the RX2 direction for the sill inserts.
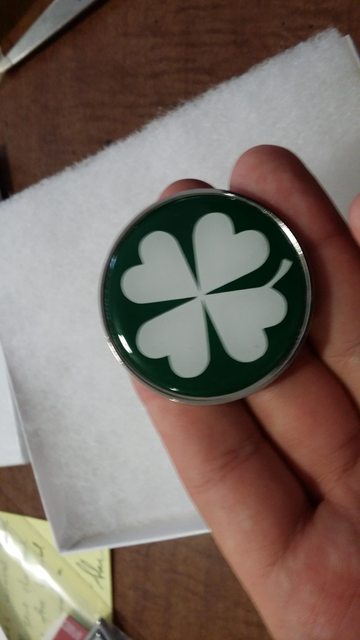
Next up is one of Sharka's hardtop badges. Adam didn't put them back on when Sharka was repainted. The other is on Sharka's cooling panel. Mine will probably go in the same place.
These items are a true treasure. Thank you Adam. They will both find a happy home.
Oh, and Adam threw in a front bumper replacement Mazda sticker. Be looking out for those on the store later on.
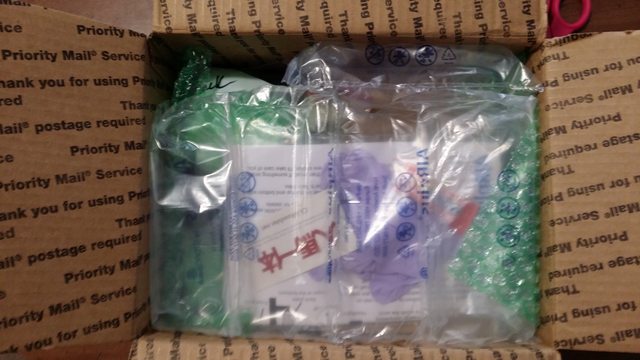
Here's a picture of the full package. I can't wait to throw all of this on the car.
Now since I have got back into Miatas, and started being a regular again, Adam and I have become friends. Great friends. That's saying something, because when I was younger, and was around the first time, Adam actually banned me from CR for a short period of time. I totally deserved it, but I just think it's a funny little addition to this.
Back when I ordered my gauge set, Adam went crazy and made the Lobo gauges for me. Today's package might even come close to topping receiving that package.
First up is a black retro window switch. Even I was surprised by the quality and heft of this piece. It's solid, and I can't wait to install it.
Next up is a black hazard switch. I didn't want to take it out of the package and assemble it just yet.
The Miata logos on the sill plates aren't terrible, but they're worn. I needed new ones. I was stuck briefly with the decision of which way to go for the new ones. I believe it was Roadster, RX2 and the Type 60. For some reason, Adam slightly nudged me in the RX2 direction, which I was actually leaning towards. But we'll retouch on that a little later.
Now with the Lobo gauges, I couldn't stand having a normal HVAC panel, so I commissioned Adam to make something that will tie in with the Lobos. He did what Adam does.
My daily keychain is heavy and bulky. It's got doodads and doohickeys. And a few keys. The Miata deserves better. The Pole Position key deserves much better. I took some inspiration from Adam's SSR keychain and asked if he could make a Big End Rodder keychain. Adam once again did a thing.
Now, this next piece of the package is what makes this package so amazing. Not that the items up to this point were rubbish, but this just takes it higher. While ordering these items, Adam told me he had a gift for the back of my car. He told me it was something I needed, and it once belonged to Scrat. This was huge to me. Although I never mentioned it, two Miatas were my biggest muses both now and back when I was around the first time. Scrat and Sharka. I read and read, lusted over their build quality. When I left the "scene", Scrat wasn't finished. When I came back, Scrat had been sold and parted. Since then I had been trying to find a piece to have for myself, without luck. Hell, I almost bought the GV Trim Rings a few months ago just because.
Now a few emails later, Adam mentioned he had an idea for a small Sharka gift as well. Now that just took me into a full stupor. I was getting pieces of my two favorite cars.
I saved this box for last when it came to opening my package.
First up is Scrat's badge, that Geoff was never able to use. Geoff sent it back after Scrat was sold, and Adam thought it needed a good home, and surprisingly, he chose my car to be that home. Now I see why Adam was pushing in the RX2 direction for the sill inserts.
Next up is one of Sharka's hardtop badges. Adam didn't put them back on when Sharka was repainted. The other is on Sharka's cooling panel. Mine will probably go in the same place.
These items are a true treasure. Thank you Adam. They will both find a happy home.
Oh, and Adam threw in a front bumper replacement Mazda sticker. Be looking out for those on the store later on.
Here's a picture of the full package. I can't wait to throw all of this on the car.
Reply
0
0
Thread Starter
Junior Member
iTrader: (1)
Joined: Jun 2010
Posts: 408
Total Cats: 21
From: Bradenton, FL
A while back I finally sacked up and decided to have my Pole Position key cut. I needed a worthy key for the Miata and the keychain Adam made me.
Was nerve-wracking, being told that if the key was messed up, they were not liable since it was one I was bringing in. But I used to make keys at a parts store, so I wasn't too nervous. Until the "new" fancy machine didn't cut the end of the key, just the middle. Thankfully, the old machine I was used to worked and fixed it. And the key actually worked.
Home Depot didn't destroy it.
Reply
0
0


Thread Starter
Junior Member
iTrader: (1)
Joined: Jun 2010
Posts: 408
Total Cats: 21
From: Bradenton, FL

Second box had this odd sticker combo.

Hello Shirley

Finally, I got my hands on a KG panel. I passed up at least 3 for sale in the last 6 months or so, and then a few told me the RSpeed shipment was coming in September. I called a few weeks ago to be added to a backup list, as all were spoken for. Then last week I got a call that they had one they could set aside. Few days later, it's in my hands. The quality is outstanding, and even more than I could have imagined.
So I went to install Adam's KG lenses today, and things got interesting. As I was removing the 4 buttonhead screws holding the panel together, I started to fear the very last one was stripping. It did. I then resorted to trying a torx bit shoved in to no avail. I conferred with Adam, and he suggested something that scared the hell out of me.

"Try using a Dremel to cut a slot in it."
I was pretty nervous, as it was a brand new panel, and I have never actually used my dremel except for maybe one time on a wood project. Needless to say, I was terrified.
I took it to the kitchen counter, made sure I had safety glasses, and could sit down and have better control of the Dremel. I set it at full speed, and took it slow, just barely touching the screw. I'd cut for a second or two, then let off and check with a flathead. After the first two tries, I was unsuccessful and began to worry. But in the words of Aaliyah(RIP),
"If at first you don't succeed
Dust yourself off and try it again
You can dust it off and try again"
I tried a third time, and when I put a flathead in I put a lot of pressure on the back and tried to slowly turn it. Miraculously, it turned, and a few seconds later it was out and I could breathe again.
Reply
0
0
Thread Starter
Junior Member
iTrader: (1)
Joined: Jun 2010
Posts: 408
Total Cats: 21
From: Bradenton, FL
So, for those of you looking to install Adam's lenses, if you've got a newer panel, you might run into a few snags. As the writeup on Adam's page shows, the panel is held together by the jeweled indicator lights, which are retained by jam nuts. That's not the case anymore. I did my best to make a writeup.
Supplies:
KG Works Cluster
RevLimiter Lenses
2mm allen/hex key
Gloves
Xacto knife
Super Glue
Hair Dryer
Patience
Cluster and lenses
Begin as usual by removing the four buttonhead screws around the panel. They take a 2mm Allen key. Be careful not to strip them, but if you do, don't worry. It can be fixed, and you can buy the 4 screws for the total price of one dollar.
Once you have the screws out, remove it from the plastic and set the plastic aside. Turn it over and set it on something that won't damage the indicators. I used the bubble wrap that came with the panel. You'll see this before you.

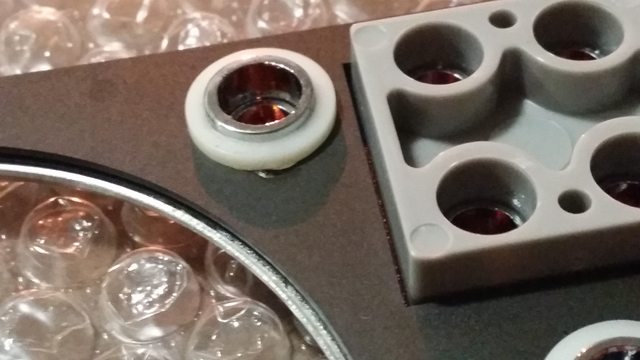
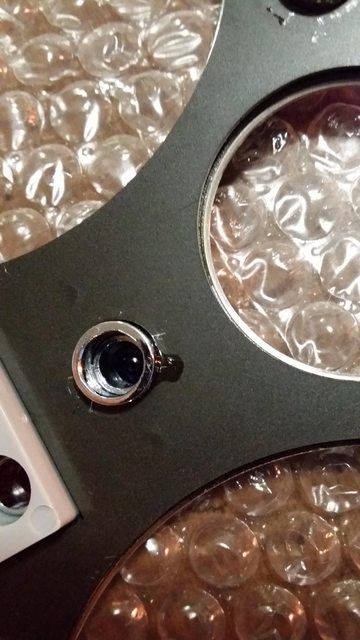
The newer panels are held on by plastic retainers that are glued to the panel and jeweled indicators.
An example of the glue

Now, the retainers are not threaded at all. They are entirely held on by glue and a small amount of friction depending on the fit. Put your glasses on and get ready to use your Xacto knife.
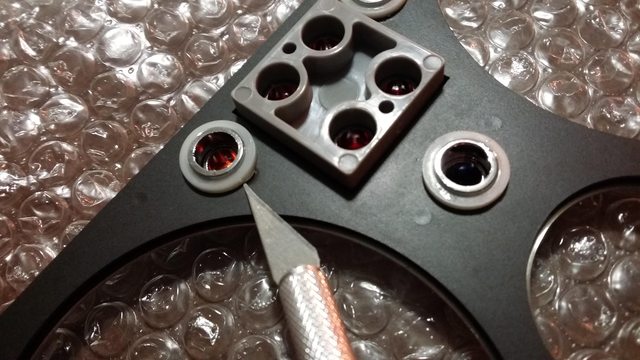
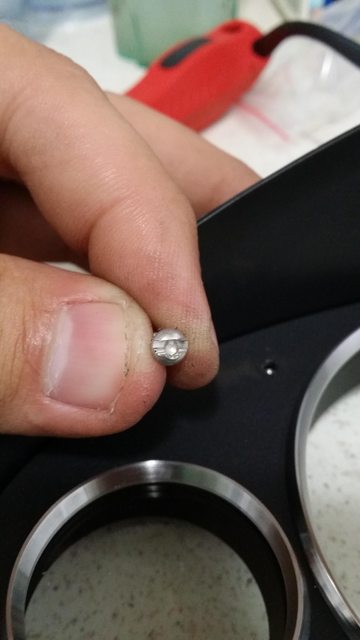
Carefully put the Xacto knife along the glued sections and slice through the glue. You may scratch the back of the panel, but nobody will know but you. Or in my case anyone who sees these pictures will know mine is.
Beginning to cut the glue.

Once you cut through the glue, the indicators should free spin, but they may not be ready to come off. You'll see that the turn signal retainers are much larger than those for the others. We'll get to those in a second, but for now focus on the other smaller ones.
Using your Xacto knife, or a smaller screwdriver if you have one that will work, slowly pry up at different spots of the retainer. It will begin to come up and then off of the indicator, allowing it to slide out of the panel. If your retainers are giving you trouble, you may need to run the knife around the base some more for excess glue.
Retainer removed

Now, for the larger ones, they may not pry as easily. For these I used a set of channel locks and lightly gripped the outer edges and wiggled back and forth once all the glue was cut. They were hesitant, but after a little work, they too came out.
Larger retainer, showing that they are not threaded.

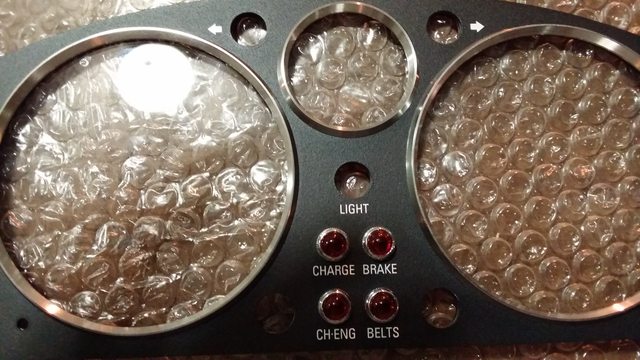
Panel with all the necessary indicators removed. Don't worry about the 4 in the center, they stay in.

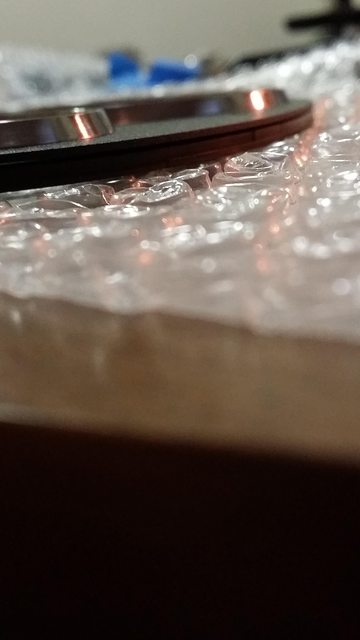
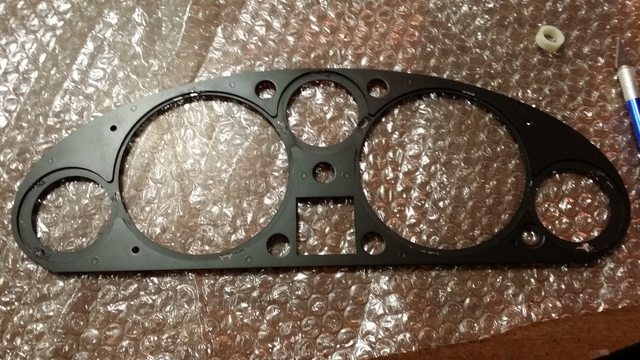
Now, the panel may not just come apart, as there is some adhesive and pressure holding it together. When you look at the sides, you'll see what appears to be 3 layers, but only worry about the top one Shown here.

Slowly work the edges and pull the top of the panel away all around the panel. It will take some work, but will come apart. Just take your time.
Panel separated

Supplies:
KG Works Cluster
RevLimiter Lenses
2mm allen/hex key
Gloves
Xacto knife
Super Glue
Hair Dryer
Patience
Cluster and lenses
Begin as usual by removing the four buttonhead screws around the panel. They take a 2mm Allen key. Be careful not to strip them, but if you do, don't worry. It can be fixed, and you can buy the 4 screws for the total price of one dollar.
Once you have the screws out, remove it from the plastic and set the plastic aside. Turn it over and set it on something that won't damage the indicators. I used the bubble wrap that came with the panel. You'll see this before you.
The newer panels are held on by plastic retainers that are glued to the panel and jeweled indicators.
An example of the glue
Now, the retainers are not threaded at all. They are entirely held on by glue and a small amount of friction depending on the fit. Put your glasses on and get ready to use your Xacto knife.
Carefully put the Xacto knife along the glued sections and slice through the glue. You may scratch the back of the panel, but nobody will know but you. Or in my case anyone who sees these pictures will know mine is.
Beginning to cut the glue.
Once you cut through the glue, the indicators should free spin, but they may not be ready to come off. You'll see that the turn signal retainers are much larger than those for the others. We'll get to those in a second, but for now focus on the other smaller ones.
Using your Xacto knife, or a smaller screwdriver if you have one that will work, slowly pry up at different spots of the retainer. It will begin to come up and then off of the indicator, allowing it to slide out of the panel. If your retainers are giving you trouble, you may need to run the knife around the base some more for excess glue.
Retainer removed
Now, for the larger ones, they may not pry as easily. For these I used a set of channel locks and lightly gripped the outer edges and wiggled back and forth once all the glue was cut. They were hesitant, but after a little work, they too came out.
Larger retainer, showing that they are not threaded.
Panel with all the necessary indicators removed. Don't worry about the 4 in the center, they stay in.
Now, the panel may not just come apart, as there is some adhesive and pressure holding it together. When you look at the sides, you'll see what appears to be 3 layers, but only worry about the top one Shown here.
Slowly work the edges and pull the top of the panel away all around the panel. It will take some work, but will come apart. Just take your time.
Panel separated
Reply
0
0
Thread Starter
Junior Member
iTrader: (1)
Joined: Jun 2010
Posts: 408
Total Cats: 21
From: Bradenton, FL
Now, once you have it apart, you will see that the lenses are actually held in by glue in various spots.

Now you can try to just push the glass out, but I didn't want to take any chances. I went and grabbed a hair dryer. If you don't have a hair dryer handy, find a girlfriend, as they are likely to have one as mine does.
I then applied high heat around the panel in slow circles making sure to cover all the adhesive spots.
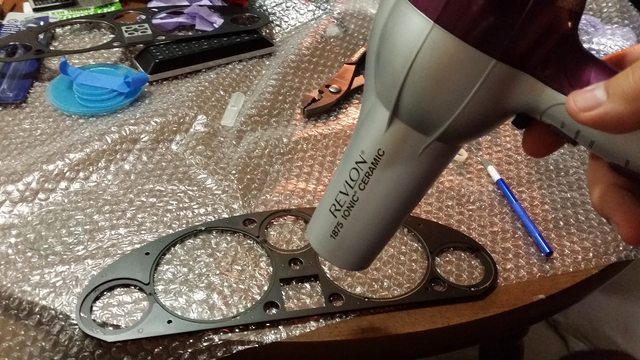
Warning:This will make the panel very hot. I used a paper towel to handle the panel in this stage.
After this step, the glass pops out fairly easily. Hold the panel firmly with one hand, and apply pressure near the glue spots to remove the glass.
Glass removed
Now when installing the new lenses, as you remove the protective film, you may see a bit of orange/yellowish residue around the edges. This will not be seen, but if you want to remove it, use the plastic film adhesive side to wipe it away or set it and pull it back. It will come off.
Also, I used the blow dryer again for this step, applying it to the glue areas of each lens before I set them.
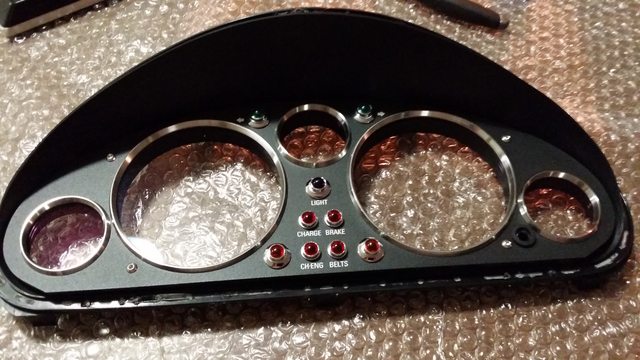
Lenses set

Now, to begin reassembly. It works best if you push the panel together some, and then one at a time, put the indicators in, and lightly push the retainers on, this way you can set the panel upside down without them falling out. Once it's upside down, remove the retainers, and grab your glue.
I used a Gorilla Glue variant, but any number of products will work.
Set the nozzle of the glue at a diagonal angle along the edge of the indicator until you have enough to work with.
Put the retainer on, and apply pressure for 10-30 seconds or until you feel it's secure. Repeat for each retainer.
Indicators installed

Once you're sure they are set, flip it back over and set it on the plastic piece and tighten down. I screwed in a diagonal pattern a bit at a time for each screw, just to be safe. Be careful to not overtighten or risk stripping the screws.
Enjoy your panel with less glare, and pat yourself on the back. Maybe buy yourself a beer.
Now you can try to just push the glass out, but I didn't want to take any chances. I went and grabbed a hair dryer. If you don't have a hair dryer handy, find a girlfriend, as they are likely to have one as mine does.
I then applied high heat around the panel in slow circles making sure to cover all the adhesive spots.
Warning:This will make the panel very hot. I used a paper towel to handle the panel in this stage.
After this step, the glass pops out fairly easily. Hold the panel firmly with one hand, and apply pressure near the glue spots to remove the glass.
Glass removed
Now when installing the new lenses, as you remove the protective film, you may see a bit of orange/yellowish residue around the edges. This will not be seen, but if you want to remove it, use the plastic film adhesive side to wipe it away or set it and pull it back. It will come off.
Also, I used the blow dryer again for this step, applying it to the glue areas of each lens before I set them.
Lenses set
Now, to begin reassembly. It works best if you push the panel together some, and then one at a time, put the indicators in, and lightly push the retainers on, this way you can set the panel upside down without them falling out. Once it's upside down, remove the retainers, and grab your glue.
I used a Gorilla Glue variant, but any number of products will work.
Set the nozzle of the glue at a diagonal angle along the edge of the indicator until you have enough to work with.
Put the retainer on, and apply pressure for 10-30 seconds or until you feel it's secure. Repeat for each retainer.
Indicators installed
Once you're sure they are set, flip it back over and set it on the plastic piece and tighten down. I screwed in a diagonal pattern a bit at a time for each screw, just to be safe. Be careful to not overtighten or risk stripping the screws.
Enjoy your panel with less glare, and pat yourself on the back. Maybe buy yourself a beer.
Reply
0
0
Thread Starter
Junior Member
iTrader: (1)
Joined: Jun 2010
Posts: 408
Total Cats: 21
From: Bradenton, FL
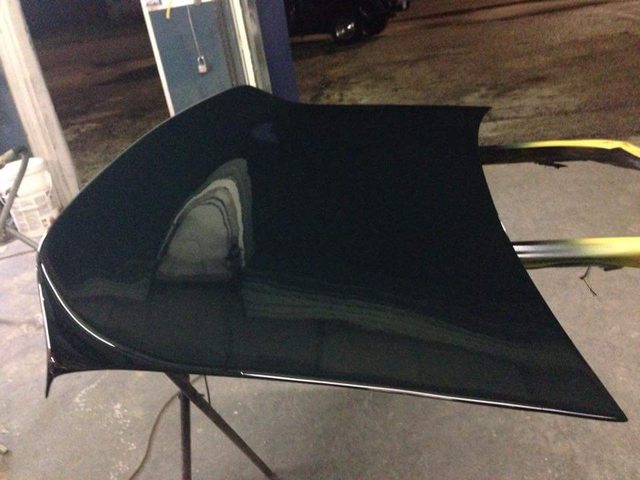
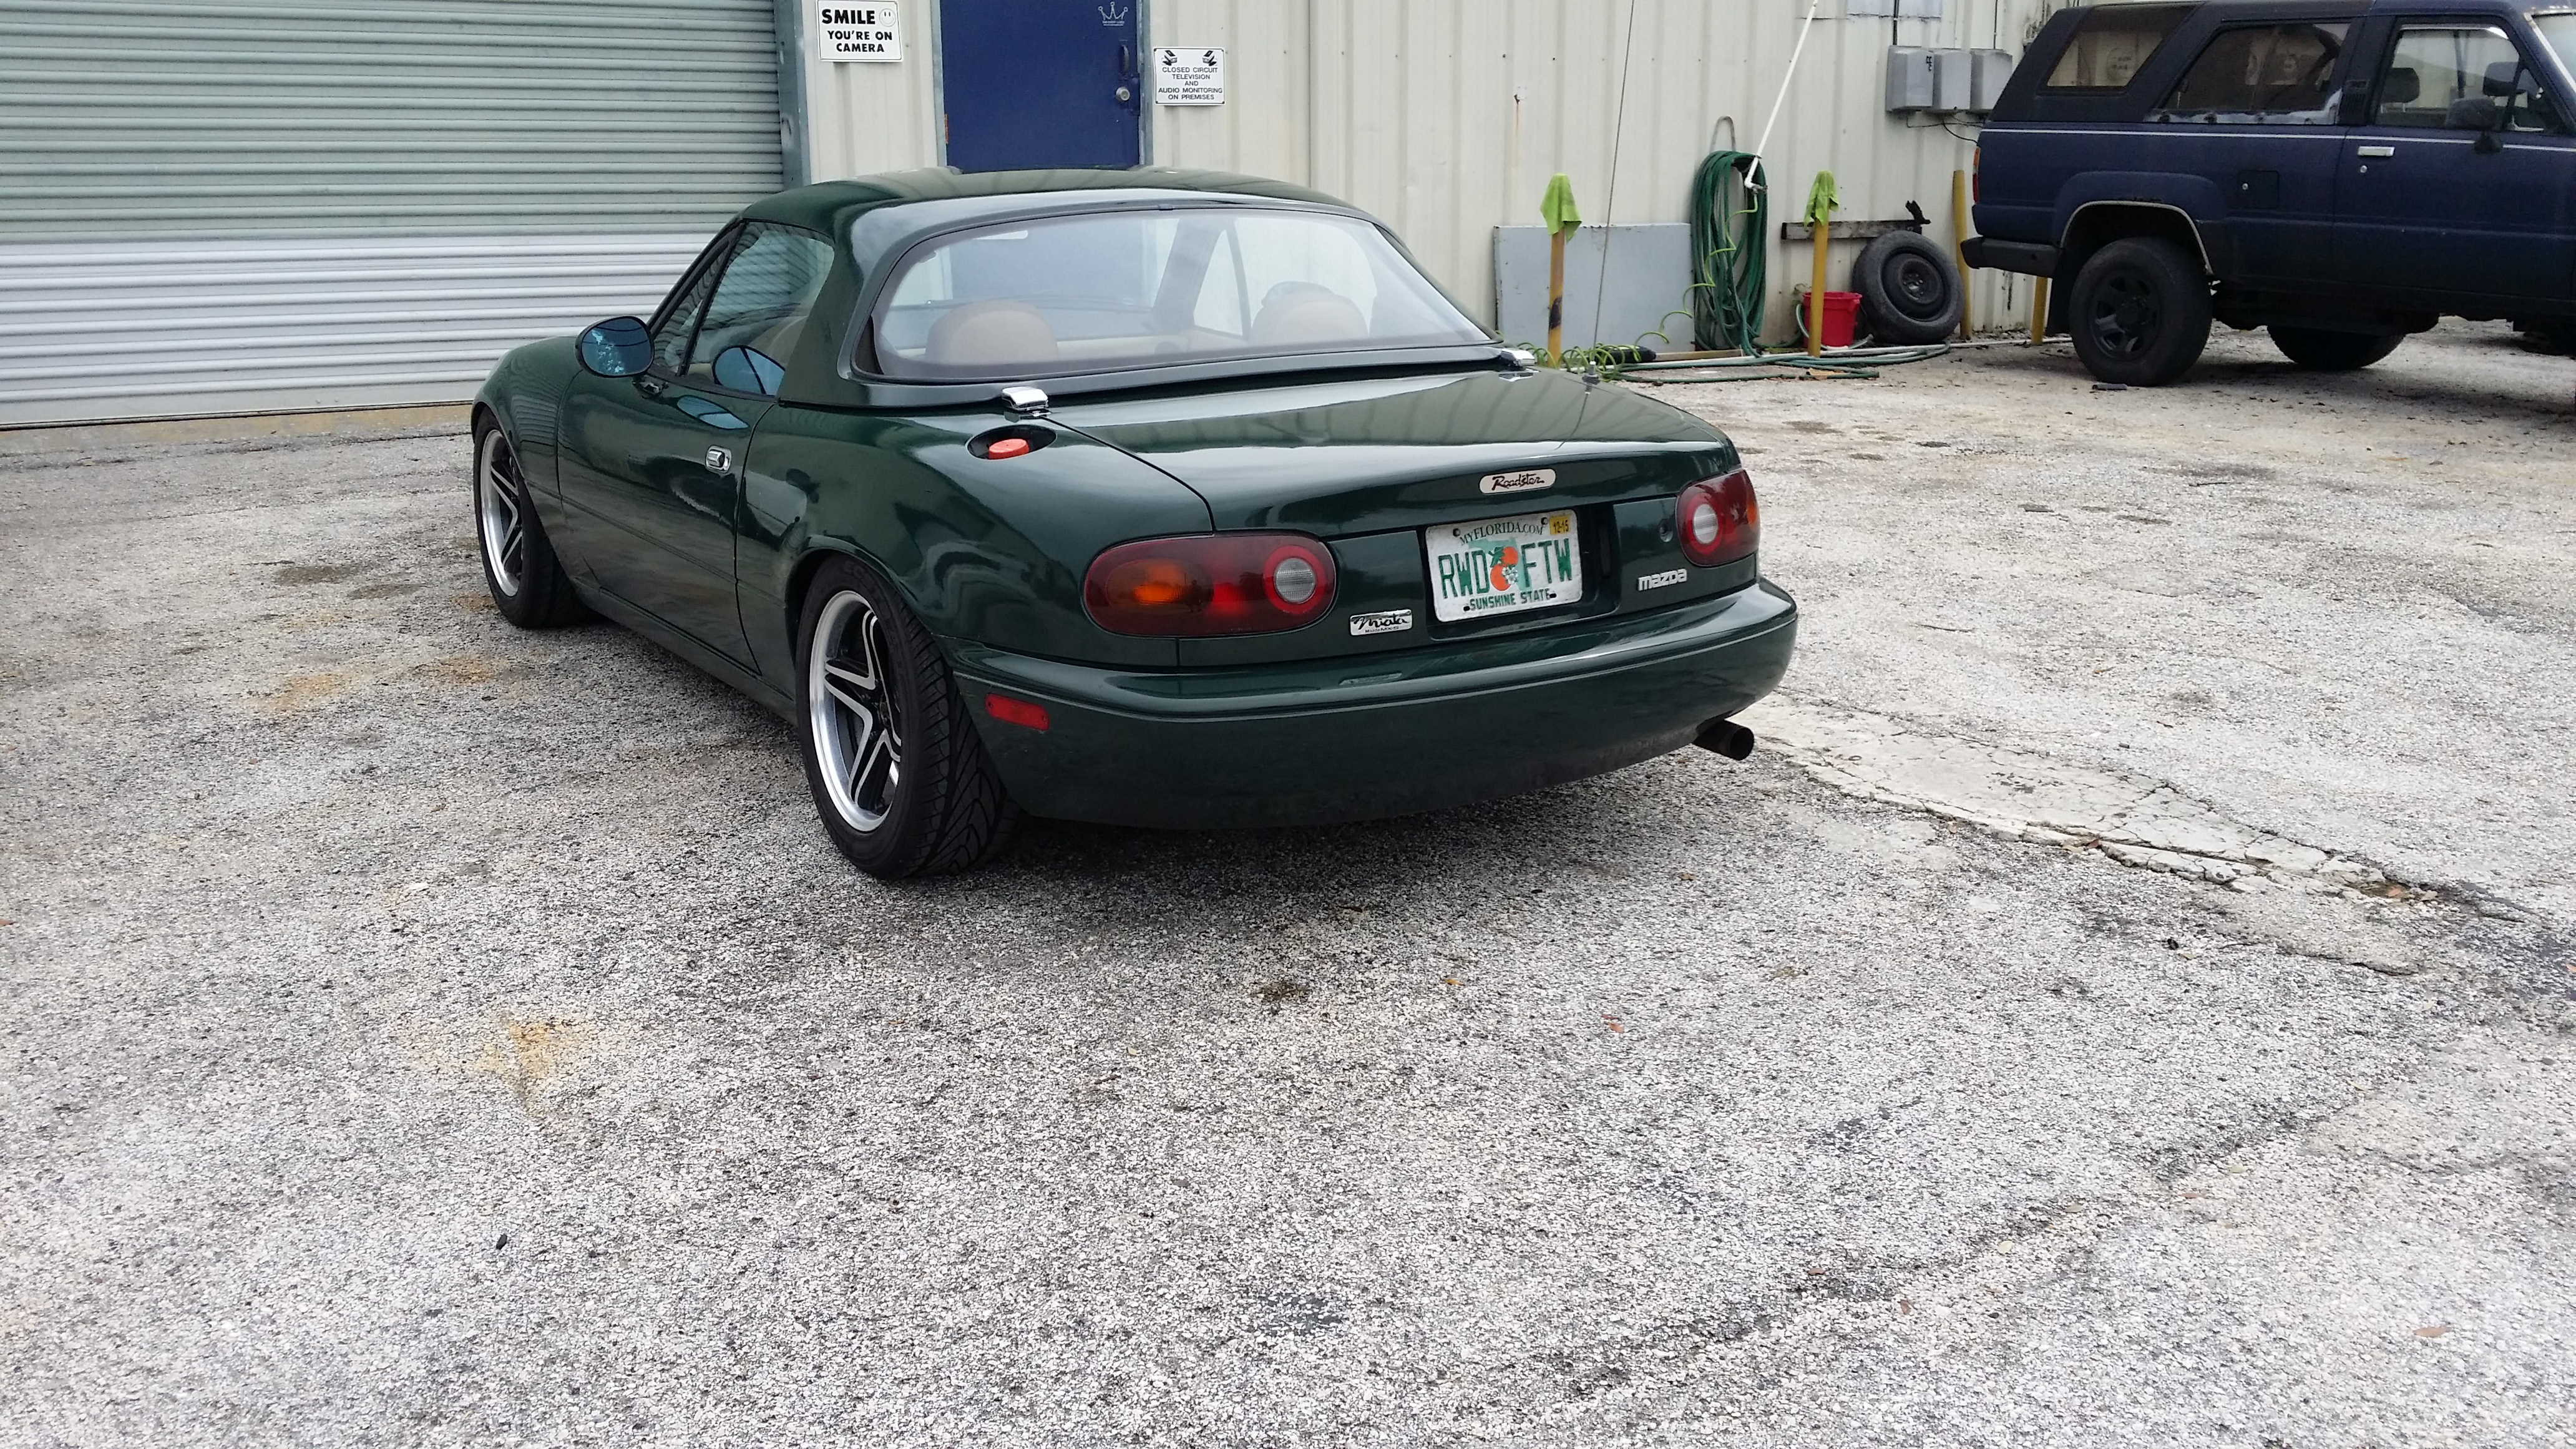
Don't mind my gauge hood, eventually I'll buy a new one.

Uggggghh...that's all I have to say about installing the new GV lights.
Super long day yesterday. Panel and trunk are "on" but not done. The standoff problem is real, went through 5 dremel metal cutting discs. After that, was given an air grinder to finish. Had a disc jump off of the grinder, fly ten feet across the shop to where my panel was sitting and put a small gash in it (which painter says he will fix today.) The 3m outdoor mounting tape I bought didn't want to play along, applied three times and the panel still won't sit flush. At first we could see the tape, so I moved it further back. Then it didn't want to hold. So toda I'm going to try to find some black trim tape. And when we went to install the trunk, we found out the OEM nuts don't work, and he couldn't find the ones that were on the trunk when I dropped it off.
So I gave in for the night, paid someone to take me to my 3,and I'll just go back refreshed today.
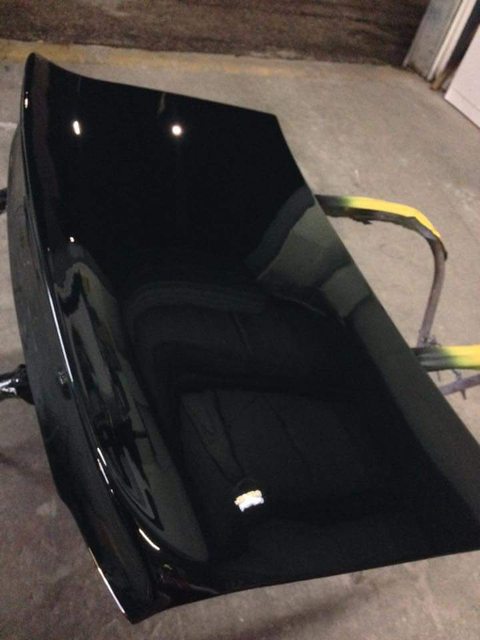
For now I guess I'll show you really shitty pics of what it currently looks like.
Uggggghh...that's all I have to say about installing the new GV lights.
Super long day yesterday. Panel and trunk are "on" but not done. The standoff problem is real, went through 5 dremel metal cutting discs. After that, was given an air grinder to finish. Had a disc jump off of the grinder, fly ten feet across the shop to where my panel was sitting and put a small gash in it (which painter says he will fix today.) The 3m outdoor mounting tape I bought didn't want to play along, applied three times and the panel still won't sit flush. At first we could see the tape, so I moved it further back. Then it didn't want to hold. So toda I'm going to try to find some black trim tape. And when we went to install the trunk, we found out the OEM nuts don't work, and he couldn't find the ones that were on the trunk when I dropped it off.
So I gave in for the night, paid someone to take me to my 3,and I'll just go back refreshed today.
For now I guess I'll show you really shitty pics of what it currently looks like.
Reply
0
0
Thread Starter
Junior Member
iTrader: (1)
Joined: Jun 2010
Posts: 408
Total Cats: 21
From: Bradenton, FL
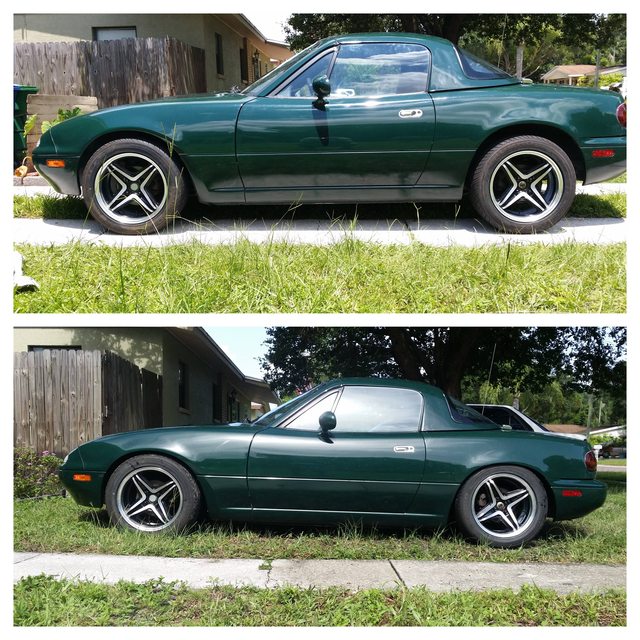
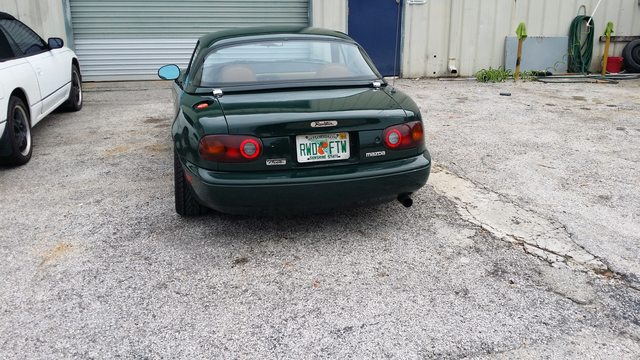
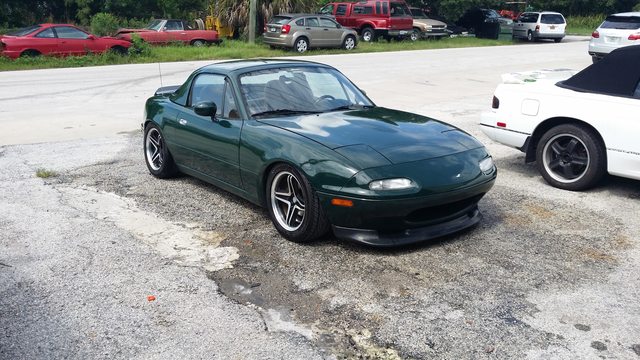
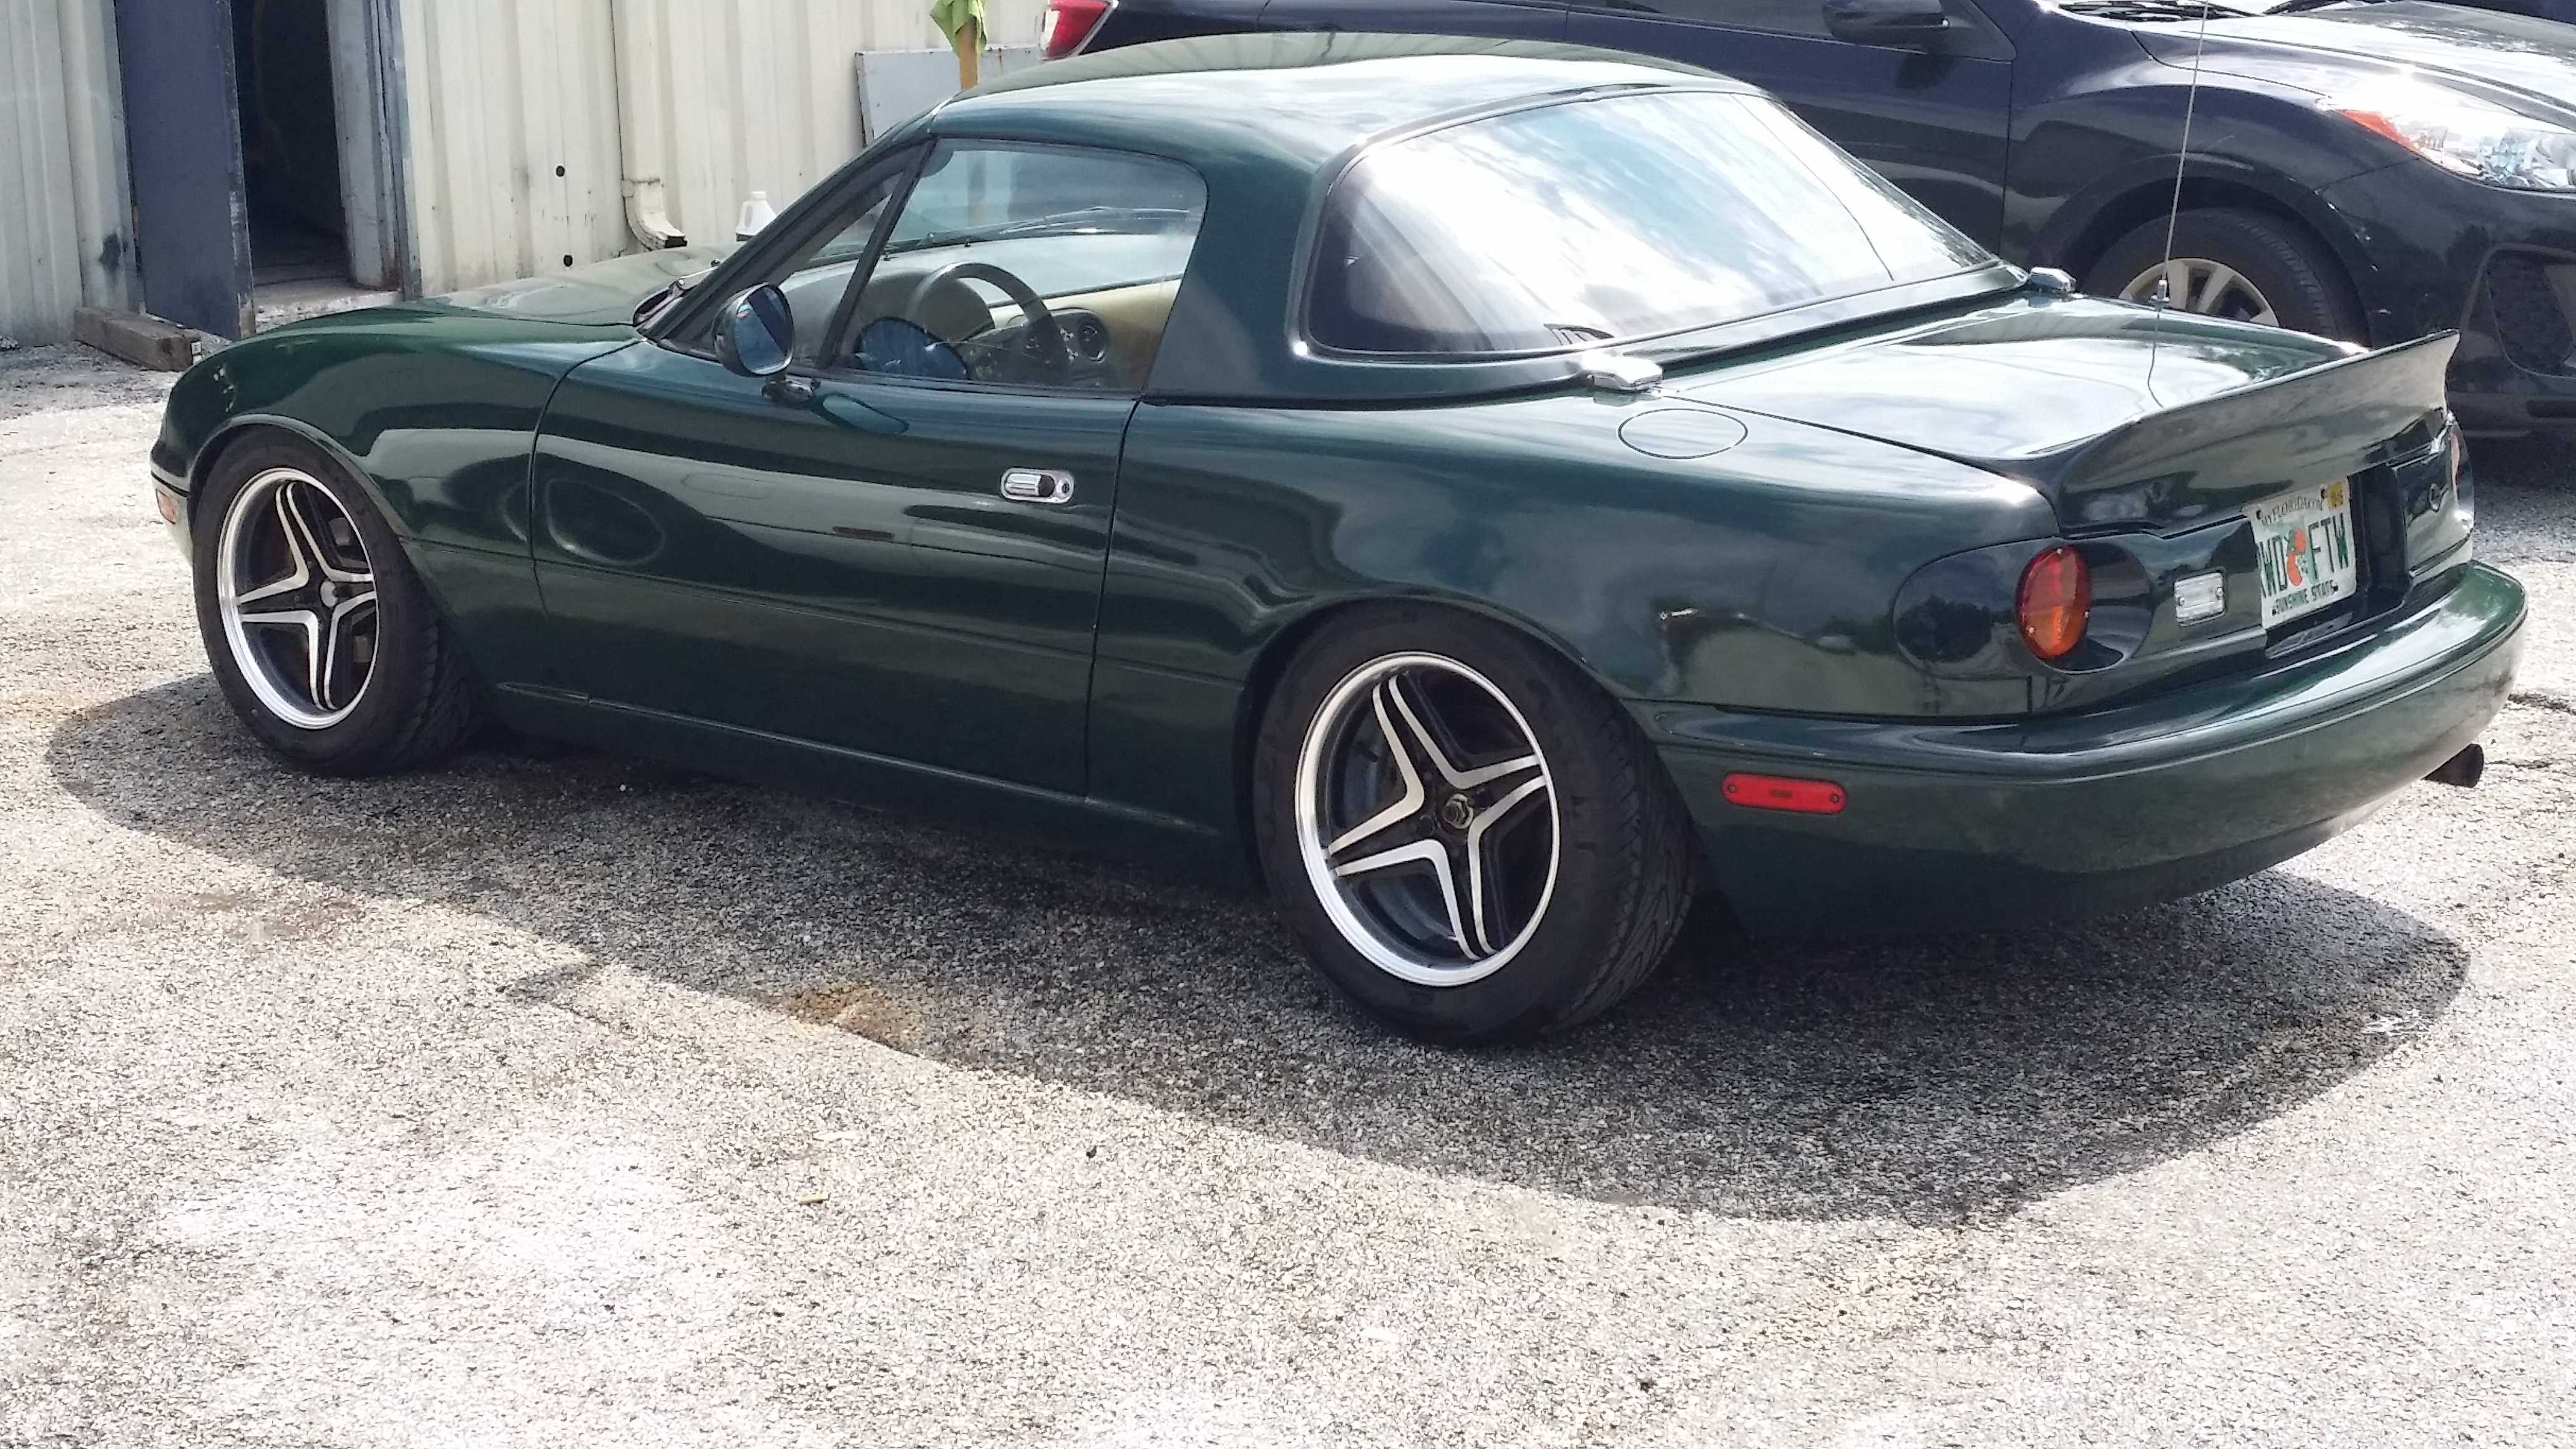
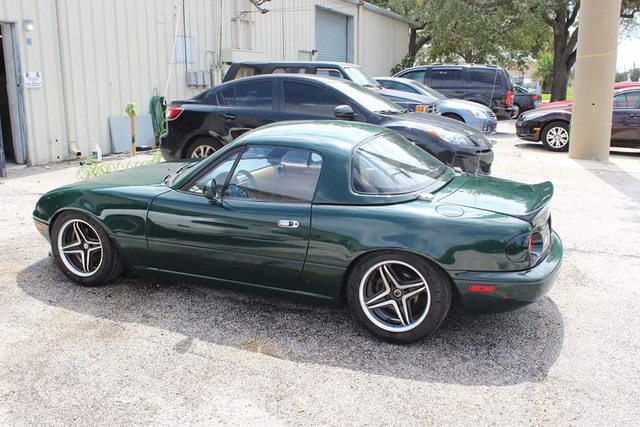
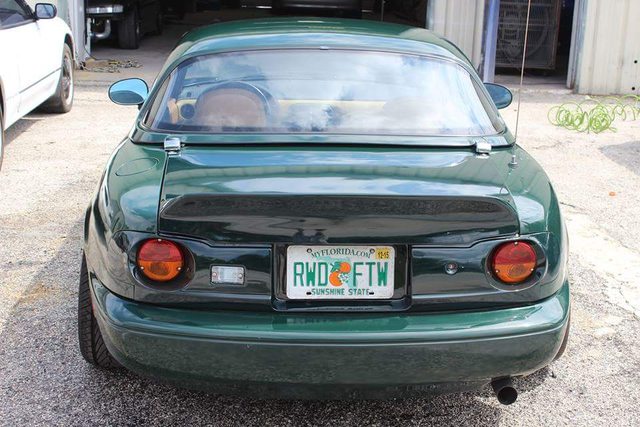
And done. Fitment is still ehh in some spots. I need to remove the trunk tensioner.(I have since removed it, much better) I messed with it for a few minutes and couldn't seem to figure out it's trick. But I do think it changes the entire car's attitude.
I also went through three silicones. First was a "clear" that applies white. Got it on, then read that it takes 7-14 days to clear. So I went back to Lowe's and grabbed a small tube of clear that goes on clear, and then a black tube that needed a caulk gun. I wasn't happy with the clear, so I took it off too and used the black.
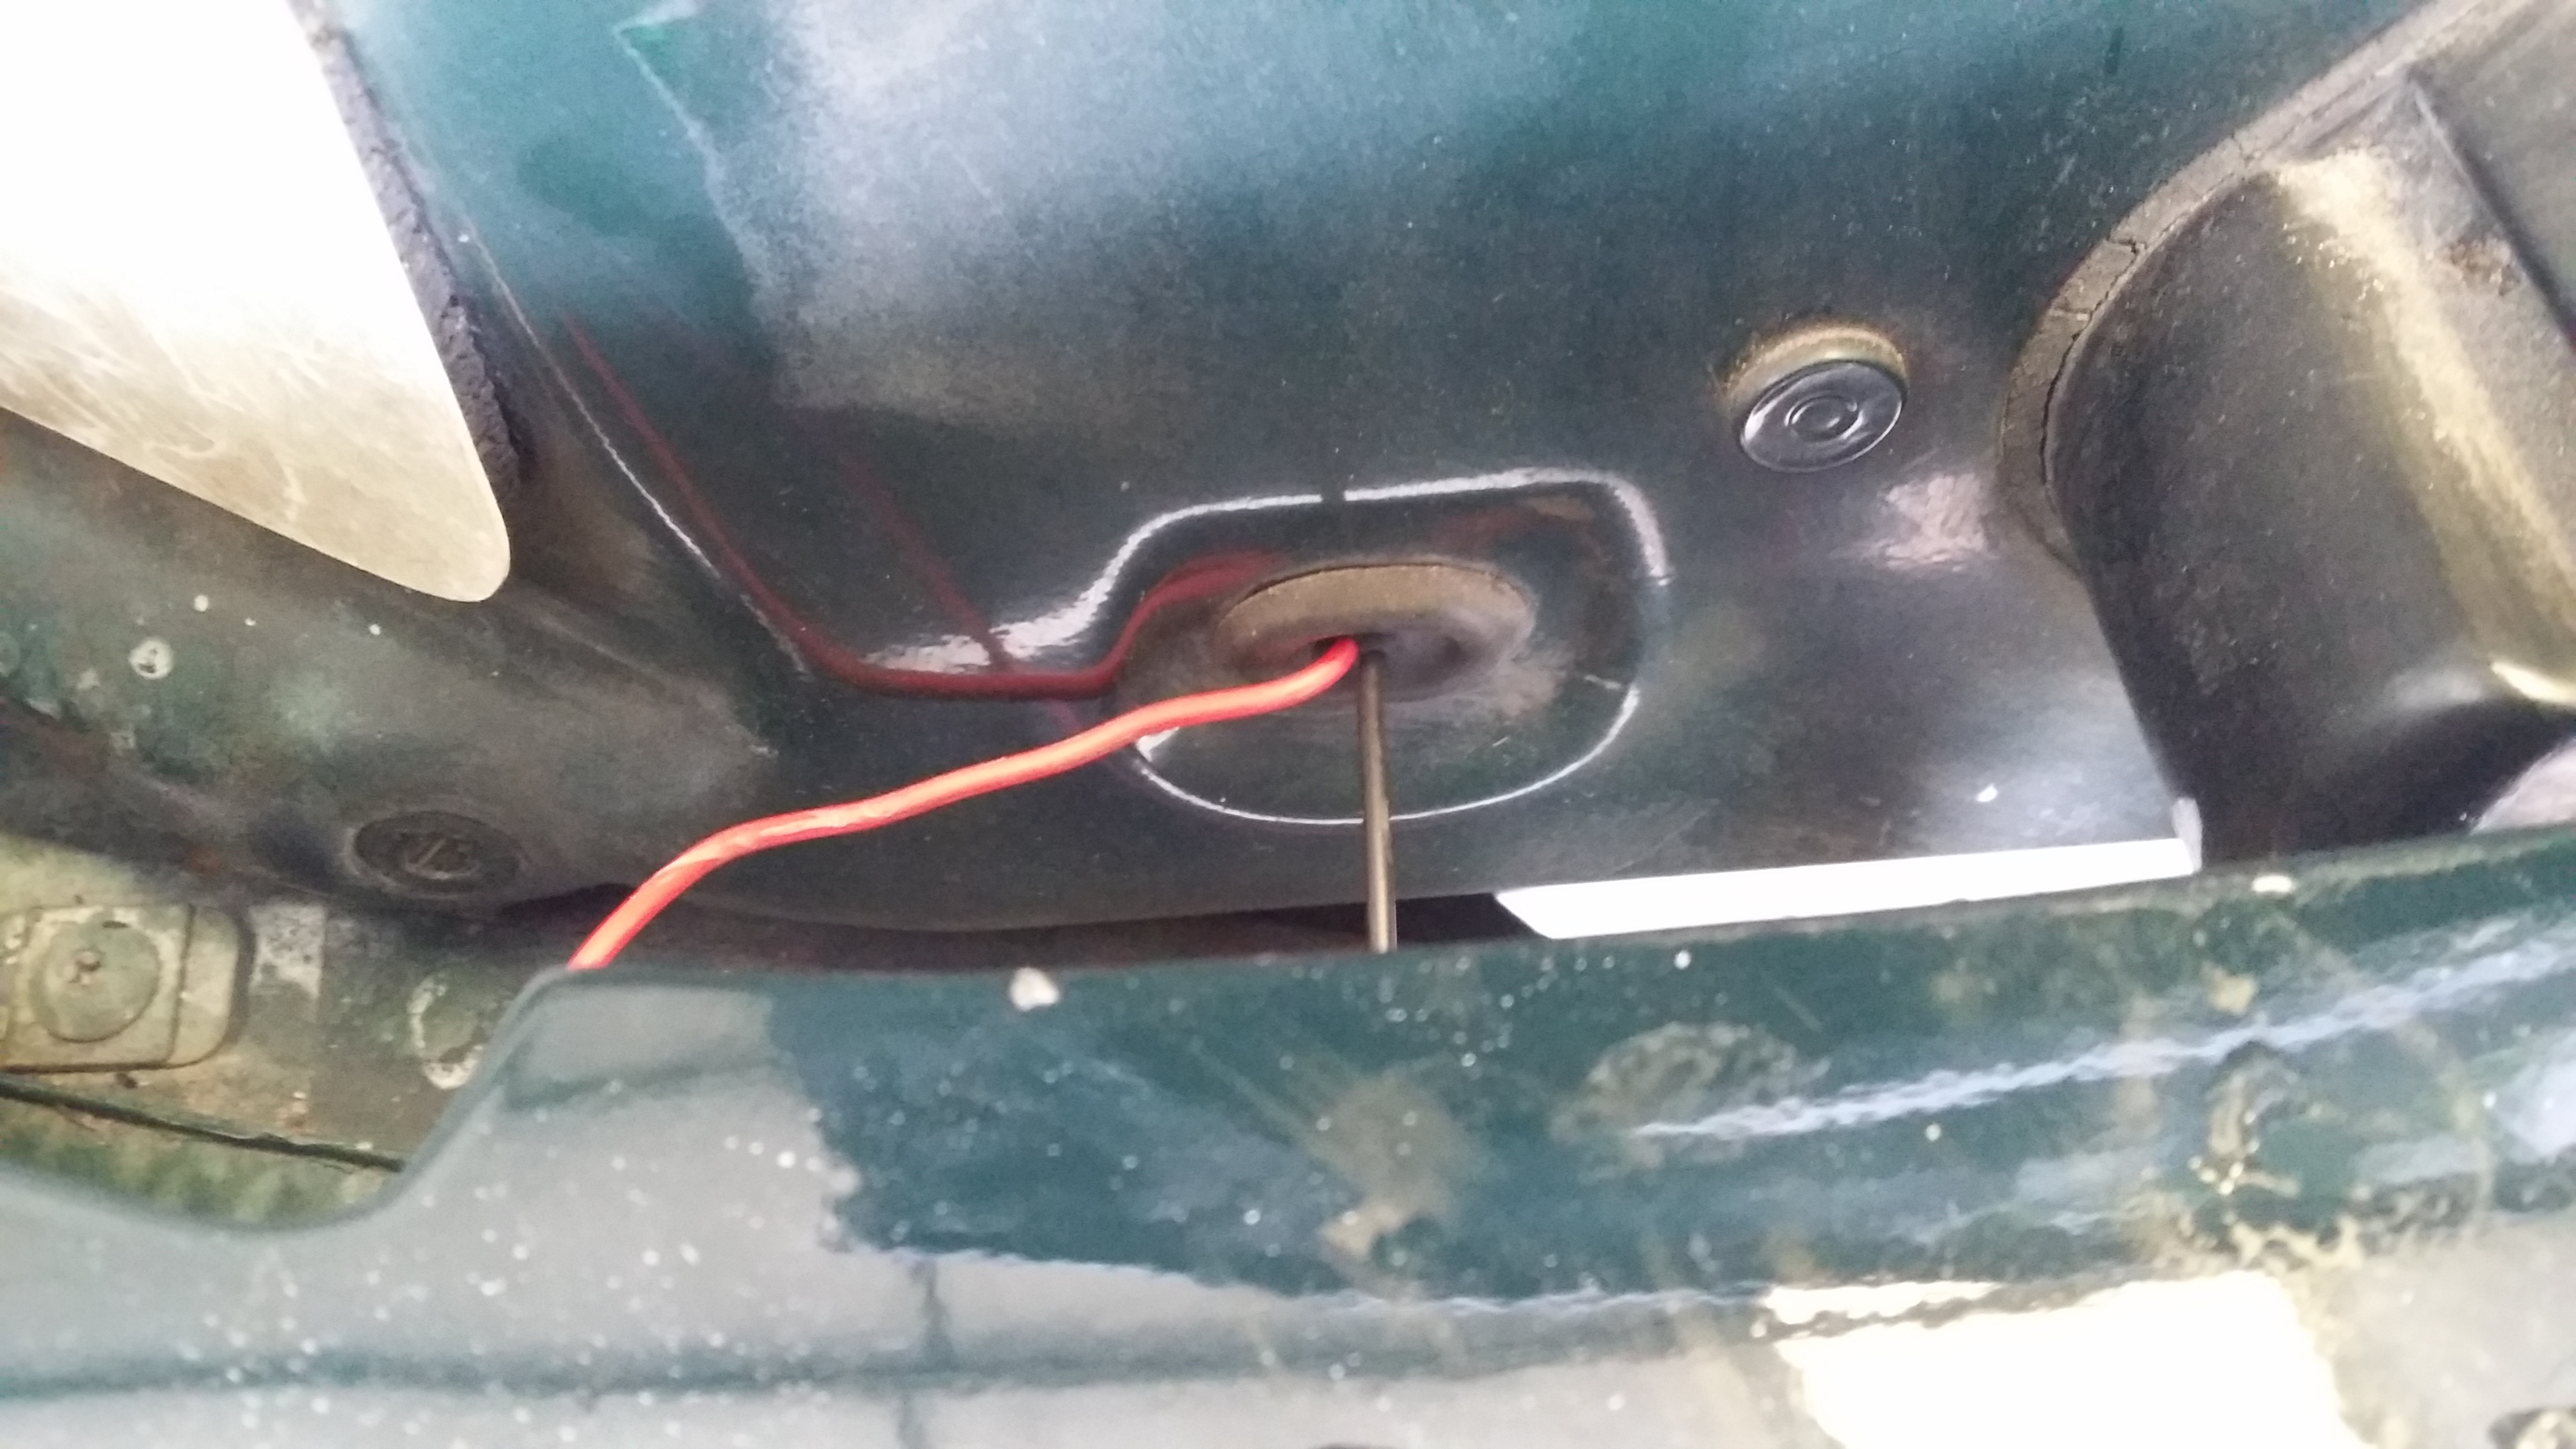
I also believe I did the wires differently than some. I was having fitment issues with the fiberglass inserts, so I actually saw a grommet to the left of the license plate wires, poked a hole through it and then ran my wires through.
Alright, I'll stop talking.


I also went through three silicones. First was a "clear" that applies white. Got it on, then read that it takes 7-14 days to clear. So I went back to Lowe's and grabbed a small tube of clear that goes on clear, and then a black tube that needed a caulk gun. I wasn't happy with the clear, so I took it off too and used the black.
I also believe I did the wires differently than some. I was having fitment issues with the fiberglass inserts, so I actually saw a grommet to the left of the license plate wires, poked a hole through it and then ran my wires through.
Alright, I'll stop talking.
Reply
0
0


