When you click on links to various merchants on this site and make a purchase, this can result in this site earning a commission. Affiliate programs and affiliations include, but are not limited to, the eBay Partner Network.
Ok, I picked up both of those tools today. Using the stethoscope I can isolate it to cylinder 2 - I can hear it best probing the freeze plug and area on the block below it on the exhaust side. Less audible from 1 and 3 area. Nothing from the head.
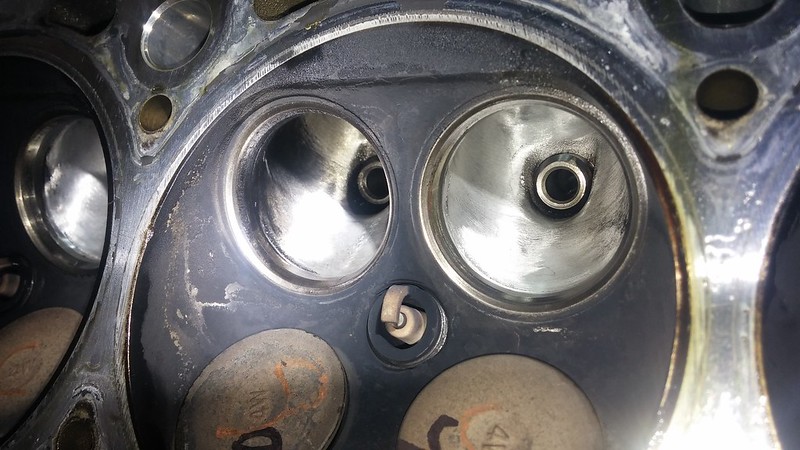
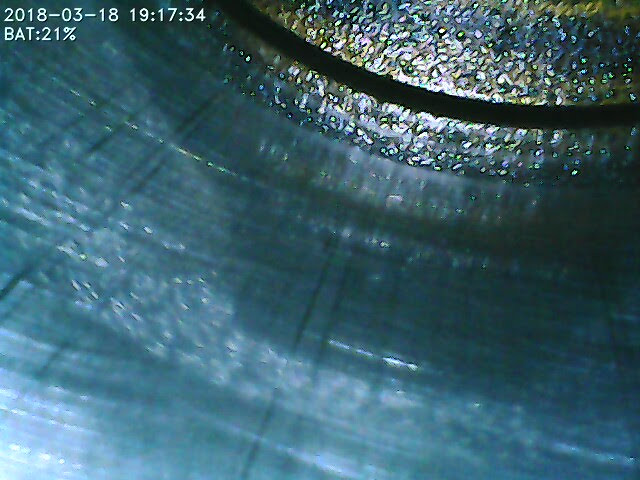
The borescope revealed a lot of wear marks like this, in all four cylinders -
Is that normal? It's not all the way around, but a fairly wide swath. I also don't know what's up with all the oil and residue on the pistons already...
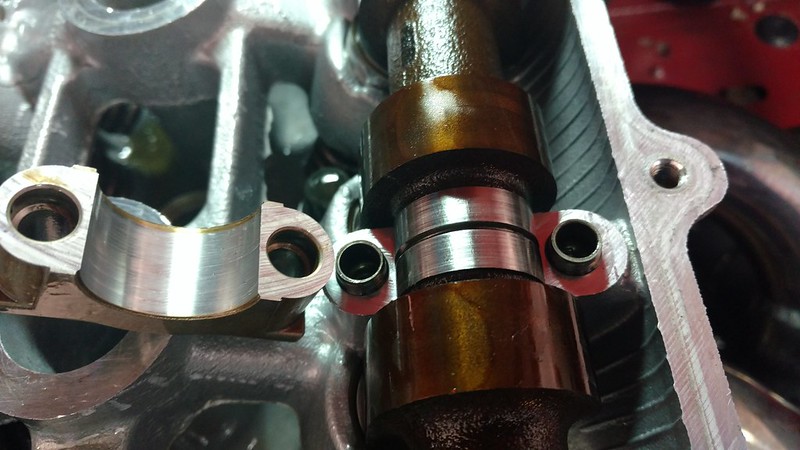
I took the cam caps off and it looks like all of them are showing wear like this. Worst being intake 2 and exhaust 4 with the embedded stuff, some aren't as bad.
What came out of the filter:
So I need to do two things:
determine source of knock
Determine root cause of damage. Ideas:
Bearing was installed improperly (I was careful about these things but who knows)
lube on the back side
not enough assembly lube
damage on surface prior to installation
Metal left in oil system after machining
???
What's the next step, pull the motor and check all the bearings in the bottom end?
Is this head trashed?? Is there anything I can do to save these parts?
What I think I see in your photos below. Also consider how these parts have changed since the engine was built and run.
- Cams/caps look ok. I have had a machine shop micro polish cams and clean up a lot of the scratching. Dragging your fingernail across the grooves will help determine what a micro polish will clean up. If your nail catches any grooves, the polish is only going to remove the peaks and soften the edges. It does not look like any of the metal debris I saw on in the filter photo has accumulated in the cam caps. Yay.
- Cylinder wall - I've had the vertical marks in walls from the piston skirts, but in engines that had several races on them. Of course those would also be on the wall areas perpendicular to the piston pin. These like evidence of debris, but do look like they could be honed out.
- Piston - It might be the scope image quality, but the piston top and edge looks pitted and I assume they weren't like that out of the box. That said, it looks consistent across the top so I'm hesitant to call it detonation.
My guess: you have bearing wear that has contaminated your oil and has just started to caused minor wear on walls and cams. I want to sat the click is early rod knock, but I can't explain why there isn't more wear on one cylinder wall than the others.
You definitely need to figure out what the knock is. Did you rotate the crank manually and hear the click, or was that with the engine running?
At this point, my next move would be on the safe side and open the engine, to avoid further/greater damage.
I most likely missed it from the previous posts. Is this a fresh build? Those vertical marks don't look like they go through the cross hatch, so I'm not so worried about those. In fact, on pretty much every new engine, if you pull it apart after only a short amount of run time, you will see those vertical marks from the rings.
Really appreciate the input guys. Yes, fresh build top to bottom, total of 40 miles on it.
I could only hear the sound with the engine running. I took the plugs out and spun it back and forth by hand and couldn't produce any similar noise in any position.
The piston tops appear oily to me, and those 'pits' you see are deposits. Picture was taken after idling for a minute. I need to investigate more closely. No signs of oil down the exhaust valve stems, yet to remove intake manifold.
I got off work early so I took the engine back out today. Time to change the thread title to 'Project do everything twice'. Album of bearings: https://flic.kr/s/aHsky3rfRs
Bearing wear indeed. What I see: rods are all worn. I want to say rod 2 looks the worst, being worn through the gray layer to the shiny layer over more area than the others. The other 3 are also worn through the brown layer to the gray layer over most of their area, with some deeper scratches down to the shiny layer. The scratches are of course from debris, but what could have caused the large wear areas? Too little or poor quality assembly lube? Could debris left over elsewhere in the engine cause that wear? Improperly seated bearing or too little clearance? IIRC they all plastigauged out to .0015".
3 rod journals have 1-2 light scratches that barely catch your fingernail. Didn't get any pics of this. Does this need to be polished or turned, or can I get away without?
The mains mostly look ok, getting worse from front to back. Mostly looks like debris scratches. What concerns me is the front edge of 4 and 5, both have a significant but narrow wear band there. What is this?? Main journals are all fine, crank thrust faces look fine, I haven't pulled the thrust bearing yet to check it.
Looking from the bottom, all four bores have the vertical scratches, all the way around but more intense perpendicular to the pin. I couldn't get a hand in there to feel it, but it doesn't look as bad from this side. I'll try something else to feel it tomorrow, trying not to remove the head if possible.
SO, looking for root cause, do the rod bearings look like they failed first and the damage compounded, or did foreign debris initiate the bearing failure? What should I be looking for?
Definitely try to get any scratches polished. Bring your parts back to as close to "original" as you can. Machine shop will be able to tell you what they can do for it. I want to say thrust bearing issue given the "front edge of 4 and 5...have a significant but narrow wear band".
Some of the photos look like bearing wear is biased to specific areas, yet other photos look like consistent wear. IF there is inconsistent wear on a bearing, then that could be the source. fwiw- I used plastigauge on my first engine build and got burned by a bad (or lack of) machining job. After that, I bought a set of gauges so I could check not only clearance but also roundness. Something plastigauge doesn't do. Though imo you shouldn't have to double check machine shop work.
If I found the metal in my filter, and found damage to bearings, I'd tear the engine down just to ensure that all the debris is removed. Any debris has a good chance of ruining the cylinder head. I'd start over so that every step along the way was fresh, not leaving anything unknown. It may not be necessary, but what if it is? I think you can be thankful that you stopped when you did and have an engine that appears to be mostly (thrust?) salvageable for a re-rebuild.
Thanks for the input, m2. So I ended up tearing the engine down again. Didn't take any pictures, because, well, it was a little less exciting this time. Didn't find much else other than the bearings in the last post. Some wear in the cam journals, and the scratches in the cylinders were visible in all four, but not deep. My theory is that the head and/or block wasn't cleaned out well enough after machining and leftover debris initiated the damage. So I stripped everything completely down again, bought a solvent sprayer from Harbor Freight, and cleaned everything that touches oil. Pulled the oil galley plugs out of the block, which I neglected to do for the shop last time, and spent a lot of time on the crank passages. Had the crank and cam journals repolished.
Buttoned it back up with new rod and main bearings, and it still runs. The noise is, well, almost gone. There's still a light ticking from the bottom end but I think I'm just being paranoid at this point, and have elected to just run it. I've got about 250 miles on it now and haven't had any issues. VE is dialed back in and, as far as feel goes, it's fantastic. Already running at least as well as before the rebuild, if not better. Power is noticeably, uh, more. I have an opportunity for a dyno run next weekend so we'll find out exactly how much more soon. I'll share some driving impressions and videos soon too.
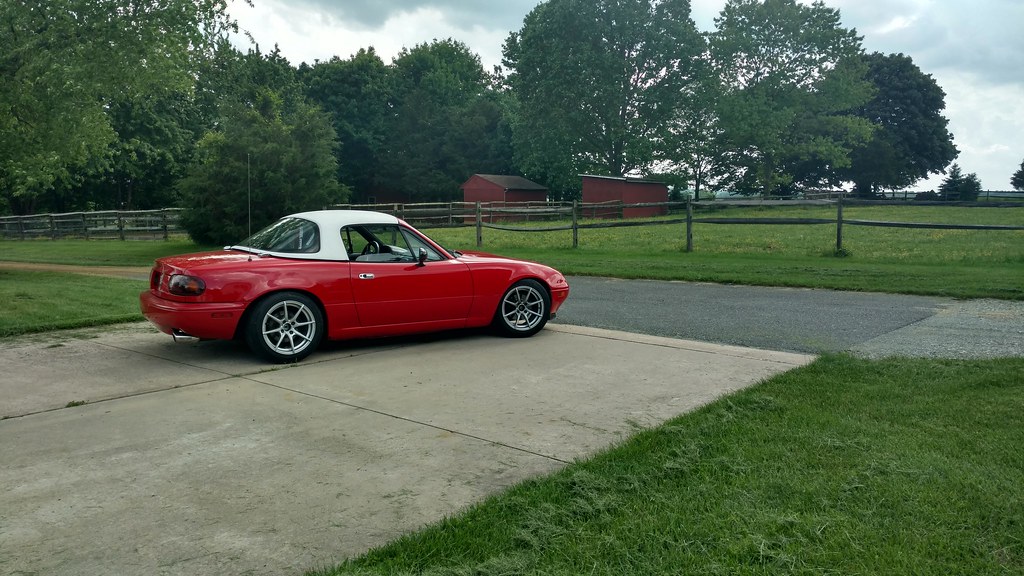
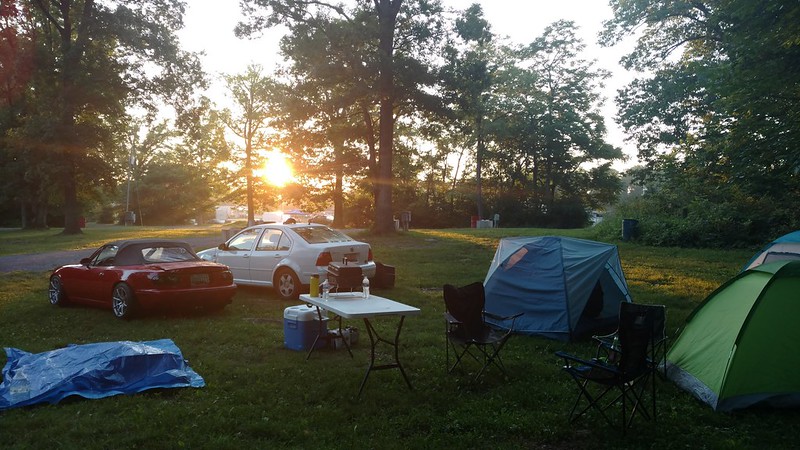
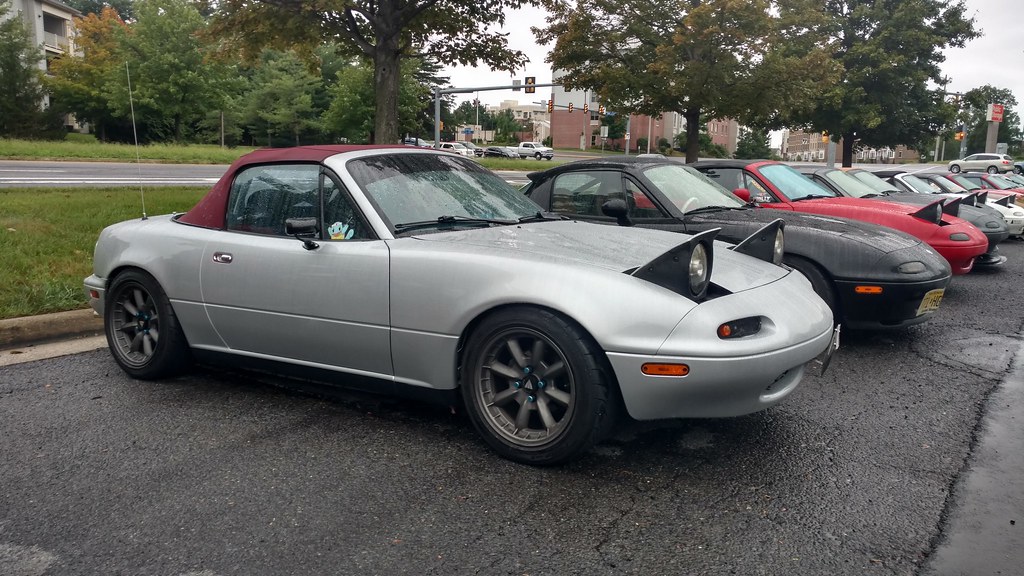
In other news, I snagged one of Goodwin's last sets of 15x9 Konig Helix, and finally got the RS4s mounted on them today.
Looks. So. Proper. Daisies hurt my soul, can't wait to never mount a set again.
Wasn't able to get ahold of the communal fender roller today so this is just a quick test fit until next week. After that, I just need to make a decision on brake pads, get a few more miles on the motor, and it'll be ready for the track!!
Well I was reminded that this thread is due for an update. Much progress has been made!
I got the fenders rolled, and the wheels actually installed. Then I broke out the detailing gear and polished the paint back up for a car show my friends were hosting, where I had the dyno runs scheduled. It proceeded to rain and that was cancelled. Oh well, the paint had been taking a beating and it finally looks good again. All the oil residue even came off the rear bumper!
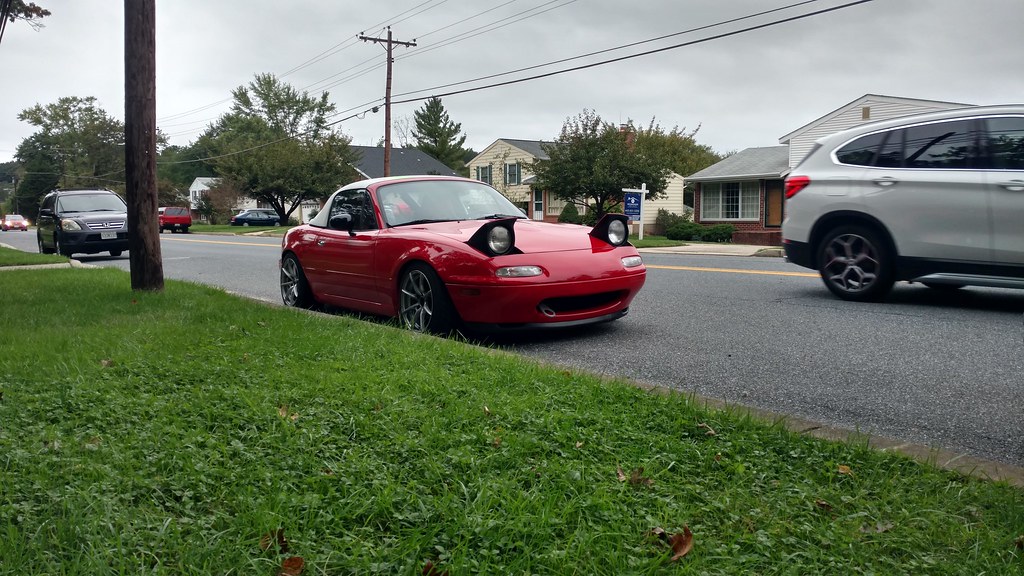
Wheels really transform the look of a car more than anything else, IMO. I really wanted bronze Jongbloeds but these were superior in every category besides looks. They're growing on me really quickly... maybe just because they fit so much better than x7s.
Decided the engine is fine, so I drove the car some. Tuned VE some more, got CL idle and AC control working better than before. Determined that my VVT advance range has shifted, and is now ~5* retarded relative to where it was before. This was causing it to peg at max duty trying to advance from -5 to 0, which it doesn't have the oil pressure to do, so I had a nasty valvetrain rattle at idle and low-rpm overrun. Shifted the range in the settings and all is fine.
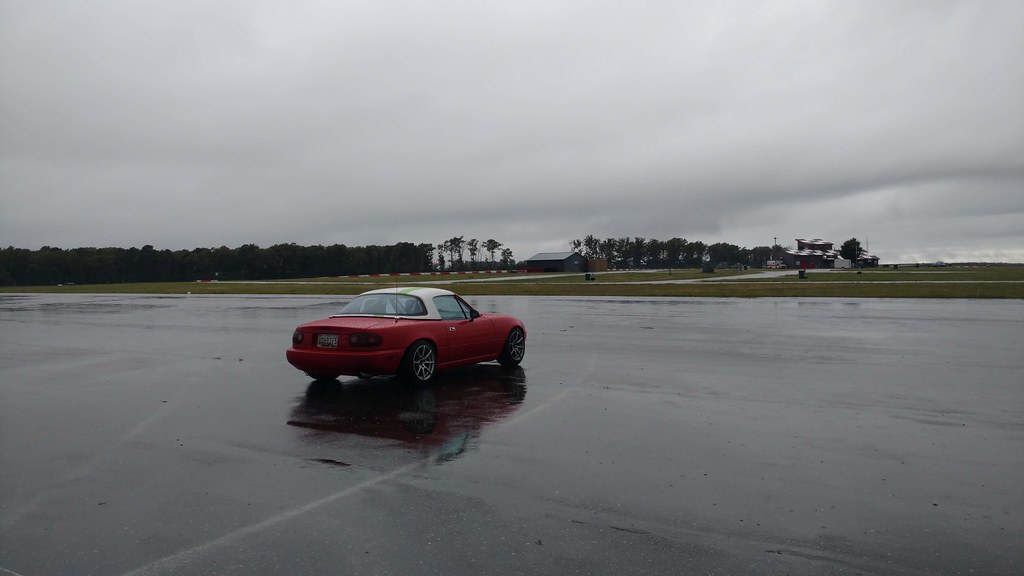
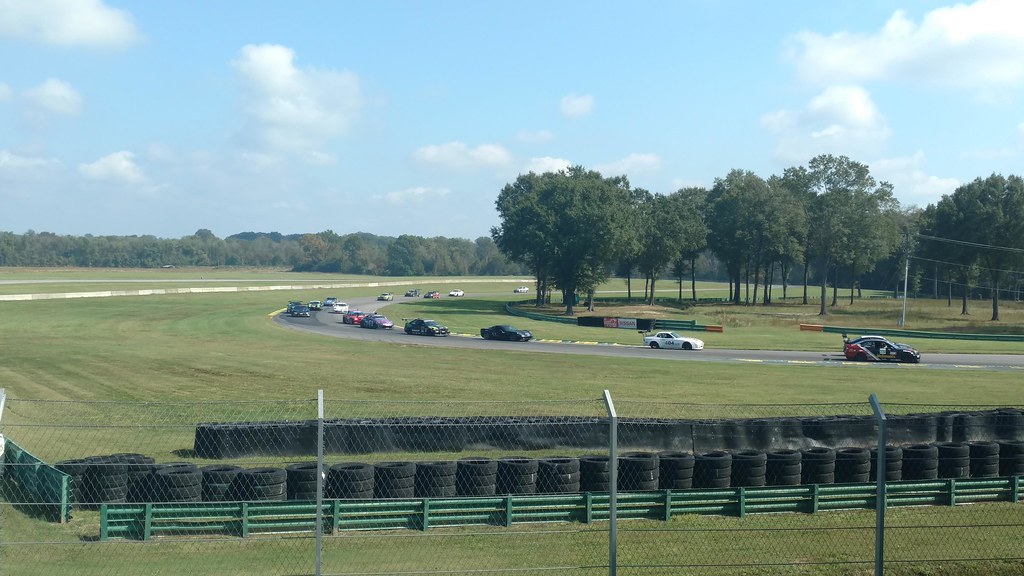
I ran out of time for break-in and switched to Mobil1 at 500 miles. Bought another set of street/race for the front to hold me over on brake upgrades a little longer. Took Tuesday off and drove up to NJMP in the rain for a Track Night in America. It was nice and steamy so I even got to test the AC.
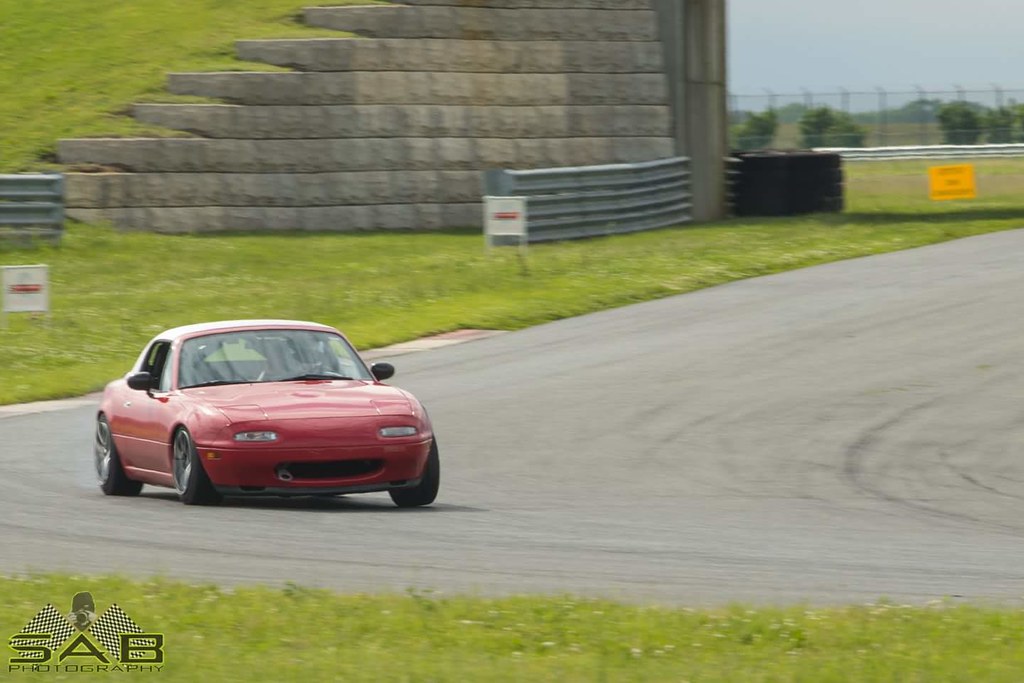
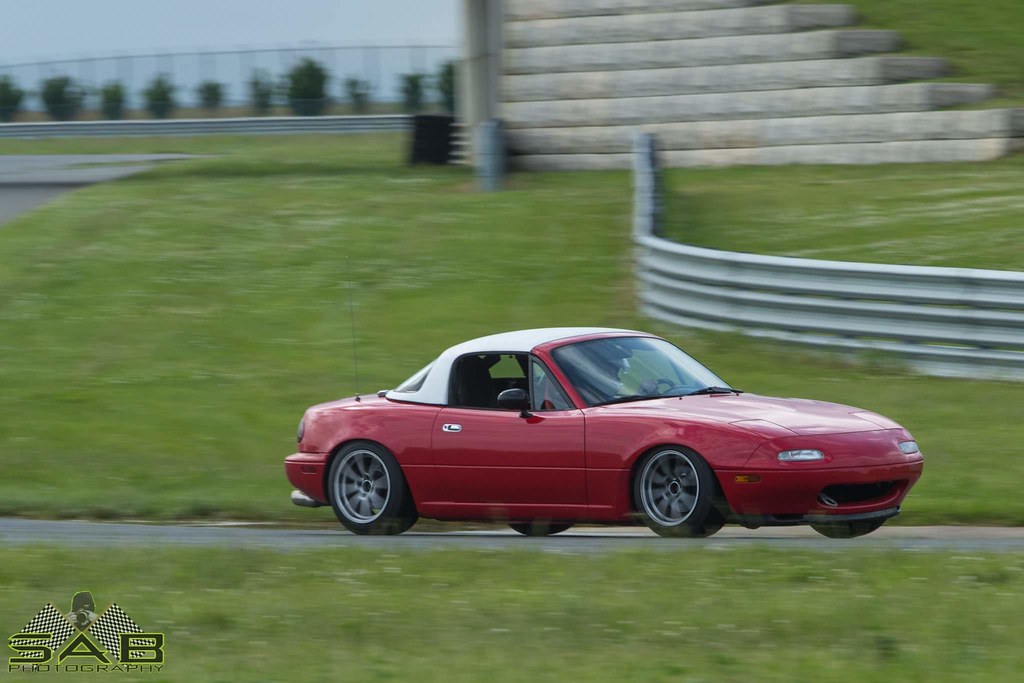
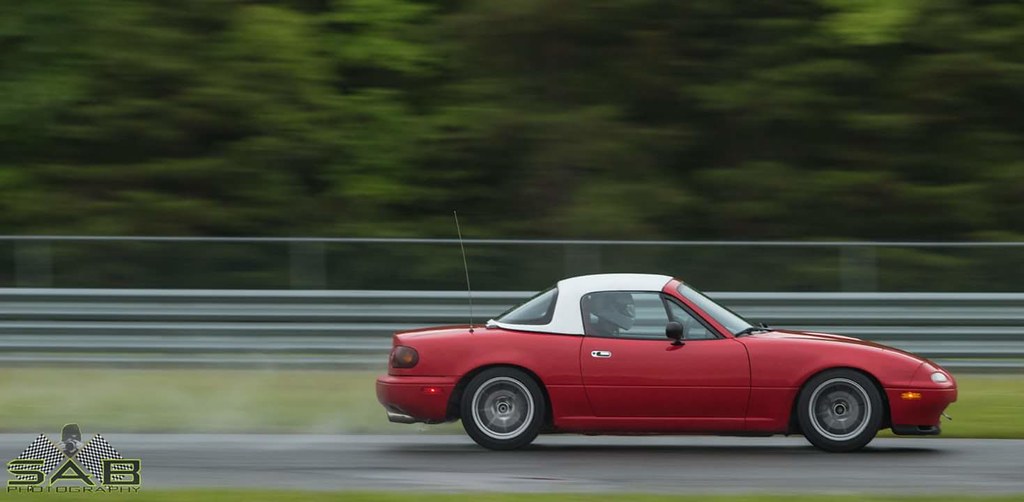
It was dry at the track when we got there, and I ended up getting two dry sessions, and the last session in the wet. My photographer friend came with me again and got some really sweet shots:
SO MUCH GRIP! I definitely was not quite driving to the limits of these tires. Also, too much tire for my suspension. The Konis with these springs are an excellent street setup, but with this much tire it's getting floaty and imprecise. The fact that they don't adjust anymore and are stuck somewhere in the middle doesn't help. I was having a hard time keeping it in a straight line under braking. Certainly room for driver improvement, sure, but something new might be moving up the list. Otherwise, this thing actually has some ***** now and it's absolutely a blast!
This was my first ever wet driving event, never even done a wet autocross before. Not sure how I've managed that in the mid-Atlantic. It was fun! There was no grip!
So I was expecting, like, 75% grip in the wet. It was more like 35%. Going into the esses on my out lap and already getting understeer, I could tell it was going to be exciting. I was taking it easy in the braking zones, but even at a seemingly slow pace, the front was on the verge of understeer, and the rear ready to kick out on exit of every turn. Only one near-off into turn 1. Excellent lesson on car control, reminds me I really need to work on smoother inputs. Really wouldn't have minded an entire wet event!
We can stop talking about engine issues now. Goals include driving the car. I'd like to look into data/telemetry setups. Suspension adjustments and maybe upgrades. More to come, it should be a fun summer!
Judging from the pictures and your commentary it needs stronger springs to keep it off the bumpstops when cornering. When you add tire you have to add spring, which means you have to add shock damping. It's a spiral.
I wouldn't use Mobil 1 for turbo track duty, but that's another thread.
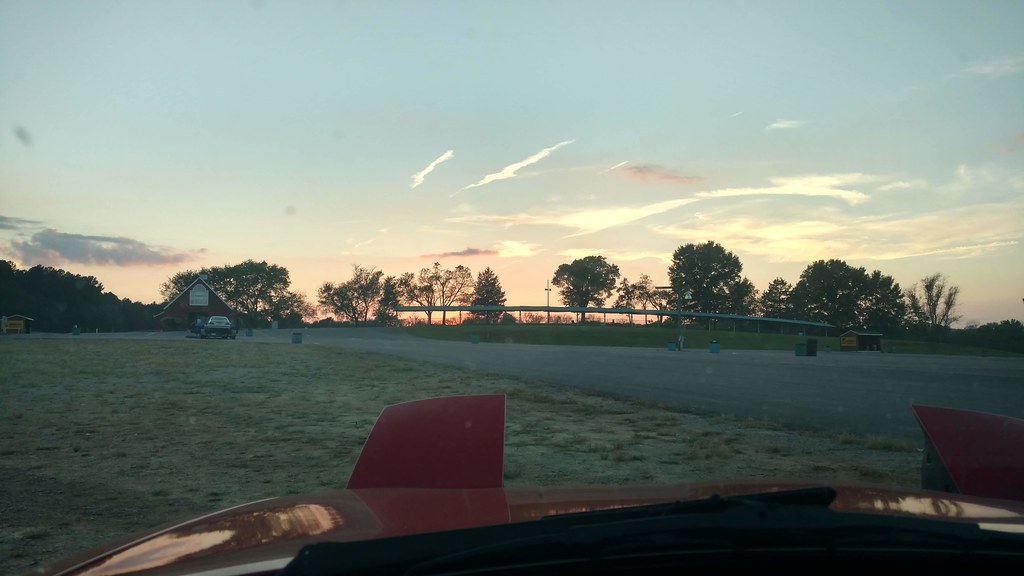
Once again it was likely the hottest weekend of the year... but the heat doesn't bother me much so it was a lot of fun! Well, Saturday at least. This was my first event with Trackdaze and their ridiculous 4hrs/day of track time. The car was great despite the temperature nearing 100F, only hitting 208F CLT, despite the little plastic radiator. I wanted to get an oil temp sensor installed before this event to get some data, but didn't get to it. I'd still like to install an oil cooler, however. Need to research that topic more.
Sunday morning the car wouldn't start! Acted like it was flooding and it took me until lunch to get it started. When it did, it was running super rich, around 12:1 at idle. Couldn't find anything in the data, so my best guess was a sticking injector. I found a generous racer with some spares, and swapped through all four of mine, without success. It seemed to lean back out some above 2k, so we accepted defeat and called it a day, and I had a fairly calm 130 mile limp home. At least a massive tow bill was avoided and I've added a few items to the spare parts list, but my first track day failure, and missing an entire day, was pretty damn disappointing.
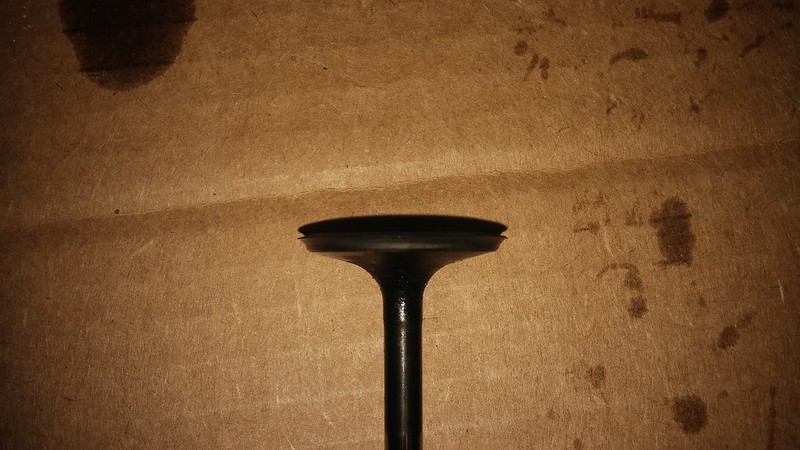
Looking through the data again at home, I found a higher commanded PW from the MS than usual, and higher MAP. Dry compression test showed ~60 psi on 3 cylinders! After some research, I tore it down today to see if the intake cam had retarded itself a tooth. Instead of that, I found fresh wear on the base of the intake cam lobes! Sure enough, lash had completely closed up on 6 of the 8 intake valves, while all 8 exhaust valves are right where I left them. I last checked lash at 40 miles, and it hadn't changed. I now have 1400 miles and 3 track hours on the motor. I assume this isn't normal? Hopefully with valves that actually close, it will still make compression, start, and make vacuum. We shall see.
Didn't get to push quite as hard as I wanted behind the wheel because I gave a couple rides on Saturday. Best lap was about 1:30. I still was able to get way more comfortable with how the suspension handles the new grip level - it absolutely needs more spring, but doesn't drive badly by any means. Still need to push my braking way deeper, was hoping to work on that Sunday as well. The aero difference is pretty impressive when topless - I'm almost 5mph down despite 10-20 hp gain and more grip out of turn 10.
Originally Posted by __clu
Looking good! Glad to see the update. Might I suggest a head and neck restraint to round out the current safety equipment?
Thanks. Yes, a HANS has been on my mind recently. I think it's one of, if not the next big purchase for this car.
All 8 intake valves looked like this. Completely destroyed. Numerous people have reported destroying intake valves or seats in VVT heads when adding RPM on a stock valvetrain, but I don't think that happened here.
I measured all of the volvo valve springs after the teardown on a digital spring tester and they hadn't changed measurably. I don't have the numbers handy, but they have very similar seat pressure and spring rate as the Supertech heavy double springs. That's a lot more spring than stock. Rev limiter only at 7500 still. Not the typical valve float issue? 3 track hours, 1500 miles on the head. Took it to a different machine shop and our best assessment was that the last shop cut one of the angles wrong. Seats were wide and surprisingly unworn.
Anyway, had the intake seats reground and put new valves in it. 500 miles and an autocross on the new, new head, and it's running extremely strong.
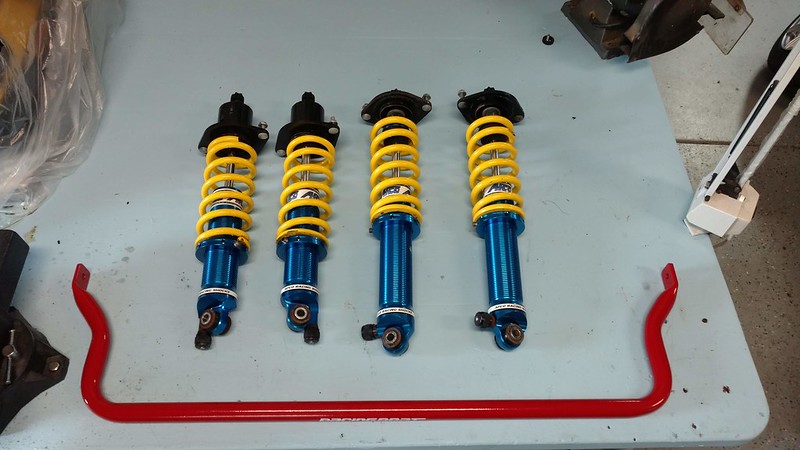
In other news, decided to finally spend some money getting the handling right.
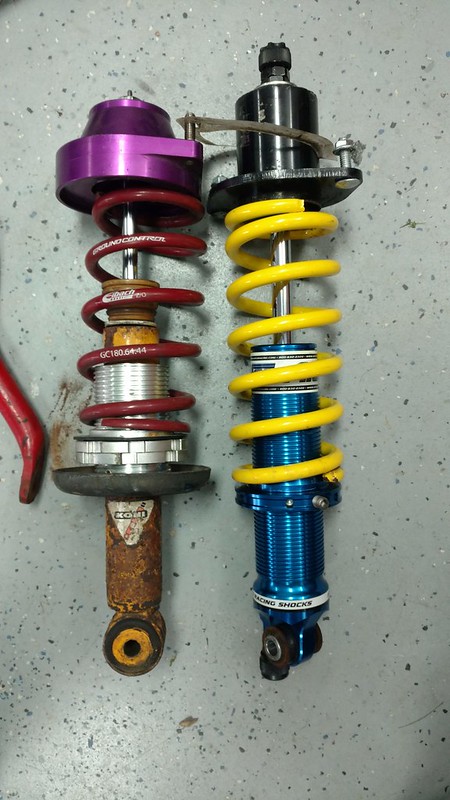
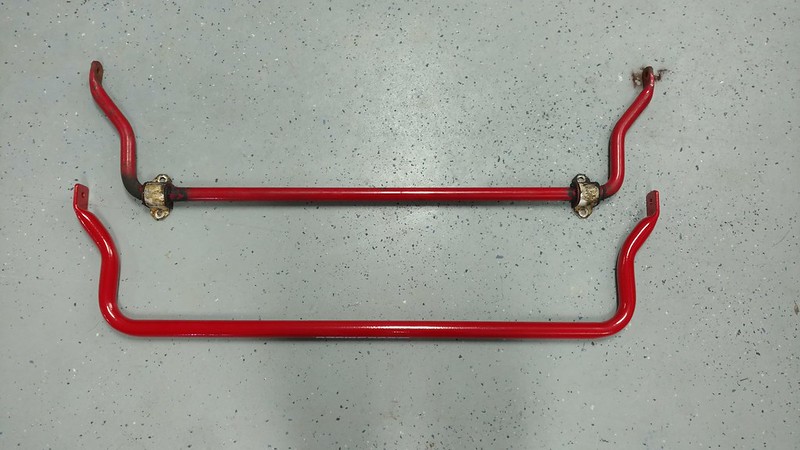
Scored these AFCOs for a very reasonable price from a local guy. Stock 550/375 rates, an improvement. RB 1.125x.125 front sway kit showed up in the mail too! The car has still been wearing the PO's 15/16" solid front and 16mm solid rear bars all this time. It's not as loose as the internet would have you believe, but I wanted to get closer to the recommended front roll stiffness bias to give me more confidence to throw the car into turns and trail brake on track. I'll stick with the 16mm rear on the soft setting for now.
Also added an oil temp sensor to my PLX wideband/gauge setup, and wired it into the MS3 for logging. Expect to see an oil cooler install this winter...
Now it's September and I've done two whole events... Gonna try to hit them hard this fall. Already registered for Track Night in America at NJMP Lightning next week, and NASA at Dominion next weekend. If all goes well, I REALLY want to make it to VIR with NASA on Oct 6-7. And then the NASA Fall Finale at Summit.
So I just fell on this thread and I love what you have done so far! Great work! also more interested in the mariner but thats because i also have one and it is on bronze jongbloeds. But keep it up!!
So I just fell on this thread and I love what you have done so far! Great work! also more interested in the mariner but thats because i also have one and it is on bronze jongbloeds. But keep it up!!
Hey, thanks! I REALLY wanted bronze Jongbloeds for this car, actually, but they haven't been in stock in a year! Post up a pic of yours! I've been collecting a few fun parts for a different themed build on the smurf, but it's slow progress. I'll get to a thread on it eventually, all it's gotten this year is a MS2 which has really woken it up!
Anyway, build thread update time again.
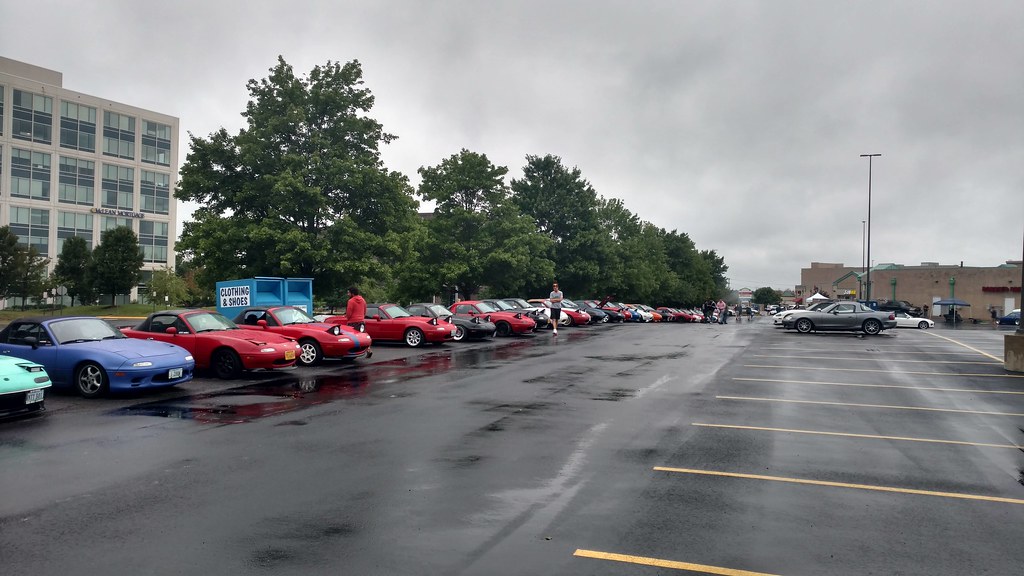
I'm not a regular at the DMV Miatas group meets due to distance, but I went to the yearly Mid-Atlantic Miata Expo this year.
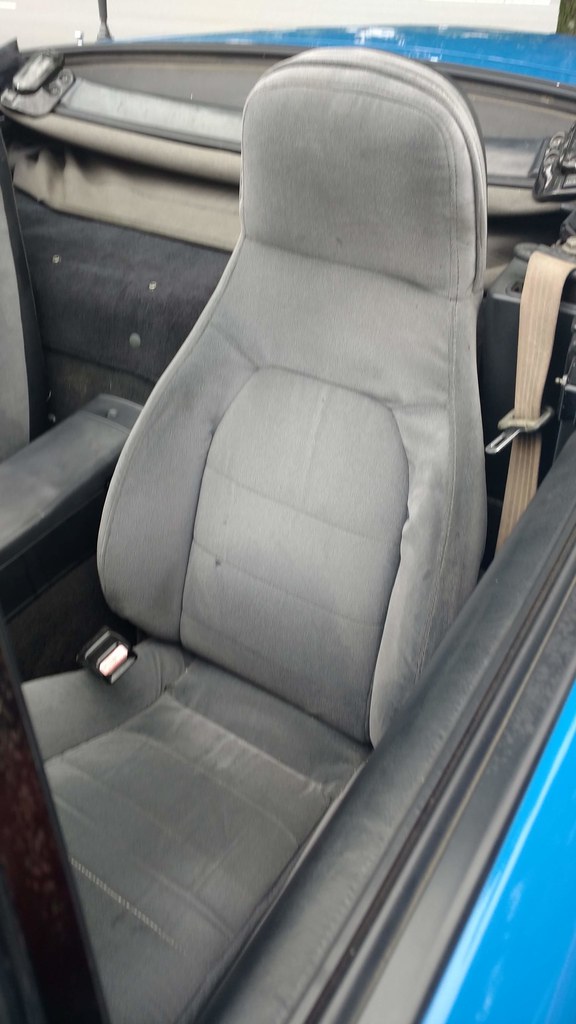
It rained, but was still really great to meet a bunch of you guys and see some internet famous cars. There's a lot of little creative things people do that you notice in real life, but not online. Like these seats covered in my parents' old sofa from 1992.
CLEAN. I like this, and I hate grey cars.
Then I went back to NJMP Lightning. It rained. It also lightninged, so I didn't get to drive. Boo.
Then I went to the new Dominion Raceway in Virginia for the first time! It rained, a lot. I drove all 8 sessions though. I think I had more grip than most on the RS4s, but it was an exercise in car control either way. One dry session each day for a chance to really feel the track out. It's a really fun course - better than I was expecting after hearing a lot of mediocre feedback from others. The walls are pretty intimidating though, I'll give it that. Overall, it's good but not worth driving the same distance as Summit...
With a couple hours on the motor, I went ahead and signed up for NASA's Oktoberfast at VIR! I've been wanting to get here for a long time. Left straight from work on Friday and the 300 mile drive took 7 hours thanks to DC traffic. With ear plugs, the car is still totally livable on the street.
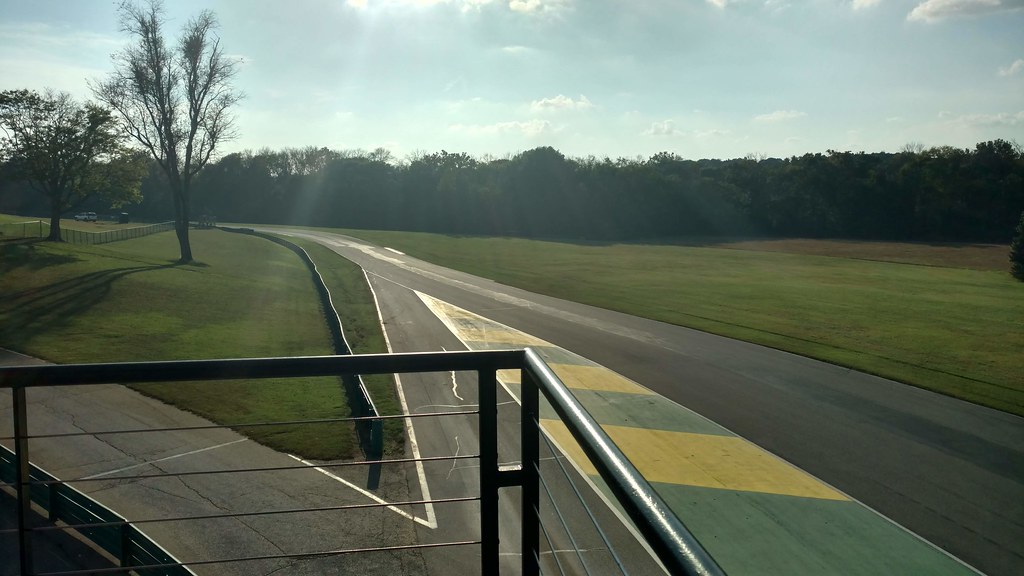
What a fantastic facility. VIR absolutely blows everything else in the DMV out of the water. The property is beautiful, the course is phenomenal, I love it. And it didn't rain!
The car was great other than one major problem - on my very first hot lap, the LF brake line blew out going into 1. I made it most of the way through the braking zone before the pedal went straight to the floor. So, I almost made the turn but went off sideways and looped it in the dirt. Frightening, but fairly low speed by the time I was actually off. Extremely grateful this happened in a good spot, and while I was still going very slow. And not at Dominon! Also fortunately, none other than Rossini themselves were there with piles of spares so I could get back on track... and home. Missed two sessions because of this. The car already had braided lines from the PO that looked in fair condition, but I didn't know their true age so really should have replaced them. Needless to say, new Supermiata lines are already sitting in my garage. Many lessons were learned here.
Other than that, the car did fantastic. The engine ran great without a single tweak to the tune needed. The AFCOs are a huge upgrade, the body is much more controlled and precise. Balance is much better with the bigger front bar. I'm done with Hawk pads and tried something different in the front with lower friction - they felt really nice with the extra pressure required but I had too much rear bias with the hawks still out back. Replacements for those parts are also waiting to go in.
A ~2:22 lap was one of my better ones. I was leaving a lot on the table, mostly on the brakes, but the 6 hour drive home was heavy in the back of my mind the rest of the weekend. Still an absolute blast going flat through the esses in 5th, and carving down the rollercoaster. Lots of good clean action in DE3 this time too!
One more event this year - Fall Finale at Summit next month! I also need to get the car back on a dyno, both to see what I built, and what it might take to get this thing eligible for TT.
Solid thread, good read, also jealous of all the tracks you're hitting. I'm getting ready to build a motor and I'm definitely dreading those first couple hundred miles, sucks that you had to do everything more than once, but good job keeping at it.
Now just drive the **** out of it, cheers.
EDIT: Also if you need help planning for TT, post here and I can help with classing.

 03-18-2018, 11:26 PM


 0
0


 I think you can be thankful that you stopped when you did and have an engine that appears to be mostly (thrust?) salvageable for a re-rebuild.