
A beginners DIY journey to ITB/Turbo


Thread Starter
Junior Member
Joined: Dec 2014
Posts: 46
Total Cats: 13
Im Will,
A long time lurker, second post ever. My first post was on a hunt for finding something that doesn't exist, and for good reason (Psht, see noobness here: https://www.miataturbo.net/diy-turbo...-flange-86517/). I had no idea what I was doing, and definitely needed to do the almighty research.
I have never had much of a plan or direction for the car, I just wanted to make it fun to drive and do all of it in my garage.
1994 1.8l, previously owned and driven into the ground by a clutch kicking couple. I bought it late 2014 so I didn't drive it much. Winter of 14/15 it got suspension components and the ITB's. As well as all of the cosmetic stuff. Summer of 15 I took it to a ton of auto crosses and one hometown drift event for fun. This winter was a big push to make some power since it already has control.
So Ill start at the beginning, and dump a ton of pics because that's my favorite part about forums... If you have any questions feel free to ask.
There are video links scattered throughout. Ive compiled them here.
Miata first start: http://vid1219.photobucket.com/album...331_205937.mp4
Miata first drive: http://vid1219.photobucket.com/album...401_180746.mp4
Miata lunch break: http://vid1219.photobucket.com/album...40174561_n.mp4
Manifold time lapse: http://vid1219.photobucket.com/album...02058928_n.mp4
340whp Civic: http://vid1219.photobucket.com/album...s/GOPR3008.mp4
340whp build thread: http://www.d-series.org/forums/showc...ld-thread.html
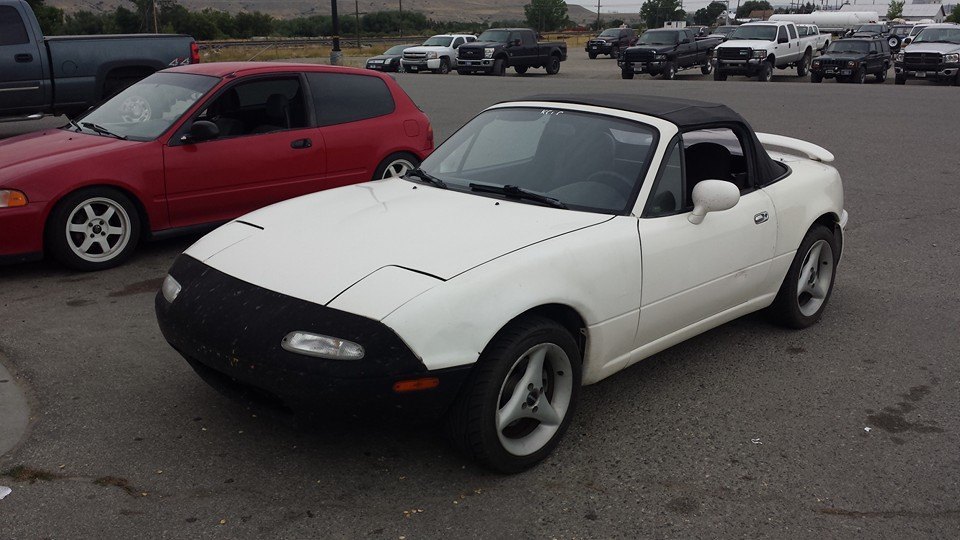
The day I bought it. August 4, 2014. (Note my 340whp 1.6l civic(I sold it to fund more Miata fun though))
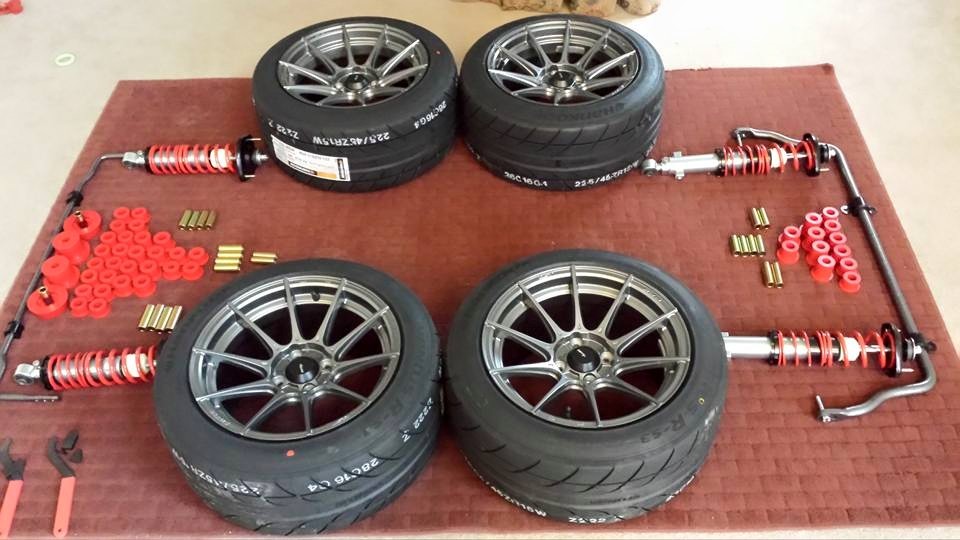
Order of business numero uno... Control
15x9 Advanti Storm S1's, 225 R-S3's
FM Vmaxx Extreme Sport pack w/ sways
Full poly bushings
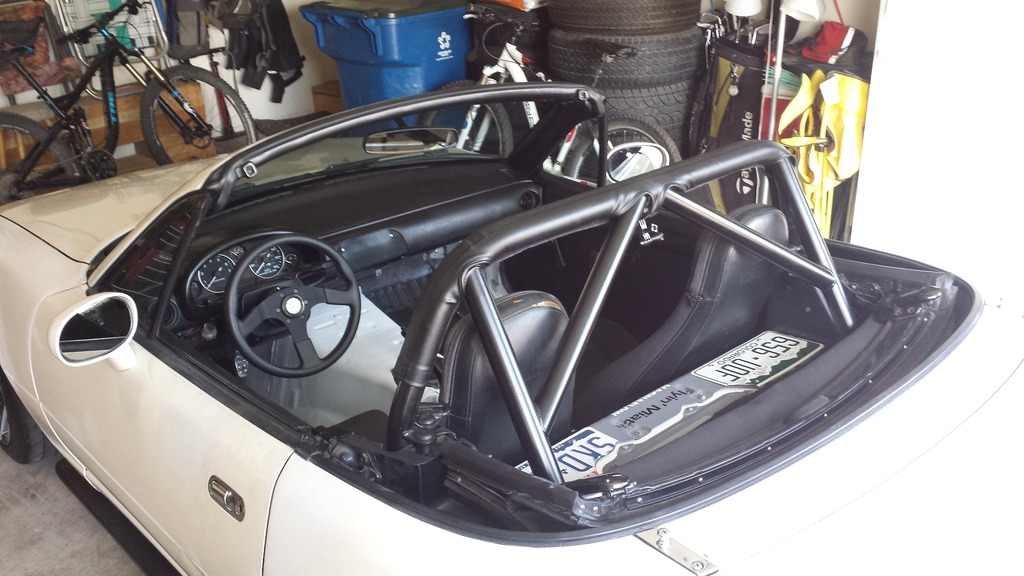
Then some safety with a HDHCHTDD.
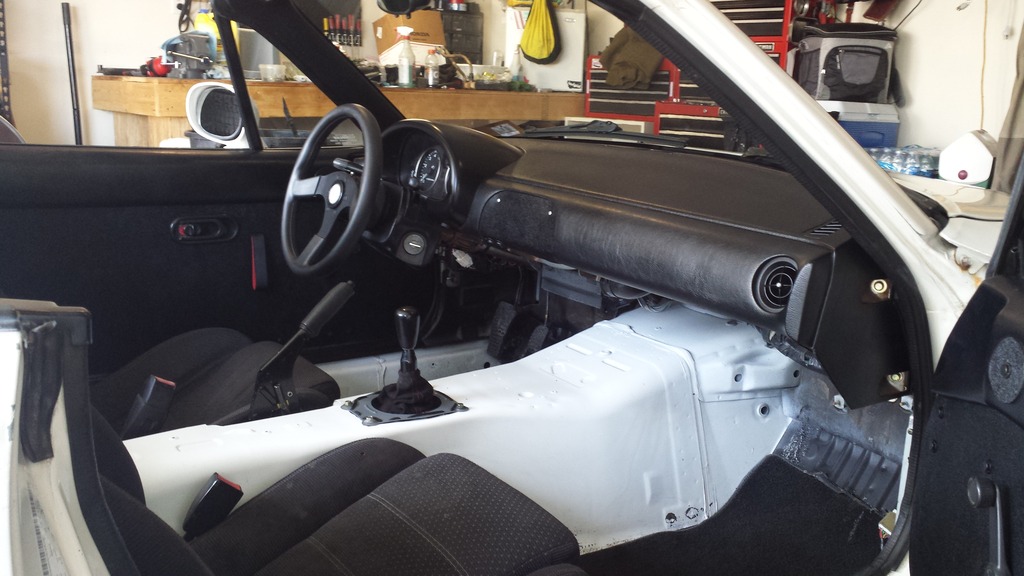
I also always liked the look of the 1.6 dash, so when a friend of mine decided to junk her NA (also previously owned by the clutch kickers) I tossed in a few bucks for a ton of spare parts.
Thought number one for power...
Supercharged ITB Miata. But I decided not to mess with a ton of throttles bodies and syncing them.

Then this came... 6758. But Im not going to use it. After doing all that research I decided to take some advice and shoot for a low hp setup.

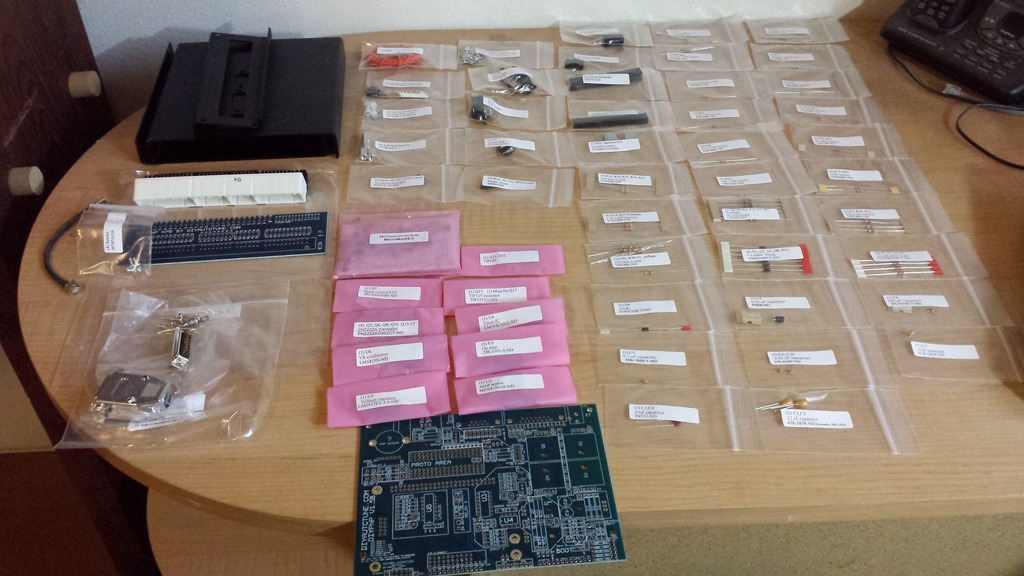
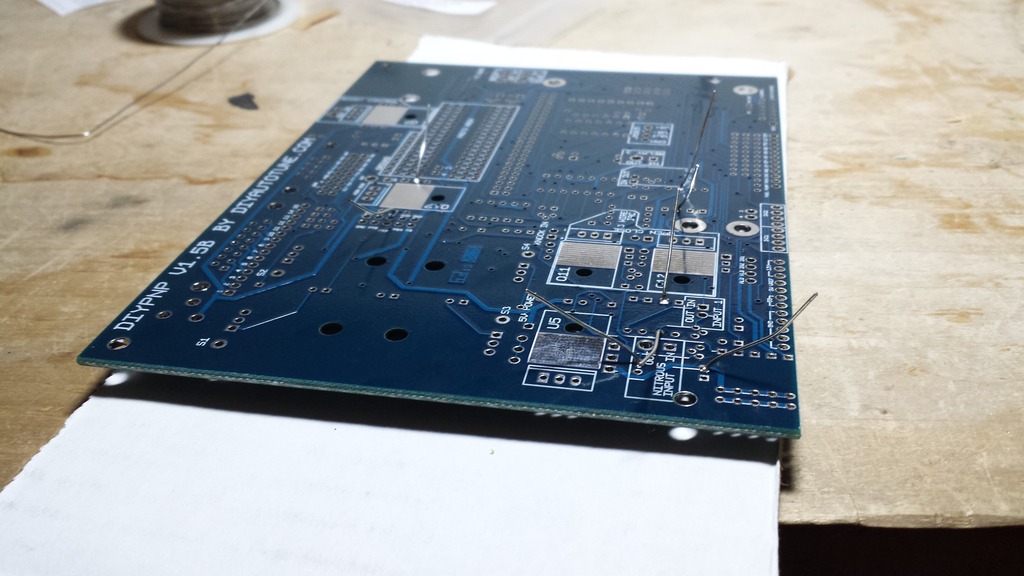
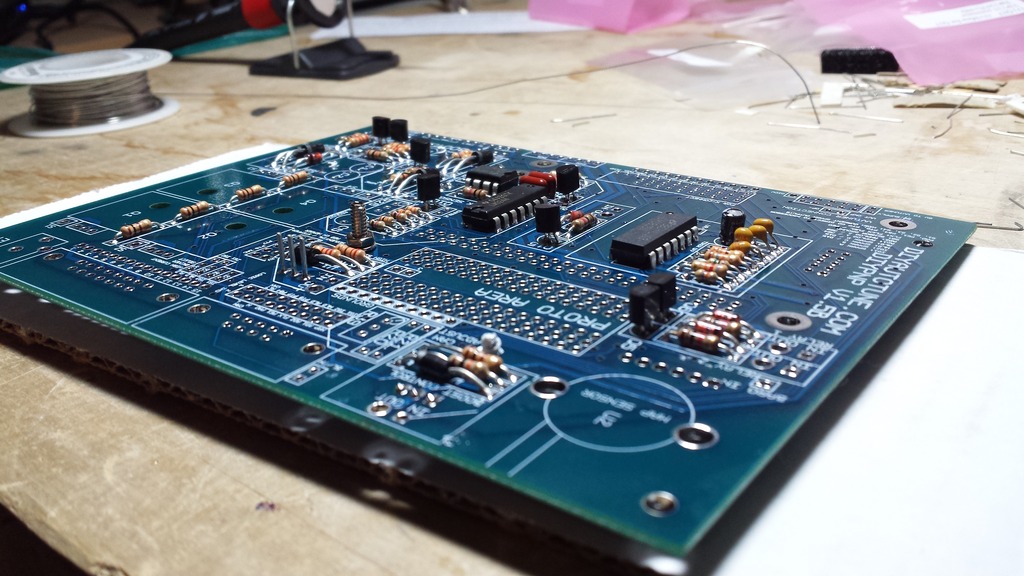
Had to control it, so ordered this jazz.
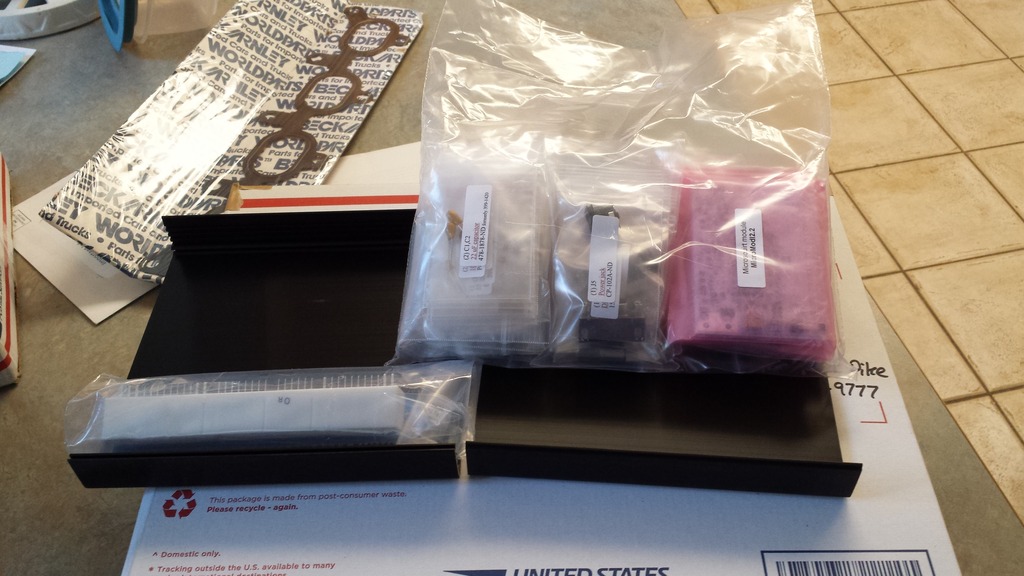
And put it together.
A long time lurker, second post ever. My first post was on a hunt for finding something that doesn't exist, and for good reason (Psht, see noobness here: https://www.miataturbo.net/diy-turbo...-flange-86517/). I had no idea what I was doing, and definitely needed to do the almighty research.
I have never had much of a plan or direction for the car, I just wanted to make it fun to drive and do all of it in my garage.
1994 1.8l, previously owned and driven into the ground by a clutch kicking couple. I bought it late 2014 so I didn't drive it much. Winter of 14/15 it got suspension components and the ITB's. As well as all of the cosmetic stuff. Summer of 15 I took it to a ton of auto crosses and one hometown drift event for fun. This winter was a big push to make some power since it already has control.
So Ill start at the beginning, and dump a ton of pics because that's my favorite part about forums... If you have any questions feel free to ask.
There are video links scattered throughout. Ive compiled them here.
Miata first start: http://vid1219.photobucket.com/album...331_205937.mp4
Miata first drive: http://vid1219.photobucket.com/album...401_180746.mp4
Miata lunch break: http://vid1219.photobucket.com/album...40174561_n.mp4
Manifold time lapse: http://vid1219.photobucket.com/album...02058928_n.mp4
340whp Civic: http://vid1219.photobucket.com/album...s/GOPR3008.mp4
340whp build thread: http://www.d-series.org/forums/showc...ld-thread.html
The day I bought it. August 4, 2014. (Note my 340whp 1.6l civic(I sold it to fund more Miata fun though))

Order of business numero uno... Control
15x9 Advanti Storm S1's, 225 R-S3's
FM Vmaxx Extreme Sport pack w/ sways
Full poly bushings

Then some safety with a HDHCHTDD.

I also always liked the look of the 1.6 dash, so when a friend of mine decided to junk her NA (also previously owned by the clutch kickers) I tossed in a few bucks for a ton of spare parts.

Thought number one for power...
Supercharged ITB Miata. But I decided not to mess with a ton of throttles bodies and syncing them.

Then this came... 6758. But Im not going to use it. After doing all that research I decided to take some advice and shoot for a low hp setup.

Had to control it, so ordered this jazz.

And put it together.


Last edited by wpapallo; Apr 15, 2016 at 04:18 AM.
Reply
 2
2

2
Thread Starter
Junior Member
Joined: Dec 2014
Posts: 46
Total Cats: 13


And it worked!!!

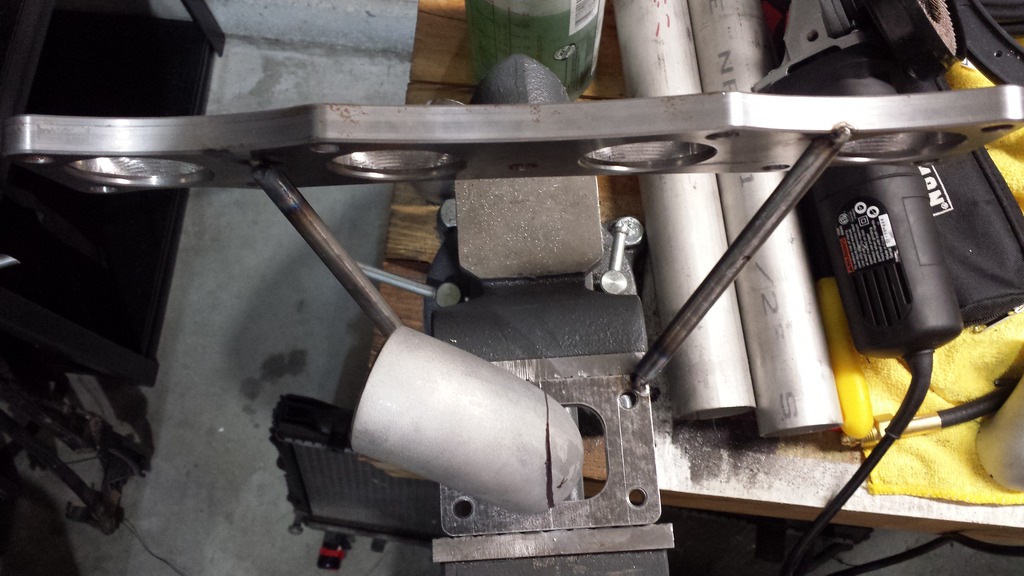
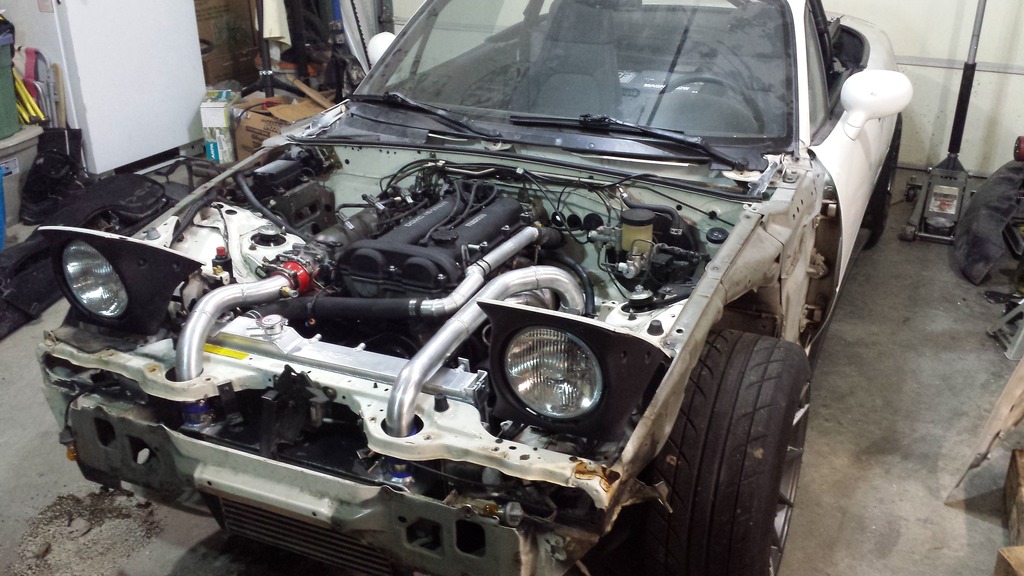
Then this stuff came in. I have to say, for a diy it worked... But Id be pissed if I had to install this as an installer. There weren�t enough relief cuts for hardware on the flange and the vacuum line nipples are directly in the way of the lower studs. But whatever, it worked.

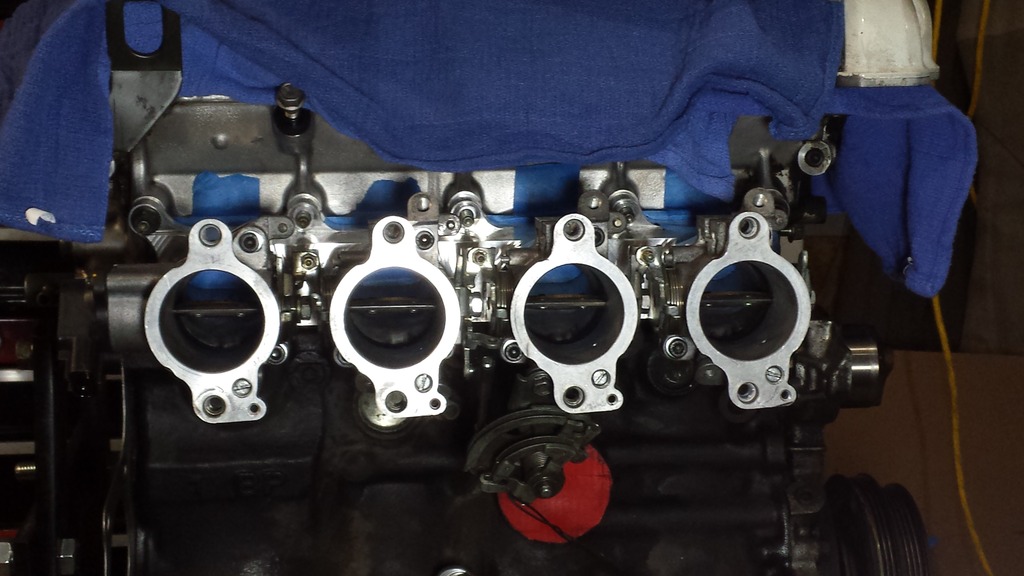
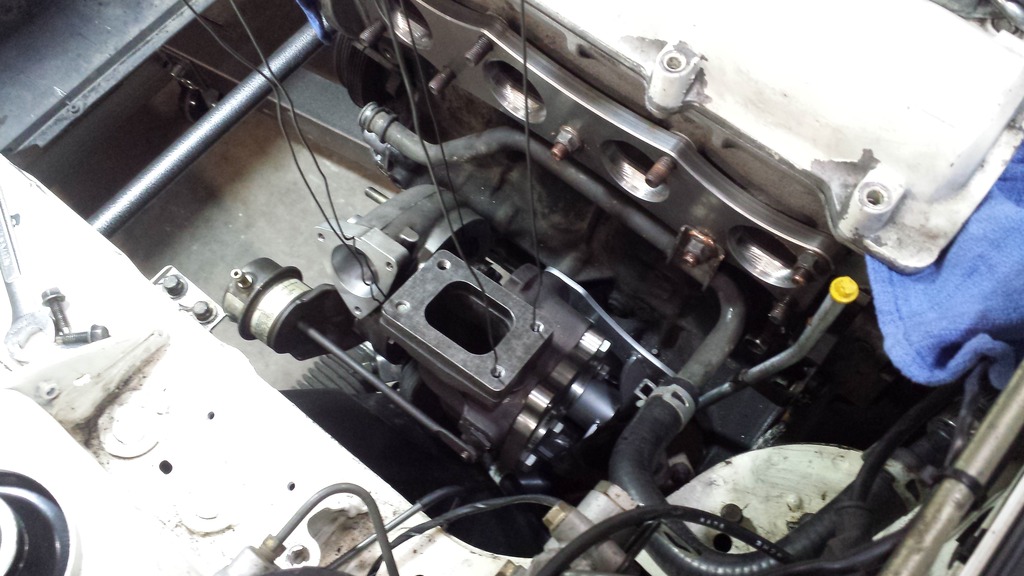
The ITB's I scored were AE111's. The flange was made for AE101's. So I went to Harbor Freight and borrowed a compressor for a bit. Top pic courtesy of T3.

On, the sound neat.

Car didn�t come with AC. I did a proper depowerd rack PS delete, and if it wasnt obvious by the dash pic I got rid of all the HVAC.

And one of my first rollers with it setup to FM recommendations for ride height and alignment. Note the eBay lip and sweet wavy ebay skirts.

######
Reply
0
0
Thread Starter
Junior Member
Joined: Dec 2014
Posts: 46
Total Cats: 13
First day autocrossing it in Helena Montana.
The previous clutch kicking owner taking a ride in it for the first time after a year of it being in my possession.
The front fenders are full of bondo, and every panel has a different color white on it. So I cut em up for style points. Ive got a fresh set of fenders on the shelf, but paint and body is way down on the list.
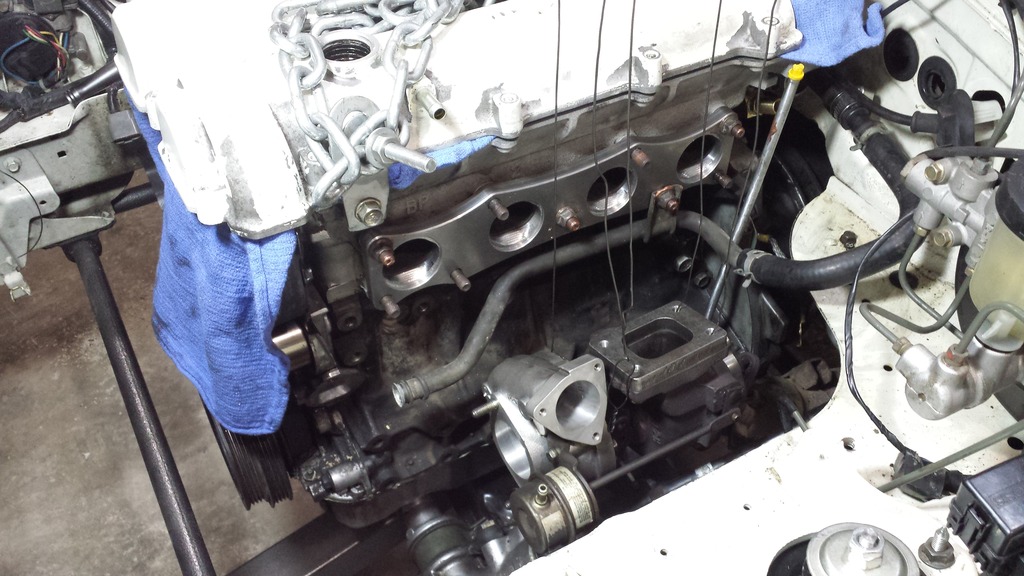
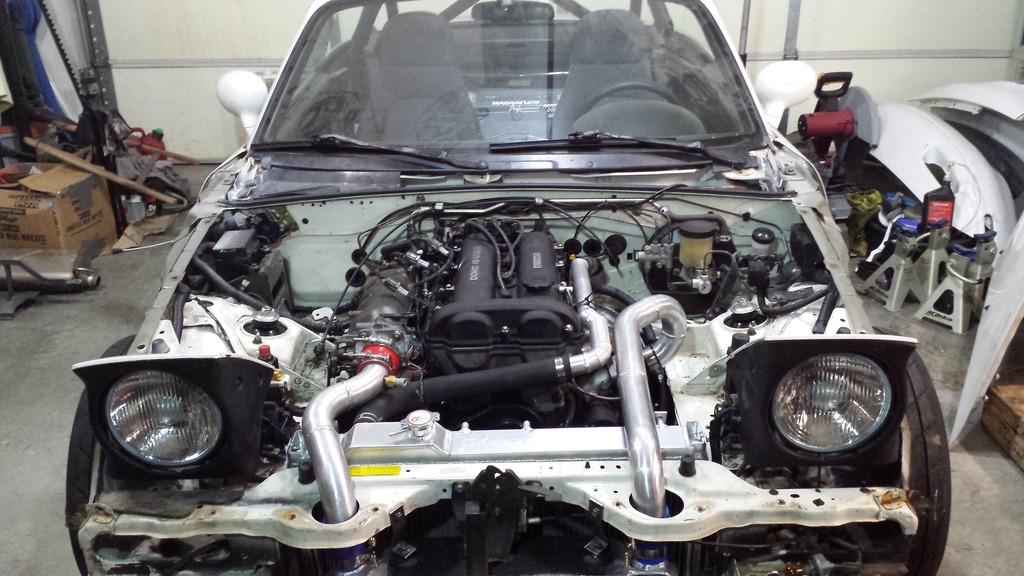
Another AE111 pic when the motor was out. Details on why it was out further down...
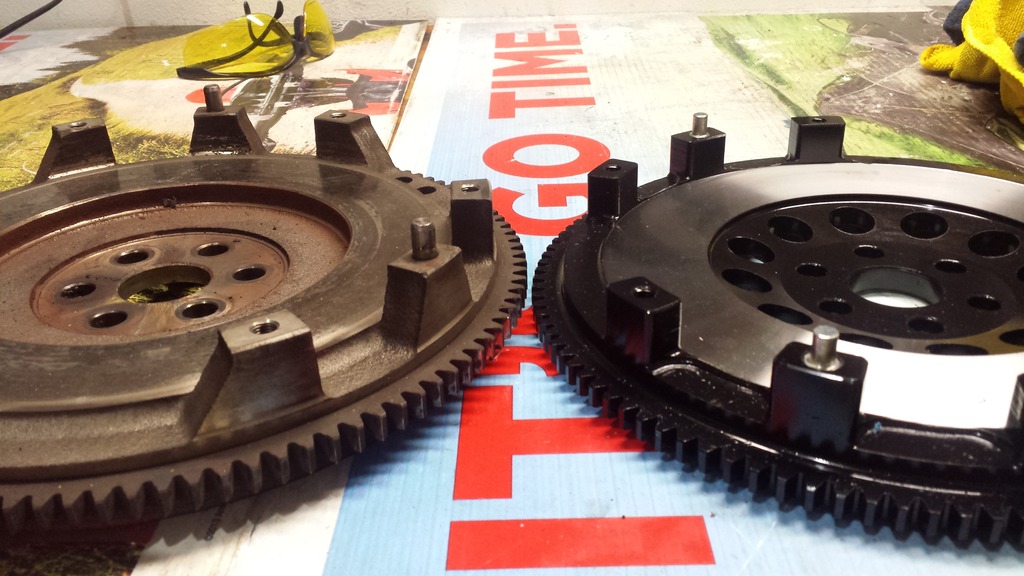
One of them there lighter flywheels. This has been my first car with a lightened flywheel. Its definitely a different driving style, but the rev matching for downshifts is much smoother and doesnt seem to unsettle the suspension as much.
Most of these pics are in no particular order. Im literally just going through my photobucket frame by frame and posting em up.
Mmmm, that EFR
Then I started amassing large quantities of things.

Time for some words from the fabricator.
So I basically dove into this head first. I saw lots of different ways to buy the skinned cat, but I like skinning those little ***** myself. Last year I tig welded for the first time at work. I work for the local police department. I am the fleet manager for a ~70 vehicle fleet. The kicker is that I also do all the maintenance as well and fabrication needed. Ill post up a few of those fabrication pics before I go on with my own project. They were my practice after all.
Project number one with the tig was a computer base.

Next I mass produced some mounts for the cameras that face into the rear cage of the patrol vehicles.
######

The previous clutch kicking owner taking a ride in it for the first time after a year of it being in my possession.

The front fenders are full of bondo, and every panel has a different color white on it. So I cut em up for style points. Ive got a fresh set of fenders on the shelf, but paint and body is way down on the list.
Another AE111 pic when the motor was out. Details on why it was out further down...

One of them there lighter flywheels. This has been my first car with a lightened flywheel. Its definitely a different driving style, but the rev matching for downshifts is much smoother and doesnt seem to unsettle the suspension as much.

Most of these pics are in no particular order. Im literally just going through my photobucket frame by frame and posting em up.
Mmmm, that EFR

Then I started amassing large quantities of things.

Time for some words from the fabricator.
So I basically dove into this head first. I saw lots of different ways to buy the skinned cat, but I like skinning those little ***** myself. Last year I tig welded for the first time at work. I work for the local police department. I am the fleet manager for a ~70 vehicle fleet. The kicker is that I also do all the maintenance as well and fabrication needed. Ill post up a few of those fabrication pics before I go on with my own project. They were my practice after all.
Project number one with the tig was a computer base.


Next I mass produced some mounts for the cameras that face into the rear cage of the patrol vehicles.

######
Reply
1
1
Thread Starter
Junior Member
Joined: Dec 2014
Posts: 46
Total Cats: 13
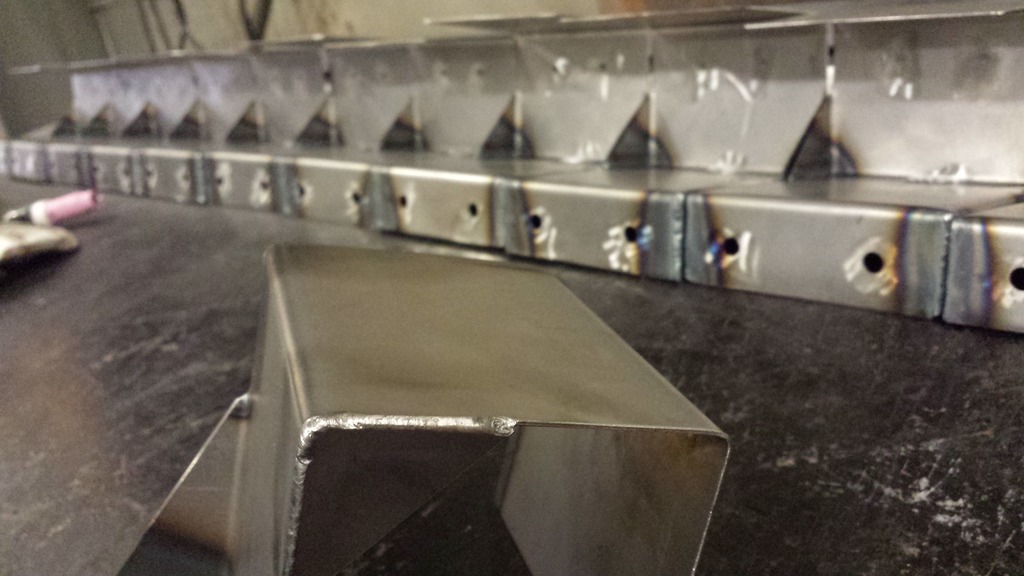
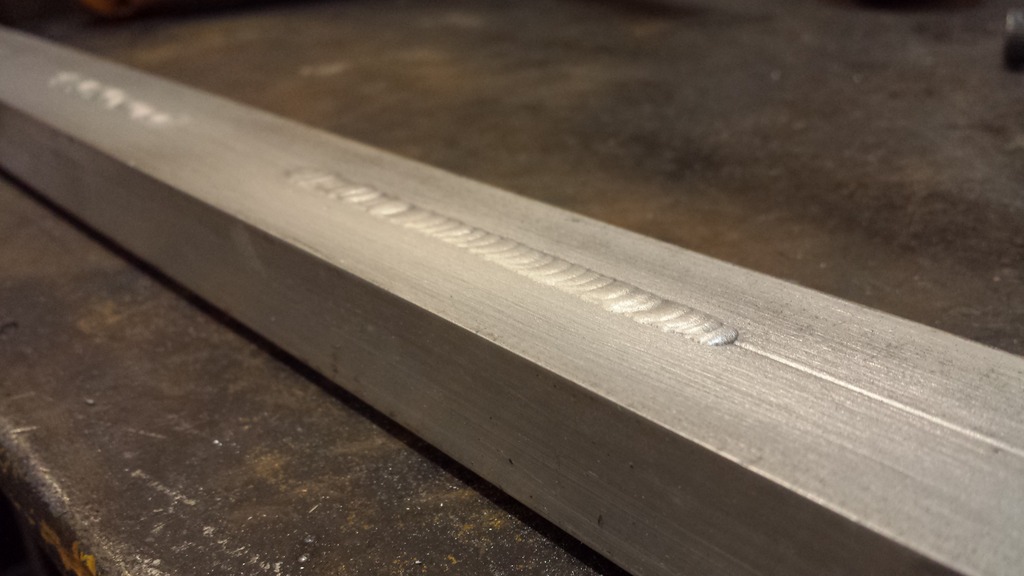
I dont have any good pics of this aluminum ramp I made for the new animal control truck I outfitted. But here was a weld from one of the center supports.
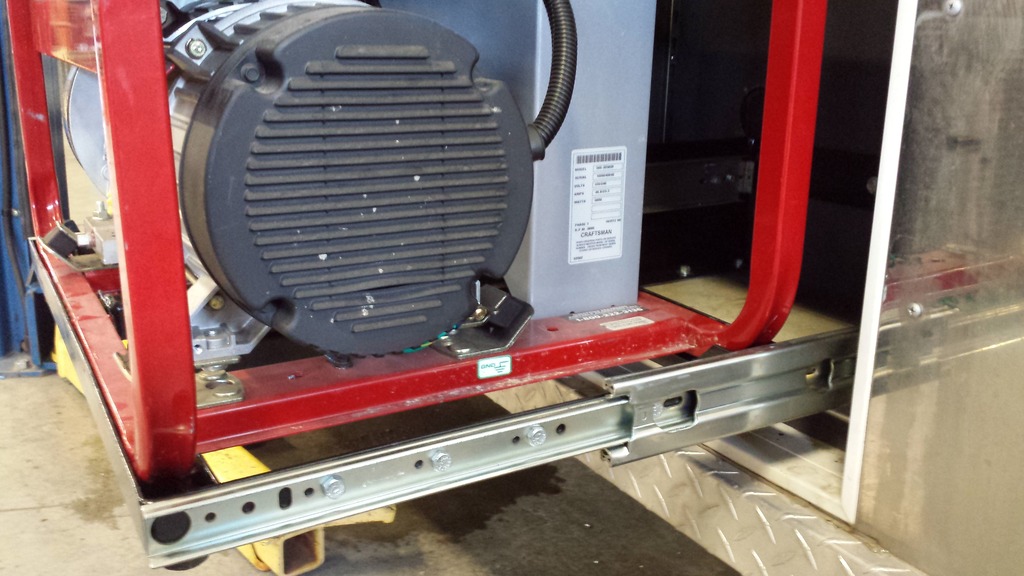
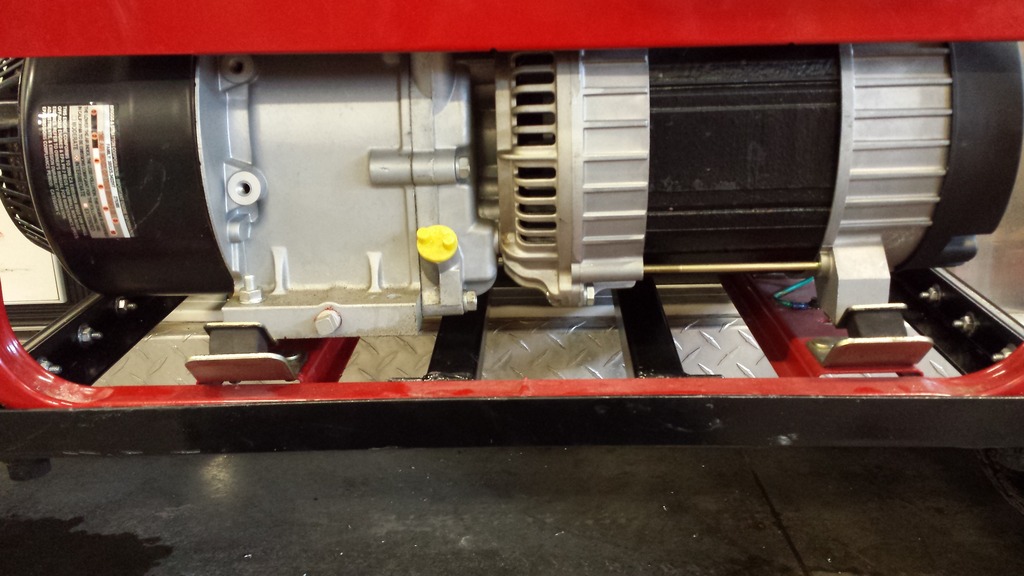
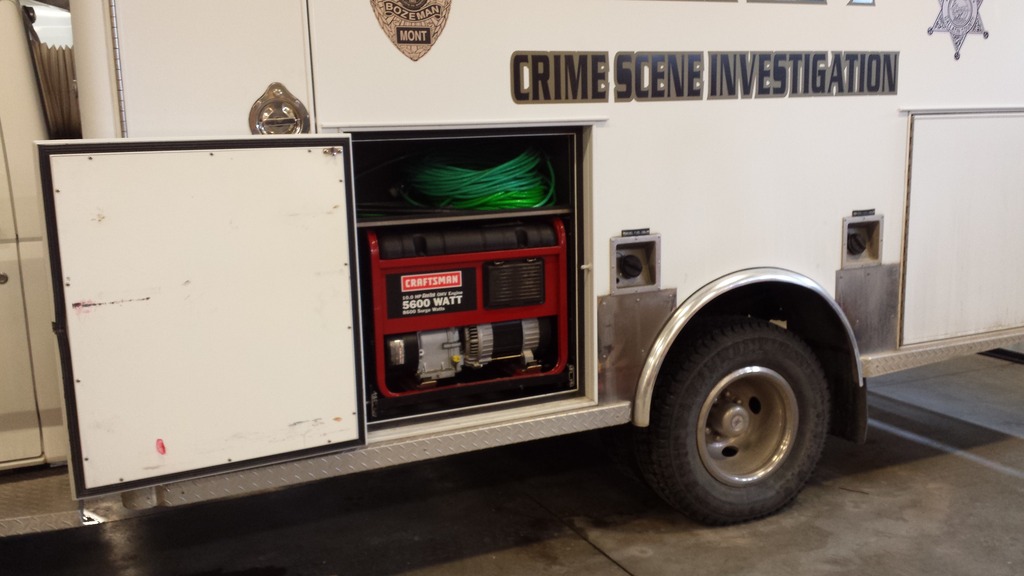
Then I made this rad slide out shelf for the generator on the CSI truck. The only thing I didn’t make were the actual ball bearing slides. This was all mig welded though... But the fabrication part was a god learning experience.

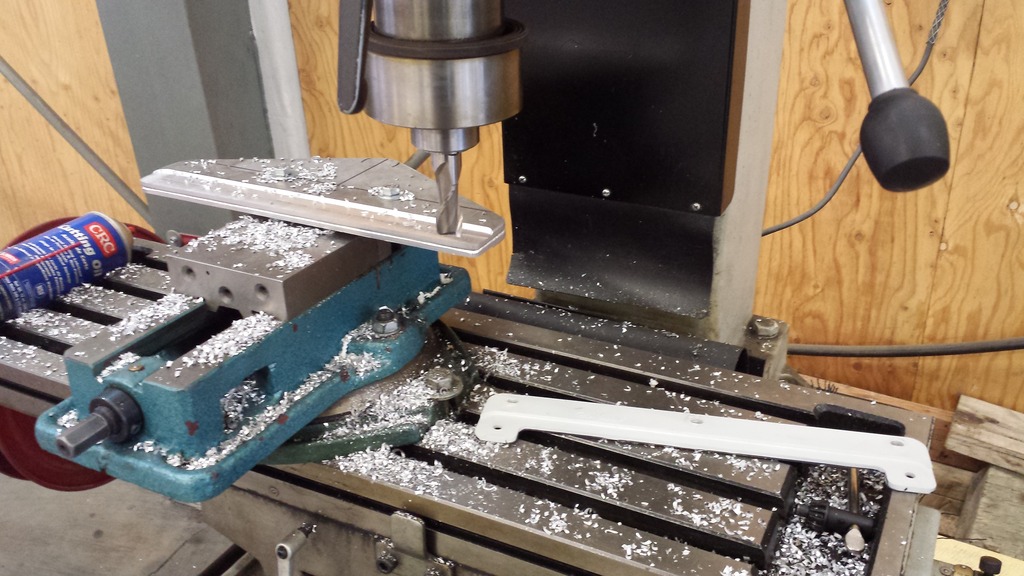
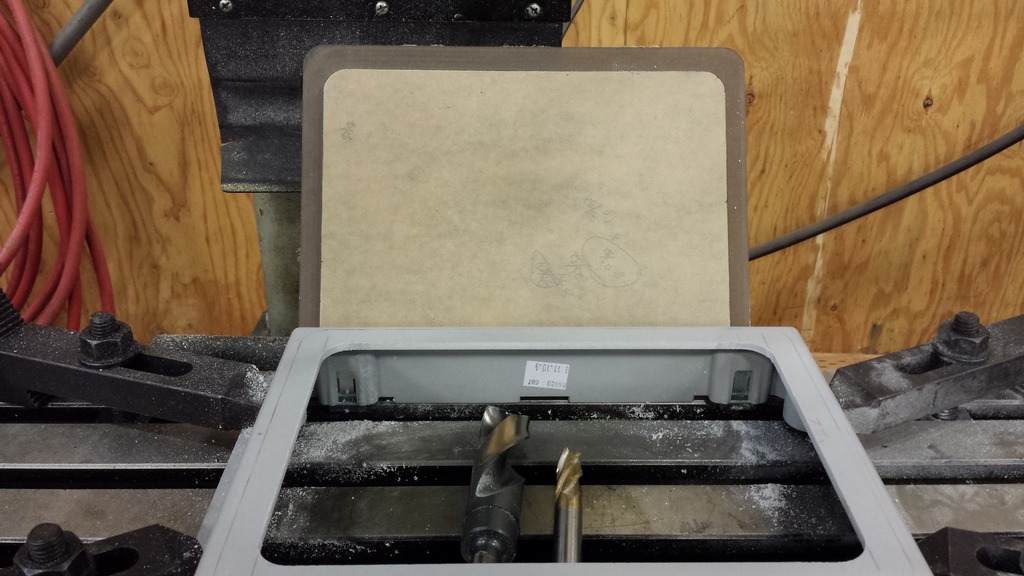
That was basically it for work projects that required welding. Then I got a couple projects that required me to try my hand with the mill. That was a lot of fun. The projects were easy, Im satisfied with the turnout.
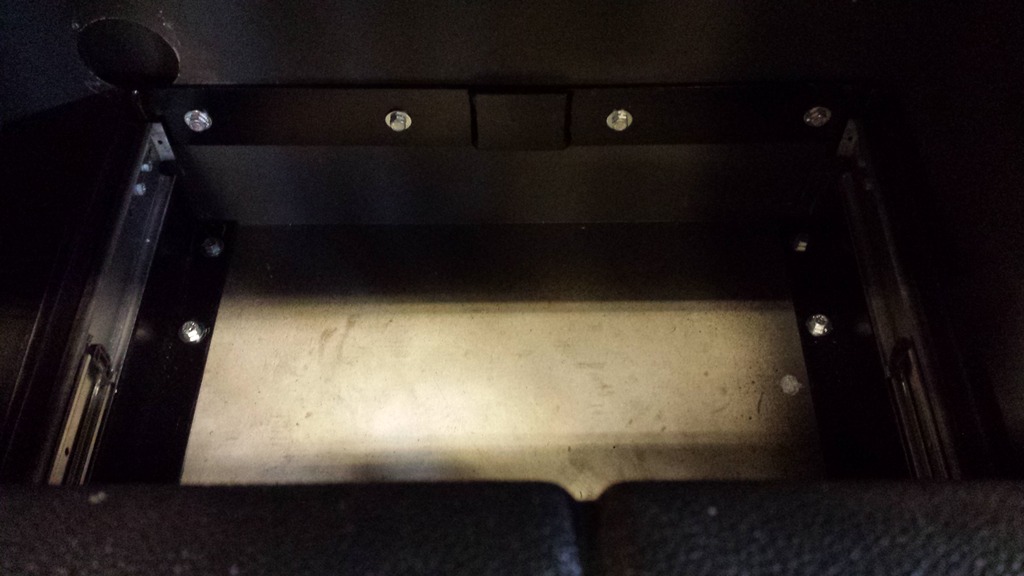
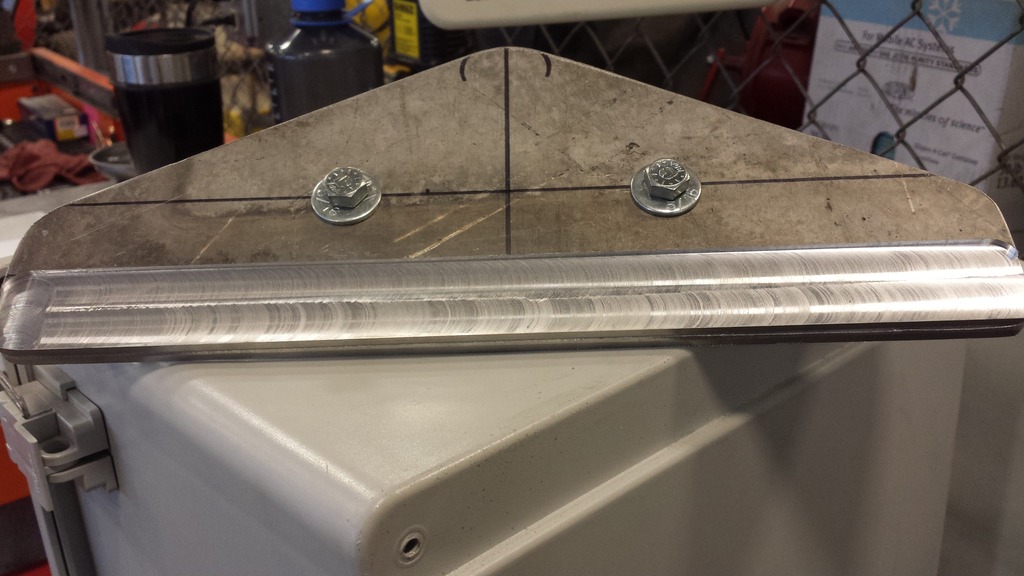
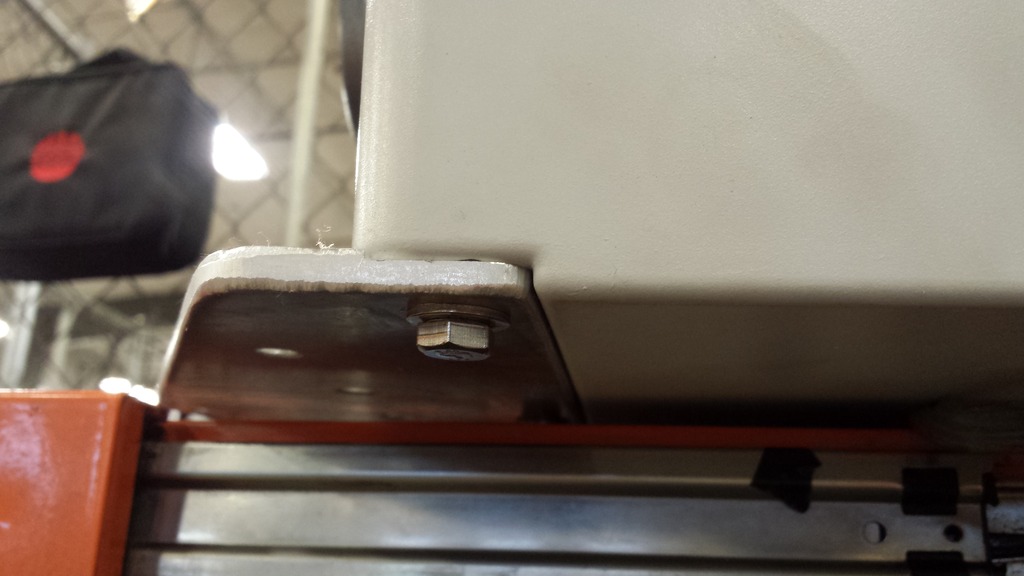
This is a bracket that holds a particular box in a particular spot, but the original plastic bracket didn’t hold up to the weather while placed atop a telephone pole.
######


Then I made this rad slide out shelf for the generator on the CSI truck. The only thing I didn’t make were the actual ball bearing slides. This was all mig welded though... But the fabrication part was a god learning experience.


That was basically it for work projects that required welding. Then I got a couple projects that required me to try my hand with the mill. That was a lot of fun. The projects were easy, Im satisfied with the turnout.
This is a bracket that holds a particular box in a particular spot, but the original plastic bracket didn’t hold up to the weather while placed atop a telephone pole.


######
Reply
0
0
Thread Starter
Junior Member
Joined: Dec 2014
Posts: 46
Total Cats: 13
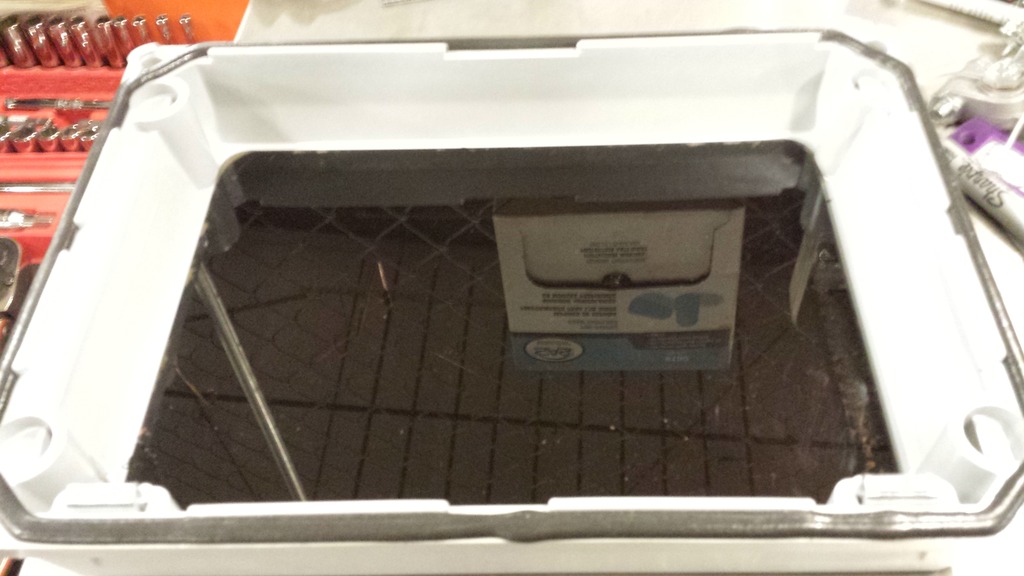
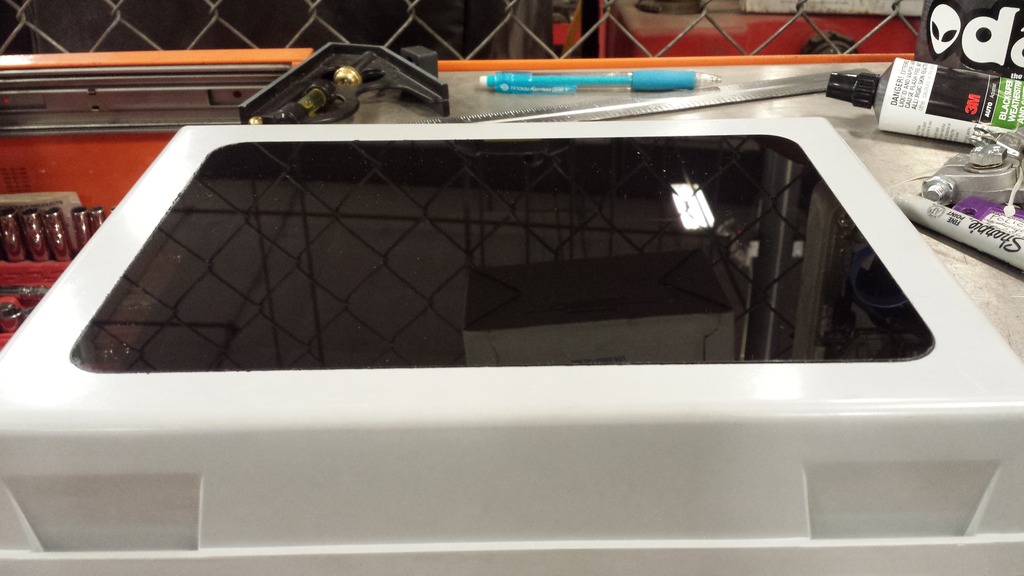
Next up was a similar box that required a tinted lexan window to be inlayed in the box as well as similar brackets made. The fitment turned out better than I expected. But then again as long as the work piece is square it should be easy. I had to use the 1” bit because the corners are a 1/2” radius and I didn’t have that large of an end mill.
So yeah, I have a light background of fabrication. I like to dabble...
Alright, back on track with the Miata stuff!
My DIY ABS door cards with red/black pull handles. They are actually bolted to the doors, not the cards.
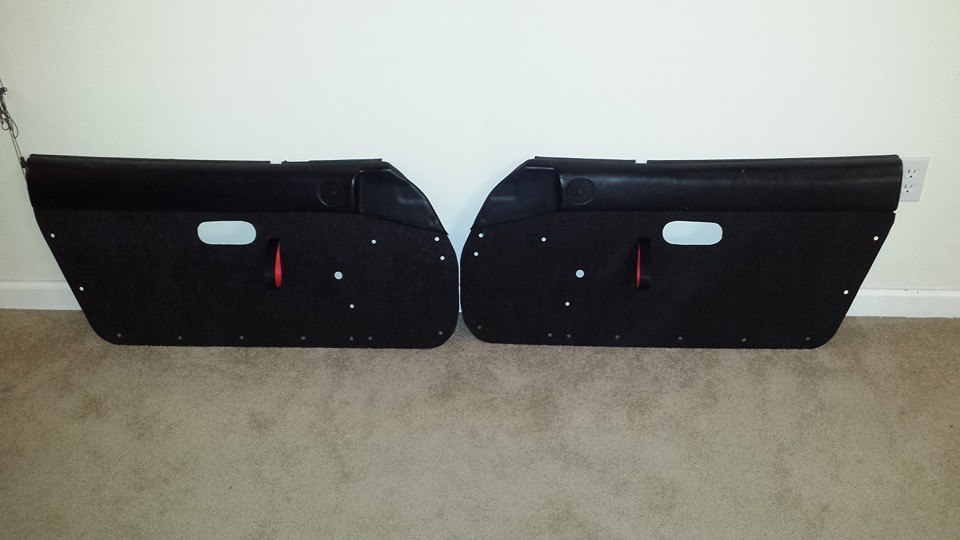
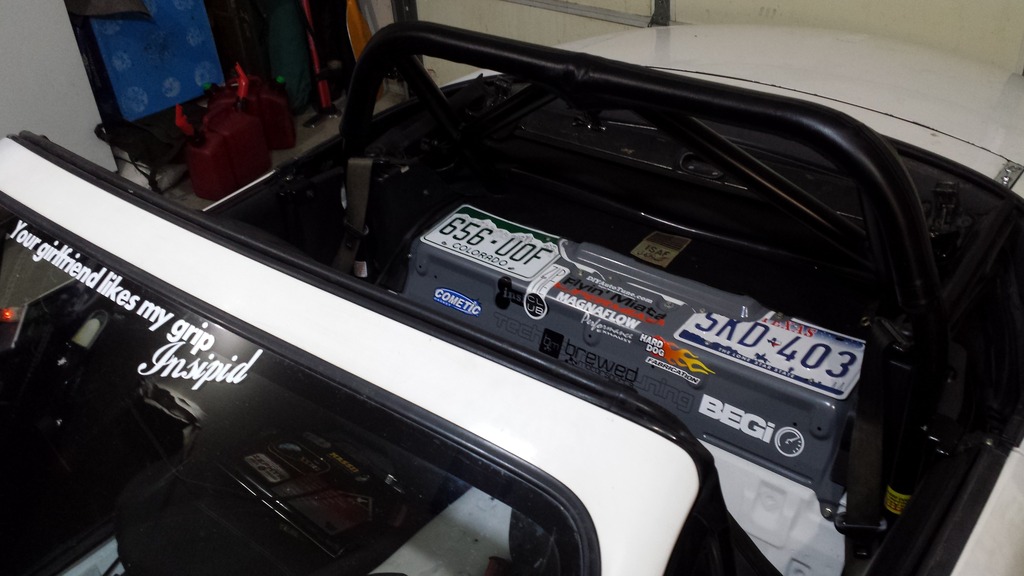
One of the past owners was a speaker guy. So there were huge holes in the package shelf. I tried getting a used one, but then a buddy gave me an idea to use license plates to cover the holes. Its my special spot for stickers now. (This car is in Montana, the plates are from when I was stationed in Colorado and Texas).
Here comes a pic dump!!!
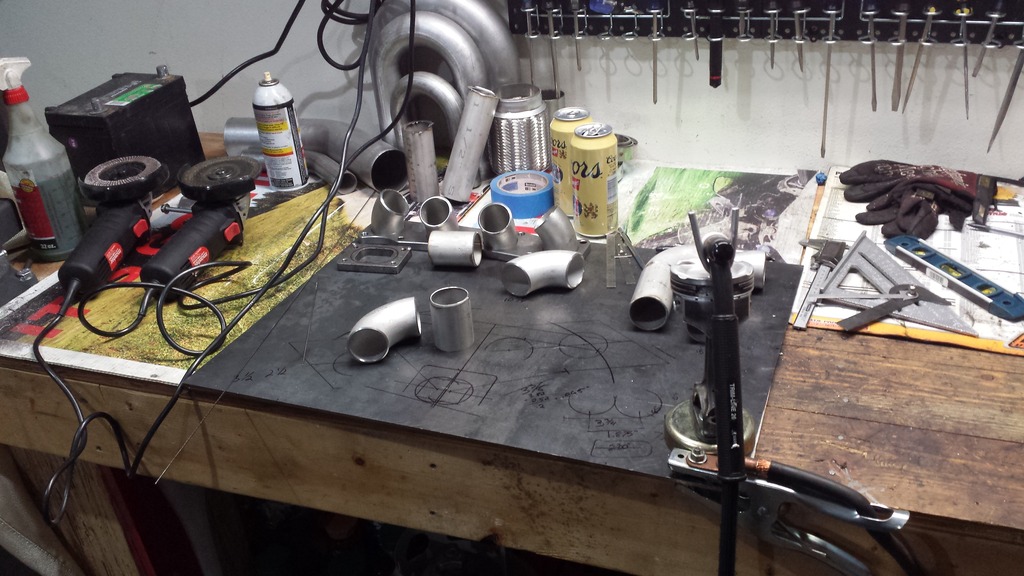
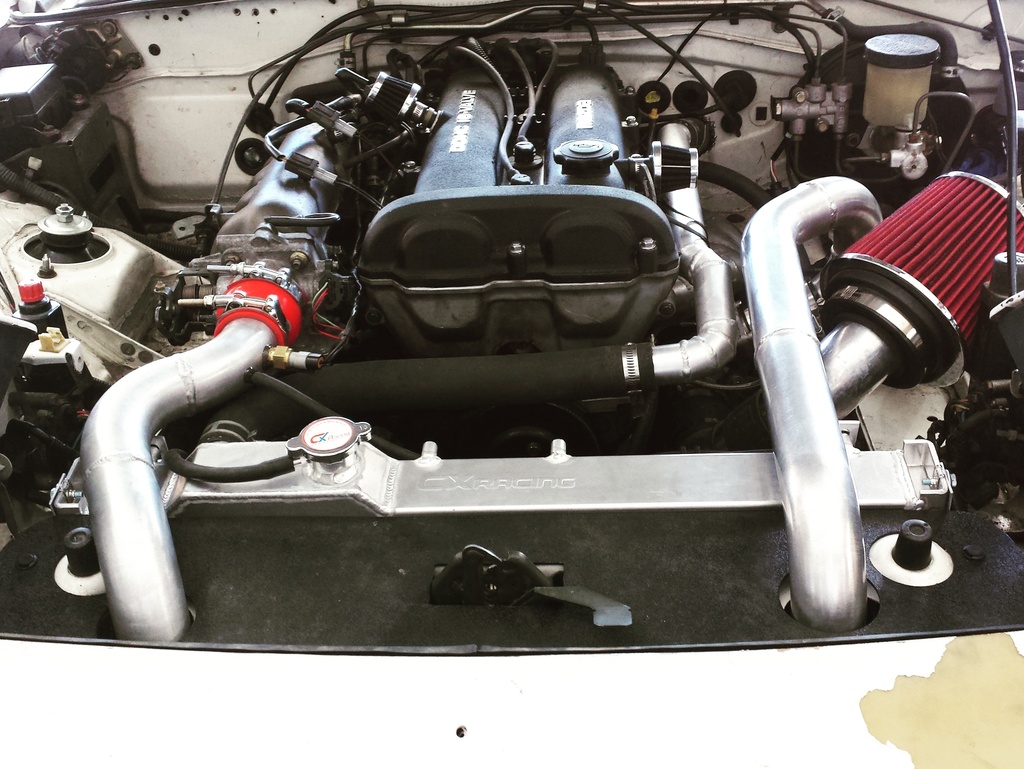
My manifold building process
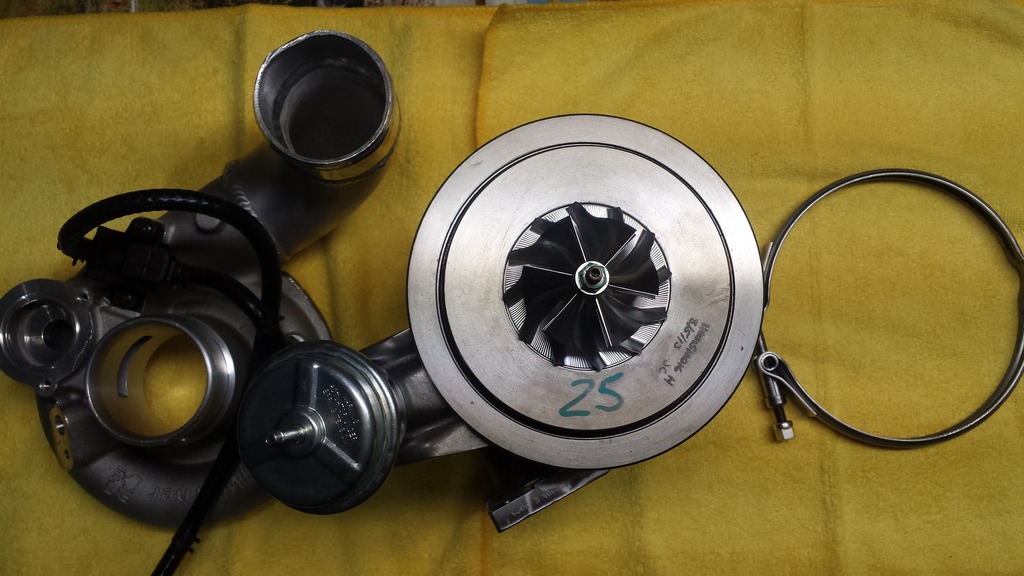
Refresher pic of parts used.
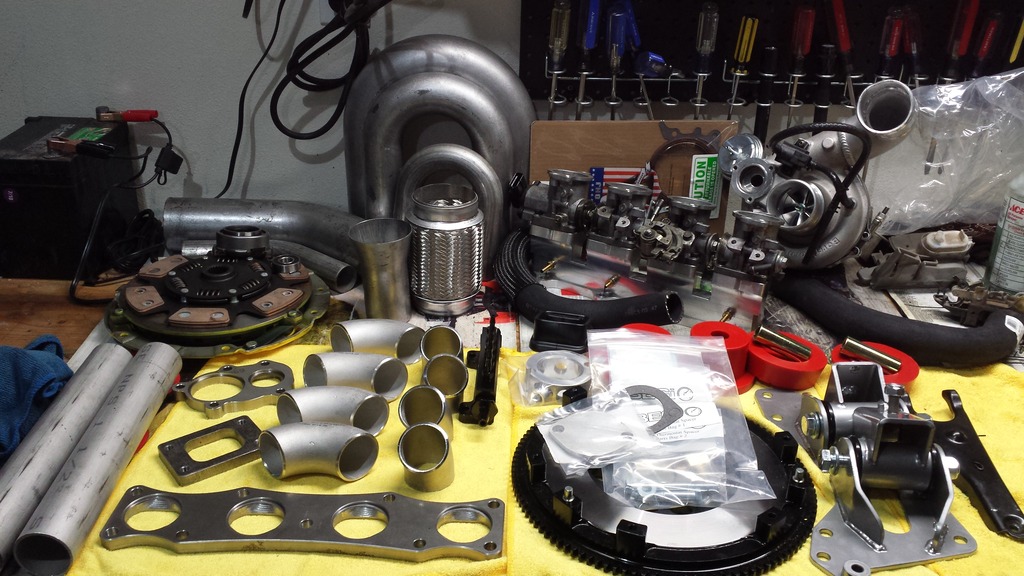
SR20 T25 is being used. The EFR is just too big for the current stock block.
######


So yeah, I have a light background of fabrication. I like to dabble...
Alright, back on track with the Miata stuff!
My DIY ABS door cards with red/black pull handles. They are actually bolted to the doors, not the cards.

One of the past owners was a speaker guy. So there were huge holes in the package shelf. I tried getting a used one, but then a buddy gave me an idea to use license plates to cover the holes. Its my special spot for stickers now. (This car is in Montana, the plates are from when I was stationed in Colorado and Texas).

Here comes a pic dump!!!
My manifold building process
Refresher pic of parts used.
SR20 T25 is being used. The EFR is just too big for the current stock block.


######
Reply
0
0
Thread Starter
Junior Member
Joined: Dec 2014
Posts: 46
Total Cats: 13
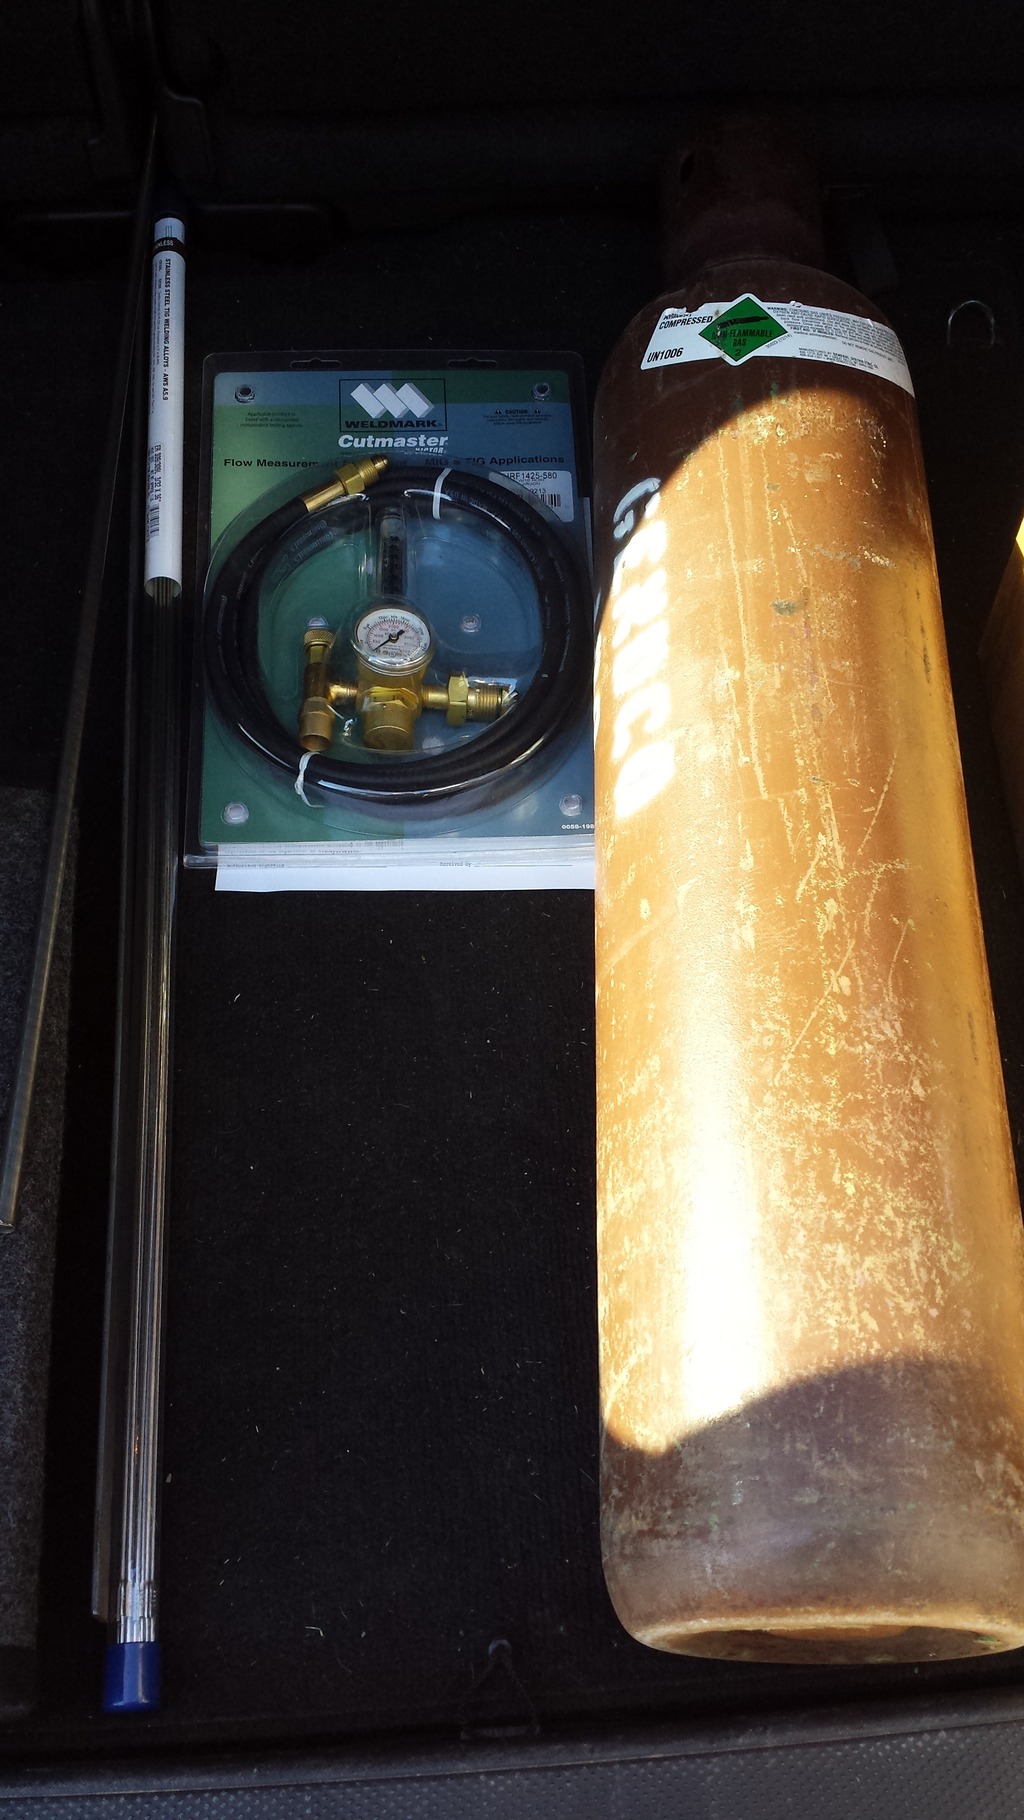
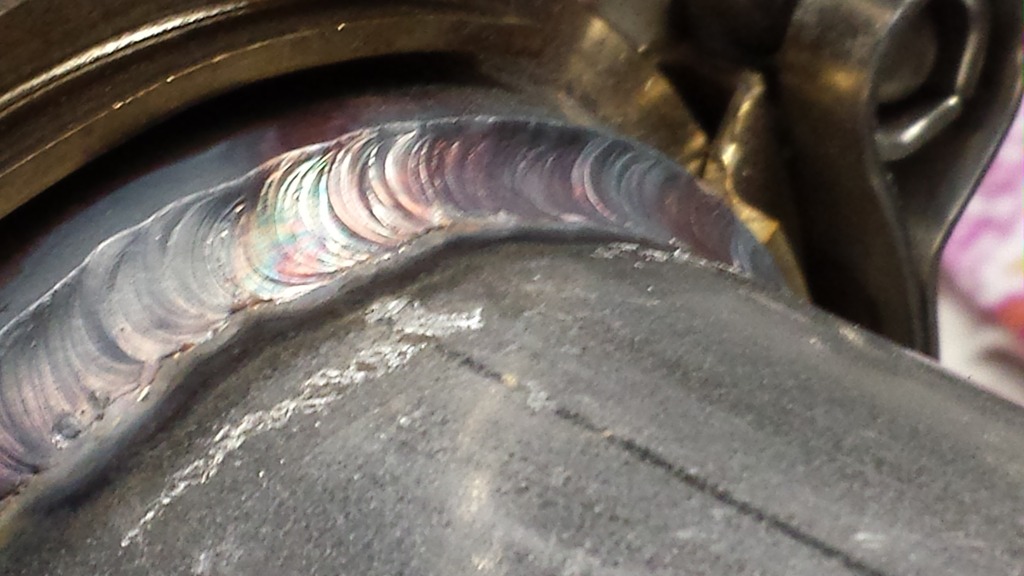
I actually bought a tig welder for this project. It was a used Thermal Arc TA185TSW. I outfitted it with a CKWorldwide Gass Lens Kit.
Second bottle and regulator for purge.
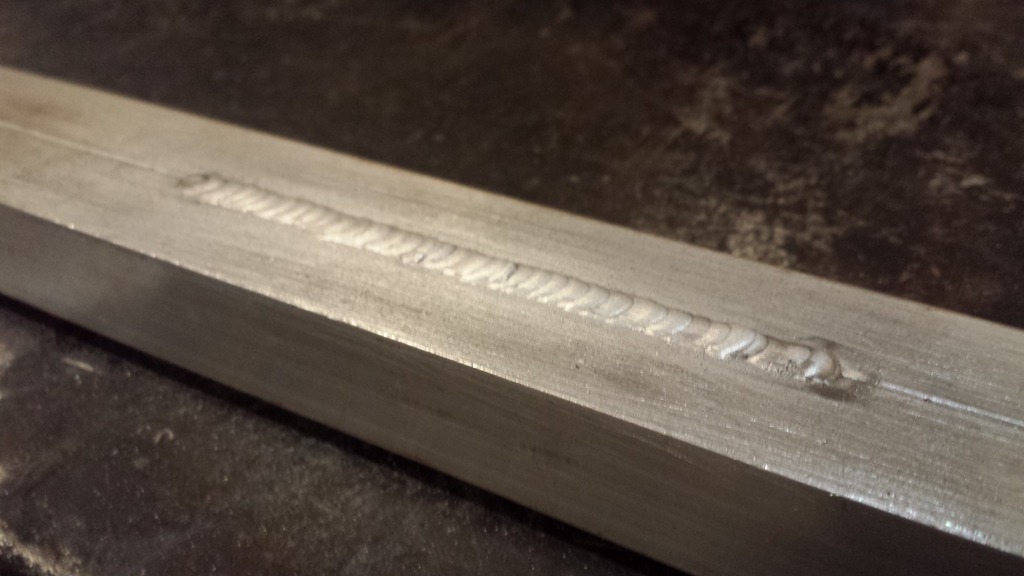
Starting out.
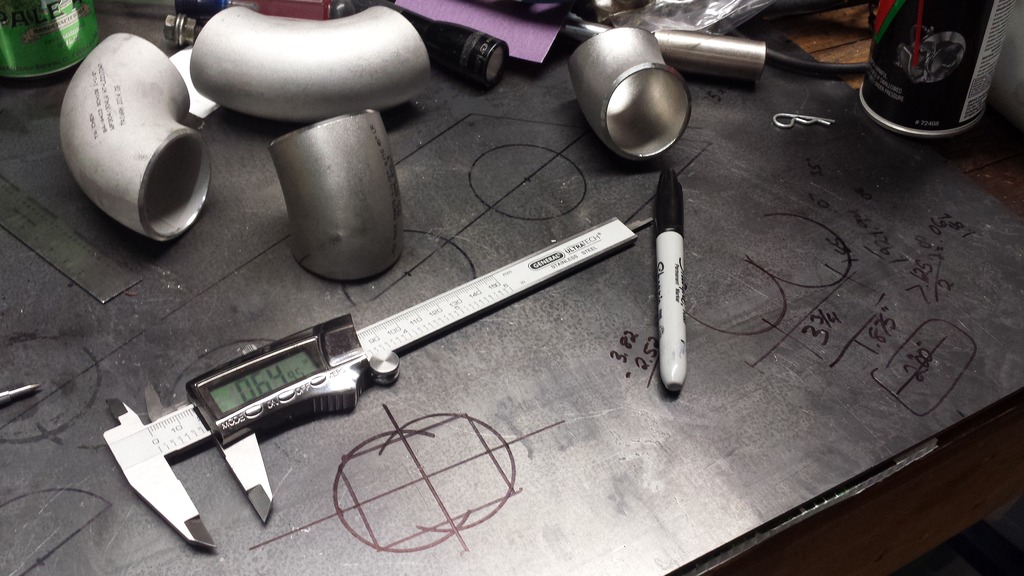
This was dumb, I ended up not using a jig like this. Instead I used a bit more math.

Took it apart, started with the math. (Lowest average grades I had in school were math, so I thought for sure I was doomed)
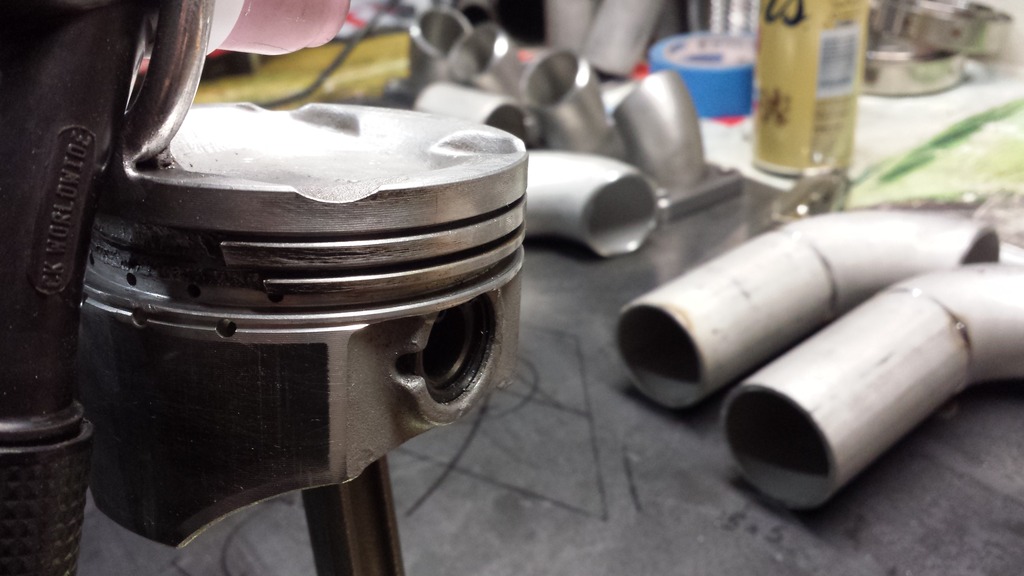
Started tacking things. My nifty tig torch holder I made out of a piston I broke a couple ring lands on.
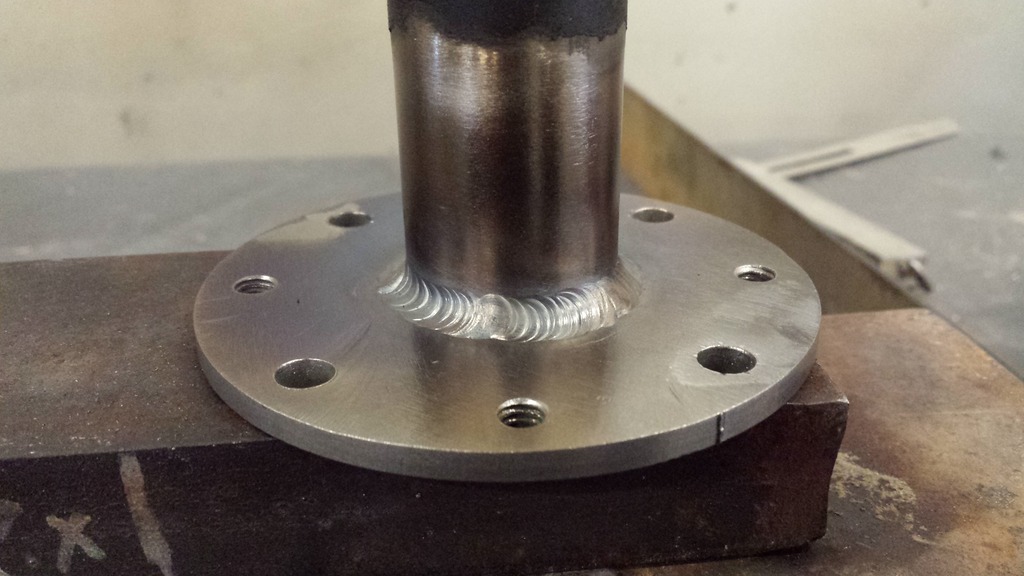
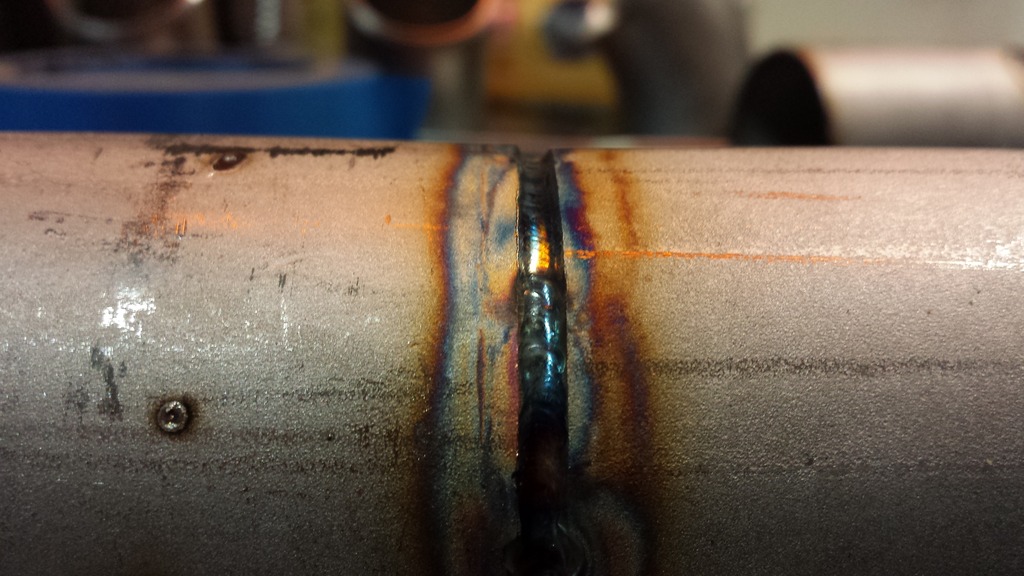
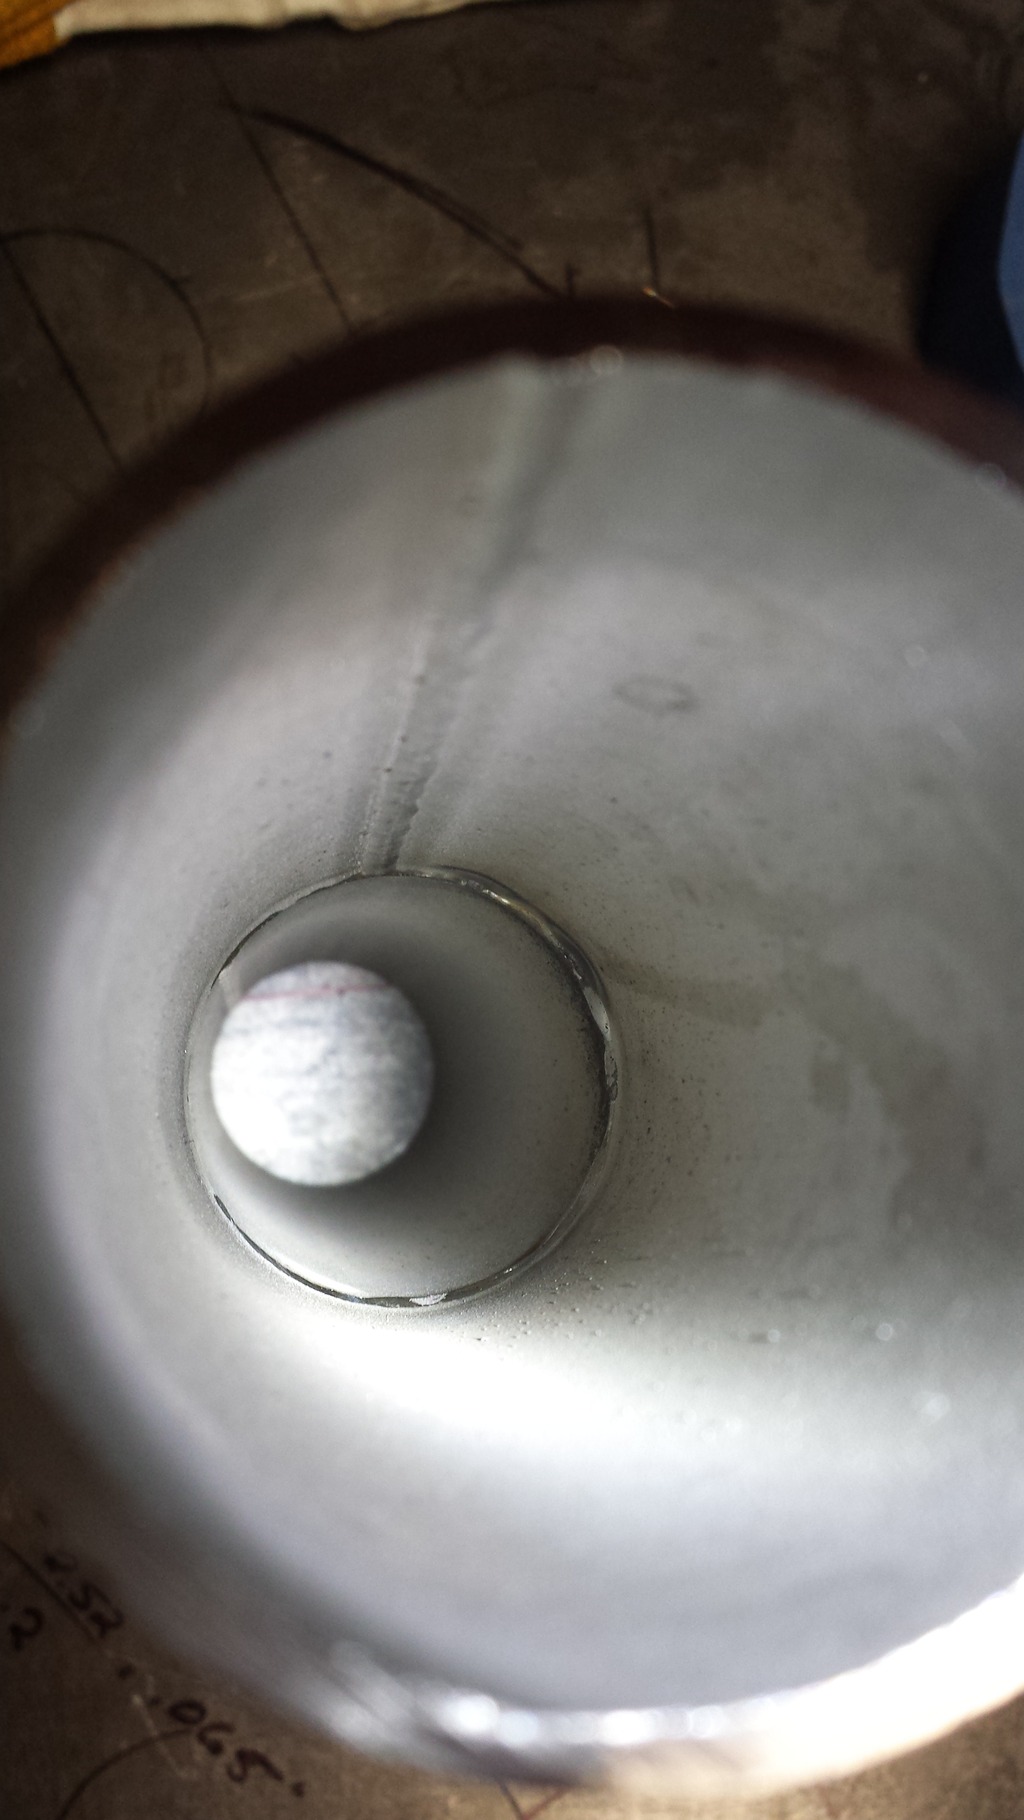
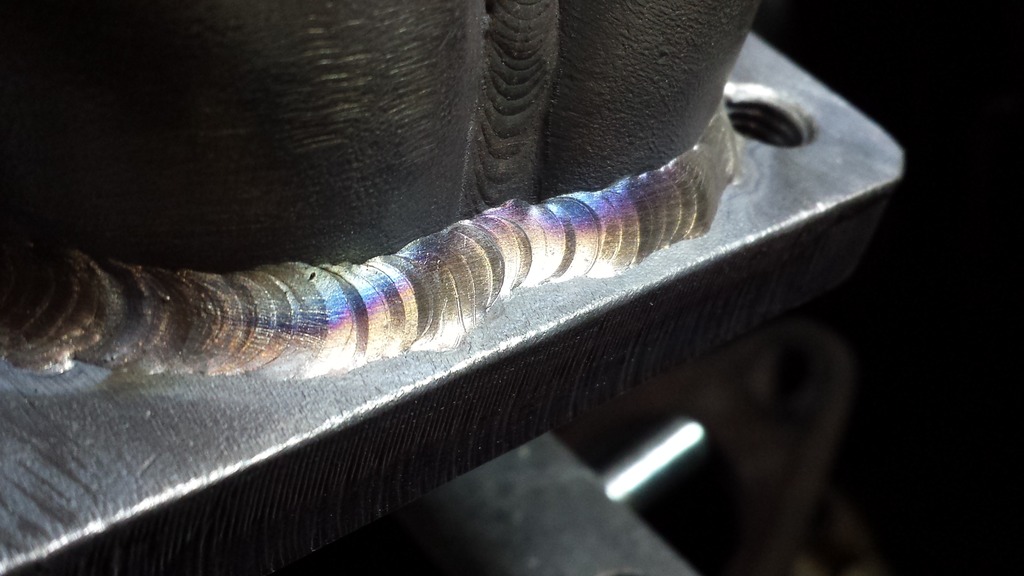
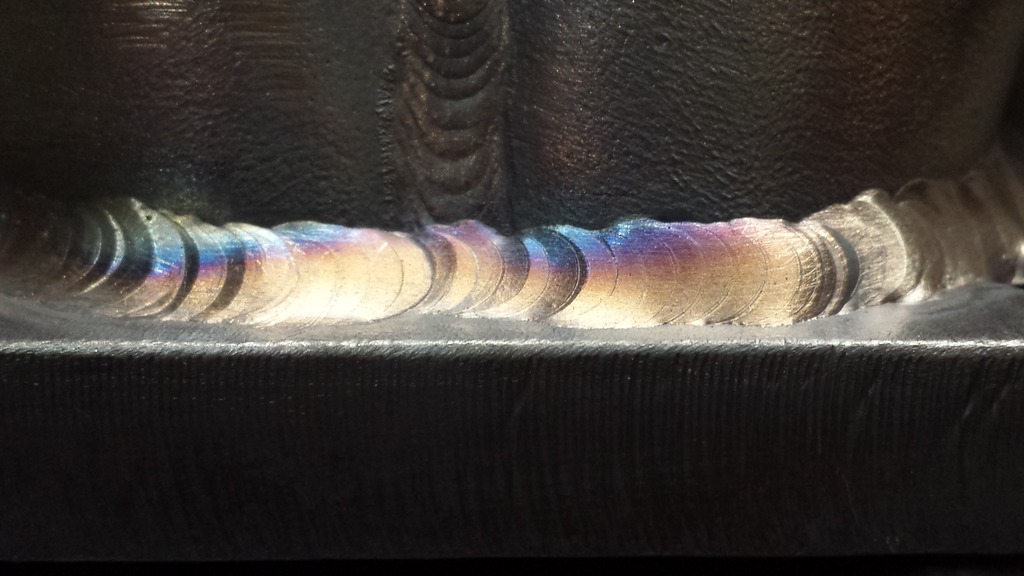
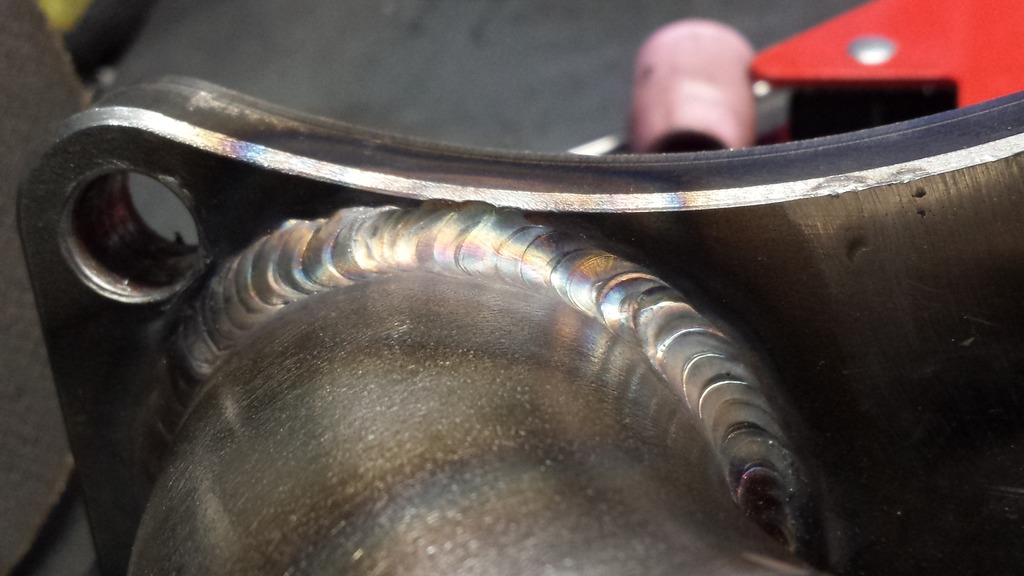
First root weld ever on some 1.5” 304 sch 10!!!
Messing around with razor blades.
######
Second bottle and regulator for purge.

Starting out.

This was dumb, I ended up not using a jig like this. Instead I used a bit more math.


Took it apart, started with the math. (Lowest average grades I had in school were math, so I thought for sure I was doomed)

Started tacking things. My nifty tig torch holder I made out of a piston I broke a couple ring lands on.

First root weld ever on some 1.5” 304 sch 10!!!


Messing around with razor blades.

######
Reply
0
0


Thread Starter
Junior Member
Joined: Dec 2014
Posts: 46
Total Cats: 13
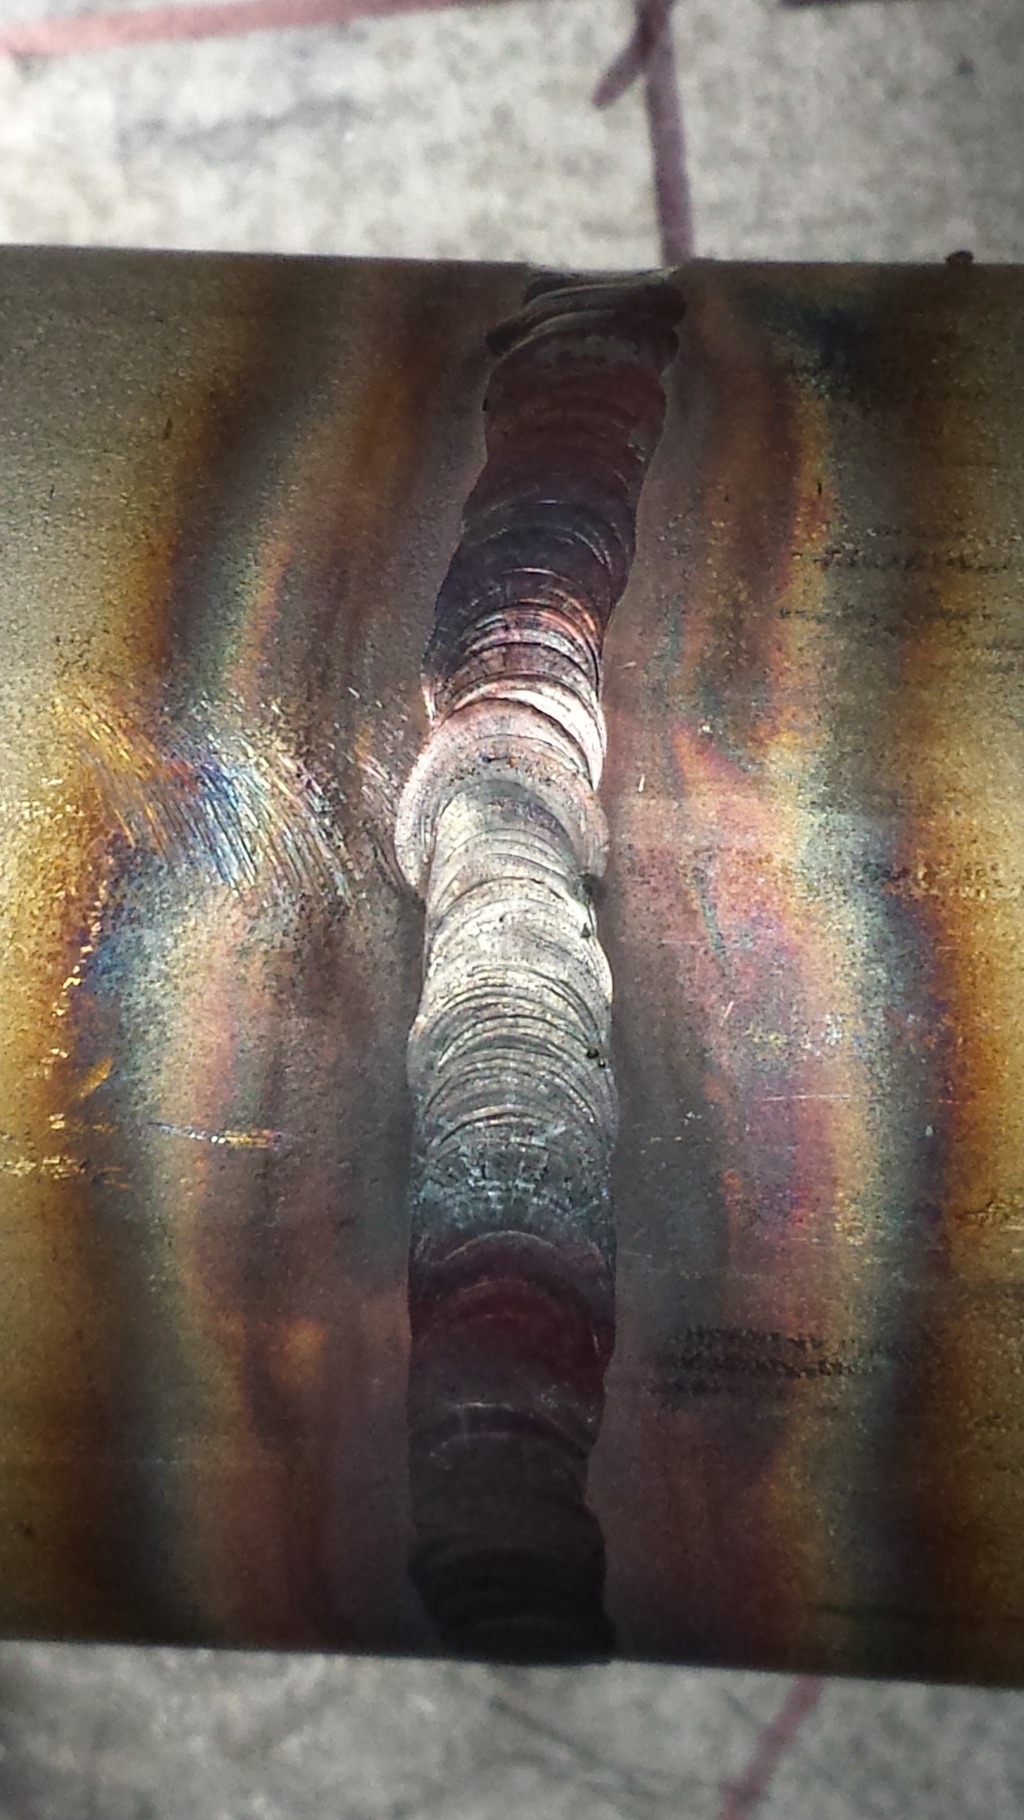
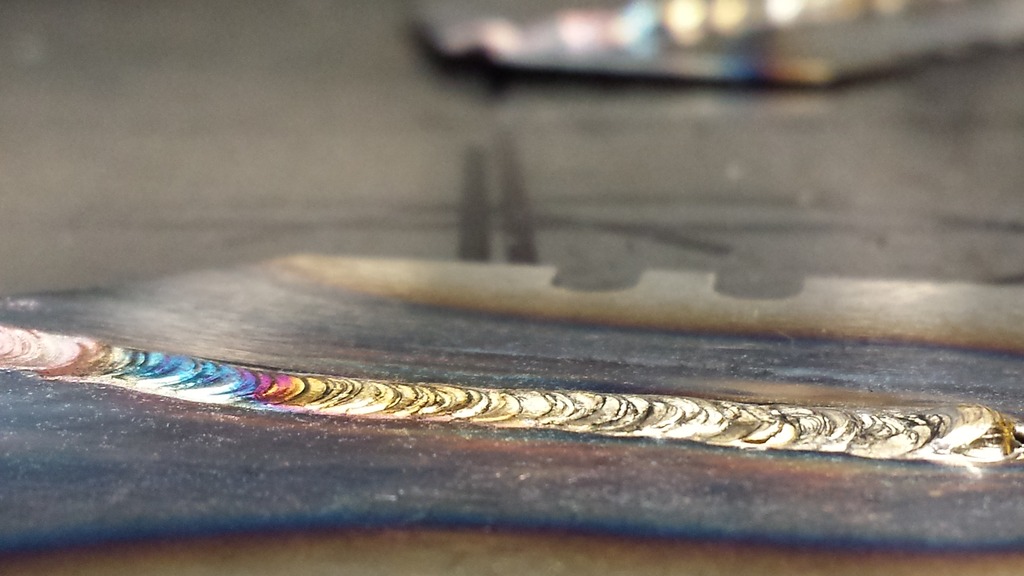
Rooted!

Welded!
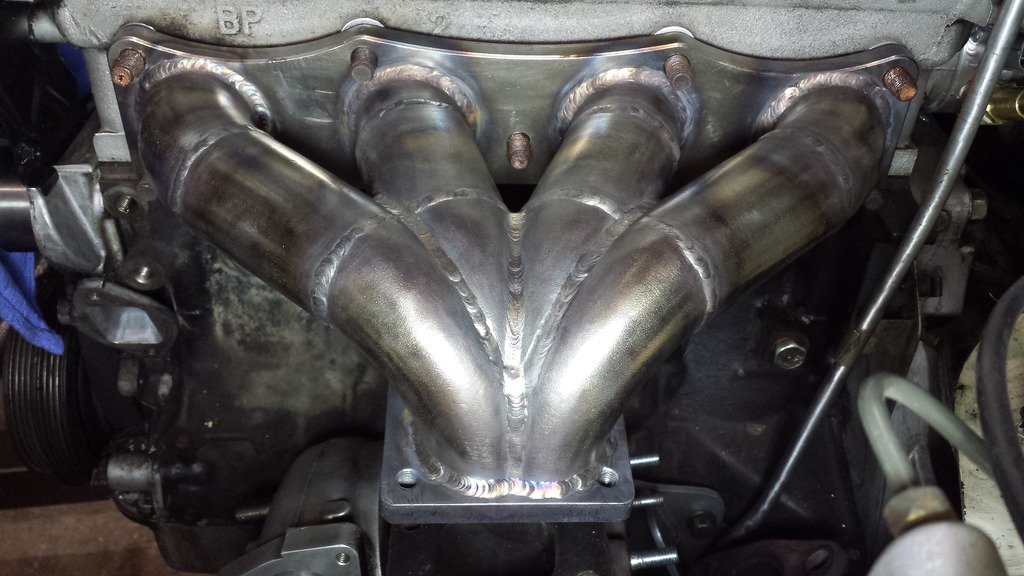
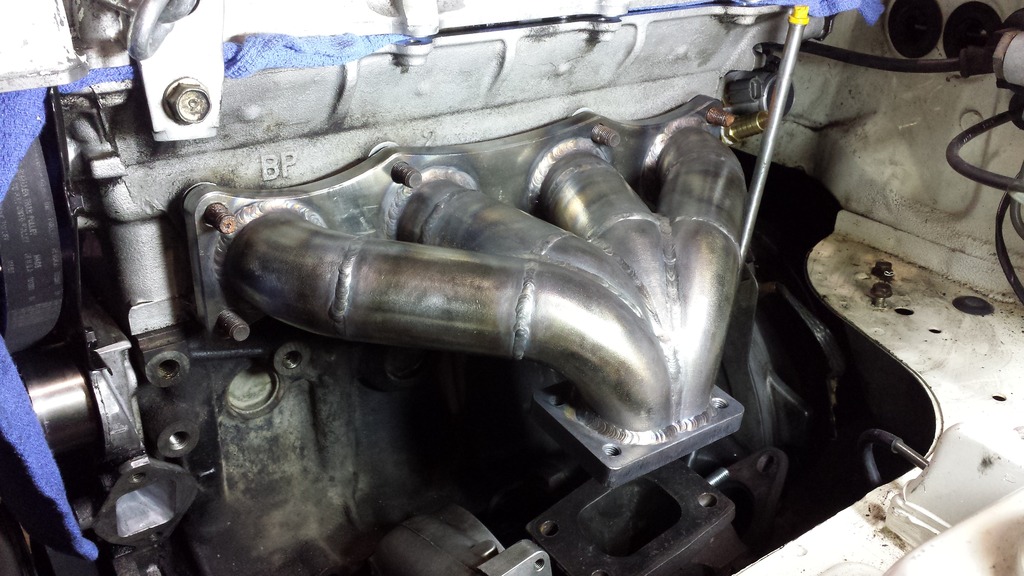
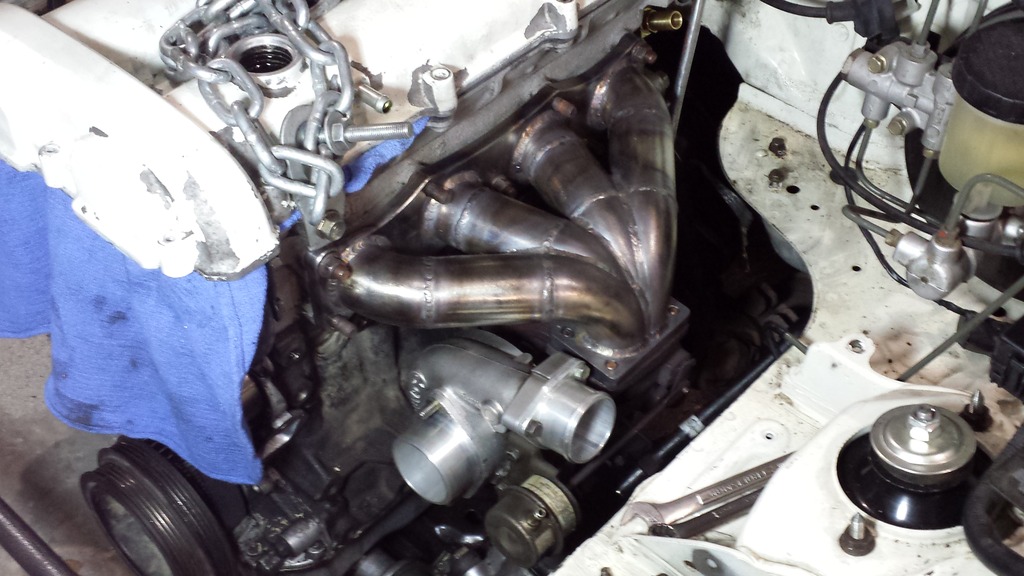
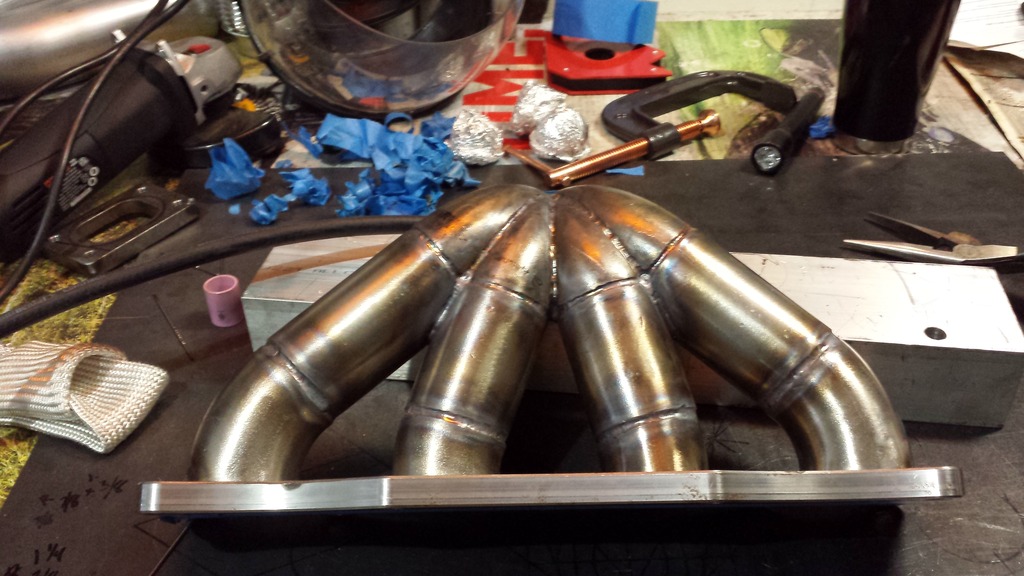
Made a time lapse of the manifold.
http://vid1219.photobucket.com/album...02058928_n.mp4
Dangling!
######


Welded!


Made a time lapse of the manifold.
http://vid1219.photobucket.com/album...02058928_n.mp4
Dangling!

######
Reply
2
2


Thread Starter
Junior Member
Joined: Dec 2014
Posts: 46
Total Cats: 13
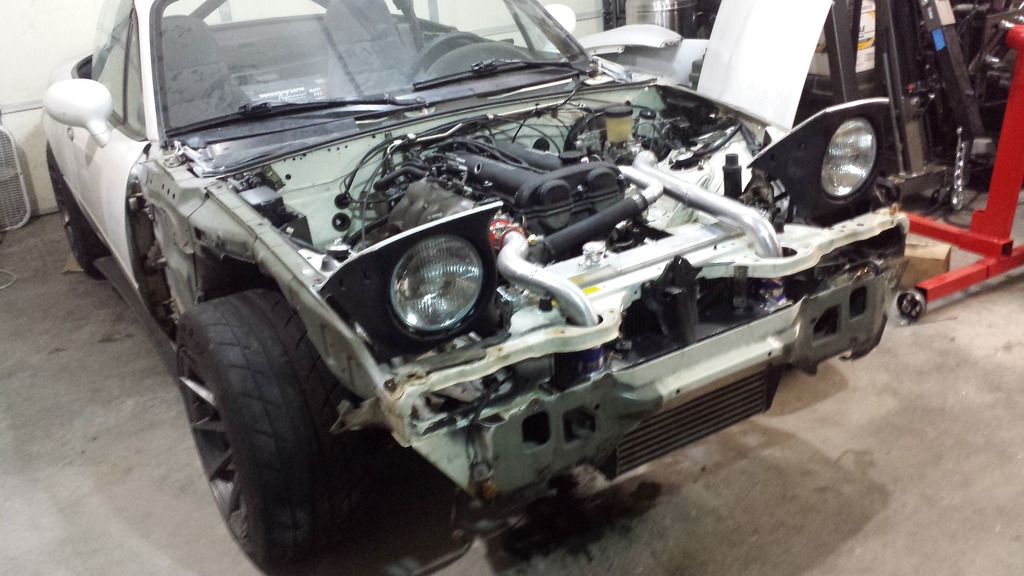
Here is where it gets disappointing. Summer was quickly approaching and I still had to make an ITB plenum if I wanted this to work. I felt crunched for time, I had already done so much this winter and I was really ready to drive this thing again. So I bailed on the ITB's for this summer.
I did make a couple drawings to scale so that I can work on it this summer without the car being down. Unfortunately it is unethical for me to use things like the mill and lathe at work for personal use. So I have to farm out machine work for some of the plenum. But whateves, it’ll happen next winter.
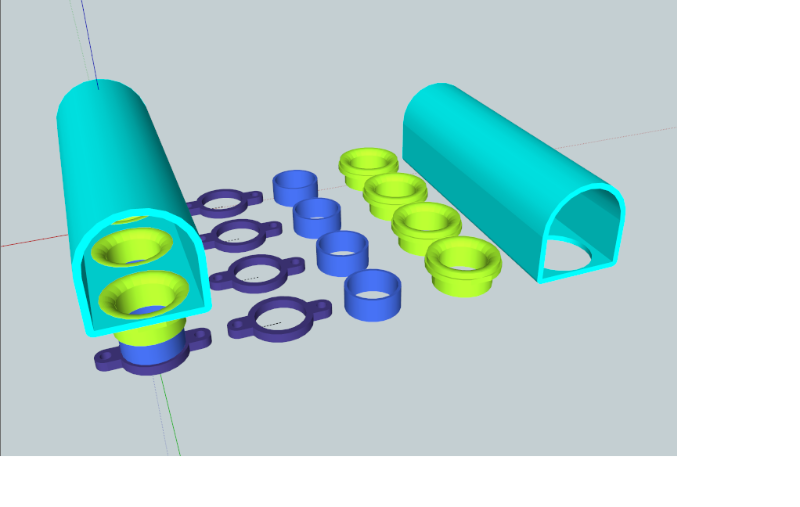
Super accurate drawing #1!!
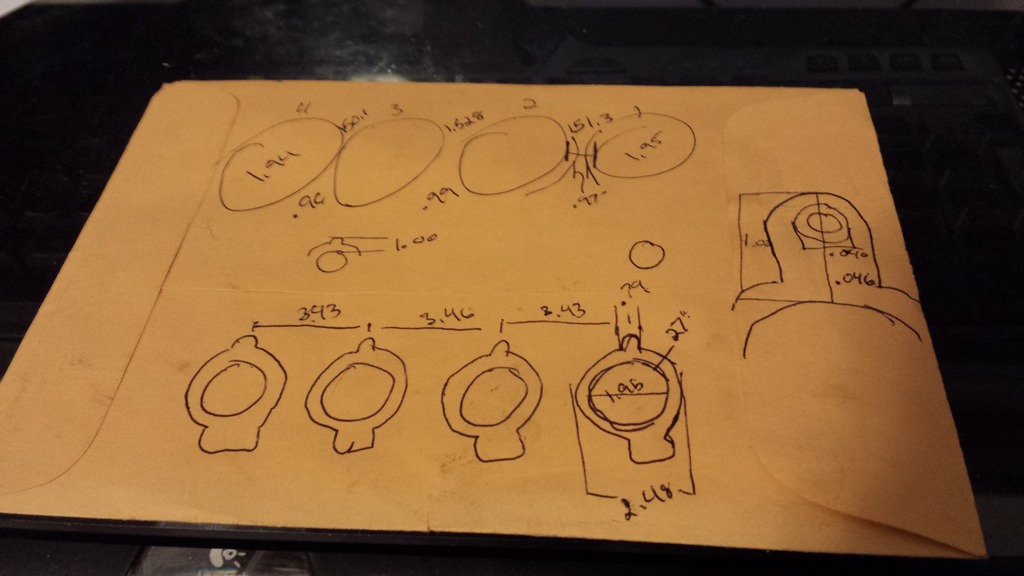
and #2 on Google Sketchup free.
Once I swallowed my pride it was hammer time to get it running.
#######
I did make a couple drawings to scale so that I can work on it this summer without the car being down. Unfortunately it is unethical for me to use things like the mill and lathe at work for personal use. So I have to farm out machine work for some of the plenum. But whateves, it’ll happen next winter.
Super accurate drawing #1!!

and #2 on Google Sketchup free.

Once I swallowed my pride it was hammer time to get it running.


#######
Reply
0
0
Thread Starter
Junior Member
Joined: Dec 2014
Posts: 46
Total Cats: 13
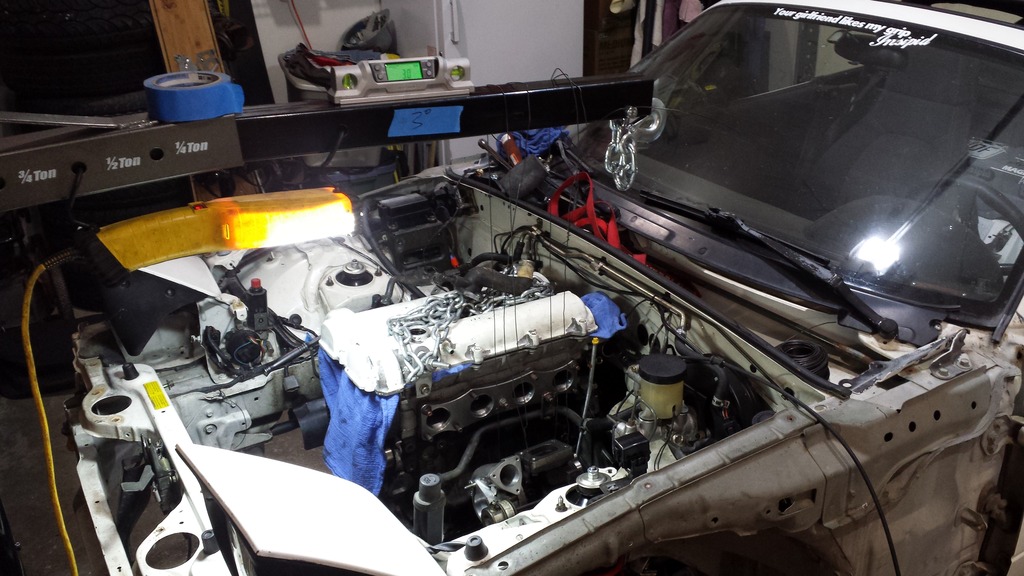
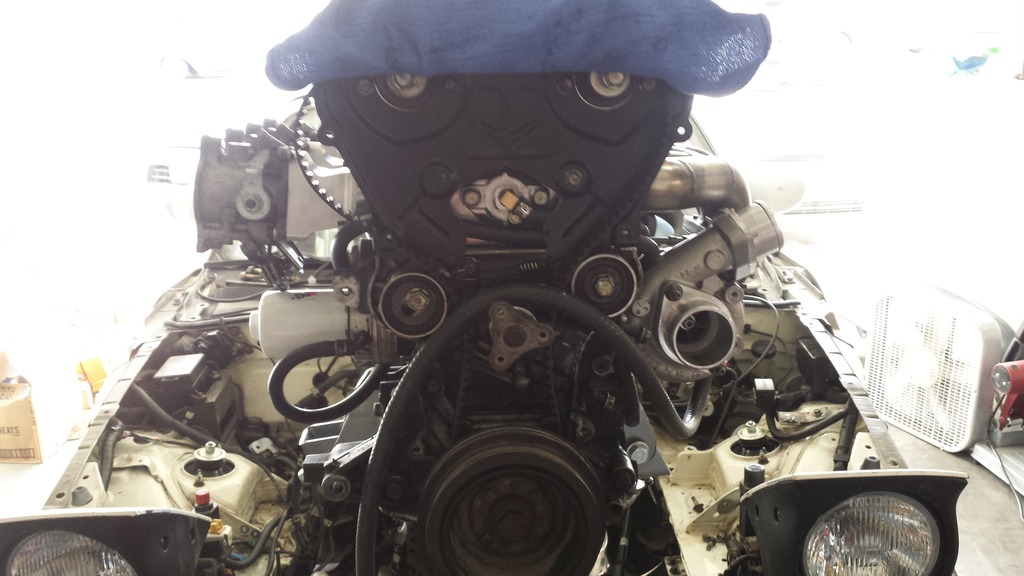
First Start video!! Gotta love that “been sitting for months” HLA rattle.
http://vid1219.photobucket.com/album...331_205937.mp4
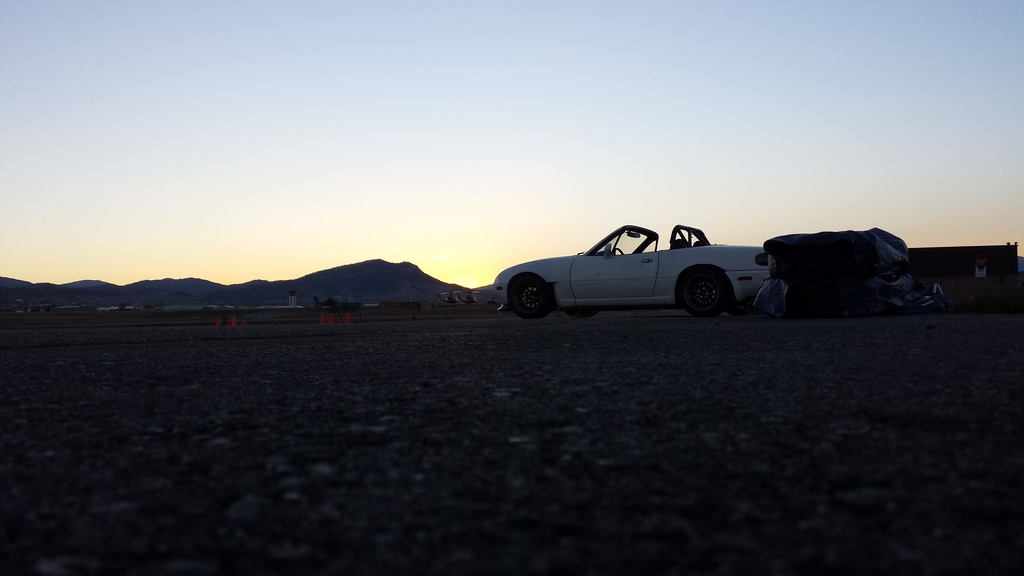
First drive!!! On April Fools Day 2016!!!

Its working!
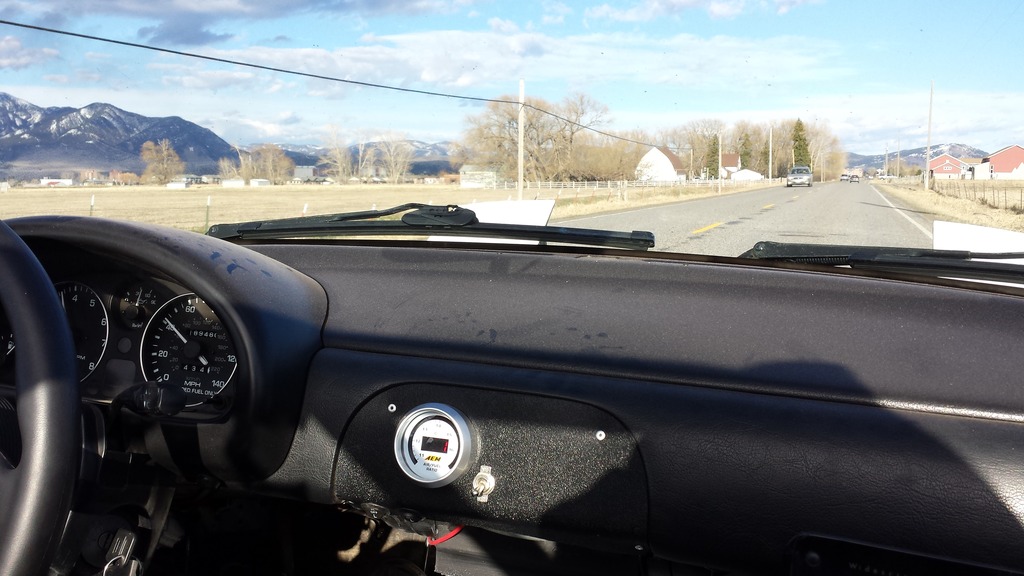
First small pull. Lots of rattles from the lack of exhaust.
http://vid1219.photobucket.com/album...401_180746.mp4
Im in love!
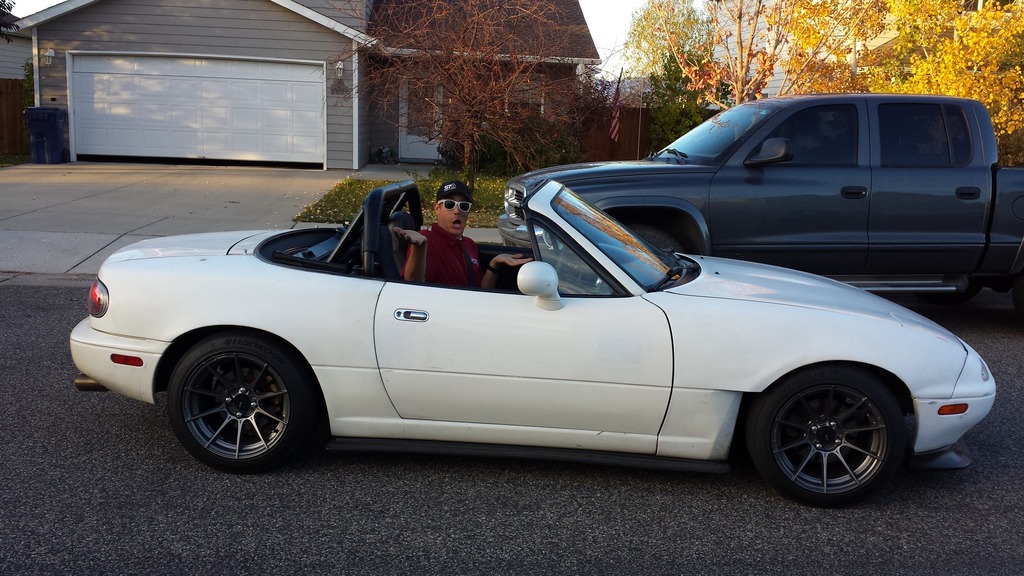
Lunchtime today 4/15. Having some fun with a coworker.
http://vid1219.photobucket.com/album...40174561_n.mp4
http://vid1219.photobucket.com/album...331_205937.mp4
First drive!!! On April Fools Day 2016!!!

Its working!

First small pull. Lots of rattles from the lack of exhaust.
http://vid1219.photobucket.com/album...401_180746.mp4
Im in love!

Lunchtime today 4/15. Having some fun with a coworker.
http://vid1219.photobucket.com/album...40174561_n.mp4
Reply
2
2
Fine work sir, I'm impressed. Love seeing a nice DIY turbo setup, and this delivers.
I like your progress on the DIY itb/plenum setup. If I ever went to ITBs with a turbo, I would take the same approach you are.
I like your progress on the DIY itb/plenum setup. If I ever went to ITBs with a turbo, I would take the same approach you are.
Reply
0
0


Thread Starter
Junior Member
Joined: Dec 2014
Posts: 46
Total Cats: 13
I really wanted to make a dual plenum design, but I couldn't find a manufacturer that would sell me just a hammer formed cone. And I don't know the first thing about making a die or hammer forming aluminum. But who knows, maybe in the next 6 months I'll source it and change the design up a bit.
One of the biggest benefits I saw with the dual plenum design is use of available space. Things get tight at the strut tower. So tight that I'll probably end up having to remove the two triangular braces to make room.
Which reminds me, I still need to do a bunch of chassis strengthening....
Reply
0
0
Thread Starter
Junior Member
Joined: Dec 2014
Posts: 46
Total Cats: 13
Well, I read a lot of posts on boosting these cars. One thread I came across was about why an entry level BEGi kit didn't come with a bov.
To preface this next part I'll say a few words. When I first went on to build my civic I got heckled a little. But I didn't care. My boss, friend and mentor at the time, gave me his copy of Maximum Boost. Now sure, that book is a little outdated. But the information is still valuable. So with the information as my tools I dove into that one. But I bought all my parts for that build or had someone else make them. That thing managed 340whp in a 1.6l and had room to go still. I had a bov on that, but at 16 psi I could still hear surge. Probably could have used a larger bov.
Back to that BEGi kit. A member asked a question about why the kit didn't come with a bov. This was the response he received.
"The sole purpose of a BOV (bypass valve, anti-surge valve, other......) is to surpress a funny noise when lifting off the throttle.
The noise is proportional to the boost. Low boost systems have nothing to gain from a a BOV.
If your intentions are to escalate the power, add in the BOV on the initial purchase, or select it somewhere along the the way.
Corky
Not enthused about using popular parts that I don't need."
Being my plans no longer called for a ton of boost I said screw it, no bov for me. The flutter as a result of surge doesn't sound harsh at all. I like to compare it to a locals MR2 that is pushing over two times the estimated power with no bov. His sounds violent, he really gets that high pitched choo choo noise.
So, what's it going to hurt? My $50 T25 Garrett? Maybe my factory 190k motor? Whatever the risk, which I don't see it being much, I've accepted the potential for failure. Much like my manifold. If I was being safe I would have made it out of mild steel, then I could have been a little more careless with building it since the thermal expansion would be less and result in it being less prone to stress cracks. But instead I went stainless, I took the risk that my welds(and material choice), that aren't flawless, will lead to the manifold falling prematurely.
I hope none of this sounds like I'm being a dick, it's just how I came to the conclusion of not running a bov.
Last edited by wpapallo; Apr 15, 2016 at 11:23 AM.
Reply
0
0


