Faelflora breaks his promise, time to part out car. GIT THE SAWZALL!
 12-19-2010, 03:39 PM
#301
Senior Member

Join Date: Aug 2010
Location: San Luis Obispo, CA
Posts: 498
Total Cats: 0
Yah maybe track or drorifto events just for fun but nothing serious.
The plain studs- whatever BEGI sells have gotten nasty and loose and I replaced them a bunch of times when I was at lower power. Resbond, sweet resbond helped them stay in but when I pulled them, they looked horrible. I do not track but I am not easy on my car.
Fine felluz I will just get some incolnel studs.

Reply
 0
0

0
12-20-2010, 02:00 PM
#302
Elite Member
Thread Starter
iTrader: (2)

Join Date: Jan 2007
Location: Los Angeles, CA
Posts: 8,682
Total Cats: 130
I did a pull for you guys on the way home.
To spite everyone, I did it in 6th gear :|
Actually I did it in 6th because I was tired as **** at 3AM and didn't have the brainpower to hold camera and pull in third at the same time.
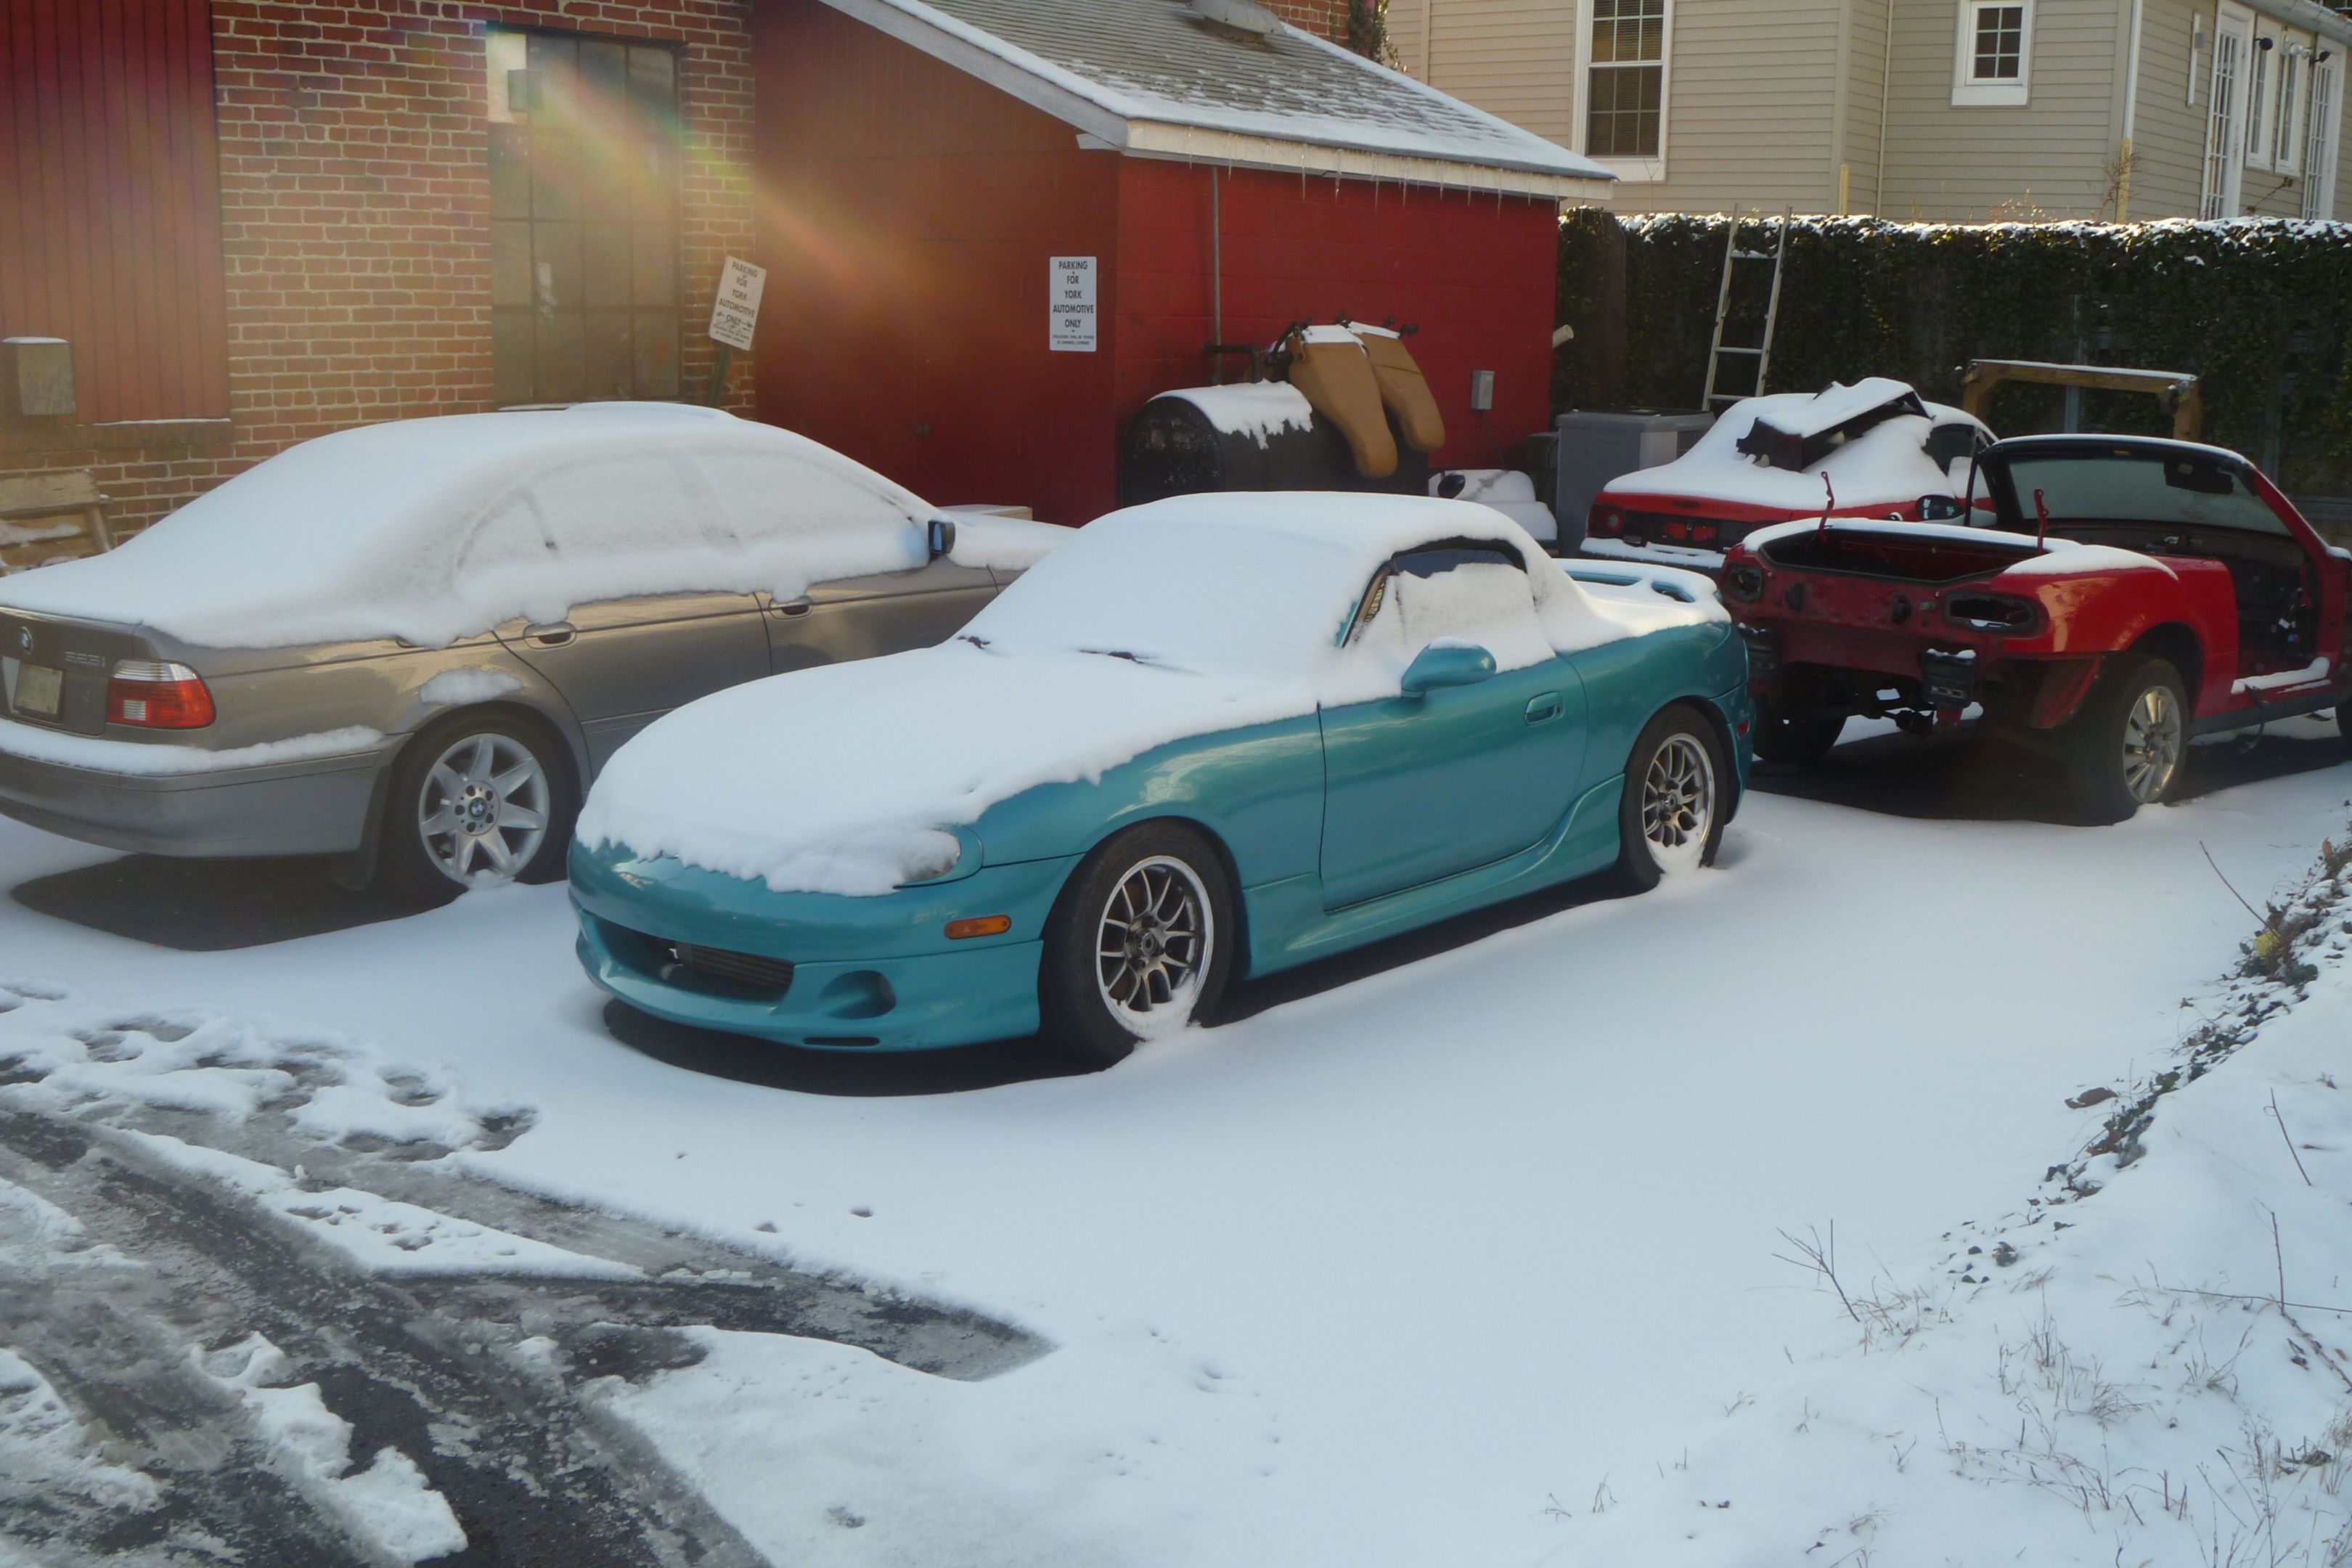
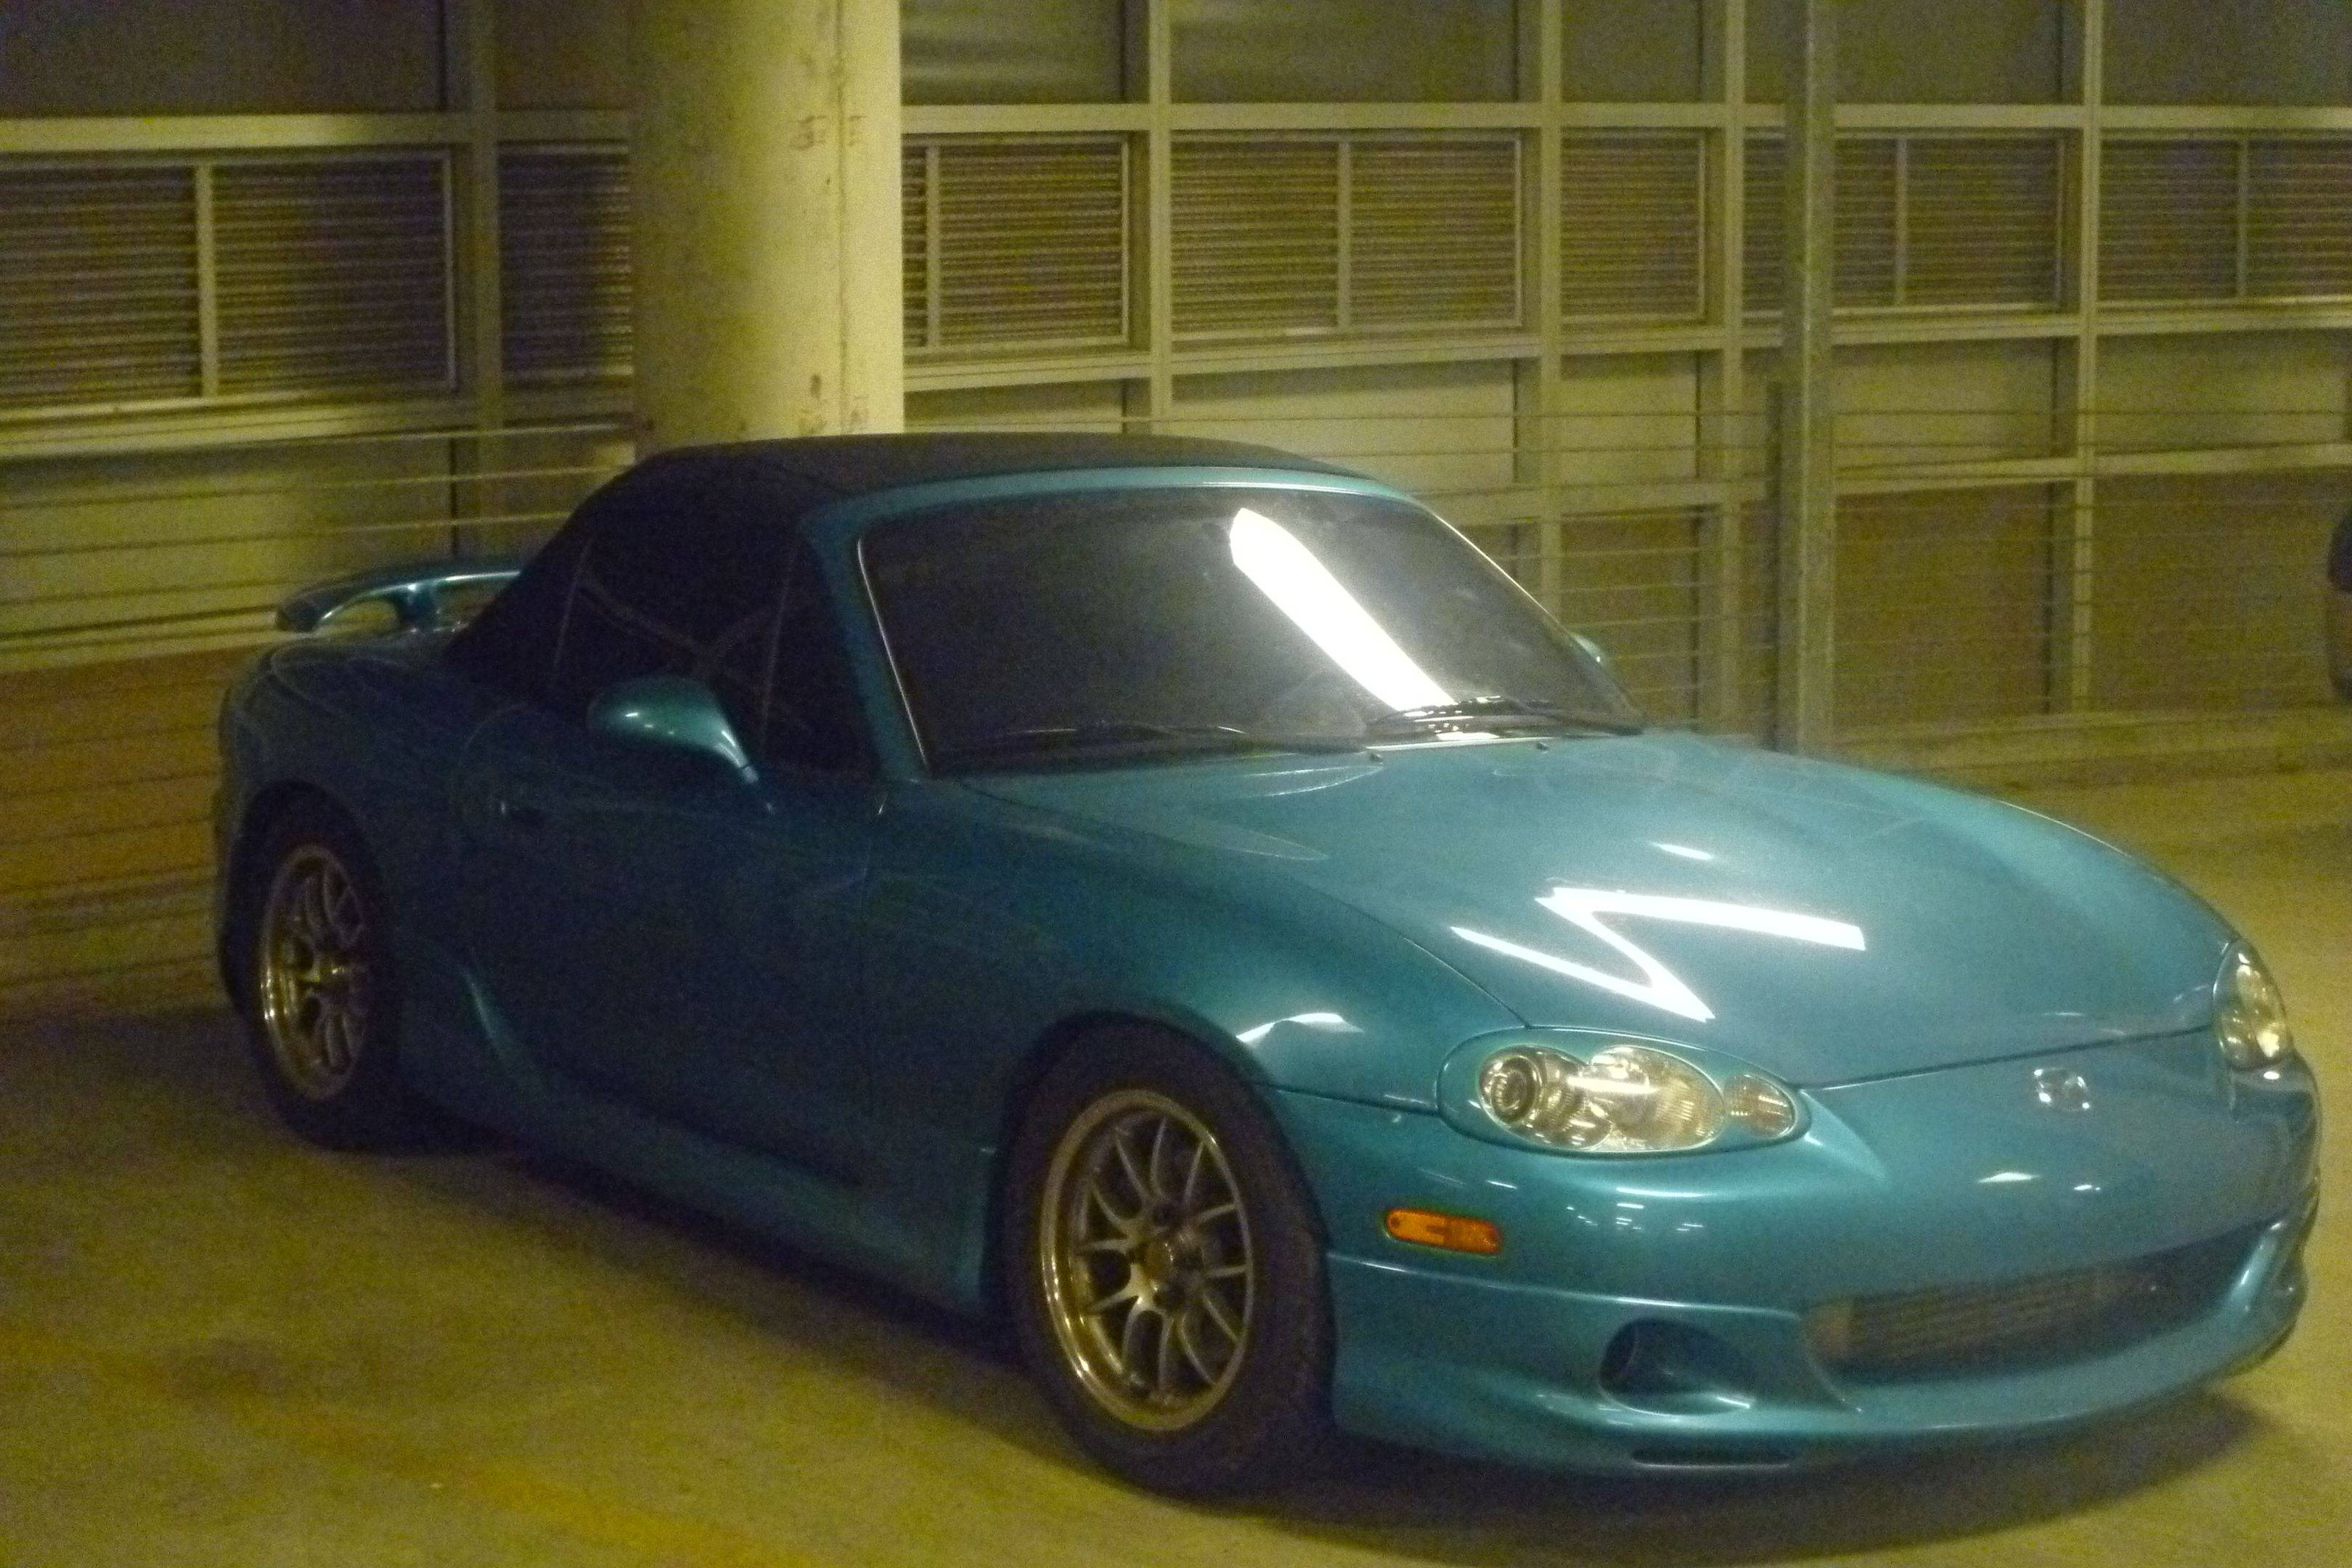
Oh and for fun This is my car, sitting in the snow and rain for the first time in a year after I say "my car will never see rain again".
To spite everyone, I did it in 6th gear :|
Actually I did it in 6th because I was tired as **** at 3AM and didn't have the brainpower to hold camera and pull in third at the same time.
Oh and for fun This is my car, sitting in the snow and rain for the first time in a year after I say "my car will never see rain again".
Reply
0
0
12-20-2010, 02:02 PM
#303
Elite Member
Thread Starter
iTrader: (2)
Join Date: Jan 2007
Location: Los Angeles, CA
Posts: 8,682
Total Cats: 130
So here is the VVT timing checklist:
1. Make sure your cams are on the cam gears properly.
2. When frontmost lobes are like this: < > pointing outwards, the ONE notch on the intake gear should be at the "I" on the timing plate. The "I" notch on the exhaust gear should be at the "E" on the timing plate. The "E" on the exhaust gear should be pointed straight up. This may sound fucked up but it is correct. If **** is like this, you will know your gears are on properly. Here is a pic of how your VVT gears should look at TDC:
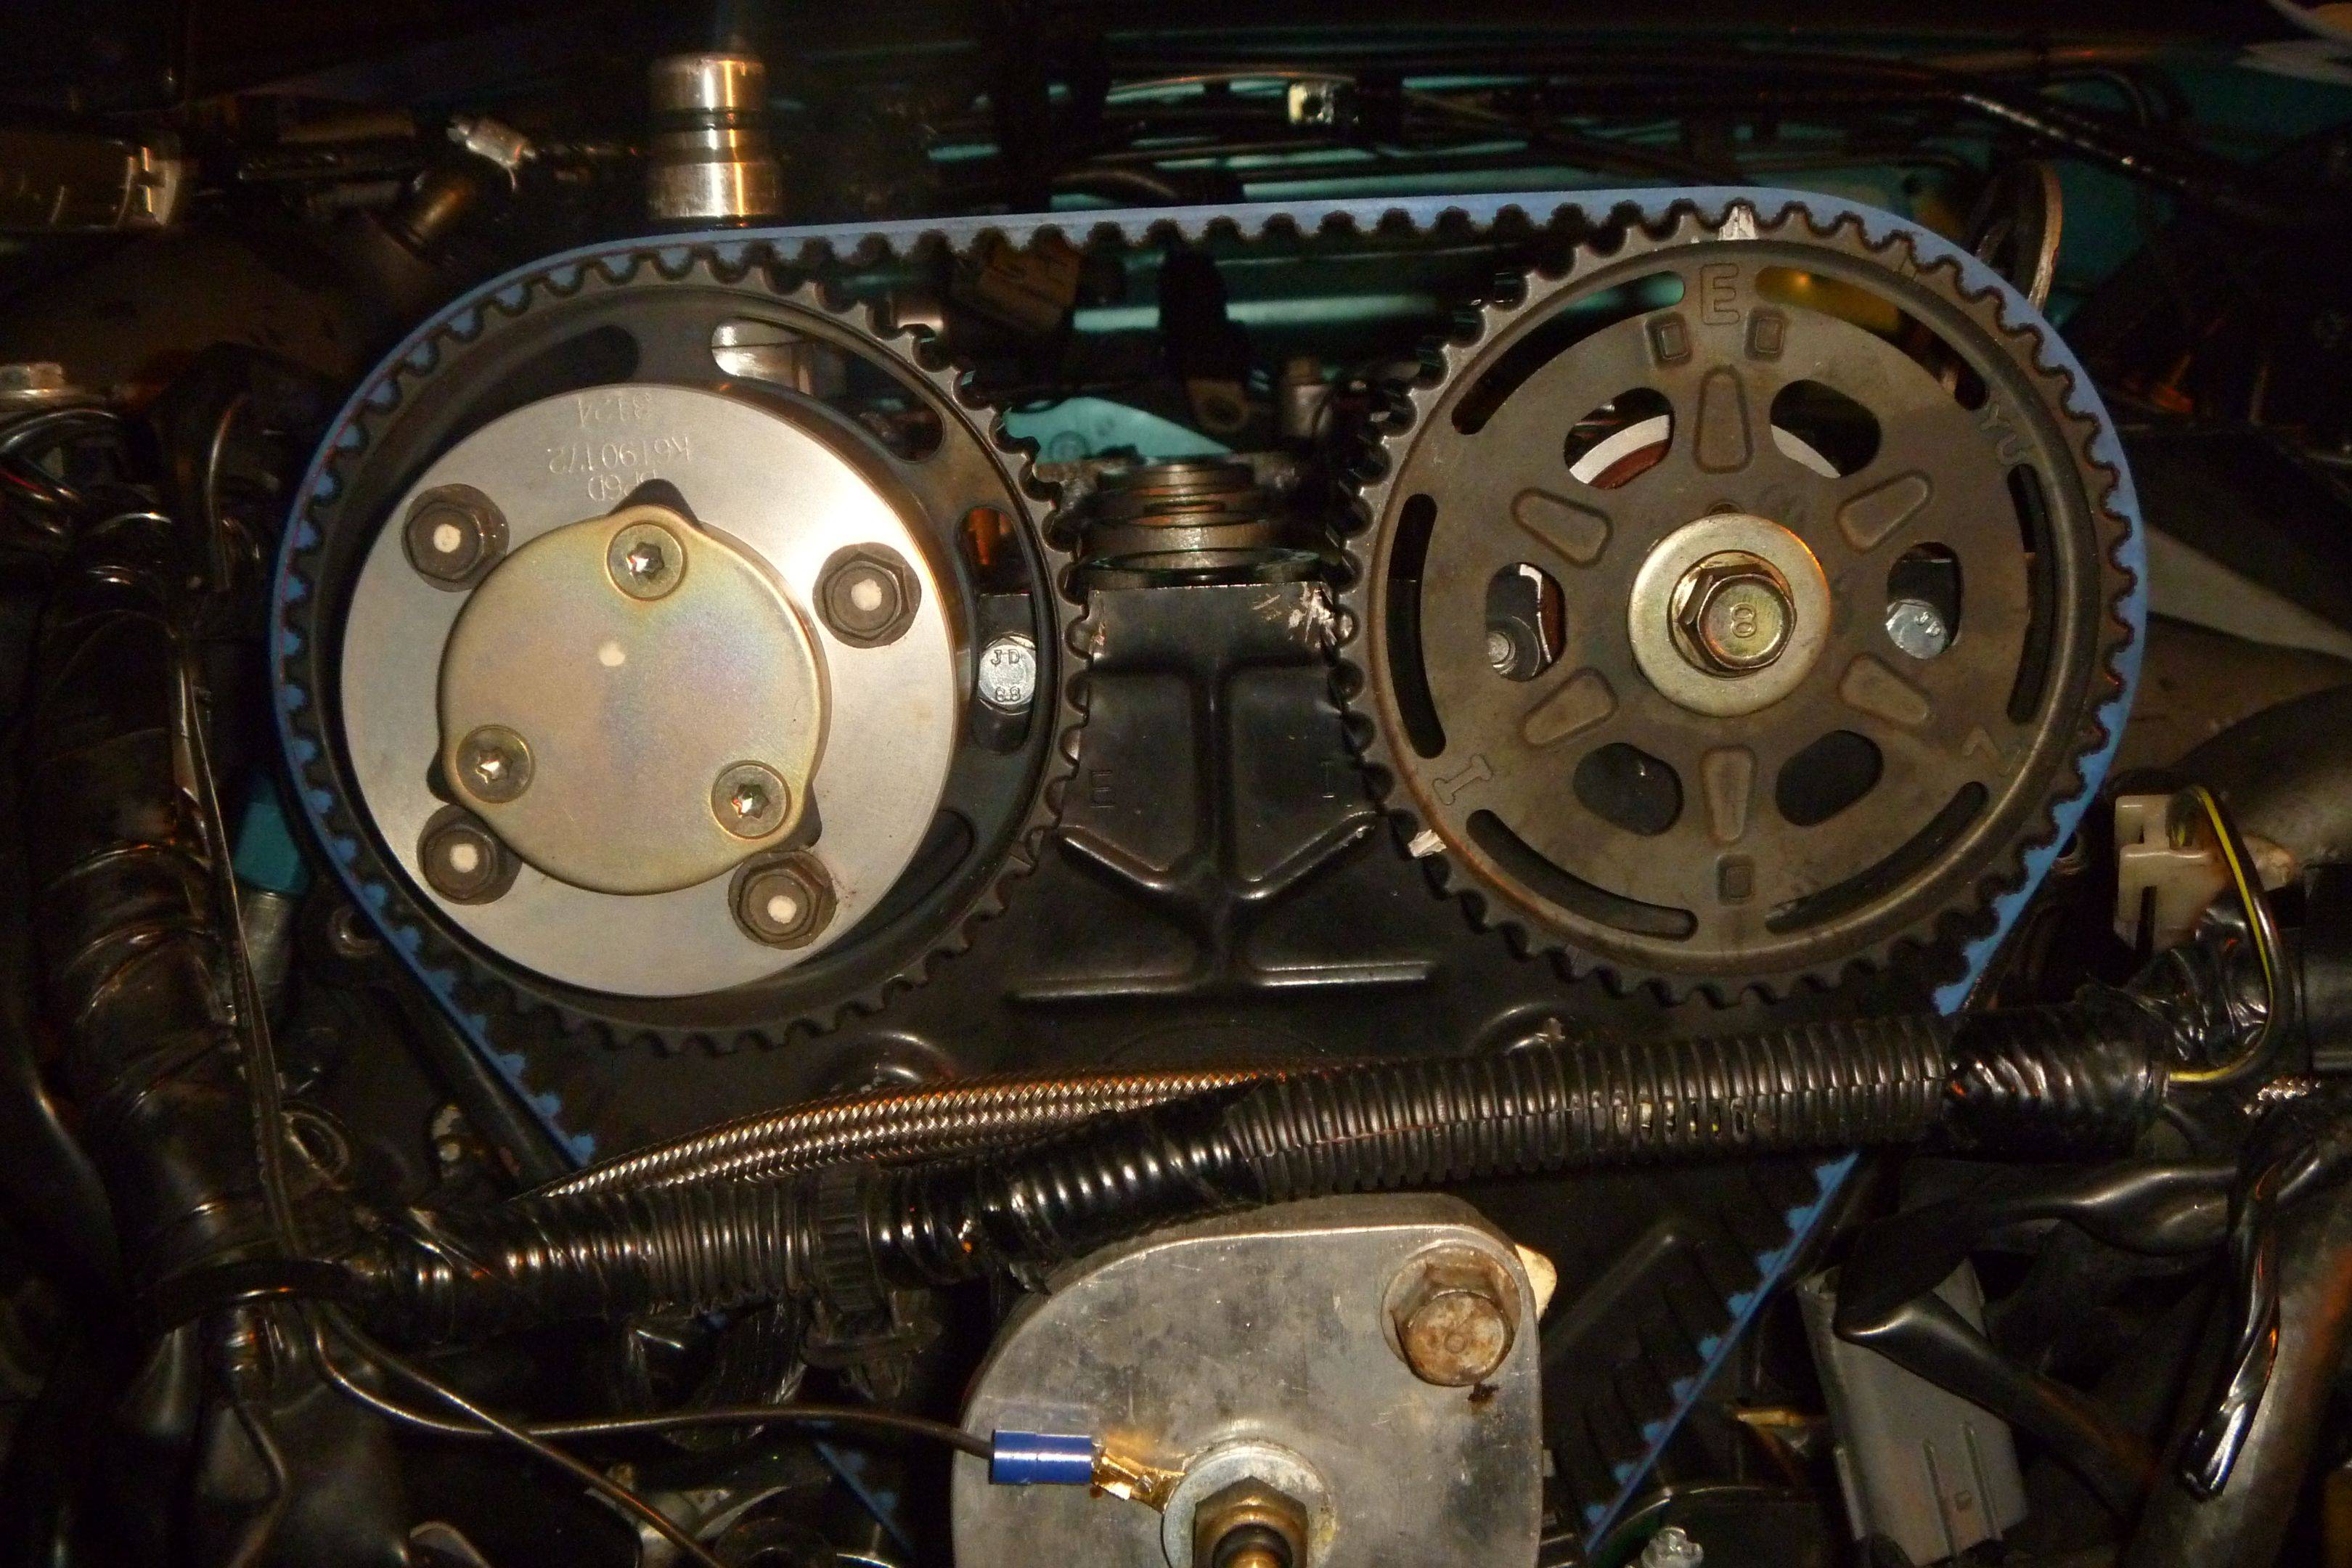
3. Pull out frontmost plug, shove a rod in the hole and rotate crank to put your timing mark at the "T" on the crank timing plate. IF you have an ATI damper, you use the LEFTMOST timing mark.
4. Loosen tensioner, move cam gears using cam wrench surface until they're in the right alignment- see step two.
5. Put belt on and apply tension.
6. Make sure crank pulley mark is at T, and cam marks are correct (in step 2)
7. Rotate crank two full revolutions. This is much better than counting belt teeth (ugh). If you have the correct teeth spacing, after two revolutions, everything will look correct.
8. Start car and drive into the sunset.
Note that there will be slop- 15 degrees or whatever VVT can do- slop in the gear rotation. If the cam lobe is in the right spot though, and the gear is mounted properly, it won't matter. ECU will figure it out when you start.
1. Make sure your cams are on the cam gears properly.
2. When frontmost lobes are like this: < > pointing outwards, the ONE notch on the intake gear should be at the "I" on the timing plate. The "I" notch on the exhaust gear should be at the "E" on the timing plate. The "E" on the exhaust gear should be pointed straight up. This may sound fucked up but it is correct. If **** is like this, you will know your gears are on properly. Here is a pic of how your VVT gears should look at TDC:
3. Pull out frontmost plug, shove a rod in the hole and rotate crank to put your timing mark at the "T" on the crank timing plate. IF you have an ATI damper, you use the LEFTMOST timing mark.
4. Loosen tensioner, move cam gears using cam wrench surface until they're in the right alignment- see step two.
5. Put belt on and apply tension.
6. Make sure crank pulley mark is at T, and cam marks are correct (in step 2)
7. Rotate crank two full revolutions. This is much better than counting belt teeth (ugh). If you have the correct teeth spacing, after two revolutions, everything will look correct.
8. Start car and drive into the sunset.
Note that there will be slop- 15 degrees or whatever VVT can do- slop in the gear rotation. If the cam lobe is in the right spot though, and the gear is mounted properly, it won't matter. ECU will figure it out when you start.
Reply
0
0
12-20-2010, 02:02 PM
#304
Elite Member
Thread Starter
iTrader: (2)
Join Date: Jan 2007
Location: Los Angeles, CA
Posts: 8,682
Total Cats: 130
There is a special list of gotchas for the ATI damper:
1. With the damper OFF THE CAR, ensure the timing plate is lined up properly- triangle on inside of plate needs to align with the keyway
2. You will need to loctite the allen screws that hold the plate on when you reinstall it. Unless you like your timing plate to fall off and for your timing to go to ****.
3. Lube up the key with grease. The lube will help the key slide in the crank keyway and the damper keyway. It will also keep it from falling out.
4. Put the key in the damper so it lines up with the frontmost edge of the crank hole. See pic for happy key location.

4a. You do NOT want it to look like this. If it is halfway into the damper, the key can bind behind the damper against the crank snout and when you push the damper on, the key will get stuck and fucked up and you will have my oscillating damper problem. See pic:
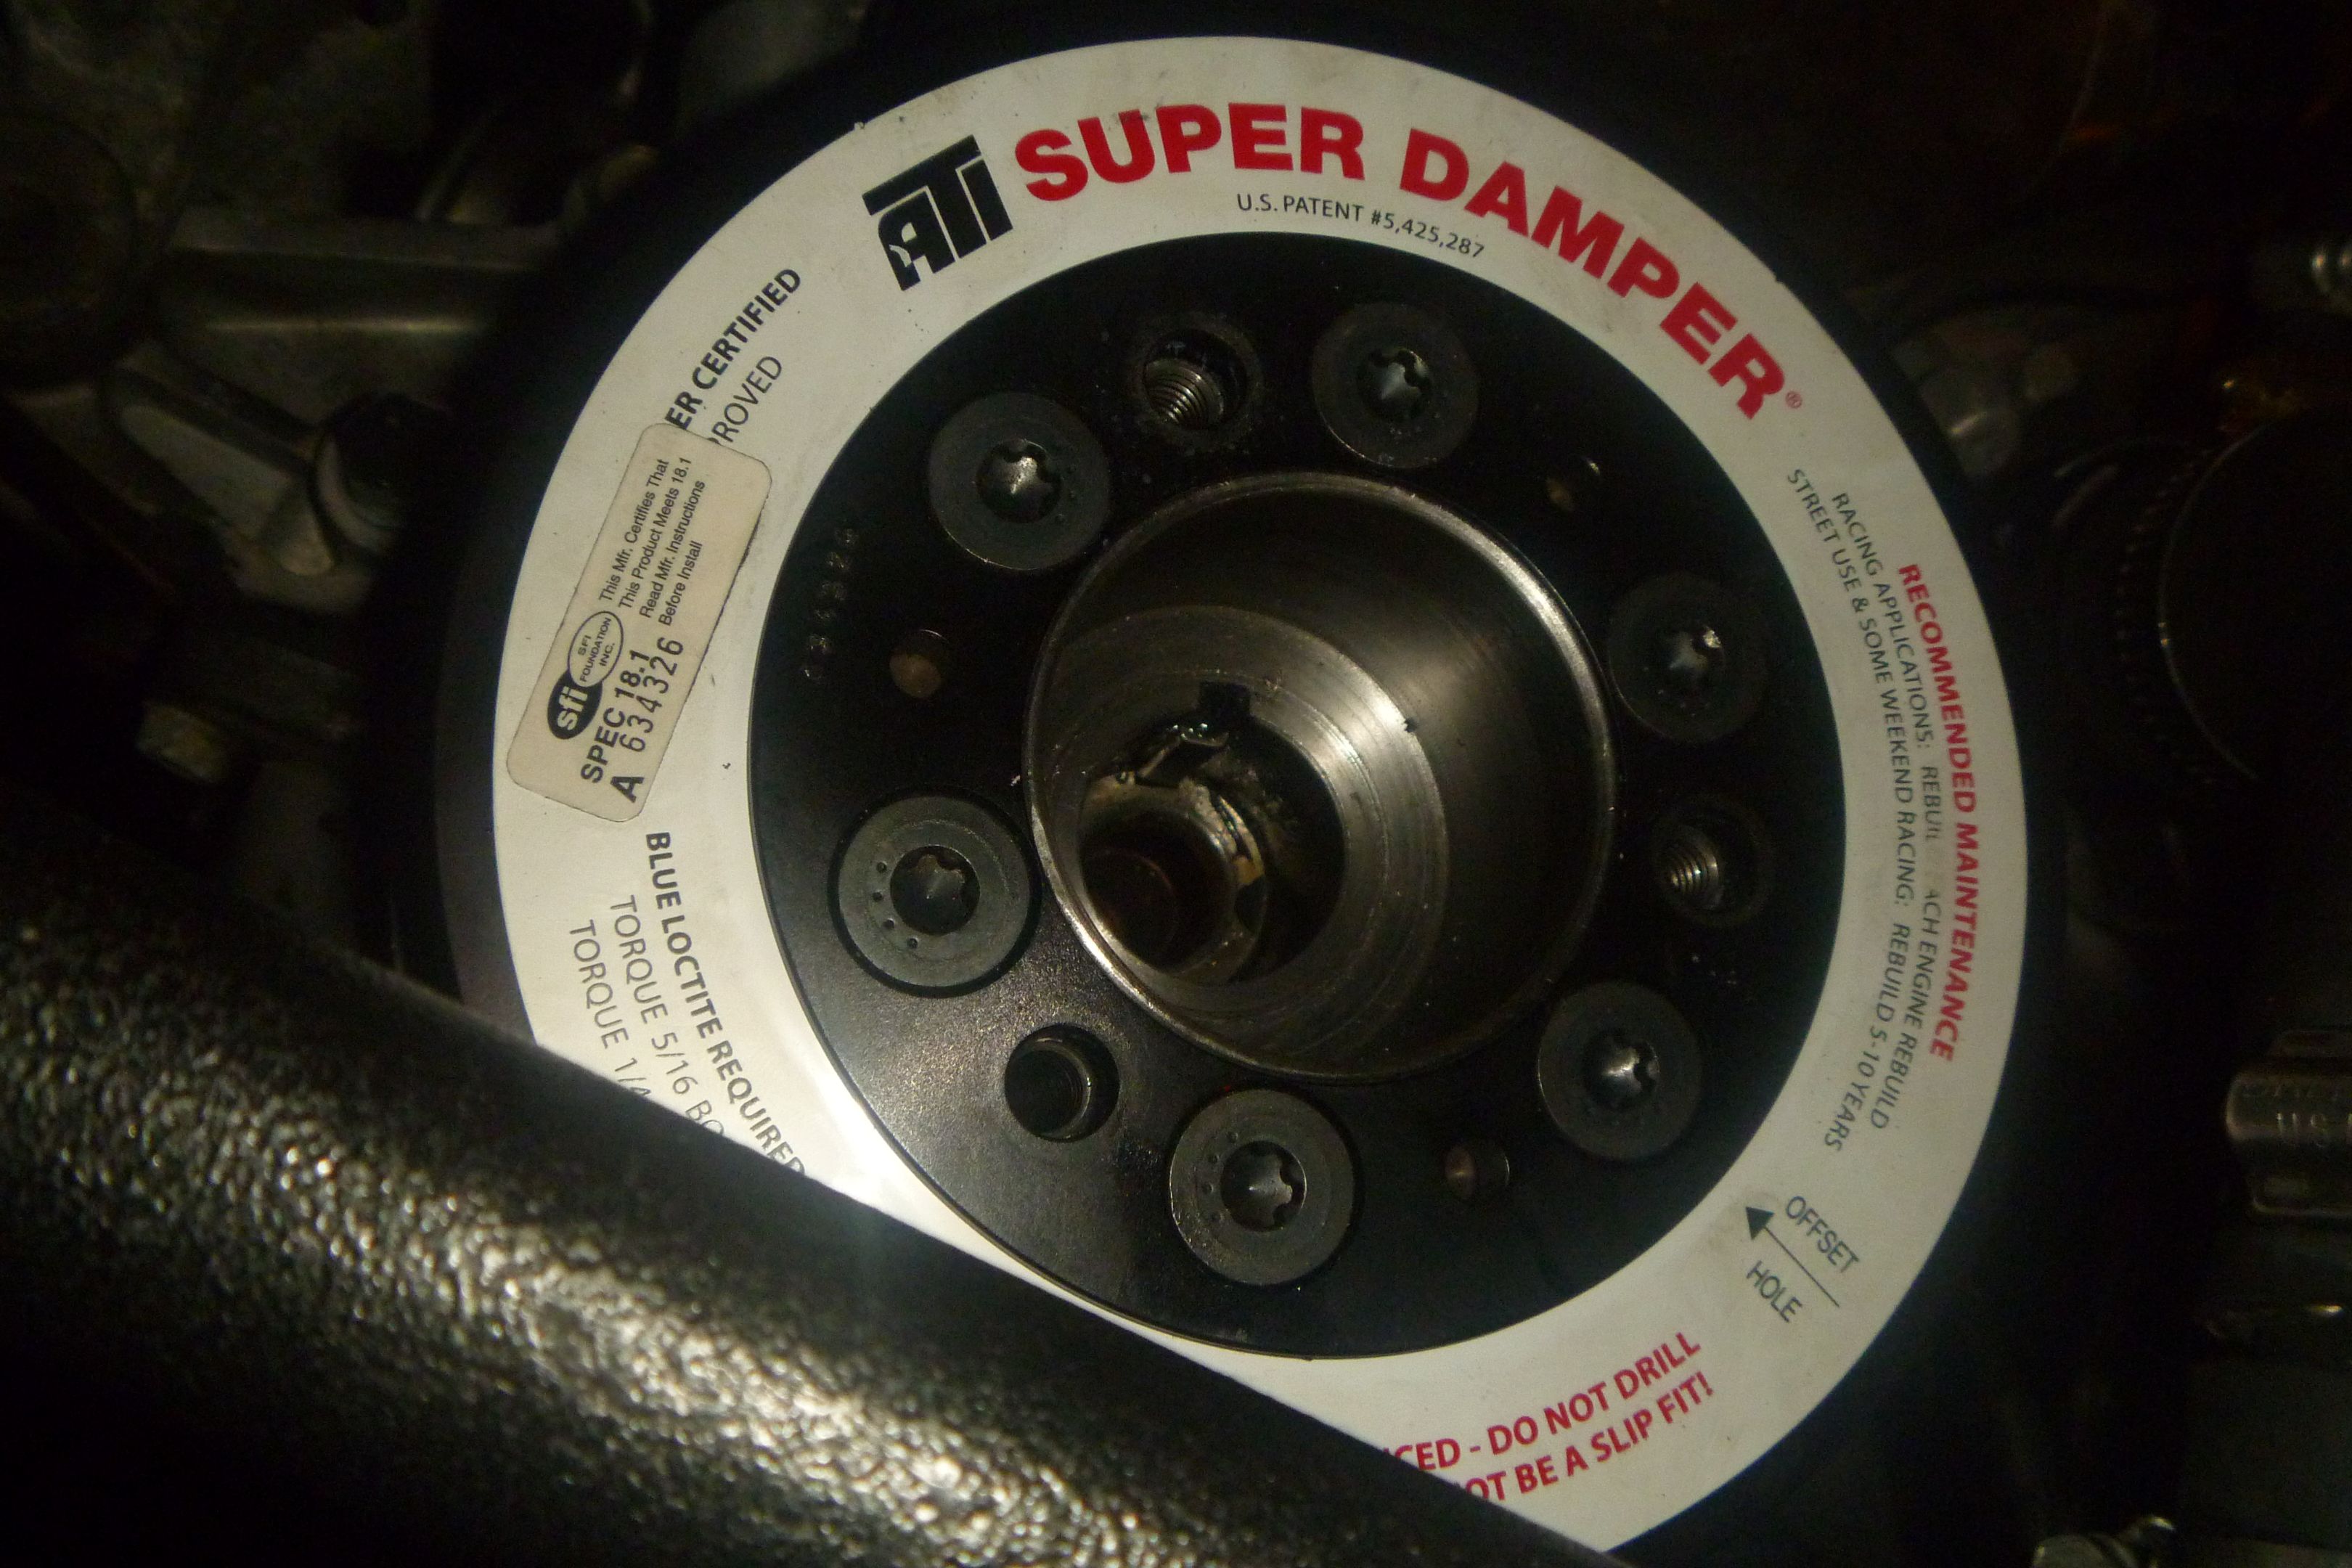
5. Line up key, and mallet on the damper a bunch.
6. Put in crank bolt, hand crank damper down until it is pretty tight.
7. Remove bolt, visually or by feel, check the alignment of the key with the front of the damper crank hole. Should look/feel like pic in #4.
8. Repeat step 6/7 again, and if all is good, whip out your impact gun and tighten bolt down all the way. Factory spec is like 150ft lbs or something so don't be afraid. You can also use a damper installer if you want.
9. The end.
Happy car
1. With the damper OFF THE CAR, ensure the timing plate is lined up properly- triangle on inside of plate needs to align with the keyway
2. You will need to loctite the allen screws that hold the plate on when you reinstall it. Unless you like your timing plate to fall off and for your timing to go to ****.
3. Lube up the key with grease. The lube will help the key slide in the crank keyway and the damper keyway. It will also keep it from falling out.
4. Put the key in the damper so it lines up with the frontmost edge of the crank hole. See pic for happy key location.
4a. You do NOT want it to look like this. If it is halfway into the damper, the key can bind behind the damper against the crank snout and when you push the damper on, the key will get stuck and fucked up and you will have my oscillating damper problem. See pic:
5. Line up key, and mallet on the damper a bunch.
6. Put in crank bolt, hand crank damper down until it is pretty tight.
7. Remove bolt, visually or by feel, check the alignment of the key with the front of the damper crank hole. Should look/feel like pic in #4.
8. Repeat step 6/7 again, and if all is good, whip out your impact gun and tighten bolt down all the way. Factory spec is like 150ft lbs or something so don't be afraid. You can also use a damper installer if you want.
9. The end.
Happy car
Reply
0
0


 12-20-2010, 11:45 PM
#310
Elite Member
Thread Starter
iTrader: (2)
Join Date: Jan 2007
Location: Los Angeles, CA
Posts: 8,682
Total Cats: 130
Well how about this video then? Here are the details:
4th Gear pull instead of 6th gear pull!!!!!!
60-100mph
NIGHT TIME
TAKEN WITH MY BLACKBERRY CAMERA FOR A NICE STEP DOWN FROM MY DIGITAL CAMERA
The car is running fantastically. I have a fucktarded VVT map so that doesn't help powah but tonight, in 30 degree weather, in 4th gear, I had wheelspin when boost hit at 3600rpm - in 4th gear. The fuel map is aok and AFRs are spiffy but I think my timing map is aggressive. I saw a big detonation event at around 4500rpm on one pull and some lesser events around the same RPM on some other pulls. I think that the timing needs to be chilled out and the boost turned up. Gonna go back and get the WI tune early in January.
Before that tune, I will be bolting on a gutted intake manifold- one that has been gutted ZX-Tex style, like on this thread: https://www.miataturbo.net/methanol-water-injection-22/port-wi-build-thread-43475/
For all the stock intake manifold haters, I think this will work very well. I measured the volume of the upper half and it is 1.3 liters. The lower half, pre-runner, when gutted, should come out to around 1 liter. That's plenty of plenum. The runners will be around 8 inches which sounds about perfect to me because I don't want all tippy top end power. The only issue is just the stock TB and manifold inlet. Seriously though, again, I don't think that will be a big problem either. The ID of the inlet is somewhere around 2 inches. A restriction but I think it won't be a huge deal. We will see what the dyno proves.
Reply
0
0
 12-21-2010, 01:24 AM
#314
Elite Member
Thread Starter
iTrader: (2)
Join Date: Jan 2007
Location: Los Angeles, CA
Posts: 8,682
Total Cats: 130
Hmm I am not seeing any knock at any time at all other than between 3500 and 5000 or so. And that knock I see is pretty darn big knock. I guess I should pull timing around there?
Reply
0
0
12-21-2010, 07:49 AM
#316

I wonder if there's some harmonic issue at 4500 that shows up as knock? A torque graph on a dyno would show if it's actual knock or not.
Reply
0
0
 12-21-2010, 10:28 AM
#319
FWIW back when my car was a turbo with the Motec, I had issues at 4500 with seeing knock but my timing wasn't very aggressive either. And that was with a 2560 at only about 12-16 psi (stock motor).
I wonder if there's some harmonic issue at 4500 that shows up as knock? A torque graph on a dyno would show if it's actual knock or not.
I wonder if there's some harmonic issue at 4500 that shows up as knock? A torque graph on a dyno would show if it's actual knock or not.
Reply
0
0


