When you click on links to various merchants on this site and make a purchase, this can result in this site earning a commission. Affiliate programs and affiliations include, but are not limited to, the eBay Partner Network.
This week I made some decent progress. Not too long now before everything will be installed on the Miata. So just a quick rundown:
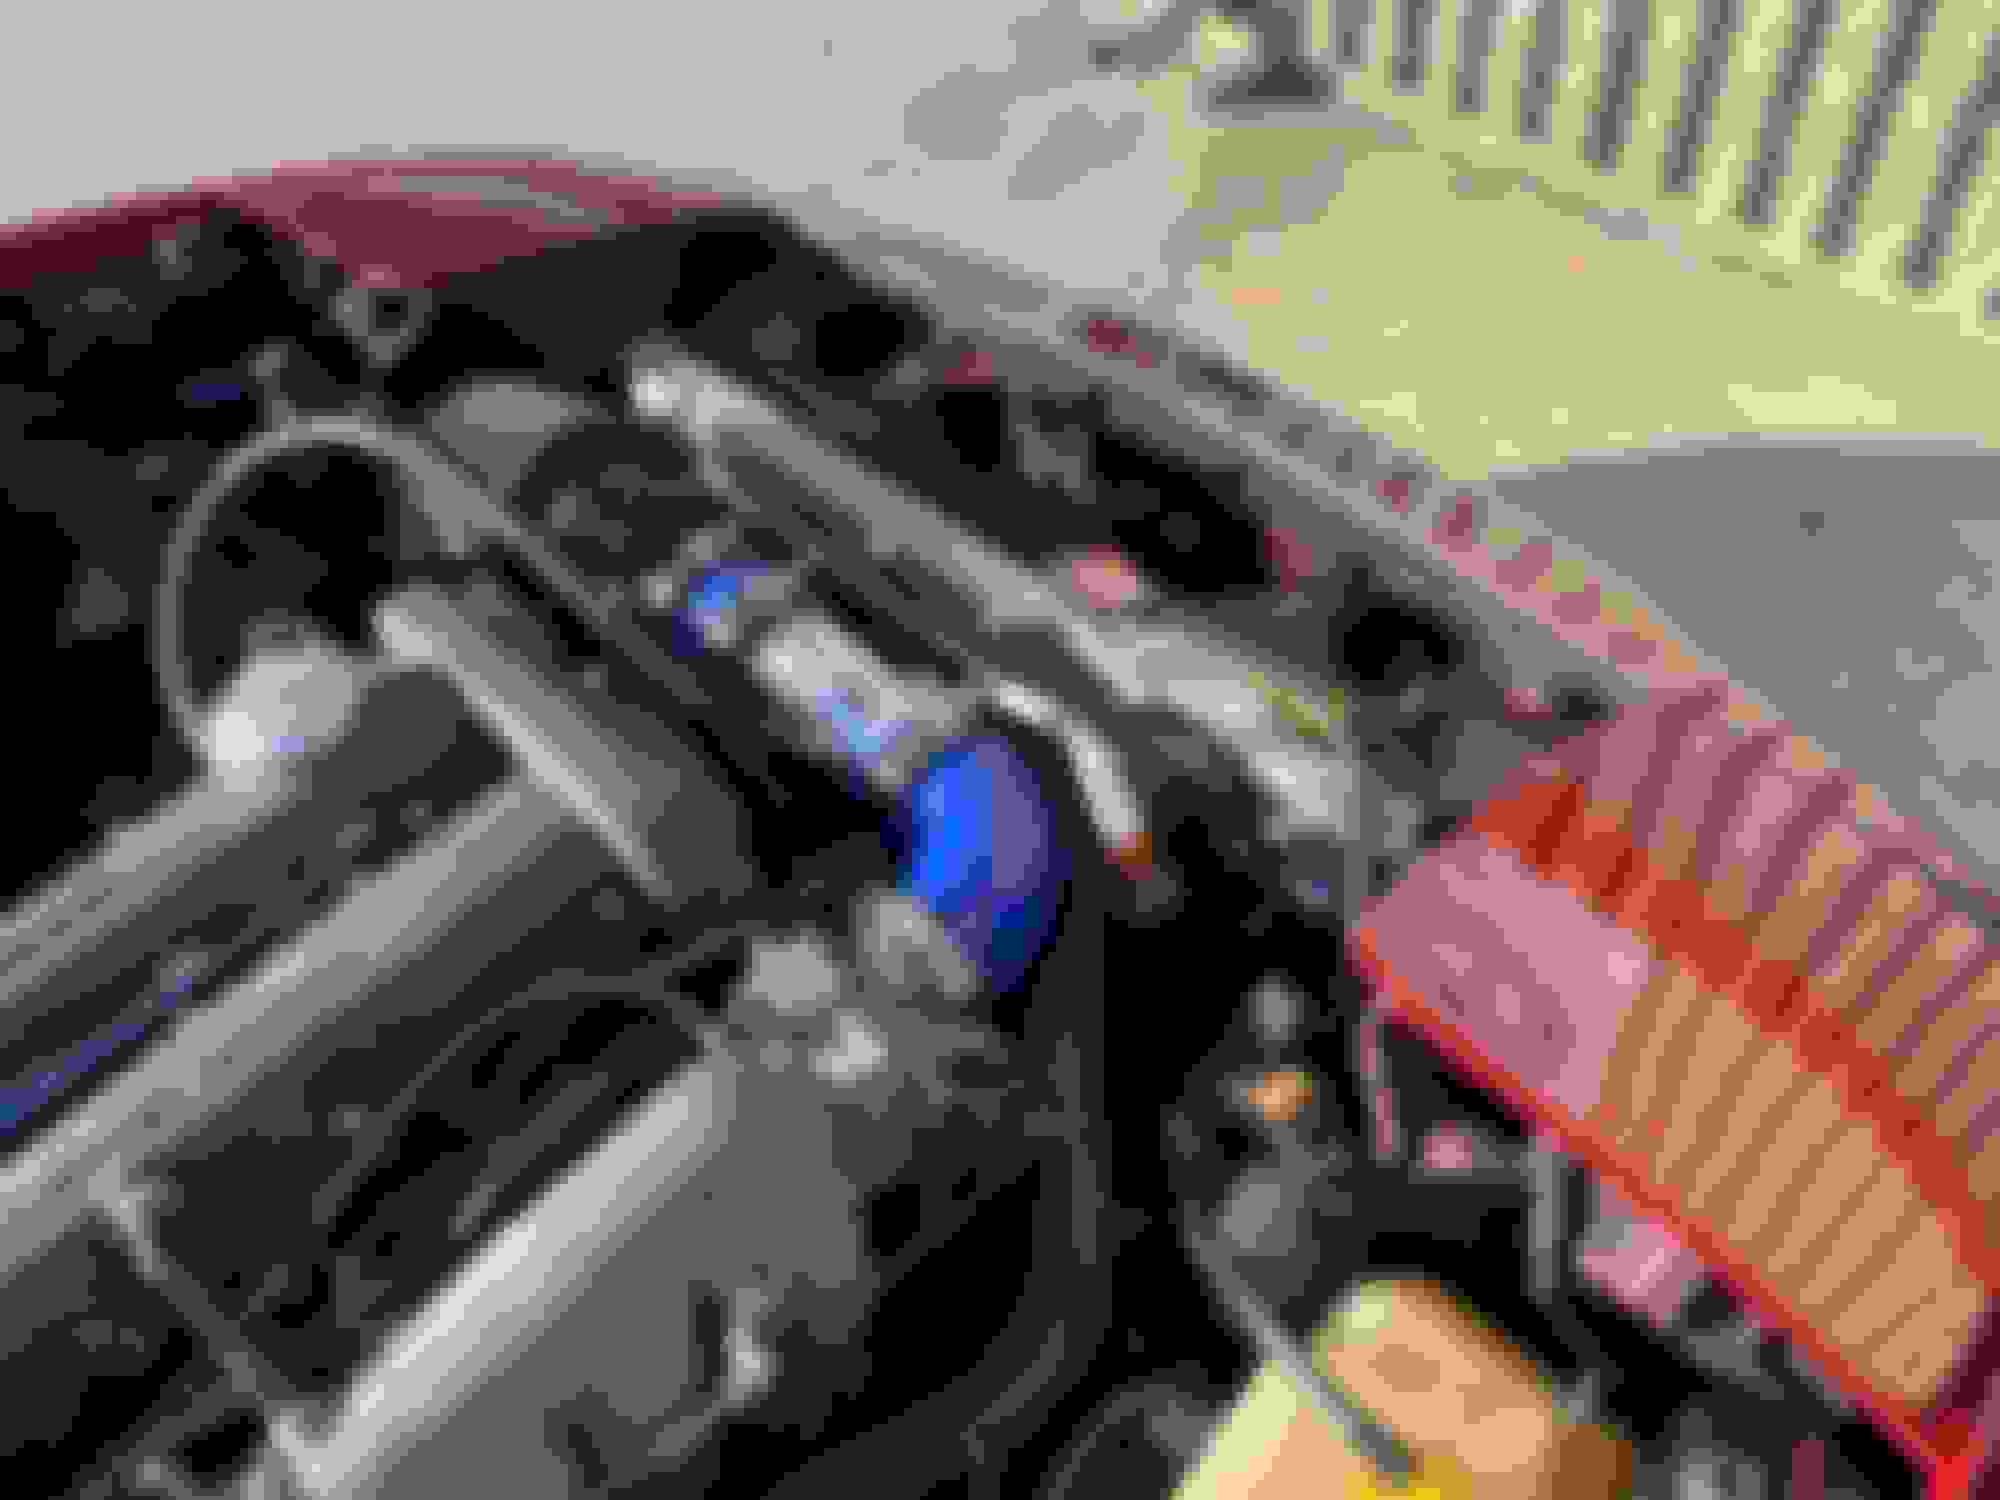
I got all new seals for the RC 550 injectors and got them installed. I used dielectric grease during that process just because it’s the only grease I had on hand and it works.
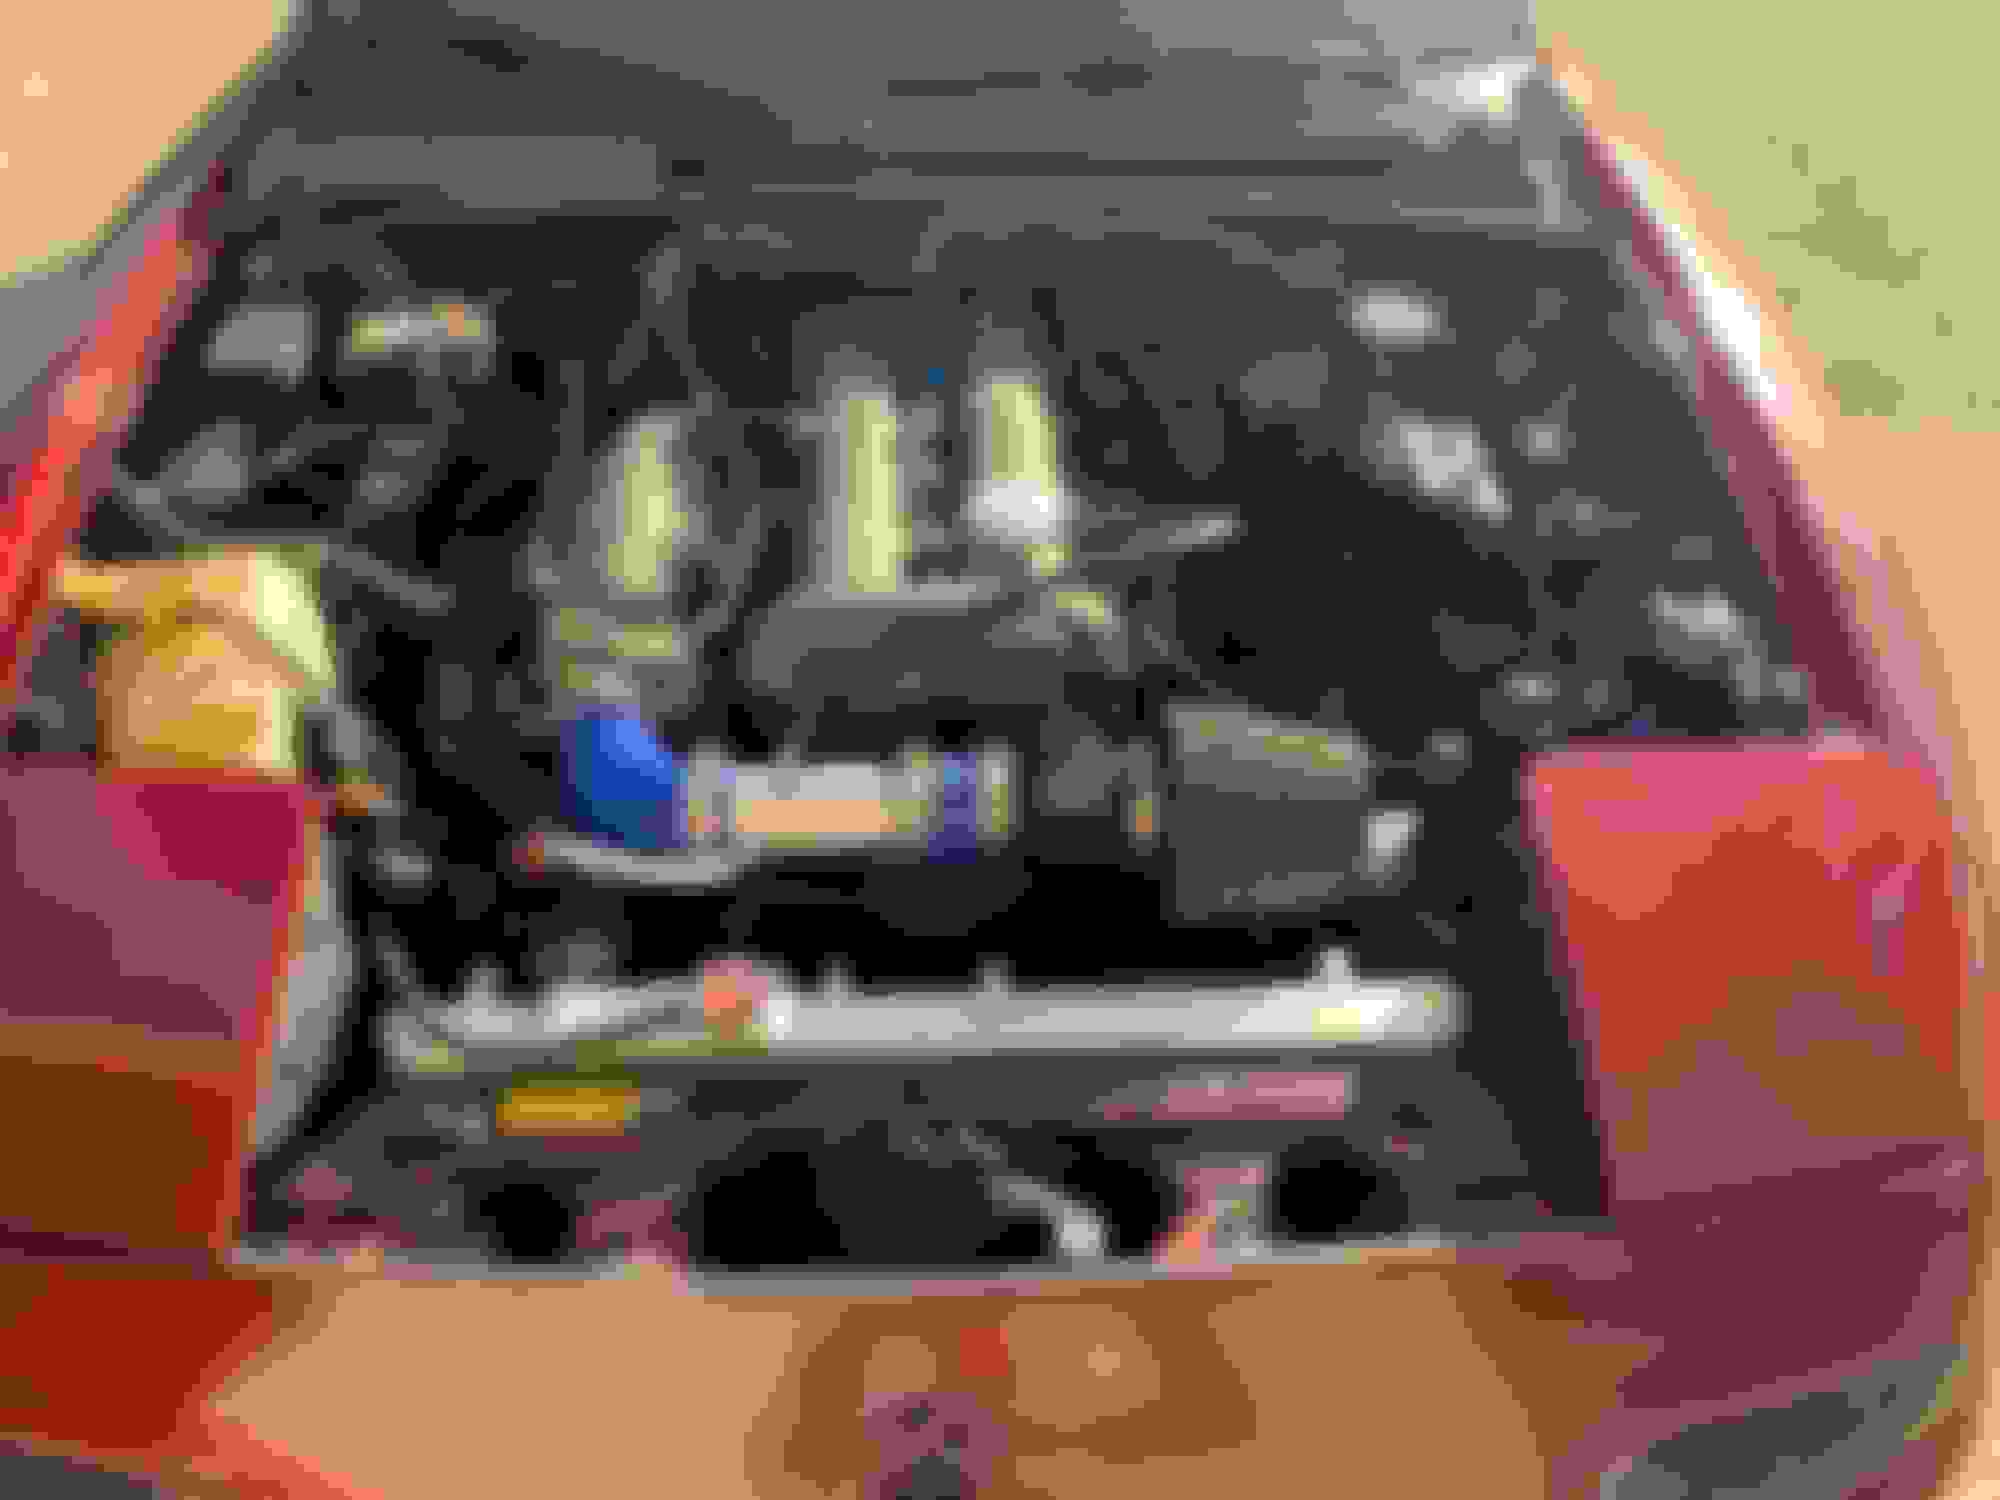
This will be the final position for the compressor housing, so I can run the intake piping up underneath it and place the filter back near the master cylinders.
Originally I was just going to put one slim fan on my radiator on the passenger side to make room for piping and leave the stock fan on the AC side but I realllllly didn’t like those universal mounting zip tie thingys so I sent the fan back and got the whole kit. Definitely worth it for sure
Got rid of the old dusty clutch, the disc was on its last leg, it was pretty much just flat with none of those separations.
Rear main seal looked brand new tbh so I decided not to change it. The oil pan gasket is leaking from right under the rear main tho.
Initially I didn’t quite align the clutch disc properly, it was slightttttttly off and it took me 2 nights worth of trying to get the trans in to finally level my pride and say MAYBE I did that wrong. The trans popped right in after that and I did the FlyinMiata instructed adjustment. I couldn’t be happier with how it feels. The extra throw, the long engagement but snaps when it’s fully engaged. Love it!
At the very end during the clutch pedal adjustment she gave me a little accomplishment kiss courtesy of a bare metal clutch pedal.
You don't want to put the air filter in that far right corner, there is not as much cold air as you think. Better place the filter behind the PS reservoir and head light and try to build a little air box.
You don't want to put the air filter in that far right corner, there is not as much cold air as you think. Better place the filter behind the PS reservoir and head light and try to build a little air box.
Well with the intercooler pipe routing through the fender it’s pretty much blocked the ability to put any filter right there, but I still might try. Sending it back by the master was my better alternative to sticking a mushroom on inlet. I just installed the slim fans so I might have more room to route it around the PS bracket and stick it right in front of the radiator
That would be good. Yeah, not really much space with your routing
Its coming together. Shouldn’t have much of an issue now that I decided to point the compressor outlet straight up and run a 90* off that instead of point it straight at the fender. Just got the email confirming that the SPEEDYEFI is on the way. That’s the final piece to this puzzle
Yesterday I installed my Koyo Hyper-V radiator with the mishimoto fan shroud kit along with a coolant reroute. Couple small roadblocks along the way but the install went mostly smooth. PITA getting behind that firewall. Only thing left to do is determine which way to wire the passenger side fan since the plug they provided didn’t match the stock miata plug.
I cleaned up the crusty paint off the pieces I got from the classifieds here. Wire brush, angle grinder with a sanding pad and then hand sanded it down to smoothness, some mothers aluminum polish and what a difference!
The coolant sensor had a different thread pitch than the bung on the adapter plate so I threw some JB weld on the threads and tightened it down about 1/2-2/3 of the way and JB welded around the base. That thing isn’t going anywhere! LOL hopefully that sensor never dies 😅
Eventually I will grab one of those inline thermostat housings off summit (like the one in the M-Tuned reroute kit) for simplicity and better reliability.
I did a little heat shielding for these pipes that will be close to the turbo. I think this should suffice. I chose the rubber hoses over silicone because 1) I think the rubber hoses are better and 2) they are way less expensive.
I’m having some idle issues with the car now and not sure why, but I’ll have that worked out in the next coupler days. Otherwise everything is functioning as it should. Originally I was just going to mount one slim fan directly to the radiator on the passenger side and keep the stock fan on the drivers side but I didn’t like those weird zippy tie mount things and could foresee that damaging the radiator in the future.
Not as much clearance as I had hoped for the coldside piping so I’ll have to run a 90* coupler off the TB instead of the straight coupler with 90* piping. No big deal. I’ll also be replacing the TB with a 99 TB instead for the compact IACV system.
SpeedyEFI is in the mail so should be here by next week! Almost there!
paid a $255 ticket that I got on Christmas Eve 😑 car was t even boosted yet
Flushed the fresh water/coolant out and put a 70/30 mixture of distilled/coolant.
Sold those RC550cc injectors in favor of some Deatschwerks 1000cc.
Installed the SPEEDYEFI on the mostly stock car and began tuning
Still waiting on the injectors. I’m going to have my midpipe finished welding up tomorrow and possibly install the turbo.
Car currently runs ok, definitely rough compared to the stock ECU but I’ve been researching maps for cars with similar mods and adjusting my tables. Still have a long way to go but AFRs are safe and the car runs halfway decent. It pretty much idled perfectly right out of the box on the base tune.
TBH I’m so glad I installed the ECU on the stock engine and started learning before I had the turbo to complicate things.
Alright! We spent about 10 hours today getting everything finalized. For some reason my wastegate pipe mounted up just fine every other time I did a test fit and this time the wastegate was all over the steering shaft by like 2 inches.
That cost a lot of time.
So I’m currently running a muffler less exhaust and it’s honesty pretty quiet. The car sounds incredible with the EWG.
im still waiting on my injectors to come in so right now I’m just running on the stock 265cc injectors which should be good for 5-7psi. Also on really conservative timing right now until the new injectors come along. Fine tuning the cruise and daily driving cells and letting VEAL run during light pulls. Half throttle and all that.
I had some great guys helping me out with everything. I get overwhelmed working on cars when stuff doesn’t go how I thought it was going to (which is all the time) so it was nice to have some friends helping out
Popped the new 700cc DW injectors in today. I didn’t end up using the fuel rail for a couple reasons.
1) it doesn’t have the right hole for the stock FPR so I would have to run my aftermarket AFPR.
2) the fuel lines that I had for the fuel rail and AFPR were old and dry so I’ll need new fuel lines.
Whats wrong with DW Injectors? I was looking at their 1000cc ones, purchasing within the next month or so.... tell me why I shouldn't
Im going to assume it’s because Flow Force is a forum vendor and if it’s not Flow Force then it’s the $600 ID1050x injectors.
I paid $314 for these injectors that are plug-n-play and don’t require adapters to make them work like the FF. I’m very happy with them
Are those ev14 injectors?
We do love Nigel and his Flow Force injectors, they have proven to be relatively easy to tune and very reliable.
In fairness, we are friends, but I do run his injectors because I am too cheap to buy the ID's.
You can let us know how well these ones work.
Are those ev14 injectors?
We do love Nigel and his Flow Force injectors, they have proven to be relatively easy to tune and very reliable.
In fairness, we are friends, but I do run his injectors because I am too cheap to buy the ID's.
You can let us know how well these ones work.
They are denso injectors. So far they’re working great, I’m a newb at tuning but I have the car idling perfectly at 14 and they have been flawless thus far. I pretty much plugged them in and changed the req fuel and they’re working perfectly: I need to adjust my voltage correction table but the table DW provides on their website made my car idle at 22:1 with the idle calls at 69ish so I reverted back to the voltage correction that was included in the basemap and they’re working pretty good. Still learning and still adjusting things slowly
I tested a set of DW injectors on a ANSU flow bench, I think they were like 460CC or something like that.
They looked drilled, had a horrible spray pattern that could be described as a single jet, and were "matched" within ~10%. Total garbage.
Sample size of one set of 4, compared to FF640's and 960's and a lot of OEM injectors. I wouldn't put DW on my car, not when OEM unmodified injectors are available for less.
Well I’m enjoying them right now and have no issues. They solved my issue and will be good for what I need them for. I have a friend running these same injectors on his miata and he’s making 275whp and his car runs great! My brother is running DW in his 420whp S13 and his car also runs really good. To each their own. Injector Dynamics obviously would be the best, but I see a lot of pro racers use DW injectors and fuel components so they can’t be that bad?
On another note, been doing some tuning everyday. Making small adjustments. Studying, learning, etc. I love this app, it’s very useful. I was pulling a lot of timing at 6000+rpm from an already conservative timing map. This is the cars state currently on 10psi.(Blue Line)
the red line was 2 days ago with less timing and 9.5psi
Came outside this morning to find this....
At first I was extremely concerned and alarmed. Had to call in from work to clean up this mess and get the car safe to drive again. A little TankWeld by JB Weld (made specifically for repairing cracks in gas tanks) fixed her right up.
I’ll probably end up buying a new gas tank and putting that in the car. Not a fun adventure
 01-16-2021, 07:30 PM


 0
0