When you click on links to various merchants on this site and make a purchase, this can result in this site earning a commission. Affiliate programs and affiliations include, but are not limited to, the eBay Partner Network.
You were at GTE this morning? Dang, we practically drove by each other, I took mine into work this morning(work about 5min from GTE).
Glad to see its still coming along! Do you have an event/date picked for a first track shakedown?
Hey! I was there yesterday. I had presidents day off. I didn't realize you worked right around there. I would have definitely loved to come by and check out your car!! (Can't believe you got her running so quickly!)
I signed up for Death of Winter (3/20?) with Jzilla at AMP about a month ago, but I'm on the wait list. So fingers crossed. There is a track night at AMP the Wed before hand. I normally don't go to those very much anymore, but thought I might as a quick shake down.
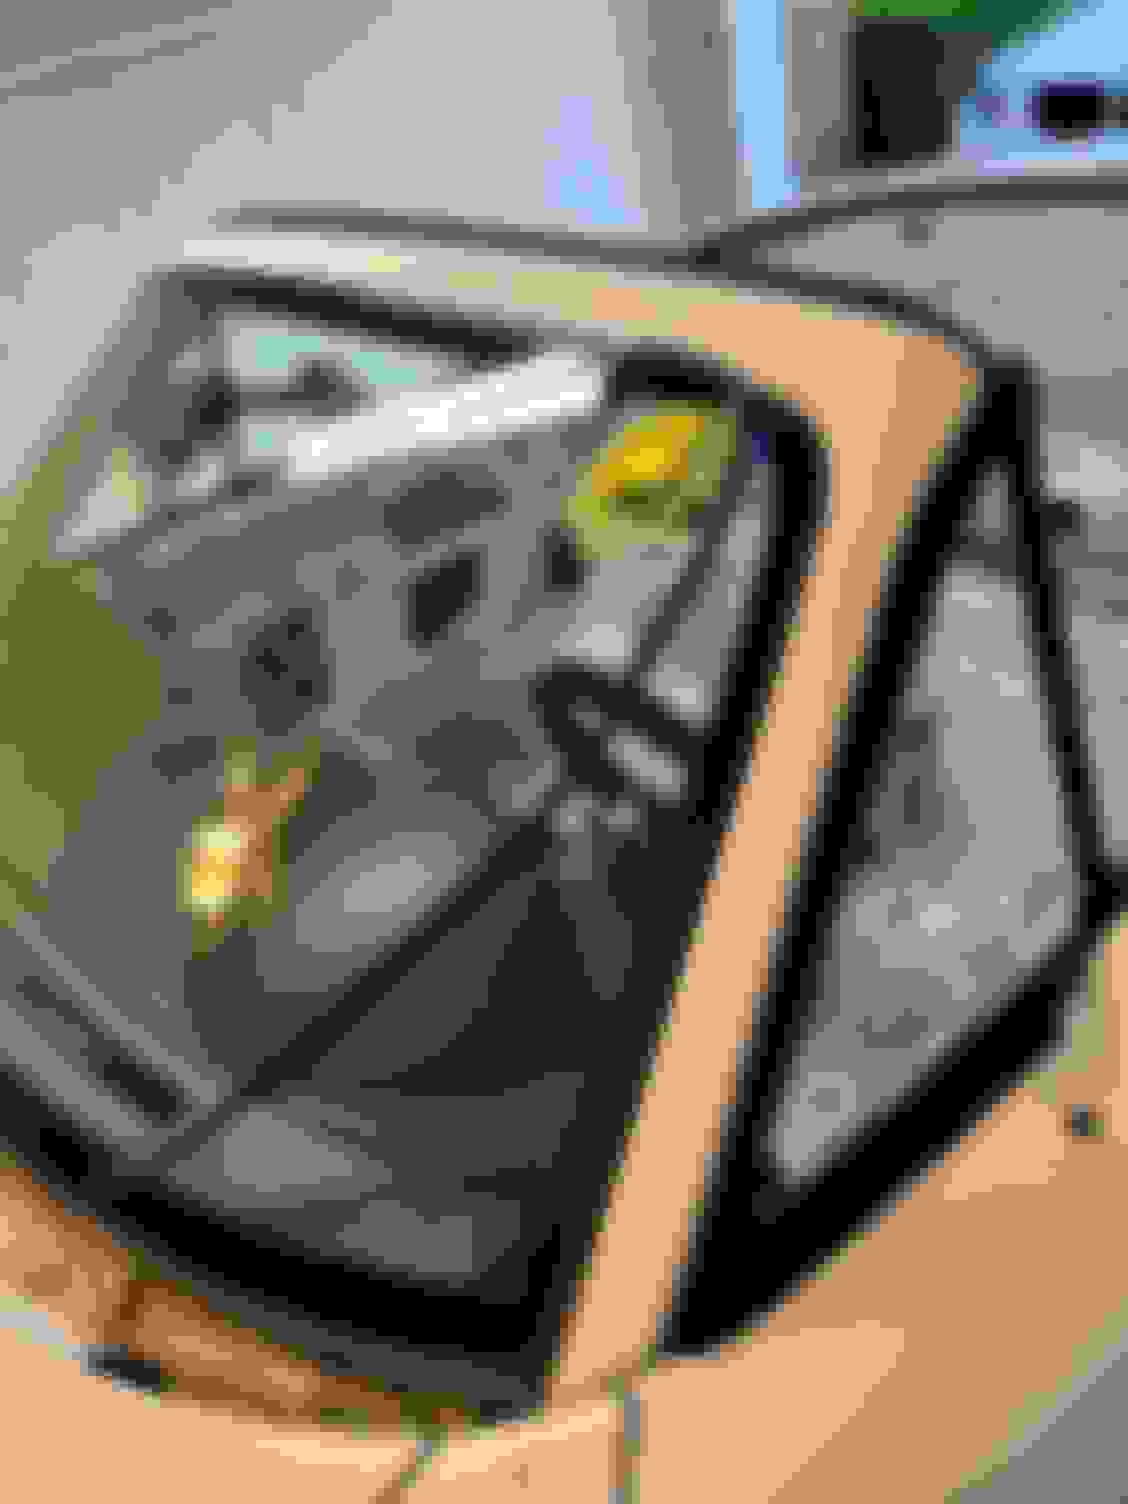
And because I know what the people really want / pictures or it didn't happen.
(Yes, I took these holding my cell phone, so...don't expect much. I need to get a go-pro and mount it.) Both of these are pretty short, but you can hear all the intake noises! (And the damn brakes!!! I need to go and bed them in still...but there really isn't a good place around here unless I go very late at night.)
It doesn't look that fast, but 30mph - 87mph in 6 seconds with 2 shifts. (trying to be semi easy on her while breaking in the clutch...so no real launch) I was going downhill for some of the start and uphill towards the end. (and as you can see...I short shifted her) She's a 7200 redline just like a stock Miata.
This video is to show all the torques...25mph dig in 3rd gear...going a little uphill too. (I slowed down there for a bit when I saw the cars on the side of the road. I didn't think it was the law & then all at once I did...and I really didn't need a ticket down in Mexico while holding my phone shooting video.
Hey! I was there yesterday. I had presidents day off. I didn't realize you worked right around there. I would have definitely loved to come by and check out your car!! (Can't believe you got her running so quickly!)
I signed up for Death of Winter (3/20?) with Jzilla at AMP about a month ago, but I'm on the wait list. So fingers crossed. There is a track night at AMP the Wed before hand. I normally don't go to those very much anymore, but thought I might as a quick shake down.
Have you signed up for an event yet?
Yeah I've been taking it into work frequently just to put miles on it and help work out the kinks. Coworkers have had great fun getting joyrides at "responsible" speeds. I work for one of the aircraft maintenance companies at PDK.
I'll be at DoW, it will be the first track shakedown for me. Small track, close to home, plenty of miata venders onsite should anything go wrong.
Two weeks after that I'm headed down to RRR for a NASA weekend to get my TT licence, then Pine Mountain hillclimb late April, and then planning on NASA at CMP early March for my first NASA TT event. Then I think I have a little break to fix whatever has broken on me.
Last edited by Wingman703; 02-23-2022 at 06:15 PM.
@Wingman703 Hopefully I get to see you at DoW! (I may go to just say hello to people if I don't get off the wait list). If I don't see you before then, good luck at Roebling with your TT license. (FYI...Don't forget to bring some bug spray for the red ants. I got bit 4 or 5 times the first day / morning and my ankles became cankles they were so swollen.)
Also trying to put miles on the car to work out any kinks. I've ran a whole tank of gas through her now. Knock on wood...only two items for last 100 miles is a slight rattle from fuel tank cover that I've already fixed, and the top was coming loose, so needed to add a lock washer to the mount. Let me know if you are looking for an excuse to drive the car more / want to grab lunch this weekend. Would love to check out your car!
@djwarner I saw the Laminator and I wondered how well it worked. I could see how smoothing out the air flow would make a big difference. Thanks for the review / I'll have to get one!
I am running the E39 ECU. I bought mine from Keisler Automation with VATS removed and a performance tune already installed. I'm actually very happy / surprised at how well and smooth everything seems to be working. Only item I've found so far is it sometimes likes to hold it's revs a bit when you push in the clutch. I've read about that and know that can be fixed in HP Tuners. Since it is running so well already, I think I'm just going to wait a bit before messing with the tune. I have some other items I'd like to focus on first. Thank you very much for the offer. (Have a !) I'll definitely reach out when it comes time to start tuning.
I will have to look into the Keisler Tune. Since I used the 6L50 transmission in mine, it was important to combine/match the tunes for the both the E39 and AT control. So, I bought the HPtuner lessons for both. What I discovered was that the E39 is quite different than the E38 and has a different engine management scheme. It uses a virtual torque table that specifies how much torque the engine should produce at any accelerator position and RPM. As you press the accelerator pedal, the ECU starts opening the throttle body. Once the torque produced matches the table, it stops opening the throttle. So, the percentage of throttle opening has little to do with the percentage of accelerator pedal travel. To top it off, the tables differ with the donor car. An Impala is different than a Camaro. This had to be considered when tuning for max performance. l can give you more info when you are ready for it.
Although I haven’t posted in a few weeks. Funny enough, that doesn’t mean I haven’t been writing posts. I have a couple that I’ve started and just haven’t finished yet. They are more involved (wiring) and not nearly as much fun to write about.
So this will be more of an update post...
Most of this was all done in March. I haven’t done anything to the car in the past three weeks. I had knee surgery and I'm on a set of Tiny Tim’s for 6 weeks without being allowed to put weight on my one leg…as you can guess, that slows down the wrenching everything. It also made me cancel my first track event in May with this car. I’m disappointed in that, but health takes precedence over pretending I’m Senna for the weekend. Hopefully I can get out there in June.
Steering
I have about 400 miles on the car now. She’s running well, but I still need to work on the steering. In true Goldilocks fashion, I’ve gone from Too Hard with the manual steering, to Too Soft with the power steering. I wasn’t sure what the problem was and it was Wingman who pointed out the steering was over-boosted on a test drive. THANK YOU! Also got to ride in his KSwap. Awesome Car! Lots of fun! If your looking into swaps, nothing wrong with the K.
The over boosted issue is too much fluid flow from the LFX pump to the Miata steering rack. The fix is a flow reducer. Luckily, the LFX pump uses a flow reducer that is the same as a pump used on a bunch of LS swaps so it’s relatively easy to find one.
The one on the right is the new reducer, it also has an -6 AN end which removes the need for the extra fitting.
I haven’t installed it yet (The first one I received was the wrong one) and once I returned and got the right one, I didn’t have enough time to install it before my surgery. Anyway, you can see the difference in the size of the hole that allows fluid to pass. I’m very excited to try the “Just Right” steering out!
The smaller hole on the right is the new one.
Interior (Early March)
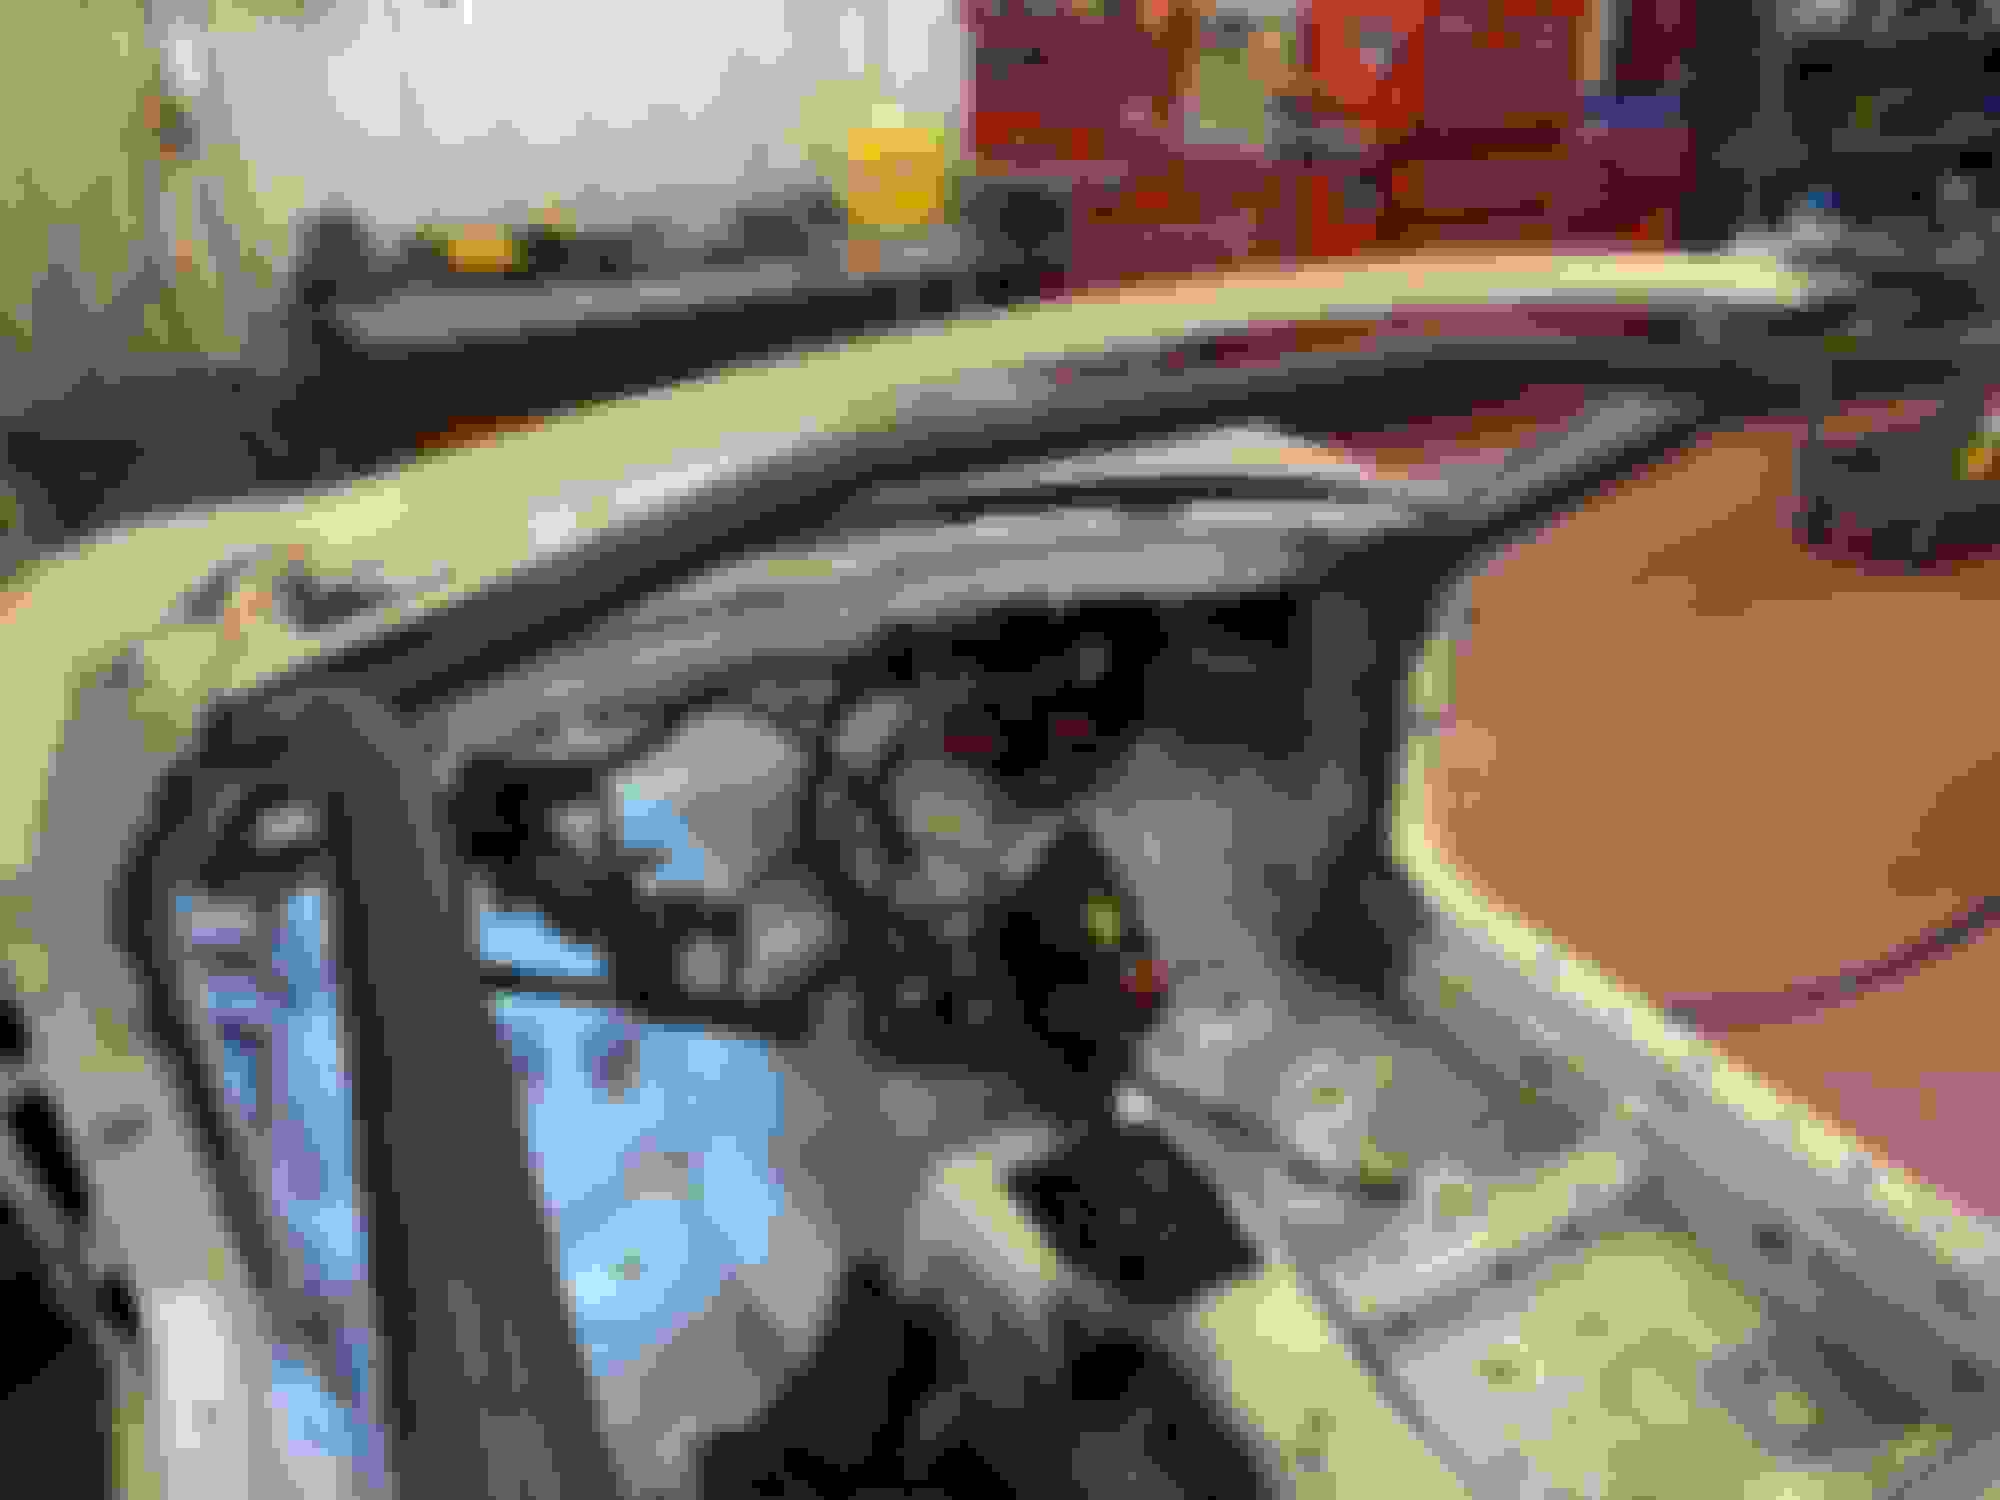
With the wiring finally done! I put the dash back into the car. What a huge difference that makes to the car. I made a few changes to the dash before putting it in. First, to make getting the dash in and out without having to fight the shifter, I cut the support out of the center part of the dash where the radio goes. This allows you to get the dash in without fighting the shifter and allows the dash to be put in or taken out without removing all the wires to the control panel. (So double win)
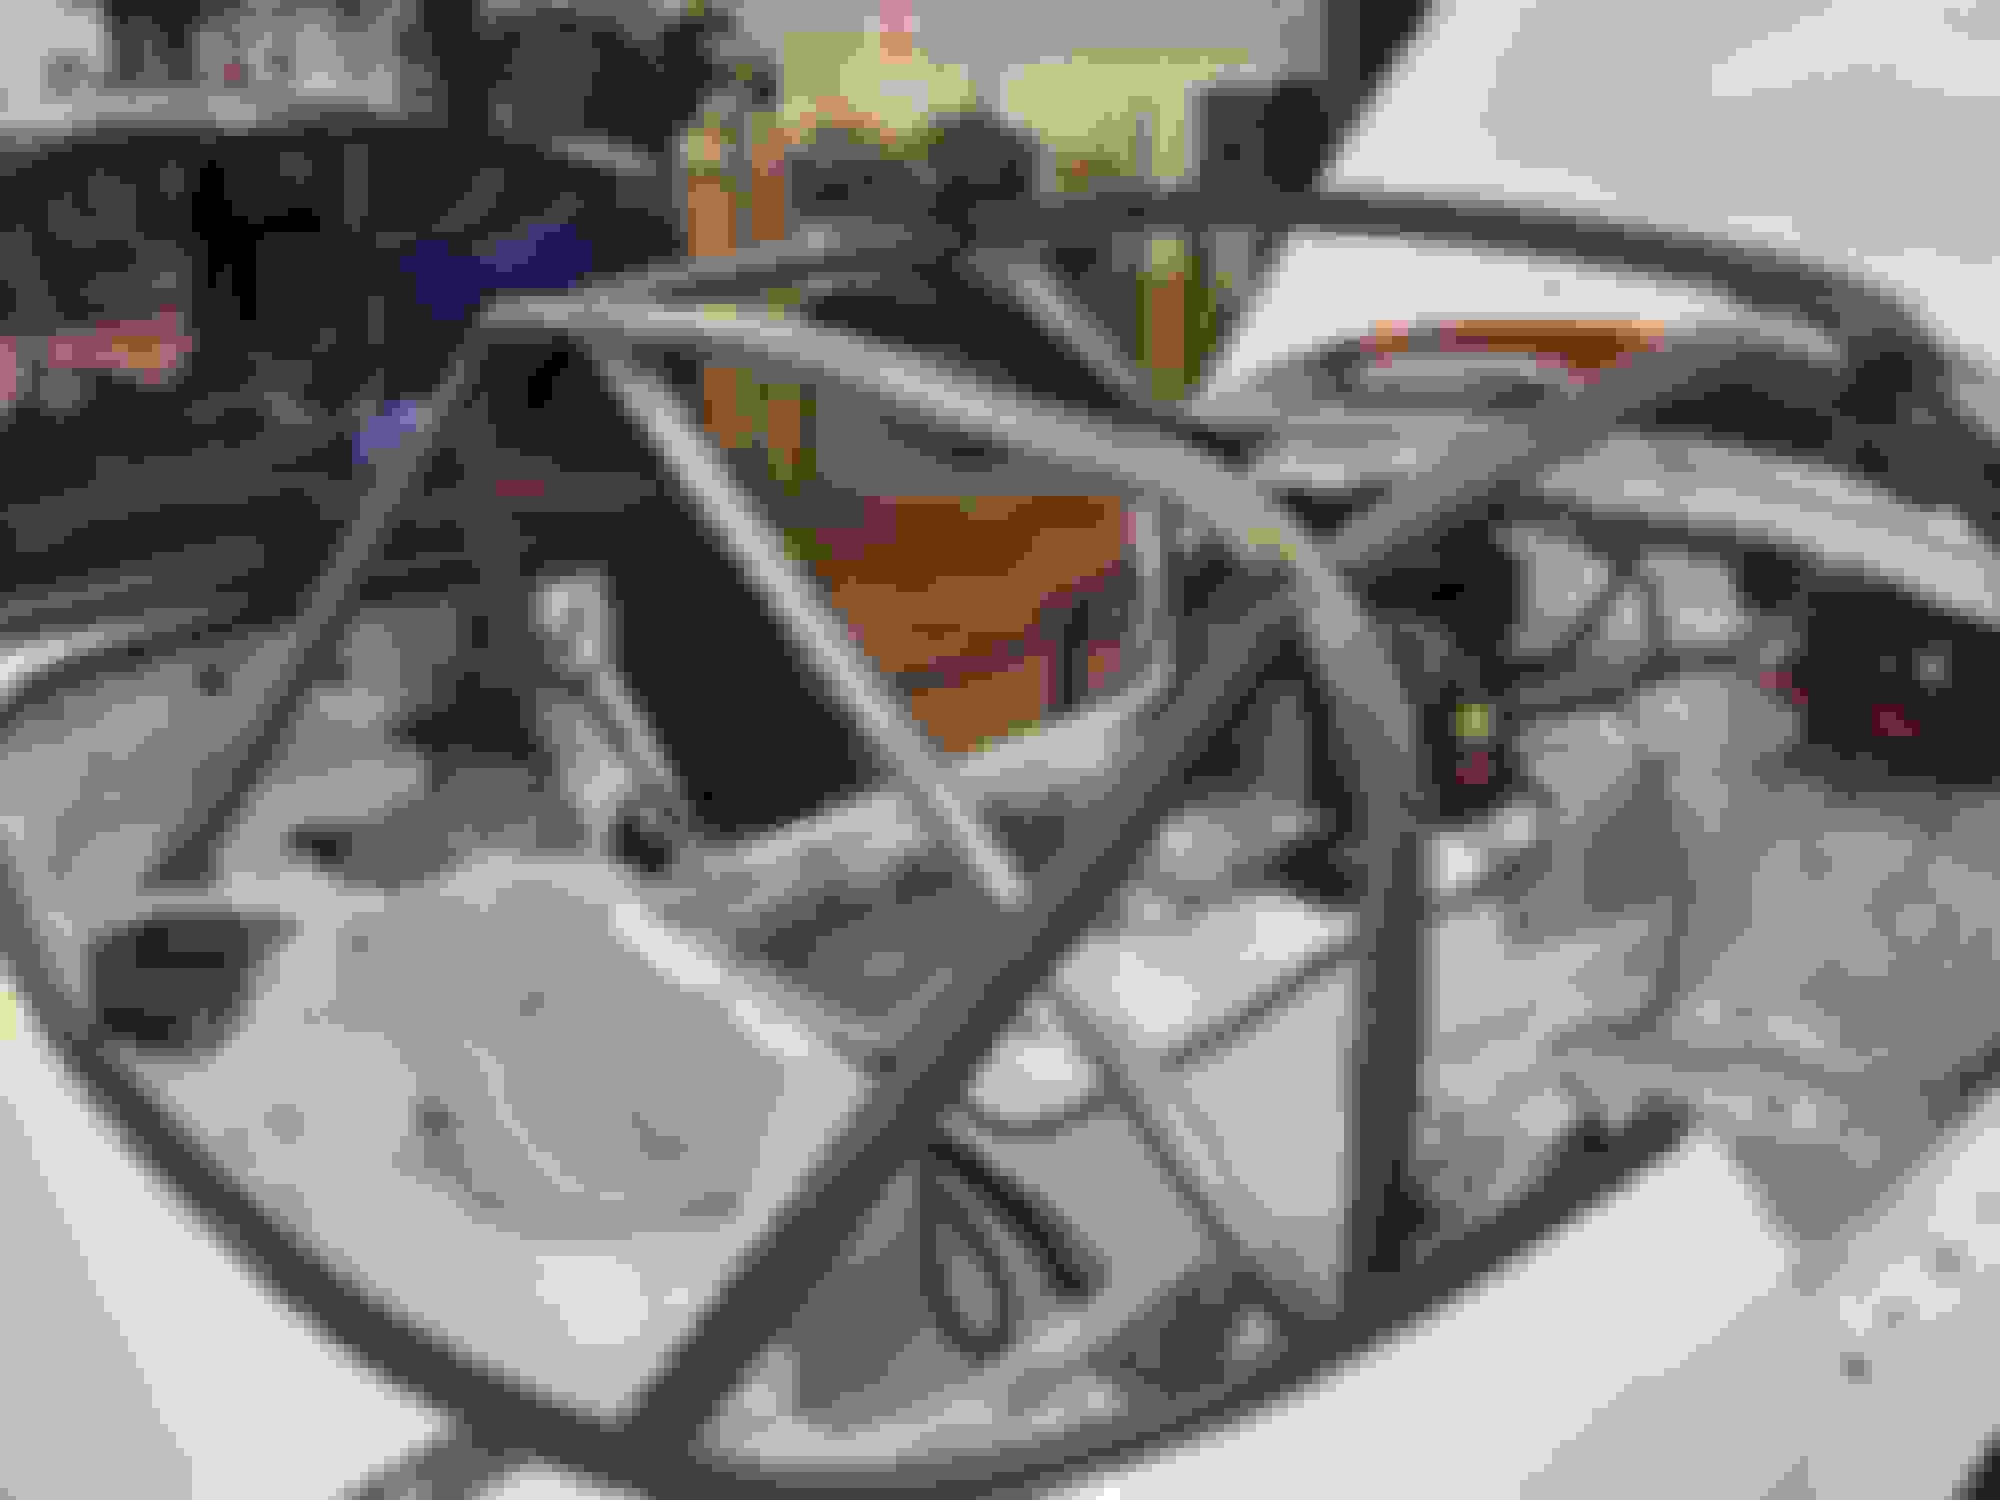
Here are all those wires you don't want to disconnect when removing the dash.
I cut out the center section...Originally I was worried about it needing some structure and was going to screw in a piece of aluminum flat bar to hold it together, but it didn’t need it, so Job Done!
I’ve been using a super cheap walmart android 8” tablet with the Torque app for gauges at the moment. (Ultimately want to get an AIM dash.) The Torque app has been working surprisingly well. People complain that it doesn’t update fast enough, but I haven’t had that issue at all. If you have a better tablet, (brighter and better screen) you could probably make this work full time for street gauges if you wanted too. Anyway, to get the tablet in…I added a few pieces of scrap wood and some velcro to hold everything in place.
You can see the scrap wood I added to the back of the dash. (Just screwed in with a single screw.) I also added some velcro to this and the back of the tablet so it can easily be pulled out.
Dash in with the tablet in place.
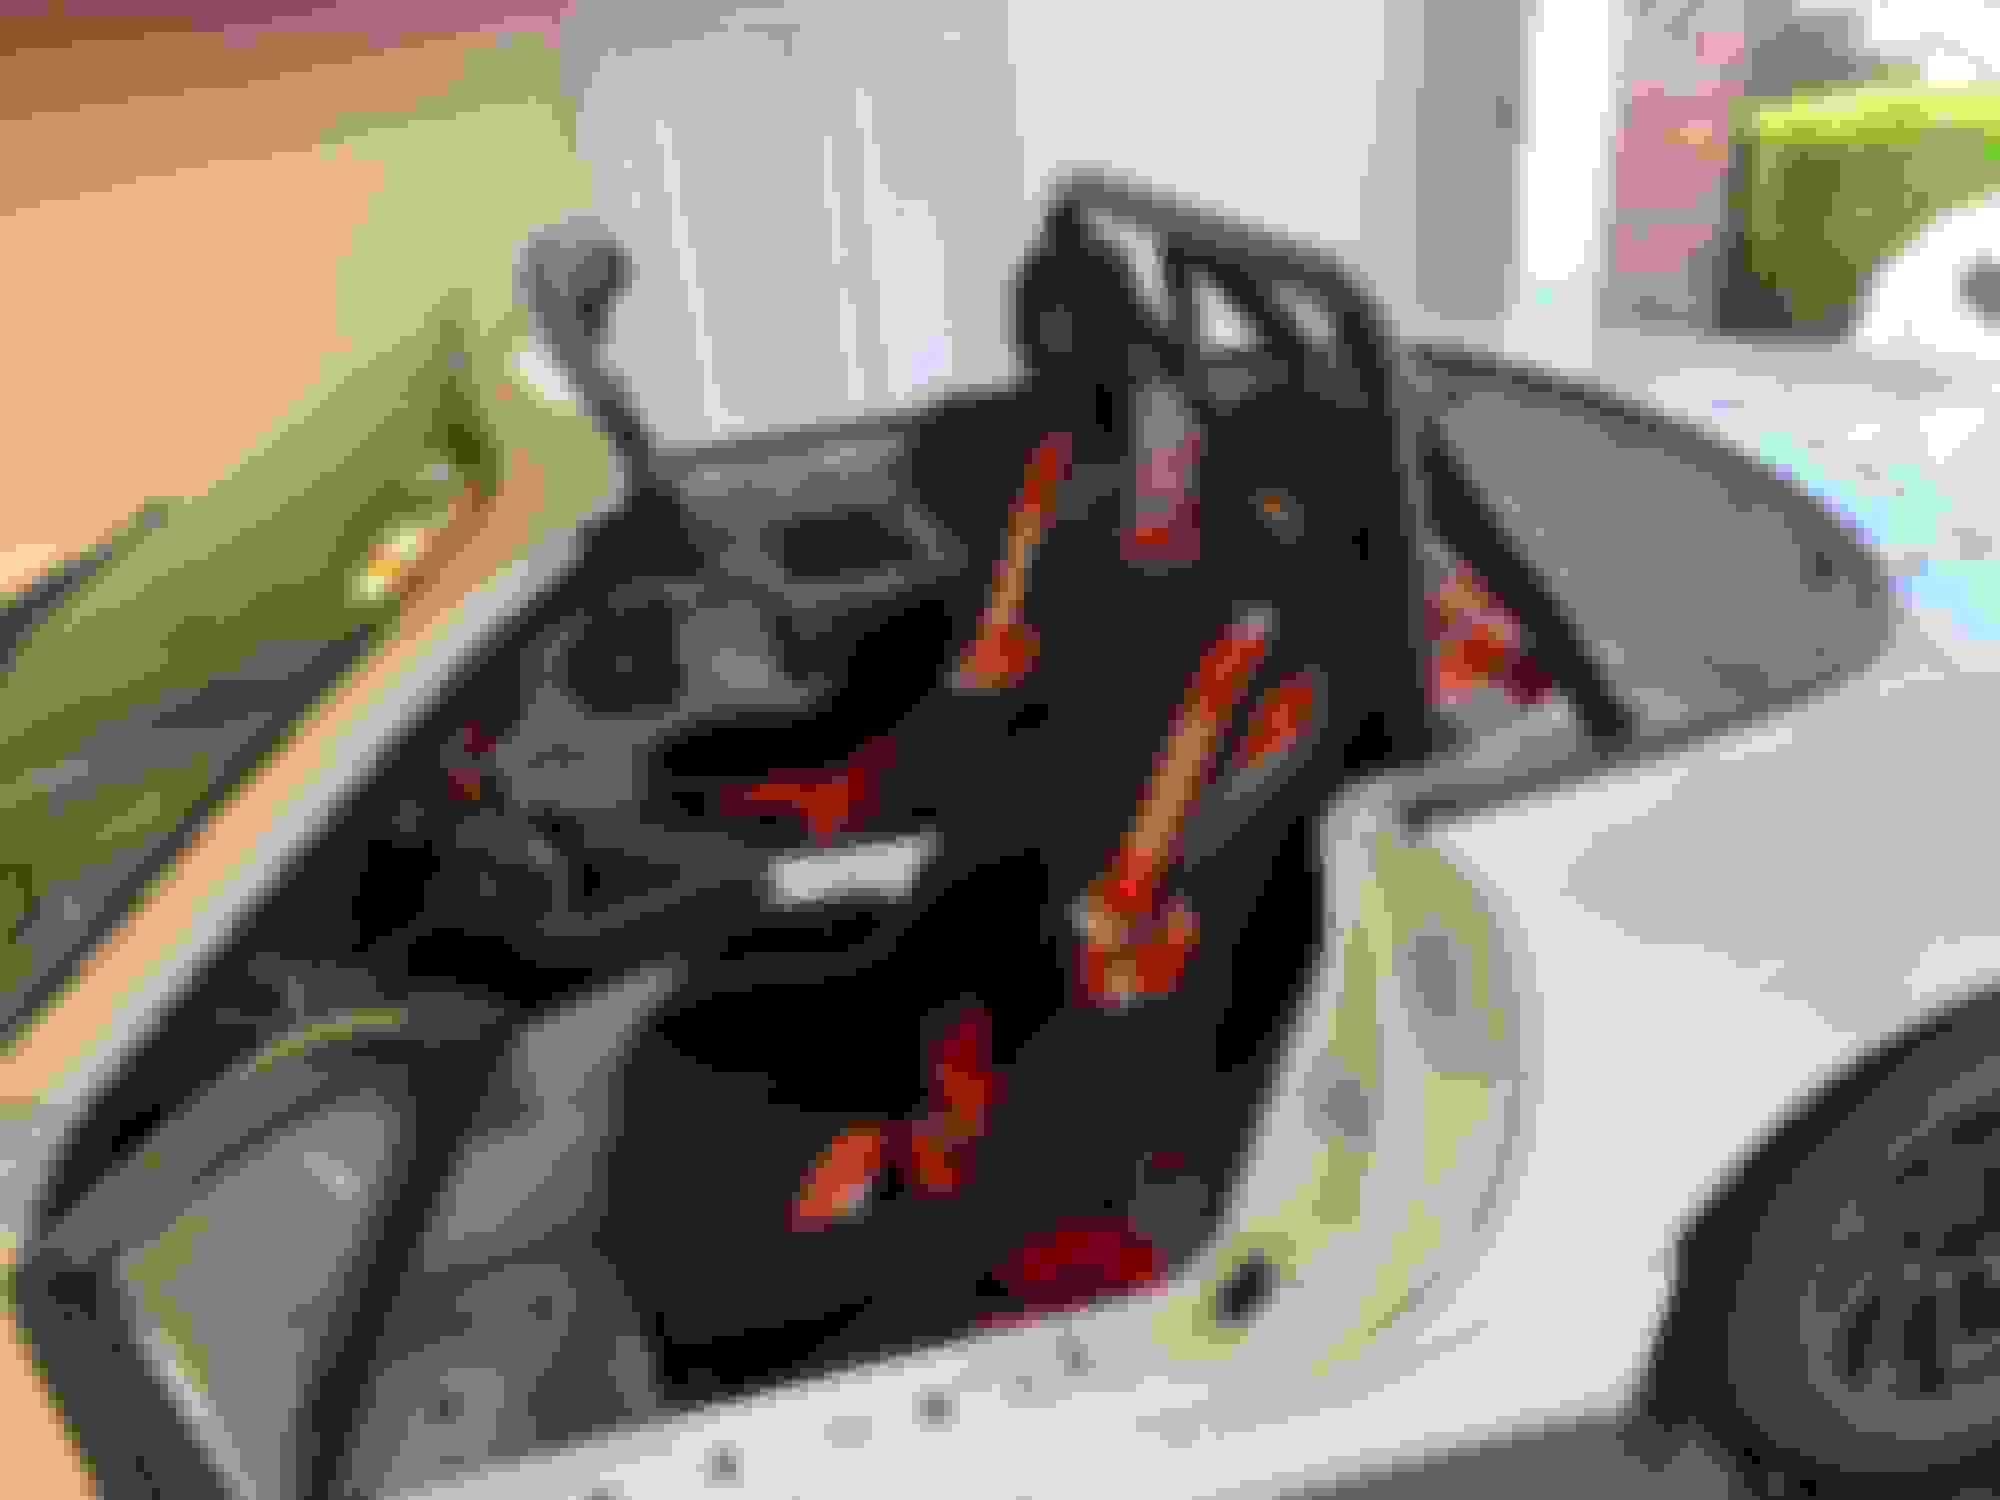
I also put my Kirkey seats & old harnesses into the car as an interim solution, figuring that would bolt in quickly. It wasn’t exactly quick…I have to “massage” the trans tunnel, remove the rear humps and drill holes / install backing plates for the harnesses and seat. (i.e. still a half day affair) The drivers seat is a bit too close, but overall, this worked for now / was better than the stock seat and sketchy seat belt mount I was using.
Adding all of this back, did introduce a new problem. It’s easy to flip the power switch "OFF" while driving down the road accidentally, when you move your hand from the steering wheel towards the shifter. I’ll probably just pull the red switch cover off for now, but eventually it needs to be moved.
Battery Mount
I needed a way to mount my little motorcycle battery. I really like this little 3lb antigravity LiFEPO4 battery, but I also know I can’t just go and pick one up at AutoZone if it dies. So I decided to run my wiring to the back of the car where the original battery goes for this reason. Along those lines, I knew I would need a battery mount. So I built this little add on adapter bracket that I just screw onto the originally battery mount, so I can quickly go back to a “stock” battery setup if needs be.
Cut some metal to start fabricating a battery adapter mount out of some sheet metal.
Put these into the vise so I could bend them into some L brackets
Here they are bent...I copied the Miata mount and added a little flare so they would easily slide over the top of the battery.
I welded some cross bars in a diamond pattern. This allows you to still reach the "reset button" (No I did not weld this while it was sitting on the battery, this was a test fit after it cooled down.)
I drilled hole into the original battery mount so I could attach my "adapter mount" onto it. The bar that goes across, I drilled and tapped so I can screw it into the original mount. These screws are temporary, but were the correct metric threads that I want to use, I'll get some button head that fit better.
Backside of the mount. Screws are way too long.
Here is the odd looking battery mount "adapter" on its own. I measured the difference between the top of the battery and the Miata mount with the bar on it. I ended up cutting some bar that length and used it to attach the two pieces together.
I haven’t “finished” this yet. I still plan to clean up some of my welds, paint it, and cut and glue the rubber padding (left over shelf liner actually) onto it, vs just laying a large piece across the top, but this works for now.
Interior (Late March)
I purchased a seat mount and attempted to install my OMP HTE-R 400 seat. I thought these were built to fit in a Miata, but I ran into all of the normal seat install issues. I can’t seem to get the seat far enough back without hitting the roll bar. I also hammered in the trans tunnel to try and get the seat further over, so it sat straight on the steering wheel and would get around the roll bar. I got the seat semi in the car, but none of that mattered, because I’m sitting too damn high. Mazda really needed to make these cars 1” more in every direction. (Sorry no picts...)
I’m thinking it’s time to just put a drop floor in. Anyone have a recommendation on which one to buy? (or not buy?) I’m also seriously thinking about just paying someone to install it. With my knee needing lots of healing time and just wanting to get the car on the track, pushing the easy button feels like the best choice. Anyone in the Atlanta area have a recommendation?
Since I built a streetable LFX swap, I wasn't concerned about meeting any particular class. My first realization of potential problems was when I considered taking the car down to the local drag strip. With quarter mile speeds expected around 130, I found they required all sorts of additional equipment. I could pose fat, dumb, and happy on a tune and test night, but getting in more than one pass might prove problematic. So I started paying attention to what are the various classes, ie what is allowed in the Spec Miata class.
Watching and appreciating your work efforts, it occurred to me to ask what class you are working towards. What major limitations you are facing?
Safety equipment can start getting expensive pretty quickly, it sucks, but I don't blame the track for wanting to keep people safe. At the end of the day, coming home in one piece is the most important.
I'm building the car to be a fun HPDE car, with main goals of being fun, safe, reliable, and enough power to actually be able to pass someone.
When I get into racing, (Probably start with nasa time trials), I'll enter competitions that are power to weight ratio with additions and subtractions mainly based upon tire choice. So, I can tune the car for more power (e85) or less power, and add / subtract ballast. So I think conservatively, I could run at the top end 310hp / 2300 lbs (which is 7.4:1 before adding / subtracting modifiers) and on the lower end 200hp / 2500 lbs (12.5:1 before adding / subtracting modifiers) So that allows me to set the car up for TT2 (8:1), TT3 (10:1), or TT4 (12:1) without trying too hard. TT3 would probably be the easiest / most cost effective for my car, since its the closest to what I plan to be in HPDE. (using 93 octane, and 200tw tires)
This build thread seems to wax and wane. I guess that's life. I still have a couple wiring write ups to finish up (HA!) and will probably get to them about the same exact time as I start re-wiring the car. I ordered an AIM PDM32 logger dash a couple months back, cause I like pain and re-doing the electrical sounds like so much fun! Anyway, my guess is that it should be arriving before Christmas, so I still have time to get those write ups done first. (They actually said 2-3 months, but I'm not holding my breath).
So let's see, what have I done to the car...
Steering
Finally got the steering fluid reducer installed. And really fortunately, I was able to do it without pulling the pulley off the steering pump! That's a huge win, because that pulley sucks. Anyway, the car steers like it should now. Definitely a needed part for the steering system!
New reducer installed poking out behind the steering pulley (still needed to install the hose to it.)
Drop Floor
I know I wrote in the past that I tried to get my new halo seat in the car, but I was having no joy getting it where it needed to be between trying to get it low enough and back enough with the roll bar. I attempted this right before my surgery, so while I was sitting around with nothing better to do...I started shopping and along with the new AIM data logging dash, I also purchased a drop floor kit.
More pictures to come with this actually installed
I also decided to let someone else install it for me. The guy who I called to install it is the local cage builder in the Atlanta area. He had a 2-3 month waiting list that I got on and the car is finally at his shop right now getting the drop floor installed.
1st Track Day Prep (June)
My knee was finally well enough to do a track day! I signed up the car up for it's very first track day and had a weekend to get her ready! Besides taking a wrench to everything making damn certain nuts and bolts were tight...I did the following...
Fixing the Seats
1st Thing I had to do was get the aluminum Kirkey seats from my old Miata installed correctly. That involved getting the back of the seat attached to the rollbar. My previous roll bar was 1.5" tube and the one in this car is 1.75" so I ordered some new shaft collars and welded them up like the original one I had for the 1.5" tube and then installed the back support.
Here's a picture of the original, so you see what I'm talking about. I forgot to take a picture of the one I welded together.
Here's the new one and the back support installed.
Sealing the Radiator
Next up was sealing up the radiator. How it was currently allowed any and all air to just go anywhere but through the radiator. That was fine with the test driving on the road, but I knew it wasn't gonna fly with the June heat at Road Atlanta. So I picked up some 1" pipe foam and 2" square foam for AC units from my local blue apron racing supply store. That along with some zip ties and I sealed up the huge gaps. This can (and will) definitely need to be redone better, but for now it worked fine.
Crappy picture, but you can see I could put my hand between the radiator and the original Miata plastic shroud
Here you can see a couple different pieces of foam I stuck in there to help seal it all up. Definitely not air tight, but much better than before.
Some more foam pieces...Again, not great, but this is just an interim solution for now.
Rollbar Foam
Bought a 3' stick of proper SFI rollbar foam and zip tied that onto the rollbar. Nothing fancy here, just trying to keep the noggin safe.
Numbers
I couldn't do the blue tape paddock walk of shame, so I borrowed a friend of mine's Cricut and got my Arts & Crafts on. I even made some Zoom - Zoom stickers.
Hardtop
I stuck the hardtop on the car again and made certain to use lock washers. I only made it 5 miles the last time before some of the bolts were backing out from not having a lock washer on it. I know the top is better for the track, but I really do enjoy driving her "top down". I almost just left it off, but my luck it would have rained.
Loaded up and ready to go with Hardtop on
First Track Day
My goal or maybe hope for the first track day was to just finish the entire event and bring the car home still running in one piece. And with that...the first track day was a huge success! I only had 2 real issues. First, the hood started to lift at speeds around 120+, so I just coasted down the back straight. Second, she burped out some power steering fluid which was a little over filled from when I changed out the fluid reducer. Otherwise the car ran very well.
Power Steering fluid puked all over my "clean" engine bay. That didn't last very long. LOL
Here's one of my Sunday Drive Laps...wish I could say I drove faster, but I didn't.
Sadly (or impressively?) most of this lap was done in 4th gear. The car has Torque...anytime, all the time.
Some notes from first track day...
Very impressed with the suspension. Previous car (which I knew needed a better suspension / a lot more spring) rode on the bumpstops all the time and also understeered at corner exit especially on slower corners really badly.
Brakes felt great the entire time, love that I don't have to push the pedal all the way to the floor like you do with a normal Miata
Funny enough, I need to adjust the pedal down a little for better heel to toe shifting
Torque...This car has it and it's addictive.
It's time to upgrade safety. I was hoping to wait a little bit on getting a cage, but its time.
Since the car did so well, I actually signed up for another event the very next weekend at Road Atlanta.
Glad to see you getting the fun you envisioned out of the LFX. While I'm still short the equipment to make the drag strips happy, my son gave me a Draggy for Christmas. Like you say, the low end torque means the car no longer drives like a Miata, but on another level of performance you just won't get with a turbo or supercharger. I don't have a local Mexico and so I haven't been able to do a 1/4 mile yet. That said, i was very happy to pull a 0-60 in 4.2 seconds. Who says a 3.23 third member is too low?
After HP Tuning for the improved breathing, I set the fuel trims for 93 Octane without any knock issues. With the high cost of gas these days, the cost difference between E10 93 Octane and E0 90 Octane is quite small. The E0 is more specific energy than the E10 so I thought I'd give it a try. Haven't pulled the Draggy out yet, but the exhaust subjectively has more growl and the driving experience seems a little meatier. For what I can tell the fuel trims can handle the small octane difference and I haven't observed and knock.
I sealed that gap under the rad with a piece of aluminium angle bolted to the tray, topped with a length of press-on rubber strip, works a treat. The rubber strip has some sort of spring loading around the slot, so it grips solidly.
So I realize that I'm letting this blog get behind again, and I don't want to do that. It's been a very busy Spring / Summer for me. Let's see if I can catch it back up some.
Since the first track day went so well, I signed up for 2 more days the very next weekend, again at Road Atlanta. I had a couple items I needed to do to prep for that weekend.
First was power steering. I cleaned up the mess and checked the level. It was still a little bit over filled after the burping. I used a thick straw to pull out a little more fluid to get it down to the "fill" line. (Turkey Baster wouldn't fit). I pulled out maybe a shot glass worth of fluid. This fixed the issue. (sorry no pics, although not much to see here.)
Next issue I needed to fix before going back to the track was the hood lift. I was having issues with the hood lifting up when I was over 120mph. I asked people for ideas in a different thread on a "quick fix", since I only had a couple days to fix after work. I ended up making a few changes here.
One recommendation was to give the car a 1/4" of rake in the rear, which was easy enough to do. I lifted the rear and added a 1/4" of rake to the rear of the car. I was actually wondering how much I would notice a change in the cars handling after this, but being the novice that I am / so new to the car, I didn't notice any change in how the car behaved.) Sorry again no pics here.
The other idea was to put some sort of under-tray under the car. There was nothing under there when I had my first track day. I started by creating a hardwood splitter, that I was going to just cut even with the bumper.
But mounting the splitter quickly was going to be a pain and require a lot of work, since I couldn't buy any ready made parts and have them here quickly enough.
So instead, I made a plastic one out of the concrete tray everyone likes to use on the front of the radiator (just used it on the back side of the radiator vs the front side). Nothing fancy here. I cut the down the corners and then used a heat gun to warm up the plastic enough to bend it semi flat to give a bit more length.
I continued to do some more cutting and fitting (that back piece is actually where I heated up and made flat, but it looks like it's bent more in this picture.)
Finally I had this shape. I held up the front of the pan by sliding it into the bumper cover. The rear was held on by a few zip ties and I also zip tied up the sides.
Final idea was to close up the fog light holes and the holes in the bumper lip. I found some gaff tape at a local music store and taped up the holes. Doesn't look pretty but held up well and did a good job all weekend.
That was it. Car ran well for the two day weekend & I no longer had hood lift over 120mph. So win!
The car ran great over the weekend. (not to get cocky here, but 3 track days without any real issue so far! I really expected a few more teething issues.) One item I kept my eye on was engine temp. It would get a little hotter then I would like at 220, but within what's considered safe for this engine. 220 is the temp the fan cuts on from the factory, and the fan cuts back off at 210. This engine likes to be ran hot, but its a bit higher then I like. The engine temp never went above 221, so it was able to "cool" enough with my one fan, but it didn't drop as quickly as I would have liked either. (In case you are wondering...Outside temps were about 90 each day and I'm certain the track was hotter than 90.) I'll be adding some hood vents soon, and I think that will give me the extra cushion I would like to see for temp over the summer months.
I think I mentioned this before, but if not, the little Miata is MUCH FASTER than stock and I feel it needs more then just a roll bar for that day that I run out of talent. I had been waiting for a local race car fabricator's schedule so I could get my drop seat pan installed. He called and said he would be ready for the car in a week and I also spoke to him about getting a cage installed at the same time. I was figuring that would put me at the back of the line, but it didn't. So all at once I had a Honey Dew list to get completed in the next week.
Remove the seats & harnesses
Remove the roll bar
Gut the doors
Remove the dash / have it so it's only a couple screws to remove
Remove the windshield
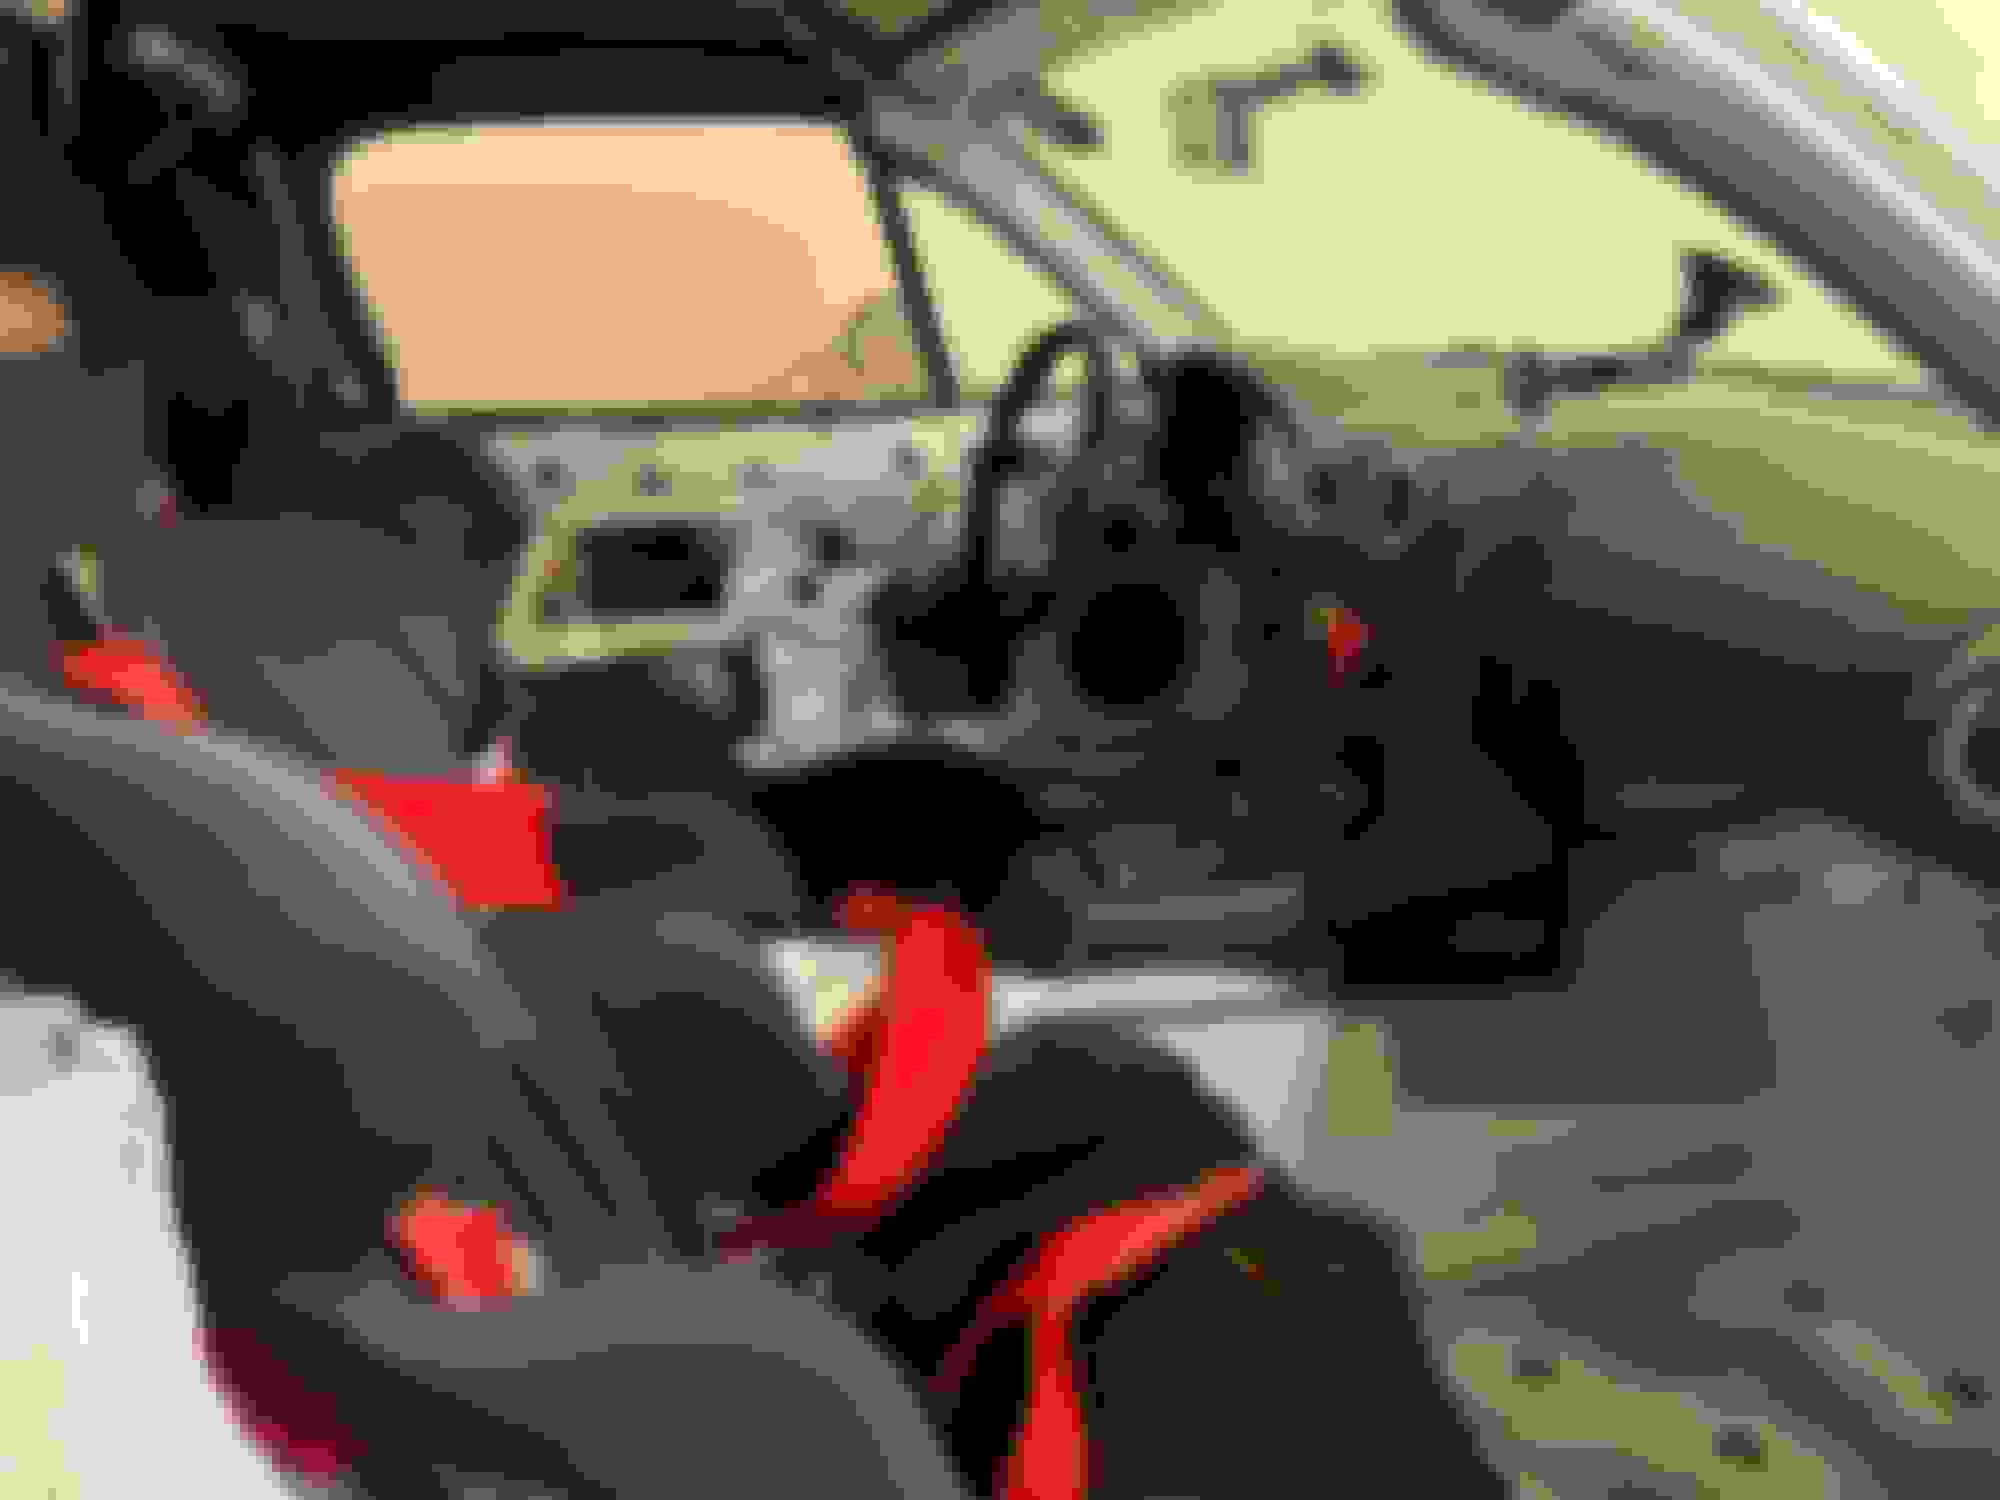
I started with the car interior looking like this...
Removing the top, seats, harnesses, roll bar was all easy enough (if not a little sad since it felt like I just got all of that situated and finally able to drive the car.)
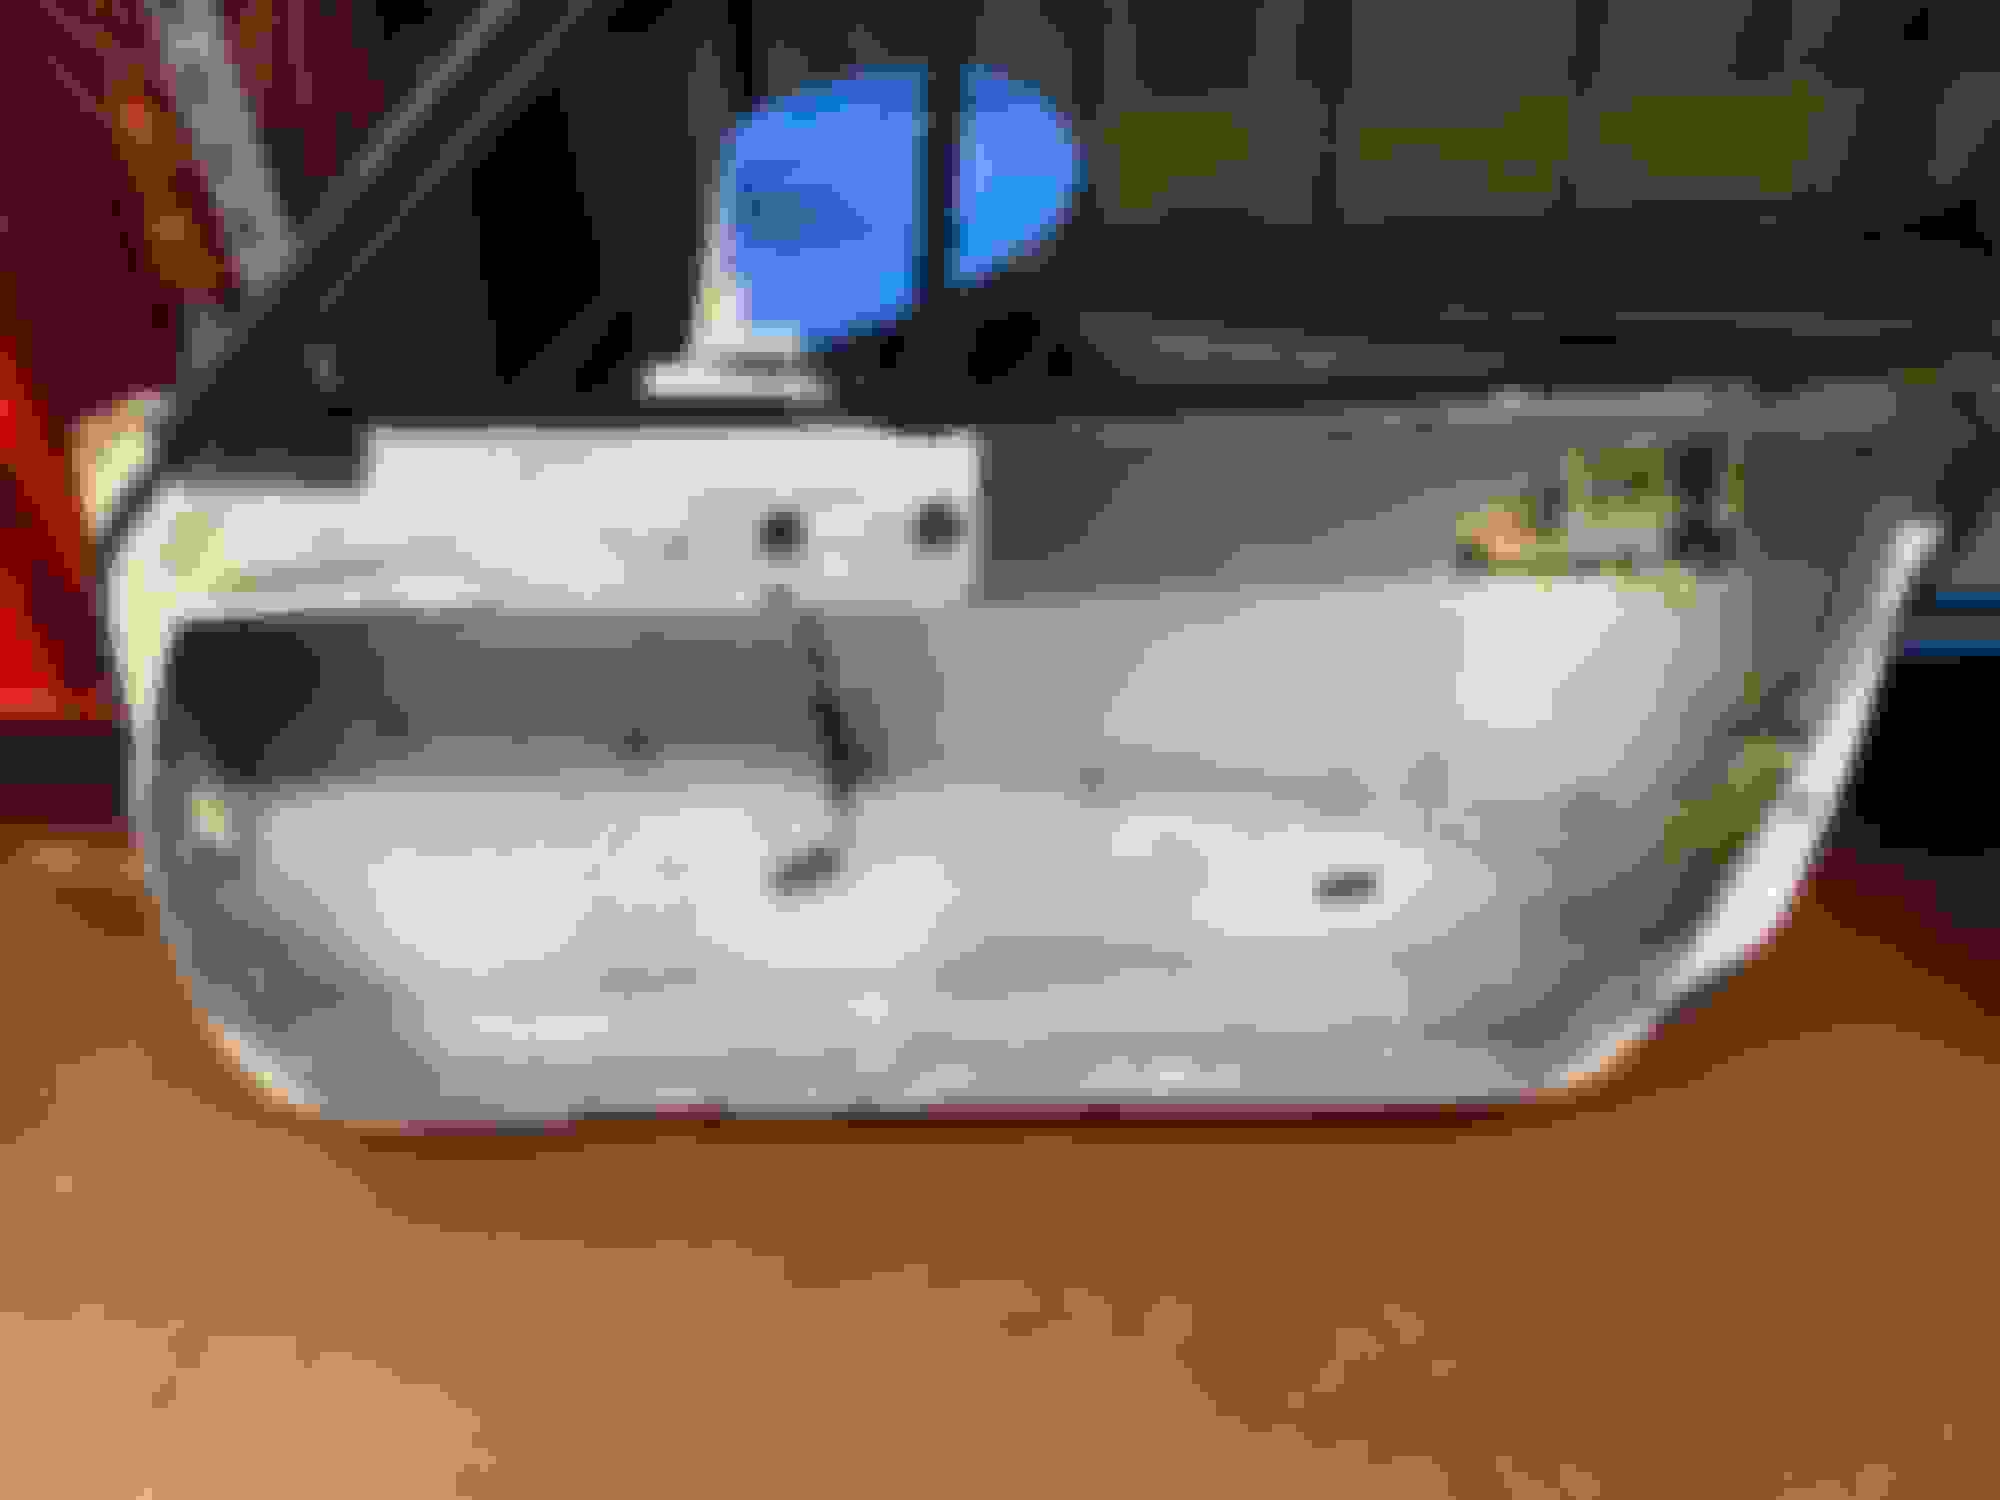
Gutting the doors was next. It took a bit more time then I was expecting. There is a bunch of **** in those doors! After a little while I had the following pile of door "parts" (this is from just one door)
I also took the time to remove some more of the "chrome" the previous owner stuck all over the car. I actually like chrome on old cars, but it doesn't belong on a Miata / the previous owner went crazy sticking crappy plastic chrome all over this car. I've been slowly removing it whenever I have to touch a part that's been "chromed". Anyway, this was a very satisfying piece to remove and if I knew it would have come off that easily, I would have done it earlier.
Gutted Door...Even the triangle window has been removed, but it looks like it's still in there.
After gutting the doors, the only major item left was the windshield. I spoke to a buddy who has removed a few and he told me to get a Windshield removal tool. From there it was relatively easy. First you pull windshield wipers and the plastic piece. Then you pull out the rubber piece of trim that goes around the windshield.
From there you stick the tool between the glass and the car and basically cut the windshield out. The hardest part was the lower corners between the fenders and the A pillar, and it wasn't that hard.
Here you can see the blade poking out between the window and the A pillar. Oddly the "glue" would cut like solid rubber, but also looked like foam. You can semi see what I mean in this picture around the blade.
And Voila, windshield removed.
Probably took me all of 30 minutes to do. (I was expecting a lot longer) I did have one small "crack" if you will, and let me tell you, you hear / feel it the moment you do it. But it's super tiny and I'm just going to use some windshield epoxy repair to fix it and send it since its never to be seen again. That said, I doubt I'll be so lucky removing this same windshield a second time. I think this spot will properly crack if I go to remove again...but I'm cool with that. It will be time for a new windshield (or Lexan) anyway.
So car was now ready to be brought to the fabricator for the cage & drop floor! It also dawned on me, besides getting tires mounted & aligned, this is the first work that I'm having someone else do on the car. Sort of feels odd.
What tubing thickness did you go with on the cage tubing? I ask this frequently as the minimum required to meet Spec Miata regs is different from other regs, and you probably want the thicker tubing.
What tubing thickness did you go with on the cage tubing? I ask this frequently as the minimum required to meet Spec Miata regs is different from other regs, and you probably want the thicker tubing.
I think we discussed this a bit earlier when I was asking people about cages. (I'm the one that did that roll cage questions in the racing forum maybe 2 months ago.) He used both .120 and .95 in the cage. Although my car is under 2500 lbs (with a very reasonable goal of under 2200 lbs) I agree with you and others that heavy cars are on the track and even more so that very fast cars are on the track. (E=MC2 It's the speed that's squared not the mass)
Since the cage post is going to be mainly pictures and less writing, figured I'd get that one done too.
First thing was the drop floor. I purchased the kit from East Street at the fabricators advice. (Since he had installed a few before and felt they were well built.)
Floor cut out...(no going back now)
Pan installed. He had to modify the pan a little bit so my trans support would still work. That's the little bit that sticks out on the trans tunnel that he added.
Under the car. (You can see how close the exhaust gets.) I'm probably going to have to re-do the exhaust so more changes can be made to the floor (more on that later.)
Better picture of how close...I'm probably going to have to re-do the exhaust so more changes can be made to the floor (more on that later.)
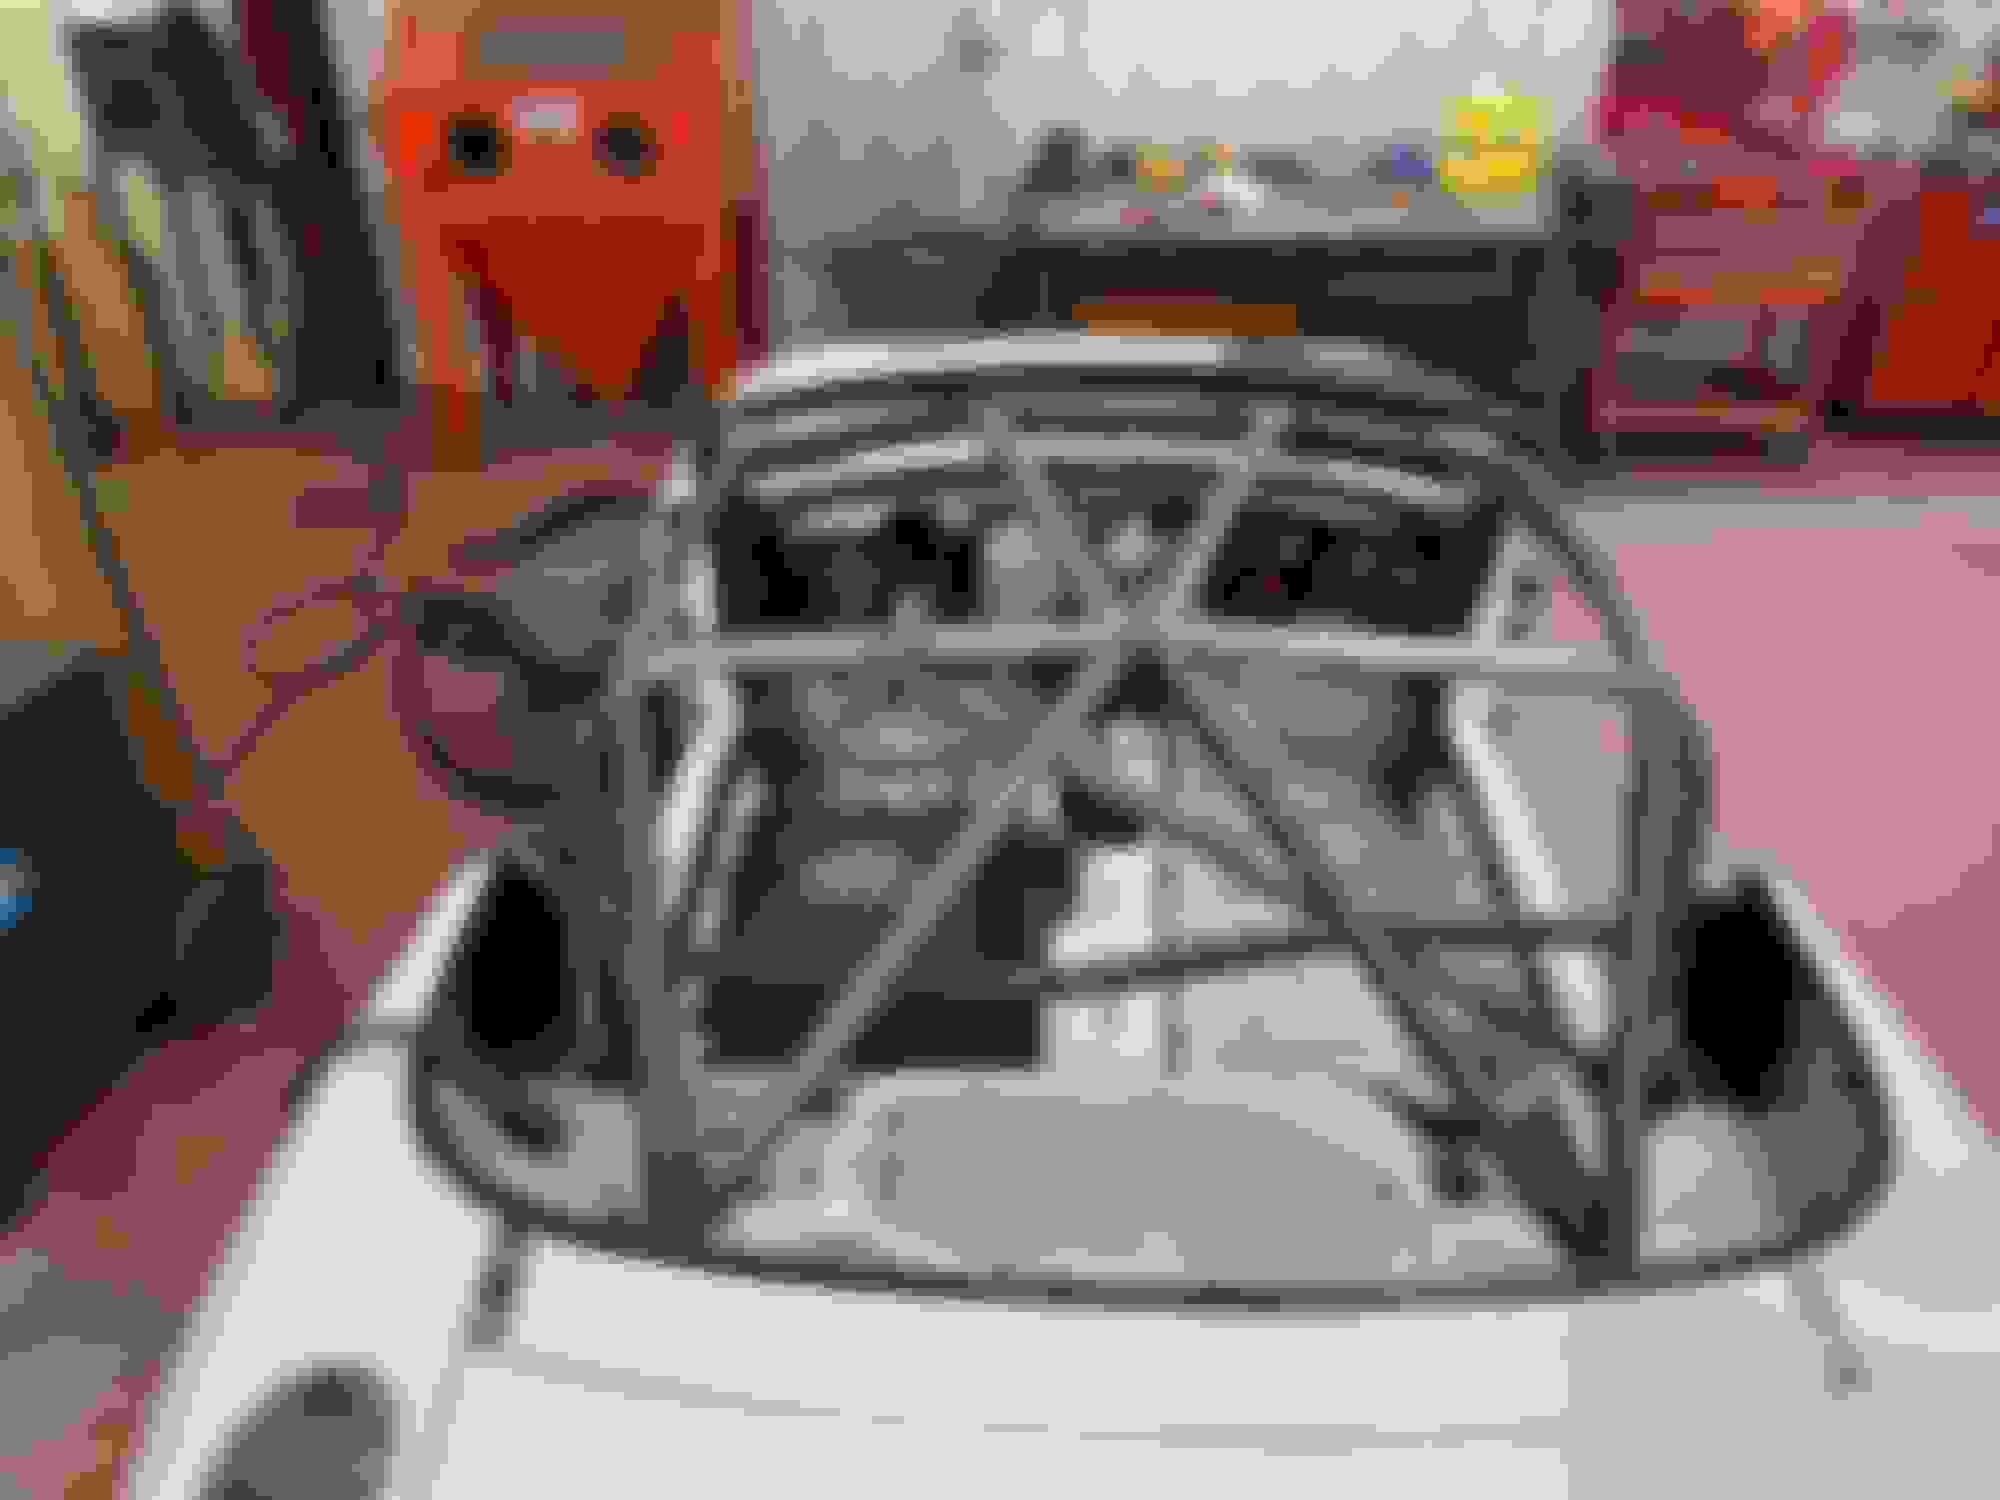
Cage...Main Hoop (I told him he could cut out the seat belt towers)
A-Pillar downbars and the main hoop downbars (I believe that's what these bars are called)
The double kickers? (Again, don't quote me on what all of the names of these bars are.)
Top Bar / Windshield bar
The "knee bar" or "dash bar" and the start of the harness bar. (Not crazy about the dash bar being bent vs straight, but it is tucked out of the way and up against the firewall, which I do like.)
More bars (LOL, don't ask me what they are all called.)
Door Bars (Notice he welded the bars to the actual pinch welds of the car too.)
That one bolt in the drop floor pan is actually part of the transmission support. I guess the nut wouldn't fit properly after the pan, so he used a larger bolt and some washers between the floor pan and the mount. It was a cleaver way to fix the problem.
He also cut out the doors. (they are super flimsy now, and don't shut well, but I have a solution for that to show in a later post.) I'll also be adding back some of the top part of the door, so I can use the windows when storing the car outside. (There is a way to "hang" them so they keep most of the water out...will work well for traveling with the car or overnight storage outside since I have an open trailer.)
Additionally, he installed some mounts for my harnesses, so I can easily install some eye hooks. (this is the passenger side tunnel one for example)
The original dash bar was cut and shortened so it still works to hold the steering wheel and dash, but it now attaches to the cage on the one side.
Roll Cage Changes
I'm going to add some additional gussets to the car.
Taco gussets on the door bars
Tube gussets at the forward hoops and the windshield bar.
Tube gussets between the forward hoops and the main hoop.
I would like to add the FIA / A-pillar support bar, but I choose not to have it put in the car due to issues with getting in and out of the car. I may have it added back in if I end up being able to bend my knee properly again. Like all things, it's a bit of a compromise. I need to be able to get in and out easily and fast enough, and I don't feel like I would be able too with that bar in place & my knee in it's current situation with lack of bending. (Getting old sucks!)
Seat...
And here is the Seat Mount he made. They are clever in the sense that the bolts are welded to the mounts so you just tighten them under the car. (If you scroll back up you can see what I mean in one of the pictures with the drop floor under the car.)
As far as where the seat sits. I FINALLY can get the seat far enough back that I'm not uncomfortably too close to the pedals. This was an issue in my other Miata and this Miata with the roll bar in it. (Had to do more with the Kirkey seats being too "big" with the shoulder supports etc. hitting the roll bar before I could get it back enough.)
Unfortunately, I was unable to sit in the car and see if I fit. I had another knee operation and could barely walk, and there was no way I was getting in and out of the car. (That's two knee operations on the same knee within 4 months for those that are counting. This spring / summer has been a bust. I was happy I got to drive a little bit between the two operations.) Last weekend, I felt brave enough to try to get in the car and back out. (I was gonna try the weekend before, but figured that would have been a very embarrassing phone call with that famous commercial from my childhood ringing in my ears. "HELP! I've sat down in the Miata and I can't get back up!") Anyway, I'm still sitting too high in the damn car!!!! I need to drop another inch to be safe. (I'm not that tall of a guy (6' on a good day) but all of my height is from the waste up. My brother who is 6'2" actually sits lower in the car then I do.)
This is with the seat padding removed & remember that the bar is 1.5" so I'm only an inch down with the broomstick test & you really should be 2" down at minimum.
Additionally, I don't sit straight onto the steering wheel. I thought the OMP seat was made for the Miata?!?! How can it be SO FAR off center??? I looked at possibly changing the seat mounts and adding a little more layback to the seat along with getting the seat to touch the floor, but it's really wedged in there without having much room at all to move. My head is also closer to the side bar then I'd like too. So, I believe the solution is two fold. 1st, Modify the tunnel so there is more room for the seat to move over. This will get me centered, move my head away from the bar, and will give room for the seat to have a little more layback. (Since it was the side of the seat hitting the cage, and not the back that was the issue. Additionally, I'm going to change the mounts so the seat basically touches the floor. I believe with these changes, I'll be more comfortable in the car and a lot safer.
What's next...
I have a ton of work to do on this car now before I can drive her again. (a few of these items could wait, but most need to be done first.) Here's the list off the top of my head. Guess I know what I'll be working on this weekend. I'm going to be slow with a lot of sitting time, so probably won't get as much done as I'm hoping too.
Fix Tunnel so seat fits
Seat mount modified to work
Fix exhaust since that's now going to need to be re-routed after tunnel changes (I hate working on that exhaust...it might end up going to a shop at this point.)
Paint cage / drop pan (this is going to be a huge amount of work...since I need to clean rust off things first etc. It rained while bringing the car home...thus why it has some surface rust on it.) I may end up cleaning & spraying with an epoxy primer this weekend to stop the rust.
Add the gussets I wrote about before
Fix doors so they open from inside
Fix doors so they can be opened and closed normally again
Fix doors so the windows can be hung while the car is being towed / stored outside
Reinstall windshield
Cut dashboard to fit
Passenger Seat needs to be test fitted / installed (remove the rear humps so it sits lower too.) <-- want to check this incase something need to be modified here, but I think it will be fine.
Remove the power window wires from the harness & switches (minor and could wait)
I don't think it's possible to get the seat centered on the wheel. I have a Tillett B6 Screamer with the rolled edge cut, which is about the narrowest seat you can possibly buy. I also have the Spec Miata tunnel cut panel, just without the floor drop. The B6 is 36cm wide between the side mounts and 40cm in the thigh area. I dropped a plumb bob from the center of the steering wheel and drew a line that runs parallel with the centerline of the car. The centerline of the seat is about 1.25" outboard of the the centerline of the steering column. And the seat is all the way up against the inner lap belt eye bolt in the stock seat belt location, so I don't think it's possible to get it perfect in this car. I don't notice it when I'm driving and my previous seat was even further outboard and that felt fine.
I don't think it's possible to get the seat centered on the wheel.
It might not be possible to get the fiberglass seat centered 100%, but it's off by a lot right now, a little over 2" would be my guess just eyeballing it. I also think the seat is pointing towards the door a degree or two. Its too much in my opinion.
I was able to get my aluminum Kirkey to sit centered (or at least centered enough that I didn't notice it was off center.) I think the big difference is the rolled edge on Fiberglass seats vs aluminum. I'm not crazy about the idea of cutting that edge off. I'm not a fiberglass man, but I'm guessing that edge gives the seat a lot of it's strength. But even if I had all the room for that edge, the seat itself needs to move inboard at the bottom and I don't have a lot of room left there.
Not a great picture, but I think you can tell the seat is basically all the way over with the drop pan. The rolled edge is touching the tunnel.
Either way, the main reason to move the seat over is so that I can fit in the car low enough and away from all the bars a bit more, but I also should be more centered then I currently am with the seat. By moving the seat over a little, the side wing won't hit the door bars when I go to lower it / lay it back.
I'm fairly certain I'll have to move the exhaust some, but there is room in the tunnel for me to move the seat over. This picture probably makes it look like there is more room then there really is, because it's towards the front of the seat where things are tight in the tunnel, but most of that is the rolled edge which is higher and not the mount that sits behind that area...so I think I can get room.
As others have said...Getting seated properly is a game of millimeters when it comes to the Miata. A pain in the *** game, but one I'm prepared to still try and win with a cut off wheel and a welder.
 02-22-2022, 04:59 PM


 0
0