When you click on links to various merchants on this site and make a purchase, this can result in this site earning a commission. Affiliate programs and affiliations include, but are not limited to, the eBay Partner Network.
Haha, nah, this is my current stock 96 1.8. I have to keep this one alive until winter so I can get the VVT motor together! I'd like to make it through the local autox season.
It's about 12psi currently, but there seems to be a little bit of inconsistency in the way the low pressure actuator and MBC is set up currently, thus the differing pulls. The higher one peaked at 13, the other 11.
The most interesting:
Manley rods
ARP main and head studs
ACL rod and main bearings
Boundary stage 2 oil pump
ATI damper
OEM 99-00 head gasket
seals, bolts, VVT stuff
FM level 2 clutch
Junk2 IM
Junk2 TB
Shitty 6 speed
Second shitty 6 speed Had to have Performance Pack and the color makes all the difference... ... but it's still a fatty compared to an NA. Dingle ball hone Block resurfaced -.005 Working on garage cabinet refurb but dem parts are waiting!
Nothing too terribly difficult about this stage of the project, but I "invested" in a cheap ultrasonic parts cleaner from HF. I really want everything clean and tidy looking as I put it together. Reusing hardware wherever I can but purchasing if stuff is too boat anchor-y. It does a pretty good job!
Getting the crank in and bolting the mains down was kind of a scary stage for me. Something I've never done. I know Greg posts here, but I can't say enough about his "The Rebirth" playlist for his VVT build on YT: https://www.youtube.com/playlist?lis...SkqRa5Zr_THDz1
Greg's videos especially helped me get over the fear of assembling the bottom end.
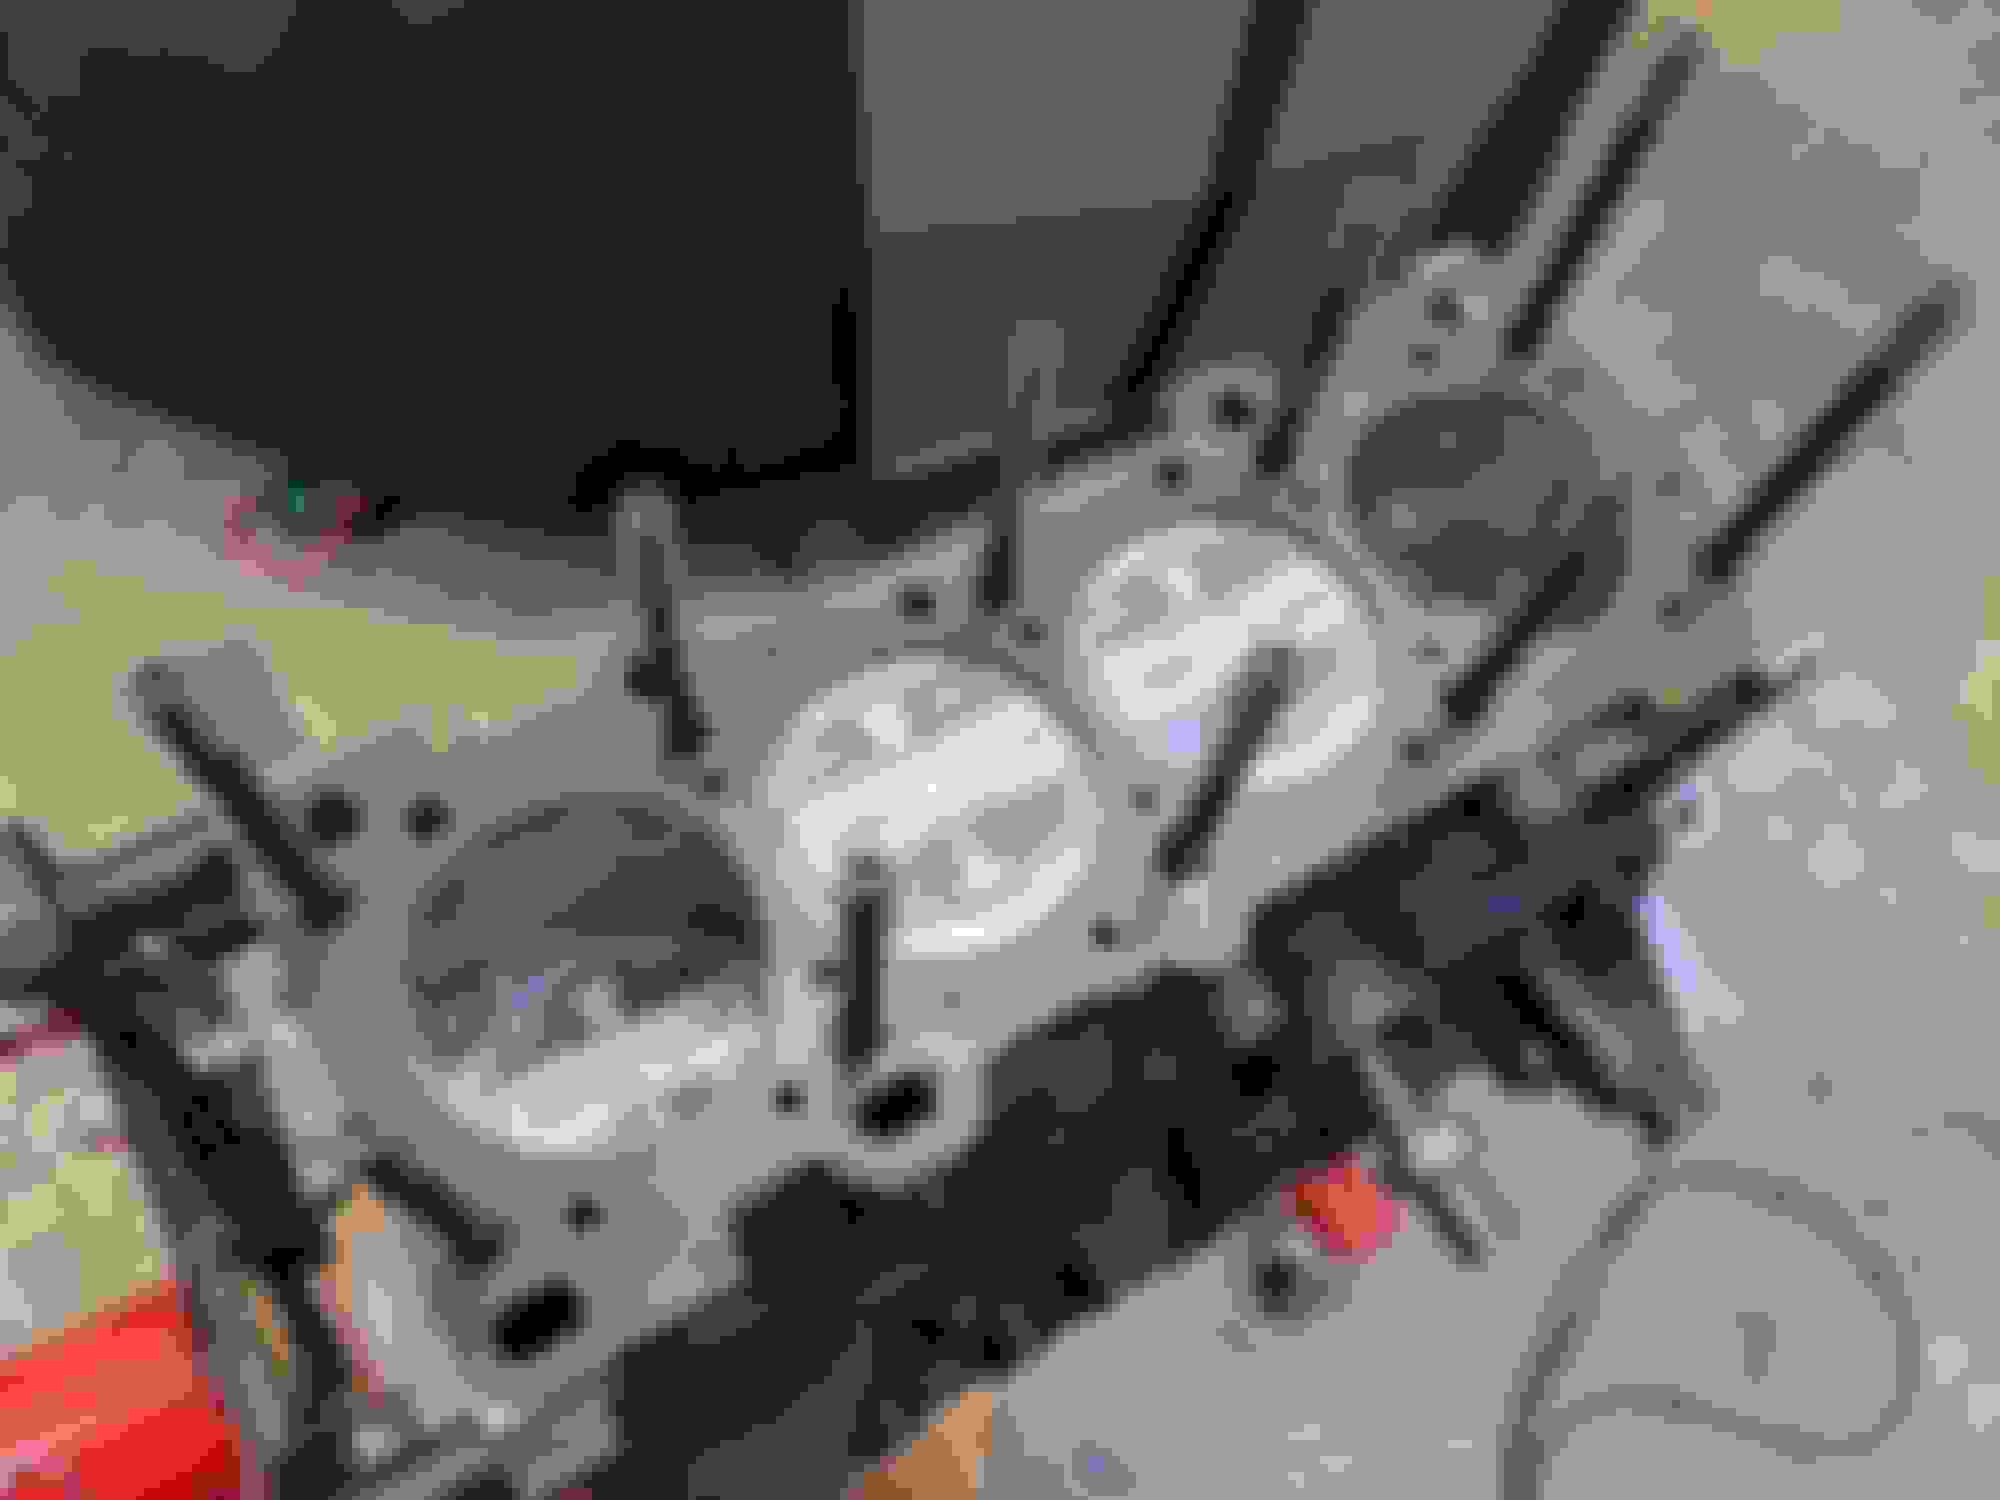
Dude, no. I'm not putting that back on the car. Yeeee. Starry blight. Time to drill. This is much easier than on-car. Not bad. Used Andrew's JB weld method as a thread sealer, served me well on the NA8. Here's about where I start to review Greg's videos a billion times over. The only part I'm for certain is lube all the things. Used the larger end of all of the FSM specs for ring gap in case anyone is wondering. OEM rings. Lots of rods only folks seem to not give a **** about this part. The Wiseco ring compressor is invaluable. Well, it rotates. Nice shiny pump. Look up the oil pump long bolt, which is the one in the lower right in this picture. In my case, the donor car didnt have AC so I already have the "short bolt" that goes through the oil pump and into the block. If you need it: 9979-40-850 or its in my parts list.
Last edited by jt@namiata.com; Mar 23, 2021 at 06:10 PM.
Just pictures this time around, I've done all this before and so it moved pretty quickly. I took a lot of time on the head stud install to be sure it was right, but it was by the book.
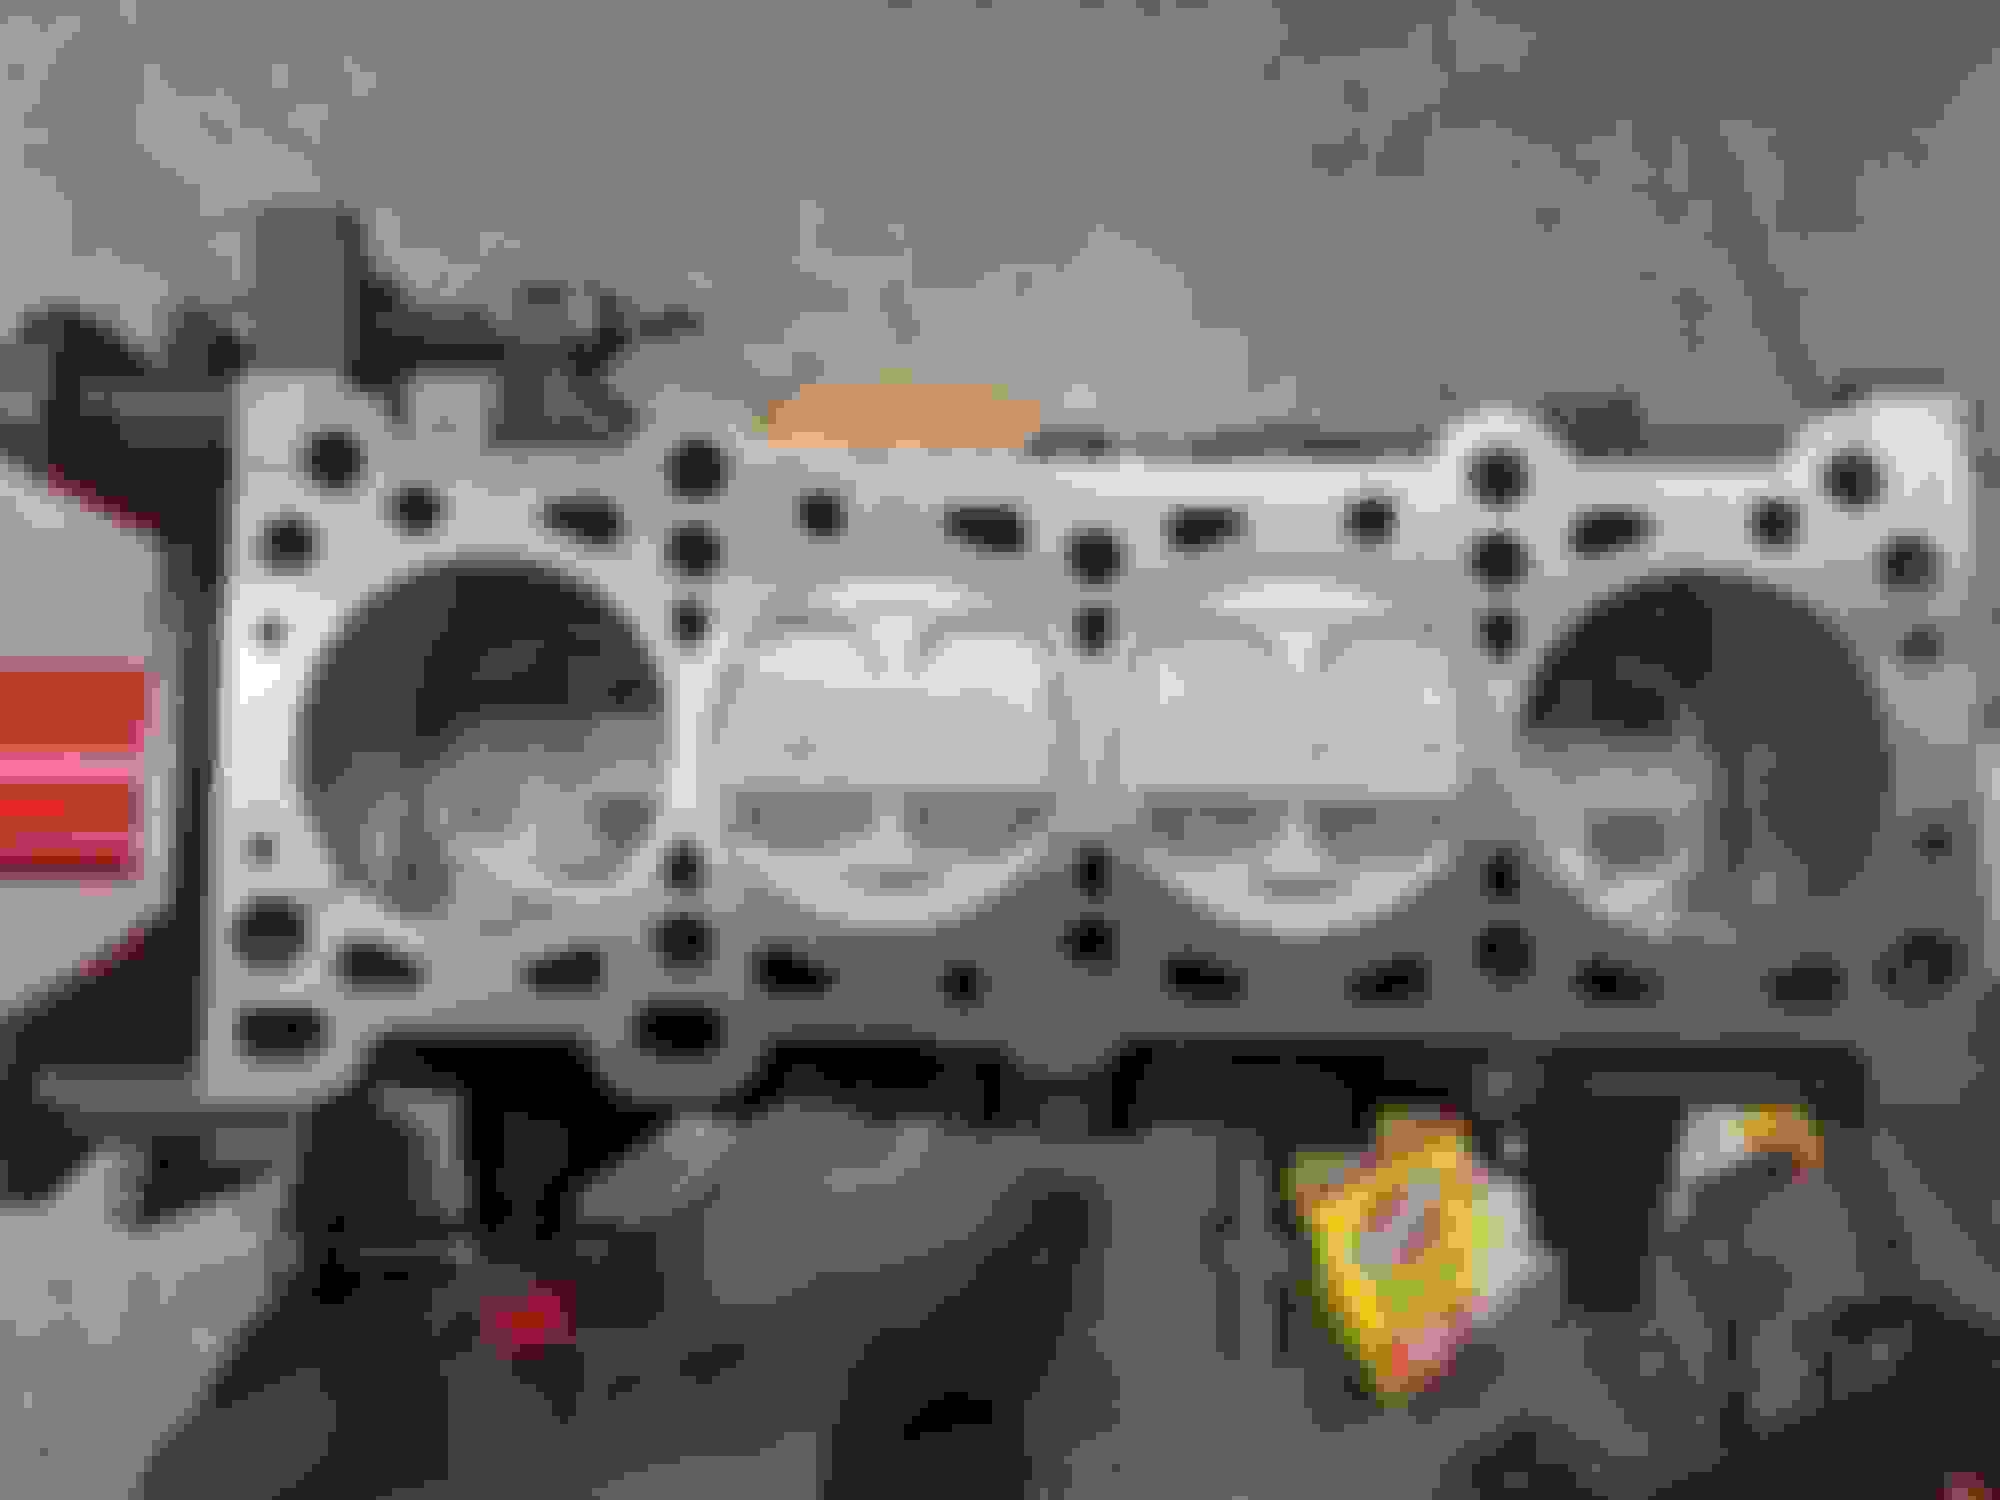
Double checking that 99-00 (NB1) head gasket is correct for this block. Note the two coolant ports at the front that are not blocked. I believe that is the deciding factor. ARP studs were easy just take your time. Zoop the head on. New cam seals and such. Test fitting the VC. Skimming over the ATI install. It was a little bit of a bitch with the new timing cover which required some trimming since it wont flex. 36-2 wheel from FM. Pretty much by the book/instructions. SOON. Gotta start pulling parts from the NA8, may as well play yanky yanky. Face-off. Harbor. Freight.
Last edited by jt@namiata.com; Mar 23, 2021 at 06:16 PM.
I got a little bit stuck again on the Junk2 IM and TB. A couple of important posts that I followed here, mainly because there are TB binding concerns that I did not experience, but read again and again. Also, the advice on the IM is to not use the thick gasket they provide, use a new OE one.
Otherwise, I'm just sorting out coolant lines, combining the SuperMiata reroute with deleted TB coolant lines, and the hard lines from the TSE kit.
I also bought a NB2 harness so I could re-use connectors and wiring colors. Picked up a Ballenger Motorsports CAS connector w/ wiring to adapt to the NB2 requirement to use cam and crank sensor such that I can control VVT w/ MS3 basic: https://www.miataturbo.net/engine-pe...4/#post1582993
I'm using a NB1 fuel rail, with NA6 FPR. Walbro GSS250 fuel pump. Cleanin' up. Gettin ready. Depowered the rack because I'm not dealing with that. Front coolant neck blockoff with nipple. Not difficult to hang the Junk2 IM, but I wouldn't want to try it on the car. Coolant lines, look pretty clean to me. Ignore my junky cold side pipe, but the wiring and connectors look good!
Last edited by jt@namiata.com; Mar 23, 2021 at 06:29 PM.
Welp, it's in. Time to wire and plumb it up! Here's some more pics.
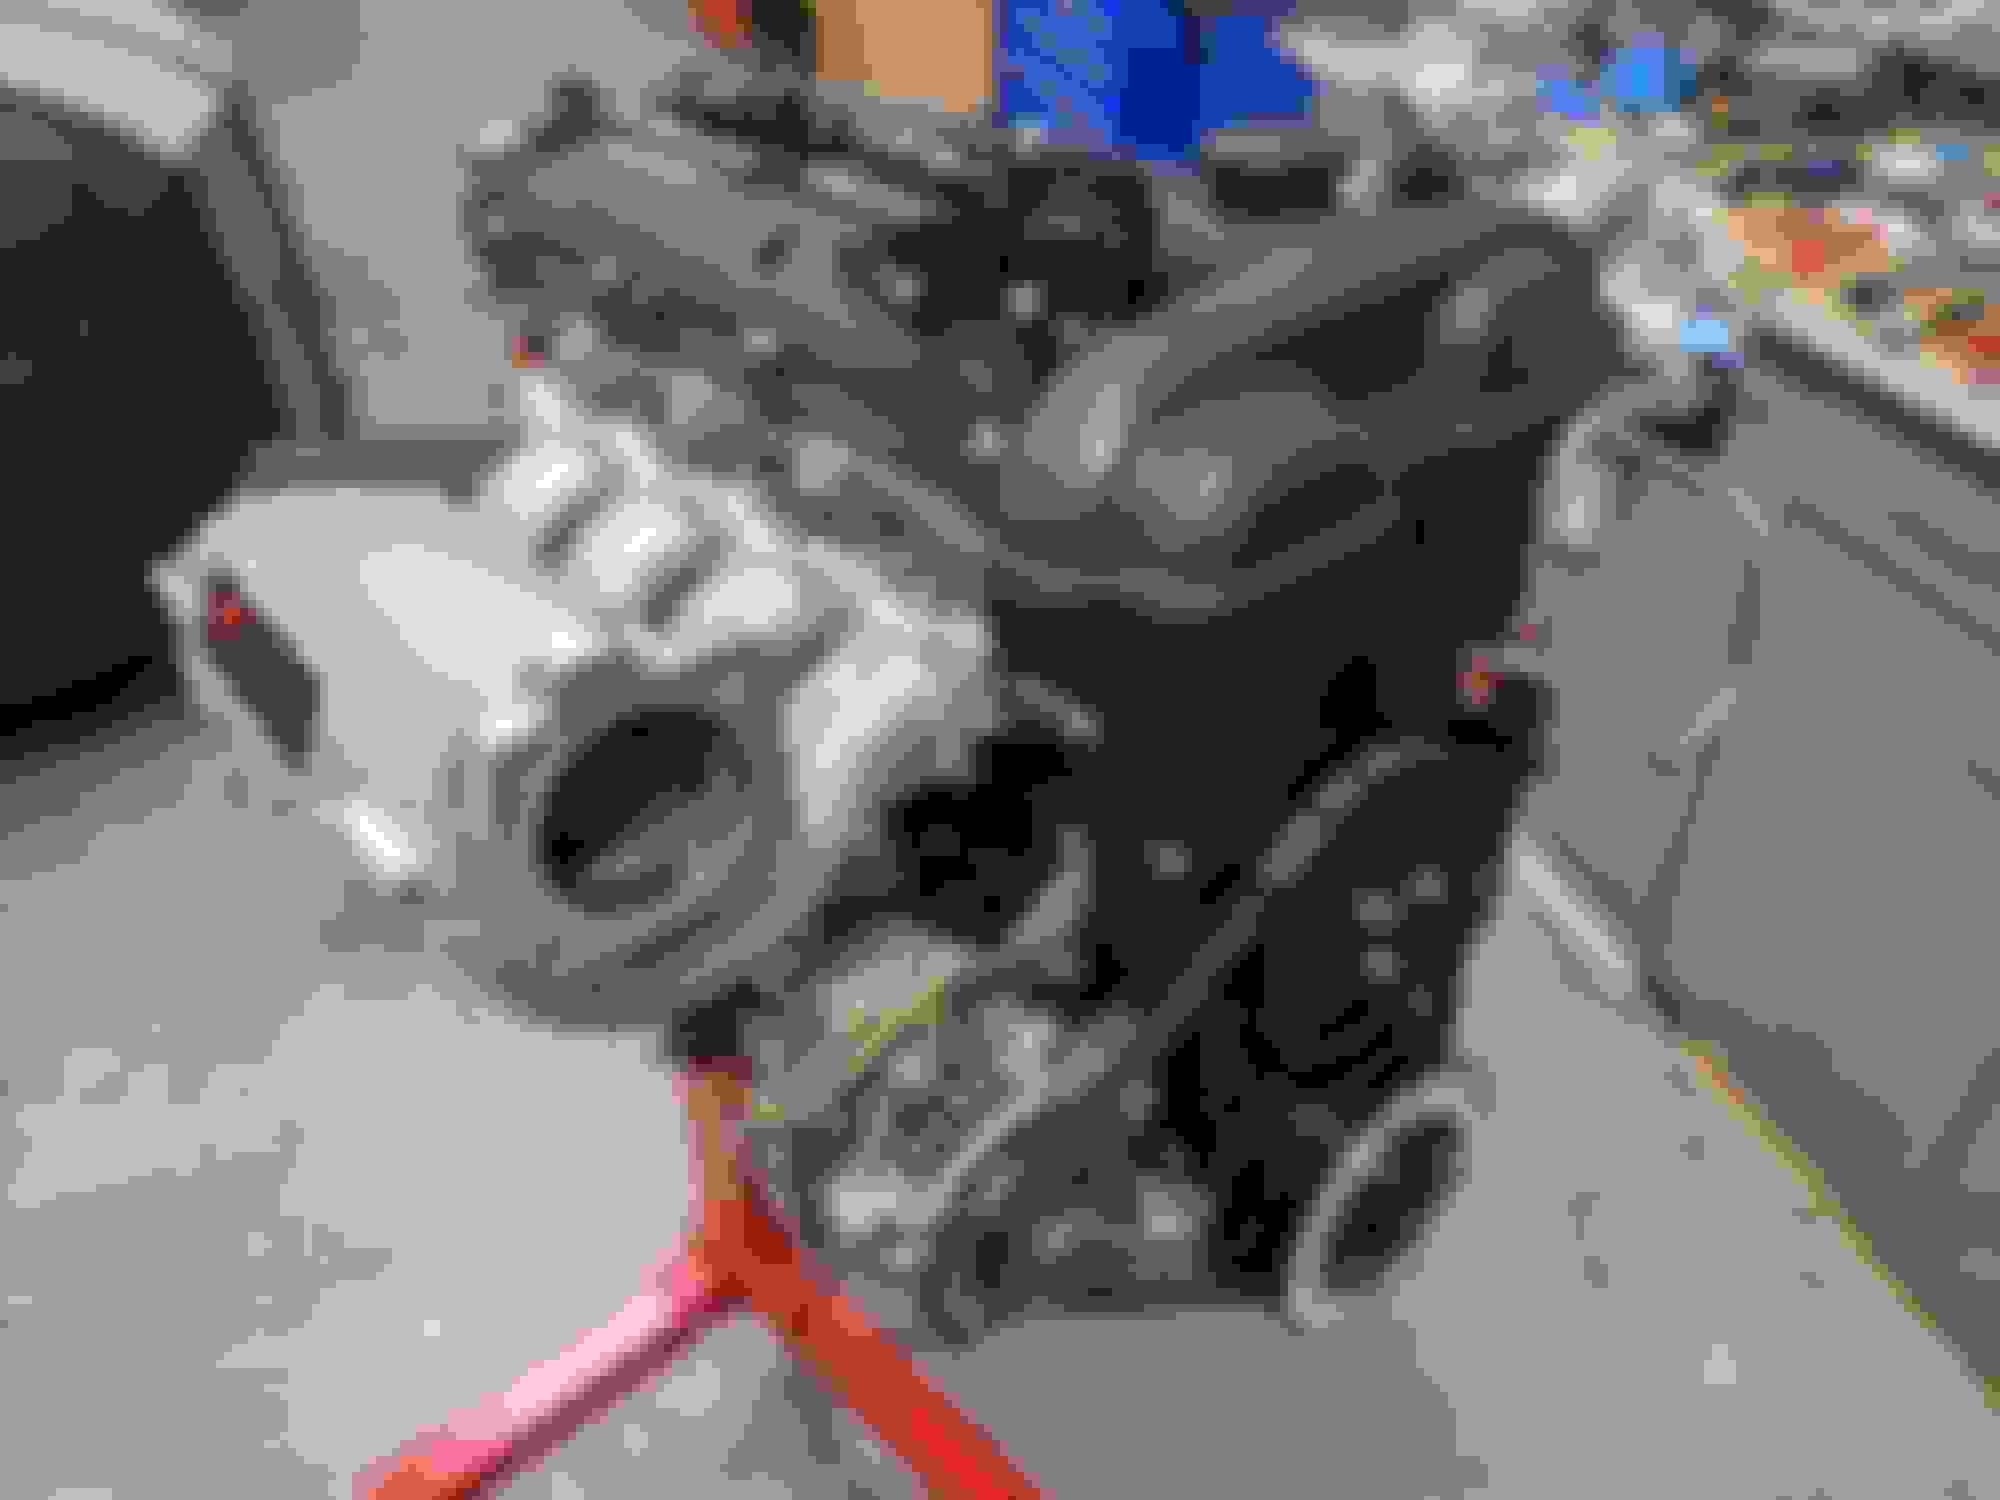
FM lightened flywheel (re-used from the NA8) and Level 2 clutch. Opted to re-buy the clutch and pressure plate, even though its only a different PP between L1 and L2. A friend told me to never waste the money on the HF hydraulic table. I love the damned thing. Made this job much easier. Now kith. STOP SPINNING. No, thank you! Did it with only my own hands, its a game of half inches. Only broke my CLT on the back of the block. Could have been worse. Looking roomy without AC and PS anymore! Set it down on SuperMiata motor mounts. Checked the PPF angle -- about 2.5" above a level run across the formed rails. Time to set 'er down for now. Mustang needs an oil change. Lookin' good though!
Me either really, but it is fun to drive, sounds great, and is comfortable. I've got one car on either end of a polarizing spectrum, and an old Odyssey to get me around in the winter.
New intake to hopefully get slightly colder air than what I had before, which was just a filter slapped on the turbo. 90 degree coupler, some 2.5" tubing, and t-bolt clamps took care of that.
Reworked cold side plumbing. I had been using the FM pre-formed TB inlet w/ the IACV hose, but now that won't fit w/ the larger Skunk2 TB. I was not a clever man, and got the NA8 style S2 TB which included the adapter plate for the IACV and coolant hoses. Took a 2.75" to 2.5" 90 degree, cut a hole, and used Sil-poxy to graft the FM IACV hose in. Added a short run of 2.5" tubing and a fitting for boost reference.
No longer have AC but still want to do what I can to try and route air to the radiator. Tipped FMIC back about 3" hopefully allowing more air past and up.
Working on the coil and timing sensor wiring adapting. Roundit wire wrap, and Tesa tape are legit. New products to me, but they look super clean and professional if you ask me.
Next steps are to finish the wiring, hang the exhaust, connect the driveshaft, fill up fluids and maybe start it this weekend? Have to sort out what the immediate changes I'll need to make in MS3 are to get it started. Thinking I just need to change from 4G63 to 36-2 for crank and cam signal to JS10 and rising edge if they aren't already, per: https://www.miataturbo.net/megasquir...t-start-90371/
Pretty simple, but sturdy and effective. Already have steel brackets on the bottom side which support very well. Easier to see the tilt from here, the top of the FMIC used to mount right below the FM logo. Hoping this makes for some more airflow behind the crash bar, and around the tank ends. This was my test piece for the Sil-poxy. I cannot separate the two pieces by hand. Didn't turn out so bad, tested to hold 30psi! At least the filter isn't right behind the rad now. This stuff is significantly nicer to work with, and the end result is much more OEM as compared to plastic split loom. Routing and wrapping wires, looking pretty clean overall. Look at all that hot side real estate. Hopefully I don't miss AC or PS. I'm digging it. Hopefully the hood closes.
Yes, it does take many PSI and does much rippage! Here are some things that worked well, and some things that maybe will guide others:
Jeff @ Evans tuning did a great job on the remote tune
I lost a stock NGK coil about 1k miles in -- inexplicable, frustrating, but replaced and all was well.
Clutch master cylinders do not last forever! I'm fastidious about replacing the slave doing any clutch/trans work, but should have done the master as well as it was the original.
I don't think I can recommend the common "drill a hole" fix for the sticky Skunk2 TB. My spring snapped, and resulted in having to replace the entire TB.
The ePowerSteering kit is fantastic.
Seal up the tail shaft housing on your AZ6 before you install it. It probably will drip if you don't.
An assumed ~300hp is massive overkill, and a handful for AutoX, but goddamn is it fun.
I don't think I'd do anything else major differently.
That said, I'm considering selling it but I'm not super serious, but kind of am. I was thinking of maybe relocating for work, and getting an ND. One of those things has happened, the other hasn't just yet.
Thanks for the updates, cool summary. Got me sweating because I did the "drill a hole" spring mod on my skunk2. We'll see! I purposely didn't add too much preload on it though. How many miles after doing the mod did it snap?
I finally got tired of ignition problems (was running COPs, seems like one one die every year) and went with LS coils. Rock solid so far.
I can agree that 300+ WHP is excessive. But fun! I've got my EBC on a switch and run a 12psi wastegate the rest of the time. Haven't run high boost on track yet, 300+ is a handful.


 0
0