When you click on links to various merchants on this site and make a purchase, this can result in this site earning a commission. Affiliate programs and affiliations include, but are not limited to, the eBay Partner Network.
Alright, so a lot has happened in the last ~5 months so this will be a long one to try to fully bring this up to date. So not strictly car news, but the reason getting this car together took so long was a good bit of time and money was going to our wedding! I am now officially a married man and I had a great time at the wedding, but it is also nice to be able to now "go back to normal" and focus on the car again haha
Having the car and horses there was her idea and created a bit of a crunch getting the car back together as I was getting down to the wire, but I made it happen and everything went great. We got to show off both of our dumb expensive hobbies for everyone haha but everyone thought it was really cool. BUT, enough of all that as you are here to see past me scramble to put my car back together in time for all of this. So when I last left you all the car still had the 'sploded engine in the chassis and I had 50% of an engine I wasnt sure I was going to use on a stand. As I was debating what to do, I found another engine for sale up in Michigan but this was a full, unopened longblock out of a running car. It was a pretty good deal and would be the fastest path to getting this car running again and you can't have too many BPs laying around so I went and picked that up and gave it a quick cleaning and paint. I also replaced all the gaskets, seals, timing belt, wather pump, etc as you do while its out of the car.
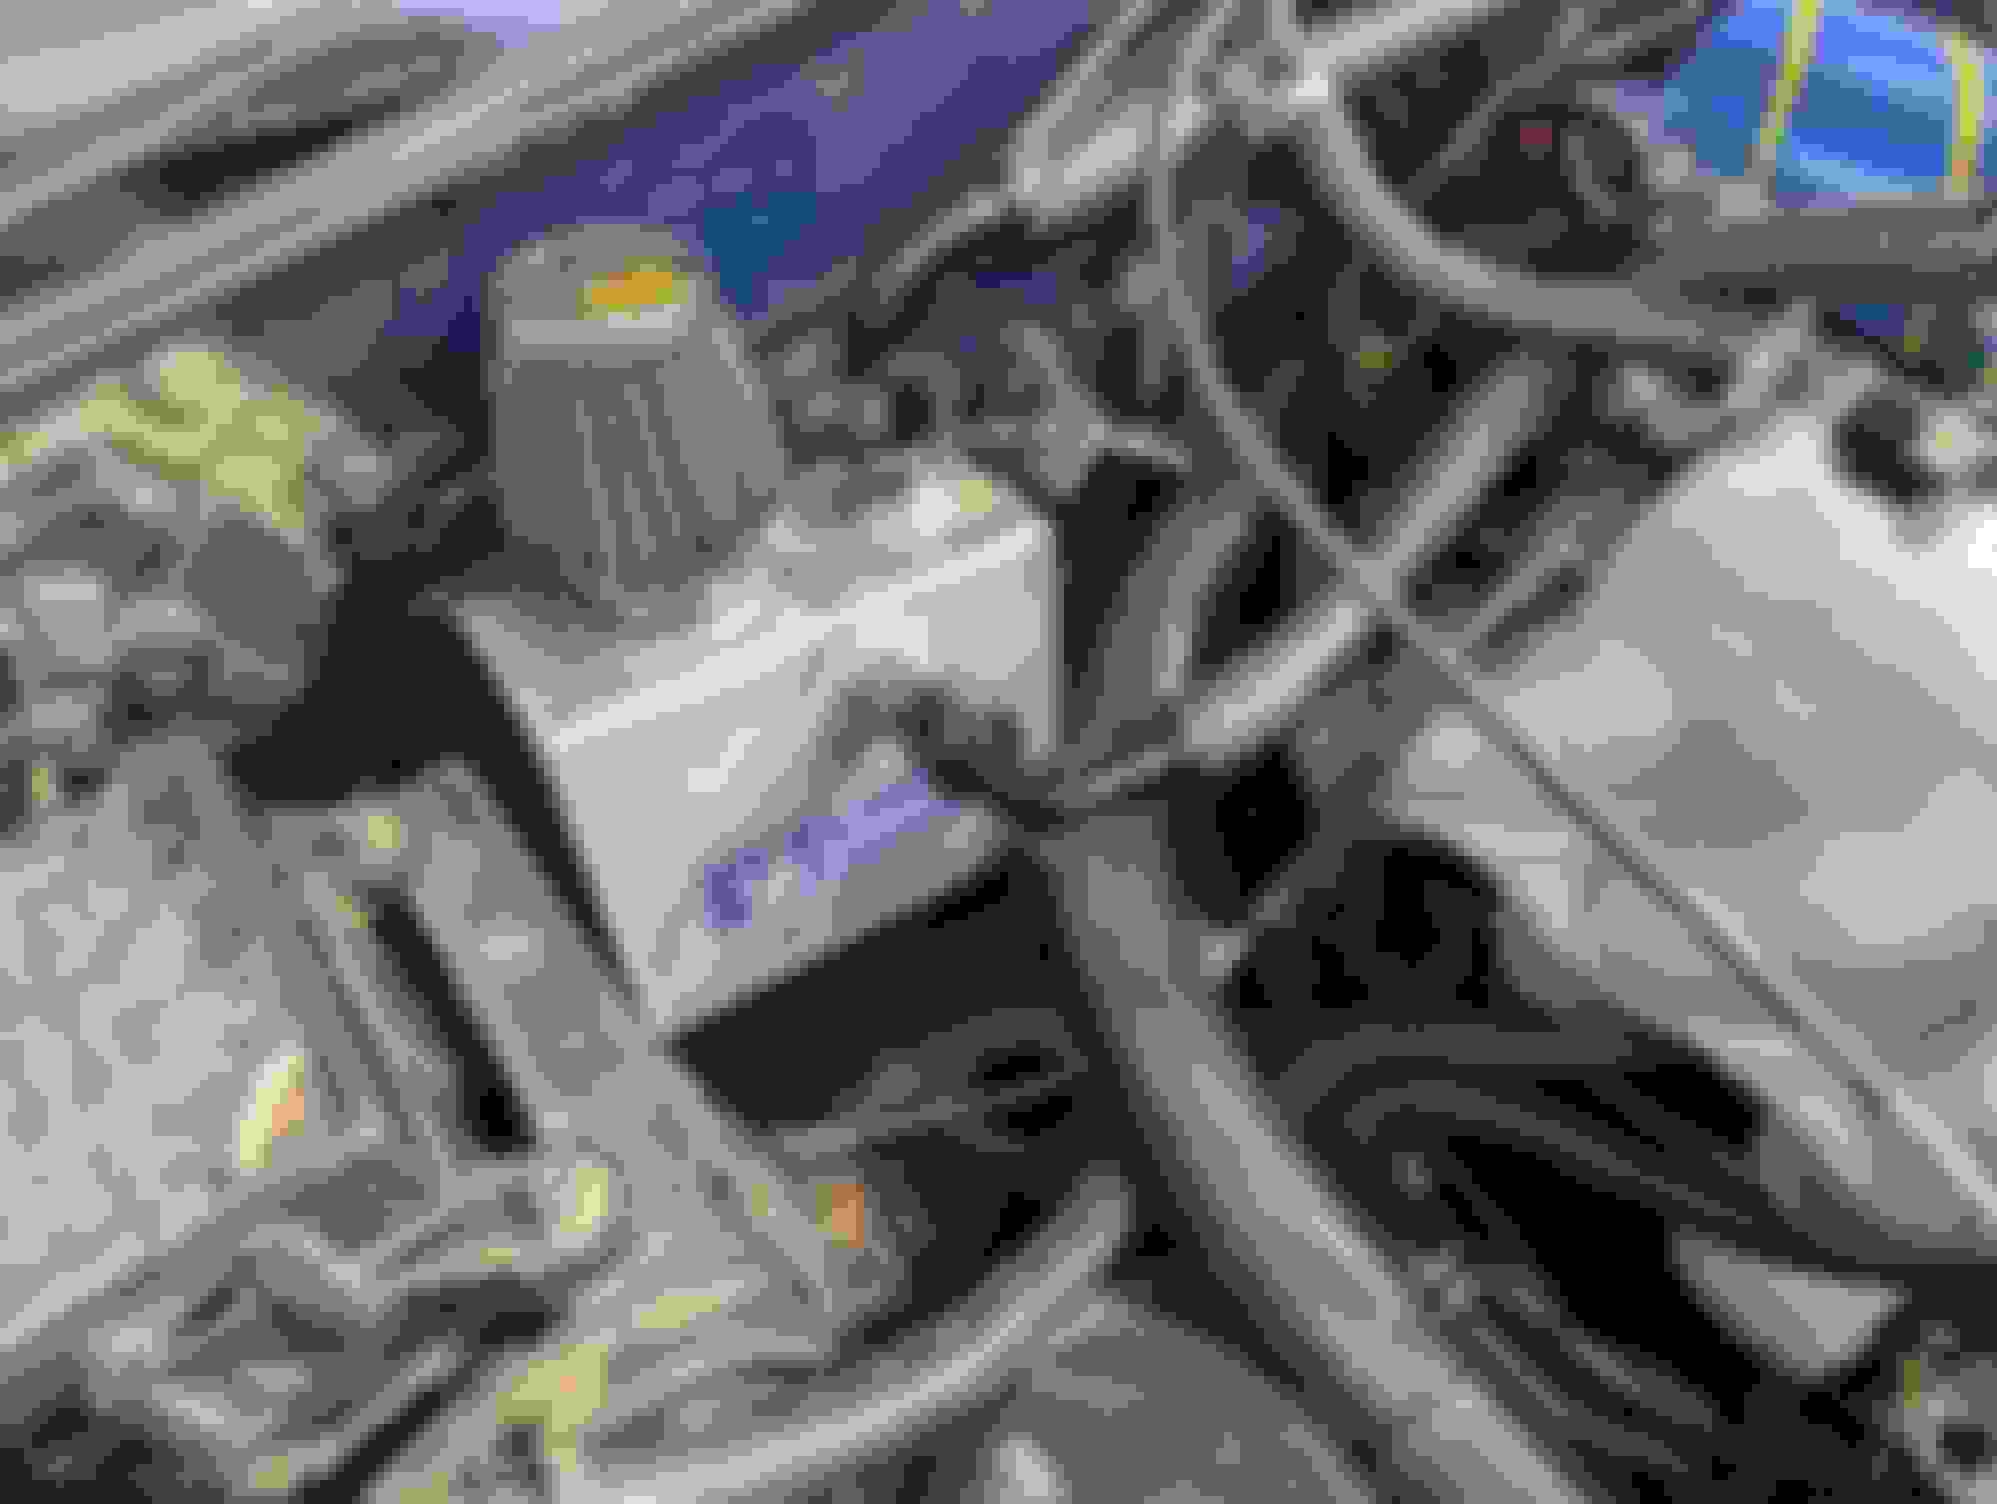
I also grabbed this nice SuperDamper from @Twibs415 which will hopefully help keep this engine happy. I got the other engine out of the car and this gave me a great opportunity to clean the hell out of the engine bay as it hasn't been cleaned in years and had gotten very grimy from years of track abuse. Some degreaser and power washing later and it was cleaner than I had seen it in years.
Yum
I forgot how blue it was under there haha
Also I forgot I got the front cut out for the airflow bar which should hopefully help a lot with cooling on track. I don't seem to have any pictures of actually putting the engine into the car, but I'm sure you all can imagine. Here I bought a small auto trans cooler that I made into a power steering cooler. The stock big looped line had no where to be mounted to now that I cut the front core support, this will hopefully not only keep the fluid cool (not that I was having any issues with it) but it also got the lines out of the front of the car. I will duct air over to the cooler from the mouth and it will just vent into the wheel well.
After this it was just throwing everything back onto the car to get to the first start. My work has a car show during their yearly summerfest and I wanted to take my racecar as it gave me a good goal of a solid date to have the car running by. I got everything buttoned up without any major hiccups. I did some other non-engine work like rebuilding the rear axles, some exhaust work, and fluid changes. I will made a separate post for the axles which can hopefully provide some good info to other owners of mazdaspeed axles who want to rebuild them as I had a very hard time getting any info on what boots do or dont fit. I got the engine charged with oil and coolant and then had a successful and uneventful first start. I got to this point the night before the car show and since I A. had plates multiple years out of date, B. not driven the car at all yet, and C. could not get my laptop to connect to the MS so I was just rocking the exact tune I had on the last engine with no changes, I decided to just trailer the car like the racecar it is. We do this parade around the center before parking for the car show and it drove alright for having zero new tuning for this "new" engine (even though its just another stock internal BP05) so I was happy enough with that for its first drive.
The miata was definitely a little out of place against all the other classic muscle cars and vintage crowd, but there was at least one other roadster friend.
And that brings us mostly up to date. I figured out my MS connection issues, it was just a matter of finding the right drivers as I updates to a windows 11 laptop which started my troubles. The car now runs great, still on ~10psi to try to keep the stock internals happy while I hopefully have time/money to do a forged build on one of the bottom ends I have. Hopefully we can get some decent weather for a bit longer up here so I can put a few more miles on it before the snow comes, then focus on getting the car fully ready to go back to the track next year. ALSO.... since I didn't have enough to do I ended up selling my mariner 1.6 and buying an '03 Shinsen as my new "daily" miata. Maybe I will make a build thread for that car too, but it will just become a basic bolt-on street car that *may* see a track day, who knows....
As I bought it a few months ago:
How it sits now (Konigs, Vmaxxs, Harddog Hardcore, RS Lip) :
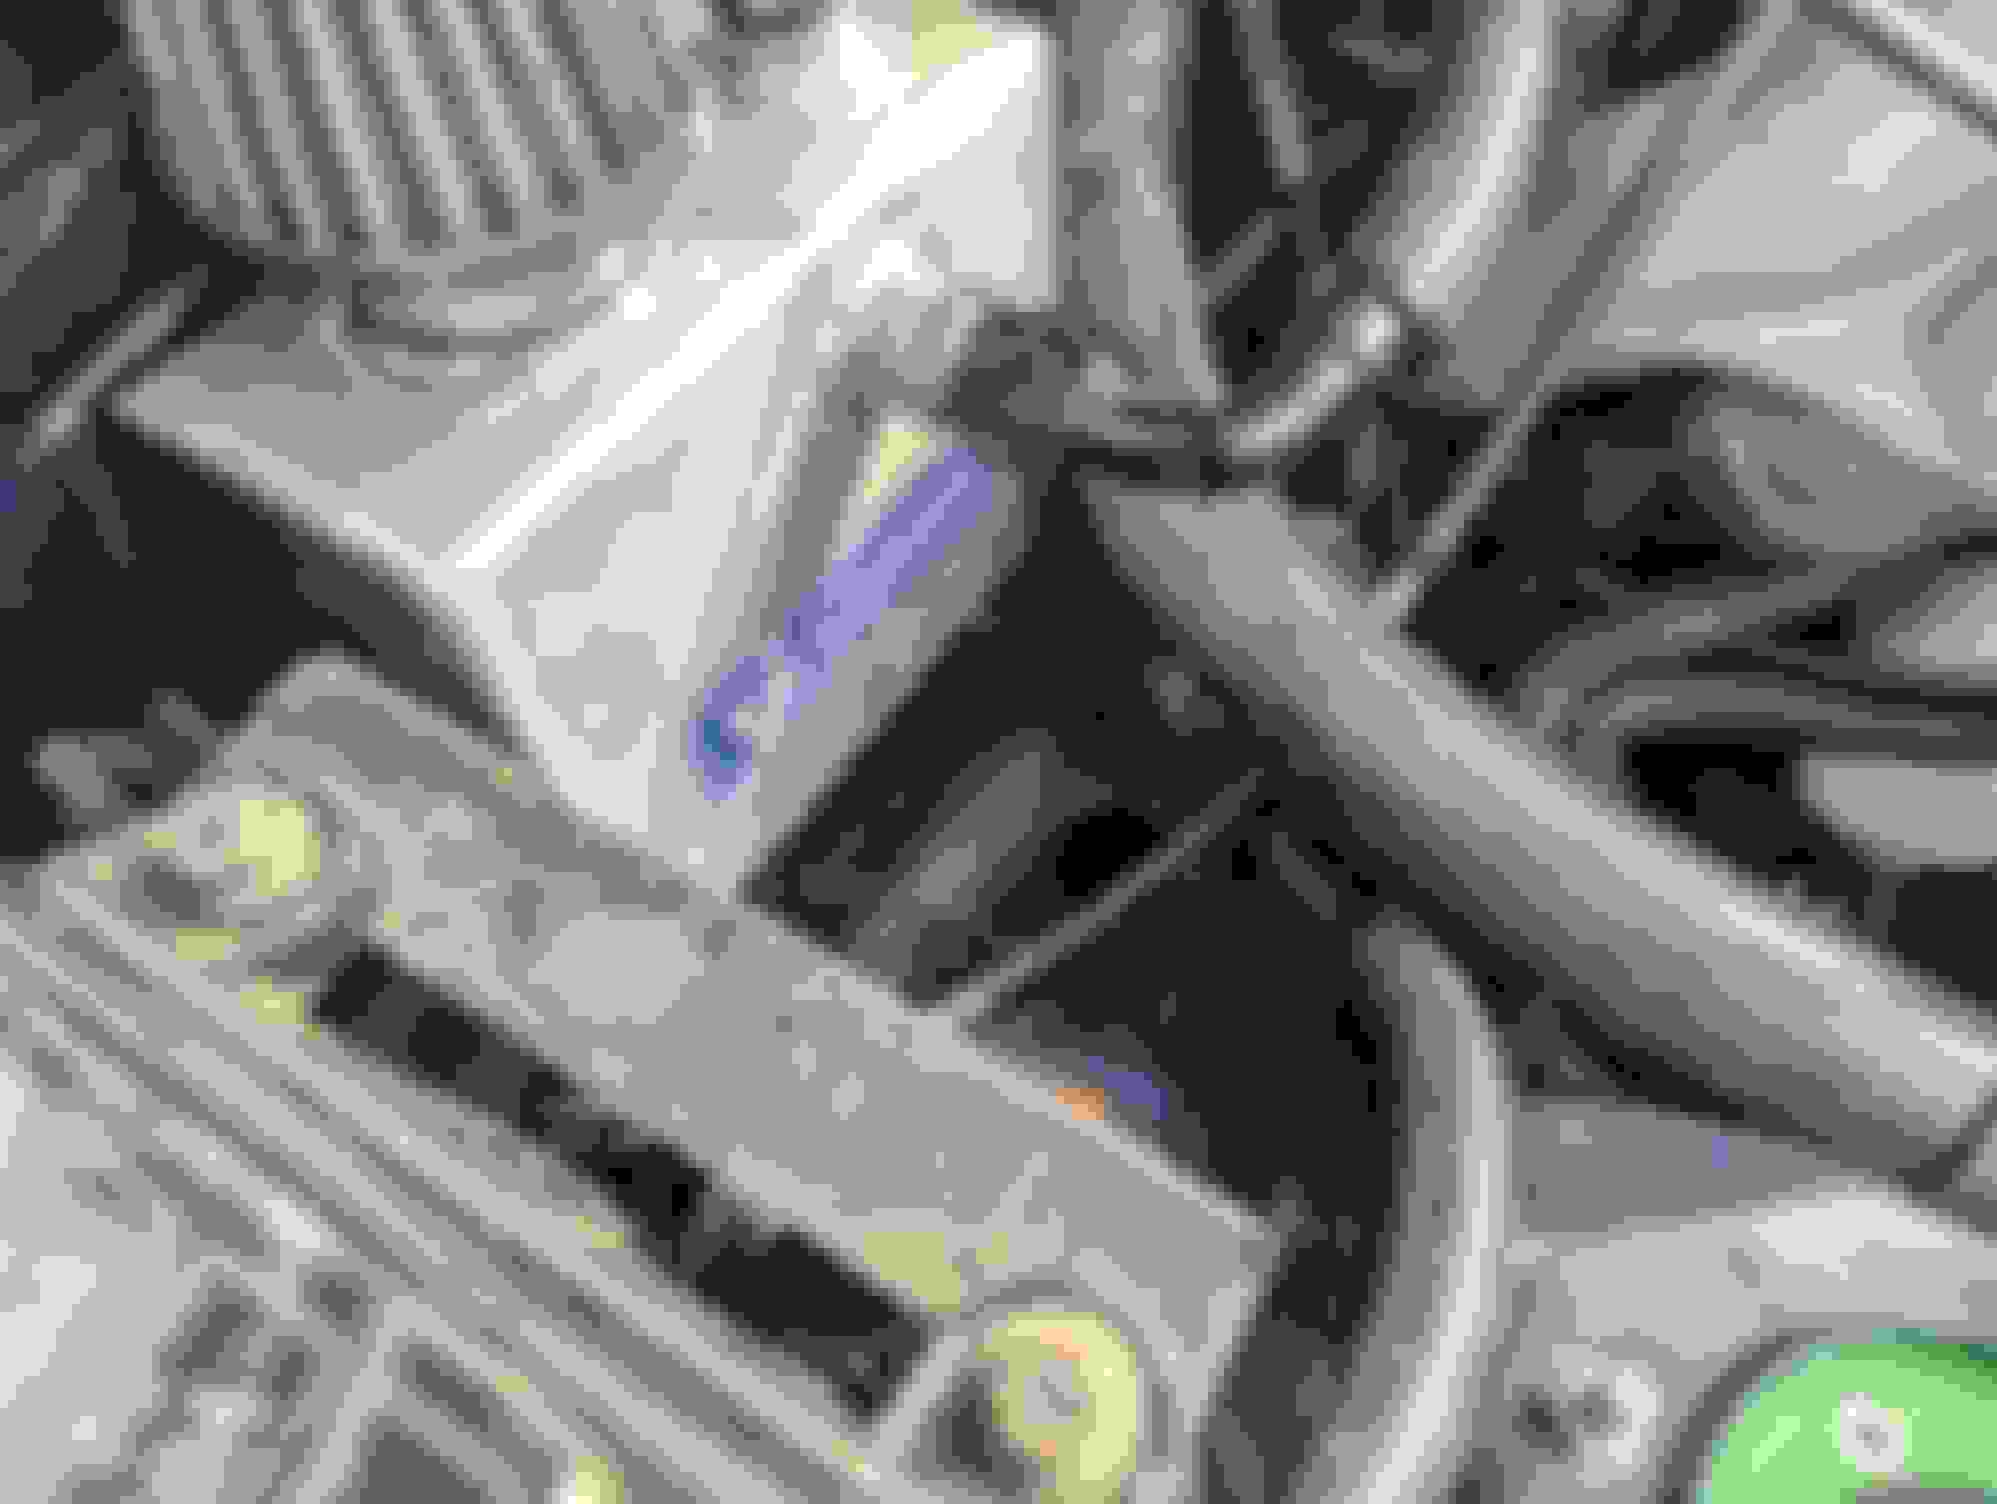
1. The hose lines are routed where your RB Sway Bar Mount Reinforcing Blocks and Bolts should be - you SHOULD have these because the OEM bracket is prone to shearing off, starting at the leading edge just under the 2x OEM bolts.
2.It looks like your mounting Alu L-bracket is just bolted onto the chassis rail by those top 2x bolts on the right, the bracket has been cut to allow the bend and you've zip-tied the cooler to it.
There's a LOT of weight hanging after that Alu bracket bend point and it will be vibrating constantly, stressing the crap out of the bend point.
If it's a 3mm Alu L-bracket you MAY get away with it but less than that is a time bomb that you MUST check every time BEFORE you get on the track.
Remake the bracket from steel OR make sure that the L-bracket section that holds the cooler is also mounted securely to the chassis (you could use zip-ties for that section through the chassis rail, it just needs to help hold the weight of the cooler so that it's NOT all bourn by the ALU bracket at the bend point)
3. The location of the cooler is wrong too, it's parallel to any airflow, even at low speeds, so air will just flow around it front to back, NOT through it.
If you want to mount the cooler here, you need to create a duct for it that fully seals to the cooler and the other end is exposed to a good input-air source so that all of it is channelled through the duct
I mounted my oil cooler in the wheel well on the opposites side - consider doing something similar (see post #5 of post-pictures-your-oil-cooler-routing-65000)
FYI: in the first picture of post#5 in the link above, you can see my sway bar mount's reinforcing block and it's front-most bolt
Keep up the DIY fab-work and posts, it's always good to see what others think, especially if they spot problems or have improvements (that's what I do, I DON'T want my **** to break and I DON'T know everything - yet :P ).
1. I didn't know this was a huge concern. I have heard of the reinforcing blocks but I don't personally know anyone who has had this failure, and I have been tracking this car for ~7 years and also haven't had an issue. But maybe I have just been lucky. I will certainly look into it though as it seems like cheap insurance against a potential failure.
2. This I totally agree thinking about it more. The cooler itself is extremely light, but that is not considering the weight of the fluid in it as well, but my thought when I made it was that it would be fine considering the light weight of the cooler. I think the bar would be adequately stiff in the horizontal axis but it will probably bend/vibrate in the vertical axis quite a lot. I will attach the front of the bracket to the frame rail and then monitor it. If it seems fine after each session like that then cool. If not I will redesign the bracket entirely.
3. Very aware haha. If you look at the other picture of the cooler you can see where the air path will be. In the pictures I hadn't reassembled any of the front of the car so none of my ducting was in. I was going to run a small naca duct off the side of my radiator ducting and feed directly onto the inboard side of the cooler which will then just vent into the wheel well. I have the Track Dog oil cooler that is going in on the other side that is mounted just like yours is and will get ducted from the other side of the rad ducting. I didn't have any issue with boiling p/s fluid with the stock "cooler" line so I don't think I will have any issue with this setup, but worse case I can make a copy of the oil cooler setup you/I have.
I appreciate the well thought out input, and totally agree that I also don't want my **** to break either and definitely welcome the feedback!
Well this thread is in dire need of an update which I promise to make soon as a lot has happened with the car in the last few months. But that recap will wait until after Gridlife Mid-Ohio... I am here requesting help with my new problem. Just had the car on track for the first time in a long time with lots of setup changes, on different tires, and on a new track lol. Well big issue is I am now filling my new, larger catch can in ~4 laps.
Alright so recap; I ran a Track Night at Pitt Race today as a shakedown for Gridlife Mid-O in a week-ish. My first time at Pitt and it seems like a very fun track if I could only manage to run a whole session.. First session out I ran the full 20min, but this was my first time ever here so I wasn't full rip. Second session I made it two laps before my car started smoking under the car and into the cabin. The catch can was overflowing and blowing oil all over the passenger side of the engine bay and leaking down the frame onto the transmission and exhaust which was smoking. Luckily nothing caught fire and I brought the car in once I saw the smoke.
Kinda hard to tell but everything is covered in oil.
Considering some of the oil was turned into smoke, and a lot was all over the engine bay and under the car, I bet it was at least a full quart that went into the catch can. This is what I drained out.
Oil is right up to the top of the label.
Maybe it was overfull I thought, maybe it had partially filled up in the little street driving I had done, maybe the engine was just toast.... Not really knowing why this happened I cleaned everything best I could at the track and made sure nothing was still on the exhaust and went out for the last session.
Aaaand:
I made it 4 laps on a known fully empty can before it was overflowing again. My current theory is that I have a breather hose routing issue or a valve cover baffle issue. I have the OEM baffles with the plates installed, but I have the passeges between the chambers drilled larger. The exterior of the cover is also drilled larger and the lines are 10an.
I don't know for sure if it is slowly filling or filling all at once, but Im thinking all at once with it happening in such a short amount of laps. Also when it would start smoking both happened on on-throttle right handers. First time was turn 6 of Pitt which is a right hander at the bottom of a hill going onto a small straight, and the second time it happened was turn 16 which is a high speed kink on the back straight. Both of them being "high g" right handers makes me think the driver side baffle is just getting overwhelmed with liquid oil and blasting it all into the can during one turn. It could just be coincidence, but I don't really have any other thoughts currently. I can post a picture of my hose routing tomorrow... Just wanted to see who else has had this issue and what steps you took to fix it, but I have a week until Gridlife haha
Looking at that reservoir, I am not sure where you are leaking /overflowing oil - the breather looks dry, so where is the oil coming from, and how is it getting to the exhaust from the catchcan, that's the RHS isn't it? They look like pushlock fittings, is that the correct hose for those fittings? You shouldn't have to use the clamps on a breather hose, but if that is not the right hose for those fittings ...
Post some photos of your routing, someone may have some ideas, obviously filling a can so fast is not a hose issue . When you say you have drilled out the passages, can you describe exactly what you did where, photos would be nice but probably too late for that? It did involve the 'tiny hole' mod?
A compression test may show that you have lots of blowby, pressurising the engine insides, that would be one possibility.
Yeah the oil just doesn't show up well in the pictures unfortunately. The breather filter was full off oil when I pulled it off, and both of the hoses were still tight on the fittings when I took them off. Oil was coming out of the breather, covering the passenger side of the engine/trans/frame and leaking down. As the oil would leak down the car the air stream would blow it onto the mid-pipe and would start burning. I will throw a photo of the routing below. I can do a compression test but I dont think this is a compression issue. If it was high blowby enough to push a quart of oil out in ~15min then it wouldn't be running haha. My lest engine had ~60psi of compression in cyl3 before I pulled it, and even that engine didn't fill my previous smaller can in a whole day of tracking. I will dig up some valve cover mod pictures if I can find them, I think I took some.
As you can see in the second picture, the passenger side comes out of the v.c. at a ~30� angle upwards but the driver side is "level" with the ground. Because of this, and the can being slightly below the top of the engine, the high point in the driver side line is basically the valve cover itself, where as on the passenger side oil would have to make it's way upwards a reasonable amount to make it into the line. This tracks with the issue seeming to occur in higher G right handers only. The question is, is the issue just the height of the driver side line relative to the valve cover causing the issue, or is it the baffles in the valve cover not doing enough before the line?
Looking at that reservoir, I am not sure where you are leaking /overflowing oil - the breather looks dry, so where is the oil coming from, and how is it getting to the exhaust from the catchcan, that's the RHS isn't it? They look like pushlock fittings, is that the correct hose for those fittings? You shouldn't have to use the clamps on a breather hose, but if that is not the right hose for those fittings ...
Post some photos of your routing, someone may have some ideas, obviously filling a can so fast is not a hose issue . When you say you have drilled out the passages, can you describe exactly what you did where, photos would be nice but probably too late for that? It did involve the 'tiny hole' mod?
A compression test may show that you have lots of blowby, pressurising the engine insides, that would be one possibility.
Also to answer your other questions, yes I have read the valve cover thread but it has been about 6 months since I read through it start to finish so maybe its worth a review. And after looking back at the thread I referenced for the valve cover mod, yes it is the "tiny hole" mod I just didn't remember that is what it had been coined haha. I did not add any scrubber material to the baffles like he did in his thread, but I did drill out the port between the middle and ext side chambers as referenced in that thread, and also drilled out the exterior valve cover ports to accommodate 10an fittings.
I had a long-time turbo Miata racer tell me, "You're never going to eliminate blow by on a boosted BP on the track, so that's why I run a drain back on my catch can." There is a reason why OEMs often do it on turbocharged performance motors, especially of the 90's era.
That catch cam looks a little small and the location of the front port may lead to more oil being pushed out the breather before its "full". I could see that port getting submerged under braking, then the air blowing through the hose forcing the oil to mist and try to exit the filter.
I have added baffles (intake side) and copper scrubbers (exhaust side) to my valve cover, -8 lines to the big Vibrant catch can, and a -6 drain back with a restrictor in the hose. The restrictor is help keep oil making its way back up the hose during cornering loads. I've only had one race weekend, but besides some light oil misting through the mesh filter (likely due to air velocity in the -8 hoses), it's working great. So much so, a TA driver with a similar setup is switching his car over to a drain back setup after trying the big Radium catch can and still having it fill. I'll be at Gridlife Mid Ohio racing in GLTC (teal NA). Feel free to stop by and take a look at my setup.
Appreciate all the info. Do you have any pictures of your setup? I looked through your build thread but it stops right when you decided to go turbo it seems haha. Did you just add another drain fitting to the pan or where do you drain the catch can to? I do agree about the second port of the can being on the side instead of the top being kinda dumb, but it is what it is with this can. I can always switch to a different/bigger can, do you have a link to the can you are using? Also I for sure will hit you up at Mid-O! Hopefully I can just end up with a workable setup before then haha
Yeah, the image host I was using went to ****, got busy with kids, and just posted most of the stuff on my Instgram out of laziness (@acowden86).
I did have to add an additional port to the oil pan. I just used a barb-NPT adapter as high up in the oil pan as I could, just under the motor mount. I can't recall if I had a friend weld a bung there or just tapped it. I wanted the port away from the sump to hopefully reduce the chances of a large amount of oil trying to make its way back up the hose.
I use a 2 port the Gen 2 version of the Vibrant catch can. Just eyeballing it, it looks like its equivalent to the 1.5L version of their Gen 3 design. It's a tight fit to get it under the hood in the same area you have yours mounted.
It seems like we see some reporting issues when the PCV valve is removed and a direct vent is applied. I'm not exactly sure why that happens but maybe we can work through the thought experiment.
During NA WOT I would think both ports on the valve cover should see roughly the same weak vacuum. They are both connected to the same pipe once the throttle if fully open assuming the PCV is fully open. The moving air through the pipe should put a small vacuum on the smaller ports that connect to it. If the blowby exceeds the vacuum this state could change? Anyway I think in normal operation there are direct paths to combustion.
During partial throttle, there is a strong vacuum on the PCV port and air will flow into the exhaust side valve cover port, through the PCV port and into the engine.
When we introduce the turbo, my take was to just add pressure sealed catch cans on each valve cover port. During normal high vacuum operation the system works as Mazda designed it. During boost the PCV valve is fully closed and ALL blowby is directed/drawn through the exhaust side valve cover port. I made a dual direction catch can for this since I was worried that oil would get to my compressor wheel. I'm not sure if my engine is magical, but I don't collect any oil in this catch can.
https://grassrootsmotorsports.com/fo.../126828/page1/ ----There is a picture of this concept on this page (I also cover it lightly in my build thread), I don't use a separate check valve as they show since I'm using a PCV valve that performs this task.
So why are you getting oil? Hrmmm the main difference that I can see is that you've removed the weak vacuum that used to exist on the exhaust side valve cover port? Maybe that vacuum is stronger than my gut says it is? If it is stronger than the pressure built by blowby, then you could have changed a design that was intended to always be in vacuum to one that is now in positive pressure?
I'll keep this concise because I'm at work, but my car filled catch cans in like 5 laps with a setup like yours. The main issue is that you are venting the PCV side straight into the can. While that side is baffled, it's a known issue that it will push oil if you vent it straight to a can (without PCV) on a gripped-up turbo track car. Especially if you are on a track with a lot of left hand turns (which pushes oil to the PCV side of the cover).
Under normal use the PCV side of the cover is closed (not venting) under WOT, even on a N/A car, so it's not an issue with the PCV in place.
The fix is to cap that side (or revert to standard PCV setup on that side with a valve in place), and instead hog-out and double up the lines on the breather side, which doesn't have this same issue.
This info comes from I think Emilio, or Sav back in the day, and correlates with my experiences as well. Here's how I have mine:
Internal baffles opened up as much as I could (I know it looks ugly, but it works):
Double 10AN breathers off the VC (drilled/tapped, and jbwelded in. It looks ugly but it works):
Current can setup:
The idea is blocking off the PCV side (that dumps oil), and opening up the breather side A LOT. Higher volume on the breather side means less velocity, and velocity of air is what carries oil and vapors into the can.
Edit: Leb replied at the same time, and I agree with a lot of what he said.
Yeah, the image host I was using went to ****, got busy with kids, and just posted most of the stuff on my Instgram out of laziness (@acowden86).
I did have to add an additional port to the oil pan. I just used a barb-NPT adapter as high up in the oil pan as I could, just under the motor mount. I can't recall if I had a friend weld a bung there or just tapped it. I wanted the port away from the sump to hopefully reduce the chances of a large amount of oil trying to make its way back up the hose.
I use a 2 port the Gen 2 version of the Vibrant catch can. Just eyeballing it, it looks like its equivalent to the 1.5L version of their Gen 3 design. It's a tight fit to get it under the hood in the same area you have yours mounted.
Cool, thanks for the link. I wasn't planning on pulling the pan this week but it does sound like this setup would work.
Originally Posted by leboeuf
It seems like we see some reporting issues when the PCV valve is removed and a direct vent is applied. I'm not exactly sure why that happens but maybe we can work through the thought experiment.
During NA WOT I would think both ports on the valve cover should see roughly the same weak vacuum. They are both connected to the same pipe once the throttle if fully open assuming the PCV is fully open. The moving air through the pipe should put a small vacuum on the smaller ports that connect to it. If the blowby exceeds the vacuum this state could change? Anyway I think in normal operation there are direct paths to combustion.
During partial throttle, there is a strong vacuum on the PCV port and air will flow into the exhaust side valve cover port, through the PCV port and into the engine.
When we introduce the turbo, my take was to just add pressure sealed catch cans on each valve cover port. During normal high vacuum operation the system works as Mazda designed it. During boost the PCV valve is fully closed and ALL blowby is directed/drawn through the exhaust side valve cover port. I made a dual direction catch can for this since I was worried that oil would get to my compressor wheel. I'm not sure if my engine is magical, but I don't collect any oil in this catch can.
https://grassrootsmotorsports.com/fo.../126828/page1/ ----There is a picture of this concept on this page (I also cover it lightly in my build thread), I don't use a separate check valve as they show since I'm using a PCV valve that performs this task.
So why are you getting oil? Hrmmm the main difference that I can see is that you've removed the weak vacuum that used to exist on the exhaust side valve cover port? Maybe that vacuum is stronger than my gut says it is? If it is stronger than the pressure built by blowby, then you could have changed a design that was intended to always be in vacuum to one that is now in positive pressure?
Could be an excess blowby issue, I just would expect it to still fill the can under boost regardless of cornering then. During the first session the car was fine and I was using the same amount of throttle as the following two sessions but just cornering slower as I learned the course and felt out the tires. Then during session 2 and 3 once I upped the pace, it started filling the can in 3 or 4 laps and seemingly right after a turn. I am not at all trying to discount the info you have provided and I understand I am not using the system as designed, I am just not convinced currently that it is a blowby/crankcase pressure issue. Personally it just seems like an oil pooling during hard cornering issue.
Originally Posted by Fireindc
I'll keep this concise because I'm at work, but my car filled catch cans in like 5 laps with a setup like yours. The main issue is that you are venting the PCV side straight into the can. While that side is baffled, it's a known issue that it will push oil if you vent it straight to a can (without PCV) on a gripped-up turbo track car. Especially if you are on a track with a lot of left hand turns (which pushes oil to the PCV side of the cover).
Under normal use the PCV side of the cover is closed (not venting) under WOT, even on a N/A car, so it's not an issue with the PCV in place.
The fix is to cap that side (or revert to standard PCV setup on that side with a valve in place), and instead hog-out and double up the lines on the breather side, which doesn't have this same issue.
This info comes from I think Emilio, or Sav back in the day, and correlates with my experiences as well. Here's how I have mine:
Internal baffles opened up as much as I could (I know it looks ugly, but it works):
Double 10AN breathers off the VC (drilled/tapped, and jbwelded in. It looks ugly but it works):
Current can setup:
The idea is blocking off the PCV side (that dumps oil), and opening up the breather side A LOT. Higher volume on the breather side means less velocity, and velocity of air is what carries oil and vapors into the can.
Edit: Leb replied at the same time, and I agree with a lot of what he said.
Appreciate the info and the pictures. It could be that the oil was pooling during left handers and then took a little longer to blow out of the can, or it was just coincidence, but the car started smoking from the oil blowing out of the can immediately following 2 different "high G" right hand corners. I dont have a problem cutting up a valve cover more, and I can't prove which side of the cover is filling my can, but my gut says the driver side because of it happening following right hand turns. But I also understand that I could be totally wrong, my worry is just that if I open up the driver side more and block off the pcv side then if my driver side is actually the one filling the can it would just make the problem worse. Do you run any scrubbers in the valve cover like @Midtenn said he does? I would like to try both of the ideas but it just sucks I dont have another test day before MidO so I just have to do what I can and hope it works. Also just curious what sort of grip levels you guys have had your setups at successfully, this was my first time out with the car with a proper wing and splitter and I was on a set of borrowed Toyo slicks, so this is more grip than I have had in the car before so maybe that is why this has just cropped up now...
I am not at all trying to discount the info you have provided and I understand I am not using the system as designed, I am just not convinced currently that it is a blowby/crankcase pressure issue. Personally it just seems like an oil pooling during hard cornering issue.
I don't know what is causing your issue so I didn't make any definitive statements, but I think I may have neglected to make the point I intended to. The fluid dynamics (and where oil gets deposited) between a system in vacuum vs. a system under pressure are probably different. I wasn't thinking about blowby as the source of oil, but as the pressure source in your scenario.
I haven't been to a track in years, but the last time was on 200tw street tires/dadbod-non-hero driving so probably slower and less lateral force.


 0
0