
I have no idea what I'm doing!


Joined: Oct 2011
Posts: 5,732
Total Cats: 830
From: Detroit (the part with no rules or laws)
Reply
 0
0

0

A little bird told ya...
-The oil feed is setup to run off of a T in the oil pressure gauge.
-The "feed" line pictured was for coolant and runs from the water pump manifold(slip on) to back of turbo. Front coolant line ran from turbo to T in the Heater Core inlet hose.
-I forgot how crude that exhaust was....it's a beaut!
-I happen to have an MSM clutch assembly available if you're interested...haha!
Reply
0
0

Thread Starter
Senior Member
iTrader: (2)
Joined: May 2010
Posts: 851
Total Cats: 37
From: Beckley, WV
A little bird told ya...
-The oil feed is setup to run off of a T in the oil pressure gauge.
-The "feed" line pictured was for coolant and runs from the water pump manifold(slip on) to back of turbo. Front coolant line ran from turbo to T in the Heater Core inlet hose.
-I forgot how crude that exhaust was....it's a beaut!
-I happen to have an MSM clutch assembly available if you're interested...haha!
-The oil feed is setup to run off of a T in the oil pressure gauge.
-The "feed" line pictured was for coolant and runs from the water pump manifold(slip on) to back of turbo. Front coolant line ran from turbo to T in the Heater Core inlet hose.
-I forgot how crude that exhaust was....it's a beaut!
-I happen to have an MSM clutch assembly available if you're interested...haha!

I will actually even have to trim the feed line since I just have to run fro right beside the manifold.
All parts have been ordered. Last thing I am waiting to arrive is my Rev MS2, hopefully it makes an uneventful and quick trip across the sea. All these little gaskets mounts, fittings etc really add up. I think I have around $300 of unexpected expenses.
Plan now (if MS arrives) is start working Sat. the 12, take a couple days off work and get it done by the 16th. This is a whole new world of working on a car for me. I plan on pulling the engine, replacing the clutch, replacing all the coolant hoses, installing turbo and all the accompanying parts, reinstalling AC, put the engine back in, and turning the key. Lets see how many times I can fail in 1 long weekend.
Reply
0
0
Thread Starter
Senior Member
iTrader: (2)
Joined: May 2010
Posts: 851
Total Cats: 37
From: Beckley, WV
Well the work weekend has begun. Pictures will come later but here is what I have done in 2 days.
Day 1:
I got started and dove right in. Took forrrreeeeverrrrr (scene from sandlot) to get everything disconnected. I was solo so it was a lot of under the car, above the car, from the wheel well and back under the car. Not knowing how anything disconnects or even connects was a huge slow down. Felt like most of the day was chasing down tools or wandering around. I ended the day with just motor mounts keeping the engine in.
Day 2: Took me a lot longer than expected to get motor mounts off. A lot of trial and error. Kept hoping I wouldn't have to remove the mounts from the motor. But in the end I did. I don't know if it was me being rough or what, but once I got the motor out both mounts were completely sheared in half. I also didn't think to cap the drive shaft so I dumped transmission fluid allllll over my garage floor. Finally got the engine out and after a frustrating time I got the transmission off. It's going to be interesting getting that reattached. Last thing I did was pull my exhaust. Destroyed 1 hanger and ended up having to cut it because I didn't have room to pull it out the rear. I doubt I will be able to work on it tomorrow, but will pick back up on Tuesday.
Not really any photos to show besides a half taken apart engine bay then an empty engine bay.
Question: any tips on when I out the motor back in and dealing with the mounts? Will I attach everything to the car then drop the engine down and then do the 5-6 boots to attach to the motor?
Reply
0
0
Joined: Oct 2011
Posts: 5,732
Total Cats: 830
From: Detroit (the part with no rules or laws)
Bolts you mean?
You using stock mounts?
I've found it easiest to slip the motor mounts down onto the subframe, then lower the engine into place and bolt the mounts to the engine. Trying to get the mounts down into place while they're attached to the engine is a pain.
Reply
0
0
Thread Starter
Senior Member
iTrader: (2)
Joined: May 2010
Posts: 851
Total Cats: 37
From: Beckley, WV
Yah. Bolts. So your saying, attach the mount to the car and to the part that bolts to the motor then drop the motor down and do all those bolts that are a PIA to get to without 9ft of extensions.
Reply
0
0
Joined: Oct 2011
Posts: 5,732
Total Cats: 830
From: Detroit (the part with no rules or laws)
You should just be able to reach down in from the top and get those bolts with a deep socket at least. Don't bolt the mount to the subframe. Just stick it in the hole. I've done I with and without the turbo in place.
Reply
0
0

Reply
0
0

The Miata's motor mounts usually degrade to the point of falling apart. Nothing you did. Just plan on new Mazdaspeed mounts whenever you pull an engine that has been in for a while.
I'm about halfway to Dillon's method. I put the passenger side mount on the engine and the driver's side mount on the subframe prior to dropping it in. No big deal.
It's fun putting the tranny back on. LOL. A transmission jack can help.
I'm about halfway to Dillon's method. I put the passenger side mount on the engine and the driver's side mount on the subframe prior to dropping it in. No big deal.
It's fun putting the tranny back on. LOL. A transmission jack can help.
Reply
0
0

Well right haha. I was questioning whether it was ball or journal.
Reply
0
0
Thread Starter
Senior Member
iTrader: (2)
Joined: May 2010
Posts: 851
Total Cats: 37
From: Beckley, WV
Kind of stressing a possible screwup. When removing my flywheel I didn't keep it from turning. It turned some when I was down to the last bolt and some when I first tried to remove it. When I was reinstalling looking for torque specs I saw some warnings in the manual. I reattached my transmission today. Did I eff up? Do I need to take stuff back apart and double check something to make sure I didn't screw myself?
This is what happens when I have no idea what I'm doing.
This is what happens when I have no idea what I'm doing.
Reply
0
0
Kind of stressing a possible screwup. When removing my flywheel I didn't keep it from turning. It turned some when I was down to the last bolt and some when I first tried to remove it. When I was reinstalling looking for torque specs I saw some warnings in the manual. I reattached my transmission today. Did I eff up? Do I need to take stuff back apart and double check something to make sure I didn't screw myself?
This is what happens when I have no idea what I'm doing.
This is what happens when I have no idea what I'm doing.
The engine/transmission is made to install with the mounts installed on it. If you look a engine cradle, you'll notice one side is a hole and the other is a longer slit (tehehehehehe). Make sure the smaller side goes in first during assembly and it should pop in. (this is how I did it a couple months ago)
Reply
0
0
Thread Starter
Senior Member
iTrader: (2)
Joined: May 2010
Posts: 851
Total Cats: 37
From: Beckley, WV
The partial progress continues and I am slowly moving forward.
Spent many more hours working and got some more done. I replaced all the engine coolant hoses with silicon hoses and got the motor back in. I drilled the pan and was ready to really knock things out. Then my brother in law who helped me put the motor back in held my DP upto the light and pointed something I had missed. It had cracks in several places and was in need of work. Yay! Another delay. I got 90% of the motor hooked back up and only have 1 plug I am not sure of. It is beigeish and a single wire. It is on the same wire set as the wires to the alternator.
Things I still need to do? My exhaust hangers don't line up so I need to do something about that and need to do something about the DP. Pretty worn down with all my snags (don't think I've even document half of them here) and really have no clue when I will be back on the road. I may eventually post from a PC and get photos up.
Reply
0
0
Thread Starter
Senior Member
iTrader: (2)
Joined: May 2010
Posts: 851
Total Cats: 37
From: Beckley, WV
While working I never remember to take photos. Here is what I do have:
Beginning of day1:
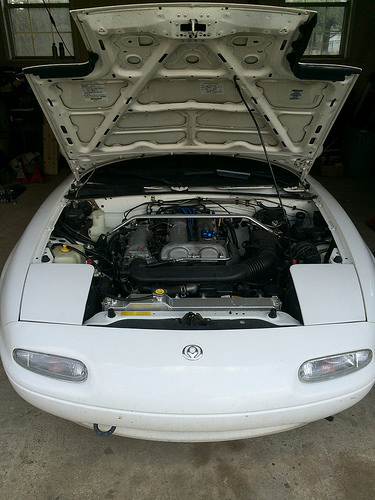 Untitled
Half way through getting the motor out (PS, the Haynes manual is almost useless)
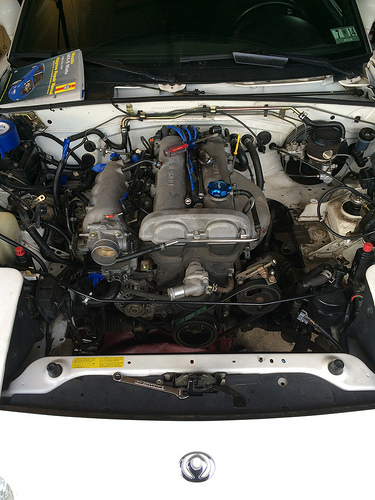 Untitled
How I left it at the end of day 1
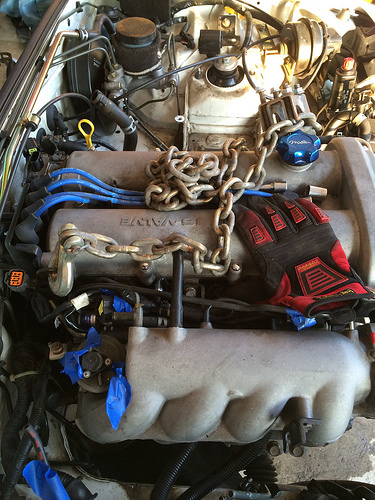 Untitled
Motor OUT!!! By this point I was feeling quite overwhelmed and really second guessing myself and taking on this project
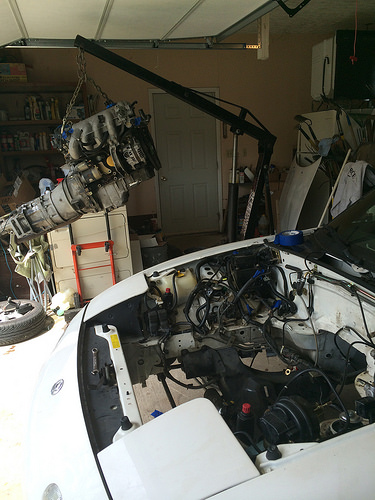 Untitled
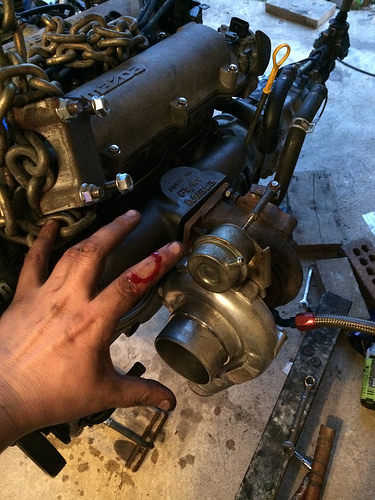
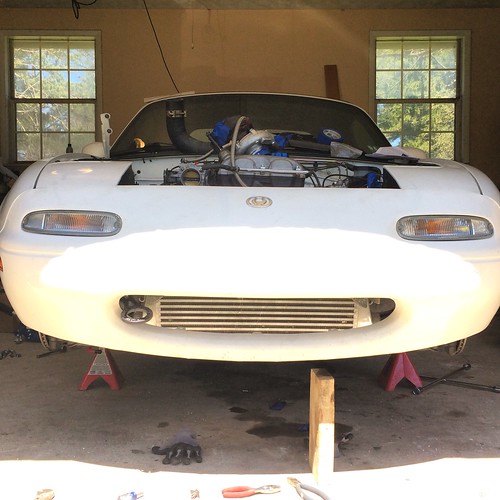
Obligatory "Look, I'm where my motor belongs" photo

Blood, check. Sweat, check. Tears? There will be lots if something doesn't work.
This point felt really good. Was able to see true progress and the light at the end of the tunnel. Little did I know that light was moving at the same speed I was.
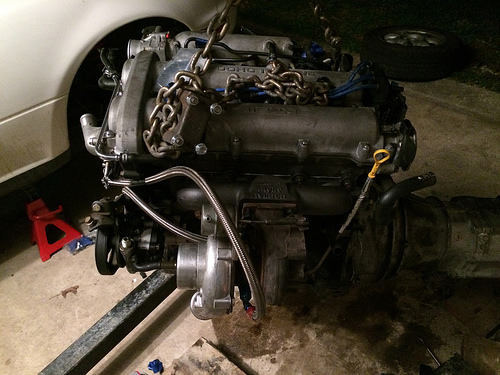
Top mount turbo?
Here is where I sit. Had to take the turbo off to make it simpler to drop the motor in. IC is bolted in but I haven't run anything for it.
What I still need to do:
I haven't run any wires for my MS2, boost gauge or wide band.
I haven't test or done anything with the MS2 yet
I have to figure out what I'm going to do with the dp and exhaust. My plan was use this for a season and then upgrade. Well is it worth having someone weld new hangers on the exhaust and stitch up the dp if I plan on replacing it? Or, should I just pick up a used setup for $600... hrmmm.... decisions decisions decisions.
Beginning of day1:
UntitledHalf way through getting the motor out (PS, the Haynes manual is almost useless)
UntitledHow I left it at the end of day 1
UntitledMotor OUT!!! By this point I was feeling quite overwhelmed and really second guessing myself and taking on this project
UntitledObligatory "Look, I'm where my motor belongs" photo
Blood, check. Sweat, check. Tears? There will be lots if something doesn't work.
This point felt really good. Was able to see true progress and the light at the end of the tunnel. Little did I know that light was moving at the same speed I was.
Top mount turbo?
Here is where I sit. Had to take the turbo off to make it simpler to drop the motor in. IC is bolted in but I haven't run anything for it.
What I still need to do:
I haven't run any wires for my MS2, boost gauge or wide band.
I haven't test or done anything with the MS2 yet
I have to figure out what I'm going to do with the dp and exhaust. My plan was use this for a season and then upgrade. Well is it worth having someone weld new hangers on the exhaust and stitch up the dp if I plan on replacing it? Or, should I just pick up a used setup for $600... hrmmm.... decisions decisions decisions.
Reply
0
0


