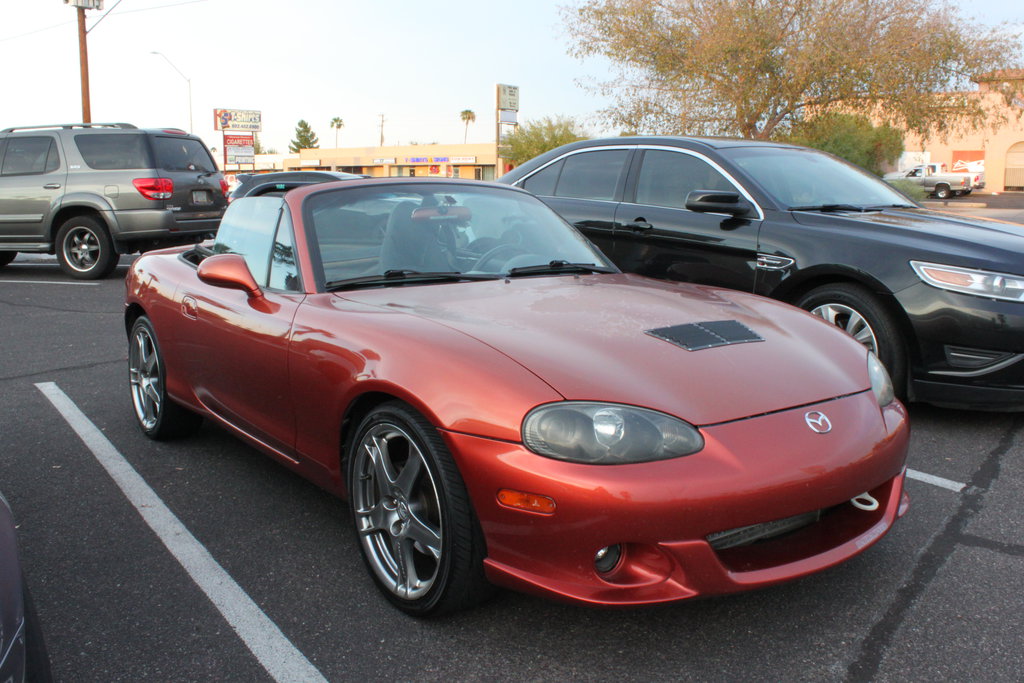
Intro turned build - Humming's '05 Lava Orange

 06-17-2015, 08:24 PM
#122
SadFab CEO

iTrader: (3)
Join Date: Sep 2012
Location: your mom's house phoenix, AZ
Posts: 4,560
Total Cats: 1,142
<p></p><p><img alt="facepalm" src="https://www.miataturbo.net/images/smilies/facepalm.gif" style="height:25px; width:25px" title="facepalm" /></p><p>https://www.miataturbo.net/build-thr...2/#post1223071</p>

Reply
 0
0

0
06-17-2015, 11:30 PM
#123
Junior Member
Thread Starter
iTrader: (2)

Join Date: Sep 2014
Location: PHX, Arizona
Posts: 227
Total Cats: 13
Yeah, hood vent on, Thinking about adding 2 more just #becauseracecar and so my fans can do their thing even better.
Got water wetter and a 180 degree t-stat. I'll pick up distilled water in a day or two and go for it on Saturday.
searched a bit with not much luck... Will I be okay using my standard pressure radiator cap with water and watter wetter only, or do I absolutely have to upgrade to a higher pressure cap before I go to 100% water+waterwetter? Any recommendations for said cap?
Reply
0
0

 06-20-2015, 02:06 PM
#131
Junior Member
Thread Starter
iTrader: (2)
Join Date: Sep 2014
Location: PHX, Arizona
Posts: 227
Total Cats: 13
New 180F thermostat, 16 psi cap, water wetter+distilled... WHAT A DIFFERENCE!
Try as I might I could NOT get it to go above 190F.
FINALLY!
The real test will be monday though.
Try as I might I could NOT get it to go above 190F.
FINALLY!
The real test will be monday though.
Reply
0
0
03-19-2016, 12:44 AM
#133
Junior Member
Thread Starter
iTrader: (2)
Join Date: Sep 2014
Location: PHX, Arizona
Posts: 227
Total Cats: 13
Well, this thread got a lot of neglect.
Where we last left off I had switched to mostly distilled water with water wetter and 10-20% of coolant, a 180F thermostat with an enlarged bypass hole drilled, and cooling problems solved.
Well, the temp still wants to climb over 75mph, but this meant my commute was fine every day, so problem solved. Over the winter I switched back to 50/50 and a 192 thermostat, and in a month or so I'll be switching back to my super cool set up again.
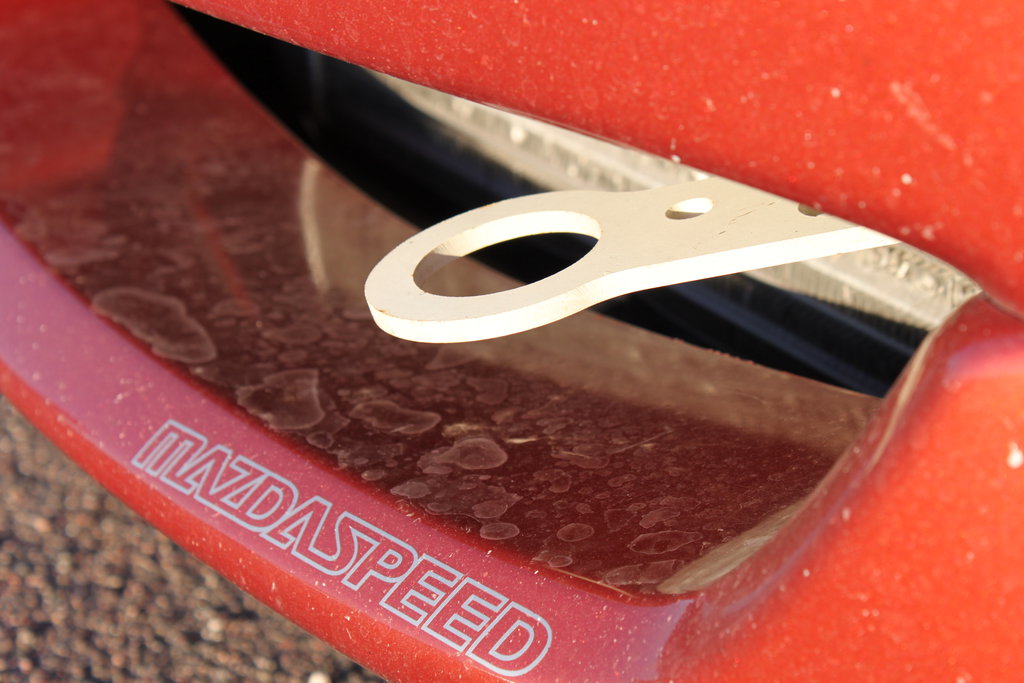
I made a new towhook for my car:
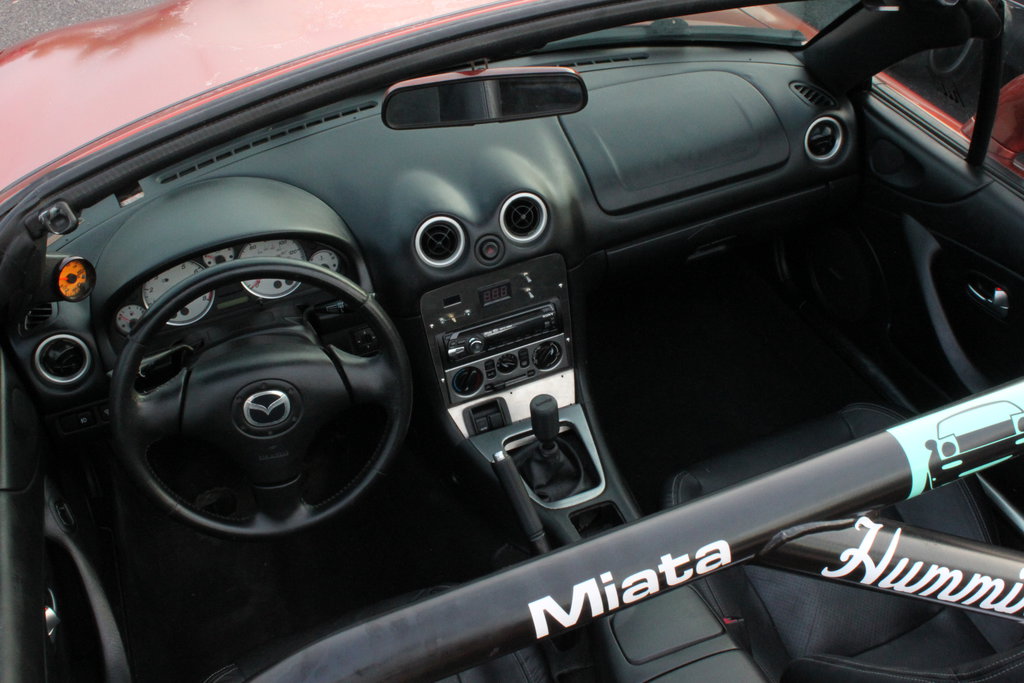
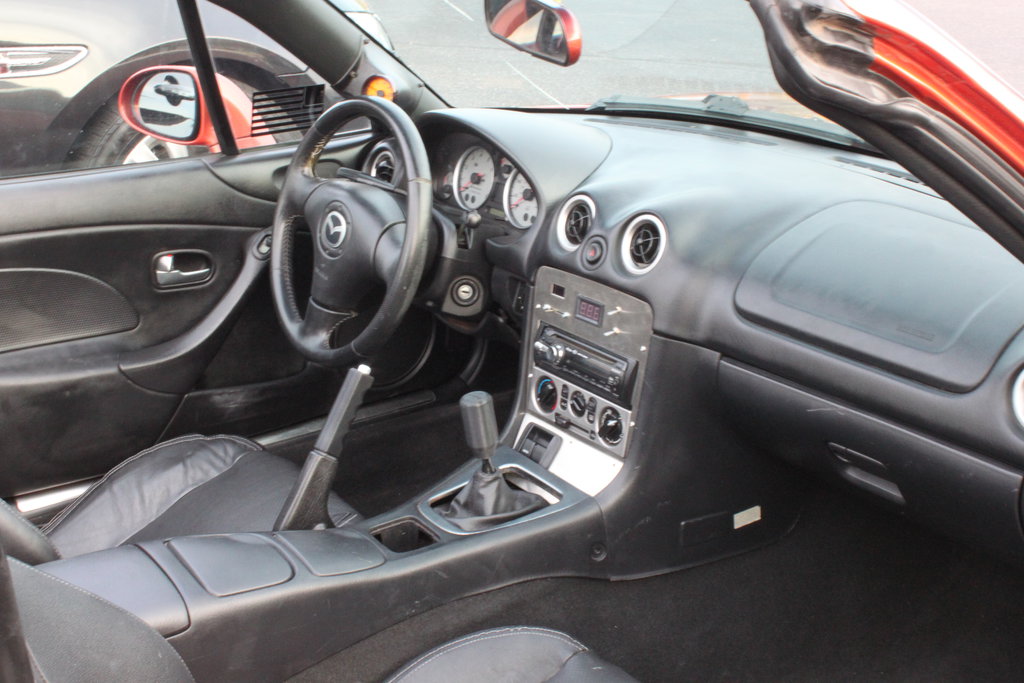
And I'm working on some nifty changes for the interior:
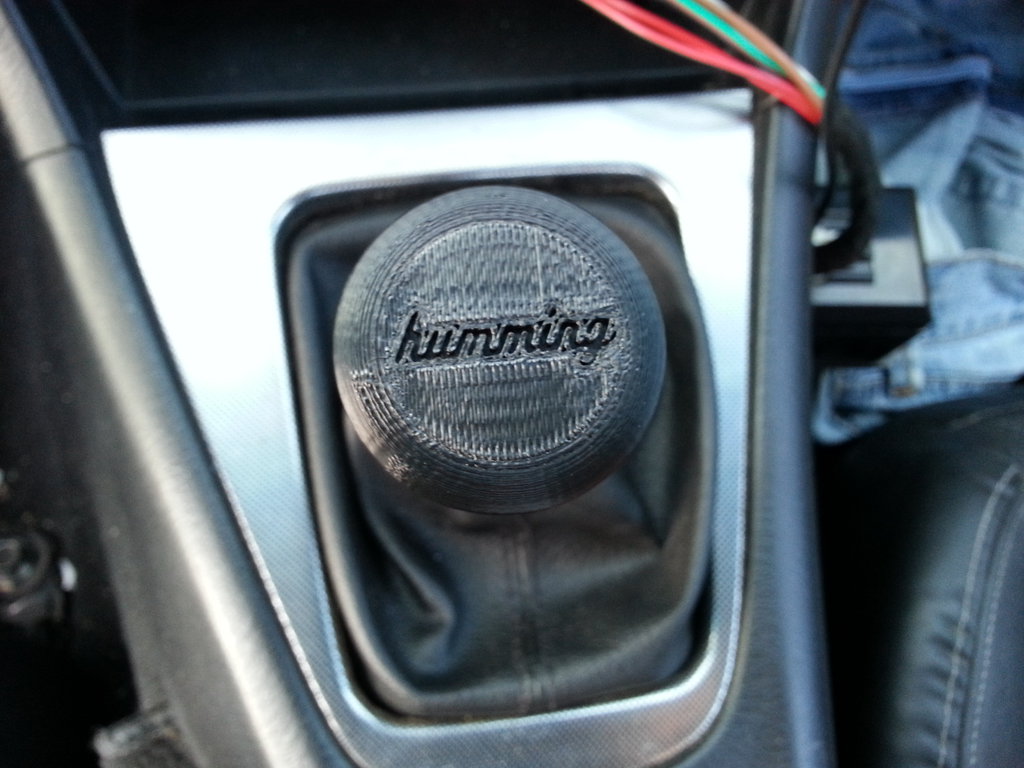
3D printed Shift **** and E-brake Handle:
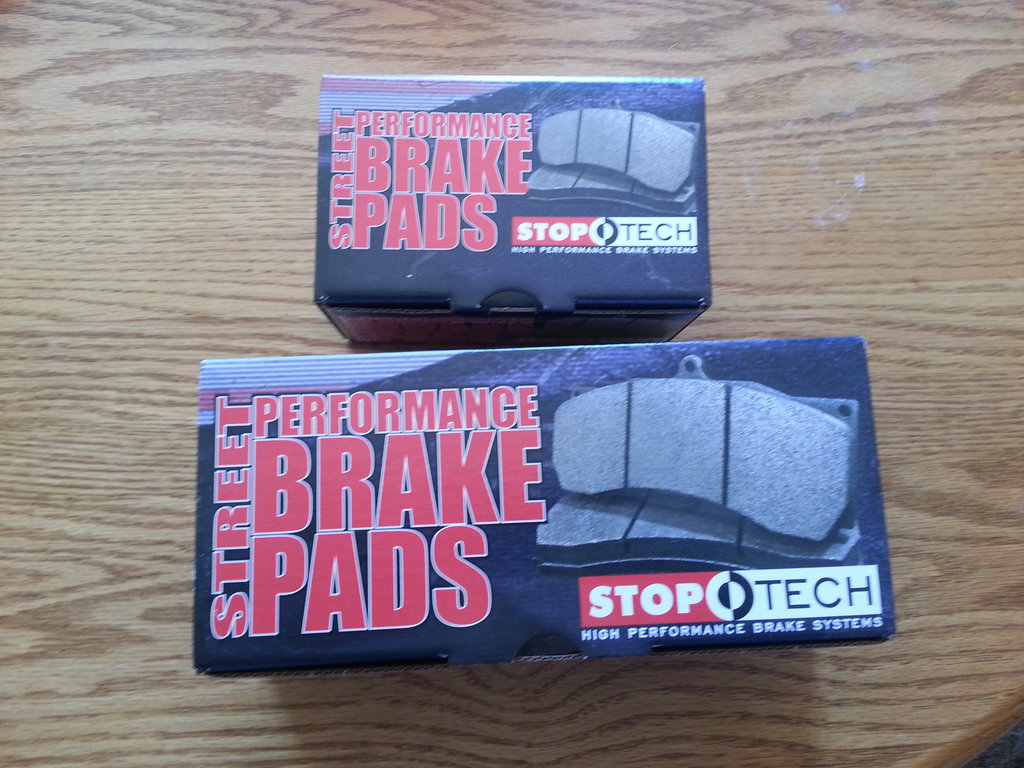
StopTech Brake Pads:
And the hood vent updated design looks swell:
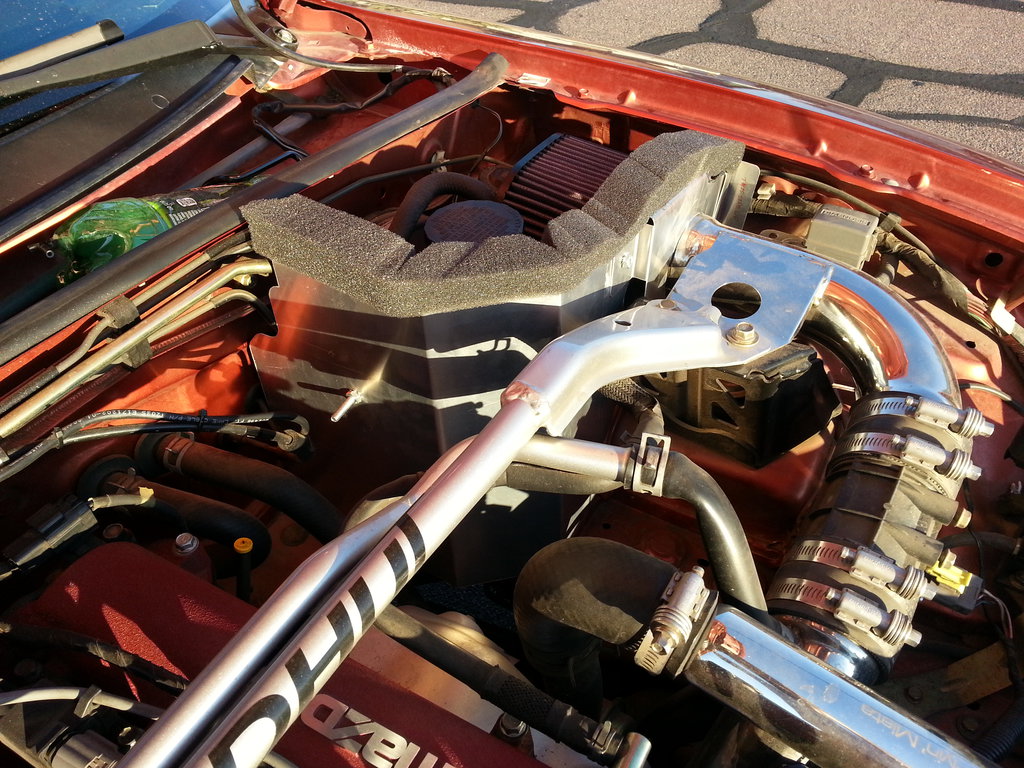
Not sure if I posted pics of Joeereid's intake box installed:
And I installed an ebay catless downpipe. Love the noise with top down, hate it with the top up.
Broken Crap on my car:
Both window regulators, windshield, top, both fog lights.
The hood, window frame, mirrors, trunk, and spoiler all have peeling clear.
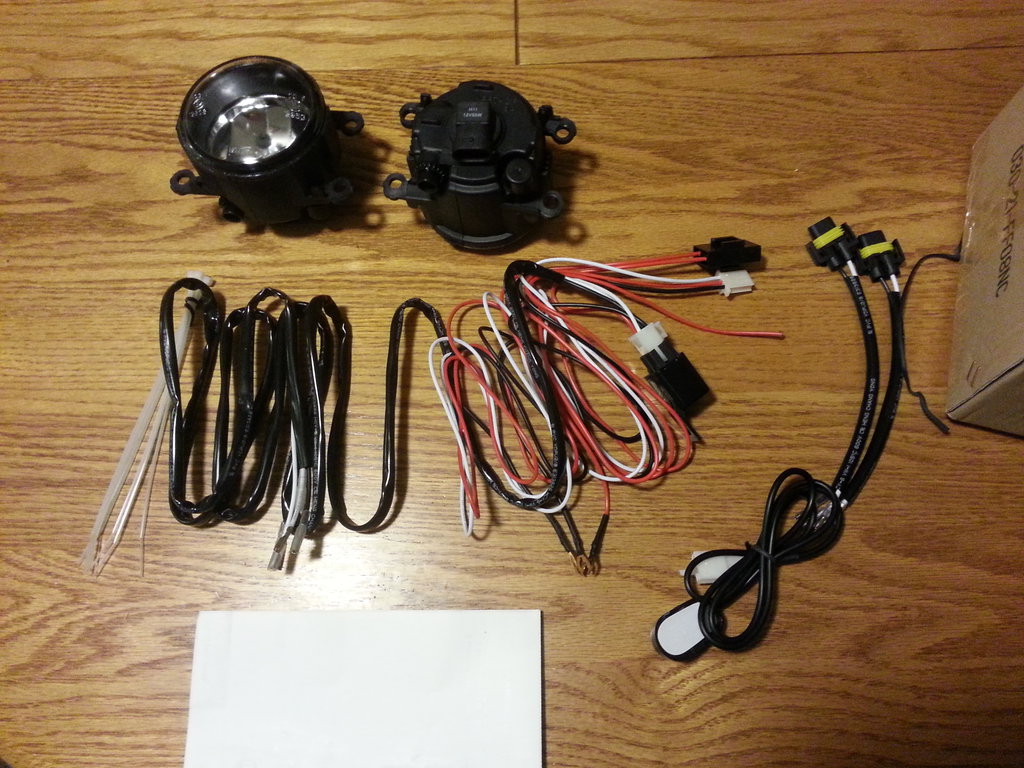
Ordered some new window tint and some replacement fog lights since the passenger one has been broken since I bought the car. Rumor has it these bolt right in:
http://amzn.com/B010156HEG
Got the lights. Not the nicest but not the worst either, but they include weather proof connectors, a relay, fuse, switch, and about a mile of cable that I'll save for some future project. Very cool.
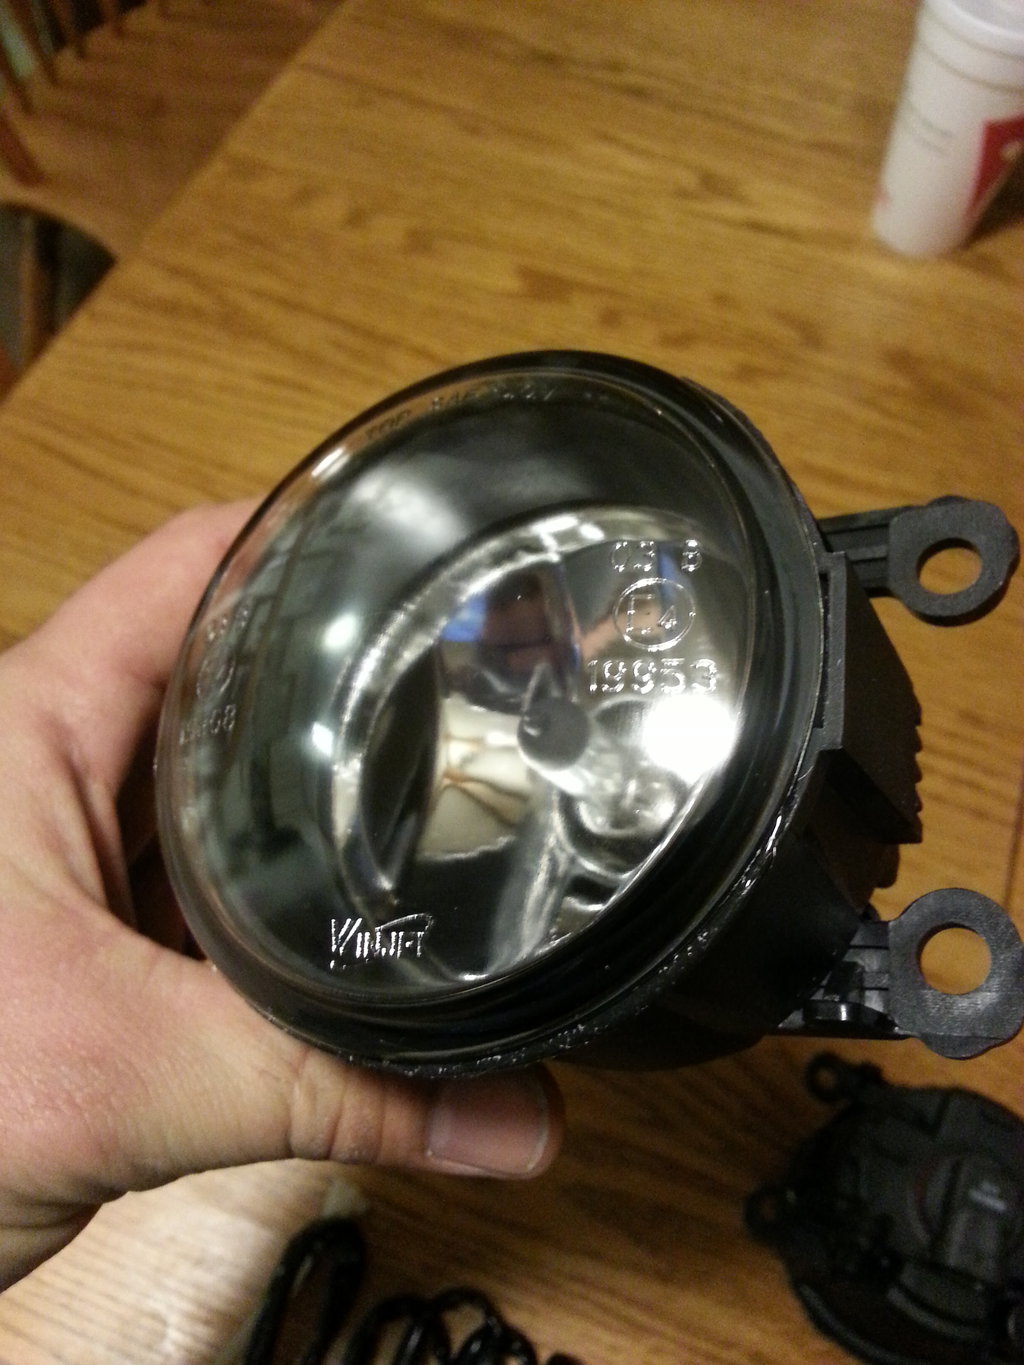
Not OEM or nice aftermarket quality, but not too bad either.
I also got some used window regulators thanks to Curly/CSTG/AR auto service(not sure where the lines are drawn these days).
I got some vinyl wrap a while back, it's pretty cheap stuff, I'm gonna try putting it on the hood this saturday and see how terribad it looks.
and right now I'm going all jeffbuc on the window regulators i bought from curly, cleaning out all the old grease and putting in new white lithium grease.
The old grease is so gross.
Where we last left off I had switched to mostly distilled water with water wetter and 10-20% of coolant, a 180F thermostat with an enlarged bypass hole drilled, and cooling problems solved.
Well, the temp still wants to climb over 75mph, but this meant my commute was fine every day, so problem solved. Over the winter I switched back to 50/50 and a 192 thermostat, and in a month or so I'll be switching back to my super cool set up again.
I made a new towhook for my car:
And I'm working on some nifty changes for the interior:
3D printed Shift **** and E-brake Handle:
StopTech Brake Pads:
And the hood vent updated design looks swell:
Not sure if I posted pics of Joeereid's intake box installed:
And I installed an ebay catless downpipe. Love the noise with top down, hate it with the top up.
Broken Crap on my car:
Both window regulators, windshield, top, both fog lights.
The hood, window frame, mirrors, trunk, and spoiler all have peeling clear.
Ordered some new window tint and some replacement fog lights since the passenger one has been broken since I bought the car. Rumor has it these bolt right in:
http://amzn.com/B010156HEG
Got the lights. Not the nicest but not the worst either, but they include weather proof connectors, a relay, fuse, switch, and about a mile of cable that I'll save for some future project. Very cool.
Not OEM or nice aftermarket quality, but not too bad either.
I also got some used window regulators thanks to Curly/CSTG/AR auto service(not sure where the lines are drawn these days).
I got some vinyl wrap a while back, it's pretty cheap stuff, I'm gonna try putting it on the hood this saturday and see how terribad it looks.
and right now I'm going all jeffbuc on the window regulators i bought from curly, cleaning out all the old grease and putting in new white lithium grease.
The old grease is so gross.
Reply
0
0
04-17-2016, 02:07 AM
#134
Junior Member
Thread Starter
iTrader: (2)
Join Date: Sep 2014
Location: PHX, Arizona
Posts: 227
Total Cats: 13
Well, finally got the passenger side regulator installed today. It is SO good to have working windows again after like 6 months without them lol.
Thanks to Curly for the deal on the regulators!
So I really wanted to make sure my used regulators would last. I didn't take any pictures :cry2: But I'll write my process here for anyone who wants to do the same.
1. remove all the old grease from the regulator assembly using alcohol and paper towels / q-tips. It took me about an hour and a half per regulator, but the end result was a spotless regulator ready for fresh grease.
2. Grease all the moving parts, the track, and the cable using white lithium grease. I put a lot in the track, and just a little everywhere else.
When that was done, I let them sit in the garage wrapped up until it was time to install:
3. Remove the two window spacers near the top via 1 10mm bolt each, remove the window via the three screws, remove the three 10mm bolts that hold the triangle window support bar(but DON'T remove the bar itself, you just need wiggle room), remove the existing regulator via 4 12mm nuts, and remove the support track via the two 12mm nuts on the other side.
4. Clean the support track. Since this is now out of the car and has nothing else on it that we need to protect or worry about we can do this the easy way! Spray the inside of the track(and anywhere that has grease) with WD-40 and hit it with a heat gun for a minute. Wipe out the WD-40 and all the grease with paper towels. Douse the track with denatured alcohol or acetone and wipe dry to remove any residual WD-40. WD-40 is great for cleaning the grease out, but you don't want to leave any on the metal after or it will attract dirt like crazy. Wipe a good amount of fresh grease(shin etsu or white lithium) into the track and install it back into the door but don't tighten it down.
5. Clean the window. I wanted to remove the wrinkled ripping old tint. Peel up a corner, grab a rag and douse it in denatured alcohol. Pull the tint and wipe the edge of the tint as it's getting pulled up with the rag. Keep rotating through to a fresh part of the rag every few inches. Once all the tint is up most of the adhesive should be off the glass. Clean whatever is left with denatured alcohol, and then clean the whole window with windex. Clean the green support track wheel carefully so you don't get grease on the glass. Don't add any grease, let the track do that. Now is a prime time to get the windows retinted if you want.
6. Reassemble and install everything. Tighten it all down except the support track. Run the window down to the bottom, tighten the bottom support track nut. Run the window up to the top, and tighten the top nut.
That's how I did it anyways. Hope it helps someone.
Reply
1
1
05-07-2016, 01:50 AM
#135
Junior Member
Thread Starter
iTrader: (2)
Join Date: Sep 2014
Location: PHX, Arizona
Posts: 227
Total Cats: 13
made a thing for my brother:
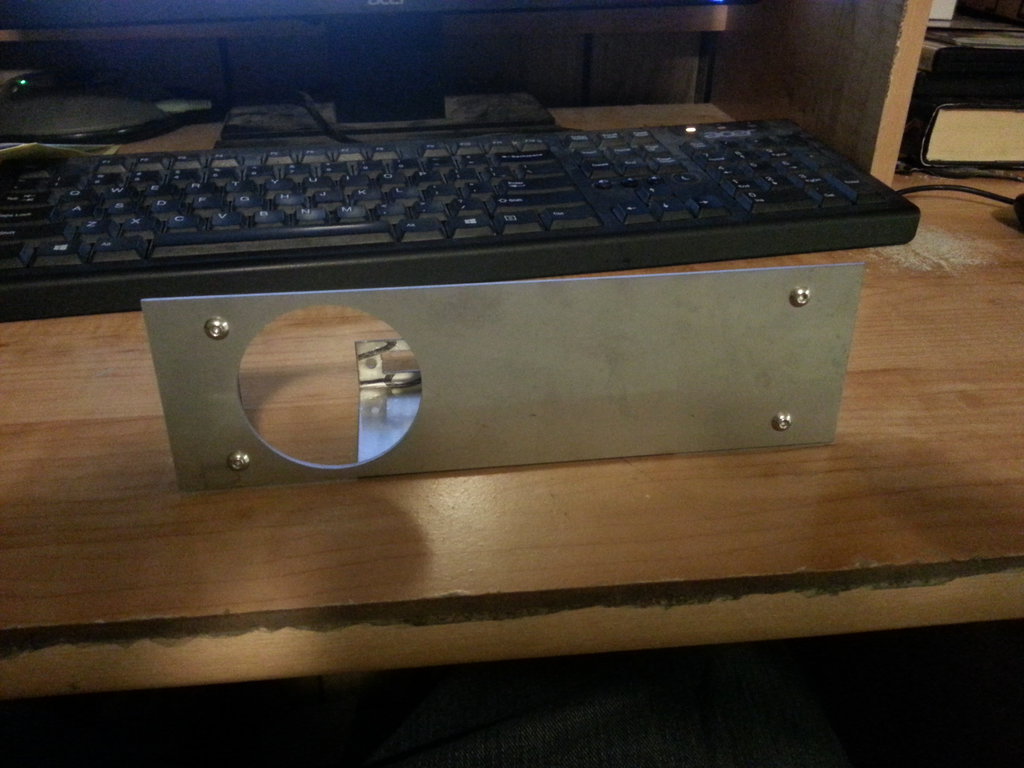
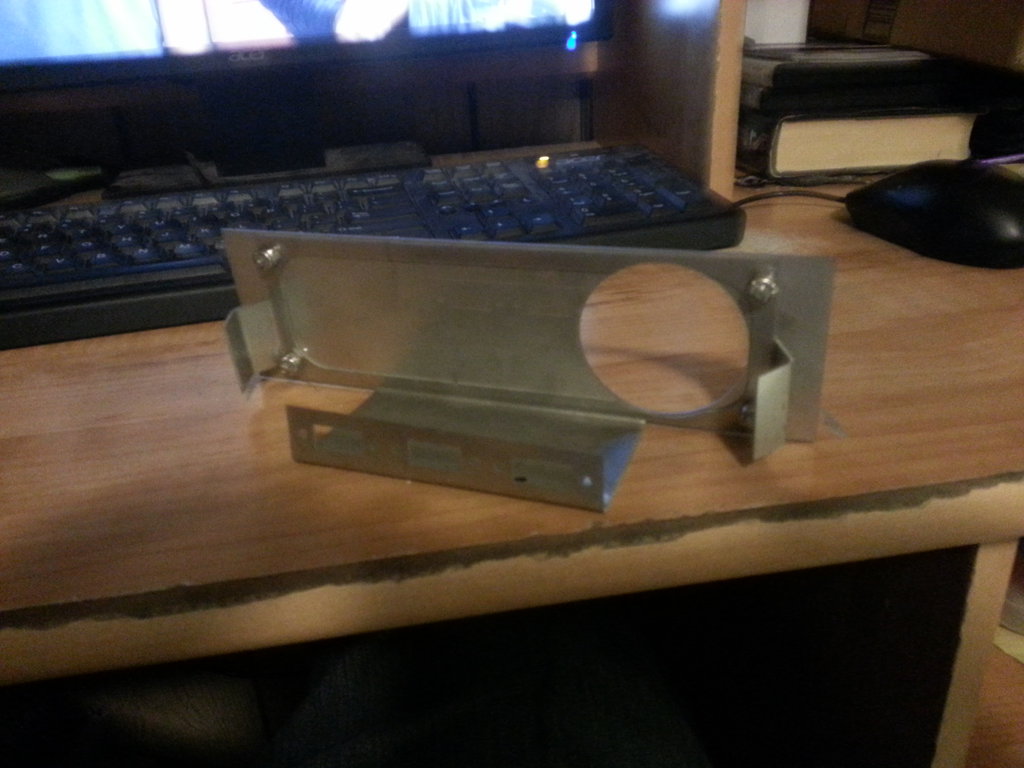
Single din gauge plate. Snaps in place. Going in his '03. He's gone megasquirt, racing beat header, FM midpipe and exhaust. We're finishing a wideband install, on his car tomorrow, and then soon he's going to install a flex fuel sensor. Then when he's got the coin together he'll get it on a dyno for a real tune on both pump gas and another on E85. Should be a good time.
Single din gauge plate. Snaps in place. Going in his '03. He's gone megasquirt, racing beat header, FM midpipe and exhaust. We're finishing a wideband install, on his car tomorrow, and then soon he's going to install a flex fuel sensor. Then when he's got the coin together he'll get it on a dyno for a real tune on both pump gas and another on E85. Should be a good time.
Reply
0
0
05-31-2016, 01:13 AM
#136
Junior Member
Thread Starter
iTrader: (2)
Join Date: Sep 2014
Location: PHX, Arizona
Posts: 227
Total Cats: 13
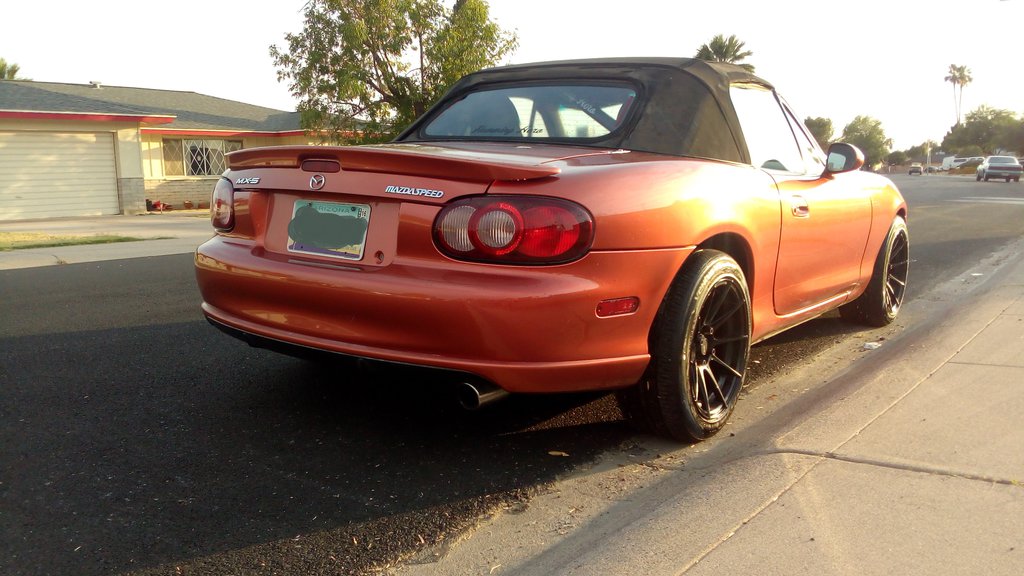
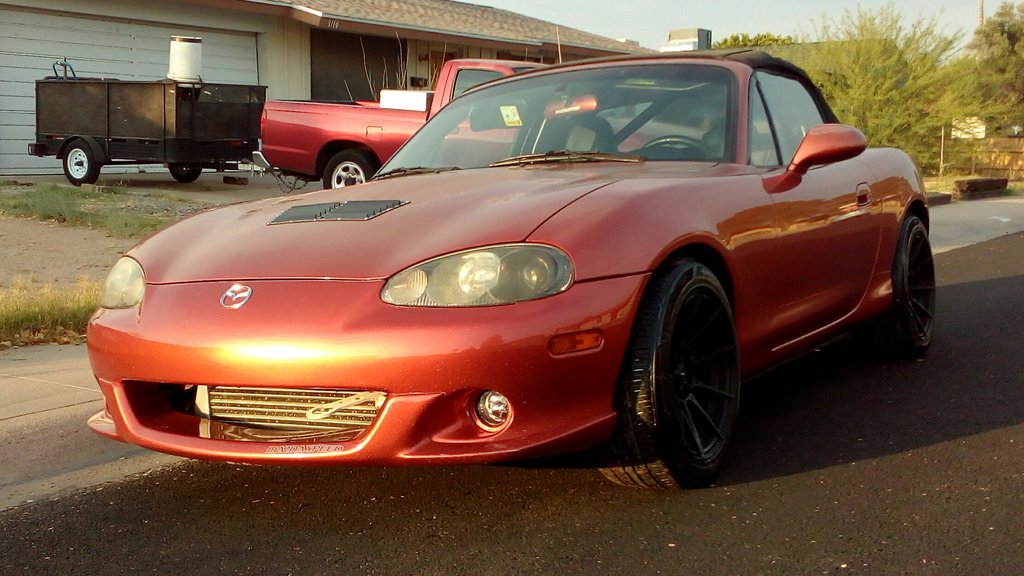
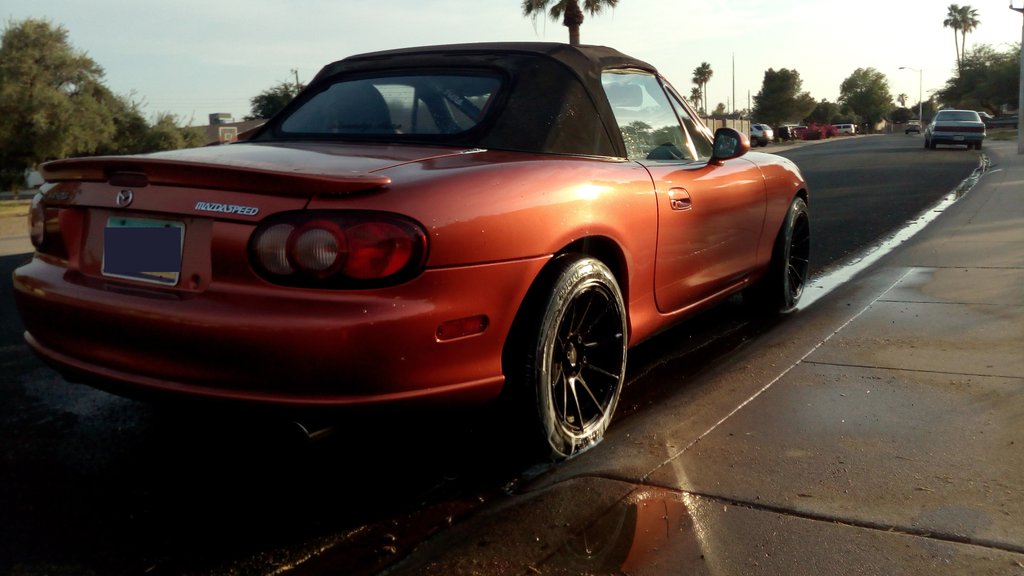
New wheels! My brother is trading in his 2003 for a focus ST, so he put his stock wheels back on and gave me his advanti storm S1. They've got Hankook ventus v2 on them for now, when these are done I'll look at some stickier tires.
Pics tomorrow!
Pics tomorrow!
Reply
0
0
 06-02-2016, 12:49 AM
#140
Junior Member
Thread Starter
iTrader: (2)
Join Date: Sep 2014
Location: PHX, Arizona
Posts: 227
Total Cats: 13
So my AC hasn't been working, but I suspected it was simply low and not anything damaged. A friend from church does HVAC and offered to help me. Took it over to his place and it still had a marginal amount of pressure in the system so I don't think the leak is too major yet. We pumped it down to 28 inHg where it topped out, and he proceeded to do his magic adding refrigerant to the 2 sides. He had me rev the engine and hold it around 3k rpm for about a minute while he topped it off. We had to switch cans in the middle, but in about 30 minutes the whole process was complete, and I have ice cold AC now.
Hopefully it lasts all summer. If it's not doing so hot by the end of summer I'll probably re-seal the system this fall.
Yay for AC in AZ!
Hopefully it lasts all summer. If it's not doing so hot by the end of summer I'll probably re-seal the system this fall.
Yay for AC in AZ!
Reply
1
1


