
Konmo's 1990 Turbo VVT Swap


Thread Starter
Junior Member
iTrader: (2)
Joined: Dec 2014
Posts: 307
Total Cats: 23
From: Salinas, CA
Reply
 0
0

0

Downpipe is stainless? I honestly can't think of any local exhaust shops that actually know what a TIG welder is, let alone trust them to get a v-band flange on straight. 
If the midpipe is mild and you don't mind keeping that flat 2 bolt flange, that opens up some options. The last mind steel exhaust I had welded up locally was for my 73 F250 by Howard (iirc?) over at All American on Abbot. He's oldschool guy, drives a super nice 66 Mustang GT350 (probably clone, but still well done) when the weather is nice. I know he can at least get a flange on to a piece of mild, and he's not the type of guy who is going to text his buddies when a Miata with a turbo hanging off of it gets dropped of for exhaust work. Just make sure you tell him exactly what you want and he'll get it done. He does decent work, but unfortunately he's not exactly cheap.
If its stainless, I can shoot out a couple emails and see who people recommend for such things. I haven't had a local go-to since the shop where I used to work closed up.
Hope some of that blathering helps!
Reply
0
0
Thread Starter
Junior Member
iTrader: (2)
Joined: Dec 2014
Posts: 307
Total Cats: 23
From: Salinas, CA
Downpipe is stainless? I honestly can't think of any local exhaust shops that actually know what a TIG welder is, let alone trust them to get a v-band flange on straight.
If the midpipe is mild and you don't mind keeping that flat 2 bolt flange, that opens up some options. The last mind steel exhaust I had welded up locally was for my 73 F250 by Howard (iirc?) over at All American on Abbot. He's oldschool guy, drives a super nice 66 Mustang GT350 (probably clone, but still well done) when the weather is nice. I know he can at least get a flange on to a piece of mild, and he's not the type of guy who is going to text his buddies when a Miata with a turbo hanging off of it gets dropped of for exhaust work. Just make sure you tell him exactly what you want and he'll get it done. He does decent work, but unfortunately he's not exactly cheap.
If its stainless, I can shoot out a couple emails and see who people recommend for such things. I haven't had a local go-to since the shop where I used to work closed up.
Hope some of that blathering helps!
Reply
0
0
Thread Starter
Junior Member
iTrader: (2)
Joined: Dec 2014
Posts: 307
Total Cats: 23
From: Salinas, CA
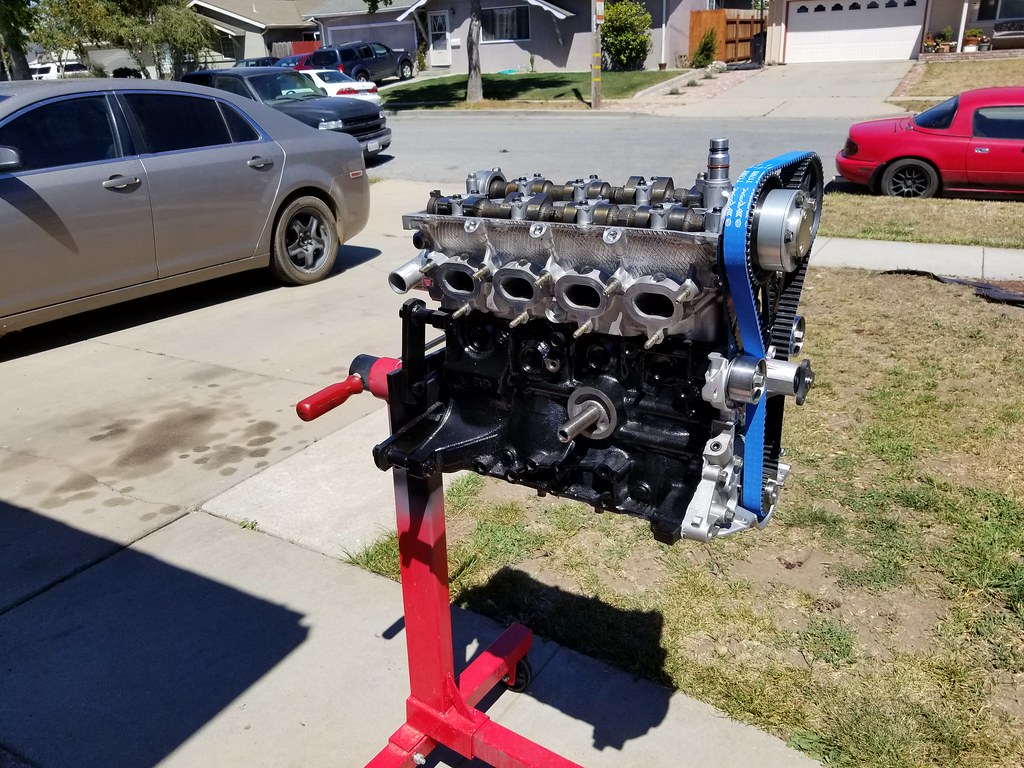
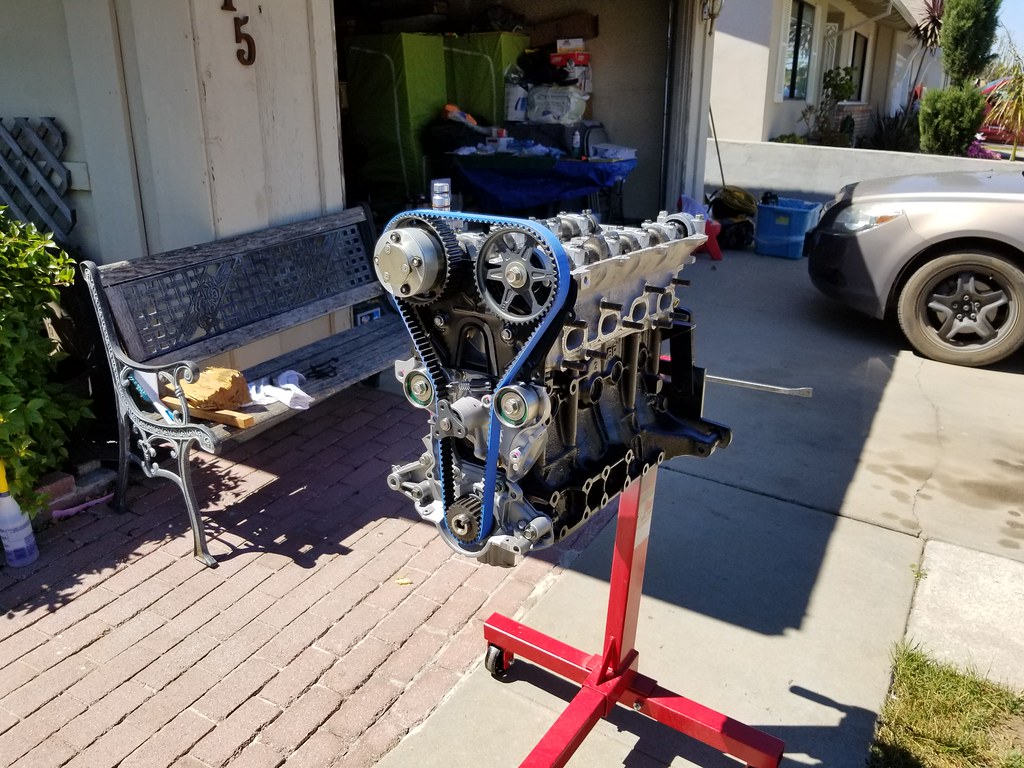
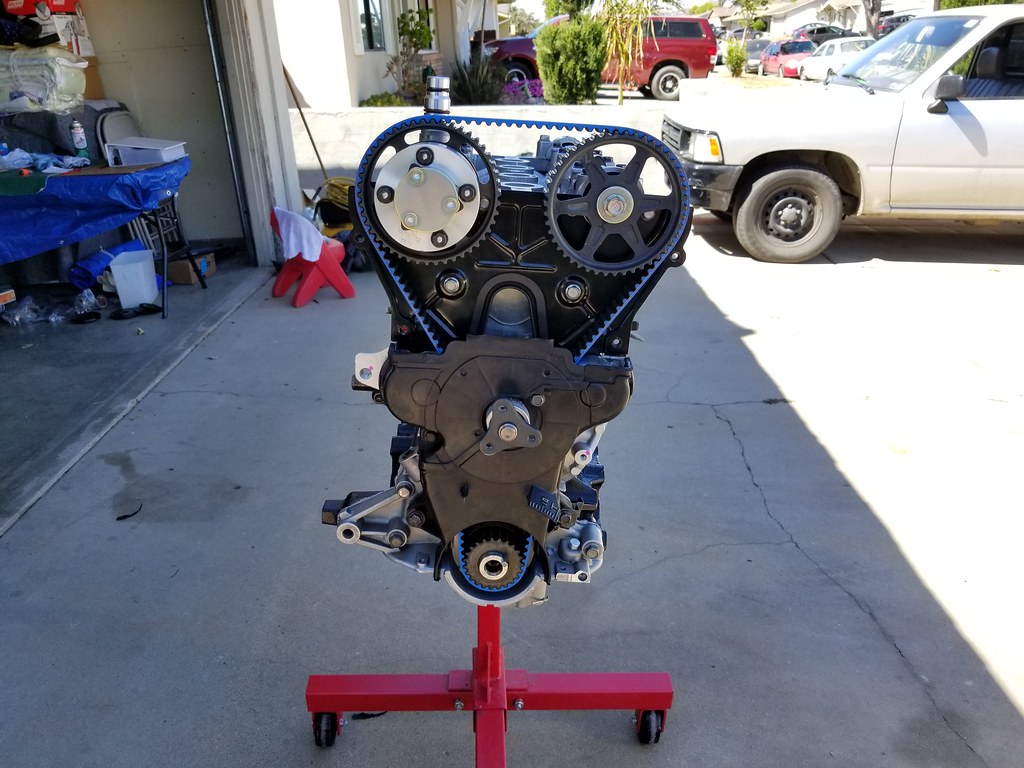
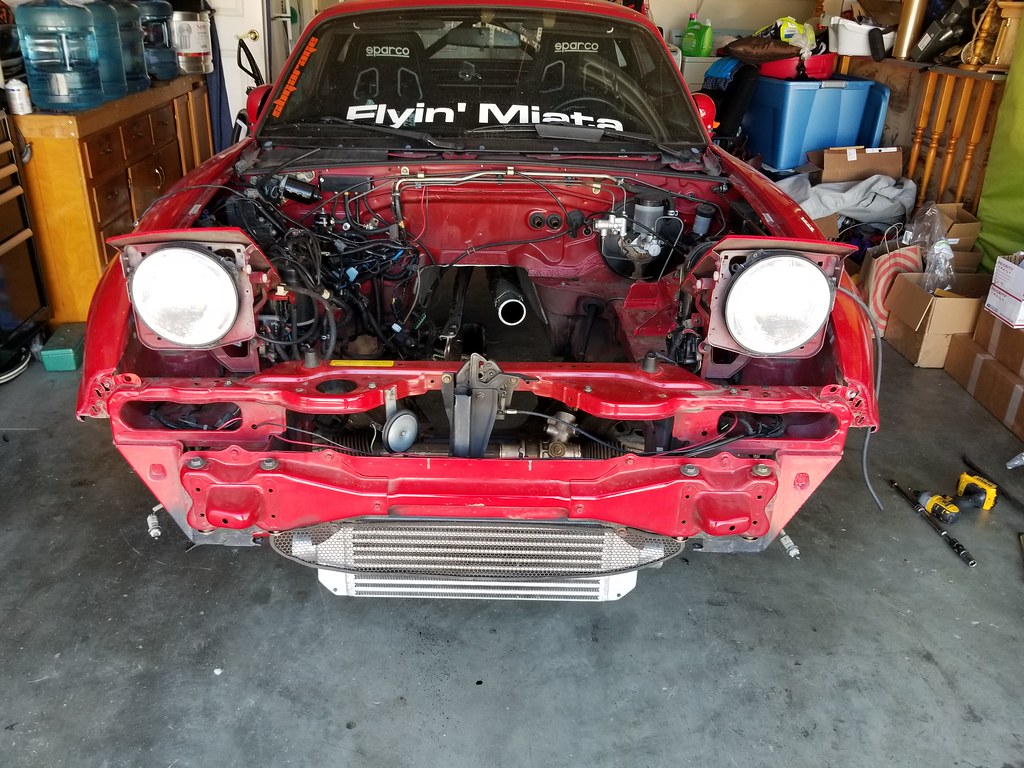
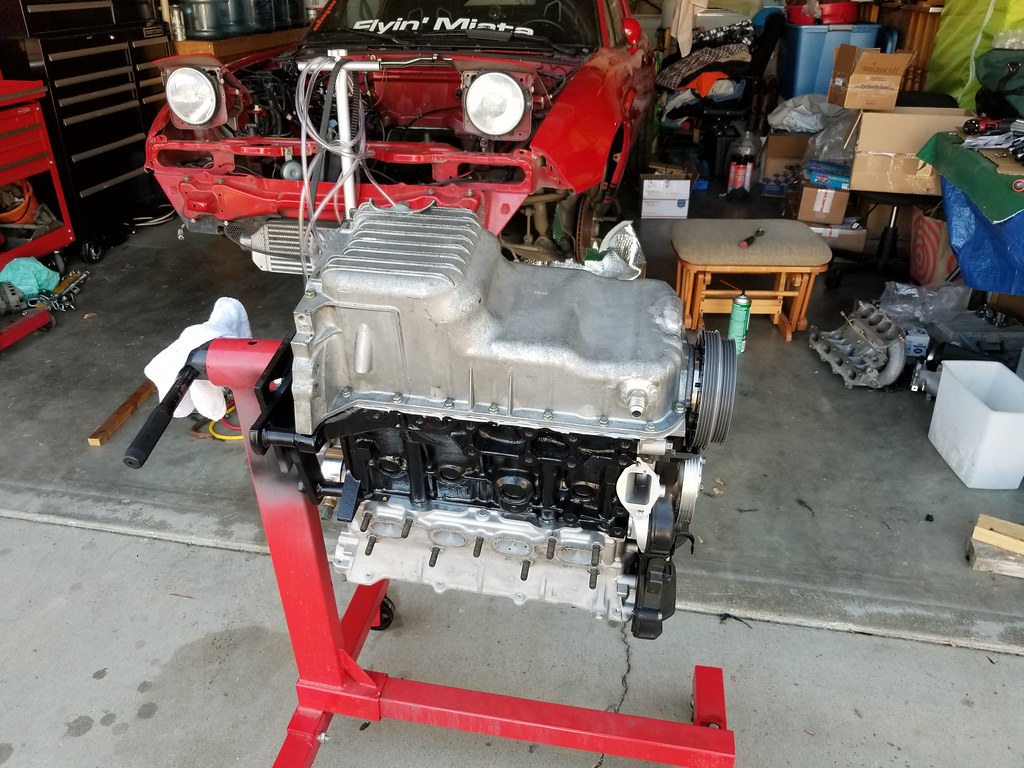
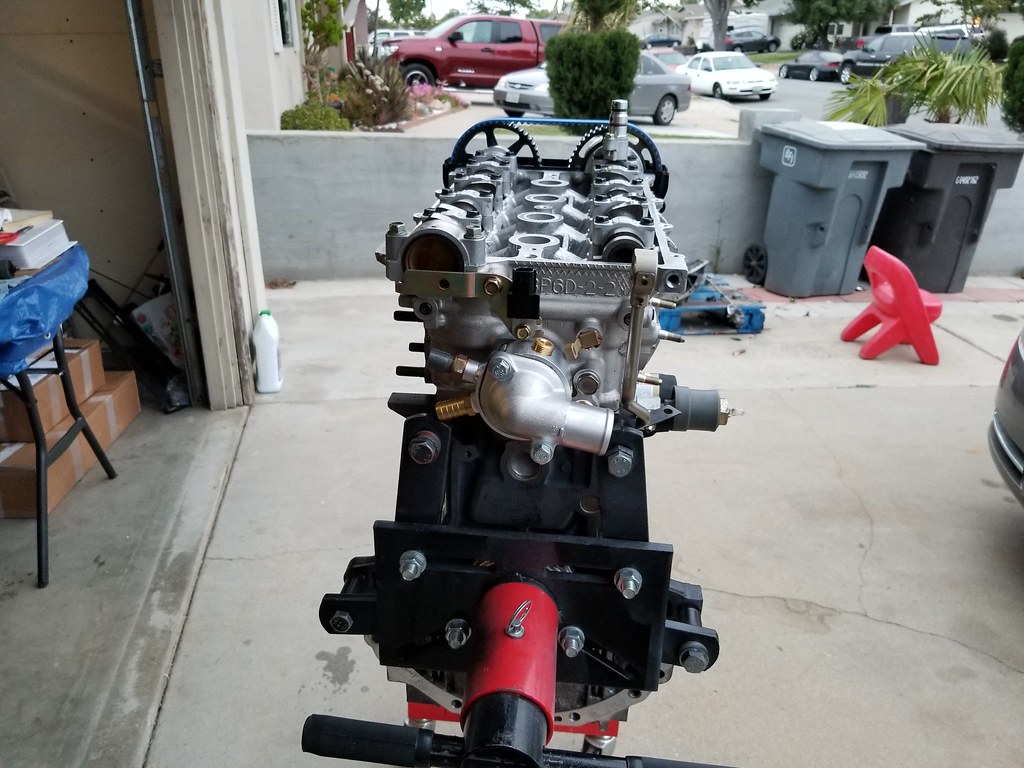
Made some more progress on my engine. I removed the paint that I got on the block around the oil filter area. I also installed the front accessories which included a Boundary Engineering oil pump, a new water pump, garage star water pump pulley, and a 949 Racing Supermiata damper. Still need to pull the VVT engine that is currently in the car since I need the valve cover and oil pan from it.


Reply
0
0
Thread Starter
Junior Member
iTrader: (2)
Joined: Dec 2014
Posts: 307
Total Cats: 23
From: Salinas, CA
I've been lagging on this build, but here's a few more things I've purchased to be installed onto this car:
ArtWorks Dewa vent rings climate control face plates/surround ring and K.G. Works pieces for the climate control *****
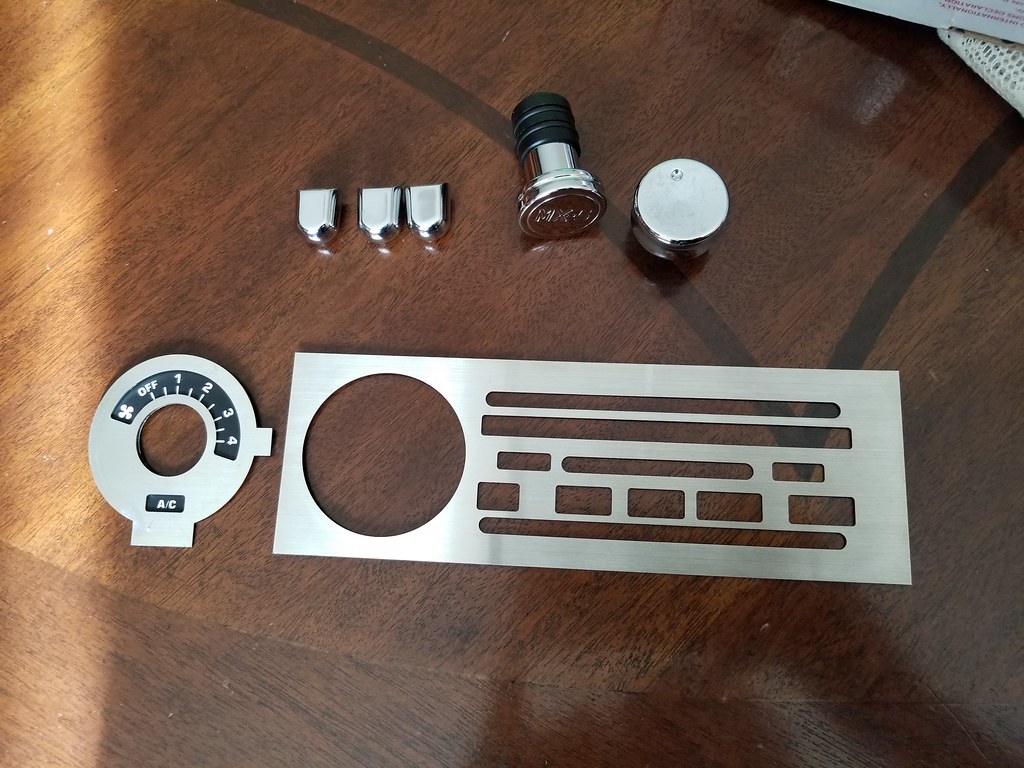
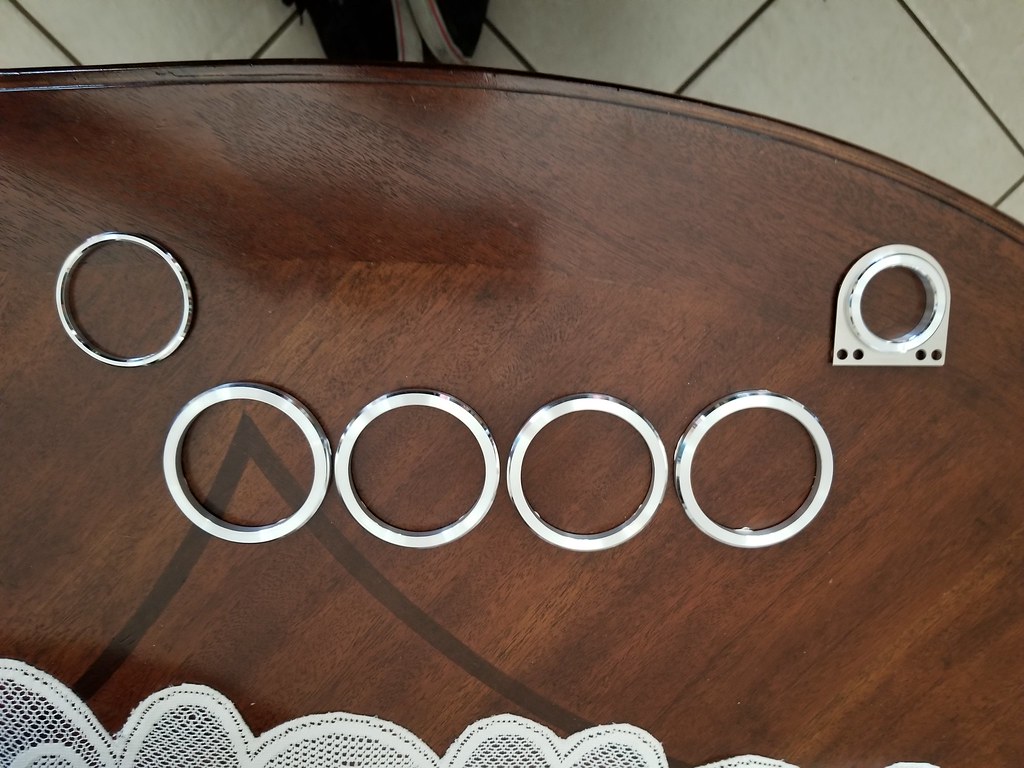
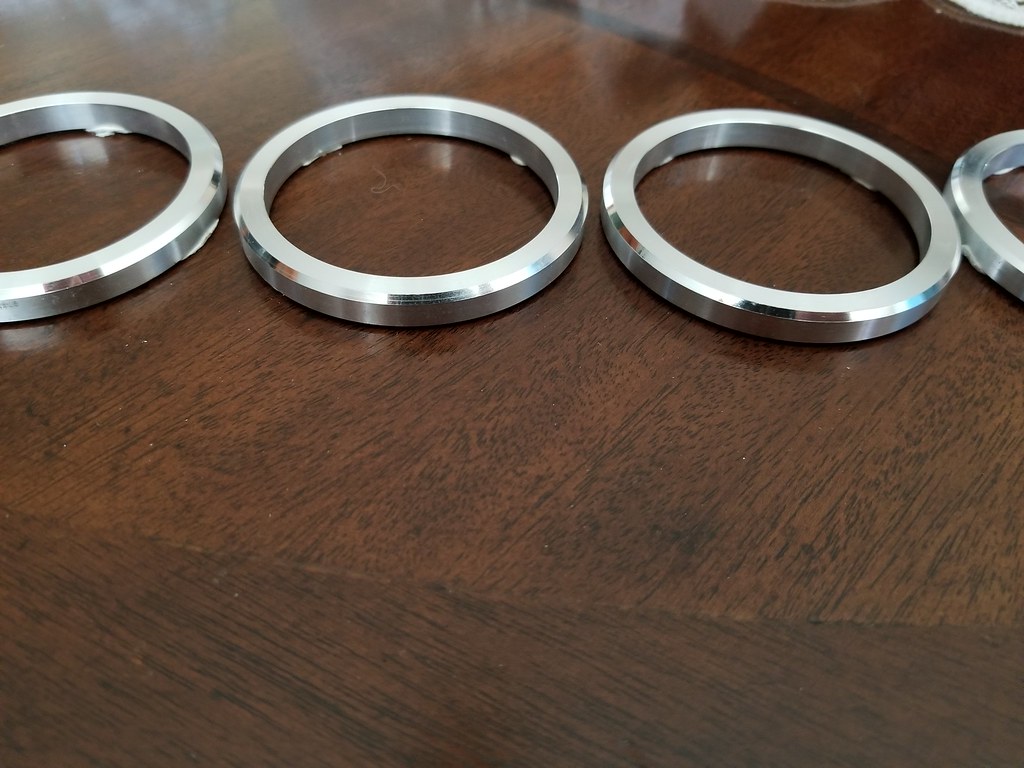
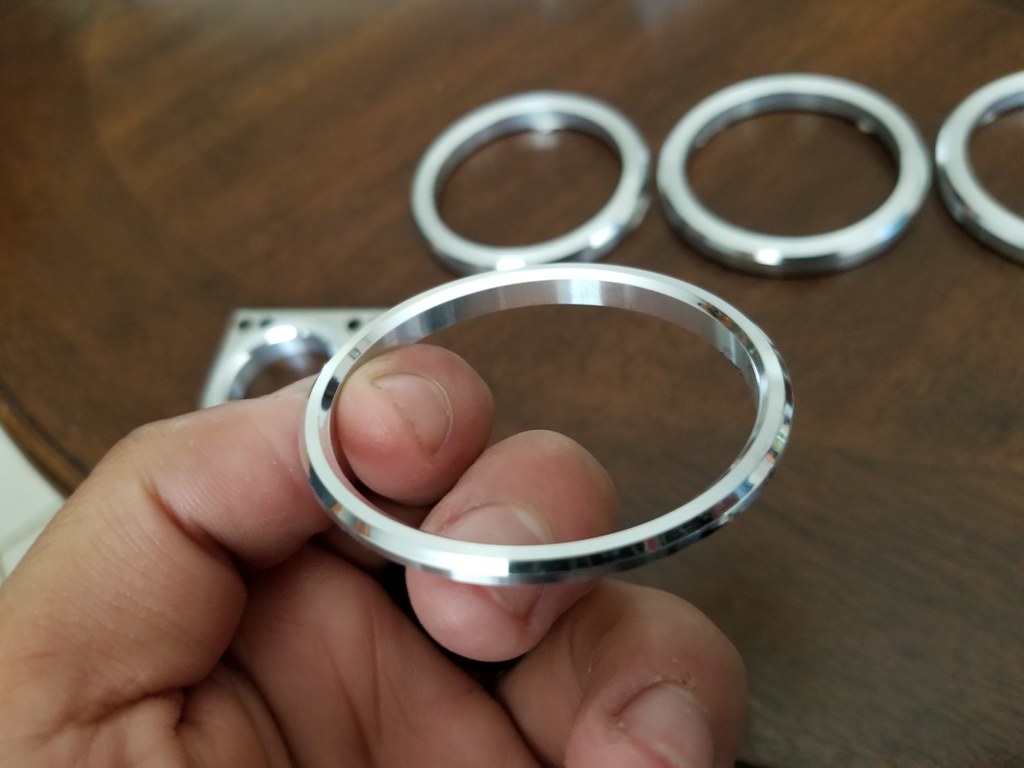
ArtWorks Dewa vent rings climate control face plates/surround ring and K.G. Works pieces for the climate control *****
Reply
0
0
Thread Starter
Junior Member
iTrader: (2)
Joined: Dec 2014
Posts: 307
Total Cats: 23
From: Salinas, CA
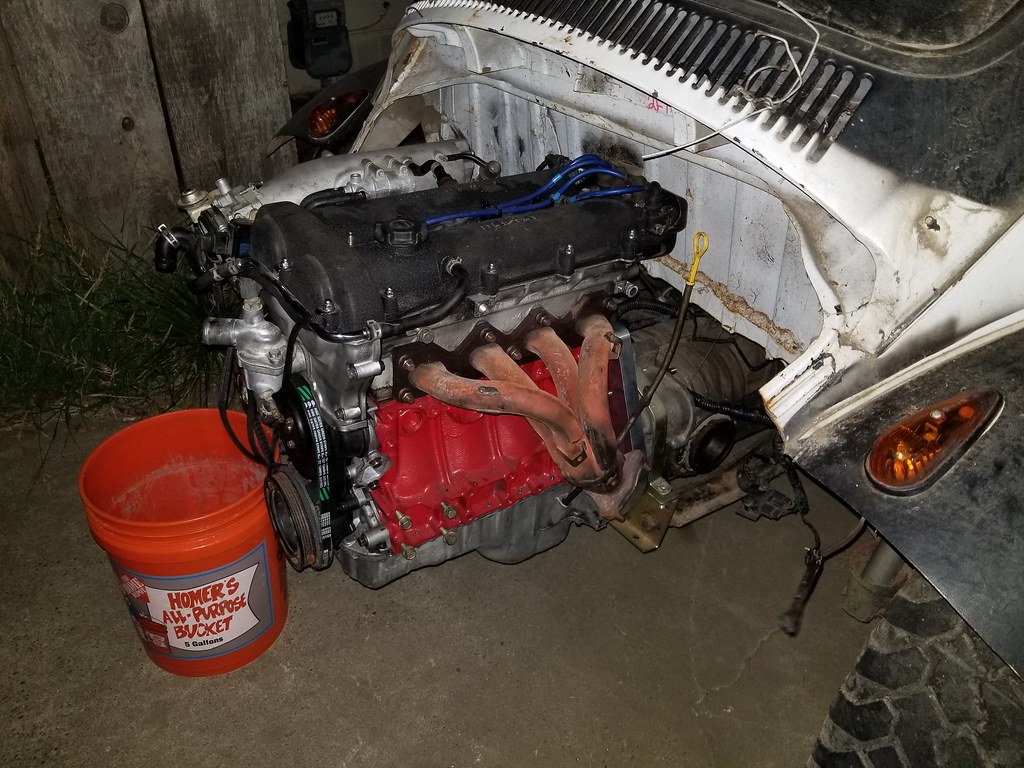
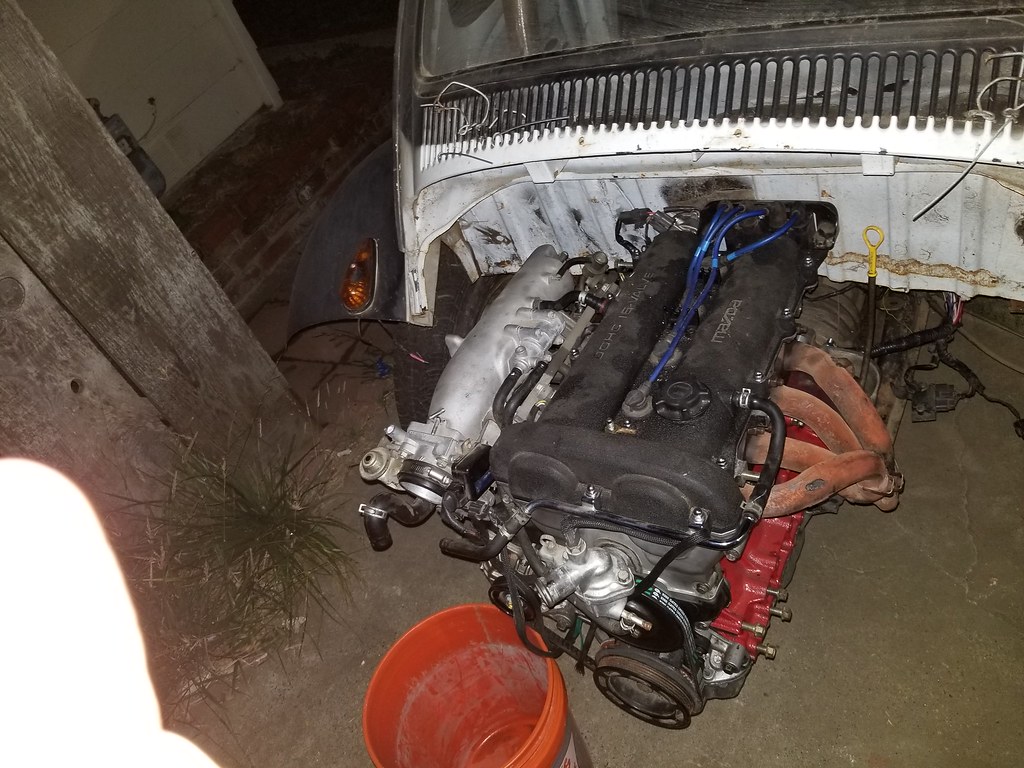
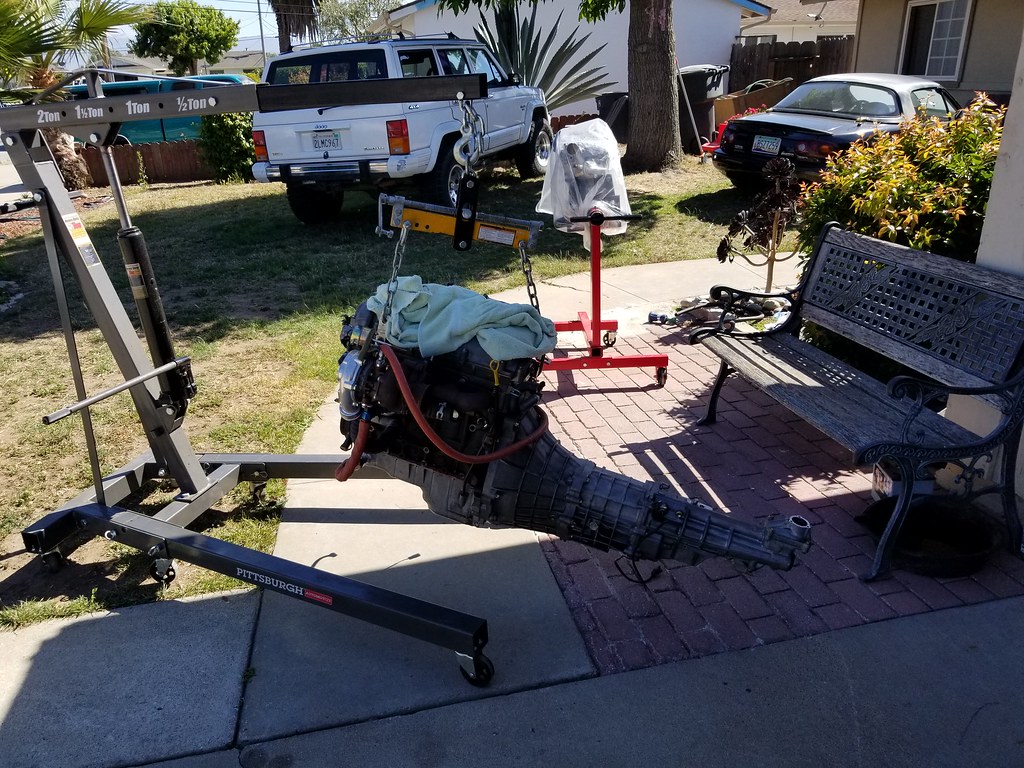
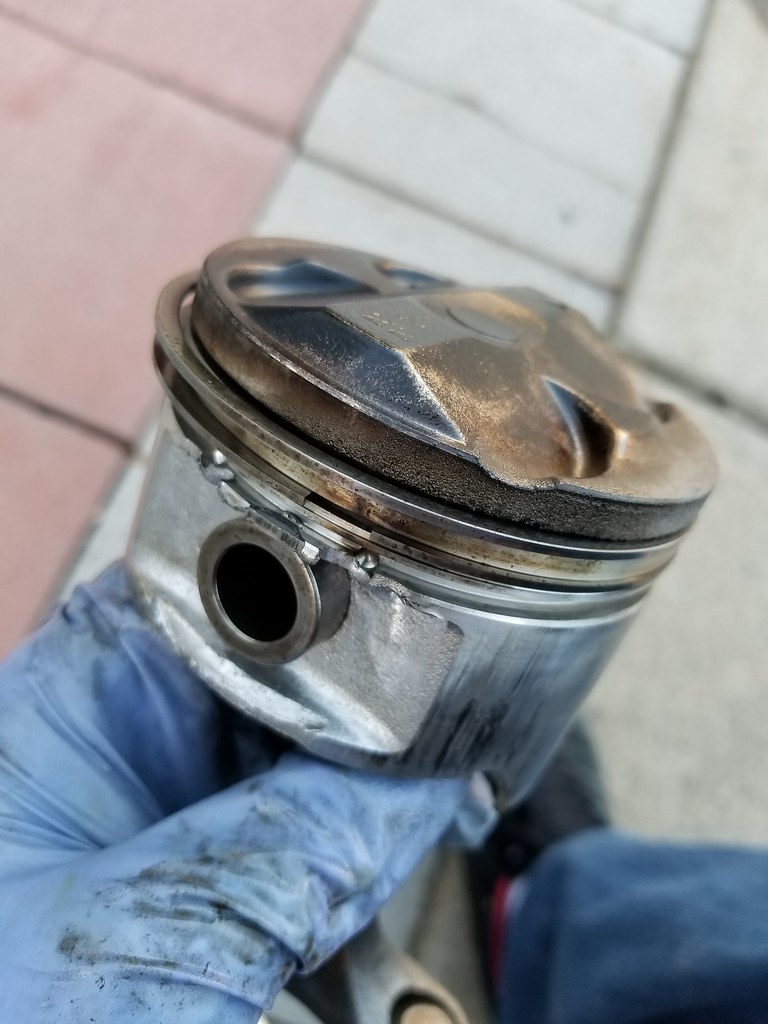
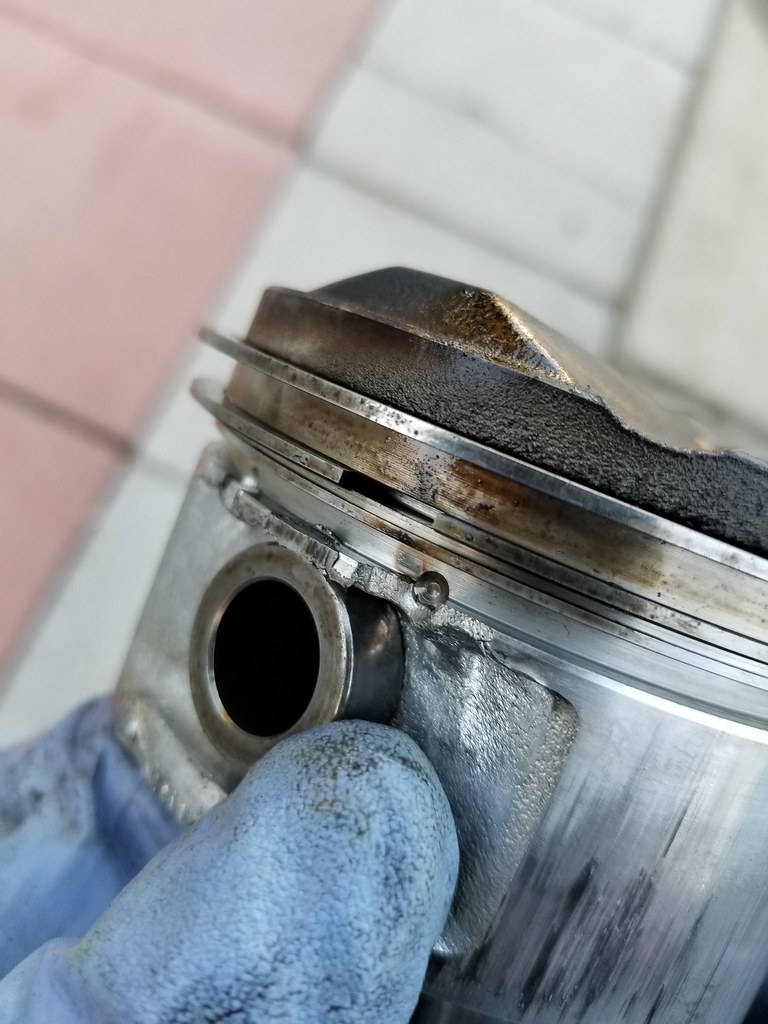
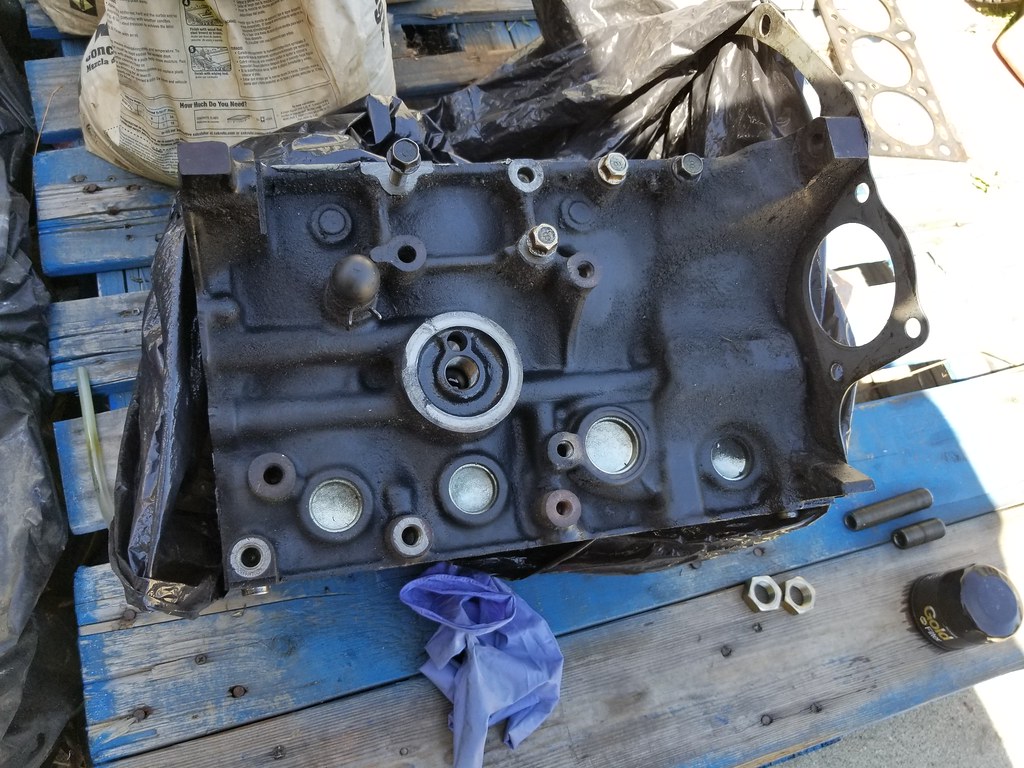
Within the next few days, I started pulling apart the older VVT motor to see why it had started to throw smoke on me. I was hoping it would just be a headgasket or maybe valve seals or piston rings. Turns it it was much worse than that.
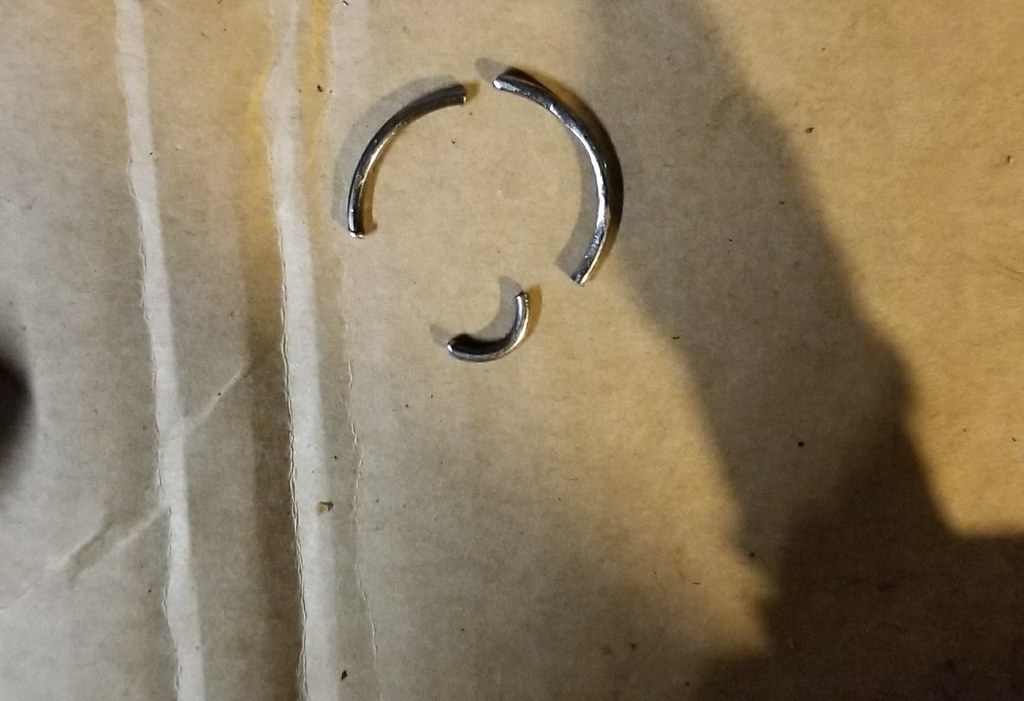
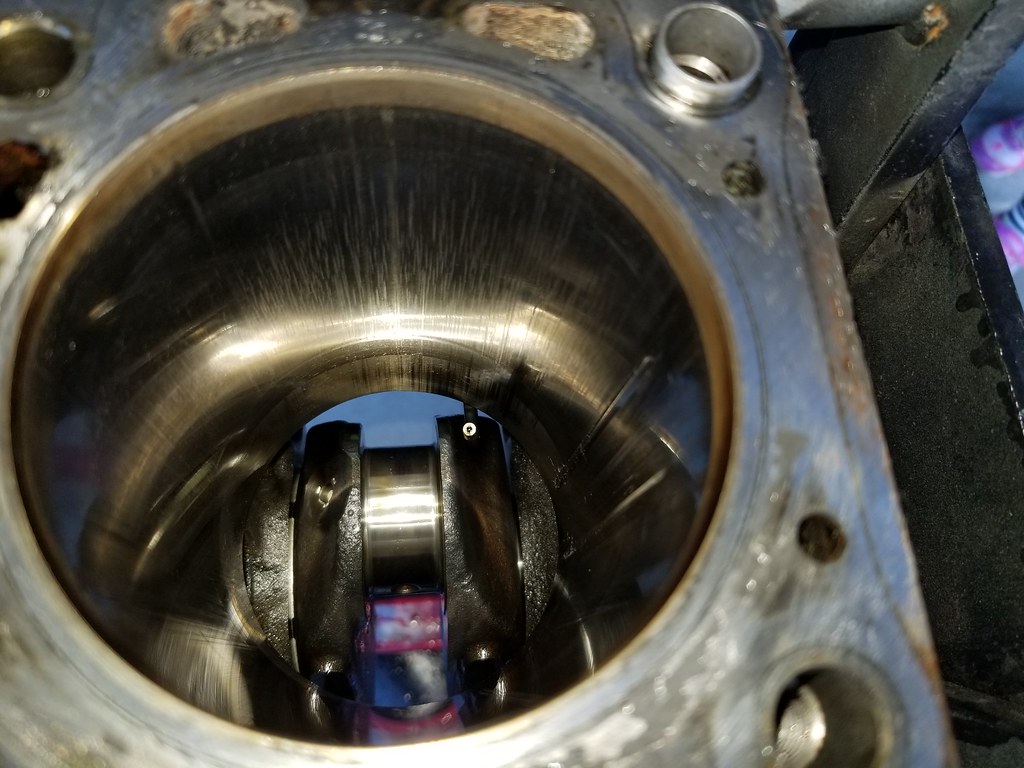
Circlip holding the wrist pin for piston #4 somehow came out the groove and gashed up the cylinder 4 walls.

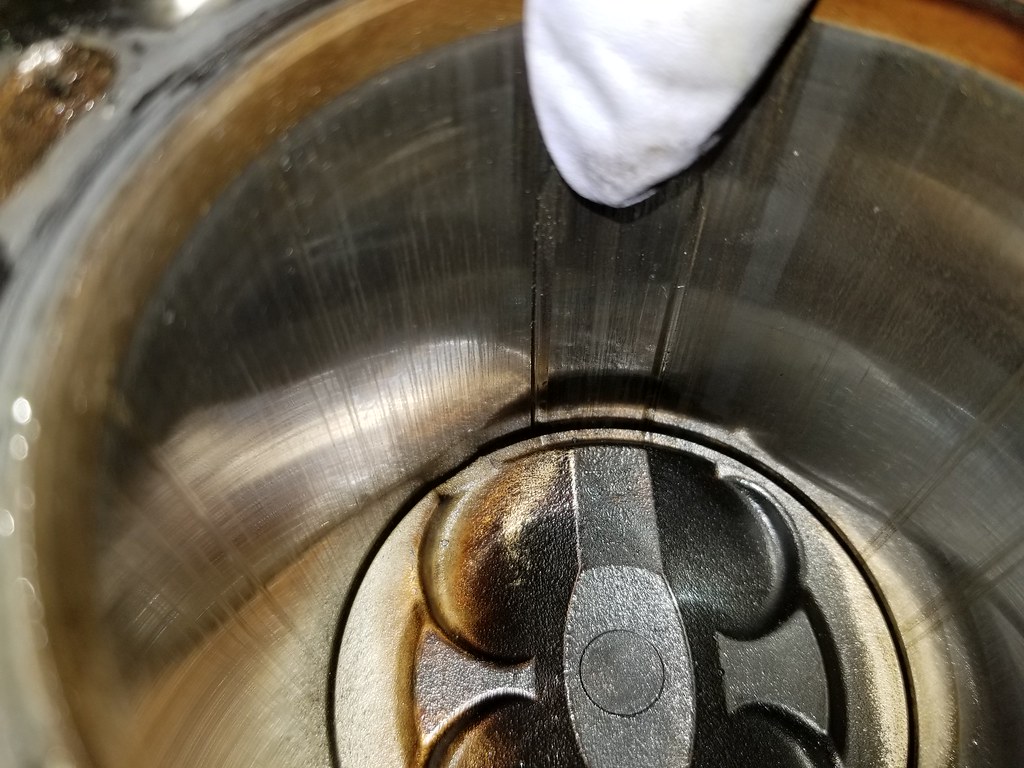


Piston 2 and 3 seemed okay.
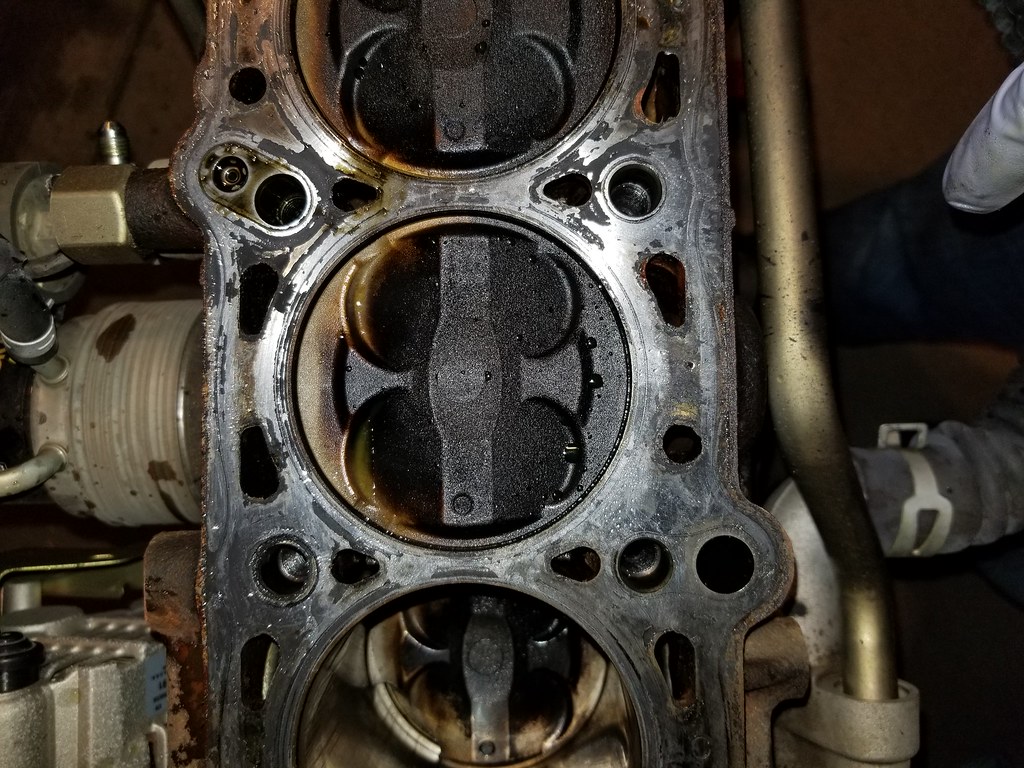

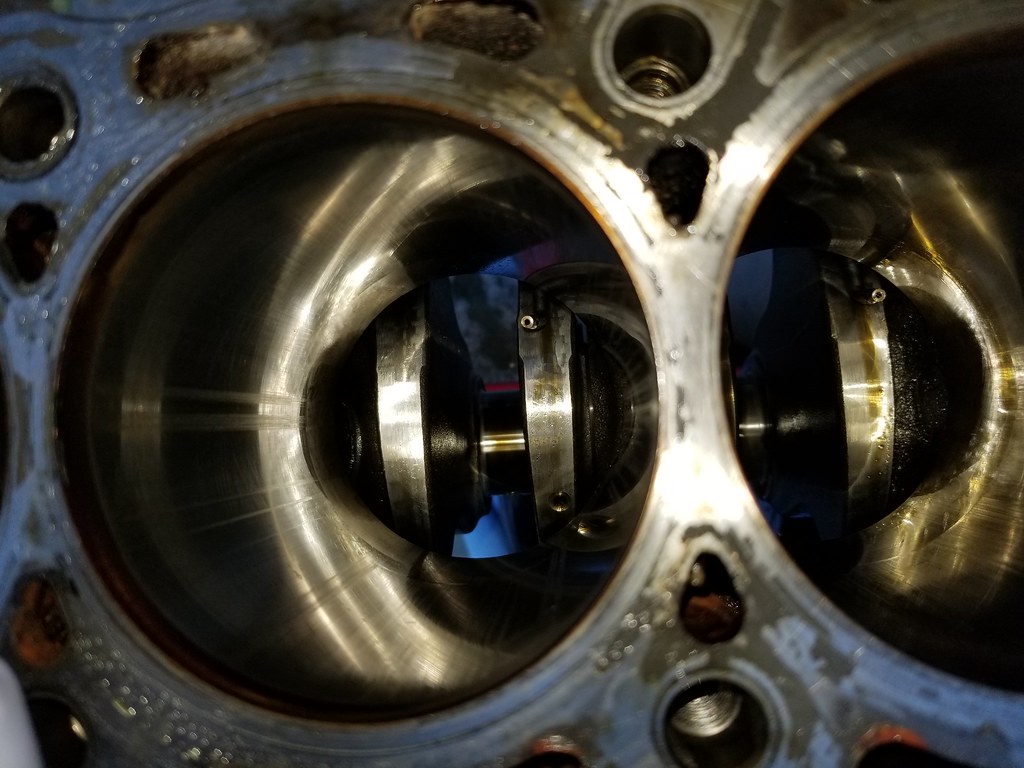
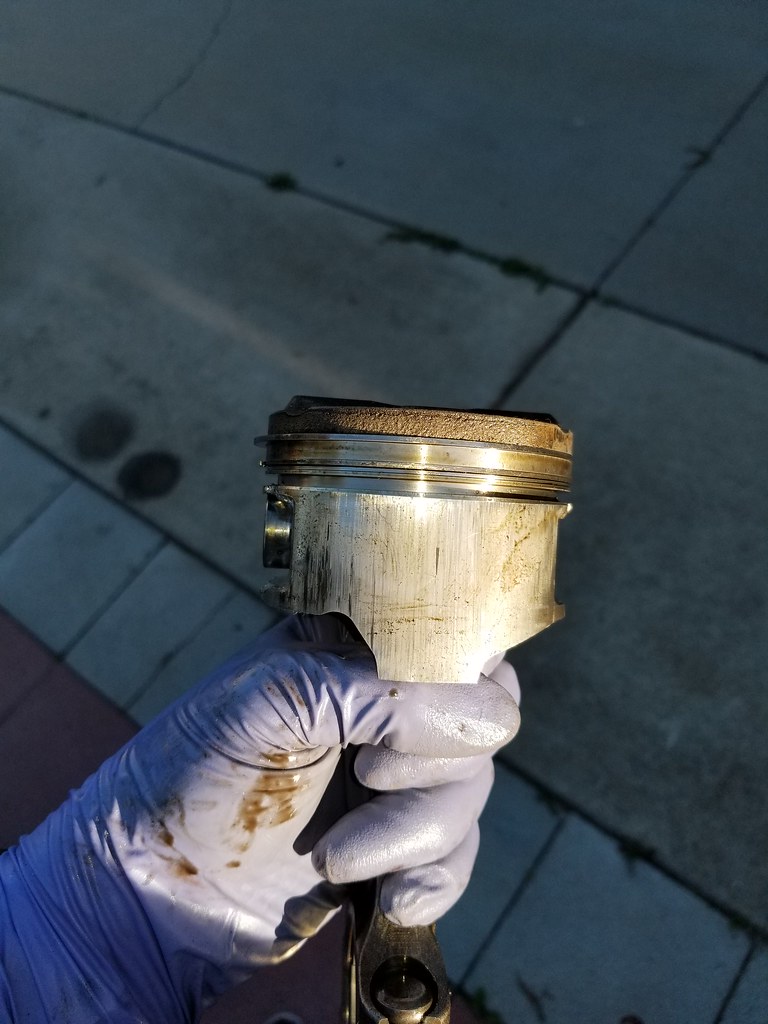
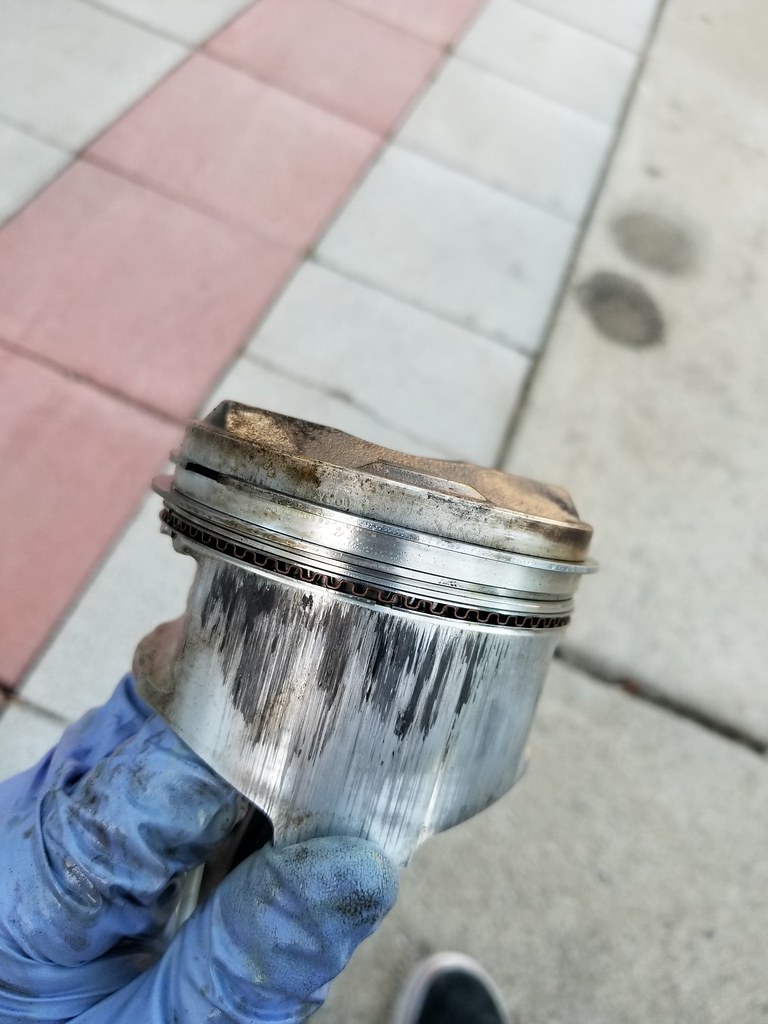
Piston in cylinder #1 was broken in two spots. Looks like detonation occurred in that area. I could be wrong though. The cylinder wall seemed okay.


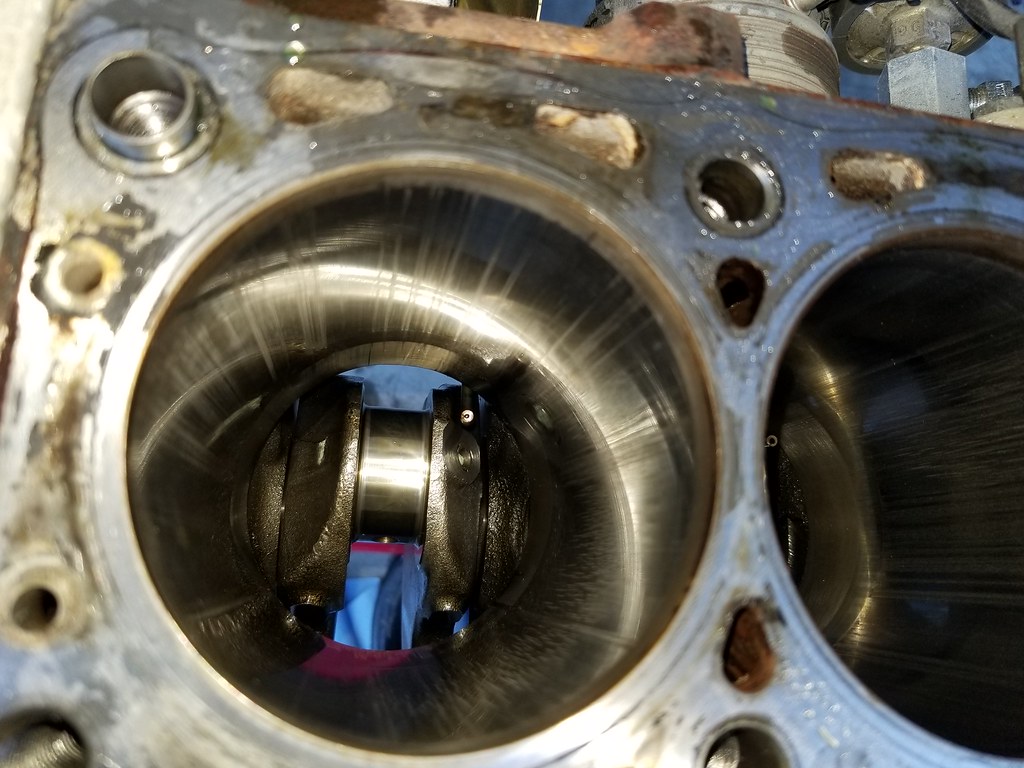
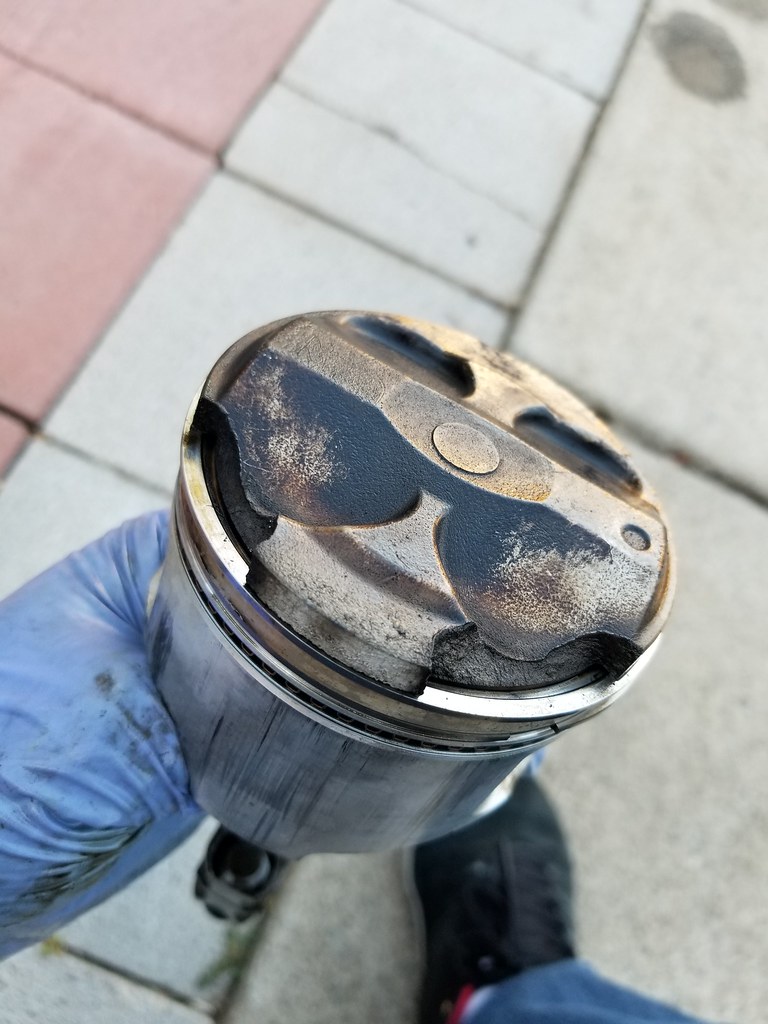
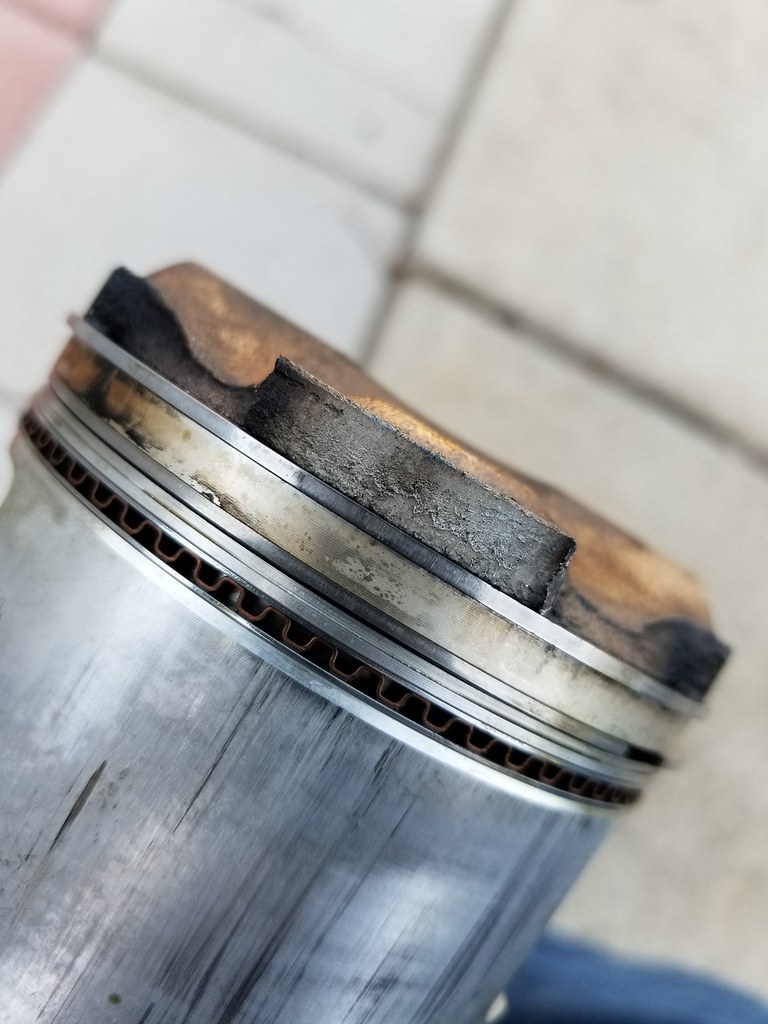

Excuse all the pictures, but I just wanted to show you guys the carnage. Does it look salvagable? The crank wasn't all scratched up so I think at least the part is good. Head also look good, I'll will have it checked later on and can post pictures.
Circlip holding the wrist pin for piston #4 somehow came out the groove and gashed up the cylinder 4 walls.
Piston 2 and 3 seemed okay.
Piston in cylinder #1 was broken in two spots. Looks like detonation occurred in that area. I could be wrong though. The cylinder wall seemed okay.
Excuse all the pictures, but I just wanted to show you guys the carnage. Does it look salvagable? The crank wasn't all scratched up so I think at least the part is good. Head also look good, I'll will have it checked later on and can post pictures.
Reply
0
0
Thread Starter
Junior Member
iTrader: (2)
Joined: Dec 2014
Posts: 307
Total Cats: 23
From: Salinas, CA
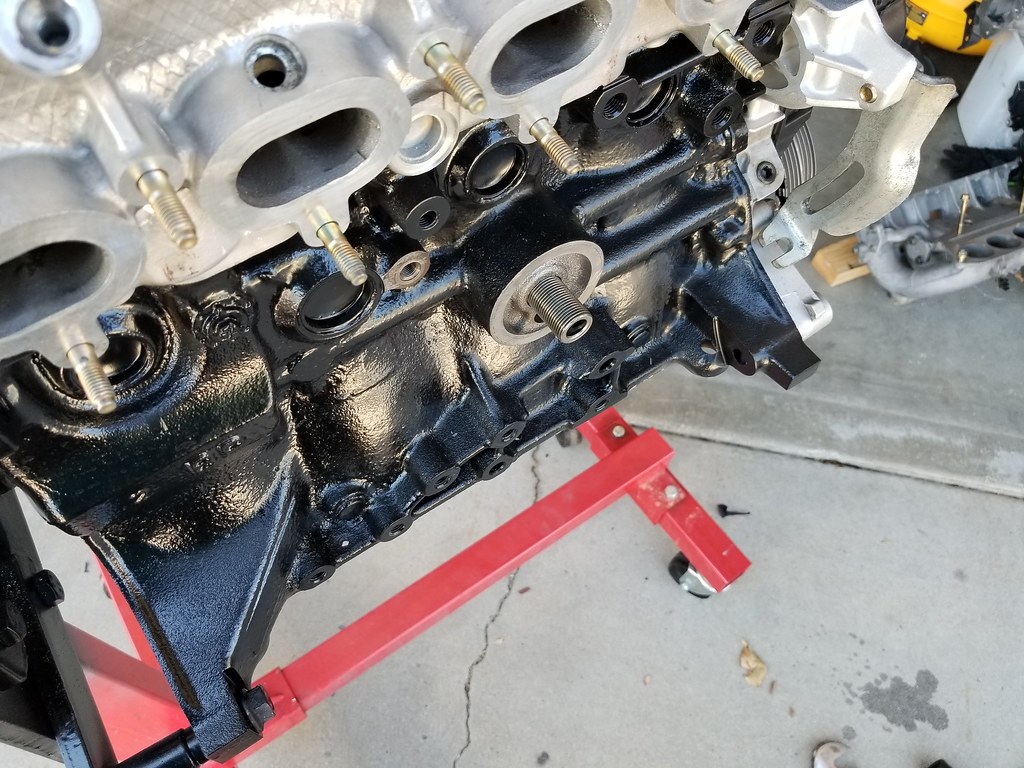
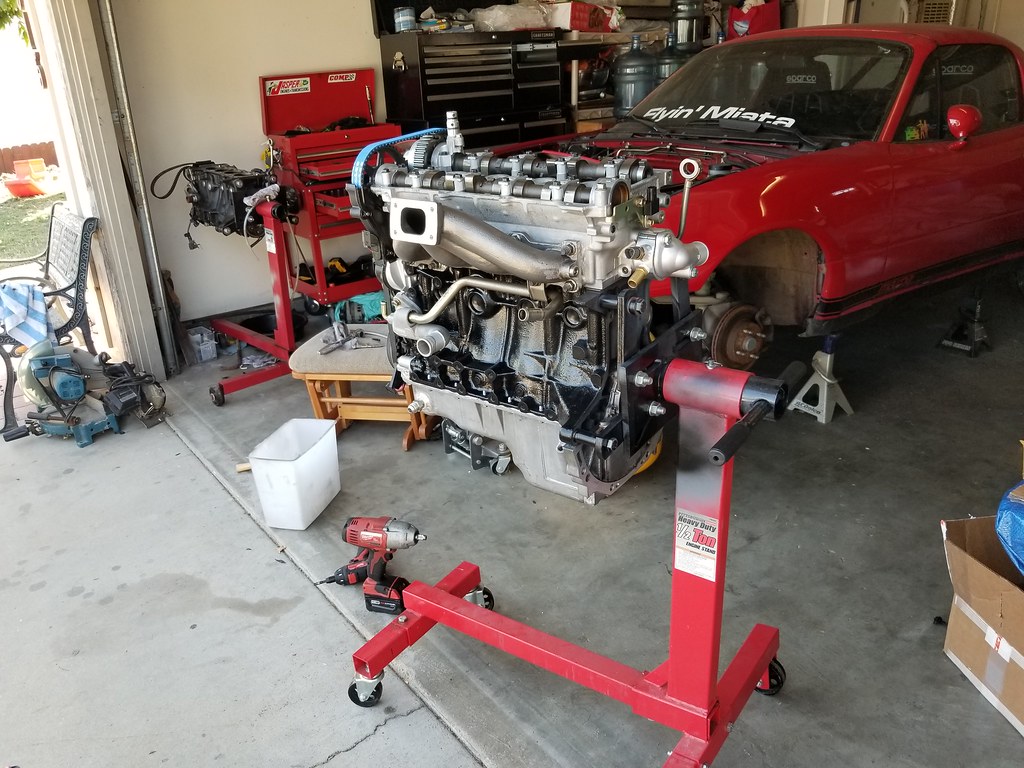
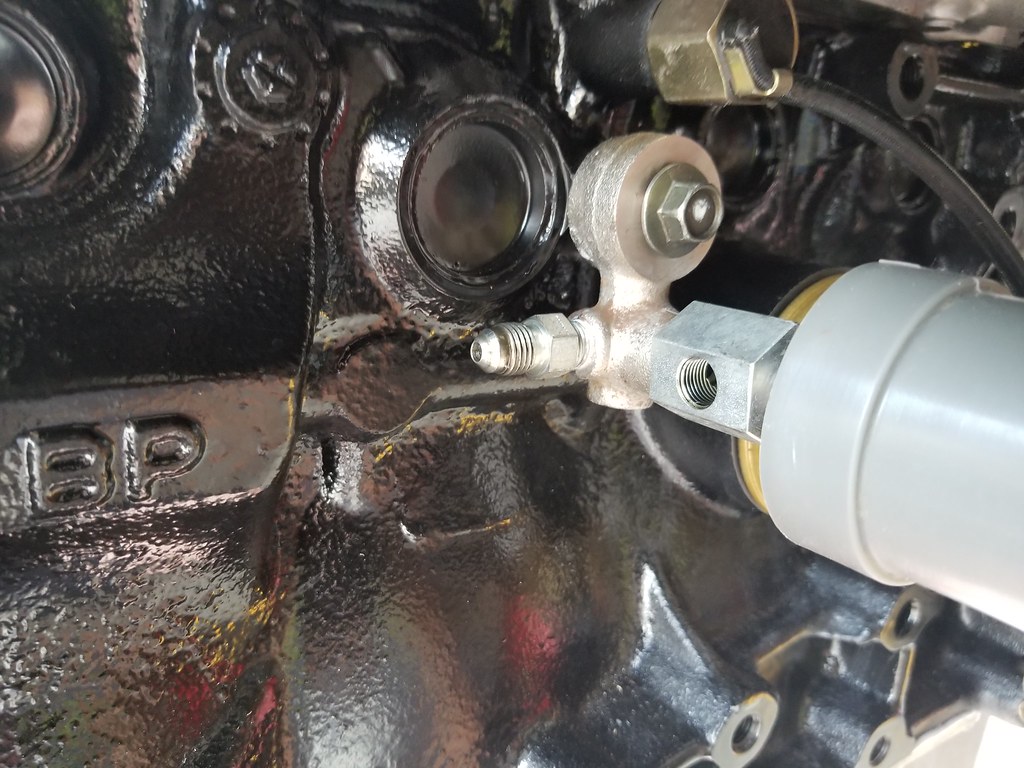
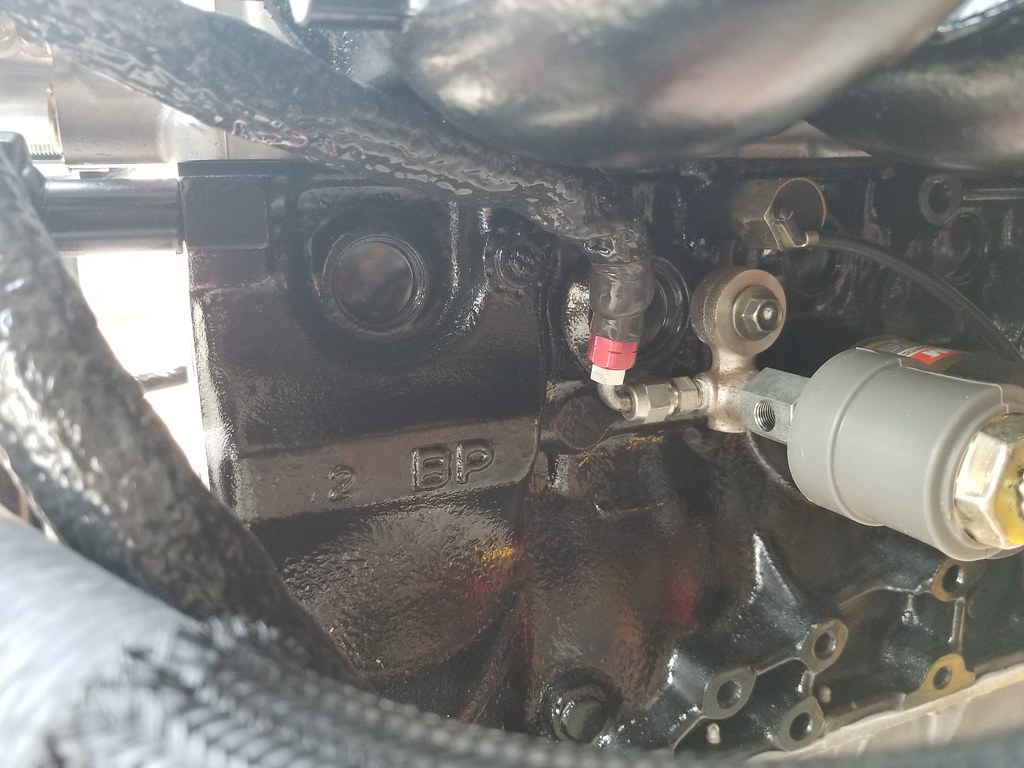
Next thing I did was swap out the long 1.8 oil pipe that the oil filter and "oil warmer" screw onto and replaced it with the 1.6 version since I was no longer going to be using the oil warmer sandwich plate. I used the double nut method to unscrew it out of the block, it came out pretty easy.

Reply
0
0


Next thing I did was swap out the long 1.8 oil pipe that the oil filter and "oil warmer" screw onto and replaced it with the 1.6 version since I was no longer going to be using the oil warmer sandwich plate. I used the double nut method to unscrew it out of the block, it came out pretty easy.
Reply
0
0
Thread Starter
Junior Member
iTrader: (2)
Joined: Dec 2014
Posts: 307
Total Cats: 23
From: Salinas, CA
I'm glad I did. I wasn't going to do it at first, but instead just plug up the nipples on the oil warmer. Since I was waiting for parts to come back from powder coating I needed something to keep me busy. It actually came out pretty effortlessly. I don't see why you couldn't do it with the engine already in the car. Besides it being a bitch to get to, seems doable lol
Reply
0
0
Thread Starter
Junior Member
iTrader: (2)
Joined: Dec 2014
Posts: 307
Total Cats: 23
From: Salinas, CA
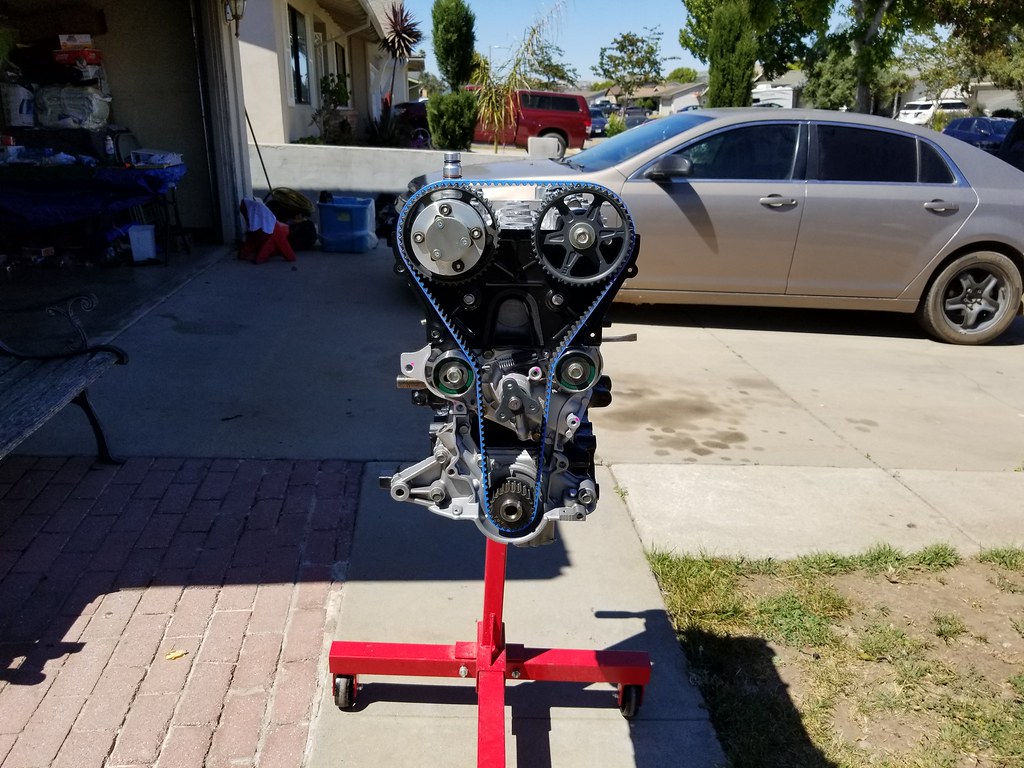
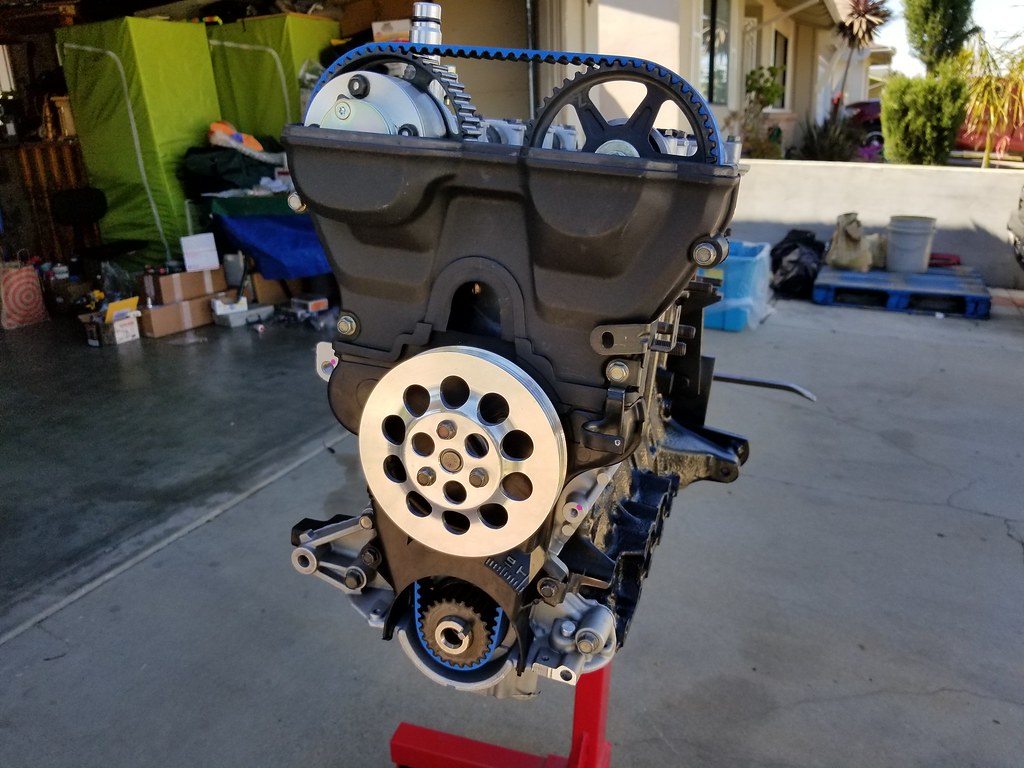
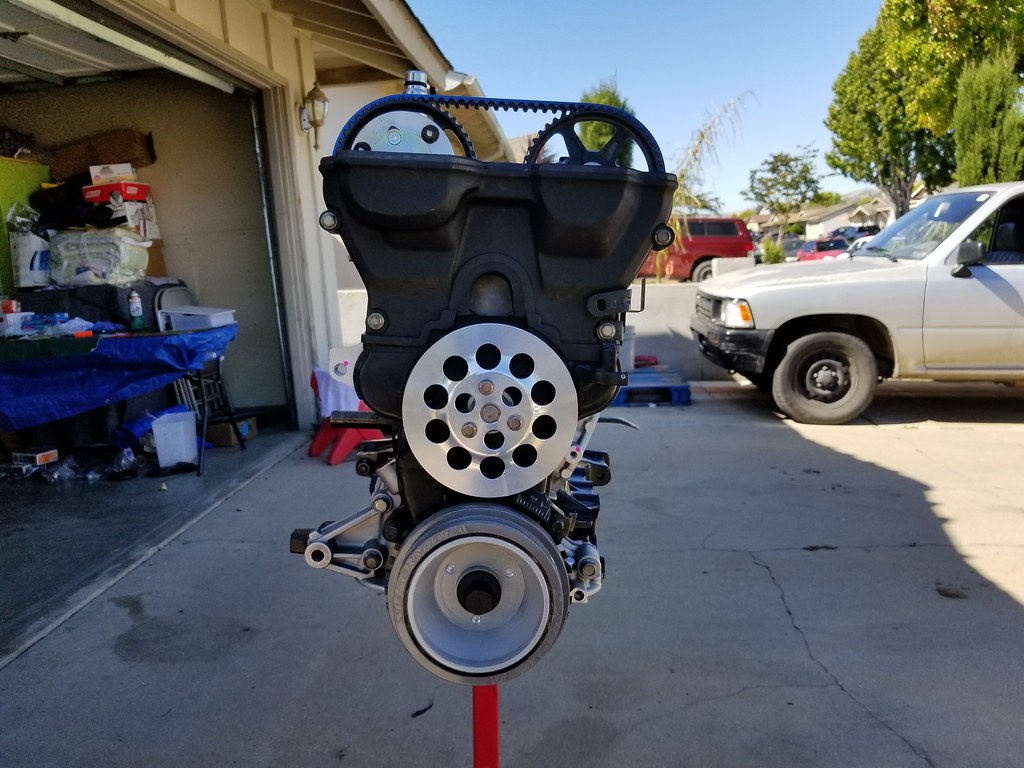
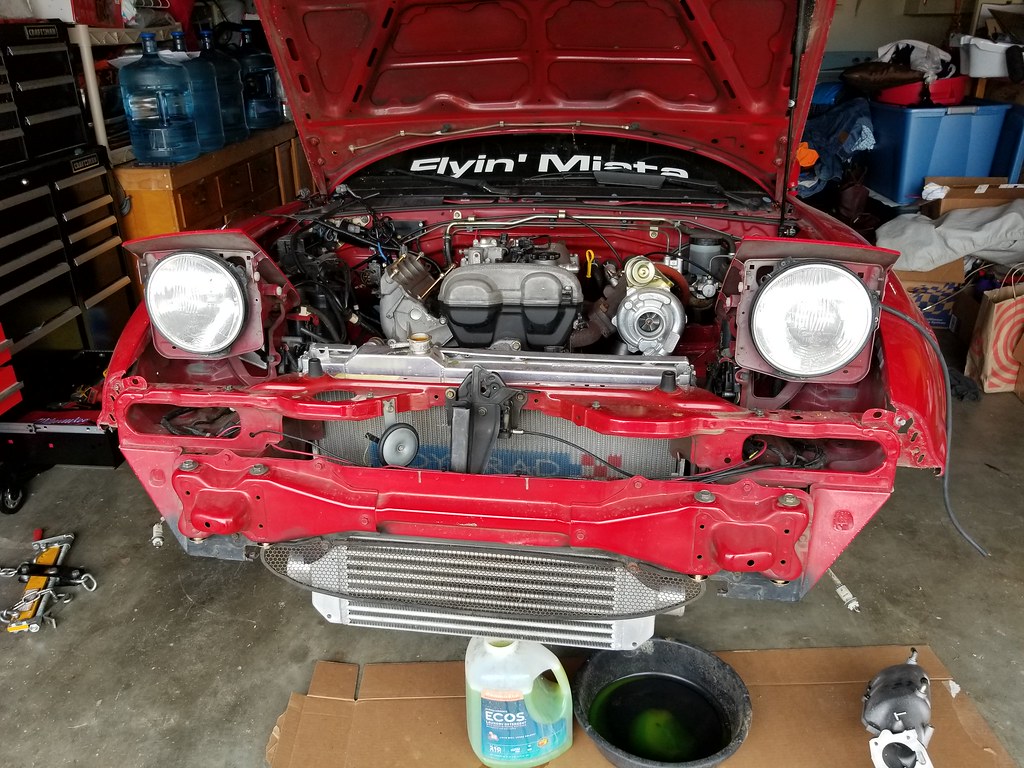
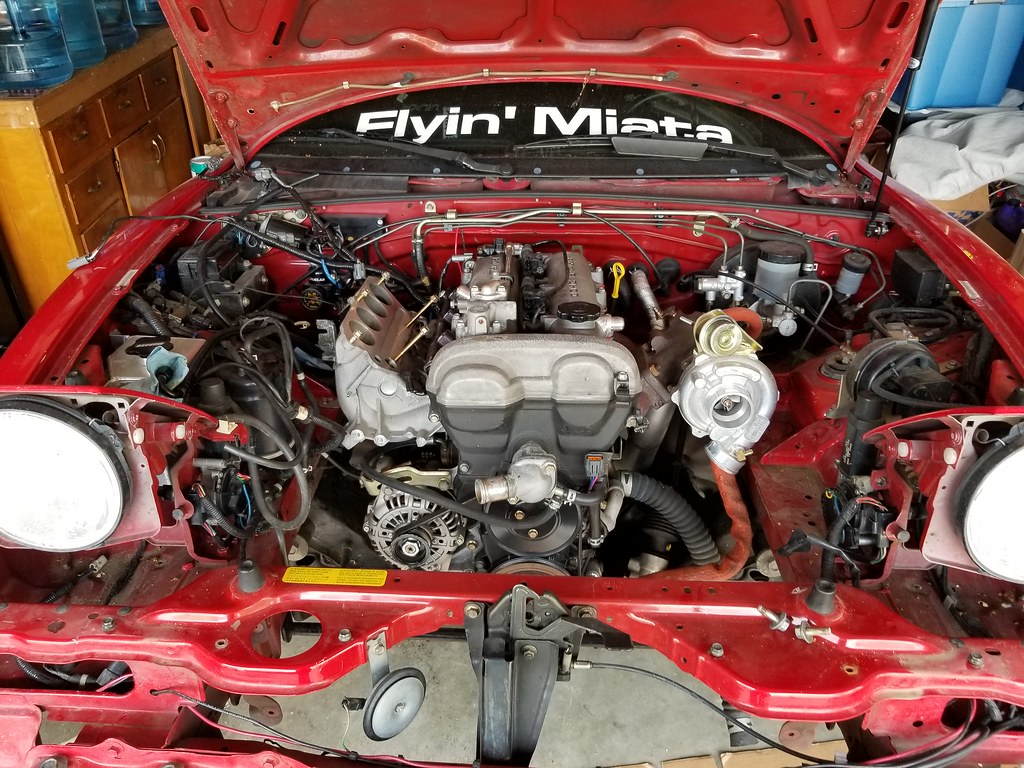
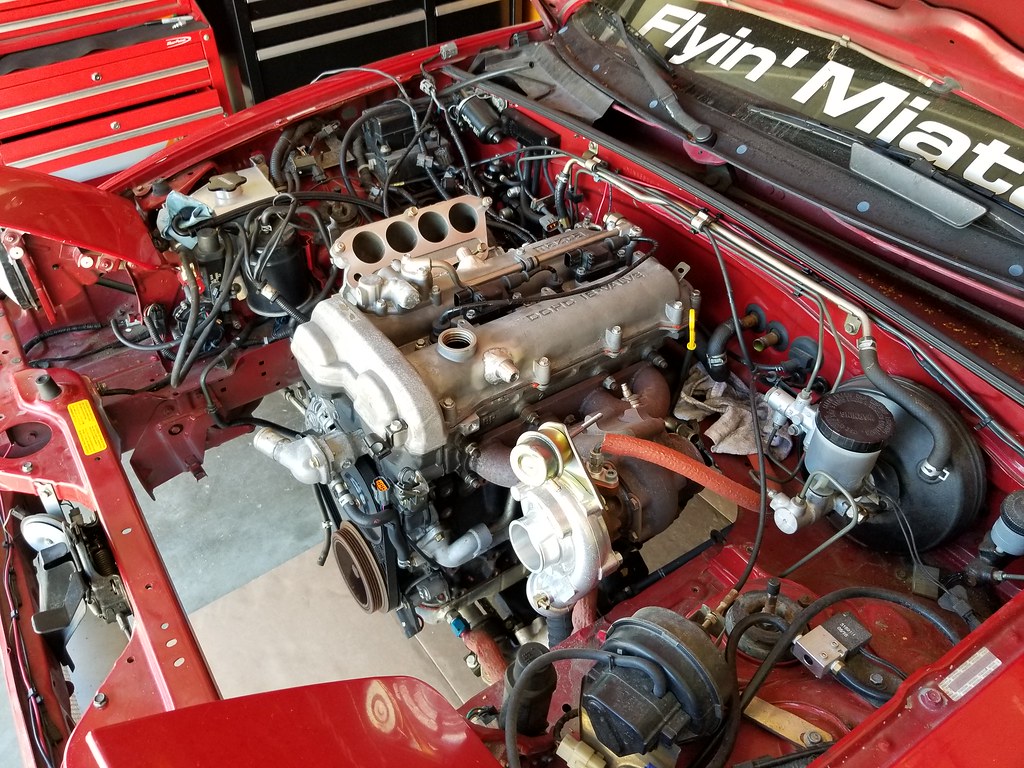
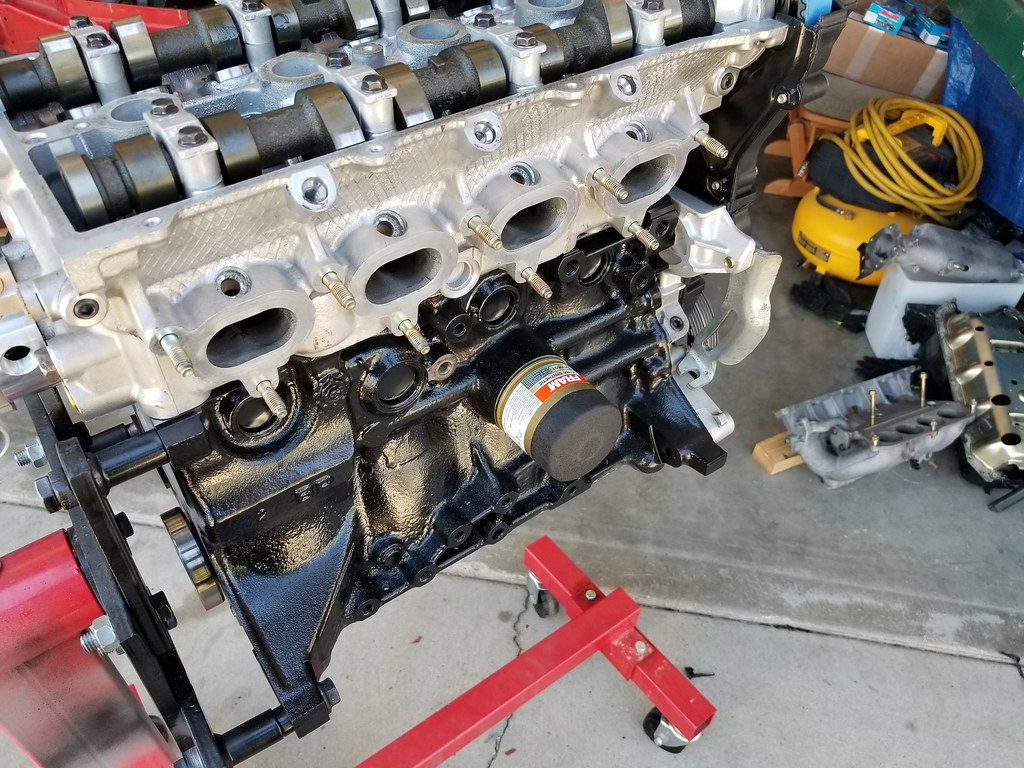
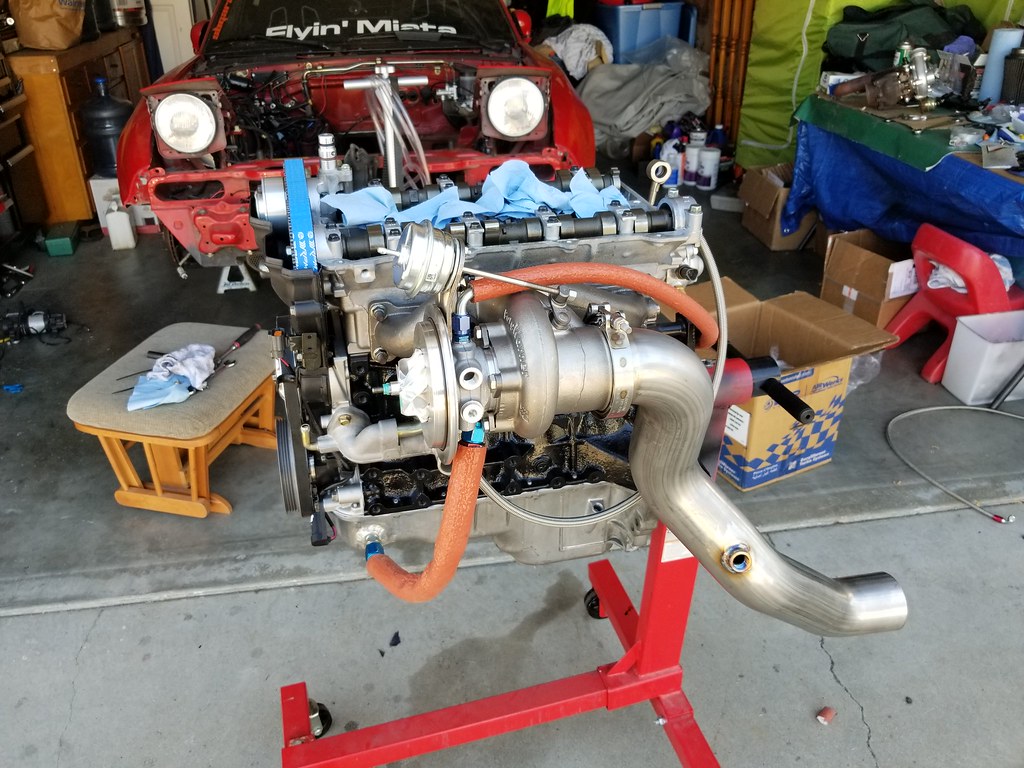
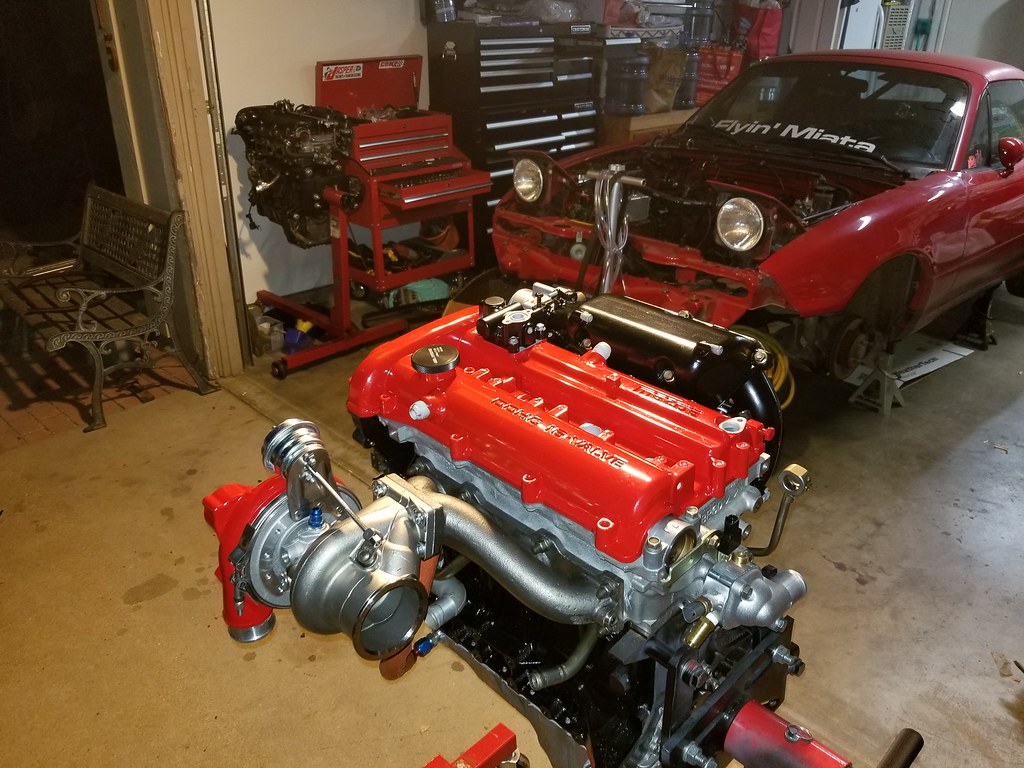
Next up was installing the alternator and accessory belt. I am using a 100 Amp alternator from a 94 RX7. Removed the factory pulley and replaced it with the Garage Star Pulley.

I mocked up the TSE manifold and also installed the mixing manifold and heater core hard line. Thinking of wrapping the hard line with some DEI reflective gold tape to help with heat from the turbo manifold. Opinions?
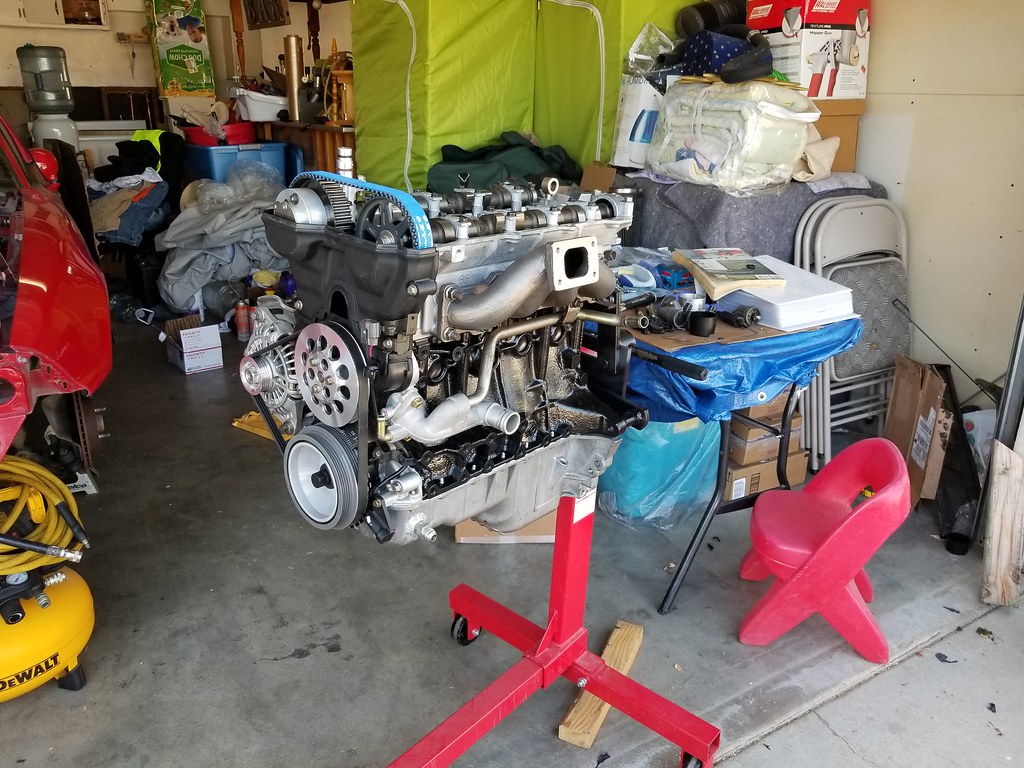
I mocked up the TSE manifold and also installed the mixing manifold and heater core hard line. Thinking of wrapping the hard line with some DEI reflective gold tape to help with heat from the turbo manifold. Opinions?
Reply
0
0

Thread Starter
Junior Member
iTrader: (2)
Joined: Dec 2014
Posts: 307
Total Cats: 23
From: Salinas, CA
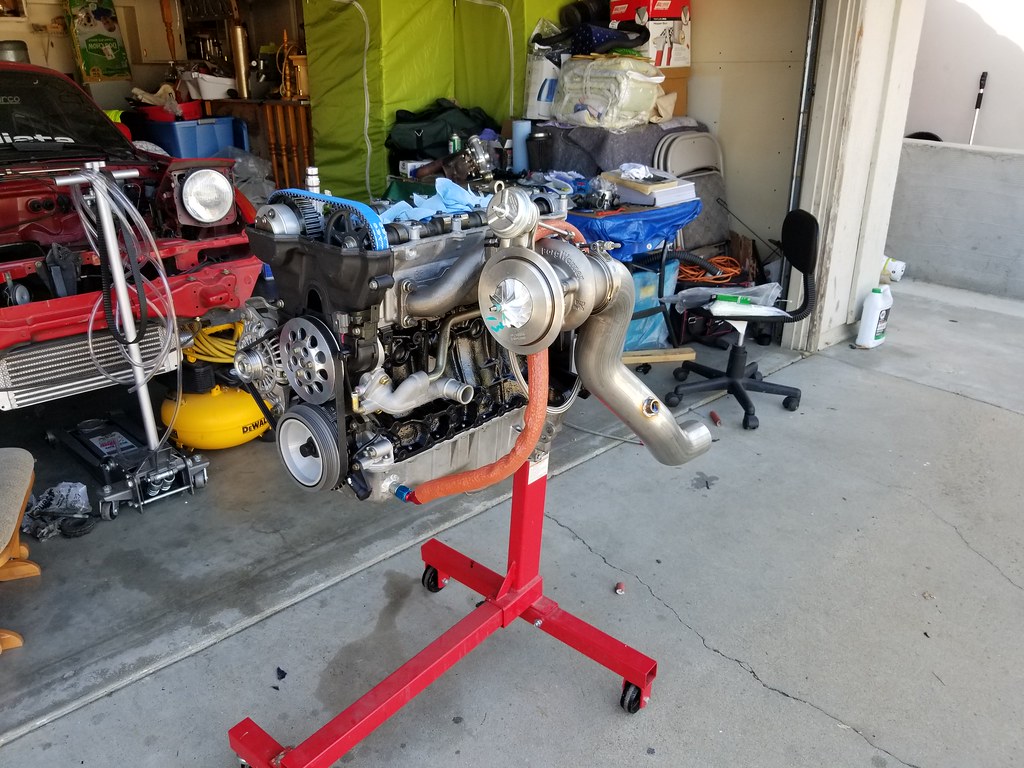
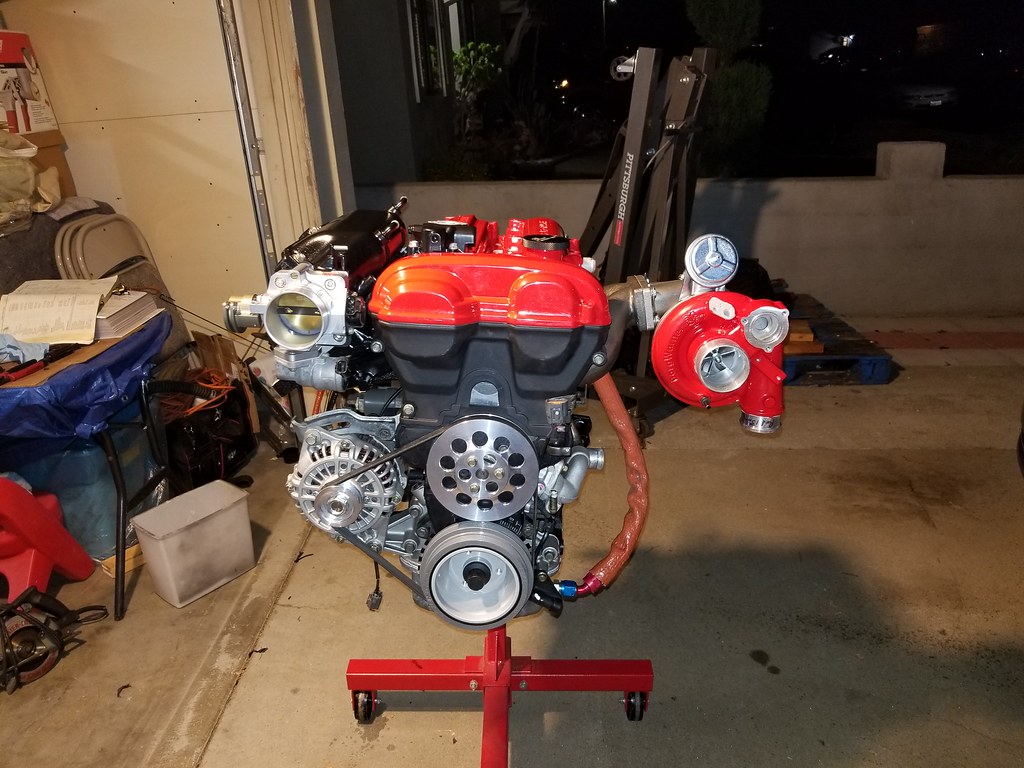
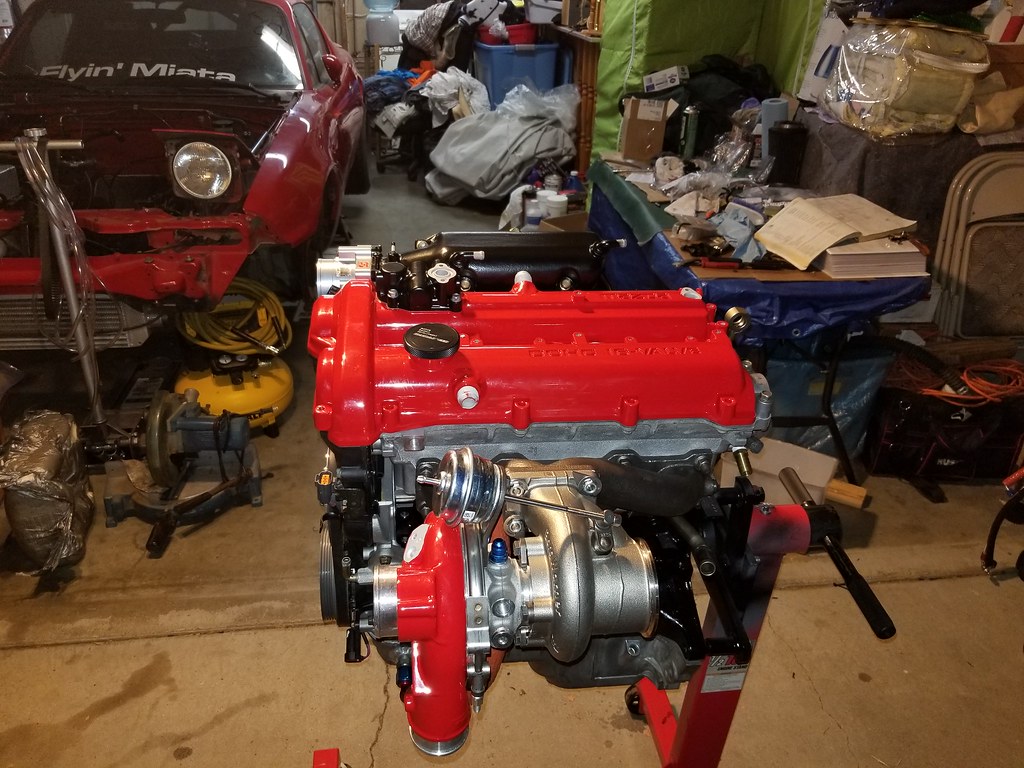
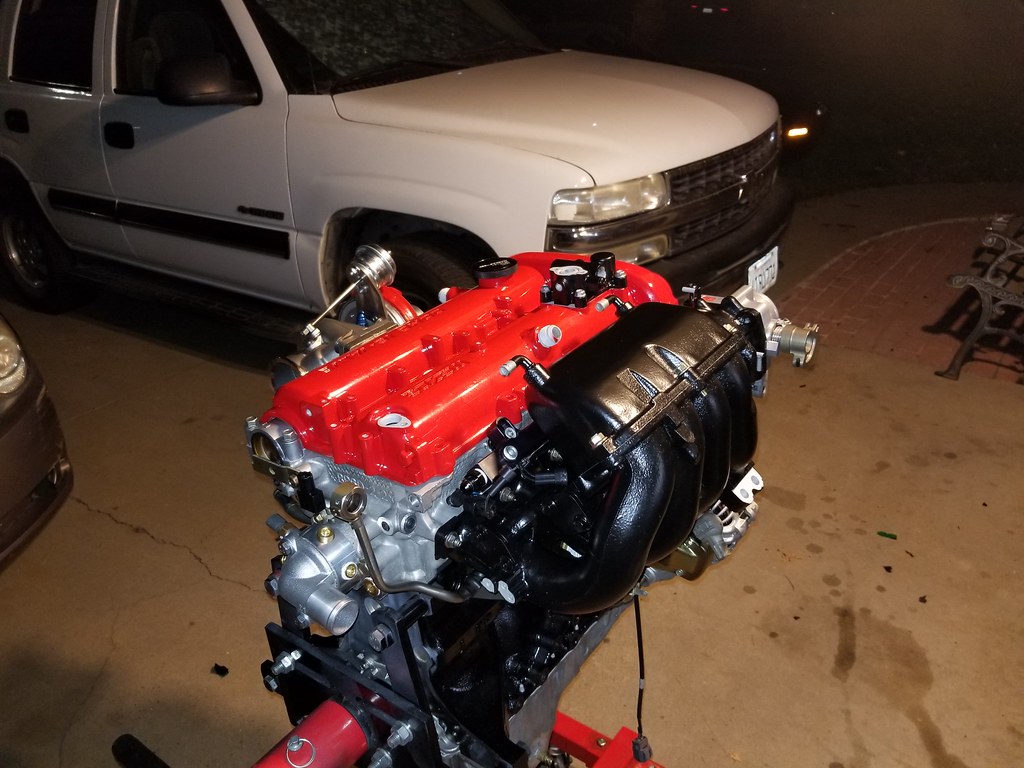
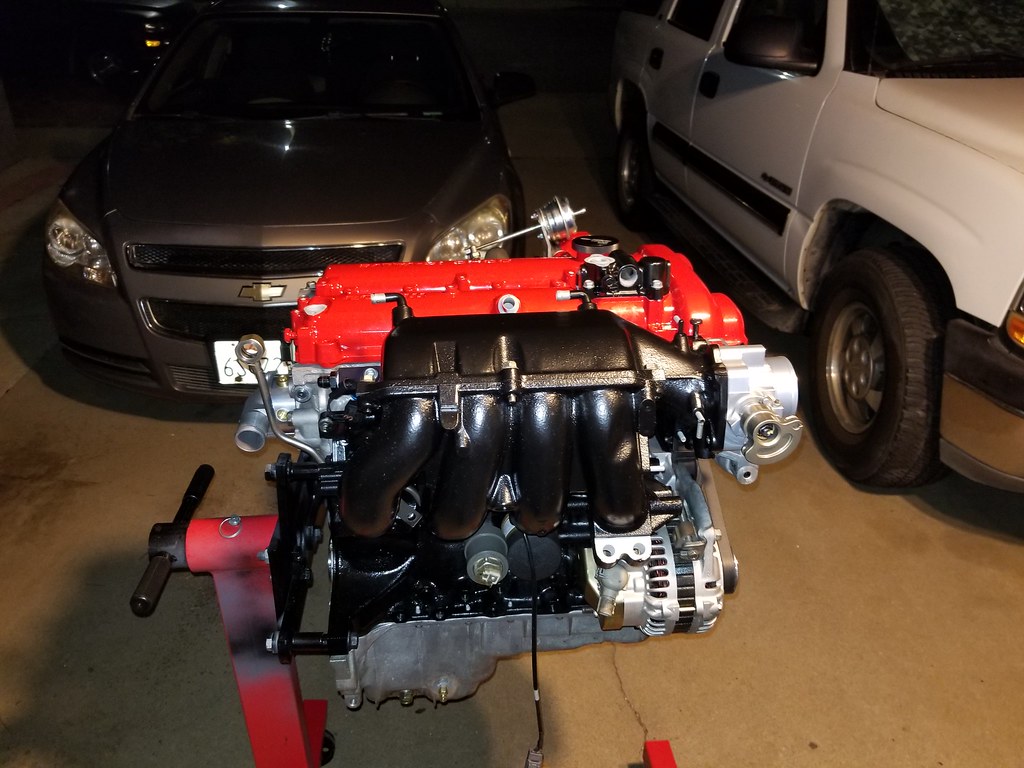
After a long 4 weeks, I finally got my parts from powder coating. They lagged and I wasn't to happy about it, but at least I have my parts back now. I got the Intake manifold, valve cover, turbo compressor housing, and VVT mechanism powder coated.
Reply
0
0
Thread Starter
Junior Member
iTrader: (2)
Joined: Dec 2014
Posts: 307
Total Cats: 23
From: Salinas, CA
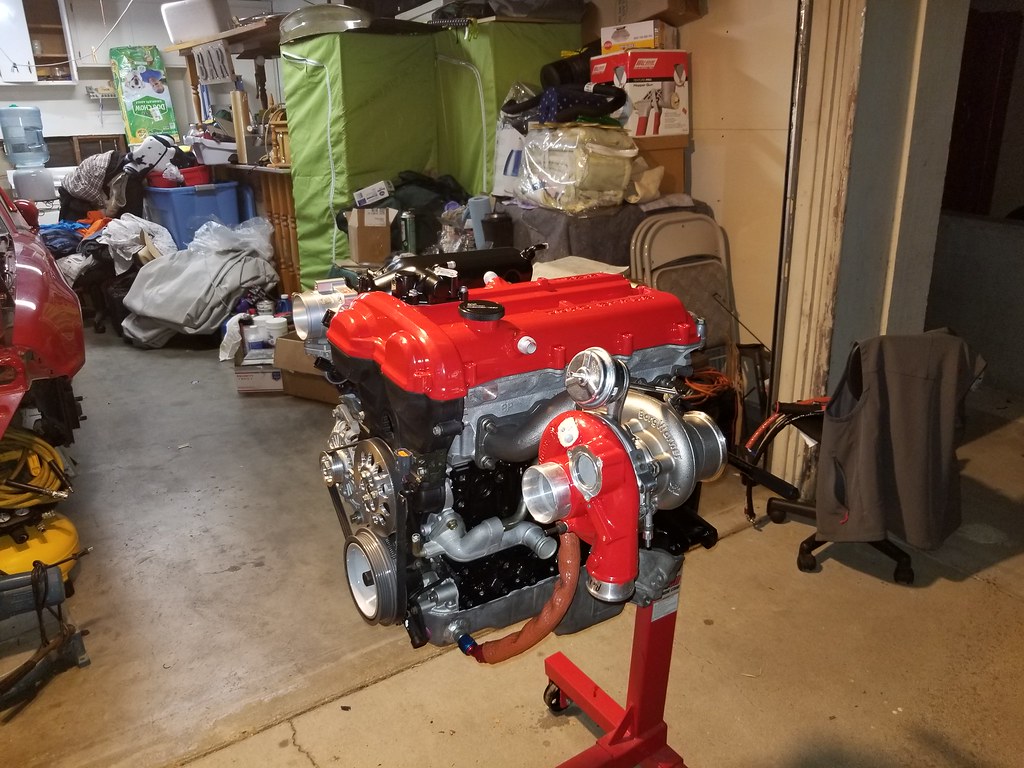
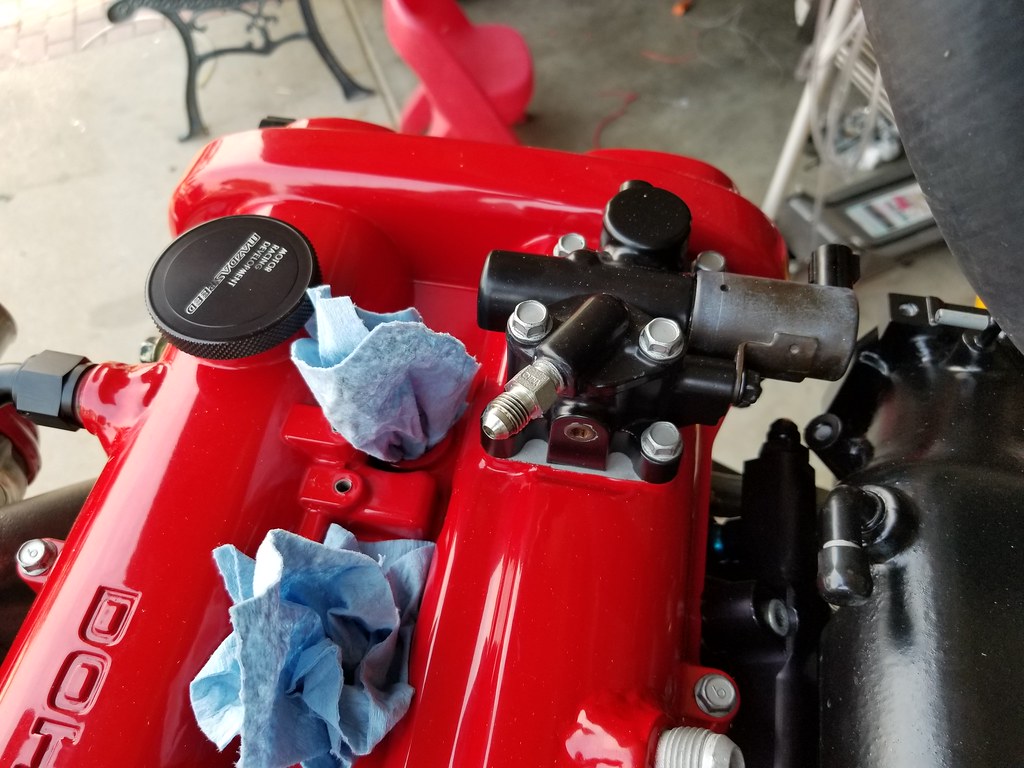
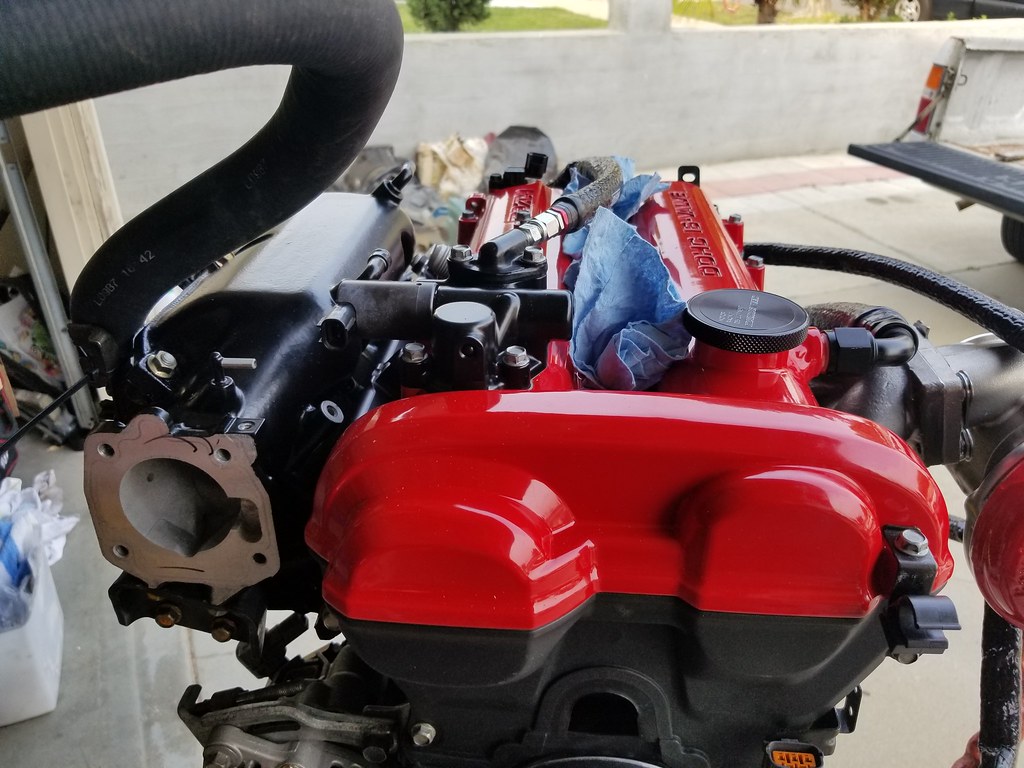
This Sunday I worked on swapping the VVT hardline for a braided -4AN line instead. I cut the line on top of the valve cover and I drilled and tapped it for 1/8" NPT. I did the same the metal line on the side on the block. I didn't have a 45 degree AN fitting for the side of the block, so the 90 will have to do for now.

Reply
1
1


