LeBoeuf's build...
 08-16-2014, 03:19 PM
#1
Junior Member
Thread Starter
iTrader: (1)

Join Date: May 2013
Location: Sandia Park, NM
Posts: 452
Total Cats: 50
I finally got moved into my new place and finally have a garage again. I spent the past week elbows deep in the miata after work each night.
I have plans to do an engine and diff swap and acquired the parts to do so, but the death shimmy and shake at 65mph+ meant that those items are on hold for a bit.
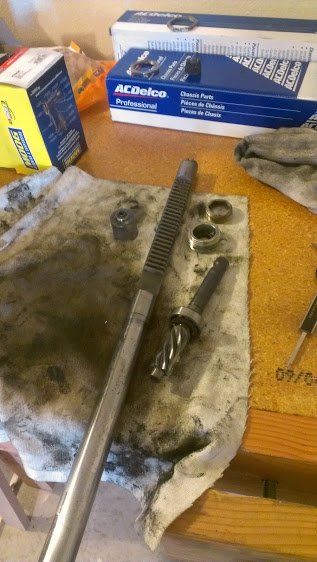
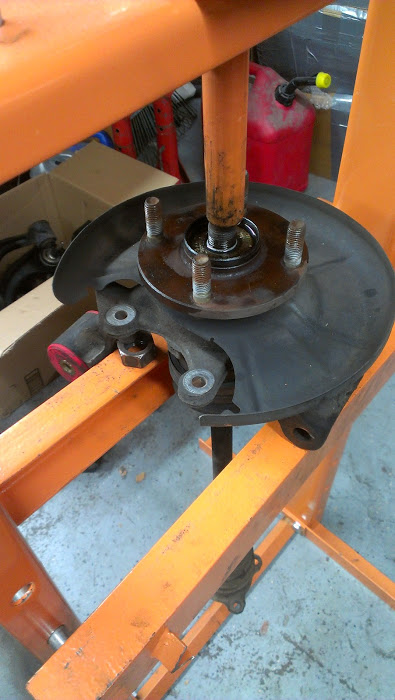
This week I installed new ball joints/94 r pkg tie rod ends/inner tie rods/steering rack bushings.
Here's some pics of my little helper lovingly referred to as "spare cat". He's a stray that took up residence in my in-laws junk yard (now a fully spoiled indoor cat )
)


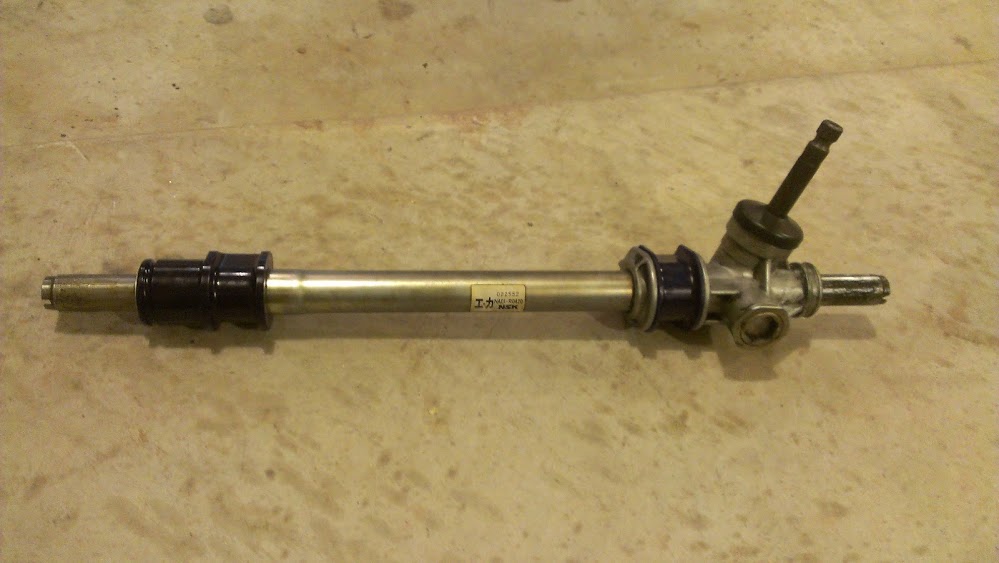
The manual rack is beautifully simple; inpected, cleaned, regreased:
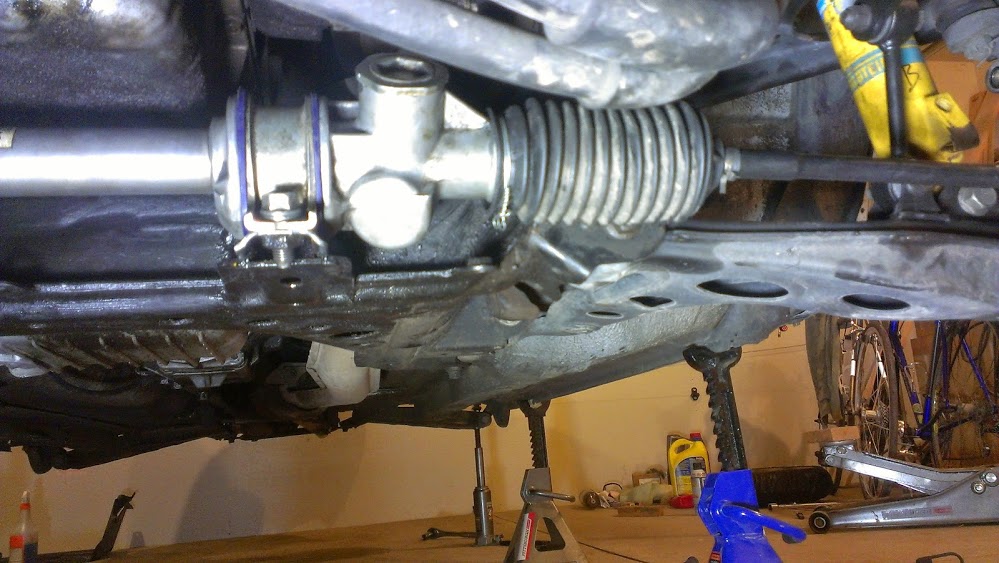
New bushings:
Also installed some bilstein sports/nb tophats/allstar sleeves that I picked up from a guy who bought them from track I believe:

Mmmm fresh parts....

Sits right nice:

Aaand soon, got these parts from forum members.... Going to do bushings and ms3x next...


I have plans to do an engine and diff swap and acquired the parts to do so, but the death shimmy and shake at 65mph+ meant that those items are on hold for a bit.
This week I installed new ball joints/94 r pkg tie rod ends/inner tie rods/steering rack bushings.
Here's some pics of my little helper lovingly referred to as "spare cat". He's a stray that took up residence in my in-laws junk yard (now a fully spoiled indoor cat
)The manual rack is beautifully simple; inpected, cleaned, regreased:
New bushings:
Also installed some bilstein sports/nb tophats/allstar sleeves that I picked up from a guy who bought them from track I believe:
Mmmm fresh parts....
Sits right nice:
Aaand soon, got these parts from forum members.... Going to do bushings and ms3x next...

Reply
 2
2

2
08-16-2014, 03:29 PM
#2
Junior Member
Thread Starter
iTrader: (1)
Join Date: May 2013
Location: Sandia Park, NM
Posts: 452
Total Cats: 50
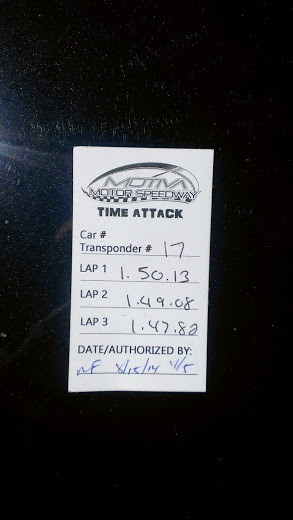
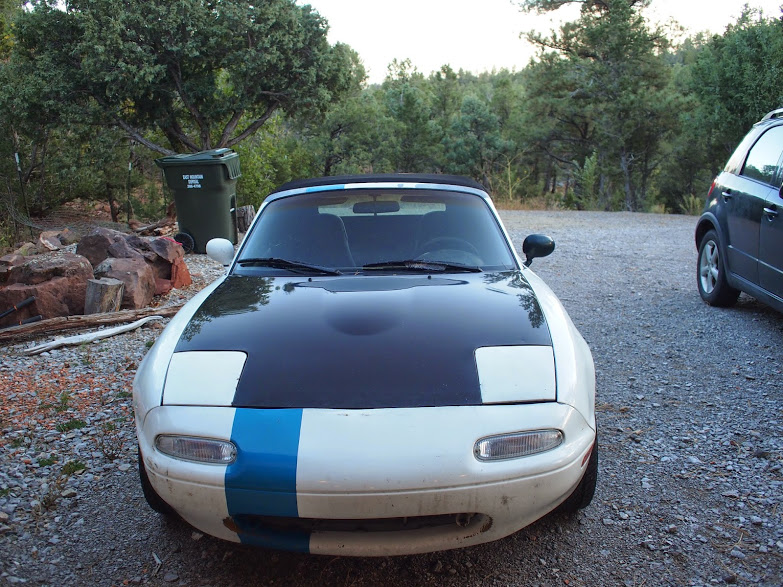
I had my first track event ever last night! What a riot.
The new suspension is 100x better than my old 205k mile stock setup. With all the new parts I no longer feel like my life is in danger once I exceed 65mph.
I feel like it went really well. I'm on 205 khumo ecstas on a 6.5" rim and they were clearly the limiting factor in my speed. The rest of the car felt really good for my ~$1500 of car/parts.
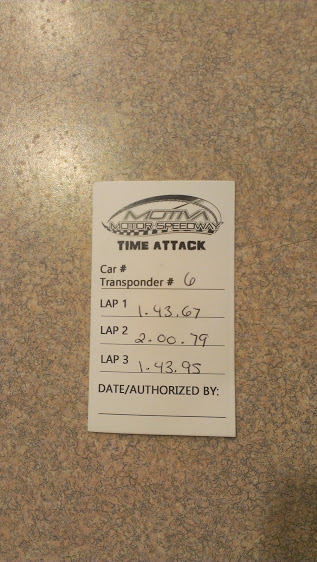
For any NM guys, what kind of times do you run at Motiva? 1:47.8 was my best lap; there's certainly room for improvement. Even with just better tires; the 90hp of fury hasn't seen its full potential out there.
The new suspension is 100x better than my old 205k mile stock setup. With all the new parts I no longer feel like my life is in danger once I exceed 65mph.
I feel like it went really well. I'm on 205 khumo ecstas on a 6.5" rim and they were clearly the limiting factor in my speed. The rest of the car felt really good for my ~$1500 of car/parts.
For any NM guys, what kind of times do you run at Motiva? 1:47.8 was my best lap; there's certainly room for improvement. Even with just better tires; the 90hp of fury hasn't seen its full potential out there.
Reply
0
0
08-16-2014, 07:57 PM
This message has been deleted by sixshooter.
Reason: A bit too much spamming for a noob
09-02-2014, 11:49 AM
#3
Junior Member
Thread Starter
iTrader: (1)
Join Date: May 2013
Location: Sandia Park, NM
Posts: 452
Total Cats: 50
I finished off the poly bushing install over the weekend. That was certainly a lot of work; my fingers and elbow joints are still sore.
Even with the alignment rather messed up, the ride is substantially improved. I noticed my rear suspension was constantly on the bumpstops even with 5.25" height from the pinch welds. After taking about .75" off the rear bumpstops I'm no longer getting jarred on larger bumps.
These bushings are a major win and come highly recommended. I picked mine up from Fab9 for a very reasonable price.
I zerk'd everything except for the upper rear joints. I will probably go back and add them at a later time, but during the install the clearances didn't look good.
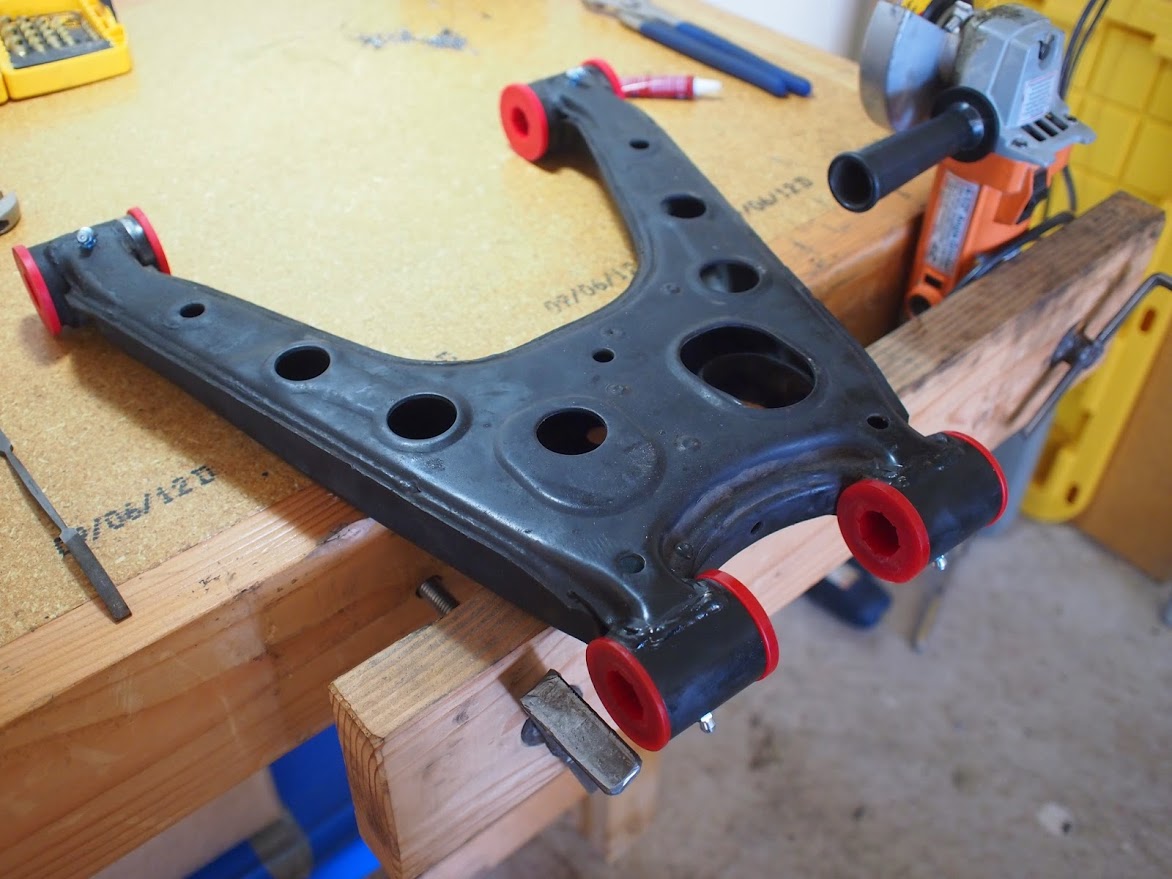
I used 45 degree zerks for the odd inner rear joints:

Which give great access:
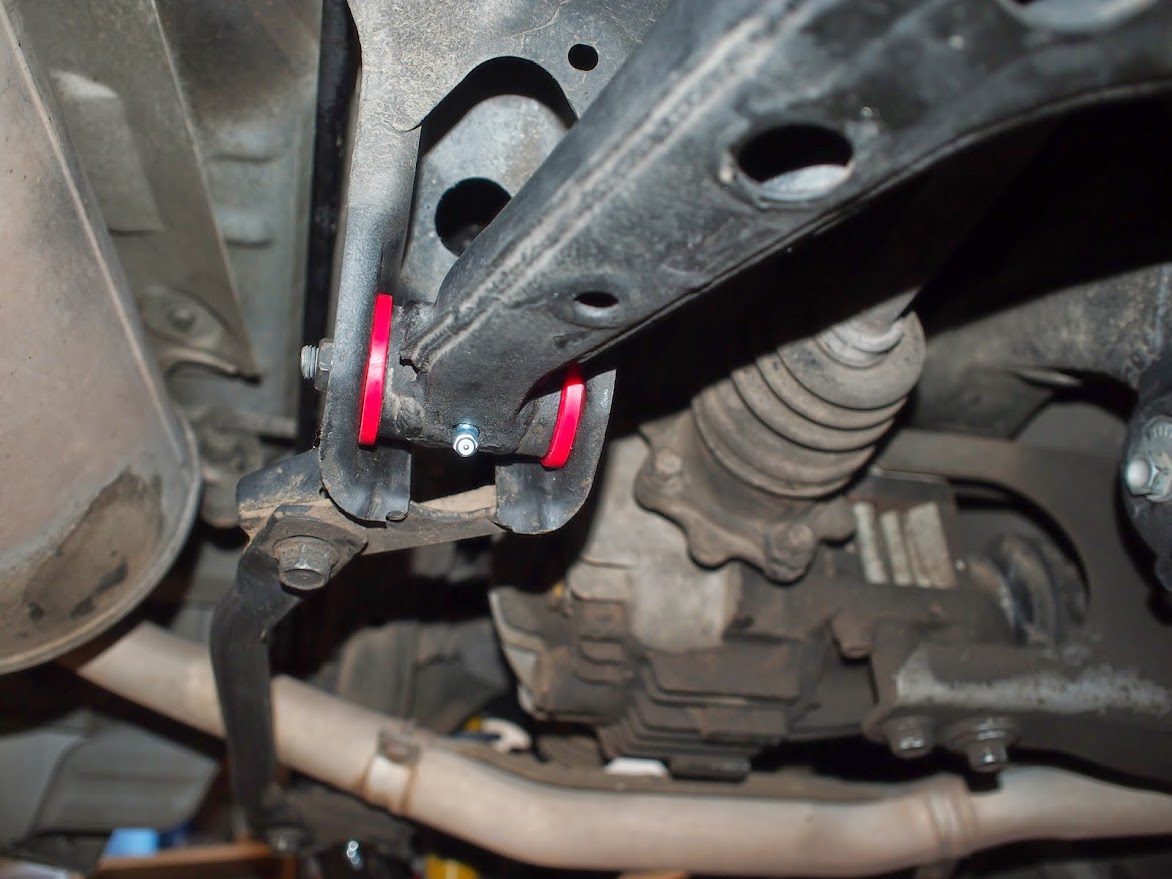
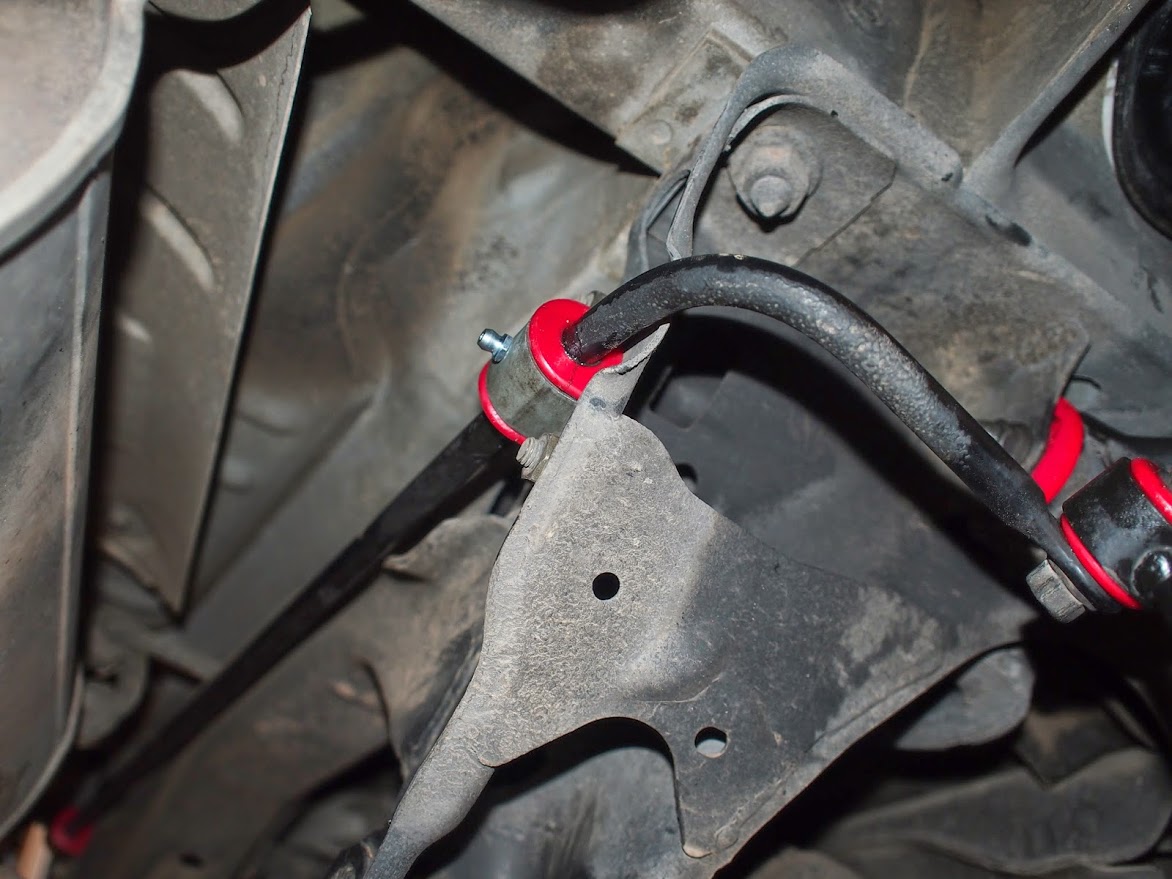
This thing rocked:


Even with the alignment rather messed up, the ride is substantially improved. I noticed my rear suspension was constantly on the bumpstops even with 5.25" height from the pinch welds. After taking about .75" off the rear bumpstops I'm no longer getting jarred on larger bumps.
These bushings are a major win and come highly recommended. I picked mine up from Fab9 for a very reasonable price.
I zerk'd everything except for the upper rear joints. I will probably go back and add them at a later time, but during the install the clearances didn't look good.
I used 45 degree zerks for the odd inner rear joints:
Which give great access:
This thing rocked:
Reply
0
0
 09-22-2014, 10:12 AM
#5
Junior Member
Thread Starter
iTrader: (1)
Join Date: May 2013
Location: Sandia Park, NM
Posts: 452
Total Cats: 50
I got my ms3x kit in and decided that I needed something to sit on in order to solder it together.
I've always wanted a solid shop stool so I found two mediocre 2x4's and went to work. (only the finest mortise and tenon joinery in my 2x4 furniture)


Bam

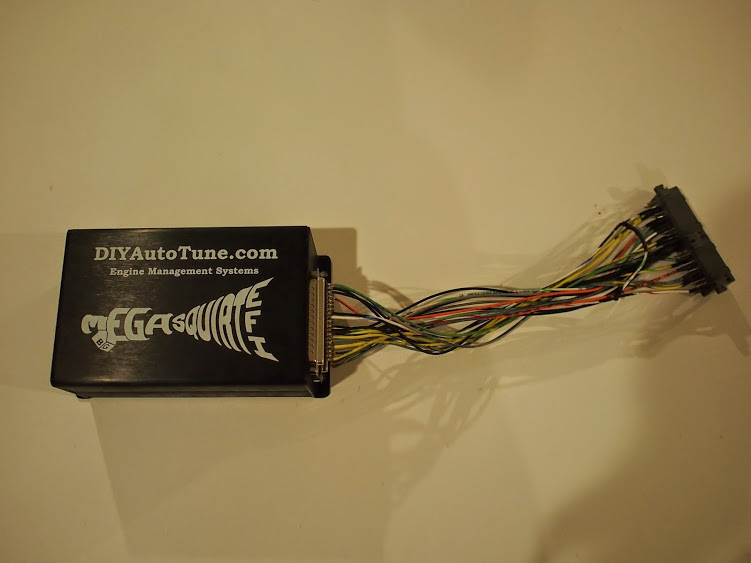
Then I proceeded to put together this megasquirt. Very well labelled and setup kit from diyautotune:

I've always wanted a solid shop stool so I found two mediocre 2x4's and went to work. (only the finest mortise and tenon joinery in my 2x4 furniture)
Bam
Then I proceeded to put together this megasquirt. Very well labelled and setup kit from diyautotune:
Reply
0
0
09-30-2014, 01:26 AM
#6
Junior Member
Thread Starter
iTrader: (1)
Join Date: May 2013
Location: Sandia Park, NM
Posts: 452
Total Cats: 50
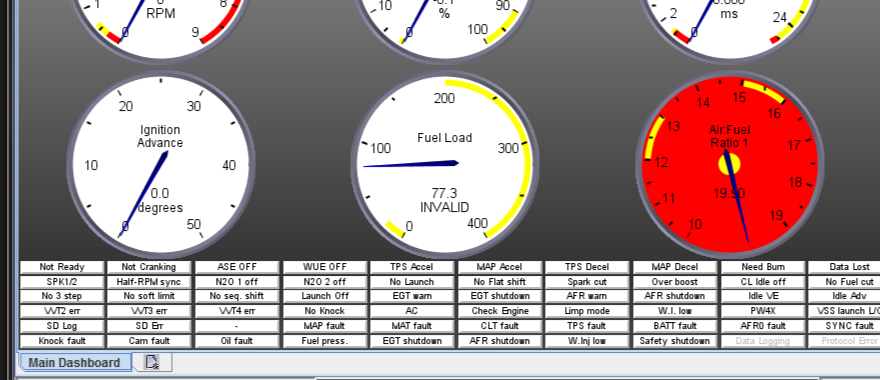
This kit/software is really well put together.... I remember trying to do this stuff with piggybacks and narrowband sensors back in high school/undergrad.... haha a decade of advancement has made this stuff so much easier...
A touch of mapdot with some autotune and this thing is already road worthy... I need to find out why my baro correction is showing as "INVALID"... I've got two independent sensors... I must not have it setup right

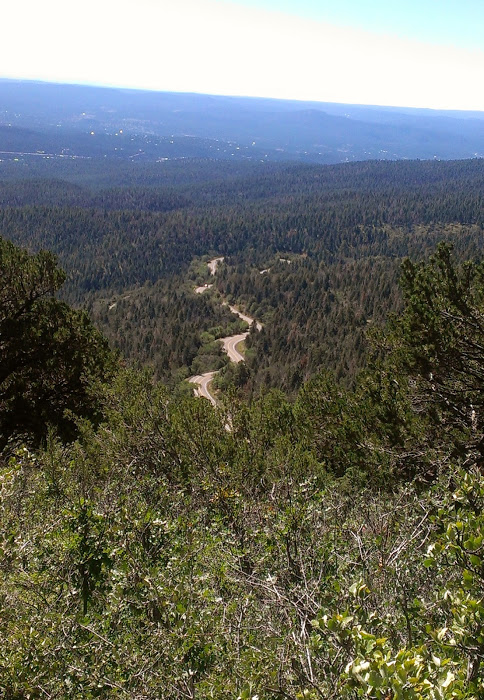
Check out my base kpa . There's no power up here but the views are worth it!
Local drive for testing upgrades
I did this with a connector from newunitedracetech.com:

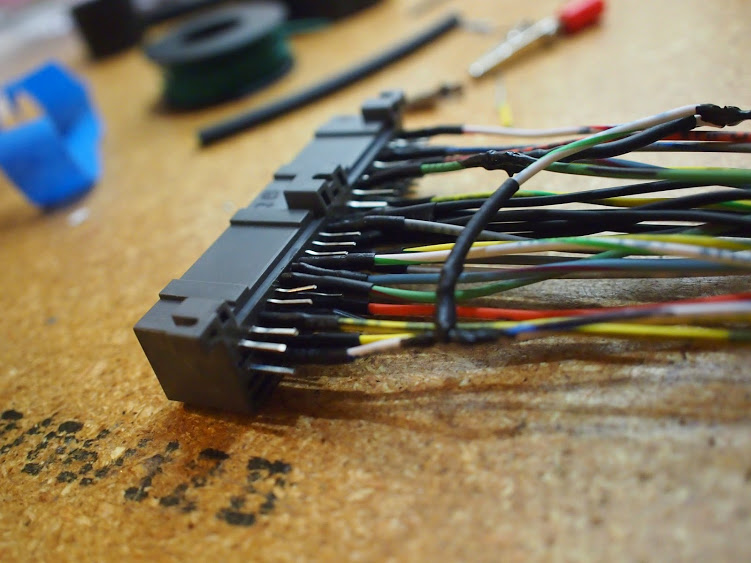
Works great!
A touch of mapdot with some autotune and this thing is already road worthy... I need to find out why my baro correction is showing as "INVALID"... I've got two independent sensors... I must not have it setup right
Check out my base kpa
. There's no power up here but the views are worth it!Local drive for testing upgrades
I did this with a connector from newunitedracetech.com:
Works great!
Last edited by leboeuf; 10-13-2014 at 05:33 PM.
Reply
0
0
10-03-2014, 02:12 AM
#7
Junior Member
Thread Starter
iTrader: (1)
Join Date: May 2013
Location: Sandia Park, NM
Posts: 452
Total Cats: 50
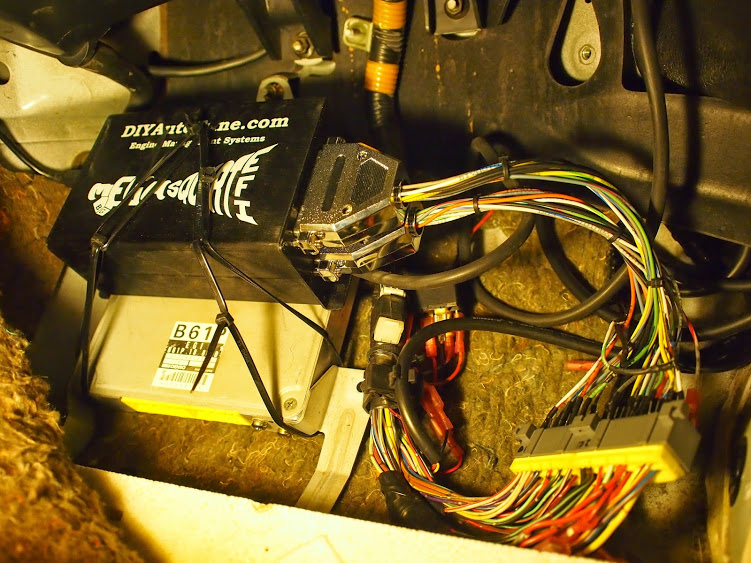
After driving around all week with my electronics strewn about my passenger floor, I've decided that I trust the setup enough to sacrifice some zip ties to the cause.
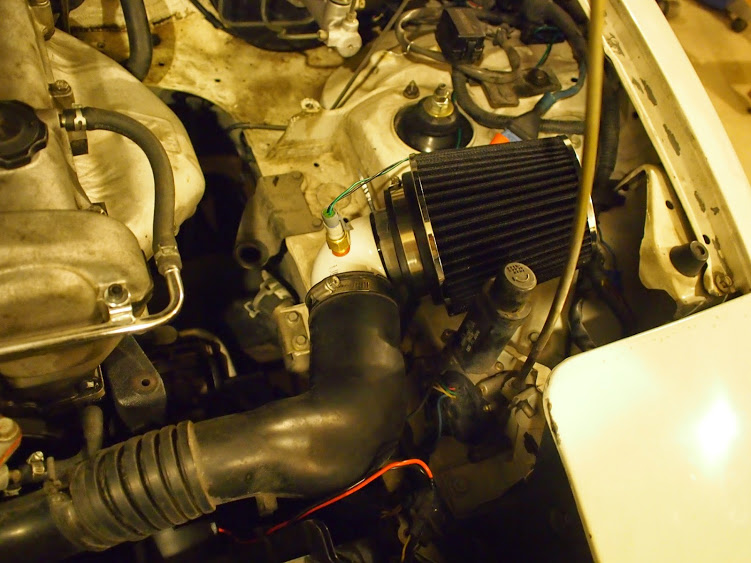
I also stopped by the autozone "performance" aisle and grabbed a cheapo air filter while dodging teenagers looking at exhaust tips. A quick trip to the hardware store later, I had my afm removed and more zip ties deployed.
And now I'm at a crossroads... I should probably continue enjoying my 1.6l of fury while I do a rods build on my 1.8l engine. Hmmm are the rods usually honed to fit each wrist pin individually? Or do you guys just plop them in there? I've never opened a miata engine so I'm not too sure what exactly I'm in for.
Anyway I need to move the oil return so the pan's coming off... I guess I'll just start there and see...
Reply
0
0
10-12-2014, 02:22 AM
#8
Junior Member
Thread Starter
iTrader: (1)
Join Date: May 2013
Location: Sandia Park, NM
Posts: 452
Total Cats: 50
Well my ms3x and ricer cone were worth 4+ seconds at the track I even did some ice skating on lap 2 to make sure I had the right transponder...
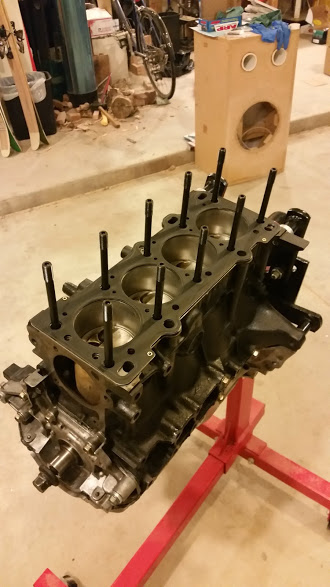
With the car now within 10ish seconds of the SM record I decided to just build my spare engine and keep the car running.
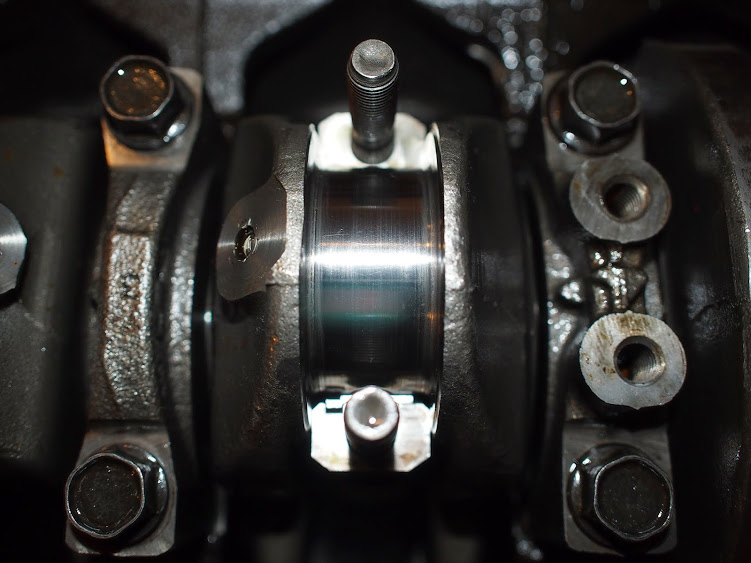
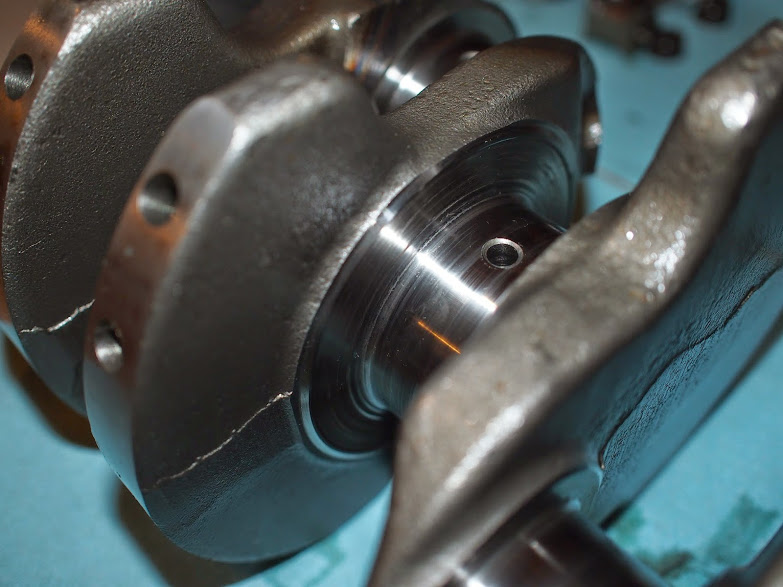
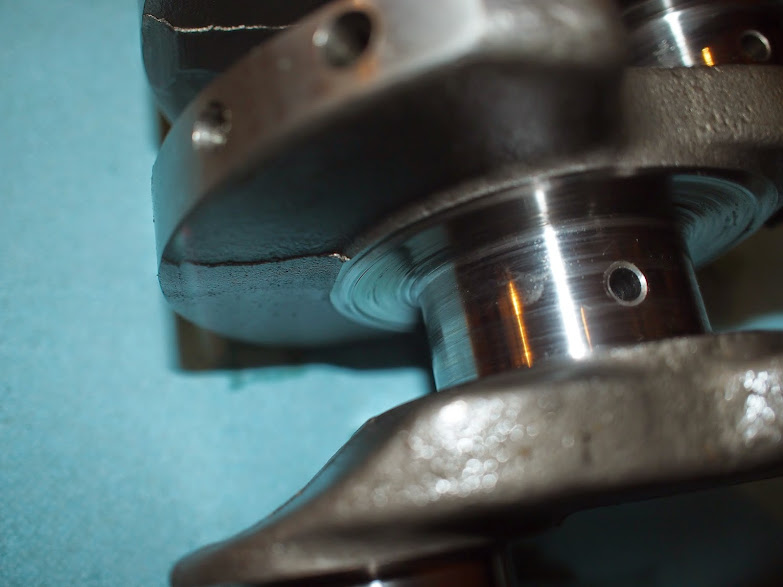
The engine looks kinda clean on the outside; leakdown is ~2% cold on all 4; crankshaft endplay is 0.008 which isn't stellar but is within spec.
After digging into it a little I think the crank might need some work. What do you guys think of the main journal? The scratches can be felt but I wouldn't say they catch the fingernail. I've never seen a mediocre journal... only brand new polished journals or completely borked ones...
No flash:
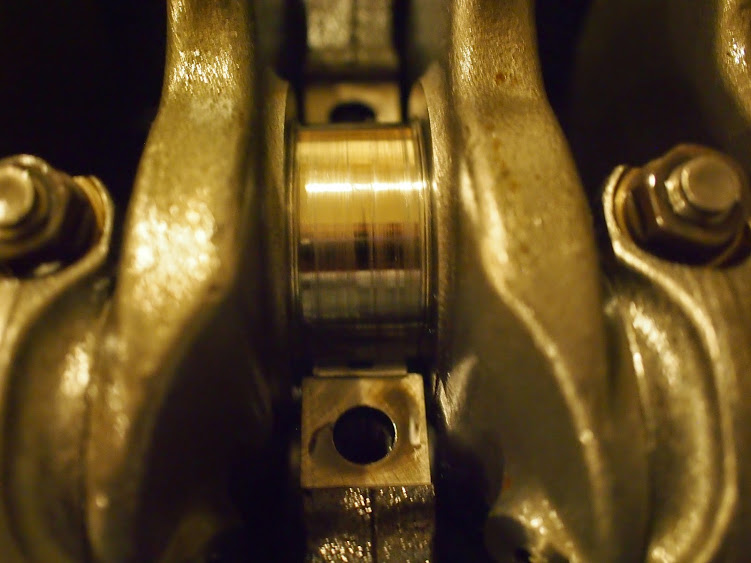
Flash:
Bearing:
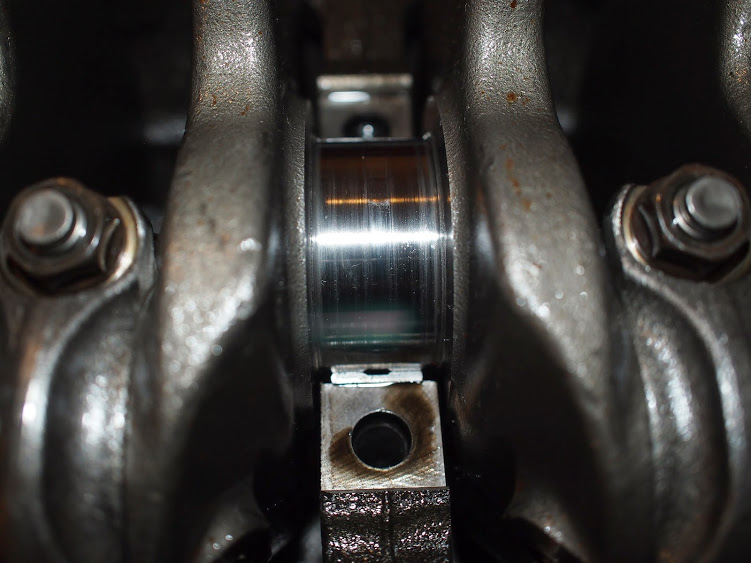
Conrod journals look a little better:
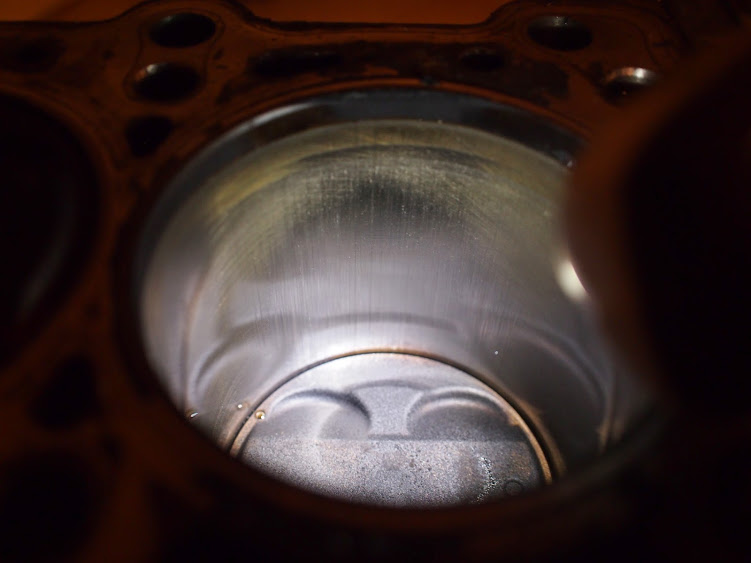
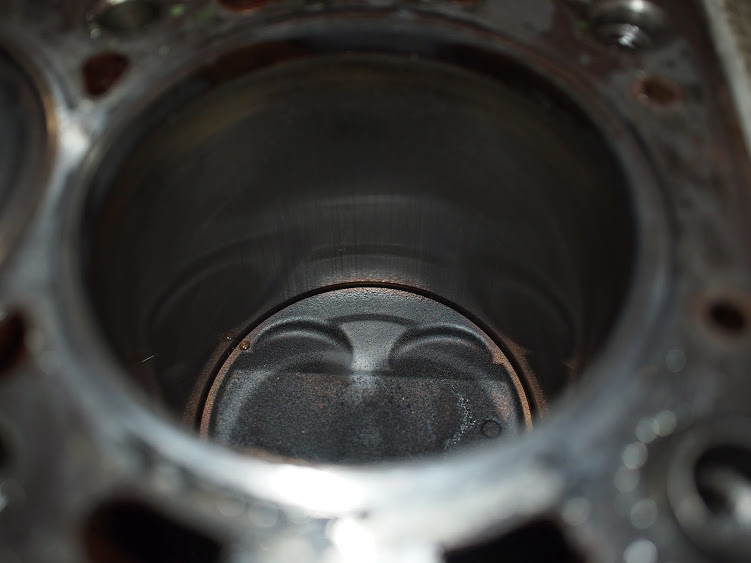
Piston bores look serviceable. There is scuffing but it can barely be felt. I've honed this level of scuff once upon a time and it worked out fine, do you guys usually just do a simple hone for this kind of wear?
(I did not succeed in getting a decent photo... pics look worse than it is)
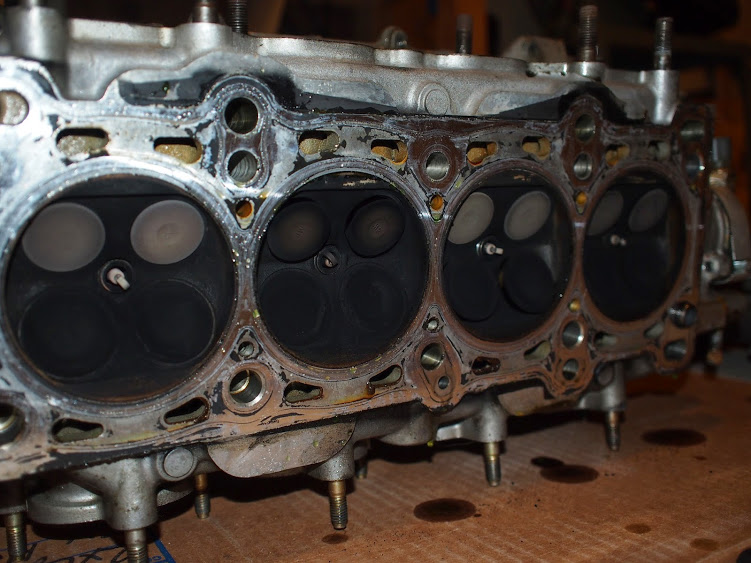
Head looks good. I scraped some of the deposits off of the det prone areas and everything looks good to my eye.

I'll probably just pull the crank out and take it to a machine shop and see what they think.
I even did some ice skating on lap 2 to make sure I had the right transponder...With the car now within 10ish seconds of the SM record I decided to just build my spare engine and keep the car running.
The engine looks kinda clean on the outside; leakdown is ~2% cold on all 4; crankshaft endplay is 0.008 which isn't stellar but is within spec.
After digging into it a little I think the crank might need some work. What do you guys think of the main journal? The scratches can be felt but I wouldn't say they catch the fingernail. I've never seen a mediocre journal... only brand new polished journals or completely borked ones...
No flash:
Flash:
Bearing:
Conrod journals look a little better:
Piston bores look serviceable. There is scuffing but it can barely be felt. I've honed this level of scuff once upon a time and it worked out fine, do you guys usually just do a simple hone for this kind of wear?
(I did not succeed in getting a decent photo... pics look worse than it is)
Head looks good. I scraped some of the deposits off of the det prone areas and everything looks good to my eye.
I'll probably just pull the crank out and take it to a machine shop and see what they think.
Reply
0
0
 10-12-2014, 05:34 PM
#11
Junior Member
Thread Starter
iTrader: (1)
Join Date: May 2013
Location: Sandia Park, NM
Posts: 452
Total Cats: 50
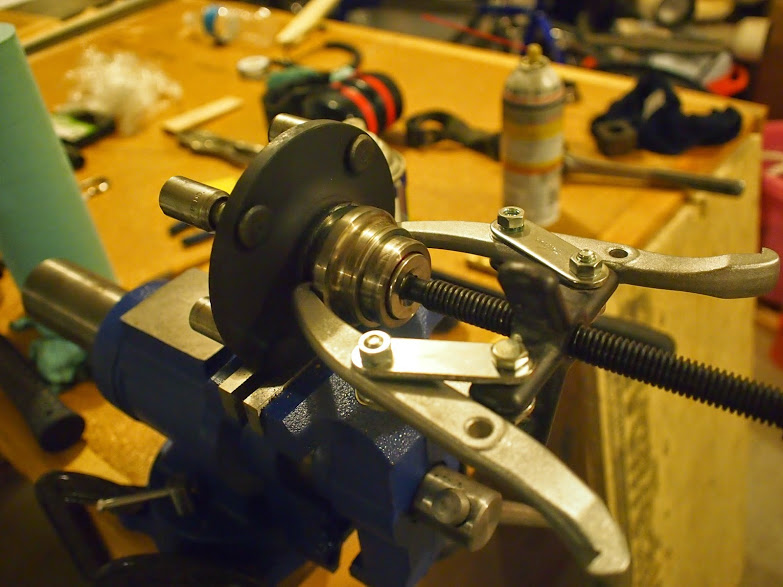
I am using keyed lug nuts. The plan is to put new wheel bearings in on all corners and see if that gets it... There are 210k miles on chassis so I can't say I'm too surprised.
It's funny, I'm willing to pull the suspension and whatnot apart but I really wish I didn't need to pull the crank out because I don't want to have to clean the oil pump gasket surfaces hah.
We'll see how much a crank polish is at the shop; I've read about some shadetree techniques involving sandpaper but I have limits on how far I'll go to save $50.
Reply
0
0
10-13-2014, 01:02 AM
#12
Junior Member
Thread Starter
iTrader: (1)
Join Date: May 2013
Location: Sandia Park, NM
Posts: 452
Total Cats: 50
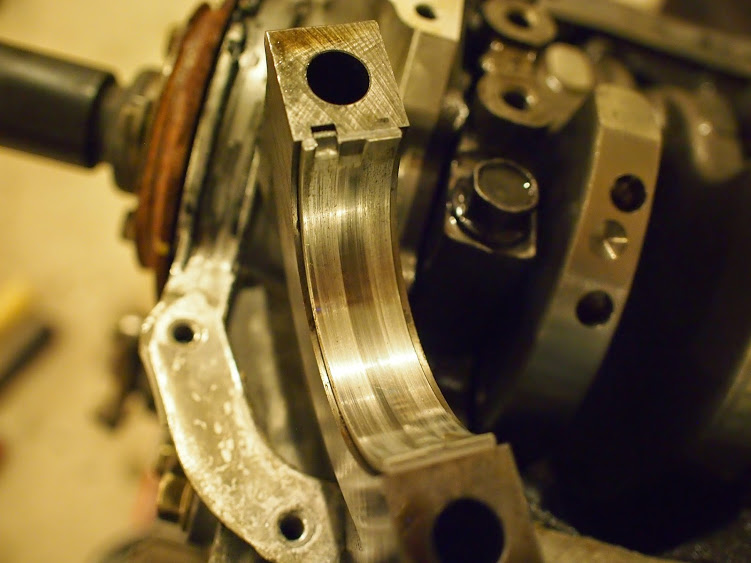
Well found some more crank wear... The thrust bearing is completely shot. Crank did not contact the block or anything, but there is a decent groove on the crank thrust surface that looks out of place. Odd seeing as how the endplay was within spec. I just caught this with dumb luck I guess.
I noticed that there are oversized thrust bearings available so hopefully the crank can be machined. Any advice/war stories would be welcomed

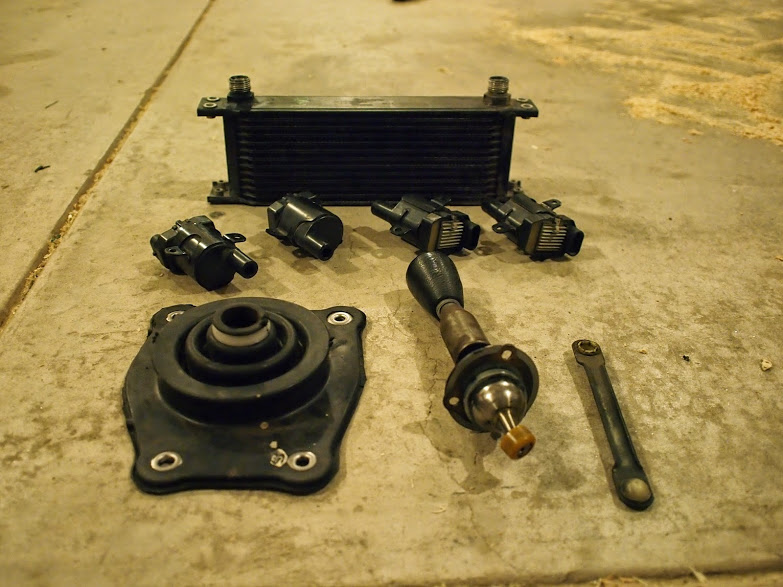
On a better note I had a good day a week back at the junk yard.
Found a pristine oem aluminum hood to replace my ill fitting steel one.
Also scored what looks to be a freshly rebuilt shifter with all clean boots, a clean oil cooler from a turbo volvo, and a set of ls2 coils.
I noticed that there are oversized thrust bearings available so hopefully the crank can be machined. Any advice/war stories would be welcomed
On a better note I had a good day a week back at the junk yard.
Found a pristine oem aluminum hood to replace my ill fitting steel one.
Also scored what looks to be a freshly rebuilt shifter with all clean boots, a clean oil cooler from a turbo volvo, and a set of ls2 coils.
Reply
0
0
11-10-2014, 12:42 AM
#13
Junior Member
Thread Starter
iTrader: (1)
Join Date: May 2013
Location: Sandia Park, NM
Posts: 452
Total Cats: 50
Well my crankshaft and block are still at the machine shop. I haven't had any luck finding oversized thrust washer's that are actually stocked. My machinist claims he can find some, so I'm waiting... Kinda on the fence, at this point I should probably just buy another crank and move on, but I'd prefer to support my machinist instead of some random ebay seller...
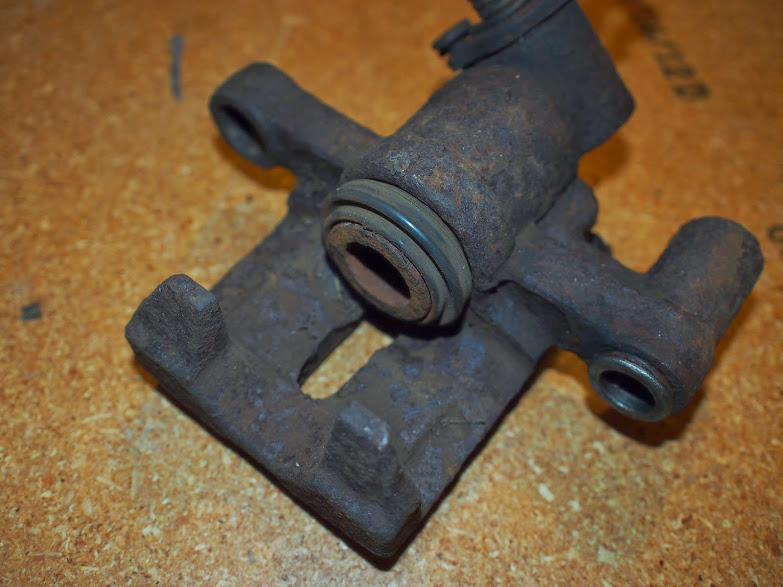
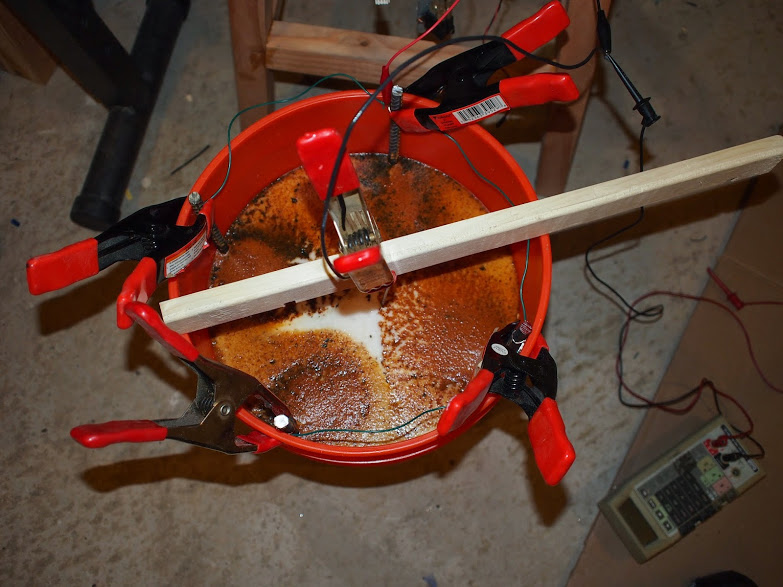
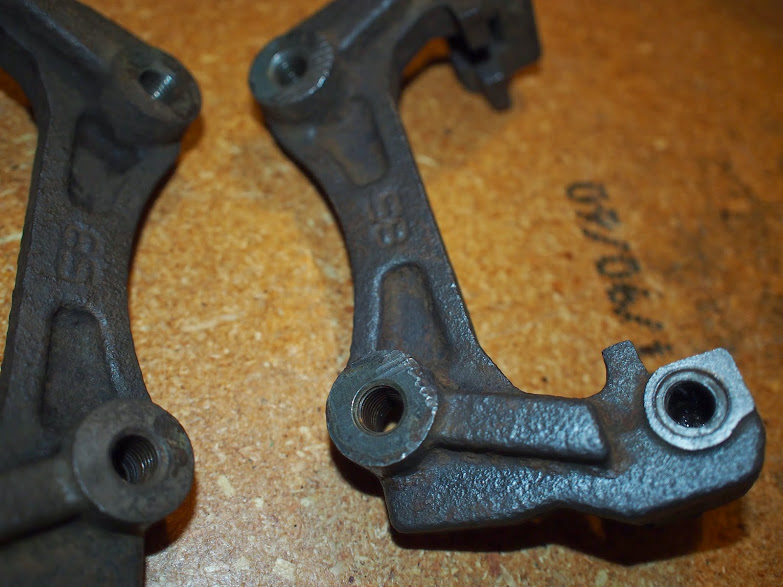
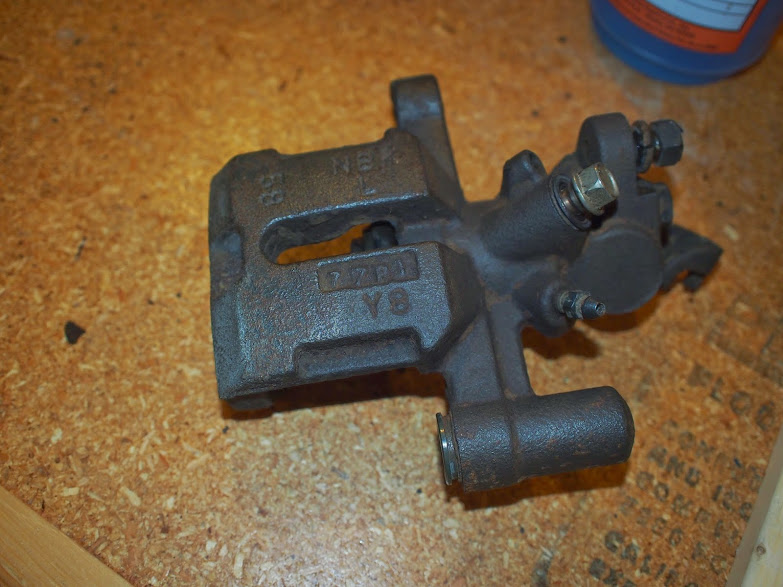
I've been keeping the project rolling by derusting some brake parts I picked up. Add a little sodium carbonate and some low voltage DC and before you know it you have rust free parts.
After that was all wrapped up I decided to replace all of my wheel bearings. The fonts took about 30 minutes. The rear..... good grief... The rear axles had become one with the hubs. I tried to use a buddy's shop press which didn't work out. I then moved on to more old school techniques and sledge hammered them out thor style with a 5lb hammer.
I followed the sticky on the site for the bearing replacement. The only thing to add is that I used a puller to get the race off the hub. A 22mil socket fit the hub perfectly to give something to push on.
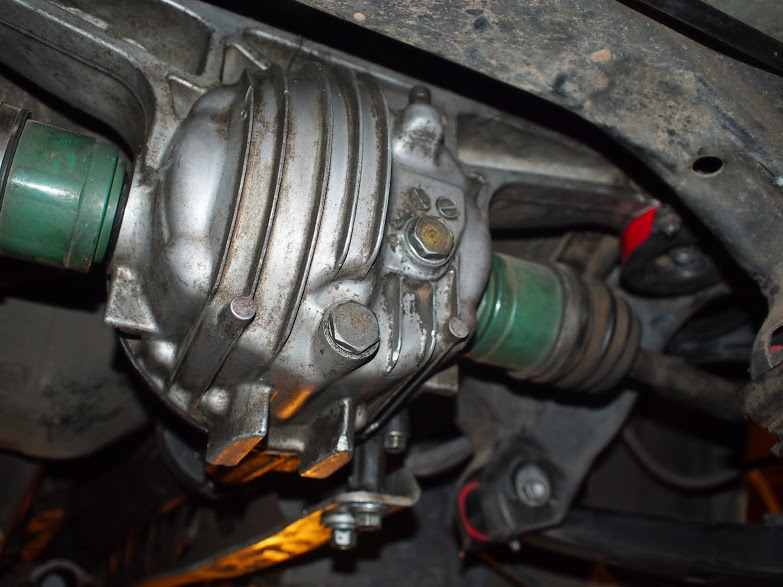
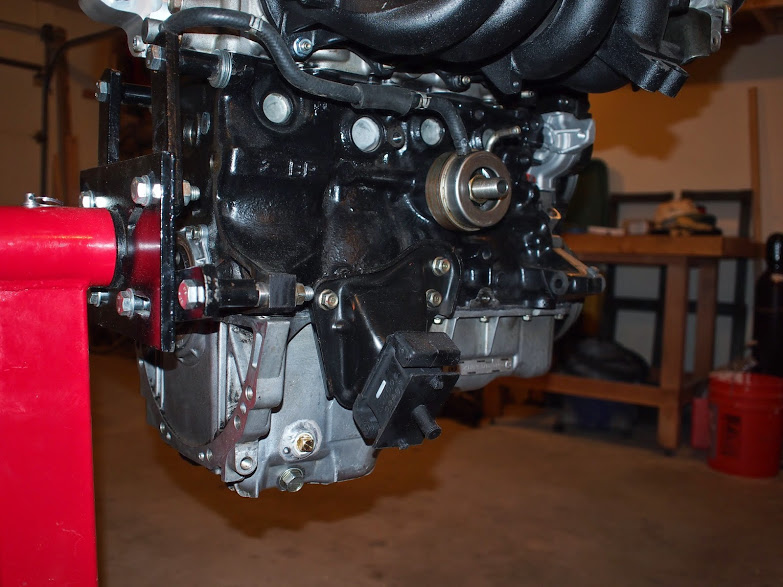
Since my axles were pretty much destroyed after the sledge hammer situation I decided to put my 1.8 kaaz diff in. With the poly bushings and clutch packs, the noises are pretty inspiring.
The car feels really great with the new bearings and driveline. It's finally rock solid at all speeds.
I've been keeping the project rolling by derusting some brake parts I picked up. Add a little sodium carbonate and some low voltage DC and before you know it you have rust free parts.
After that was all wrapped up I decided to replace all of my wheel bearings. The fonts took about 30 minutes. The rear..... good grief... The rear axles had become one with the hubs. I tried to use a buddy's shop press which didn't work out. I then moved on to more old school techniques and sledge hammered them out thor style with a 5lb hammer.
I followed the sticky on the site for the bearing replacement. The only thing to add is that I used a puller to get the race off the hub. A 22mil socket fit the hub perfectly to give something to push on.
Since my axles were pretty much destroyed after the sledge hammer situation I decided to put my 1.8 kaaz diff in. With the poly bushings and clutch packs, the noises are pretty inspiring.
The car feels really great with the new bearings and driveline. It's finally rock solid at all speeds.
Reply
0
0
 01-05-2015, 11:46 AM
#15
Junior Member
Thread Starter
iTrader: (1)
Join Date: May 2013
Location: Sandia Park, NM
Posts: 452
Total Cats: 50
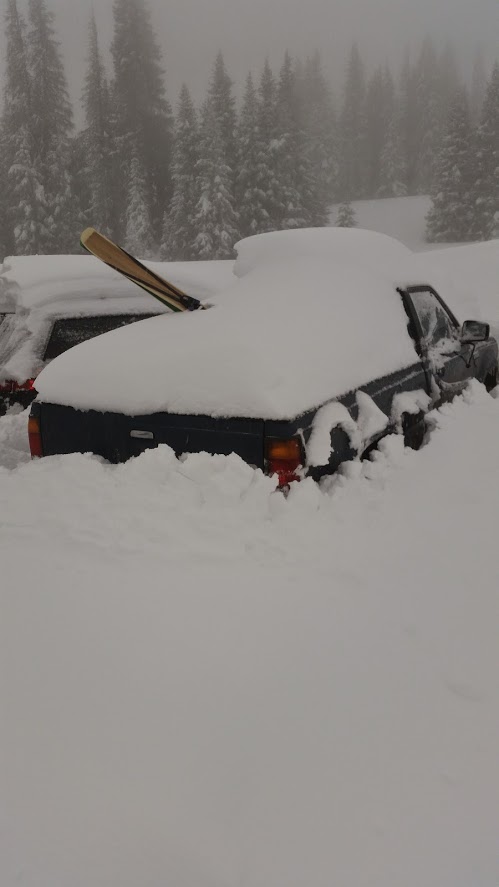
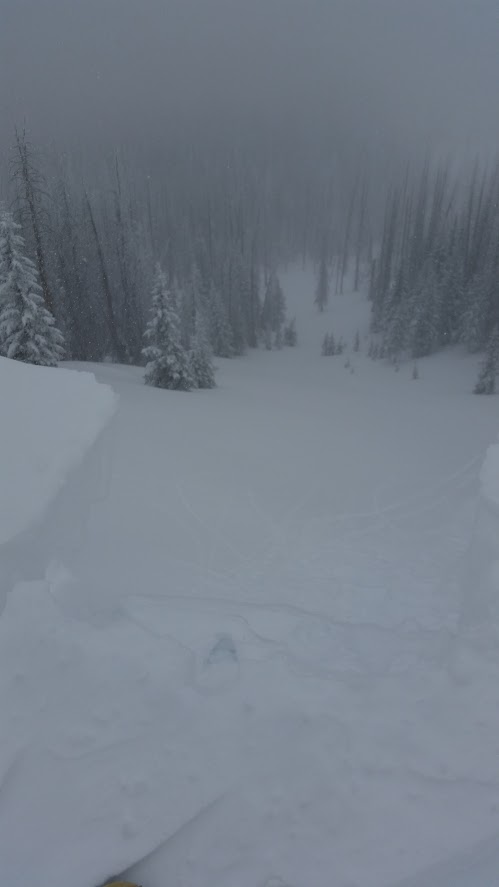
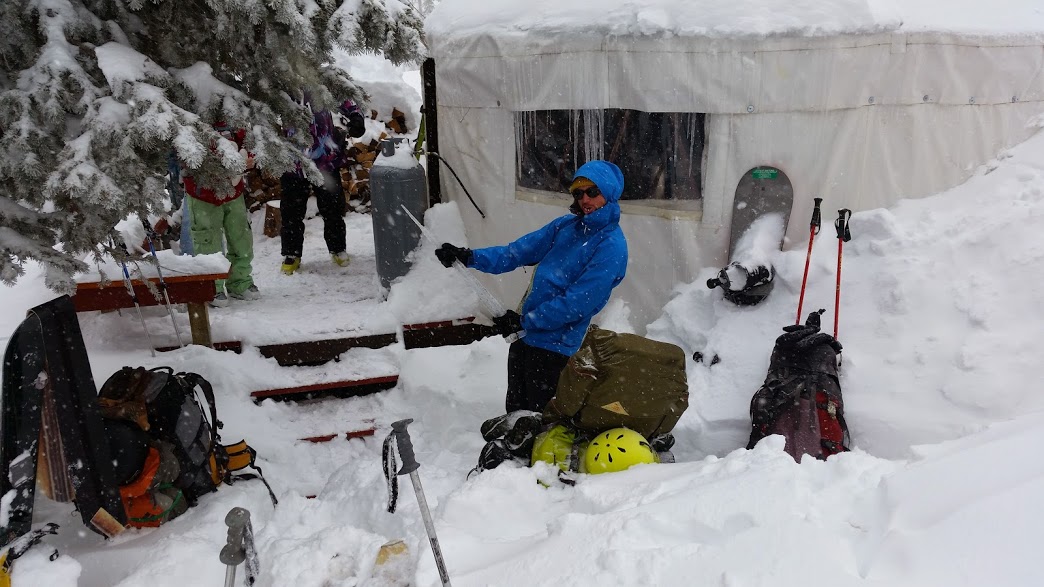
I've been making slow winter progress on the car (too much skiing and other awesome stuff ). I picked up an AHP ac/dc tig around Thanksgiving and have been learning how to aluminum weld. If you're in the market, I've been pretty pleased with the welder for the price I paid.
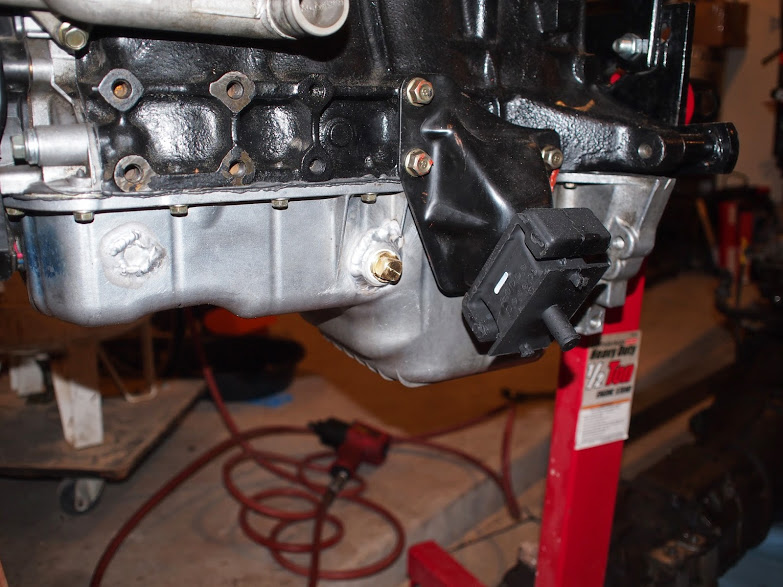
Added a 1/2" bung for my oil return. It looks kind of huge. I guess most do a 3/8"? Better to be too large than small hah.
I also added a 3/8" over the drain plug for a temp sensor and a 1/4" on the water neck for my coolant lines.


Welding the oil pan has been interesting... Some times it goes great and other times it gets strange with porosity and unexpected contamination... But it looks like what I accomplished should be fine.
My engine is finally back on the stand and I should be fitting pistons tonight! After futzing around with the wrong machinists I found an actual crank grinder who just welded/reground the thrust surface. More updates on that tonight...
). I picked up an AHP ac/dc tig around Thanksgiving and have been learning how to aluminum weld. If you're in the market, I've been pretty pleased with the welder for the price I paid.Added a 1/2" bung for my oil return. It looks kind of huge. I guess most do a 3/8"? Better to be too large than small hah.
I also added a 3/8" over the drain plug for a temp sensor and a 1/4" on the water neck for my coolant lines.
Welding the oil pan has been interesting... Some times it goes great and other times it gets strange with porosity and unexpected contamination... But it looks like what I accomplished should be fine.
My engine is finally back on the stand and I should be fitting pistons tonight! After futzing around with the wrong machinists I found an actual crank grinder who just welded/reground the thrust surface. More updates on that tonight...
Reply
0
0
01-05-2015, 12:19 PM
#16
Cpt. Slow

iTrader: (25)
Join Date: Oct 2005
Location: Oregon City, OR
Posts: 14,203
Total Cats: 1,138
Nope, 1/2 NPT is great for an oil drain. Bigger the better, but above 1/2" is stupid.
Your 3/8NPT for the oil temp sensor however, is too big. Most sensors are 1/8" NPT.
Your 3/8NPT for the oil temp sensor however, is too big. Most sensors are 1/8" NPT.

Reply
0
0
01-05-2015, 12:27 PM
#17
Junior Member
Thread Starter
iTrader: (1)
Join Date: May 2013
Location: Sandia Park, NM
Posts: 452
Total Cats: 50
Hrrmm... My plan was to use this GM one:
GM Closed Element CLT / IAT Sensor with Connector DIYAutoTune.com
Didn't really look into if it was ok for oil; I can't see why it wouldn't be?
GM Closed Element CLT / IAT Sensor with Connector DIYAutoTune.com
Didn't really look into if it was ok for oil; I can't see why it wouldn't be?
Reply
0
0
03-09-2015, 02:14 AM
#18
Junior Member
Thread Starter
iTrader: (1)
Join Date: May 2013
Location: Sandia Park, NM
Posts: 452
Total Cats: 50
More progress...
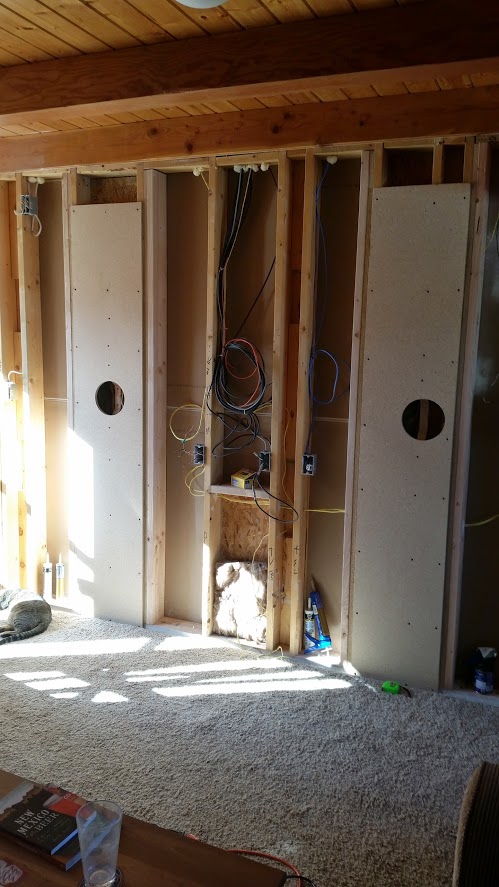
Did a lot of skiing, got radical, made some in wall speakers, finished my engine rebuild, and removed one nasty 210Kmile engine. It's been a busy Jan-now.
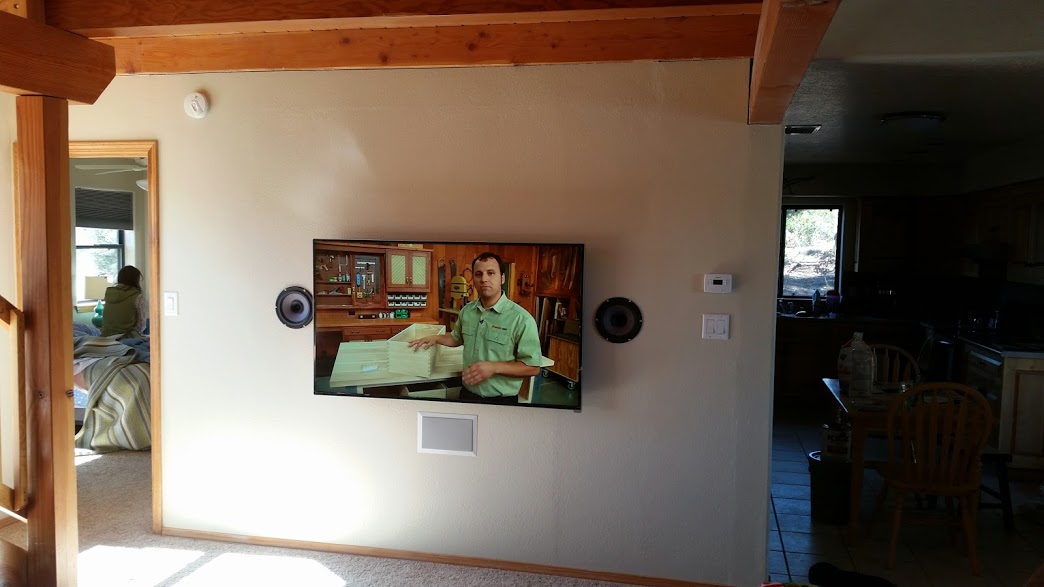

Nasty
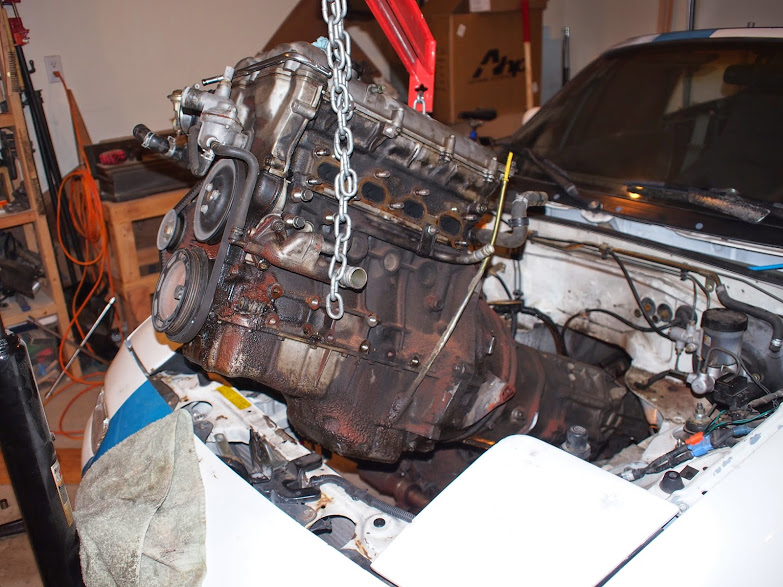
Nasty nasty
Minor oil leaks..... everywhere
Did a lot of skiing, got radical, made some in wall speakers, finished my engine rebuild, and removed one nasty 210Kmile engine. It's been a busy Jan-now.
Nasty
Nasty nasty
Minor oil leaks..... everywhere
Reply
0
0
03-22-2015, 12:43 AM
#19
Junior Member
Thread Starter
iTrader: (1)
Join Date: May 2013
Location: Sandia Park, NM
Posts: 452
Total Cats: 50
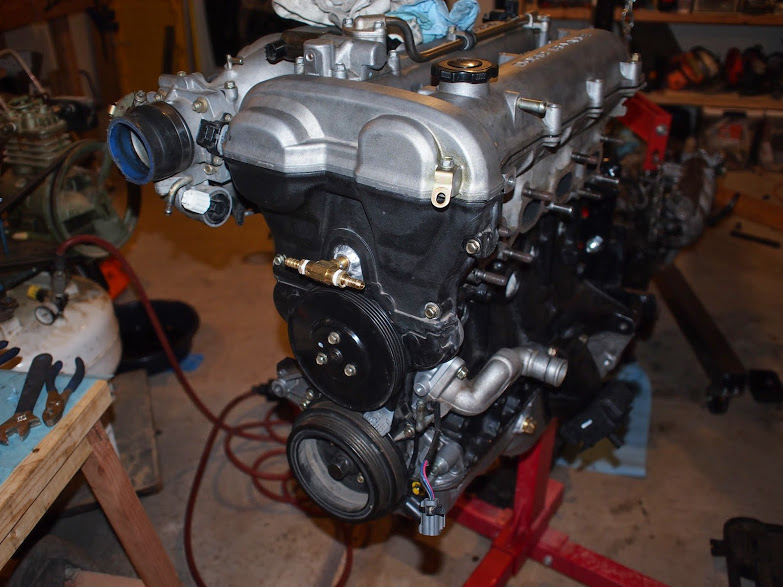
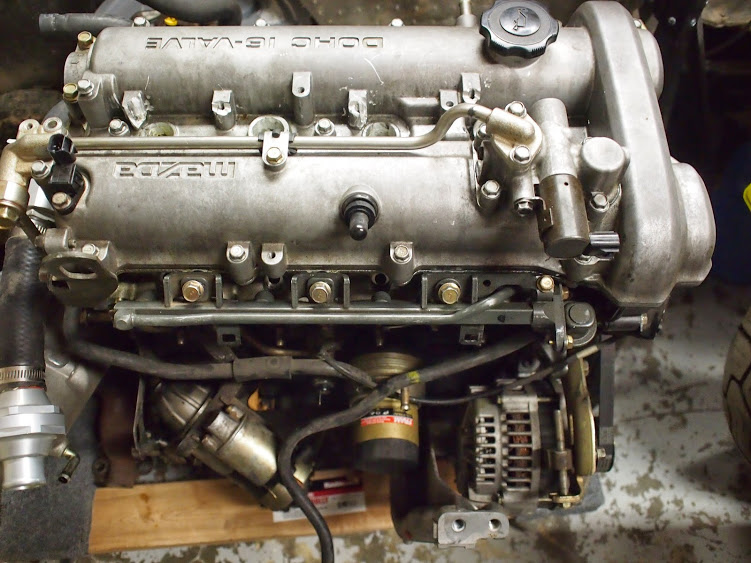
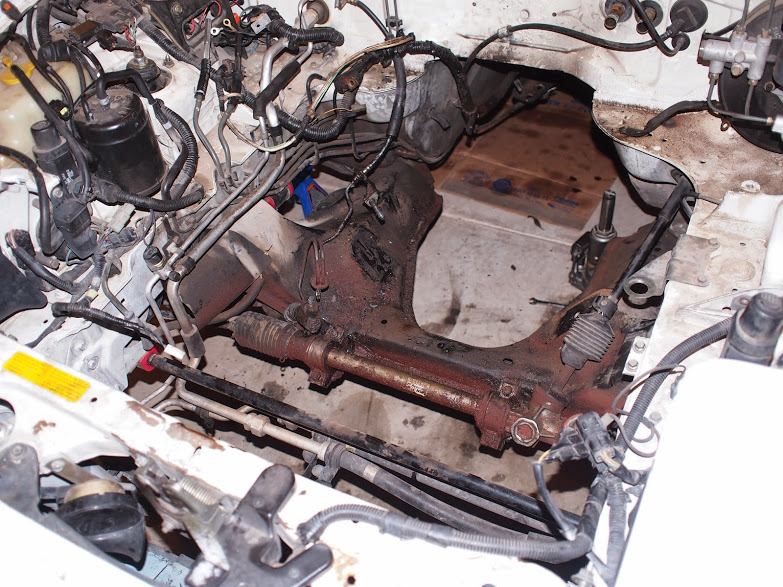
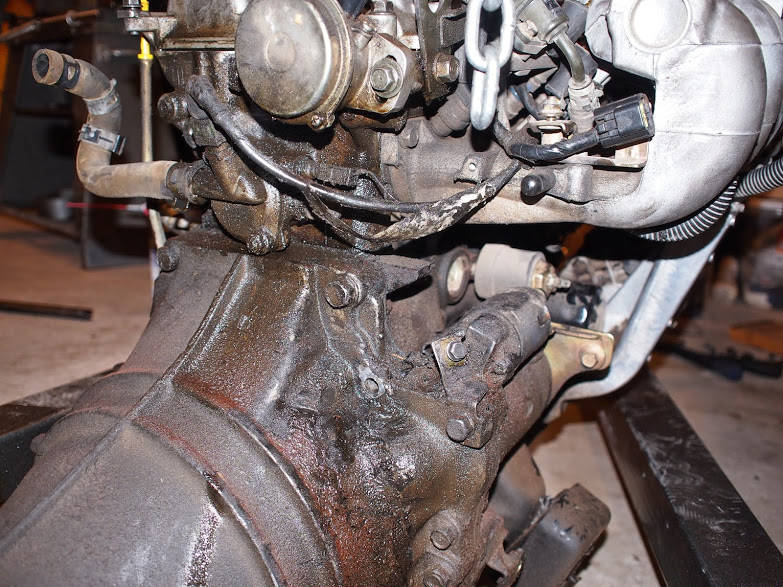
Making some decent progress. Got the engine dropped in just in time to find that the previous engine owner left me yet another little surprise.
I picked up another valve on fleabay so now I have a solid week to clean up loose ends while I wait for that.


Ehhhhh I was told everything was in working order lol.

I picked up another valve on fleabay so now I have a solid week to clean up loose ends while I wait for that.
Ehhhhh I was told everything was in working order lol.
Reply
0
0