The Mazzder MX FIVE Build
 02-22-2015, 08:26 AM
#1
Senior Member
Thread Starter
iTrader: (5)

Join Date: Jan 2014
Location: Mount Pleasant, SC
Posts: 567
Total Cats: 7
The MAZZDER AMM X FIIVVEE – pronounced just like Jeremy Clarkson.
It. Is. Time. I have been waiting for this moment for a while, researching, studying, asking questions, etc. I would like to reintroduce myself on the forum to everyone before I get started. My name is Yazen(pronounced Yahh zen) and I purchased a 1990 all white Miata, pictured below, to be able to turbo a car and to eventually get to auto crossing it.
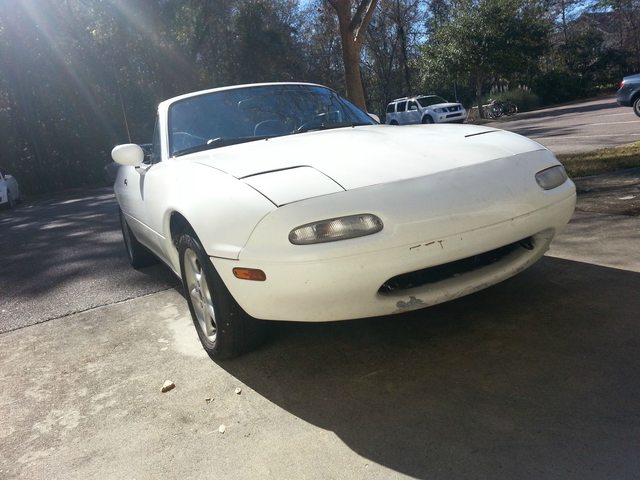
I live in Mount Pleasant South Carolina and have performance goals of getting close to 200 hp on my stock 1.6L and when that blows up a rebuilt 1.8 that I will eventually start on. So I purchased my Miata in January 2014 from an older gentleman who used it as a DD, but seems like had not taken as much care of it as the previous owner who had maintenance history since 1992!
By word of mouth this is apparently one of the first Miatas in Charleston…I started by performing some basic maintenance and clean up to it. Cleaned up the trunk of this black moldiness, it needs more cleaning…changed the oil, changed the rear diff fluid, etc. Then began to drive it around. I first bought a new trunk lid for it as I did not like the one with the black rack on it. It just didn’t look very good. I also painted the brake calipers black and changed the rotors on the rear.
I then purchased some crappy firestone tires just to drive it as a DD to and from work to enjoy it during the warmer months. Then I began to research on the forum and here is my game plan:
200 hp turbocharged 1.6L engine
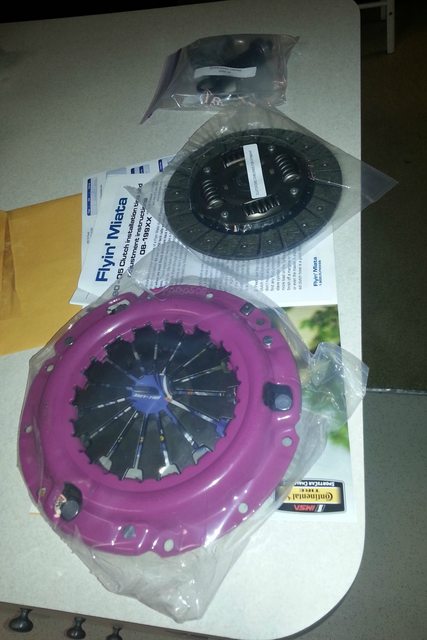
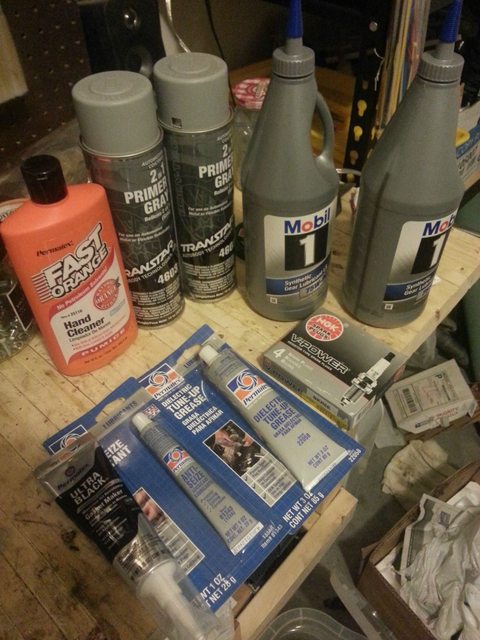
1. Flyin Miata Stage 1 clutch – purchased just not installed – got some nice racing transmission fluid from Sav – thank you there! – bought a 1.8L flywheel for like $40 SWEETNESS!
2. SS brake lines and Motul RBF600 Dot4 brake fluid – installed just need to add the new brake fluid
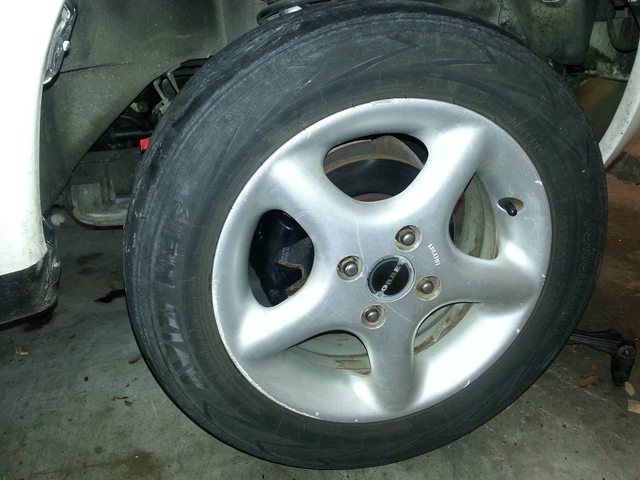
3. Advanti Storm S1s with 22550R15 or some similar tire size
4. Some GOOD coilovers – preferably a tokico combo as 18psi said those were one of the best he has used a while back – input is highly suggested and encouraged!
5. Going with the MK turbo as a tester car for the 1.6 for shuiend! Go MK TRUBO KITTTY POWAH!
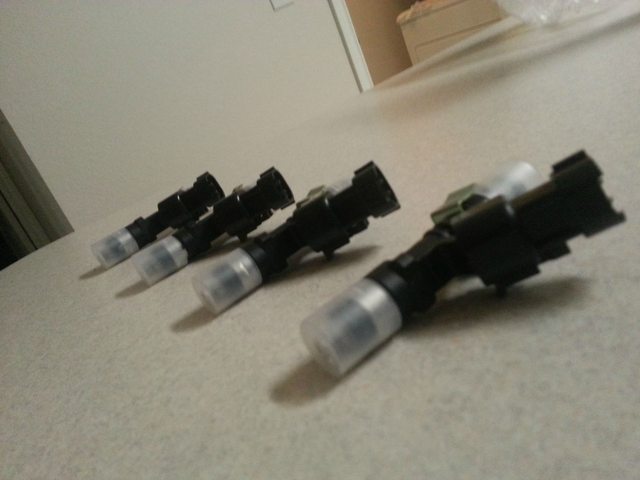
6. Mustang EV14s – purchased just not installed
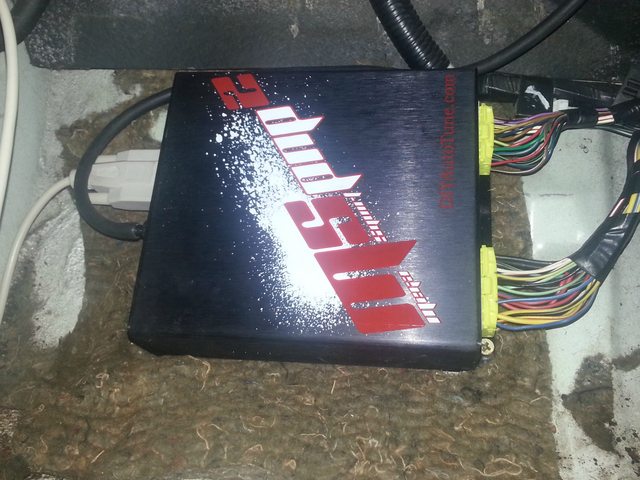
7. Totally forgot…MSPNP2 – installed and still tuning – running a bit rich on the higher engine loads
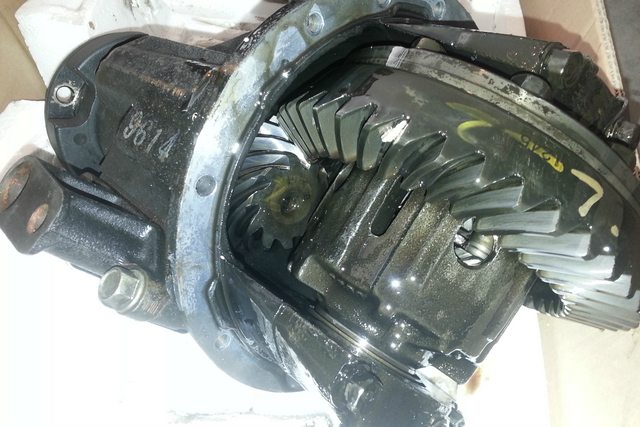
8. Procured a Torsen off a 94 I believe, don’t quote me, for less than $300 buckaroos!! –installing that now with my father! Lots of pics and learnings there! For example don’t hammer the lock nut on the threads to remove a stuck axle…I’ll elaborate more later!
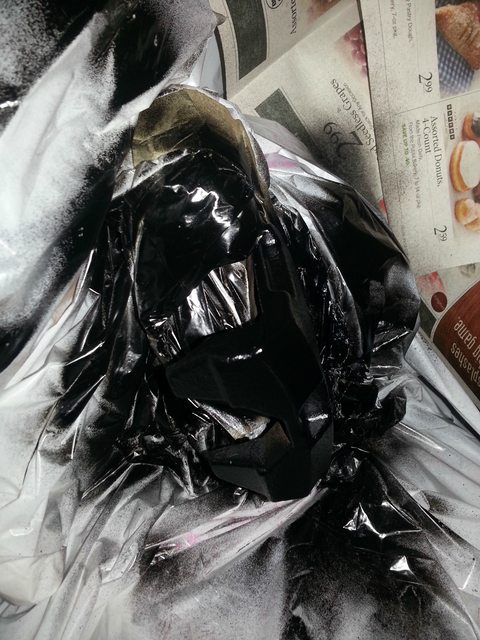
9. Paint that sucker all BLACK – DONE pictures to follow
10. Some blow off valve preferably not an eBay one as I understand safety relief devices from work and this is kind of crucial in the mechanical integrity of the compressor wheel.
11. MTX L – Installed and pictures to follow.
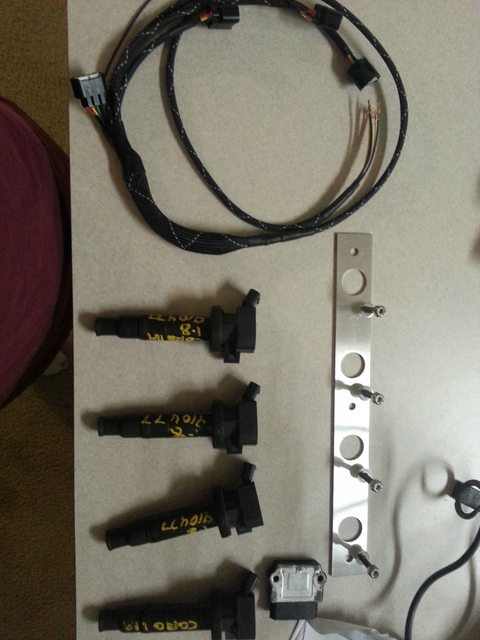
12. Trackspeed engineering Coil on plugs – need to upgrade sparks when I turbo.
13. Ebay intercooler probably for now – even know I know the importance of a solid heat exchanger… I will let it go. For you nerds:
Q=hA(T2-T1) even though we have to factor in pressure drop for automotive applications that is still the basic equation.
14. Other stuff I am forgetting!
So that leads me to give you all more to read and look at with pictures from the items that took me some time in the past.
First was converting over to a MSPNP2, which is pretty fun and easy when you pay close attention to details. Found a bunch of rust under the condenser? of the AC unit. Anyways right or wrong on that had to pry that sucker out because PB blaster did not do much good. If I had used CRC's freeze off stuff that would have worked like a charm. It works on EVERYTHING and anything!

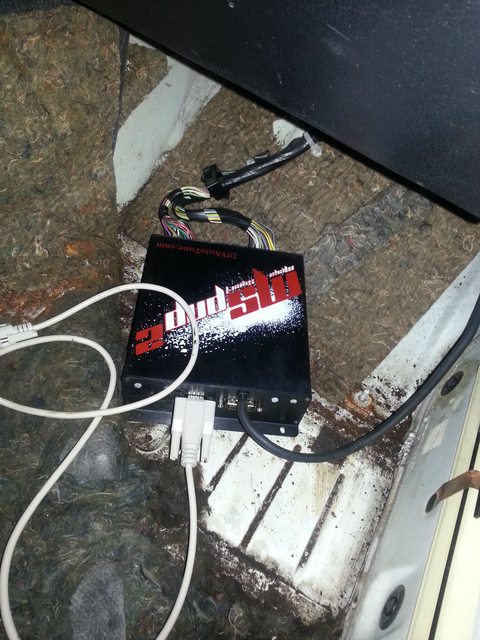
I literally just drilled 4 holes in the floor pan and screwed in some screws. Worked like a charm. I kept the padding behind it to reduce vibration of the unit and overall noise.
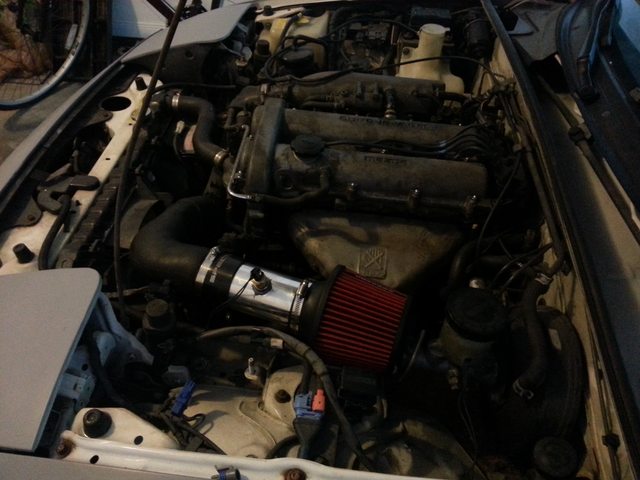
I got a GM IAT and a cone filter from advanced auto and got those installed. The connector was being a dick and I just used high temp electrical tape in its stead. I WILL FIX THAT I PROMISE! Zip ties all around to remind me of how professional my installs are!
PACKAGE!
That piece of pipe did not do the job I wanted because it created a moment arm on the assembly and caused it to move around too much. It also kept the pod filter way too close to the exhaust manifold.
My solution for it:
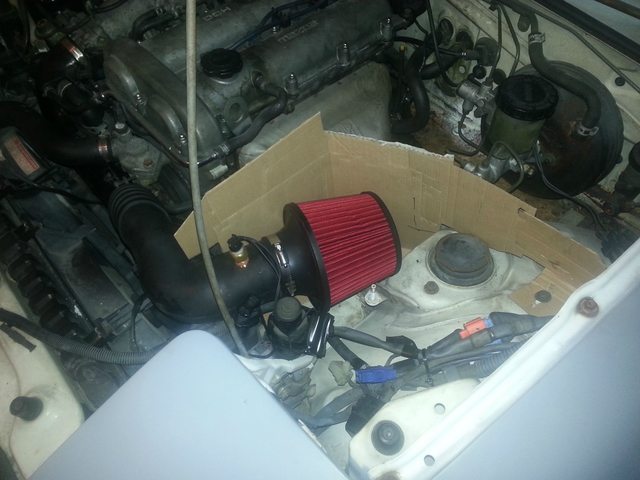
I was going to get some sheet metal from Lowes and do the popsicle stick thing with the cardboard to get this thing just right buuuut I wanted to focus my efforts elsewhere to be able to get some turbo power sooner rather than later.
I managed to locate the correct wires to solder into and found that both Weller soldering irons that I borrowed from work did not heat the wire up enough so I had to cheat and touch the iron to the solder…for shame I know…
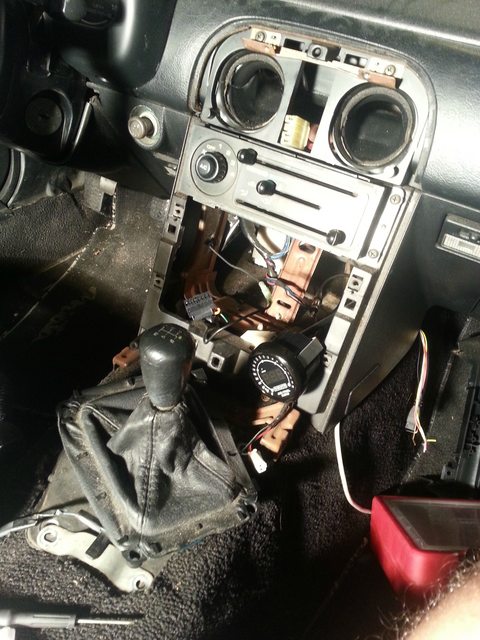
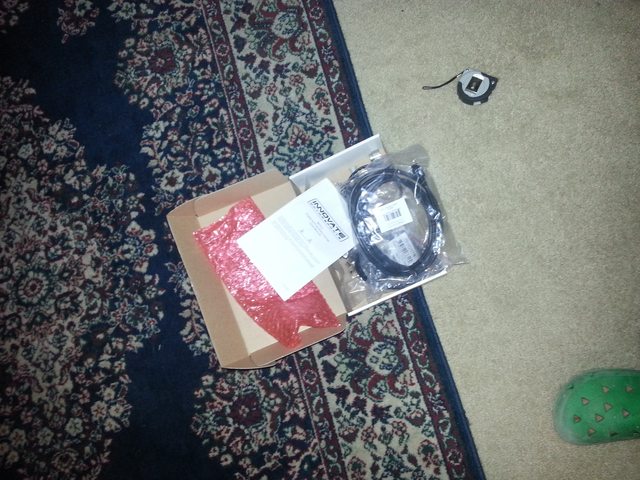
I also got the Innovate Motorsports MTX L installed and now its just dangling in the center console compartment.
I plan on getting one of those 3 gauge things (DDM Motorsports or something) and have my boost gauge there to keep the inside clean.
My next thing was cleaning up the braking system. I managed to put some fresh fluid in and take care of the slave cylinder by just putting some fresh fluid through both when my father visited.
Went ahead and painted the calipers...(I can feel the judgement, but I am good )
)
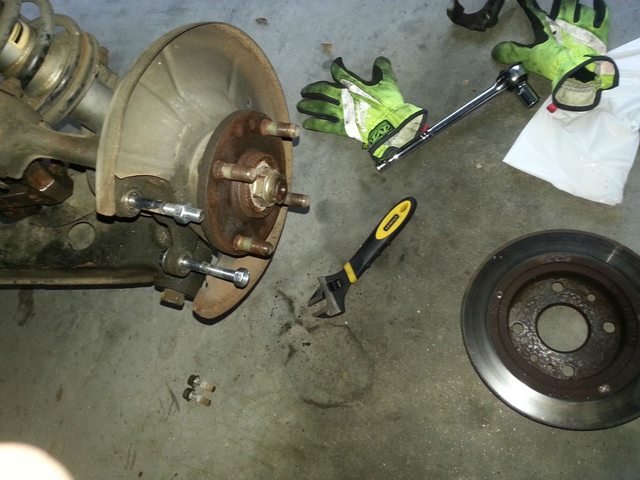
Right before I was doing this I wanted to change front rotors and I had one that was stuck. Luckily I used the tighten the grade 8 bolts to pop that sucker off trick. IT LITERALLY POPS OFF!
I think some pictures are in order of when I officially converted the car to a ricer by painting brake calipers. I like the subtleness of the black.
I also installed some turn signal induction lights as I was getting intake temperatures of 135 deg F because of my poor location of the pod filter next to the exhaust manifold…Going to leave it like that so I can focus spending on turbo stuff!
Disclaimer: I understand that putting the turn signal induction lights could yield some higher engine bay internal pressures but that is ok with me for now.
Now onto the next thing was installing stainless steel braided brake lines. Just some pictures. I am not going to detail this one as its more straight forward than the directions from DIYAutotune.
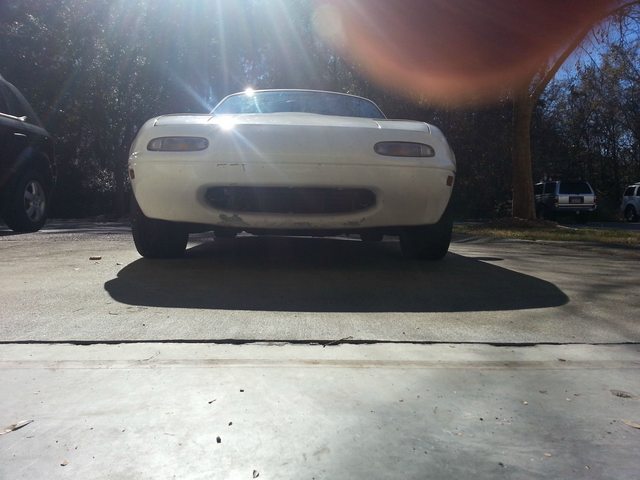
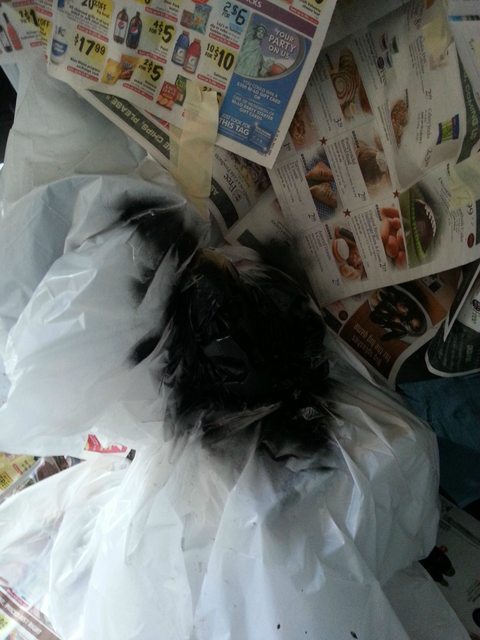
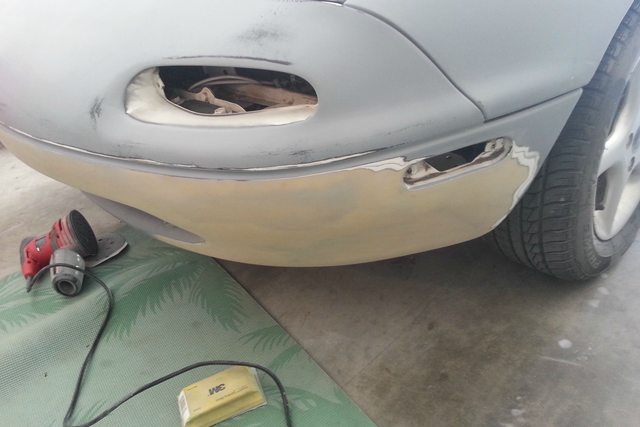
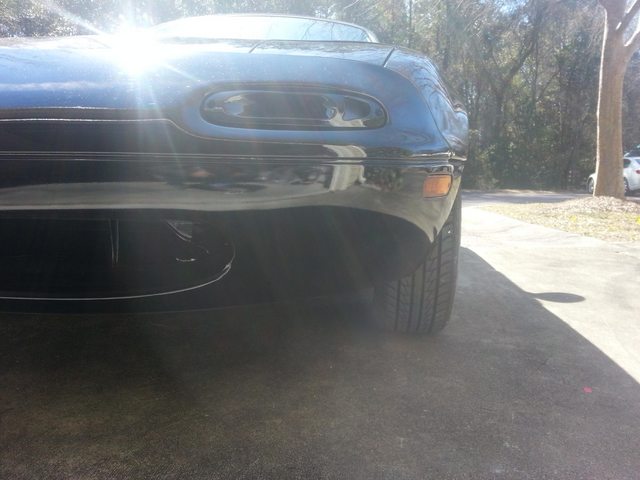
I then got EXTREMELY OCD about the paint job out of nowhere…I entertained the idea of a neighbor painting the miata for me for $100 not including the cost of paint and primer and stuff…which btw is like $300 from the store he wanted to get it from. So I then began to sand the front bumper finding LOADS of imperfections and things that upset me in ways I cannot explain.

Haha. So over the course of months I got stuck on this idea and wasted tons of time I could have been working on turbo kitty powahhh!
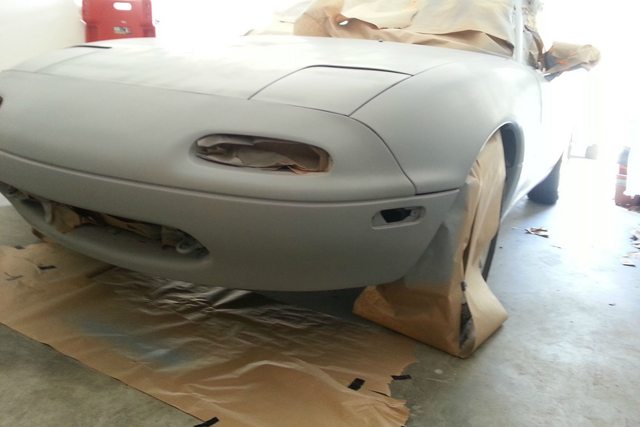
So I finally got it all primered and to where I was satisfied with it and the guy who wanted to paint it started acting flaky…Like your side girl when she meets a guy and starts liking him…LOL JK. My jokes are terrible ignore them. So I finally got the thing painted 2/19/2015 which was two days ago from when I am writing this.
I actually went back and tried to do a better job on the front bumper because of all of the noticeable impurrrrfections. (LOL)
ALL BLACK! MAACO took care of it and actually messed up so I will have to take it to them next week again for them to fix it. By the way, some people are kind and some people are dicks and the guy who owns this place is a dick. That is all I will remark on that!

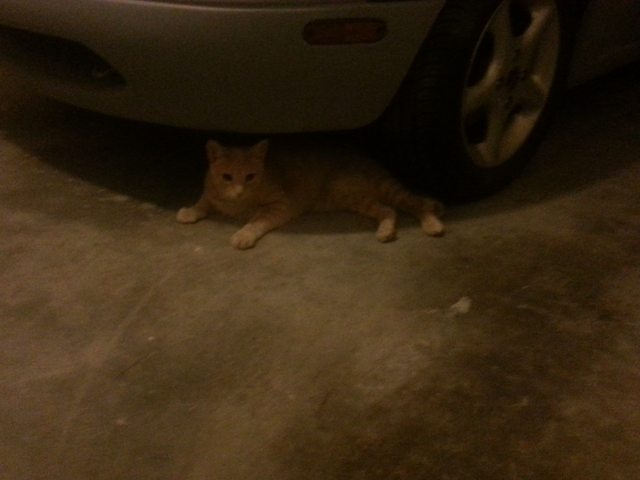
TURBO KITTY!
I also have changed the spark plugs out and found them to be extremely fouled up and 0.010” off where they need to be. I replaced them with what was recommended to me by Trackspeed Engineering. Thanks for the support there!
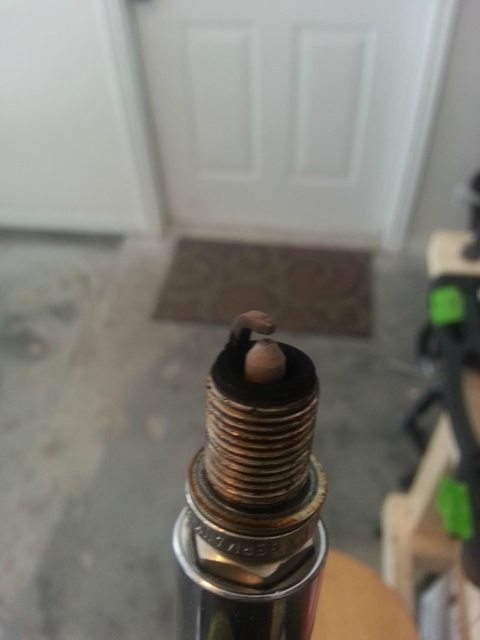
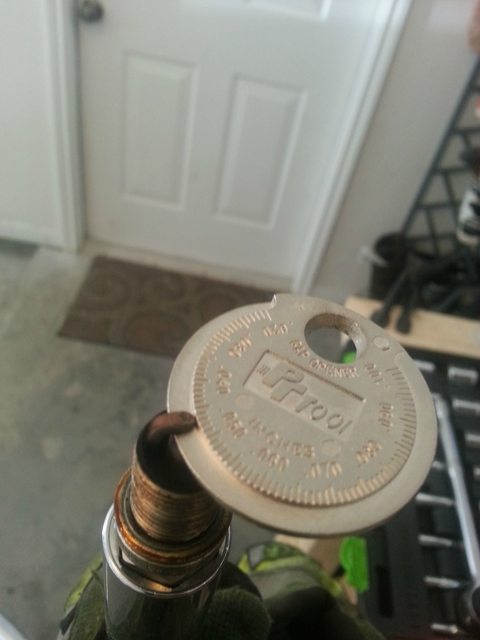
By the way, this definitely helped the idle sound smoother. I would recommend doing this when you first buy the car as it only costs like $20 for the dielectric grease, anti sieze and the plugs from advanced auto.
I also received the EV14's from a fellow MT.netter a couple weeks back.
I also got the FM1 clutch. Wish I bought the happy meal as I have this heavy 1.8 flywheel in my garage that could have been 10 lbs lighter...might see what it takes a machine shop to lighten and balance it...
I bought the Torsen LSD (I believe to be a 4.1 ratio) only $300 from someone! Hot dog! Pulled it apart to inspect it a couple weeks ago!

The kind gentleman also was selling TSE COP kit for $100 bucks so I jumped on it ($200 of savings there).
GO HOKIES! – Yes that is hokie stone from when they were building Lavary Hall aka Turner’s to the local folk!
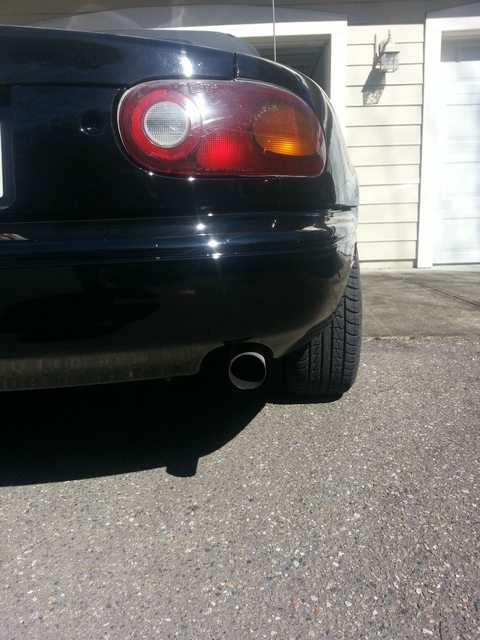
Put a >2" test pipe to give the exhaust some better stock sounds! This is like the second ricer thing I have done...Oh no I might be....A RICER! Haha JK. Once again ignore the jokes.
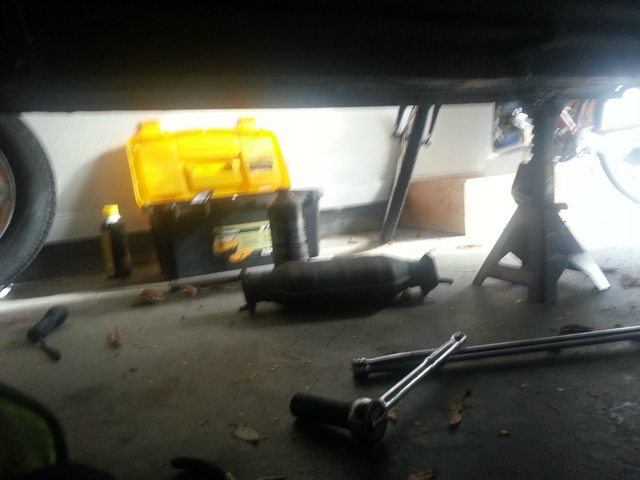
Prepping for the weekend!
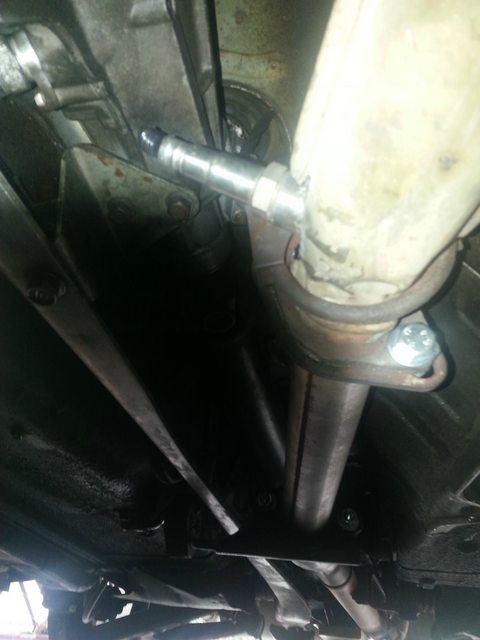
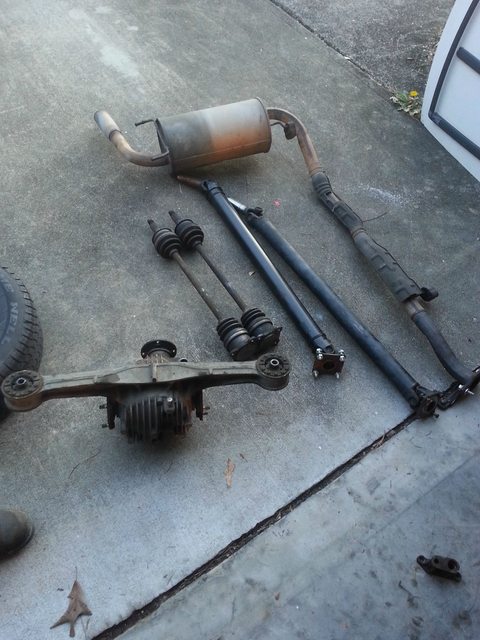
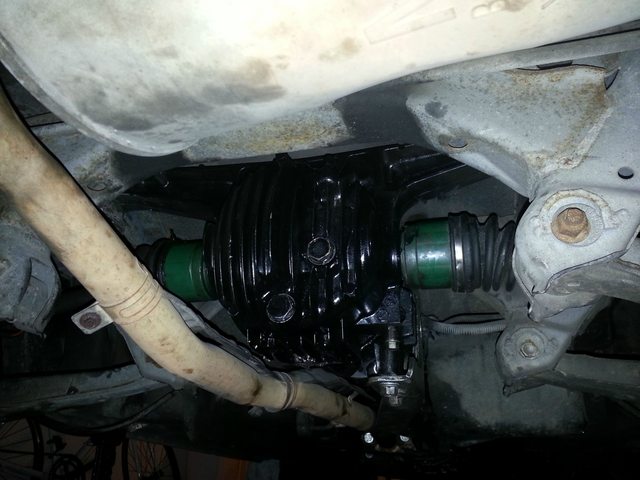
Now back to this present weekend…My father and I are working on getting this stock rear diff out and it took us 6 hours to pull it out because of 1 stupid component that would not want us to separate it from the power plant frame (PPF). Ignore my explaining some of the acronyms, I am doing this write up for some of my family to read up on as well. The first day we managed to get out all of the components from the car (25 years old hard to believe they even came out!)
Note to people doing this job. Screw the torch and get some crc freeze off! This stuff is FANTASTIC! Also buy that new craftsman high torque impact wrench. 300 ft-lbs of torque made breaking any bolt easy. Just wear some ear plugs so it doesn't sound like you just got back from a concert...
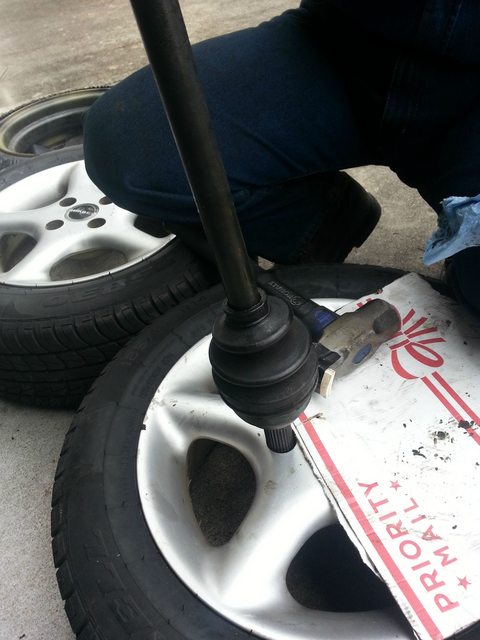
That took all of 6 hours which includes going to the store to buy the freeze off an seperating the Torsen halfshafts from the axle nuts. DO NOT USE THE NUT TO HAMMER THESE THINGS FREE! Get a piece of wood or a punch and hammer right on the head of the spline shaft. It works like a charm. You are applying a ring load on the shaft instead of a concentrated/evenly distributed load on the head of the spline shaft. Much better and will save you a lot of heartache as at the conclusion of this install (spoiler alert!) i could barely get the new axle nuts on because we destroyed some threading.
Back to work the next day!
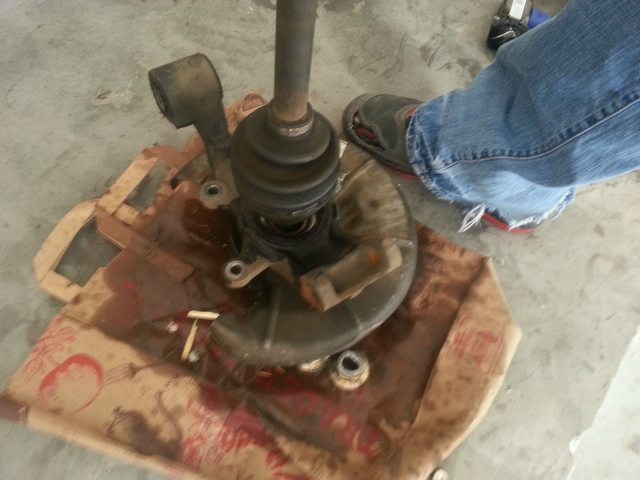
Had to move the wheel bearing around by removing the boot and then hammer the spline shaft in. That worked very well.
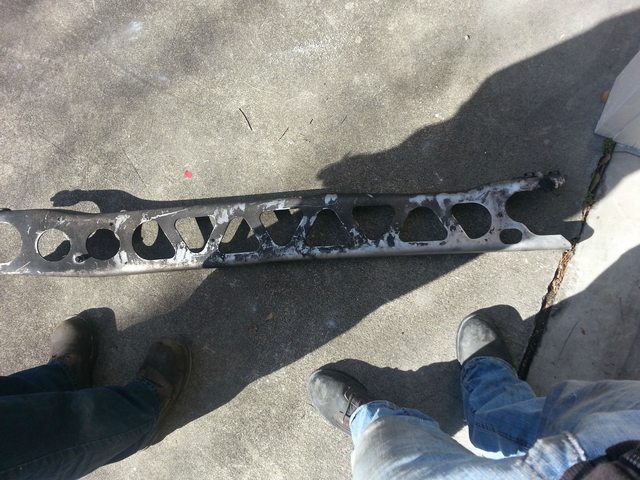
Then we continued on working and removed the PPF and gave it a nice buff. Thanks Dad for that. That's the picture of it dirty so not very good before and after, but I can promise you it shines like a diamond now.
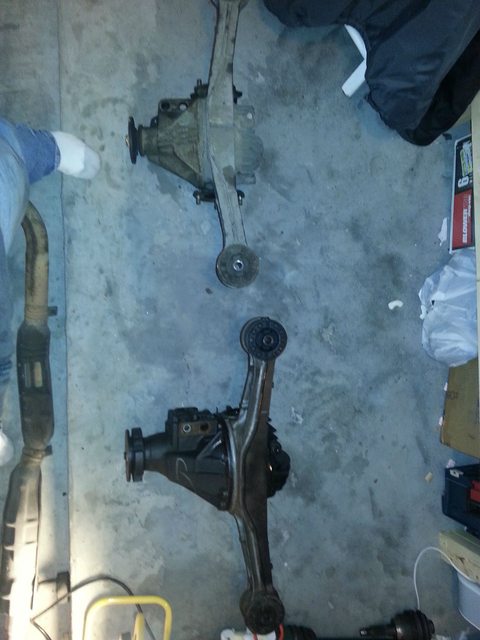
Cool comparison to note.
All done!
That pretty much sums up my past year and a half.
I will continue to post more as I go. It will be slow so be patient. I hope all of the image links are good and the write up is not to grammatically incorrect. Please post any criticism, feedback, encouragement or whatever as this forum has been the sole reason I could do a lot of this work. I hope everyone enjoys the read and hope to have turbo kitty powahhhh by summer by using an MK Turbo setup.
It. Is. Time. I have been waiting for this moment for a while, researching, studying, asking questions, etc. I would like to reintroduce myself on the forum to everyone before I get started. My name is Yazen(pronounced Yahh zen) and I purchased a 1990 all white Miata, pictured below, to be able to turbo a car and to eventually get to auto crossing it.
I live in Mount Pleasant South Carolina and have performance goals of getting close to 200 hp on my stock 1.6L and when that blows up a rebuilt 1.8 that I will eventually start on. So I purchased my Miata in January 2014 from an older gentleman who used it as a DD, but seems like had not taken as much care of it as the previous owner who had maintenance history since 1992!
By word of mouth this is apparently one of the first Miatas in Charleston…I started by performing some basic maintenance and clean up to it. Cleaned up the trunk of this black moldiness, it needs more cleaning…changed the oil, changed the rear diff fluid, etc. Then began to drive it around. I first bought a new trunk lid for it as I did not like the one with the black rack on it. It just didn’t look very good. I also painted the brake calipers black and changed the rotors on the rear.
I then purchased some crappy firestone tires just to drive it as a DD to and from work to enjoy it during the warmer months. Then I began to research on the forum and here is my game plan:
200 hp turbocharged 1.6L engine
1. Flyin Miata Stage 1 clutch – purchased just not installed – got some nice racing transmission fluid from Sav – thank you there! – bought a 1.8L flywheel for like $40 SWEETNESS!
2. SS brake lines and Motul RBF600 Dot4 brake fluid – installed just need to add the new brake fluid
3. Advanti Storm S1s with 22550R15 or some similar tire size
4. Some GOOD coilovers – preferably a tokico combo as 18psi said those were one of the best he has used a while back – input is highly suggested and encouraged!
5. Going with the MK turbo as a tester car for the 1.6 for shuiend! Go MK TRUBO KITTTY POWAH!
6. Mustang EV14s – purchased just not installed
7. Totally forgot…MSPNP2 – installed and still tuning – running a bit rich on the higher engine loads
8. Procured a Torsen off a 94 I believe, don’t quote me, for less than $300 buckaroos!! –installing that now with my father! Lots of pics and learnings there! For example don’t hammer the lock nut on the threads to remove a stuck axle…I’ll elaborate more later!
9. Paint that sucker all BLACK – DONE pictures to follow
10. Some blow off valve preferably not an eBay one as I understand safety relief devices from work and this is kind of crucial in the mechanical integrity of the compressor wheel.
11. MTX L – Installed and pictures to follow.
12. Trackspeed engineering Coil on plugs – need to upgrade sparks when I turbo.
13. Ebay intercooler probably for now – even know I know the importance of a solid heat exchanger… I will let it go. For you nerds:
Q=hA(T2-T1) even though we have to factor in pressure drop for automotive applications that is still the basic equation.
14. Other stuff I am forgetting!
So that leads me to give you all more to read and look at with pictures from the items that took me some time in the past.
First was converting over to a MSPNP2, which is pretty fun and easy when you pay close attention to details. Found a bunch of rust under the condenser? of the AC unit. Anyways right or wrong on that had to pry that sucker out because PB blaster did not do much good. If I had used CRC's freeze off stuff that would have worked like a charm. It works on EVERYTHING and anything!
I literally just drilled 4 holes in the floor pan and screwed in some screws. Worked like a charm. I kept the padding behind it to reduce vibration of the unit and overall noise.
I got a GM IAT and a cone filter from advanced auto and got those installed. The connector was being a dick and I just used high temp electrical tape in its stead. I WILL FIX THAT I PROMISE! Zip ties all around to remind me of how professional my installs are!
PACKAGE!
That piece of pipe did not do the job I wanted because it created a moment arm on the assembly and caused it to move around too much. It also kept the pod filter way too close to the exhaust manifold.
My solution for it:
I was going to get some sheet metal from Lowes and do the popsicle stick thing with the cardboard to get this thing just right buuuut I wanted to focus my efforts elsewhere to be able to get some turbo power sooner rather than later.
I managed to locate the correct wires to solder into and found that both Weller soldering irons that I borrowed from work did not heat the wire up enough so I had to cheat and touch the iron to the solder…for shame I know…
I also got the Innovate Motorsports MTX L installed and now its just dangling in the center console compartment.
I plan on getting one of those 3 gauge things (DDM Motorsports or something) and have my boost gauge there to keep the inside clean.
My next thing was cleaning up the braking system. I managed to put some fresh fluid in and take care of the slave cylinder by just putting some fresh fluid through both when my father visited.
Went ahead and painted the calipers...(I can feel the judgement, but I am good
) Right before I was doing this I wanted to change front rotors and I had one that was stuck. Luckily I used the tighten the grade 8 bolts to pop that sucker off trick. IT LITERALLY POPS OFF!
I think some pictures are in order of when I officially converted the car to a ricer by painting brake calipers. I like the subtleness of the black.
I also installed some turn signal induction lights as I was getting intake temperatures of 135 deg F because of my poor location of the pod filter next to the exhaust manifold…Going to leave it like that so I can focus spending on turbo stuff!
Disclaimer: I understand that putting the turn signal induction lights could yield some higher engine bay internal pressures but that is ok with me for now.
Now onto the next thing was installing stainless steel braided brake lines. Just some pictures. I am not going to detail this one as its more straight forward than the directions from DIYAutotune.
I then got EXTREMELY OCD about the paint job out of nowhere…I entertained the idea of a neighbor painting the miata for me for $100 not including the cost of paint and primer and stuff…which btw is like $300 from the store he wanted to get it from. So I then began to sand the front bumper finding LOADS of imperfections and things that upset me in ways I cannot explain.
Haha. So over the course of months I got stuck on this idea and wasted tons of time I could have been working on turbo kitty powahhh!
So I finally got it all primered and to where I was satisfied with it and the guy who wanted to paint it started acting flaky…Like your side girl when she meets a guy and starts liking him…LOL JK. My jokes are terrible ignore them. So I finally got the thing painted 2/19/2015 which was two days ago from when I am writing this.
I actually went back and tried to do a better job on the front bumper because of all of the noticeable impurrrrfections. (LOL)
ALL BLACK! MAACO took care of it and actually messed up so I will have to take it to them next week again for them to fix it. By the way, some people are kind and some people are dicks and the guy who owns this place is a dick. That is all I will remark on that!
TURBO KITTY!
I also have changed the spark plugs out and found them to be extremely fouled up and 0.010” off where they need to be. I replaced them with what was recommended to me by Trackspeed Engineering. Thanks for the support there!
By the way, this definitely helped the idle sound smoother. I would recommend doing this when you first buy the car as it only costs like $20 for the dielectric grease, anti sieze and the plugs from advanced auto.
I also received the EV14's from a fellow MT.netter a couple weeks back.
I also got the FM1 clutch. Wish I bought the happy meal as I have this heavy 1.8 flywheel in my garage that could have been 10 lbs lighter...might see what it takes a machine shop to lighten and balance it...
I bought the Torsen LSD (I believe to be a 4.1 ratio) only $300 from someone! Hot dog! Pulled it apart to inspect it a couple weeks ago!
The kind gentleman also was selling TSE COP kit for $100 bucks so I jumped on it ($200 of savings there).
GO HOKIES! – Yes that is hokie stone from when they were building Lavary Hall aka Turner’s to the local folk!
Put a >2" test pipe to give the exhaust some better stock sounds! This is like the second ricer thing I have done...Oh no I might be....A RICER! Haha JK. Once again ignore the jokes.
Prepping for the weekend!
Now back to this present weekend…My father and I are working on getting this stock rear diff out and it took us 6 hours to pull it out because of 1 stupid component that would not want us to separate it from the power plant frame (PPF). Ignore my explaining some of the acronyms, I am doing this write up for some of my family to read up on as well. The first day we managed to get out all of the components from the car (25 years old hard to believe they even came out!)
Note to people doing this job. Screw the torch and get some crc freeze off! This stuff is FANTASTIC! Also buy that new craftsman high torque impact wrench. 300 ft-lbs of torque made breaking any bolt easy. Just wear some ear plugs so it doesn't sound like you just got back from a concert...
That took all of 6 hours which includes going to the store to buy the freeze off an seperating the Torsen halfshafts from the axle nuts. DO NOT USE THE NUT TO HAMMER THESE THINGS FREE! Get a piece of wood or a punch and hammer right on the head of the spline shaft. It works like a charm. You are applying a ring load on the shaft instead of a concentrated/evenly distributed load on the head of the spline shaft. Much better and will save you a lot of heartache as at the conclusion of this install (spoiler alert!) i could barely get the new axle nuts on because we destroyed some threading.
Back to work the next day!
Had to move the wheel bearing around by removing the boot and then hammer the spline shaft in. That worked very well.
Then we continued on working and removed the PPF and gave it a nice buff. Thanks Dad for that. That's the picture of it dirty so not very good before and after, but I can promise you it shines like a diamond now.
Cool comparison to note.
All done!
That pretty much sums up my past year and a half.
I will continue to post more as I go. It will be slow so be patient. I hope all of the image links are good and the write up is not to grammatically incorrect. Please post any criticism, feedback, encouragement or whatever as this forum has been the sole reason I could do a lot of this work. I hope everyone enjoys the read and hope to have turbo kitty powahhhh by summer by using an MK Turbo setup.
Last edited by ysleem; 02-23-2015 at 06:58 PM. Reason: Updating Pictures - DONE

Reply
 2
2

2
02-22-2015, 09:13 AM
#3
Senior Member
Thread Starter
iTrader: (5)
Join Date: Jan 2014
Location: Mount Pleasant, SC
Posts: 567
Total Cats: 7
https://drive.google.com/file/d/0B-F...ew?usp=sharing
See if that works. Download and read at your own pace! Enjoy!
See if that works. Download and read at your own pace! Enjoy!
Reply
0
0
02-25-2015, 04:05 PM
#5
Senior Member
Thread Starter
iTrader: (5)
Join Date: Jan 2014
Location: Mount Pleasant, SC
Posts: 567
Total Cats: 7
Considering purchasing a fab9 intercooler. I have considered begi and FM. Any other vendor considerations that could be made for a quality IC? Ebay is out.
Reply
0
0
02-25-2015, 04:57 PM
#7
Senior Member
Thread Starter
iTrader: (5)
Join Date: Jan 2014
Location: Mount Pleasant, SC
Posts: 567
Total Cats: 7
Reply
0
0
 03-02-2015, 09:42 AM
#11
Senior Member
Thread Starter
iTrader: (5)
Join Date: Jan 2014
Location: Mount Pleasant, SC
Posts: 567
Total Cats: 7
So update for those interested:
Purchased ebay intercooler and it should be arriving this week.
Just purchased a sweet looking boost gauge! Autometer #5903.
Need to buy a gauge panel from trackdog this week to mount them.
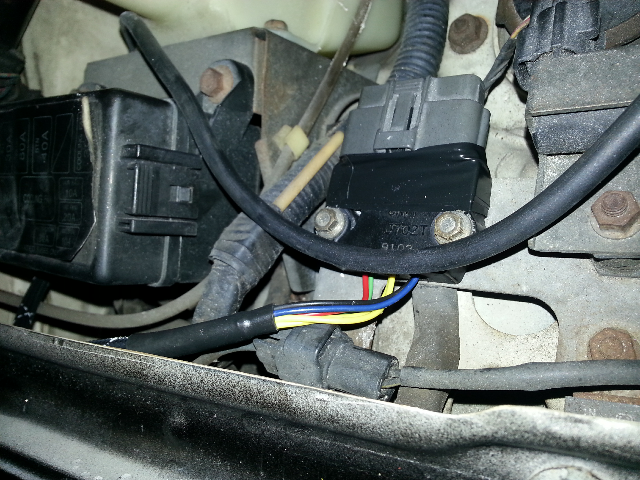
Installed toyota cops yesterday and turned over the mazderr and the idle was very different. Seems like the rpms were very high and the car was almost shaking so I'm doing some research based largely on 3 of Brain's posts and trying to hammer that out this week. I set the cranking dwell to 3.5ms and the nominal dwell to 3ms so It looks like I need to lower the nominal a little more and make some adjustments to the dwell battery adjustment. So more to come there. Any input would be very helpful so I dont burn up a coil or two. Lol. Pics of install for your viewing pleasure.
Purchased ebay intercooler and it should be arriving this week.
Just purchased a sweet looking boost gauge! Autometer #5903.
Need to buy a gauge panel from trackdog this week to mount them.
Installed toyota cops yesterday and turned over the mazderr and the idle was very different. Seems like the rpms were very high and the car was almost shaking so I'm doing some research based largely on 3 of Brain's posts and trying to hammer that out this week. I set the cranking dwell to 3.5ms and the nominal dwell to 3ms so It looks like I need to lower the nominal a little more and make some adjustments to the dwell battery adjustment. So more to come there. Any input would be very helpful so I dont burn up a coil or two. Lol. Pics of install for your viewing pleasure.
Reply
0
0
 03-02-2015, 01:47 PM
#19
SADFab Destructive Testing Engineer


iTrader: (5)
Join Date: Apr 2014
Location: Beaverton, USA
Posts: 18,642
Total Cats: 1,866
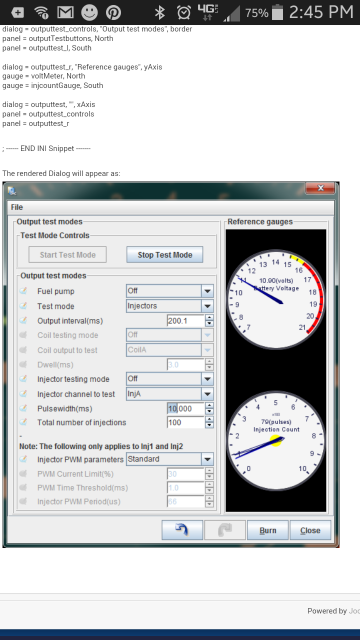
Open test menu:

Inj/Spk test:

Enable test mode:

Select whichever coil you want to test and press start:

Then test for spark. Press stop, switch to coil b and press start again. Do this for ABCD if you have sequential spark and A and B if you have batch spark.
If sequential then:
A = 1
B = 3
C = 4
D = 2
If batch:
A = 1 & 4
B = 3 & 2
Inj/Spk test:
Enable test mode:
Select whichever coil you want to test and press start:
Then test for spark. Press stop, switch to coil b and press start again. Do this for ABCD if you have sequential spark and A and B if you have batch spark.
If sequential then:
A = 1
B = 3
C = 4
D = 2
If batch:
A = 1 & 4
B = 3 & 2
Reply
0
0