Moderate Power on 1999
 12-11-2013, 07:02 PM
#1
Retired Mech Design Engr

Thread Starter
iTrader: (3)
Join Date: Jan 2013
Location: Seneca, SC
Posts: 5,009
Total Cats: 857
Finally, I think I am ready to start my build thread.
Started with a stock 1999 with 80K miles. Purchased from original owner.
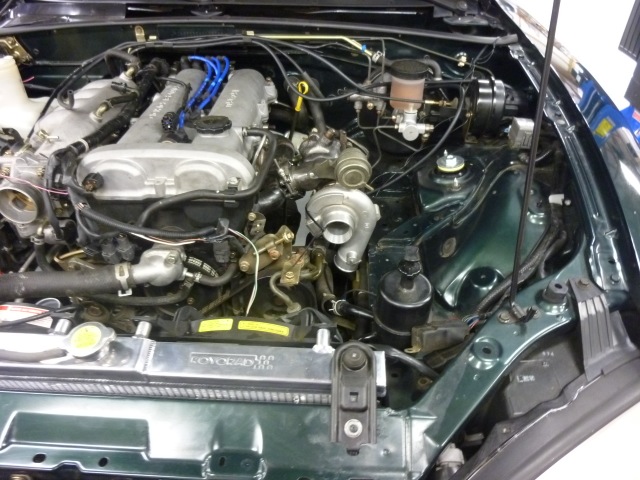
I determined, by no good method, that 200 or so WHP would be fine. Target is driving in the mountains and some Autocross. Karter74’s dyno with TD04L-13T, along with Sturovo and 18PSI’s commentaries directed me to that turbo. No need to build the engine for this.

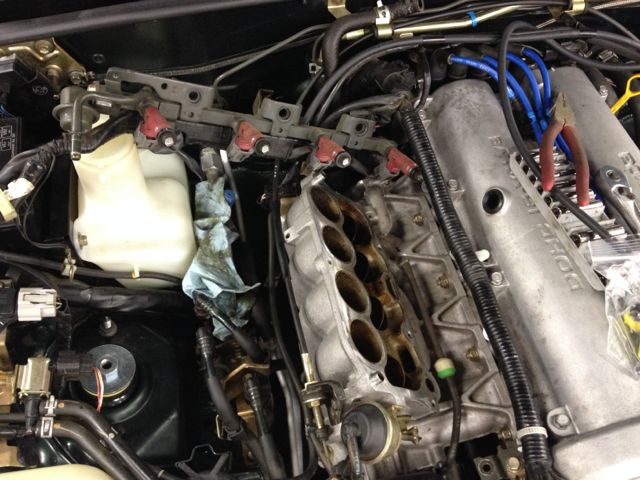
Stock Engine
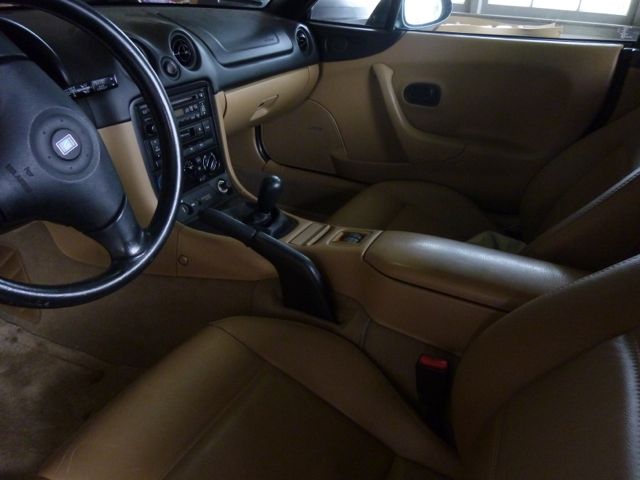
Stock Interior
I was planning to stage the boost, starting with stock exhaust and clutch. However, my Son-in-law (welding skills) talked me into going ahead with the clutch. Hence I plan to go ahead with the exhaust as well… and the COP’s.
Accumulated parts. (see below). Many used from various sources.
Began running 93 Octane gas.
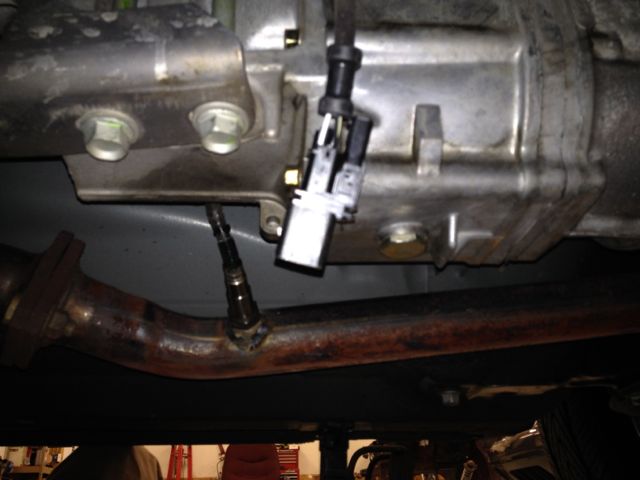
Installed EGO and AFR gauge (Innovate LC-2) and Boost Gage.
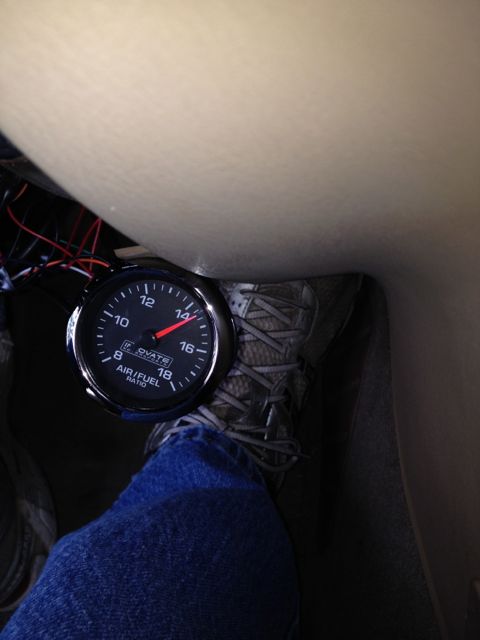
Temporary when running Stock ECU
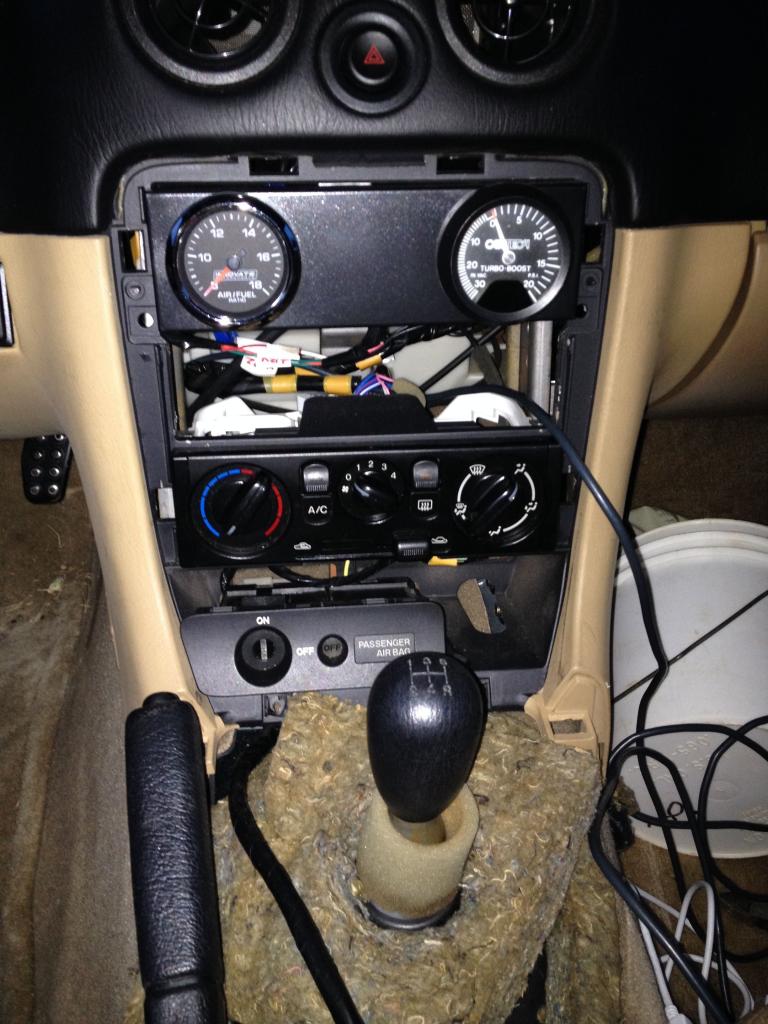
More permanent install, waiting on USB cable and other switches before radio goes back in.
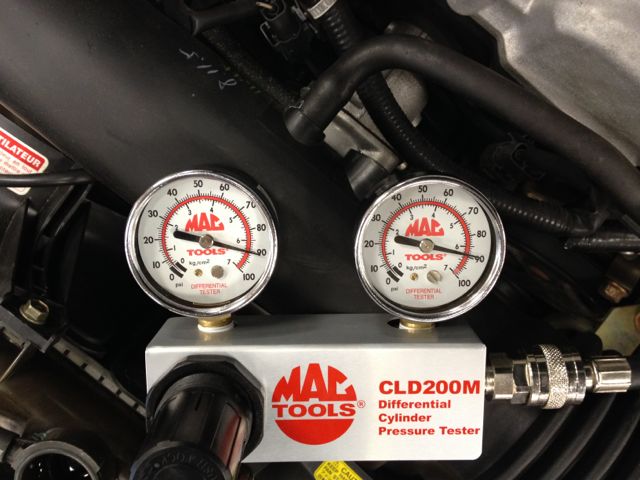
Ran Leak-down test. From 1 to 8 percent. Honestly, I think the 8% was due to engine getting cold by the time I got 2 and 3 done, due to fighting with motor turning during test.
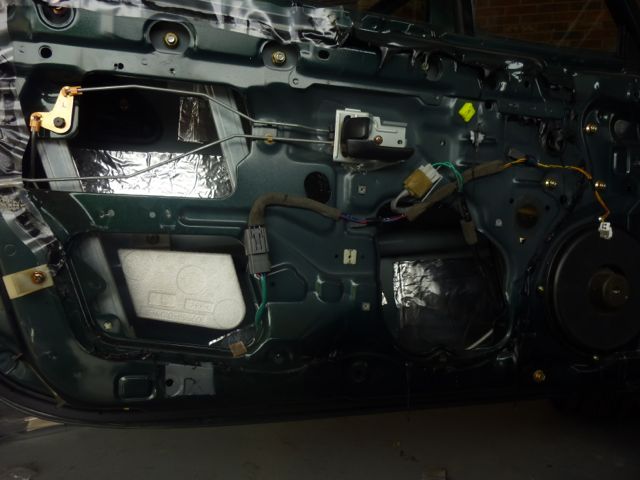
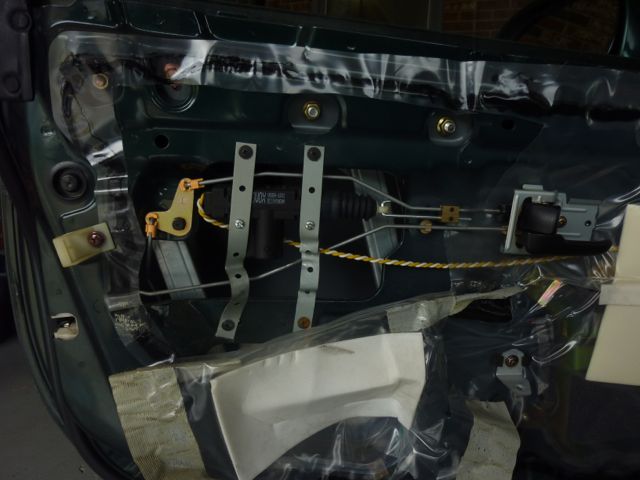
I also took the time to remove remnants of old alarm, install Crearwater speakers, lube the window runners, and add some sound deadening.
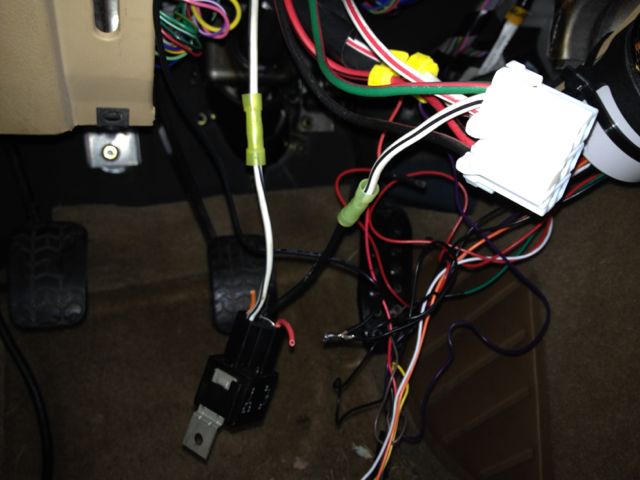
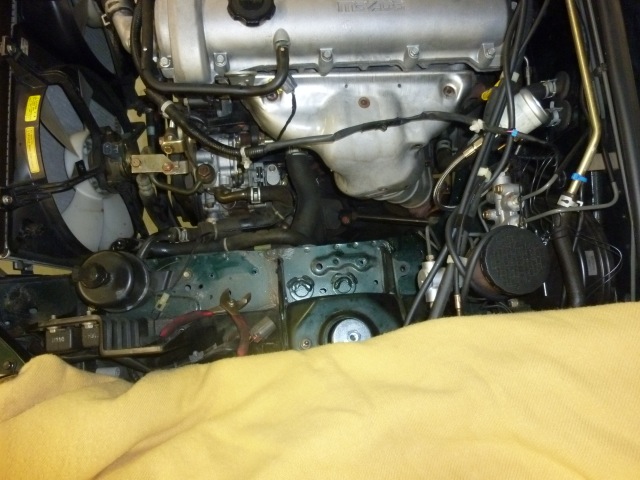
Installed and tuned MS3 Basic from Reverant. Temporarily mounted with Zip ties. I removed Power Door Lock relay to give a little room. Also altered outlet of DB37 and utilized Tee to prevent kink in MAP tubing
.

Got it tuned pretty much correct everywhere. Still a little work on low kPa EAE and start pulses for shorter start times. Idle is good. EGO is making only small corrections.
This weekend I added the used, cleaned and flowed by Witch Hunter, Yellow 420's, and removed and blocked the EGR valve ports. Changed the Required Fuel and the MS3 required almost no changes (VEAL made a few, minor (3%) changes to sparsely located cells of the VE table. Idle is still as good as before injector change.
Old injectors on their way out.
EGR Delete blank from a sheet of Al cut out with plasma cutter.
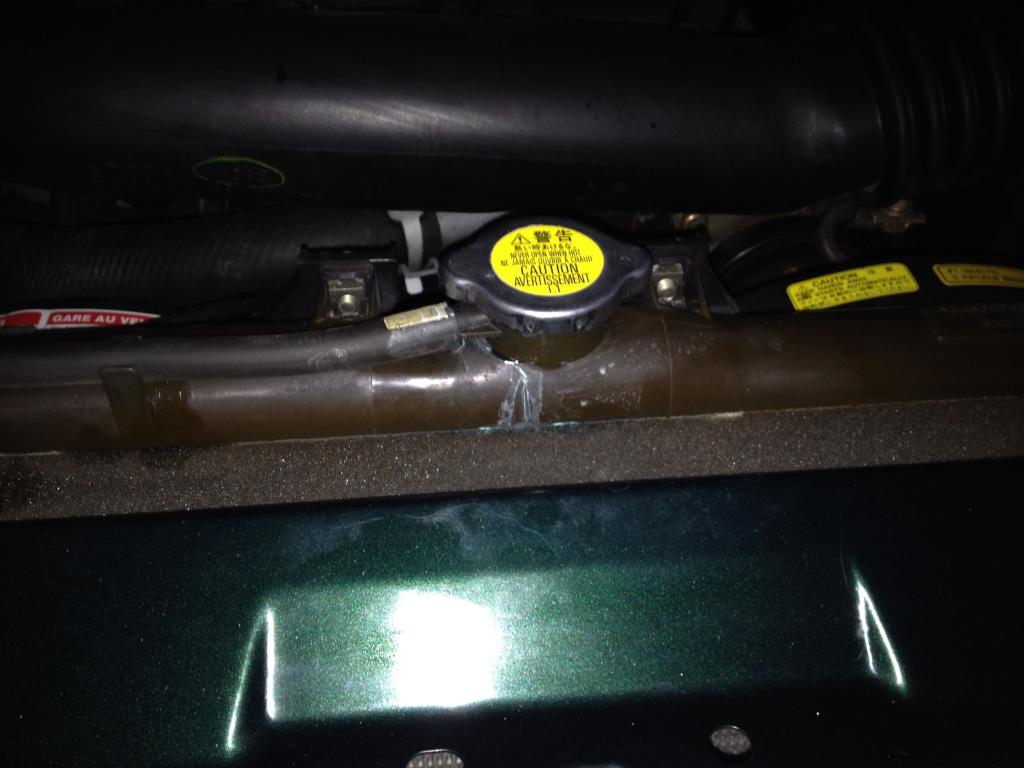
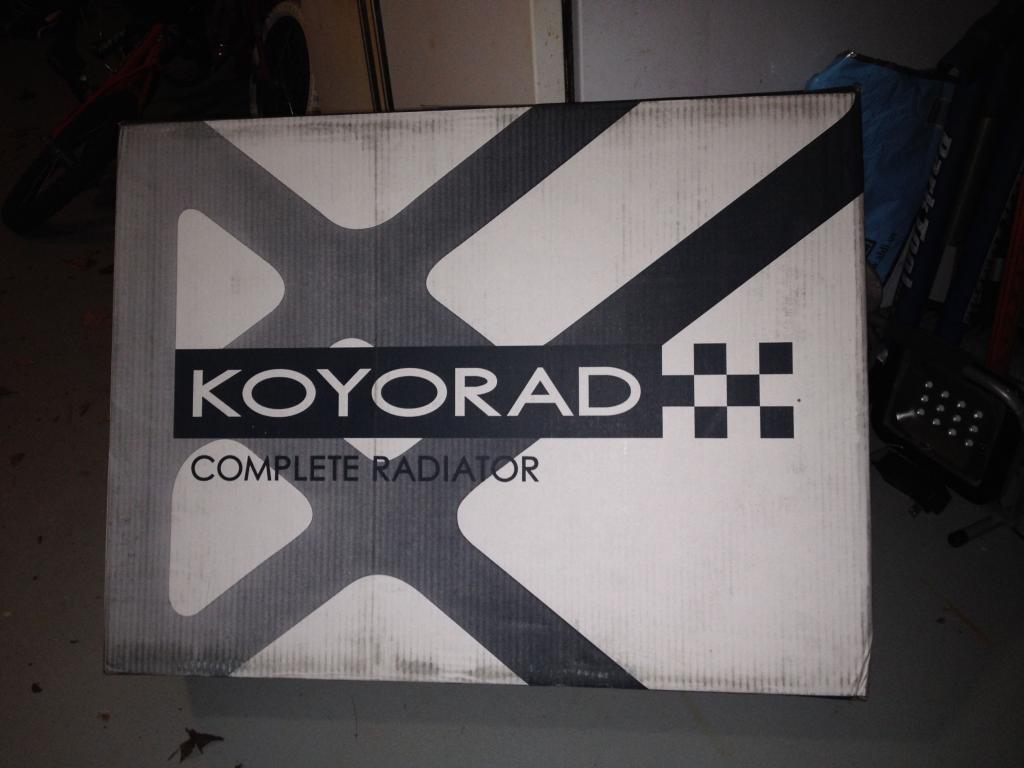
That's it for now. Happy so far. Oh, did find neck of radiator has crack, so ordered a Koyo 37mm which is now here..
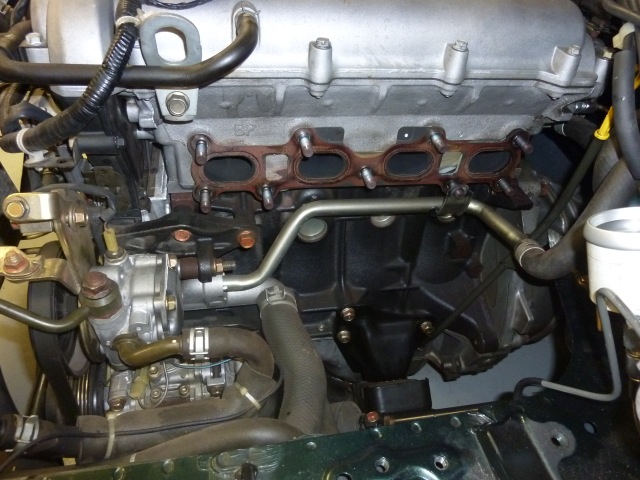
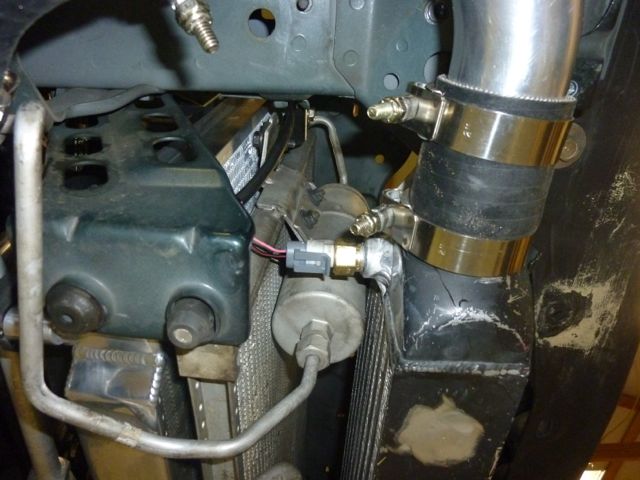
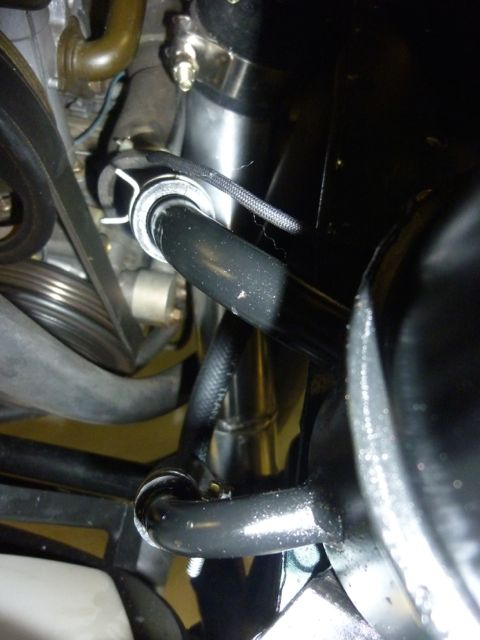
Here is back-of-head oil feed.
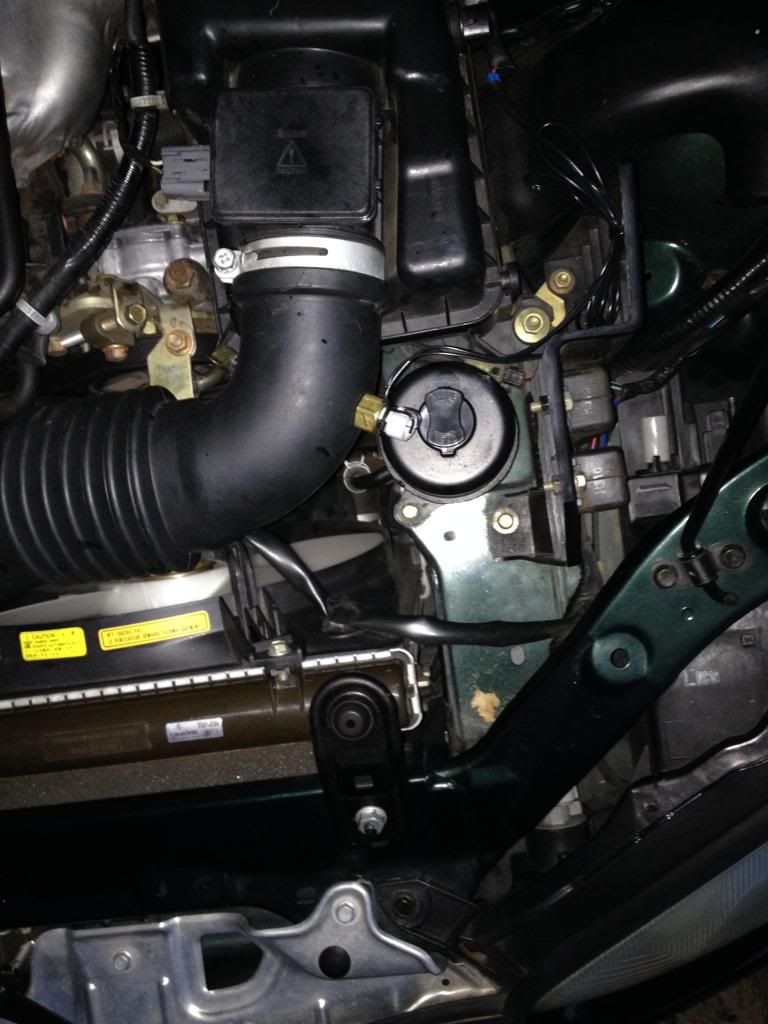
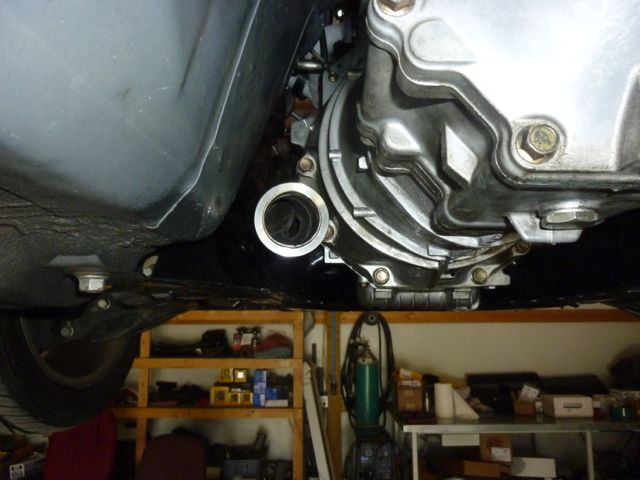
Temporary Home of GM AIT. Just drilled hole in rubber pipe with 1/.2" flat face bit and screwed it in.
Rest of build:
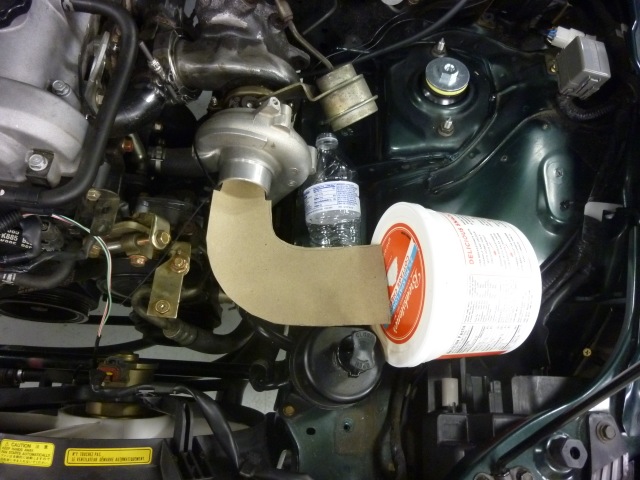
TD04 from WRX. I plan to machine the turbine inlet to fit a SPD v-band and machine a billet to transition out of log manifold (Schd 40 1 1/4" mild steel).
Segregated down pipe: which ends at 2.5". Used, to be modified as needed.
Using one of the exhaust flanges that transitions oval to round and the round fits the 1 1/4” Els and Tees nicely. PICs when this happens.
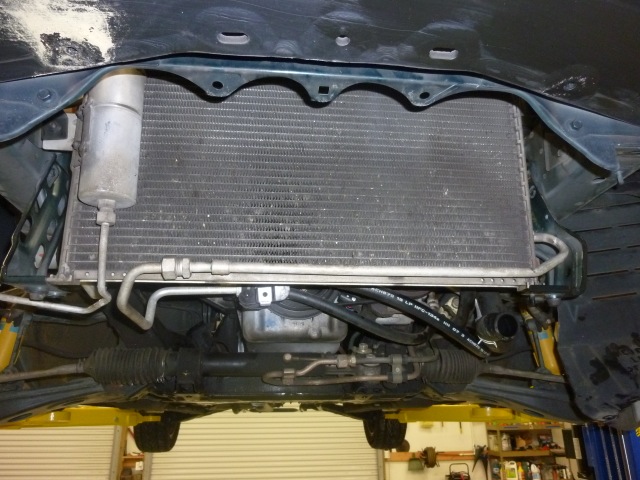
Small, 5.5 x 22 x 2.5 intercooler (Used) with 2.0" charge pipes (CRXRacing).
Will build a 3" exhaust, because, if you are going to build it, why argue 2.5 or 3? Karter74 made about 225 WHP and 200 Ft-Lbs with 2.5 exhaust on same turbo, but perhaps a better manifold. If a 2.5” comes up for sale at a good price, I may change my mind on that one.
Oil to come from head port (hasn’t that been a hot topic)
Still hoping to go low and back mounting, and will modify coolant mixing manifold if needed.
Mitsubishi atmospheric blow-off (like the Bosch but steel cap)
AIT mounted to end cap of FMIC. Likely blow-off there as well.
That's all I can think of so far. COMMENTS WELCOME
Started with a stock 1999 with 80K miles. Purchased from original owner.
I determined, by no good method, that 200 or so WHP would be fine. Target is driving in the mountains and some Autocross. Karter74’s dyno with TD04L-13T, along with Sturovo and 18PSI’s commentaries directed me to that turbo. No need to build the engine for this.
Stock Engine
Stock Interior
I was planning to stage the boost, starting with stock exhaust and clutch. However, my Son-in-law (welding skills) talked me into going ahead with the clutch. Hence I plan to go ahead with the exhaust as well… and the COP’s.
Accumulated parts. (see below). Many used from various sources.
Began running 93 Octane gas.
Installed EGO and AFR gauge (Innovate LC-2) and Boost Gage.
Temporary when running Stock ECU
More permanent install, waiting on USB cable and other switches before radio goes back in.
Ran Leak-down test. From 1 to 8 percent. Honestly, I think the 8% was due to engine getting cold by the time I got 2 and 3 done, due to fighting with motor turning during test.
I also took the time to remove remnants of old alarm, install Crearwater speakers, lube the window runners, and add some sound deadening.
Installed and tuned MS3 Basic from Reverant. Temporarily mounted with Zip ties. I removed Power Door Lock relay to give a little room. Also altered outlet of DB37 and utilized Tee to prevent kink in MAP tubing
.
Got it tuned pretty much correct everywhere. Still a little work on low kPa EAE and start pulses for shorter start times. Idle is good. EGO is making only small corrections.
This weekend I added the used, cleaned and flowed by Witch Hunter, Yellow 420's, and removed and blocked the EGR valve ports. Changed the Required Fuel and the MS3 required almost no changes (VEAL made a few, minor (3%) changes to sparsely located cells of the VE table. Idle is still as good as before injector change.
Old injectors on their way out.
EGR Delete blank from a sheet of Al cut out with plasma cutter.
That's it for now. Happy so far. Oh, did find neck of radiator has crack, so ordered a Koyo 37mm which is now here..
Here is back-of-head oil feed.
Temporary Home of GM AIT. Just drilled hole in rubber pipe with 1/.2" flat face bit and screwed it in.
Rest of build:
TD04 from WRX. I plan to machine the turbine inlet to fit a SPD v-band and machine a billet to transition out of log manifold (Schd 40 1 1/4" mild steel).
Segregated down pipe: which ends at 2.5". Used, to be modified as needed.
Using one of the exhaust flanges that transitions oval to round and the round fits the 1 1/4” Els and Tees nicely. PICs when this happens.
Small, 5.5 x 22 x 2.5 intercooler (Used) with 2.0" charge pipes (CRXRacing).
Will build a 3" exhaust, because, if you are going to build it, why argue 2.5 or 3? Karter74 made about 225 WHP and 200 Ft-Lbs with 2.5 exhaust on same turbo, but perhaps a better manifold. If a 2.5” comes up for sale at a good price, I may change my mind on that one.
Oil to come from head port (hasn’t that been a hot topic)
Still hoping to go low and back mounting, and will modify coolant mixing manifold if needed.
Mitsubishi atmospheric blow-off (like the Bosch but steel cap)
AIT mounted to end cap of FMIC. Likely blow-off there as well.
That's all I can think of so far. COMMENTS WELCOME
Last edited by DNMakinson; 12-11-2013 at 07:23 PM. Reason: Added Pictures (I Hope)

Reply
 2
2

2

 then just paste the link in there and voila: pictures
12-12-2013, 08:00 AM
then just paste the link in there and voila: pictures
12-12-2013, 08:00 AM
#5

I'm confused. Why are you trying to do everything right the first time? This is going to be the most boring build thread ever.
"Yeah guys so here's my build thread; I actually researched, bought all the right parts, and I'm installing them in the right order. This way I can build a perfectly reliable miata, with realistic power goals, that behaves exactly like stock but makes twice the power. I'm not going to mess around with concepts that have been proven not to work or screw anything up the first time. This way the build will be really straightforward, come together really quick, and work perfectly." WTF is this ****?
Seriously though, this is probably the best start to a build I've seen. Looking forward to seeing the completed results.
Reply
2
2
 aint that the truth.
12-12-2013, 09:30 AM
aint that the truth.
12-12-2013, 09:30 AM
#7

Good luck on a great start!
Using a 3" exhaust will probably make the turbo spool slightly faster (its already ridiculously fast) but you probably won't see much of a overall gain. The dyno chart I had was on purely a road tune, not dyno tuned. I'm guessing there was just a little more HP to be had, but honestly, the turbo is probably pretty damn closed to being maxed out.
My dyno was done on a Mustang dyno, so if you compare my numbers to FM or BEGi, they will read lower. The general consensus is that a Mustang dyno reads about 12% low, the comparable WHP from that turbo would be around ~250.
And my manifold was nothing special. It was literally a BEGi T3 manifold with a plate bolted on the front converting it to the Subaru bolt pattern. Basically a round hole in front of a rectangle. Probably not the best for flow....
Reply
0
0
12-12-2013, 09:46 AM
#8
Retired Mech Design Engr
Thread Starter
iTrader: (3)
Join Date: Jan 2013
Location: Seneca, SC
Posts: 5,009
Total Cats: 857
Thanks for this input, and all the preliminary stuff as well (Brain early on pointed out that I would need the injector upgrade). My main departure from norm is the attempt to go low and back with placement (like MSM really, so not a departure from all concepts).
Those final decisions will be made when I have the old manifold and exhaust out.
Karter74: yes, I noticed that you got some pretty good spool with the 2.5". Hence, my vacillation on that issue.
Lastly, I'm not rushing this at all. It is our winter project. Hence I will not buy El's and Tee's and build the manifold until we see what we want to do there.
Reply
0
0
 03-09-2014, 08:33 PM
#10
Retired Mech Design Engr
Thread Starter
iTrader: (3)
Join Date: Jan 2013
Location: Seneca, SC
Posts: 5,009
Total Cats: 857
Time to start back the picture record:
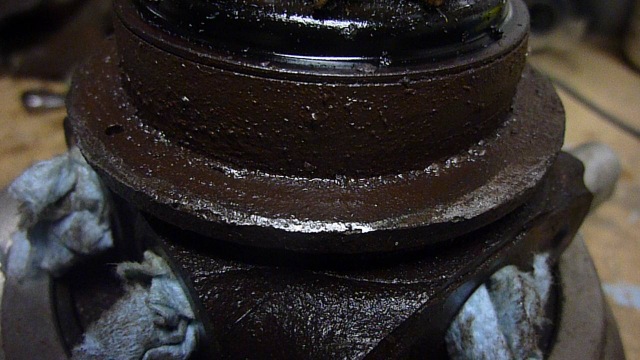
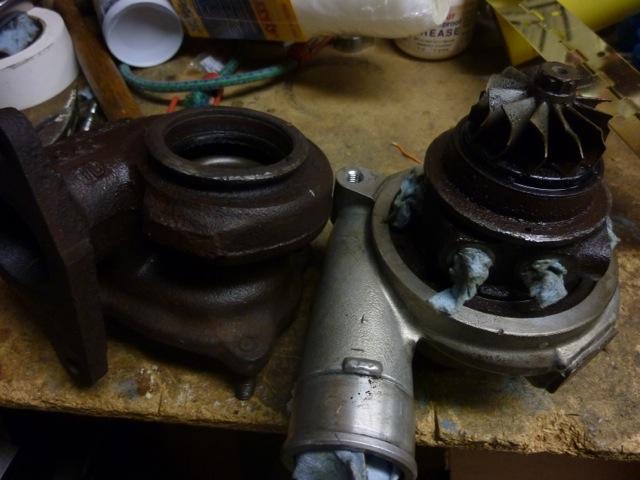
Took turbo apart, kind of neglected, but it came apart. Not shown yet, but upon removing the compressor housing, I was glad I bought the rebuild kit:
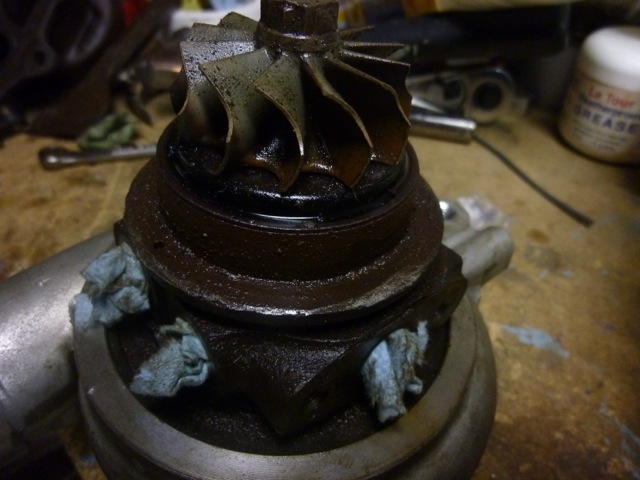
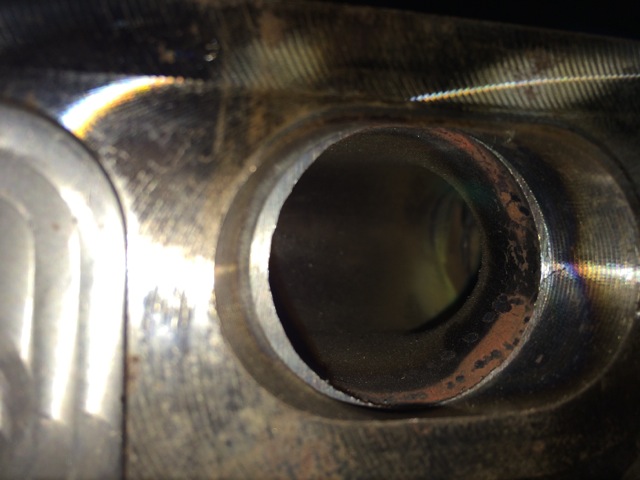
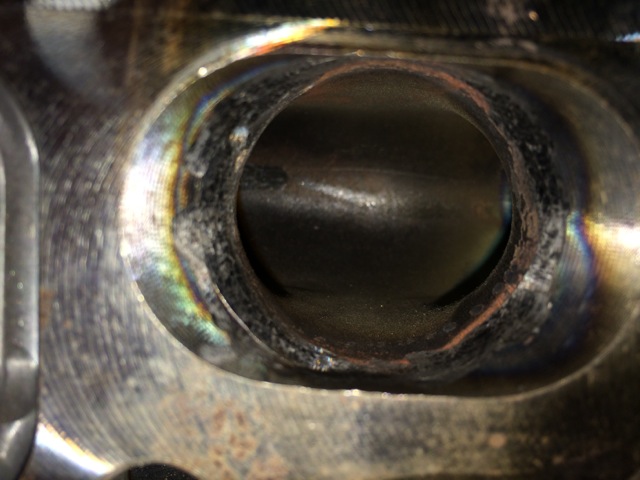
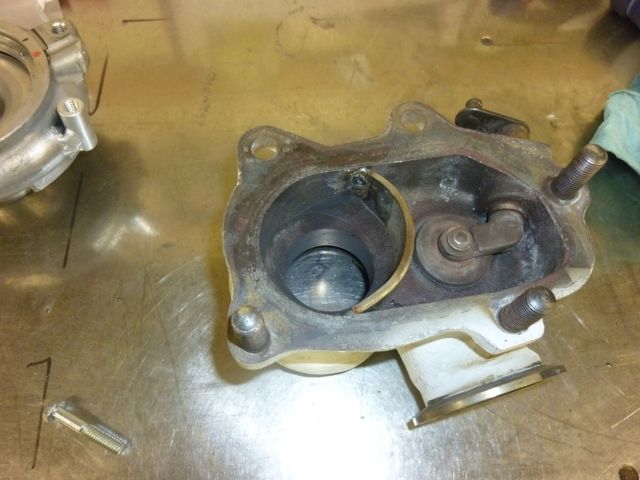
Turbine housing after a co-worker machined the V-Band:
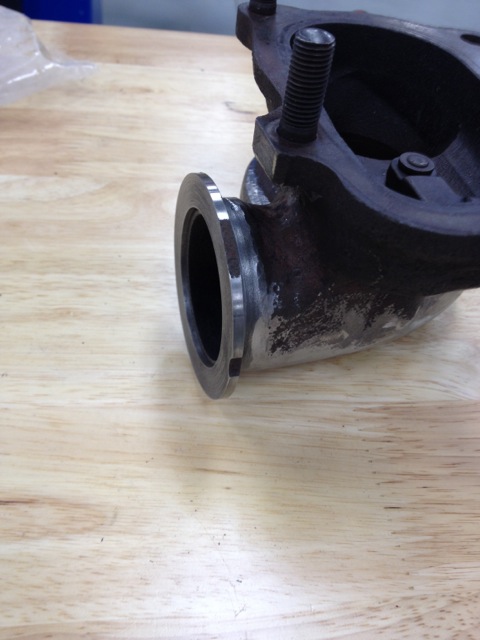
Then after I cleaned it up with burr and grinder:
Start the demolition with PB Blaster:
Removed the P/S "cooler" to be replaced later with a finned unit:
What we thought we would do to fit the IC up high... FAIL, so we carefully moved it back to stock position and fit the 2.5" the FMIC in front of the dryer:
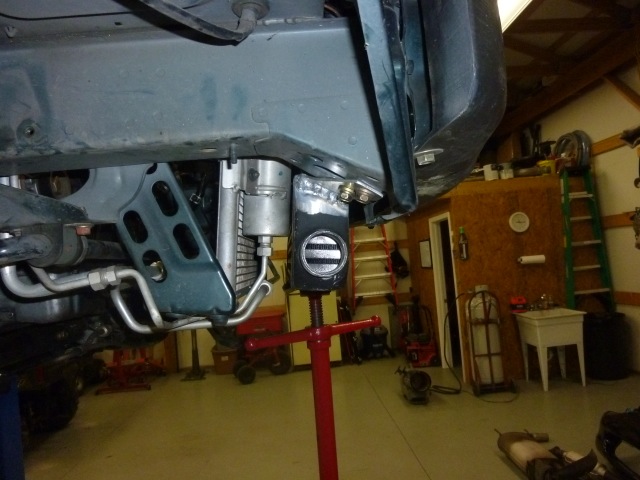
We could not get it any higher than this, due to the width (1" narrower (shorter) would have been perfect, this one is 27" x 5.5 high x 2.5" thick), so we did have to relieve some of the bottom of the front pan / bumper cover support. We did not have to remove the vertical support bars, however:
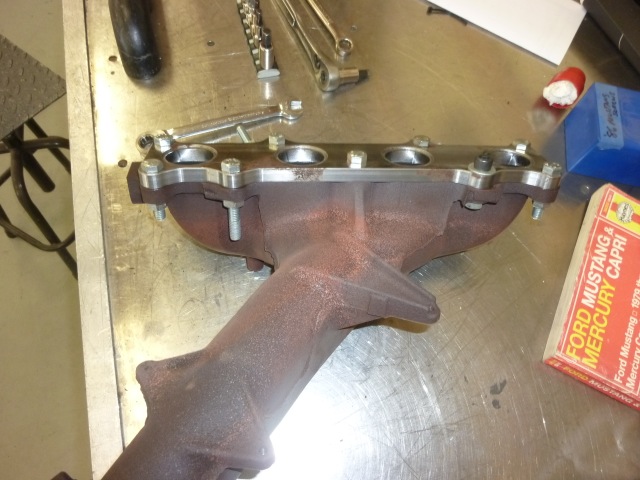
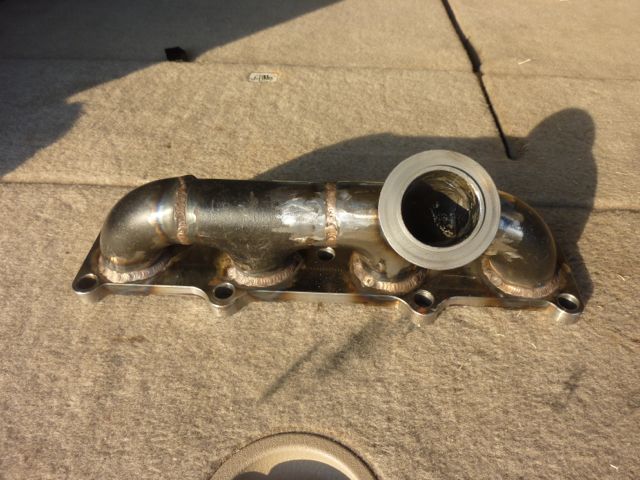
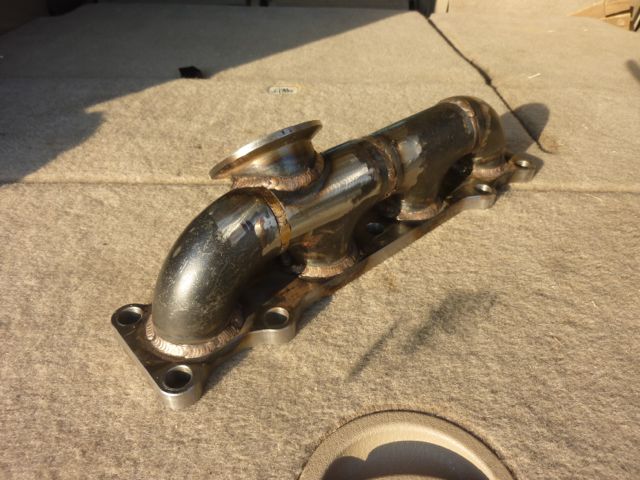
As the Mani is symmetrical, we bolted the new flange to the old manifold during welding of the els and tees to make the log. We used a 1/2" flange that transitioned oval to round and used 1 1/4 carbon steel fittings.
I'm a total novice at prep, but here it is tacked:
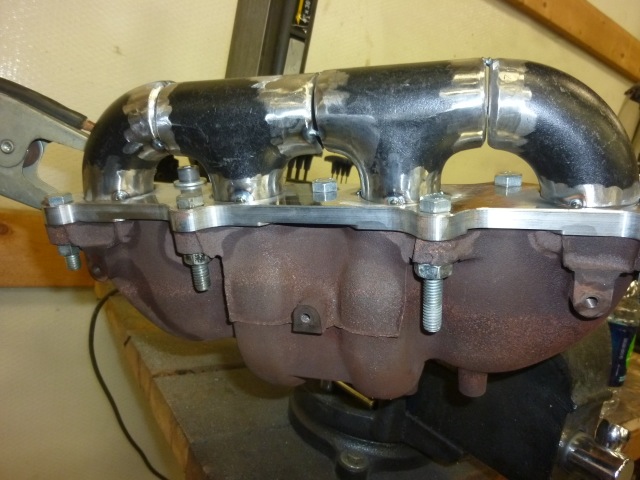
And welded (no outlet yet):
One Oops. Had to cut this bolt to get it out:
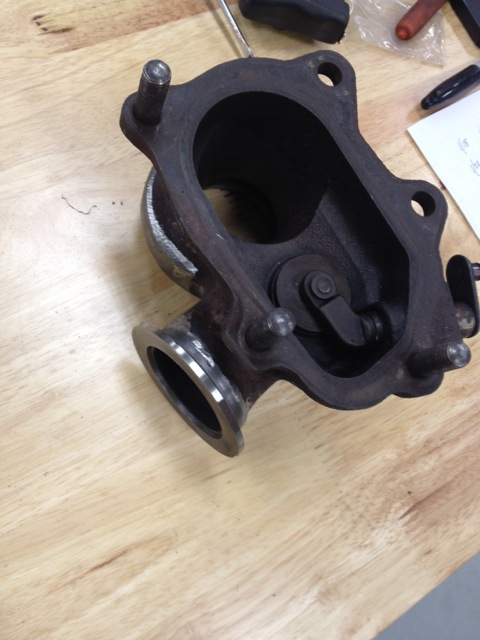
After cooling and removal, perfectly flat:
After welding, then after porting:
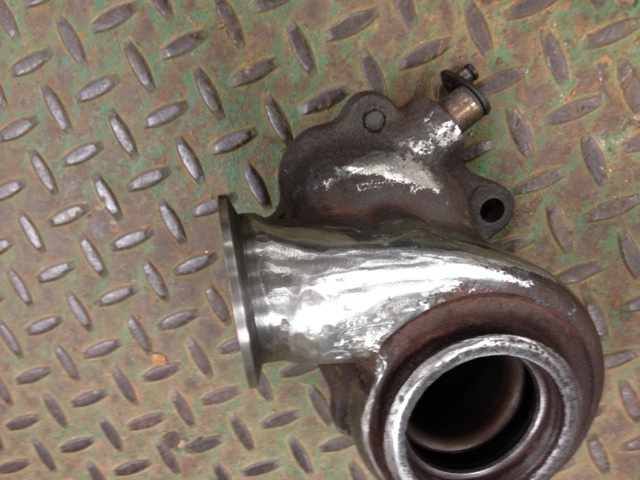
Mounted to tack on a flange. Note, we abandoned the low and back and went instead with a high and front (over the P/S):
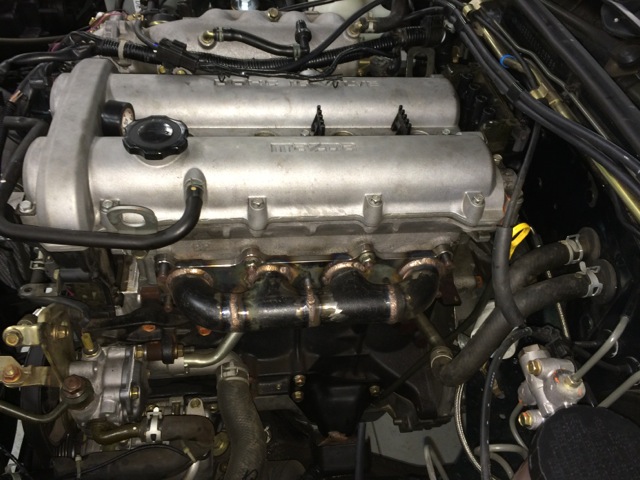
Note, we ended up going about 1/2" higher than this to make it easier to get to the turbine outlet clamps.
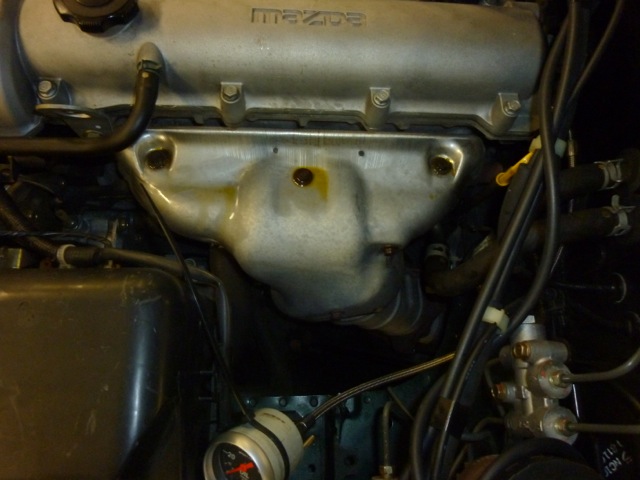
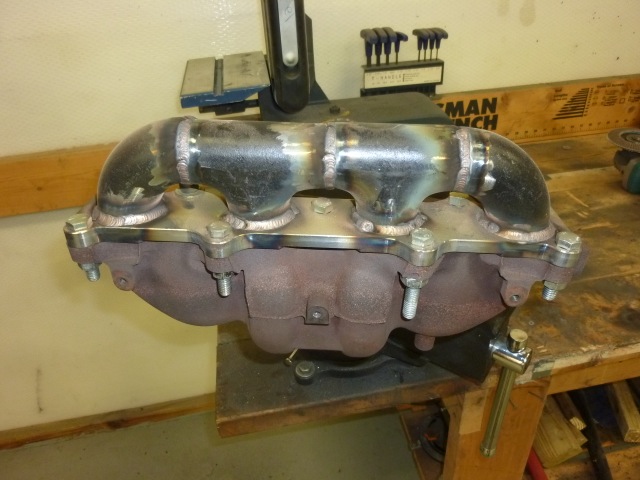
Mock-up of the intake:
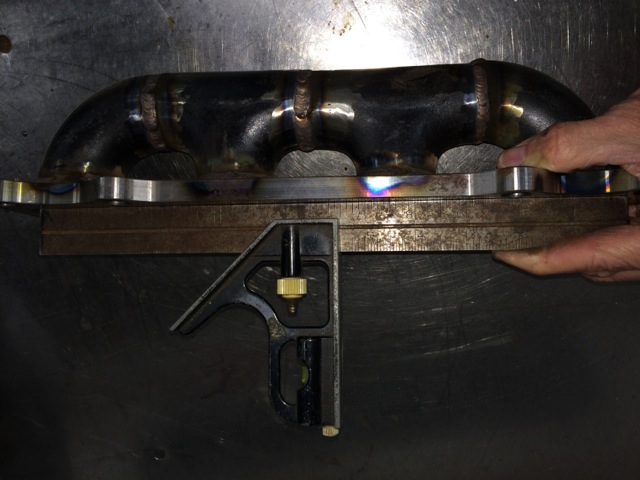
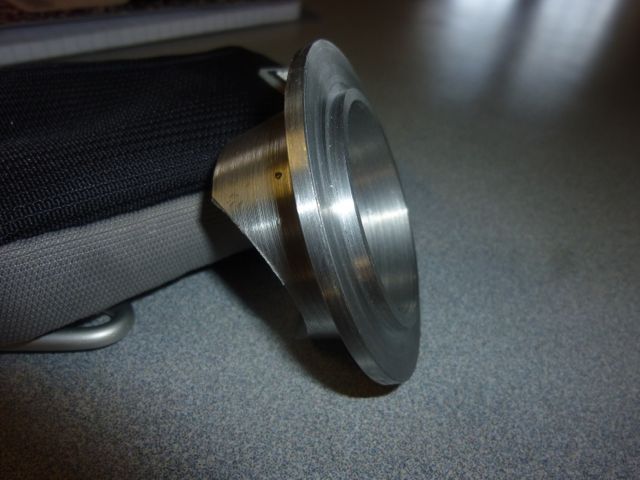
Spent about 6 hours creating this outlet flange (Novice lathe operator that I am). Also first use of a fly cutter.
Ready to go to Ceramic coating:
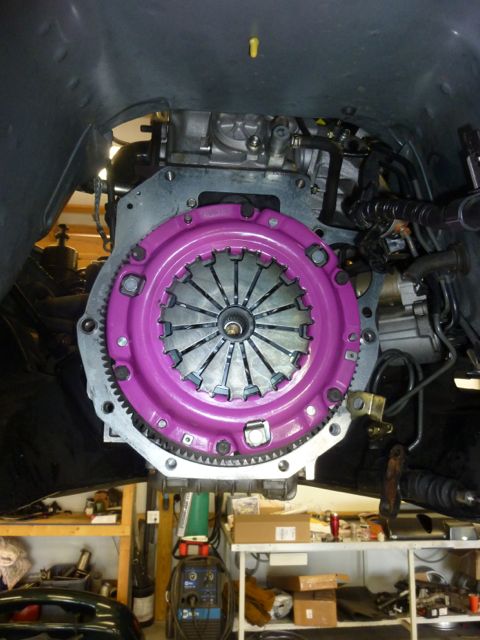
Also got the Rear main beg seal in (used the drill, screw, pull method to get the old one out), clutch changed, and drive back together:
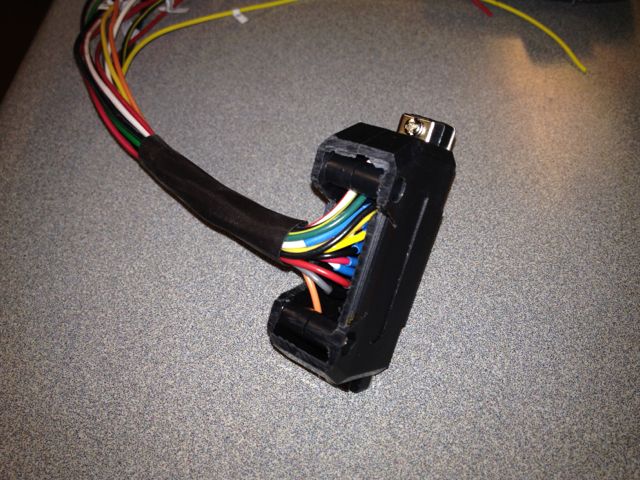
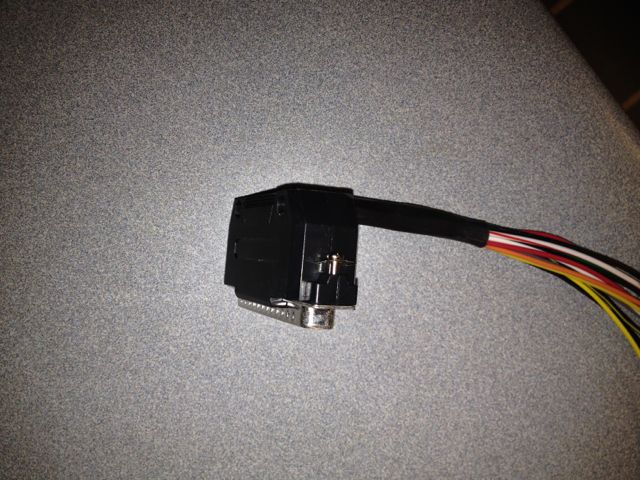
That is all for now. Looking to find some non-shrink tubing to run the wires for the AIT to the new location. I cut open the loom and pulled the original wires from the stock AIT out. There will be no need to splice, but I want to properly sheath them and tie them off.
We also did get the main down pipe welded to the outlet flange, but can do no more until the turbine housing and manifold come back.
Light can be seen at the end of this tunnel.
DNM
Took turbo apart, kind of neglected, but it came apart. Not shown yet, but upon removing the compressor housing, I was glad I bought the rebuild kit:
Turbine housing after a co-worker machined the V-Band:
Then after I cleaned it up with burr and grinder:
Start the demolition with PB Blaster:
Removed the P/S "cooler" to be replaced later with a finned unit:
What we thought we would do to fit the IC up high... FAIL, so we carefully moved it back to stock position and fit the 2.5" the FMIC in front of the dryer:
We could not get it any higher than this, due to the width (1" narrower (shorter) would have been perfect, this one is 27" x 5.5 high x 2.5" thick), so we did have to relieve some of the bottom of the front pan / bumper cover support. We did not have to remove the vertical support bars, however:
As the Mani is symmetrical, we bolted the new flange to the old manifold during welding of the els and tees to make the log. We used a 1/2" flange that transitioned oval to round and used 1 1/4 carbon steel fittings.
I'm a total novice at prep, but here it is tacked:
And welded (no outlet yet):
One Oops. Had to cut this bolt to get it out:
After cooling and removal, perfectly flat:
After welding, then after porting:
Mounted to tack on a flange. Note, we abandoned the low and back and went instead with a high and front (over the P/S):
Note, we ended up going about 1/2" higher than this to make it easier to get to the turbine outlet clamps.
Mock-up of the intake:
Spent about 6 hours creating this outlet flange (Novice lathe operator that I am). Also first use of a fly cutter.
Ready to go to Ceramic coating:
Also got the Rear main beg seal in (used the drill, screw, pull method to get the old one out), clutch changed, and drive back together:
That is all for now. Looking to find some non-shrink tubing to run the wires for the AIT to the new location. I cut open the loom and pulled the original wires from the stock AIT out. There will be no need to splice, but I want to properly sheath them and tie them off.
We also did get the main down pipe welded to the outlet flange, but can do no more until the turbine housing and manifold come back.
Light can be seen at the end of this tunnel.
DNM
Last edited by DNMakinson; 03-09-2014 at 08:39 PM. Reason: Proper image insert
Reply
2
2
 03-21-2014, 07:17 PM
#13
Retired Mech Design Engr
Thread Starter
iTrader: (3)
Join Date: Jan 2013
Location: Seneca, SC
Posts: 5,009
Total Cats: 857
Update (no pictures). I have had little time to work on the car, but I have been accumulating most of the remaining pieces.
1) Water lines from Sturovo.
2) Clutch replacement line from 18PSI. I had purchased one, but it turned out to only replace the rubber hose, whereas this one does that AND the curly little pig's tail solid line.
3) Lots of 3" SST exhaust parts. U, 90's, 2.5 to 3 "reducer", straights, flex joint (all from Ace Stainless), High flow Magnaflow Cat (ebay), The BIG Magnaflow muffler (ebay), V-Band (SPD). Could not find a good deal on a 2.5" and figured if we were going to weld our own, it might as well be 3".
4) The manifold and turbine housing should get ceramic coated first of next week.
5) Miscellaneous electrical: Non-shrink tubing, switch for EBC (need to find a way to make fancy labels that say, "boost" and "BOOST").
6) Updated boost gauge, as the old CarTech lighting was really no lighting.
7) Intake filter and elbow, and VTA blow-off filter (in case it leaks at idle)
I think that's about it. Getting really antsy, but remaining patient enough to do it right. Will start putting all that in, as well as pulling out all the emission stuff on the passenger side.
Still staying with the idea of only having waste gate boost for this season. Then next winter, or whenever there is time to devote (likely next winter) add EBC, COP's, Coolant Reroute, colder plugs, and DYNO tune. That't the plan for now, power wise.
Peace
Reply
0
0
03-21-2014, 09:15 PM
#14
Slowest Progress Ever
iTrader: (26)
Join Date: Oct 2007
Location: The coal ridden hills of Pennsylvania
Posts: 6,022
Total Cats: 304
I didn't realize the first time I read this thread that you machined the 4 bolt flange into a v band flange. That is amazing! Very cool work.
Reply
0
0
03-21-2014, 09:42 PM
#15
Retired Mech Design Engr
Thread Starter
iTrader: (3)
Join Date: Jan 2013
Location: Seneca, SC
Posts: 5,009
Total Cats: 857
^ Only kind-of. It was one of those weird 3-bolt flanges, and I confess, that a much more experienced colleague did that in an engine lathe by bolting the exit flange to a right angle plate. I did machine the matching manifold flange however, complete with male-female interlock. It was fun. Sturovo gave me the idea.
Reply
0
0
04-19-2014, 11:58 AM
#16
Retired Mech Design Engr
Thread Starter
iTrader: (3)
Join Date: Jan 2013
Location: Seneca, SC
Posts: 5,009
Total Cats: 857
Finally, after a month, I have some progress to show and tell.
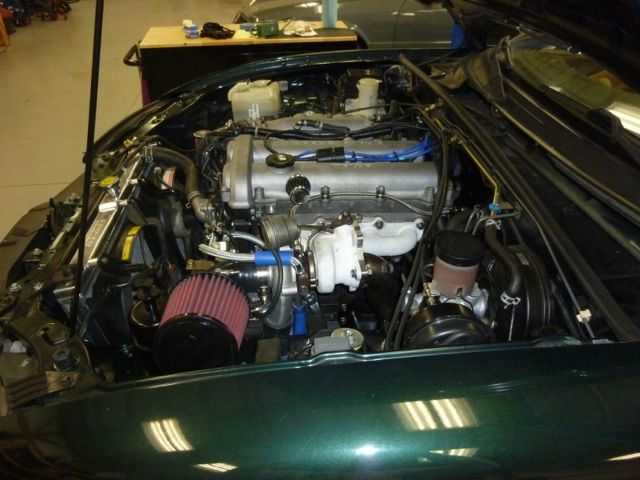
The big news is that I have gotten far enough to put in oil and coolant, start and move the car. Yeah! Since I have no O2 installed right now, I only gave enough throttle to move the car. Still the turbo spooled some. What a great sound.
Clutch worked flawlessly.
Thanks for all the help / input. Progress is slow, but so far, no bad gotchas.
I got a little scared when other posts came out about drilling into the pick-up tube, so I borrowed a bore scope from work and looked in my drain fitting before I hooked up drain line and added oil. No issues. Pressure would not build when we only spun the engine with starter, but then I remembered that was normal.
Engine started right up, and oil pressure in about a second.
I had talked about using the neutral detect switch to operate a relay to force starting in neutral, rather than a clutch pedal prevent by-pass. However, when I tested the switch, it was properly normally open, but when closed, it was 70 ohms. Plenty low for an input to an ECU, but I didn't want to put a relay coil in series with it. It would work with a solid state relay, I suppose, but I just mounted the Flyin Miata switch clip and went on. Now I just have to remind myself to not push the pedal when I want to start (old habits die slowly). Really, though, is starting with clutch pedal in a big deal with a FM1 clutch?
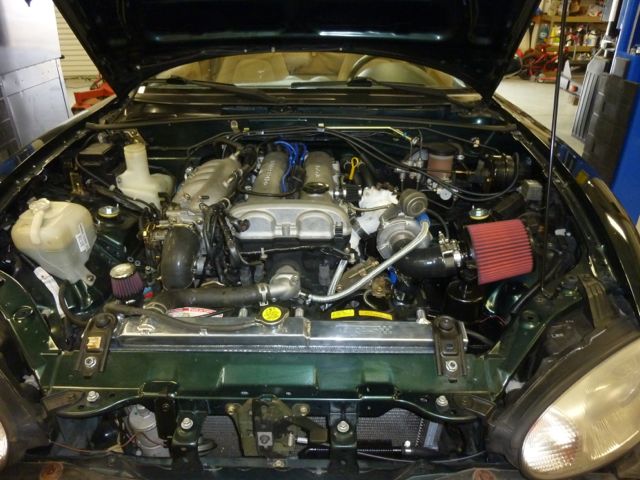
Accomplished:
1) Turbine housing and Mani ceramic coated.
2) Tweak to downpipe, but not enough. I bought a 180* bend 1 1/2" bend to make further changes to segregated pipe. Did get the V-Band welded to the end.
3) All Charge Piping, oil and water feed and drain, including drilling of pan, rerouting of AIT
4) On the oil from back of head, I bought a 90* -4AN elbow (Female to Male) and then bent it to almost 180* to allow for a better approach to the front of the engine.
Left to do (pictures in a minute, have patience):
1) Rest of exhaust. Just after the V-Band, will be 2.5" to 3" reducer, then out to the end of the XMSN for a Flyin Miata support. The O2 sensor will have to be in that section to meet the 24" requirement. Next a flex and CAT, then to the back, Big Magnaflow and out. Have urethane hanger thingies for the big muffler.
2) TUNE
3) Finish up the interior: Proper mounting the MS3, change out Boost gauge, some wiring, put console back in.
4) As the turbine is fairly far forward, and therefore away from the firewall, I am thinking forgoing heat shield except some DEI stick on the hood (some for the XMSN tunnel as well). Then take some left over 3" exhaust, cut it in half with some tabs, and weld it over the down pipe. A bit heavy but should work and leave the Turbo glory open to the eyes. Actually, I'm not sure for a DD if I even need that much, but it seems a good insurance.
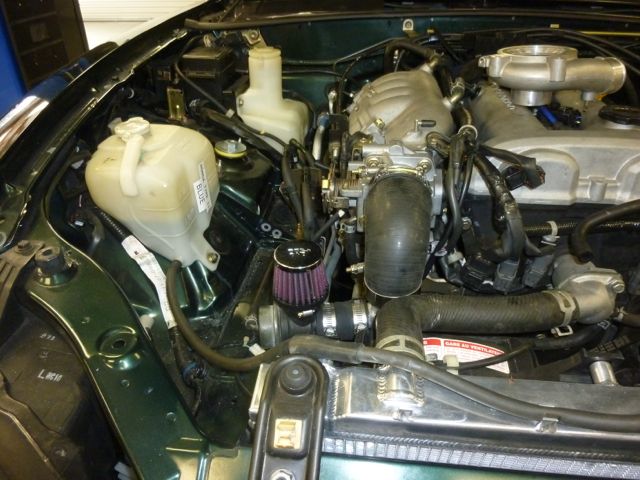
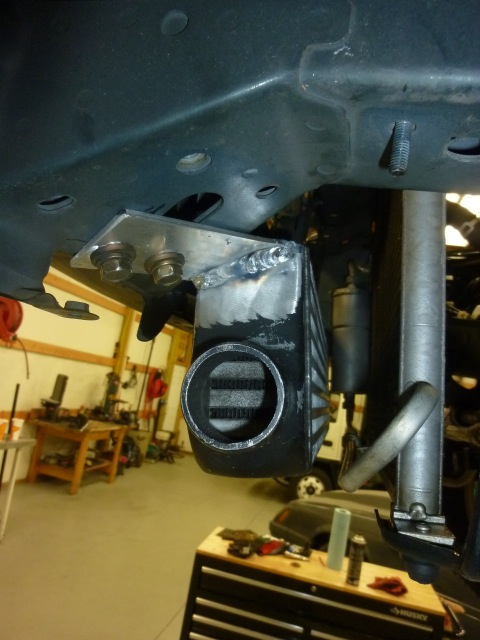
Cold Side Charge completed with Blow-off valve non-recirculated.
Oops. Clearance a bit tight on this one.
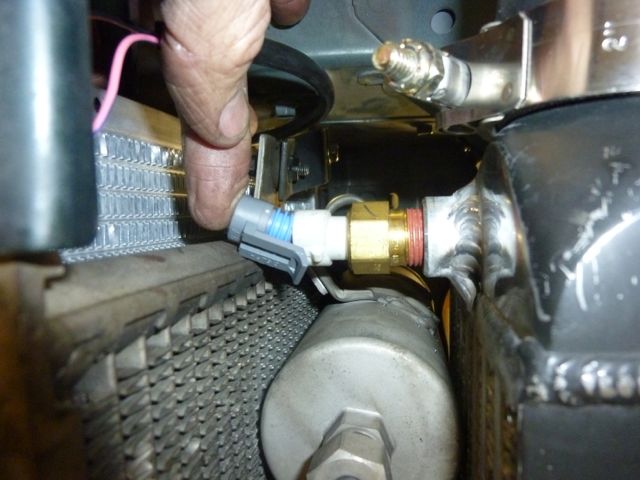
Fixed by re-tapping bung to a proper depth and re-installing AIT. Then the connector would go on.

Separator made for turbine outlet
Welded in.
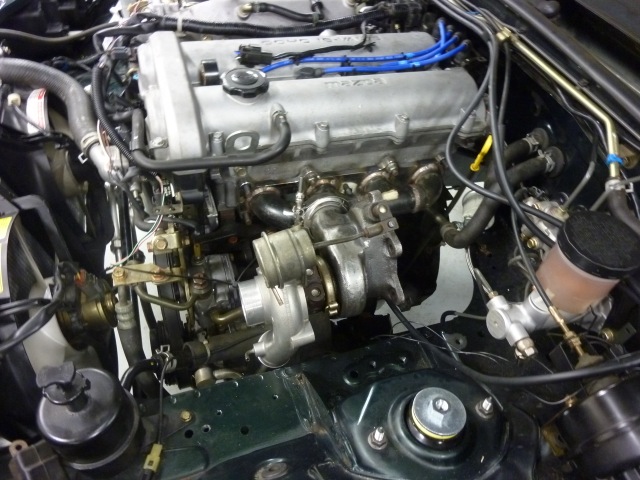
Finished (thus far) Side View. Cannot see it on this pic, but having clocked the tubing differently from the compressor, we made a new boss for the WGA and welded it to the turbine, and drilled an extra hole in the WGA flange. Worked well, but the bolt is so close to the oil feed, that it is necessary to mount the feed first, then put in the second WGA bolt. I got lucky on that on.
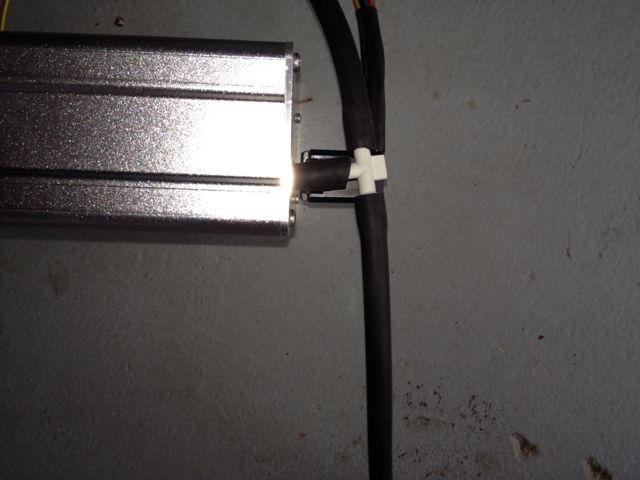
Finished (thus far) Front View. For re-routing the AIT, I undid the harness and was able to use the existing wire with no splices. Got some 1/4" non-shrink for the two leads so it looks pretty good. Had to buy 100' of it, so if someone wants some, they can have it for shipping $.
Hot side charge pipe. Only 2" so not too bad. Made up of (3) sections welded together to give it a good shape. Then at the bottom, it is same pieces for hot side and cold side going into intercooler. I thought I had a shot of the underside, but I can't find it. I'll get one and post it. Try to get a better shot of this one too.
End of down pipe as it sits right now. Will likely raise it and to the outside a bit before final welding. I also need to remove and patch the old NBO2 bungs.
I couldn't get Photobucket to behave, so I'm trying out M.net hosting of the pics in this post.
I suppose drag and drop from the thumbnails is not correct. Plan B for pics. Change [url] to [IMG]
DNM
The big news is that I have gotten far enough to put in oil and coolant, start and move the car. Yeah! Since I have no O2 installed right now, I only gave enough throttle to move the car. Still the turbo spooled some. What a great sound.
Clutch worked flawlessly.
Thanks for all the help / input. Progress is slow, but so far, no bad gotchas.
I got a little scared when other posts came out about drilling into the pick-up tube, so I borrowed a bore scope from work and looked in my drain fitting before I hooked up drain line and added oil. No issues. Pressure would not build when we only spun the engine with starter, but then I remembered that was normal.
Engine started right up, and oil pressure in about a second.
I had talked about using the neutral detect switch to operate a relay to force starting in neutral, rather than a clutch pedal prevent by-pass. However, when I tested the switch, it was properly normally open, but when closed, it was 70 ohms. Plenty low for an input to an ECU, but I didn't want to put a relay coil in series with it. It would work with a solid state relay, I suppose, but I just mounted the Flyin Miata switch clip and went on. Now I just have to remind myself to not push the pedal when I want to start (old habits die slowly). Really, though, is starting with clutch pedal in a big deal with a FM1 clutch?
Accomplished:
1) Turbine housing and Mani ceramic coated.
2) Tweak to downpipe, but not enough. I bought a 180* bend 1 1/2" bend to make further changes to segregated pipe. Did get the V-Band welded to the end.
3) All Charge Piping, oil and water feed and drain, including drilling of pan, rerouting of AIT
4) On the oil from back of head, I bought a 90* -4AN elbow (Female to Male) and then bent it to almost 180* to allow for a better approach to the front of the engine.
Left to do (pictures in a minute, have patience):
1) Rest of exhaust. Just after the V-Band, will be 2.5" to 3" reducer, then out to the end of the XMSN for a Flyin Miata support. The O2 sensor will have to be in that section to meet the 24" requirement. Next a flex and CAT, then to the back, Big Magnaflow and out. Have urethane hanger thingies for the big muffler.
2) TUNE
3) Finish up the interior: Proper mounting the MS3, change out Boost gauge, some wiring, put console back in.
4) As the turbine is fairly far forward, and therefore away from the firewall, I am thinking forgoing heat shield except some DEI stick on the hood (some for the XMSN tunnel as well). Then take some left over 3" exhaust, cut it in half with some tabs, and weld it over the down pipe. A bit heavy but should work and leave the Turbo glory open to the eyes. Actually, I'm not sure for a DD if I even need that much, but it seems a good insurance.
Cold Side Charge completed with Blow-off valve non-recirculated.
Oops. Clearance a bit tight on this one.
Fixed by re-tapping bung to a proper depth and re-installing AIT. Then the connector would go on.
Separator made for turbine outlet
Welded in.
Finished (thus far) Side View. Cannot see it on this pic, but having clocked the tubing differently from the compressor, we made a new boss for the WGA and welded it to the turbine, and drilled an extra hole in the WGA flange. Worked well, but the bolt is so close to the oil feed, that it is necessary to mount the feed first, then put in the second WGA bolt. I got lucky on that on.
Finished (thus far) Front View. For re-routing the AIT, I undid the harness and was able to use the existing wire with no splices. Got some 1/4" non-shrink for the two leads so it looks pretty good. Had to buy 100' of it, so if someone wants some, they can have it for shipping $.
Hot side charge pipe. Only 2" so not too bad. Made up of (3) sections welded together to give it a good shape. Then at the bottom, it is same pieces for hot side and cold side going into intercooler. I thought I had a shot of the underside, but I can't find it. I'll get one and post it. Try to get a better shot of this one too.
End of down pipe as it sits right now. Will likely raise it and to the outside a bit before final welding. I also need to remove and patch the old NBO2 bungs.
I couldn't get Photobucket to behave, so I'm trying out M.net hosting of the pics in this post.
I suppose drag and drop from the thumbnails is not correct. Plan B for pics. Change [url] to [IMG]
DNM
Last edited by DNMakinson; 04-19-2014 at 12:02 PM. Reason: Try to get pics to show in body.
Reply
1
1
04-19-2014, 12:27 PM
#17
Slowest Progress Ever
iTrader: (26)
Join Date: Oct 2007
Location: The coal ridden hills of Pennsylvania
Posts: 6,022
Total Cats: 304
Everytime I open this thread and see that 4 bolt flanged machined to v band...I get a boner.
A mental boner...not an actual physical erection of my *****.
A mental boner...not an actual physical erection of my *****.
Reply
0
0
04-21-2014, 04:55 PM
#18
Senior Member

Join Date: Apr 2011
Location: Martin, Slovakia
Posts: 507
Total Cats: 74
Great stuff David!
I had often wondered about the possibility of v banding the Subaru flange but I never imagined it could turn out so well.
That along with the ceramic coating and segregated downpipe make this a pretty awesome and unique setup.
I am curious about the dimensions of the v band, did you make it to fit a standard size? Any details would be appreciated.
Reply
0
0


