
Need More Towing Power........


Thread Starter
Senior Member
iTrader: (2)
Joined: Sep 2009
Posts: 1,193
Total Cats: 29
From: Edmonton, AB, Canada
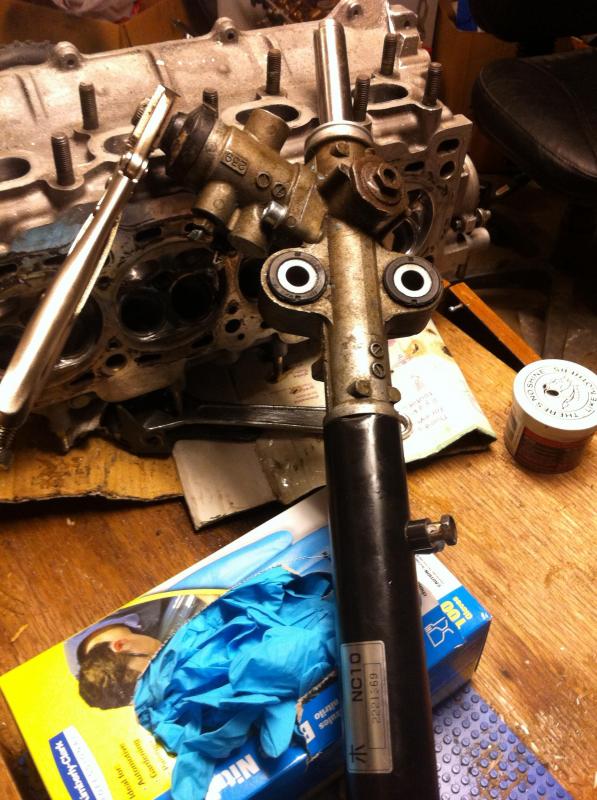
Got the steering rack back together. Did it the full monty way but cutting out the internal seals, crimping lines and/or filling ports with RTV, then had Abe weld my pinion.
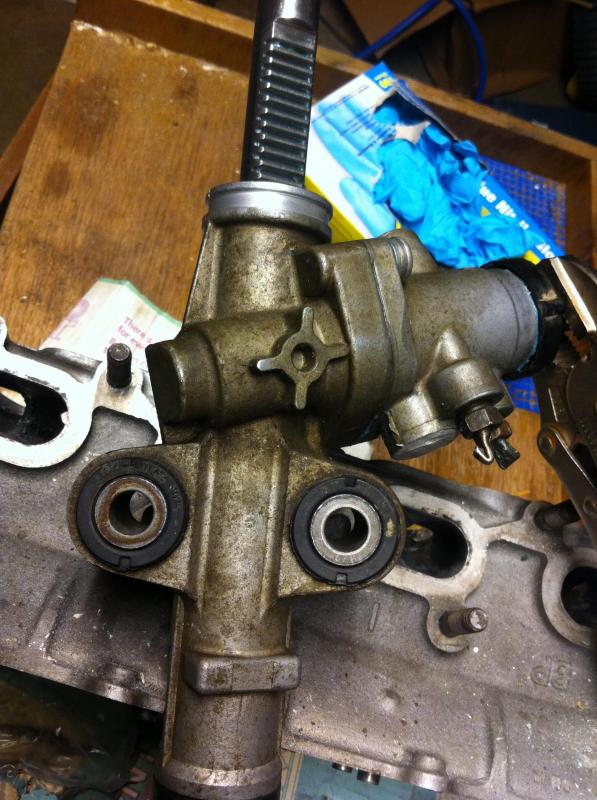
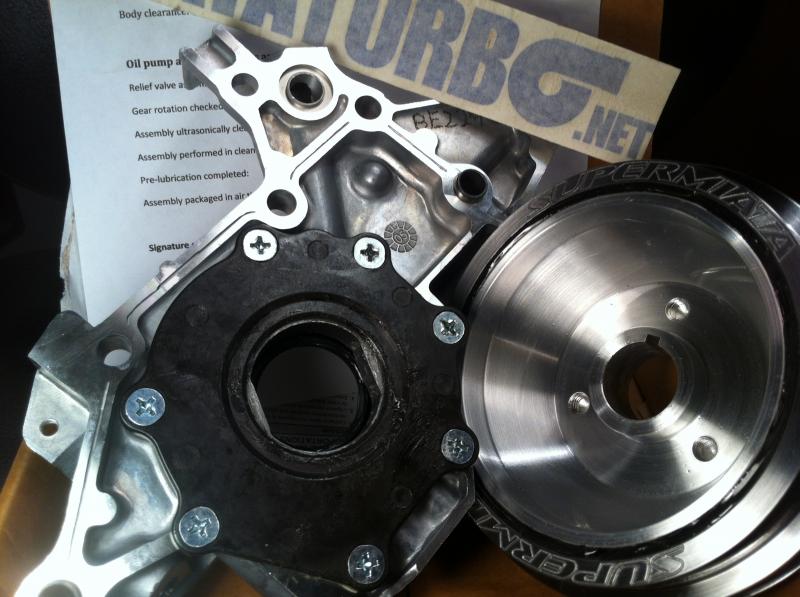
Just a quick shot of 2 of the more expensive options I decided to go with for utmost reliability.
BE VVT full pump and the SuperMiata Harmonic Damper


Just a quick shot of 2 of the more expensive options I decided to go with for utmost reliability.
BE VVT full pump and the SuperMiata Harmonic Damper

Reply
 0
0

0
Thread Starter
Senior Member
iTrader: (2)
Joined: Sep 2009
Posts: 1,193
Total Cats: 29
From: Edmonton, AB, Canada
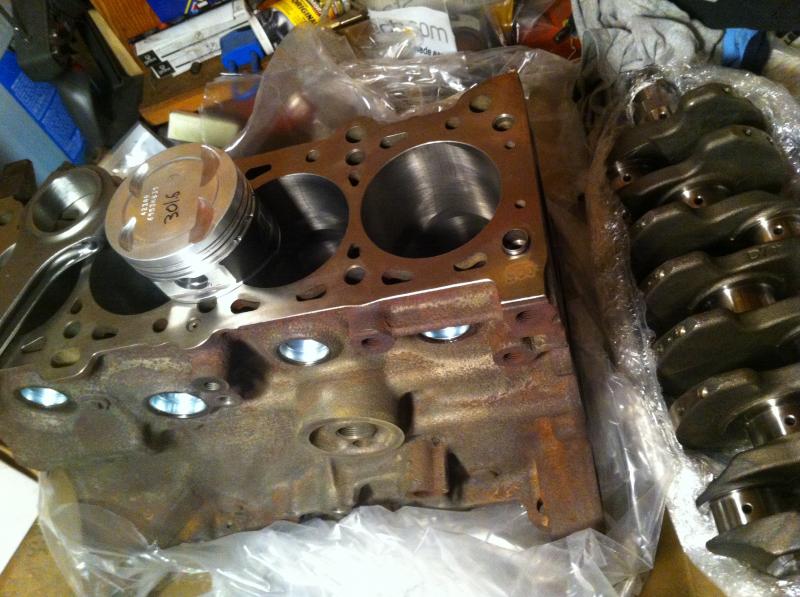
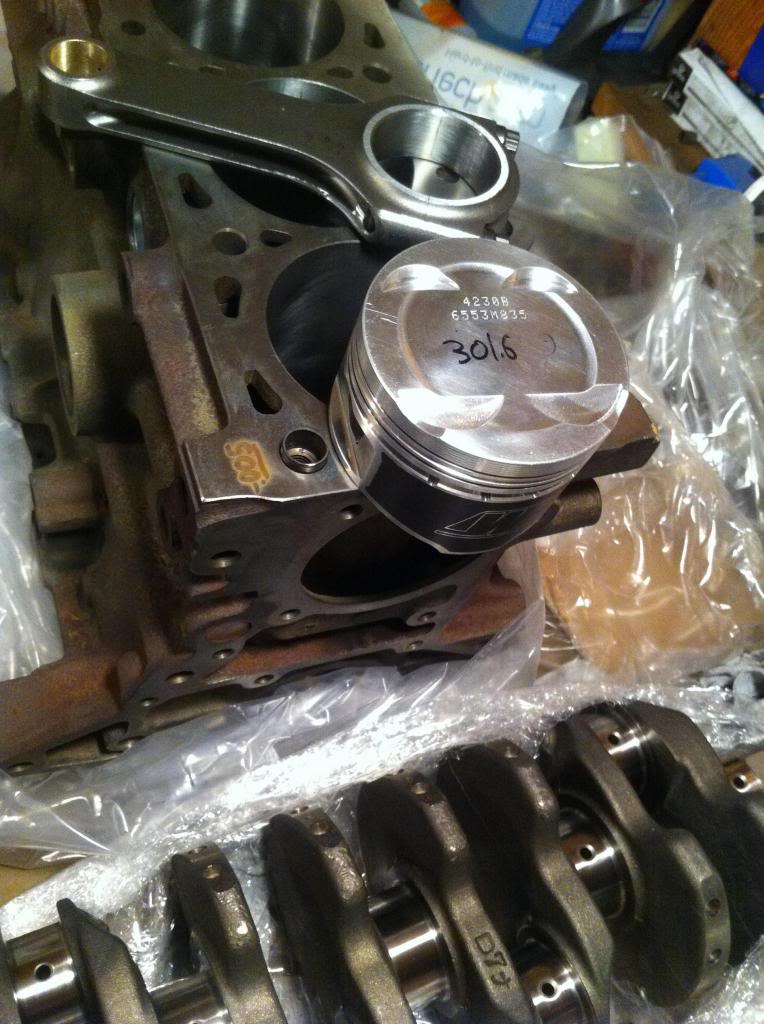
Got the bottom end back today. Looks great. I will paint the block a grey color and then start assembly some time. When I picked up the block I dropped off the head for a cleaning, skim and valve job.
Oops how'd that get in there. Sushi on the way back from Calgary the city that flooded just last week. Had to help get some computers set up at a dry location. I love All You Can Eat Sushi

I asked my machinist if he could trim the weight ring and he said yes. I think he charged $40 CAN for this. On a digital bathroom scale I get 16.5lbs. I might chamfer the teeth and maybe we will see 16 even.
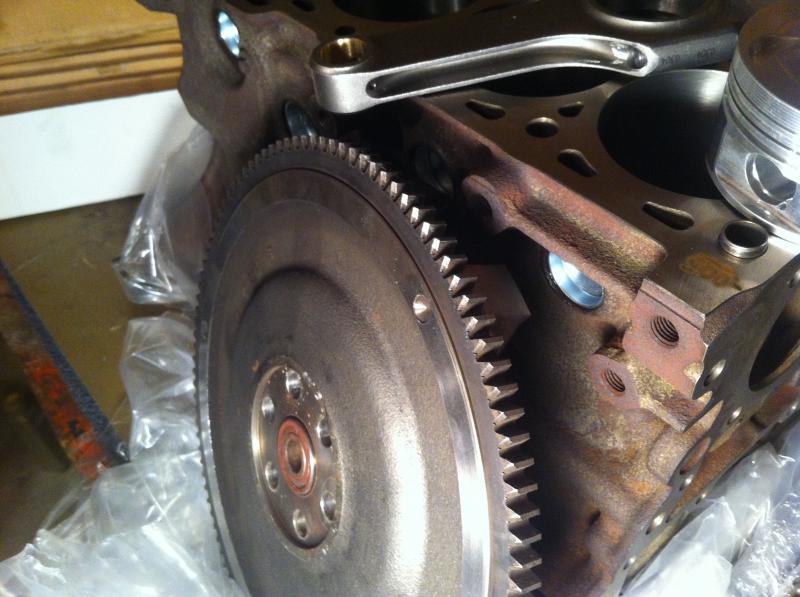
Now since I'm not running A/C or PWR steering anymore and I have the SuperMiata Damper I should see an even more responsive engine. I have eliminated a belt with 2 pulleys and the load on them, I have a lighter damper and now taken about 4lbs off my flywheel. The A/C and PWST aren't much but there definitely is an increased load with them attached, whether or not I can feel it is another thing.
Last edited by Landrew; Jun 27, 2013 at 11:38 AM.
Reply
0
0
Thread Starter
Senior Member
iTrader: (2)
Joined: Sep 2009
Posts: 1,193
Total Cats: 29
From: Edmonton, AB, Canada
Got the block taped and etch primered last night. I'm thinking of going grey with it. Anyone tried a brighter color and it just looked silly down there ?
These pics are before primering.
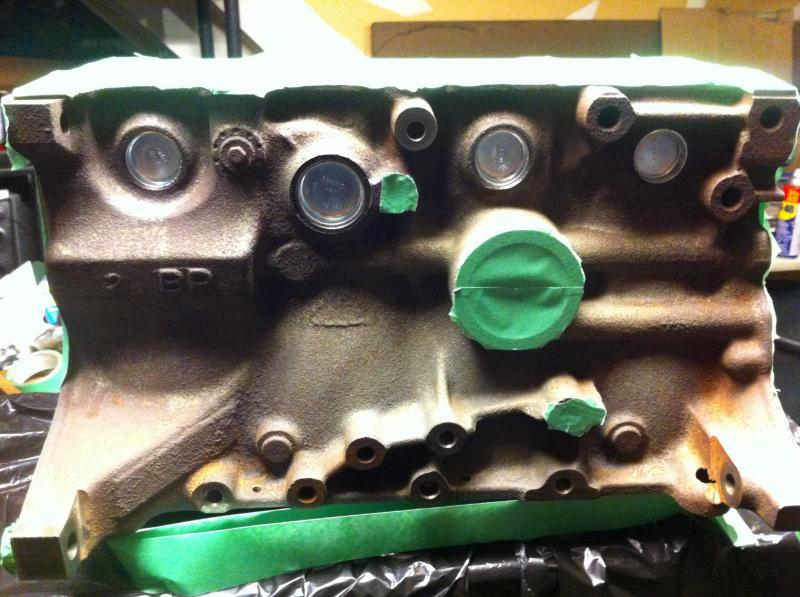

Put in a new front tranny seal. The inside of the housing was completely black before a few washings.
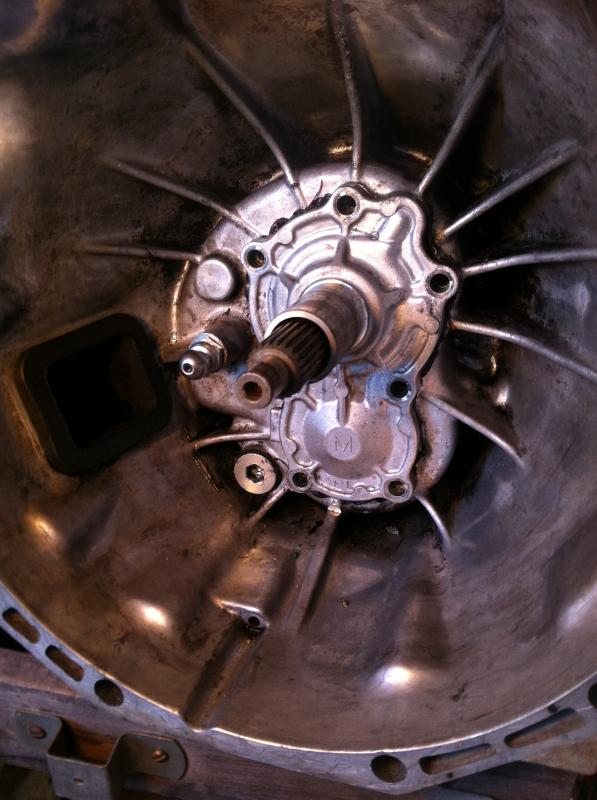
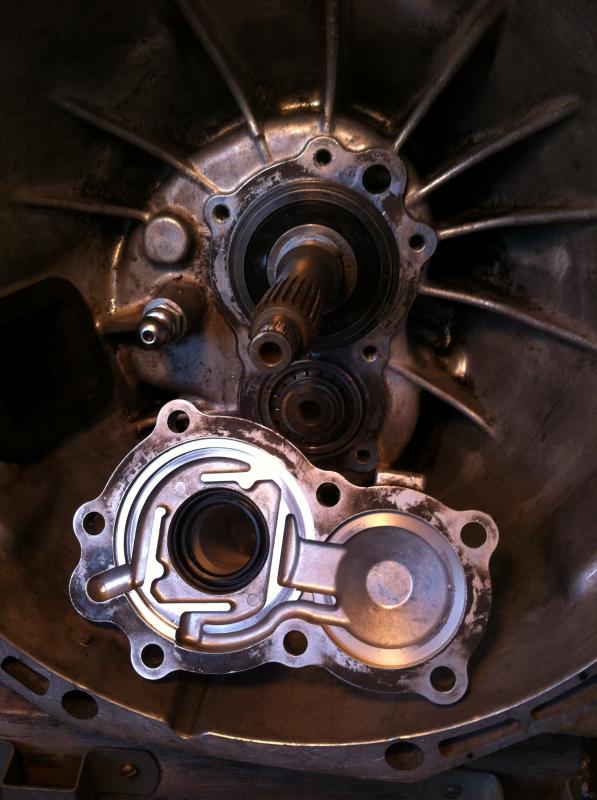
It looked from all the excess black RTV. and some marks on the splitter tabs on the various tranny parts and the fact that the one large main shaft bearing seal (the black portion) had some dents in it, I definitely wasn't the first guy inside here. I wonder what ever happened to the tranny? Is there ever a 6spd part that has a typical failure part ?
These pics are before primering.

Put in a new front tranny seal. The inside of the housing was completely black before a few washings.

It looked from all the excess black RTV. and some marks on the splitter tabs on the various tranny parts and the fact that the one large main shaft bearing seal (the black portion) had some dents in it, I definitely wasn't the first guy inside here. I wonder what ever happened to the tranny? Is there ever a 6spd part that has a typical failure part ?
Reply
0
0


Thread Starter
Senior Member
iTrader: (2)
Joined: Sep 2009
Posts: 1,193
Total Cats: 29
From: Edmonton, AB, Canada
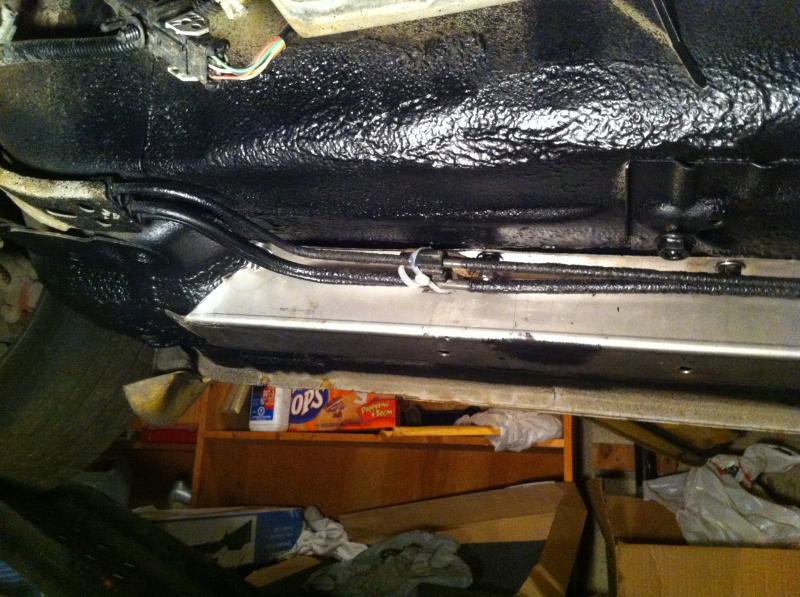
Got a single BE frame rail installed. I modified it a bit. I hammered a taper on the leading edge so it would be less likely to catch anything. I added 3 or 4 drain holes, I ground them smooth and also pounded/ flared them down to promote drainage. I also wanted to retain my OEM rear cross brace so I drilled a hole for that screw and I also depressed the rail just like the factory spot so I could retain some decent ground clearance. If not the rear brace would work like a fighter jet carrier hook!
Some observations. Stainless is not fun to drill, at all, ever! I should have greased or lubed the stainless bolts/nuts as I snapped 2 early on after they galled. Using a small vice and squeezing the deformed factory rails works so much better than sledging them. I sprayed over my factory rails with rocker guard just in case.
Ill get some pics up soon.
Reply
0
0

Reply
0
0

Thread Starter
Senior Member
iTrader: (2)
Joined: Sep 2009
Posts: 1,193
Total Cats: 29
From: Edmonton, AB, Canada
I am also doing some longevity ensurability coatings for my sheet metal.
Being a car that has 265,000km's and seen many a Canadian winter/spring its starting to show a tiny bit of rust underneath the panels. You can't see anything from standing height but in one or 2 spots in front of the rear wheel just as the rocker panel goes horizontal you can see some light rust. Otherwise the paint is actually quite nice for a 2002 but any rust underneath can stay there. I don't want this to continue or get worse. After it gets 300+ HP it will be a terrible winter car but I may take it out to scare myself some winter days and I don't want to worry about that or on rainy days. I have the time (still haven't got all my parts yet - waiting on shipment) and spray equipment and the oil is maybe $10-$30 so I'm going for it.
My plan is to spray a mix of oil/wax/ATF/phosphorous into all the crevasses that I can. I also just last night finished the right rear fender well exterior coating. I have coated the inside completely seamless right up to the fender lip and over the lip about 1cm thus leaving another cm of original paint showing. The goal is to stop water from seeping into that seam, and stop rocks from chipping away at things. A nice side effect will be sound proofing from the rocker guard. Now I need a way to get my oil spray just inside and above the fender wheel well lip seam and coat the inside/backside. I'm sure there is an access port some place in the trunk or where the soft top sits or maybe even behind the door lock mechanism. I'm using this siphon air spray gun with a long rubber hose to reach and apply the oil mix under pressure in all the rocker access ports, and in the multiple holes under the entry sill I had to pry up to get the carpet up for the frame rail bolts and any other place I can. I also plan to coat the lower rocker panel in rocker guard. I'll be putting the small Tupperwear on so it won't be visible.
I also have a can of Herculiner and may try that on the left rear wheel well fender lip and see what last longer.
Pics up some other day.
BTW feel free to give me some more tips on anything you see here. I'm all for learning more from those who have trod this path.
Last edited by Landrew; Jul 31, 2013 at 12:18 PM.
Reply
0
0
Thread Starter
Senior Member
iTrader: (2)
Joined: Sep 2009
Posts: 1,193
Total Cats: 29
From: Edmonton, AB, Canada
Crap, so the drivers side bolt the connects the rear brace to the OEM frame rails still won't come out. I snapped the head off trying to take it out a while back. Its been soaking for days in penetrant. I've drilled a hole in it and then tried an easy-out. I snapped the easy out handle. Then came out the pipe wrench and the easy out just keeps threading in more and more under extreme force even after I added heat with a torch (careful of gas lines) and more penetrant. It might be cracked since the easy-out kept threading in although it took 2 hands to keep it turning. I think its time to drill it out another step bigger and try again.
We usually see the good side of builds so I thought I'd share the stupid side where one little bolt can cost hours of work.
If you can't beat them join em. Drilled out the nut to almost 10mm, went up to the next easy out still nothing so I tapped it for the original 10X1.25 and we'll se how that holds
Last edited by Landrew; Jul 31, 2013 at 12:13 PM.
Reply
0
0
Thread Starter
Senior Member
iTrader: (2)
Joined: Sep 2009
Posts: 1,193
Total Cats: 29
From: Edmonton, AB, Canada
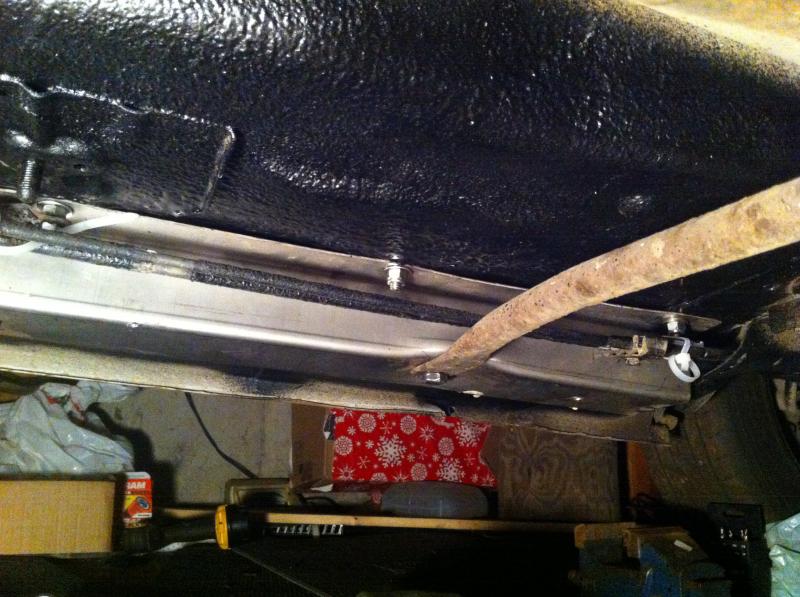
Finished the other rail. Didn't like how the fuel line holders were holding the lines at the same height or just hanging lower than the rails so I bolted the fuel line holders to the rail install bolts. This keeps them a cm or 2 above the rails and out of harms way. Just have to pivot the plastic clips in the holders 90 degrees. Also installed the rear OEM brace and its barely down past the rails.
My black Konig Feathers came with chrome centre caps so I painted them etching primer grey and then matte black. All black looks better than the chrome in the middle for my car in my opinion.
My black Konig Feathers came with chrome centre caps so I painted them etching primer grey and then matte black. All black looks better than the chrome in the middle for my car in my opinion.


Last edited by Landrew; Aug 6, 2013 at 12:30 PM.
Reply
0
0
Thread Starter
Senior Member
iTrader: (2)
Joined: Sep 2009
Posts: 1,193
Total Cats: 29
From: Edmonton, AB, Canada
No progress because busy.
Still have head at shop and still waiting to get parts from US and A. Should get confirmation of my parts shipping this Sat.
Since my carpet was up I put some asphalt repair roof paper (Canadian brand) in the foot wells and will be applying it to the rear shelf. It's all exposed so now is the time. It'll help but not like quiet like an S-Class.
Tested my oil / rust sprayer on my Sierra truck in a few spots by the rear wheels/frame. Fuel pump went out so I'm lifting one side of the bed to get to it. Pre-soaking the bolts for ease of removal with my spray tool and I want to see how the oil migrates and survives exposure when its back on the road. Its nice that I can stuff the hose way in there but the diameter is to big. I need less diameter and more backpressure for more spraying power - not a typical Miata Turbo desire!
Next is probably fuel pump (walbro 255) and small side skirt install/oil spray.
Hmm, that or I really should start installing the bottom end parts.
When I get to it in a day or week........................
Reply
0
0
Thread Starter
Senior Member
iTrader: (2)
Joined: Sep 2009
Posts: 1,193
Total Cats: 29
From: Edmonton, AB, Canada
Allright I've been told my parts will ship this week.
I'm replacing a fuel pump in my Sierra pickup. Lifting one side of the bed to get to the pump as opposed to dropping the tank. I had to order it from the states and pay $50 to get it shipped here from a Tuesday to a Tuesday. Such is Canadian life. At least there was an option to just replace the pump. Up here it was the whole pump/sender assembly or nothing for 3 times the price I paid including shipping.
Hopefully this will get me to do that same on the Miata and put in the Walbro 255. When I do, ill post pics etc.
Reply
0
0
Thread Starter
Senior Member
iTrader: (2)
Joined: Sep 2009
Posts: 1,193
Total Cats: 29
From: Edmonton, AB, Canada
Parts didn't ship.
I've been told they will ship this weekend. I sure hope so. It's now September and the leaves are falling in spots. I've lost a bit of interest because of this but maybe I'll look at the car in hopes I'll be getting the parts. I'll post if I do.
I'm going to test the valve clearance of the OEM VVT piston vs the Wiseco 8.5:1 pistons I have. I'll use a dial indicator and try to do it properly. Then I'll know if I know have an interference engine.
Reply
0
0
Thread Starter
Senior Member
iTrader: (2)
Joined: Sep 2009
Posts: 1,193
Total Cats: 29
From: Edmonton, AB, Canada
So my stuff was supposed to ship on Satruday but it did not as expected. Then I was told Tuesday but it did not, or at least I haven’t heard so maybe it did. I wish I could just cancel now but it’s been too long to get PayPal involved. I suppose I will have to try other legal methods if it gets to that point. Very very frustrating.
Reply
0
0


Thread Starter
Senior Member
iTrader: (2)
Joined: Sep 2009
Posts: 1,193
Total Cats: 29
From: Edmonton, AB, Canada
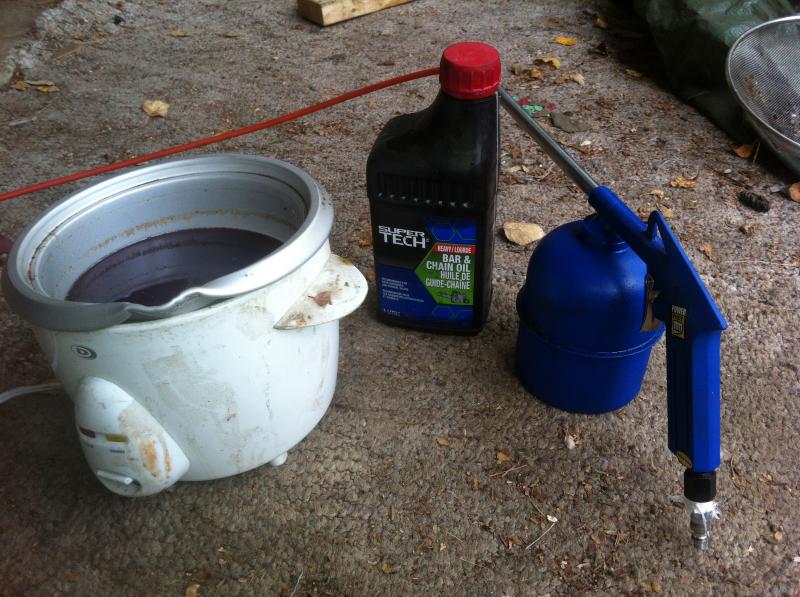
While I stilllll wait for my parts to arrive I thought I'd get some more rust prevention going.
Warmed summer chainsaw oil and a Shutz gun. Open up the frame rail cover and sprayed inside using the extension tube I made for the gun. All the wat one direction and all the way back. Then I sprayed every hole and crevice along the sill and seatbelt tower. I even took the door lock latch and unbolted it from the sill and any other bolted item so I could spray behind the threaded holes. I also sprayed the door drains until some came out there. I left it outside for the last 2 days but it's only getting to 15 celcius for a high lately. The next hot day (for Canada) I'll have to park it at home outside with the doors open. That will be approximately 10 months from now or roughly the same day my parts show up.
Cover comes off quite easily:

It was dripping out the OEM rail holes and then through the holes I added to the Aftermarket rail. Sure it will drip when the weather gets warm again but that's ok.
Warmed summer chainsaw oil and a Shutz gun. Open up the frame rail cover and sprayed inside using the extension tube I made for the gun. All the wat one direction and all the way back. Then I sprayed every hole and crevice along the sill and seatbelt tower. I even took the door lock latch and unbolted it from the sill and any other bolted item so I could spray behind the threaded holes. I also sprayed the door drains until some came out there. I left it outside for the last 2 days but it's only getting to 15 celcius for a high lately. The next hot day (for Canada) I'll have to park it at home outside with the doors open. That will be approximately 10 months from now or roughly the same day my parts show up.

Cover comes off quite easily:

It was dripping out the OEM rail holes and then through the holes I added to the Aftermarket rail. Sure it will drip when the weather gets warm again but that's ok.
Last edited by Landrew; Oct 7, 2013 at 04:24 PM.
Reply
0
0


