Pat's Ebay Turbo Compound Boost Build
 11-20-2017, 11:38 AM
#1441
Elite Member
Thread Starter
iTrader: (16)
Join Date: Aug 2007
Location: Houston, TX
Posts: 9,297
Total Cats: 477

I'd also be really curious to see testing results of this thing with and without the rear turbo. Correct me if I'm wrong, but IIRC the best "quarter mile trap" as calculated by an online 1/8 to 1/4 mile calculator working from your best 1/8 trap speed is 130ish mph...right?

Reply
 0
0

0
 11-20-2017, 12:44 PM
#1443
Retired Mech Design Engr

iTrader: (3)
Join Date: Jan 2013
Location: Seneca, SC
Posts: 5,009
Total Cats: 856
Agreed, you have changed out all the Previously Over-stressed items now, and are turning down the Rev Limit to preserve the bearings in the engine. But, first you diligently worked hard to find all those limits. Hats off.
Reply
1
1

 11-21-2017, 02:11 PM
#1447
Elite Member
Thread Starter
iTrader: (16)
Join Date: Aug 2007
Location: Houston, TX
Posts: 9,297
Total Cats: 477
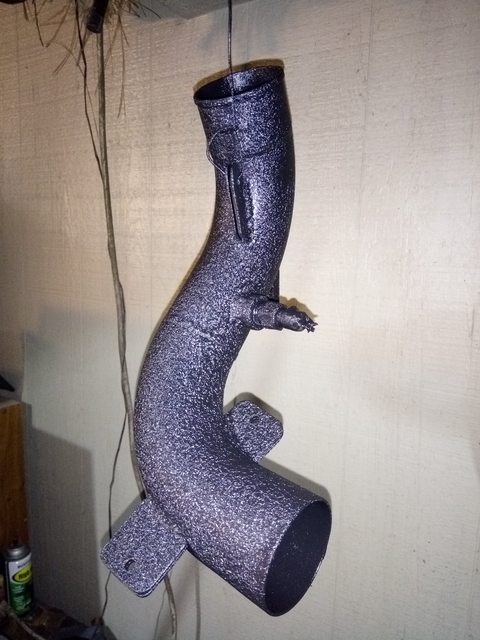
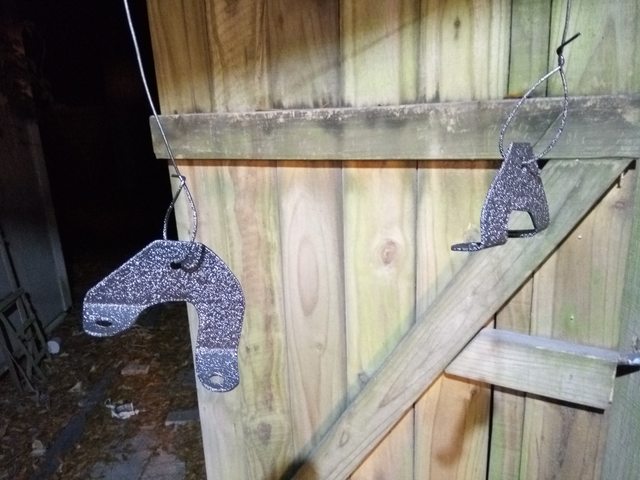
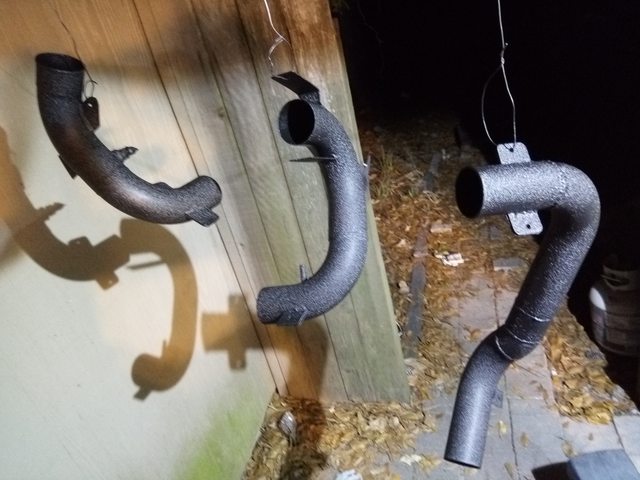
As above, I could get them to work for a while, but eventually things would pop loose. When I lift off the gas, the big turbo blows into the front one and pressure spikes really high momentarily, and that's almost always when they would pop off. If the pipes get a tiny amount of oil on them, the friction coefficient between the coupler/pipe goes down a ton and friction was previously the only thing that held it together. I think the bracing should be the "set it and forget it" solution so I did it so I can hopefully never have a coupler pop off again. Math says 40 PSI on a 2.5" pipe is 200lbs of force trying to pull the coupler off. Add in temp/vibration/pressure spikes from rear turbo on liftoff/oil film on surfaces, etc, stuff happened.
Reply
0
0
 11-21-2017, 06:32 PM
#1450
Elite Member
Thread Starter
iTrader: (16)
Join Date: Aug 2007
Location: Houston, TX
Posts: 9,297
Total Cats: 477
Car is really close to done. I'm finishing up the ducting now, it is by far better than any ducting I've done before. Once it's done, and I reinstall the pipes and connections and all that, I'll take some pics and post them up. It's gonna look a lot better and should work better than before.
Reply
1
1
11-22-2017, 02:31 AM
#1451
Elite Member
Thread Starter
iTrader: (16)
Join Date: Aug 2007
Location: Houston, TX
Posts: 9,297
Total Cats: 477
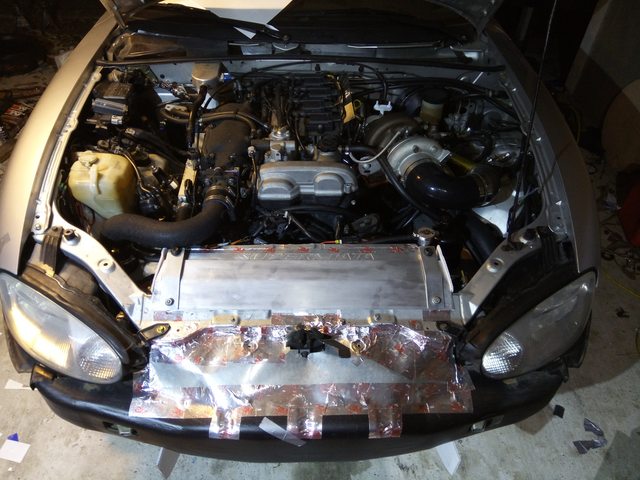
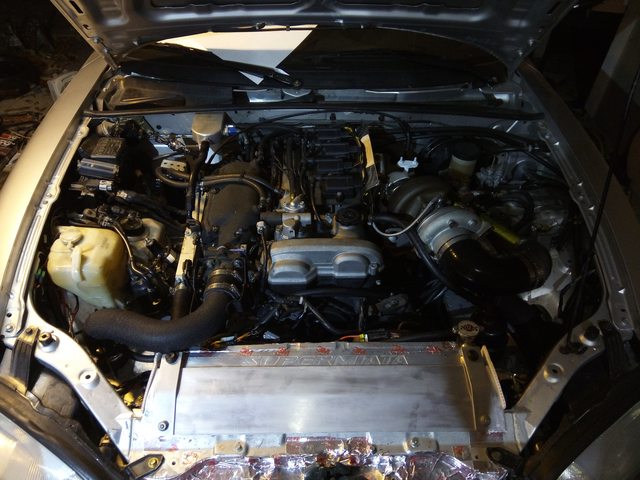
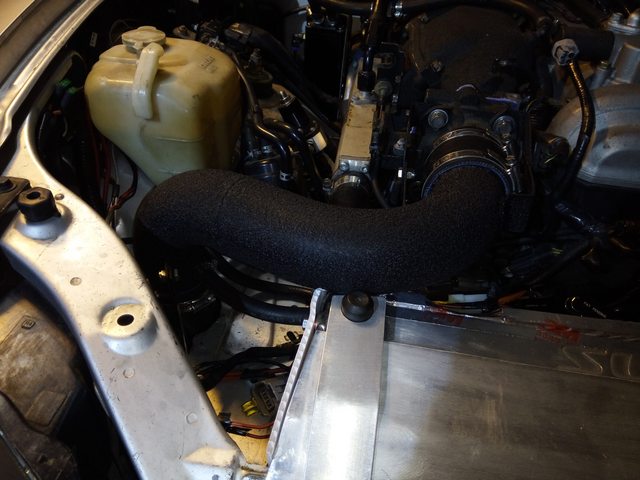
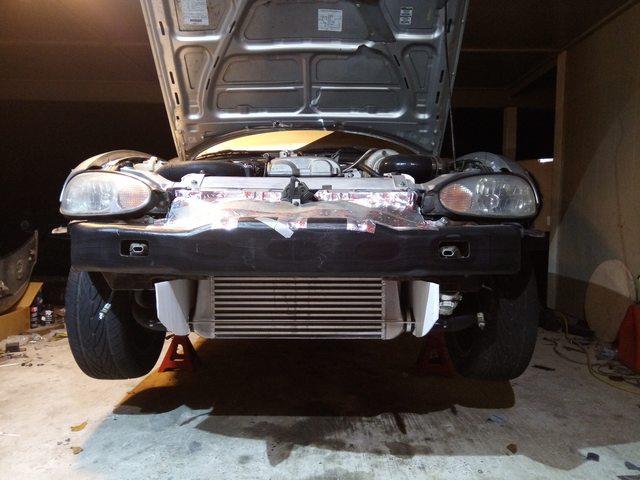
Update with PICS!
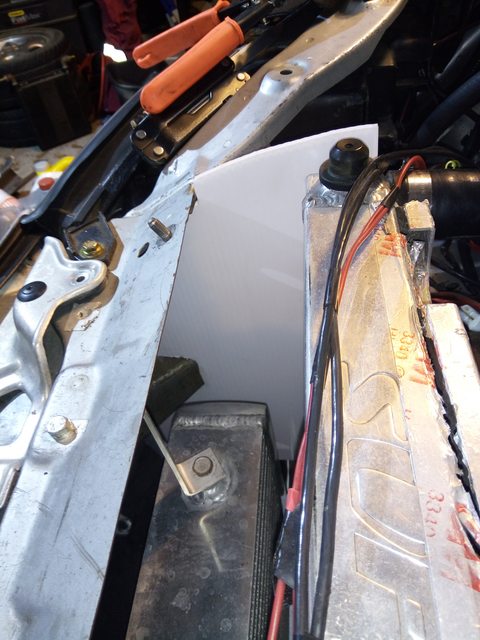
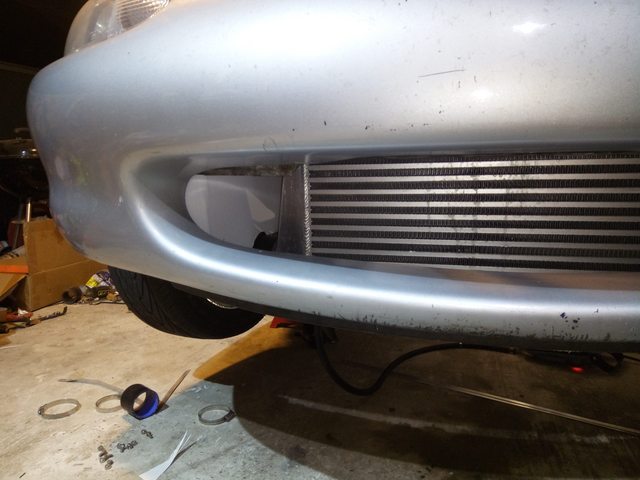
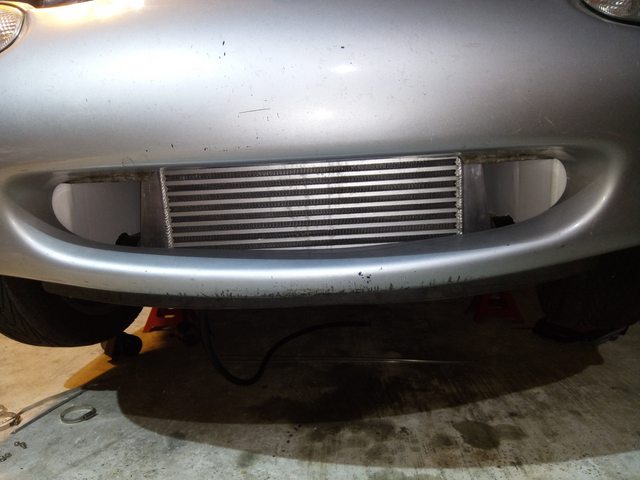
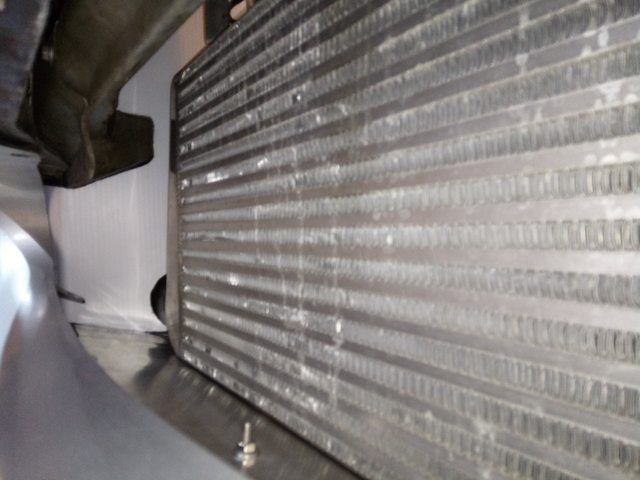
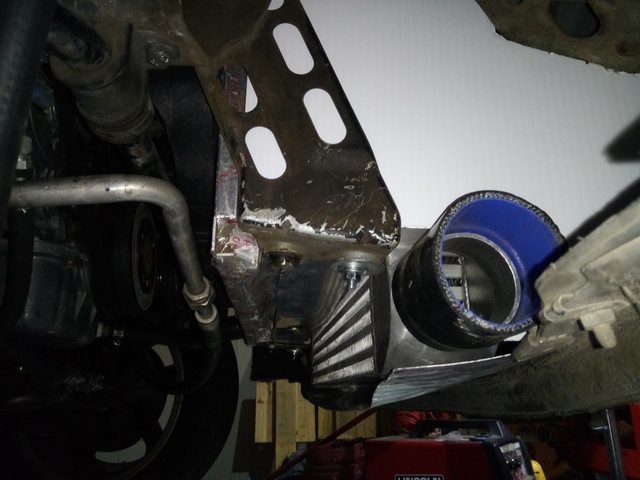
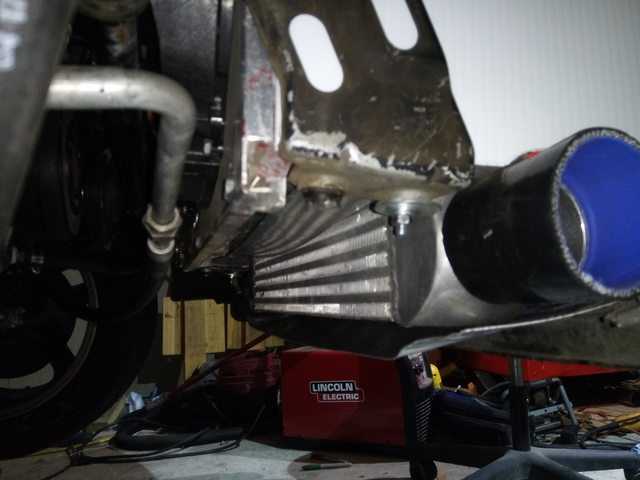
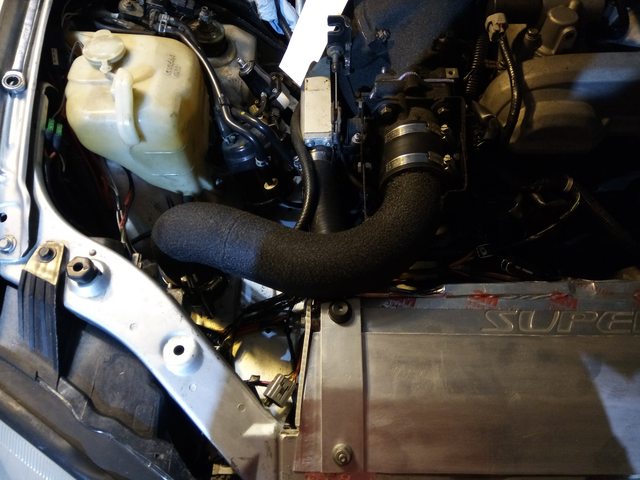
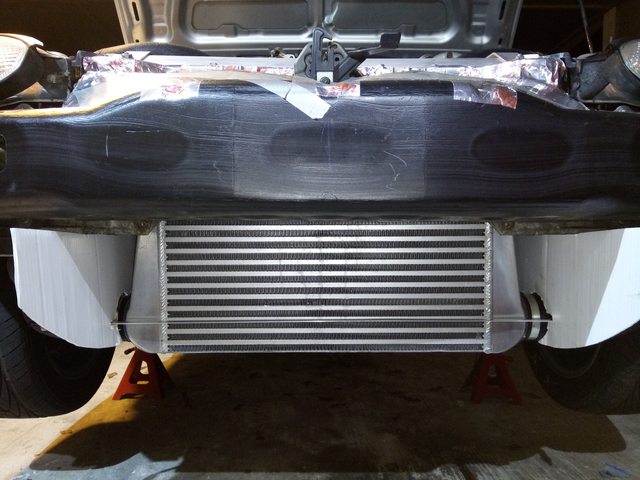
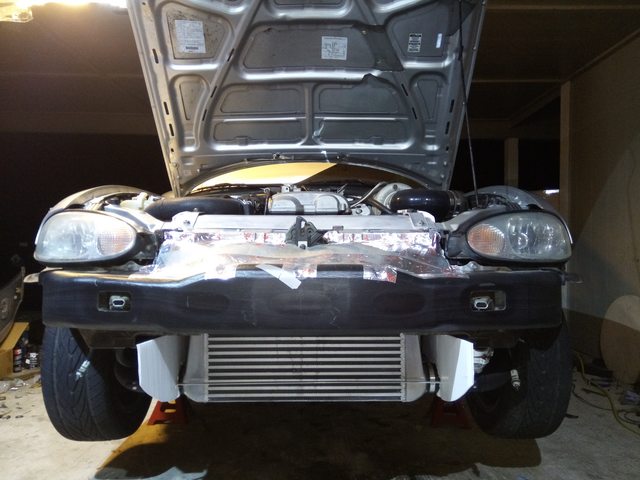
I got the ducting finished. Finally. I had to make the side pieces out of corrugated plastic as I ran out of aluminum, but both bottom pieces and top pieces are all aluminum and bolted in. I'll do the sides in AL once i get some more and have it apart again.
Turbo fittings and pipes are all hooked up. Still gotta do wastegate/BOV vacuum hoses, and put charge pipes in. Plan to finish it up tomorrow and do an oil change or two on it to clean the oil out from the failed turbo, then drive it.
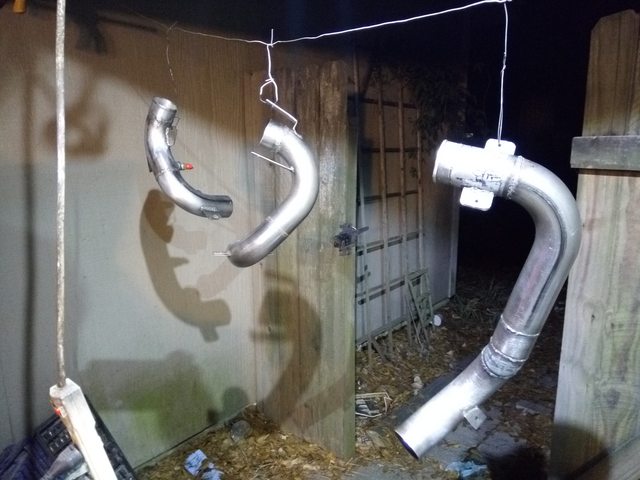
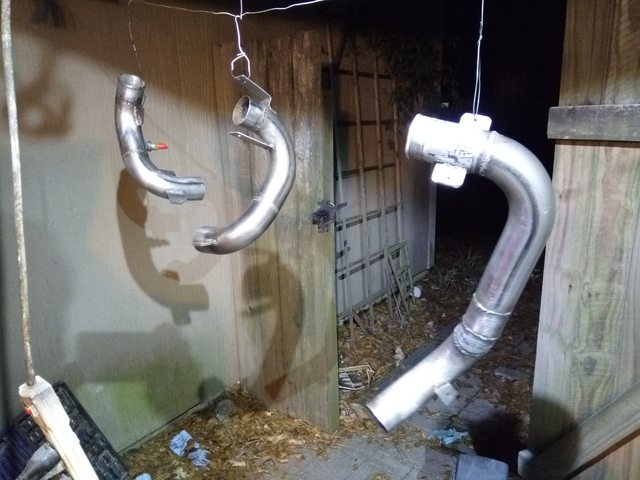
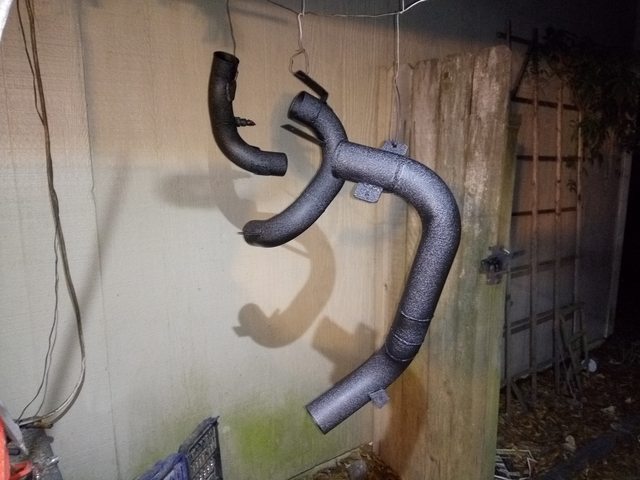
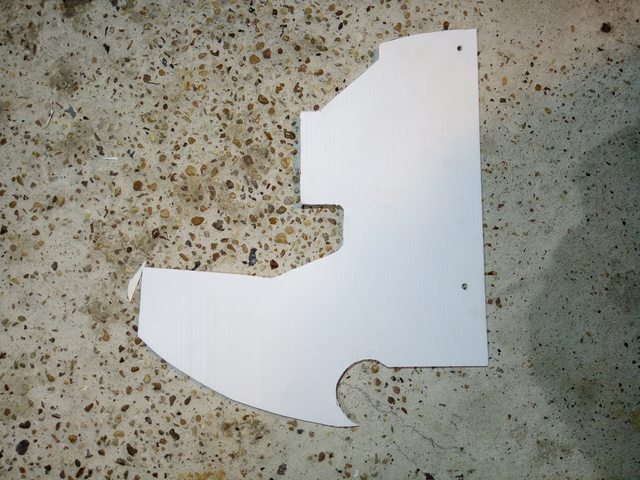
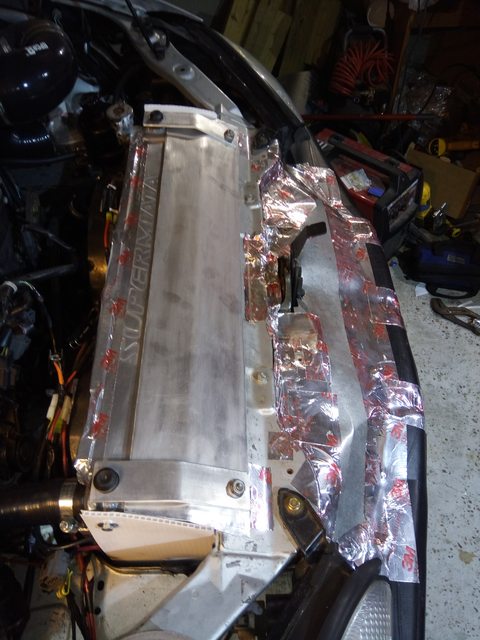
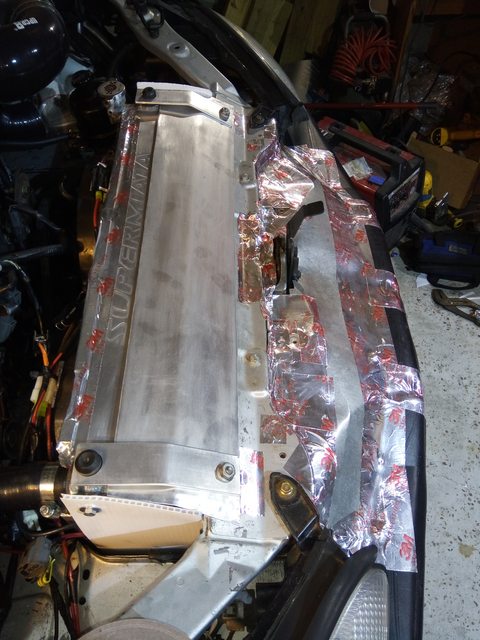
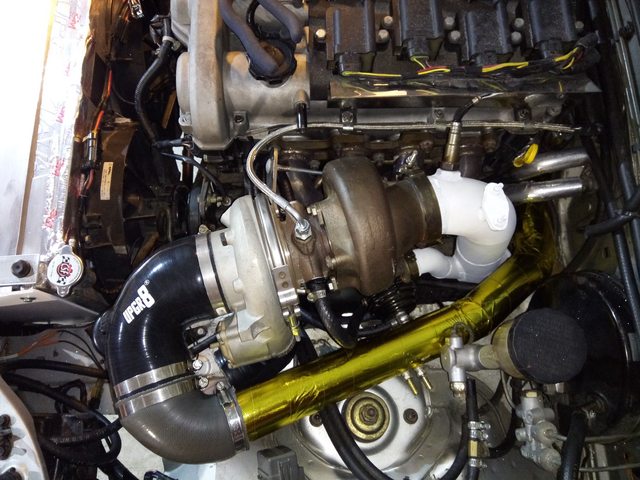
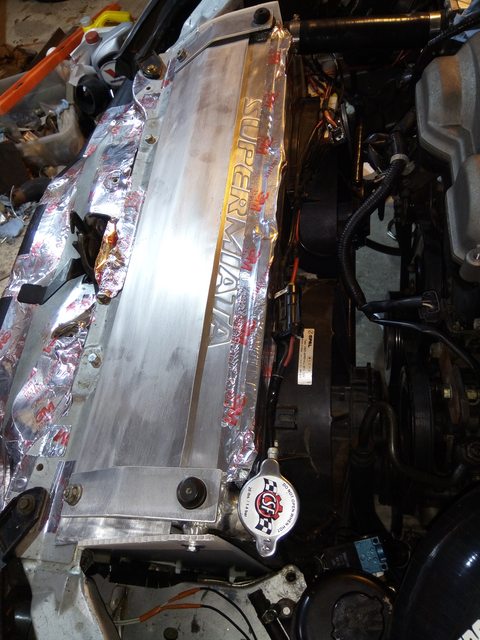
Reply
0
0
11-22-2017, 12:32 PM
#1453
Elite Member
Thread Starter
iTrader: (16)
Join Date: Aug 2007
Location: Houston, TX
Posts: 9,297
Total Cats: 477
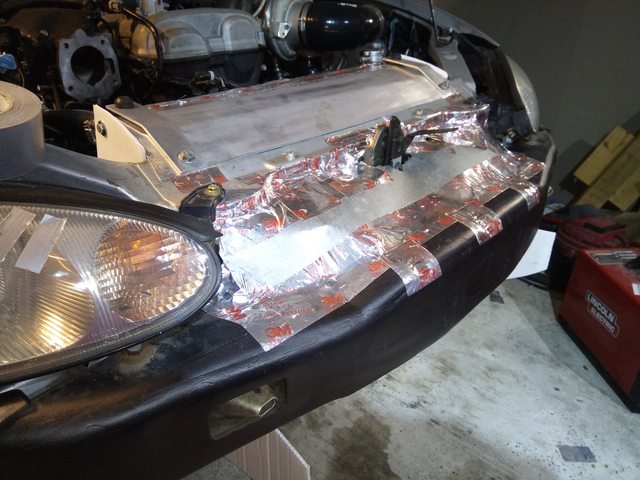
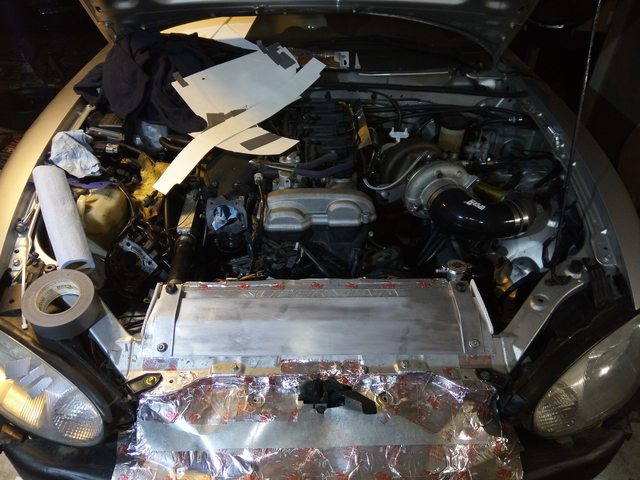
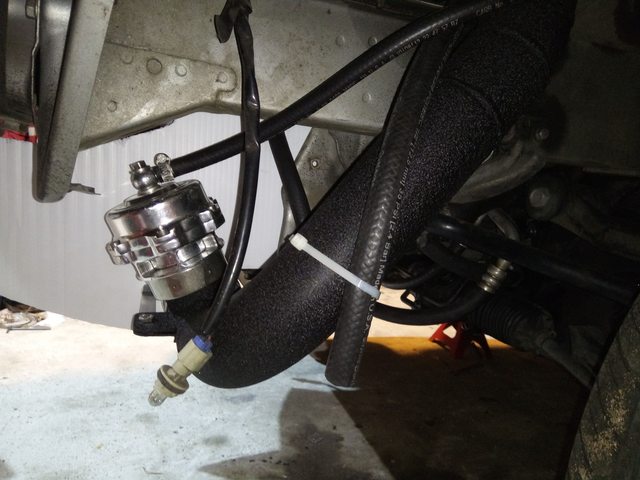
I made a curved piece of sheet metal that goes between the plastic crash thingy and the chassis, but I decided to tape the edges for a better seal. Almost all of that goes under the bumper cover so it will be out of sight anyway. I just wanted this to work as well as it could.
Reply
0
0
11-22-2017, 05:00 PM
#1454
Supporting Vendor

iTrader: (10)
Join Date: Aug 2014
Location: Bainbridge Island, WA
Posts: 1,461
Total Cats: 388
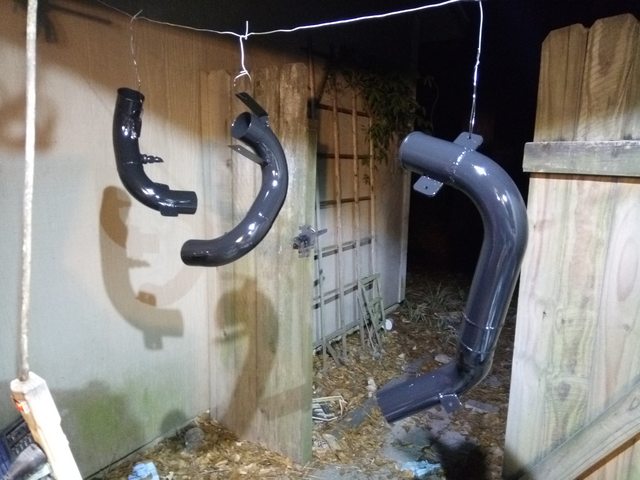
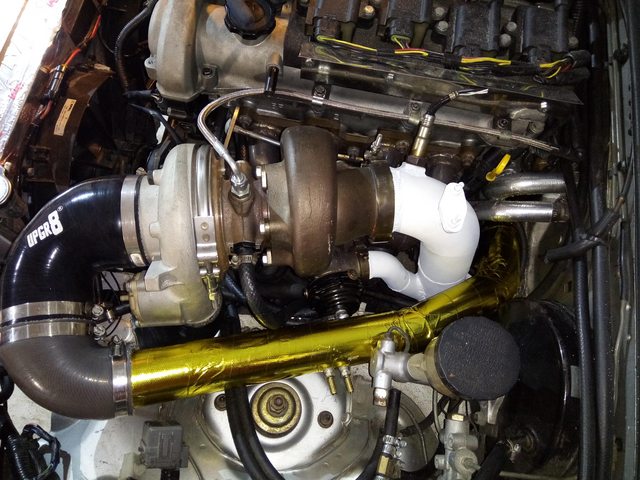
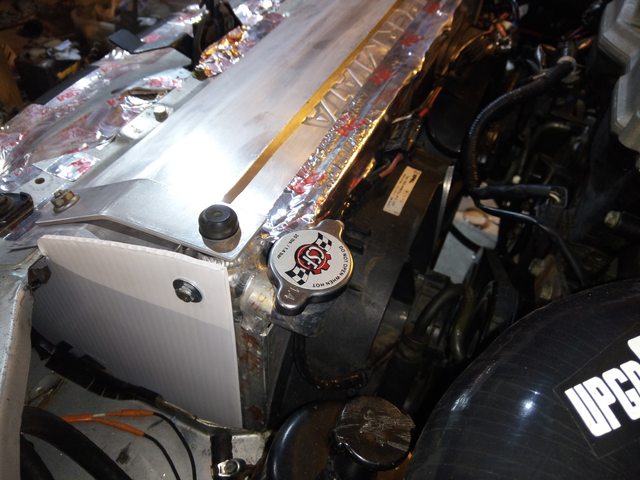
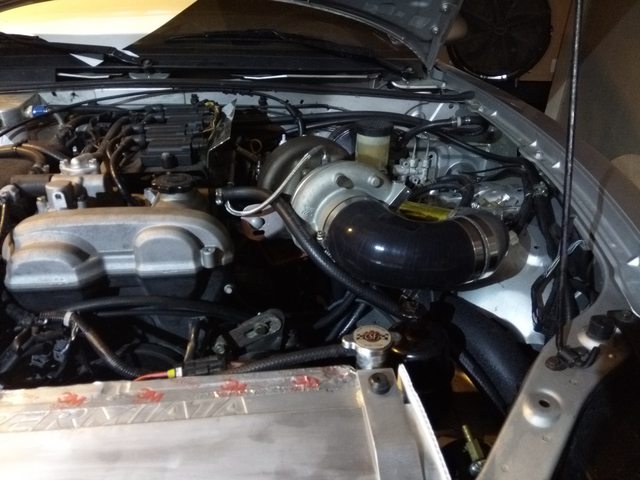
Really nicely done. It looks like you aren't plugging the ends of the piping when you paint it. Are you worried at all about flaking inside?
Also, with all the work you do to make it look sweet, you could definitely sharpy over the UPGR8! It's the only high contrast logo in your whole engine bay, so it really pops.
Also, with all the work you do to make it look sweet, you could definitely sharpy over the UPGR8! It's the only high contrast logo in your whole engine bay, so it really pops.
__________________

Reply
0
0
11-22-2017, 07:29 PM
#1455
Elite Member
Thread Starter
iTrader: (16)
Join Date: Aug 2007
Location: Houston, TX
Posts: 9,297
Total Cats: 477
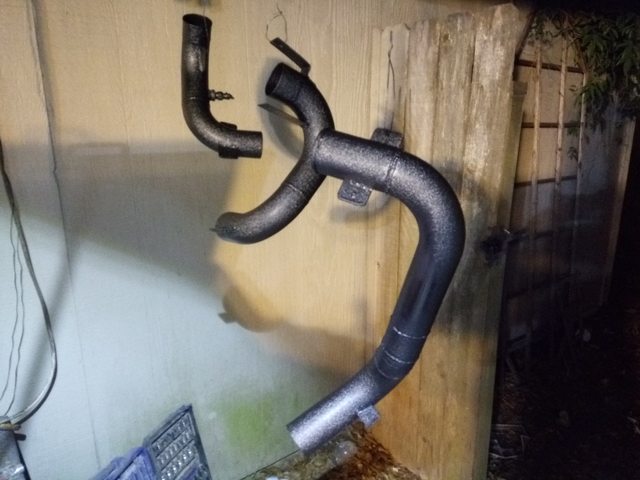
I actually did spray paint on the insides on purpose. I did this in 2008 when I turbo'd the car, and I still have those old pipes and the paint inside is ok. I found if you don't do that, the pipes rust inside. Even if the paint flakes, probably better to have paint flakes in the motor vs rust. I cleaned the inside and outside with isopropyl alcohol before painting them.
Good catch on the UPGR8 logo, fixed as suggested! Definitely looks better blacked out.
Car still isn't finished, but very close. Putting things together, doing intercooler pipes right now.
Good catch on the UPGR8 logo, fixed as suggested! Definitely looks better blacked out.
Car still isn't finished, but very close. Putting things together, doing intercooler pipes right now.
Reply
0
0
 11-22-2017, 09:41 PM
#1457
Elite Member
Thread Starter
iTrader: (16)
Join Date: Aug 2007
Location: Houston, TX
Posts: 9,297
Total Cats: 477
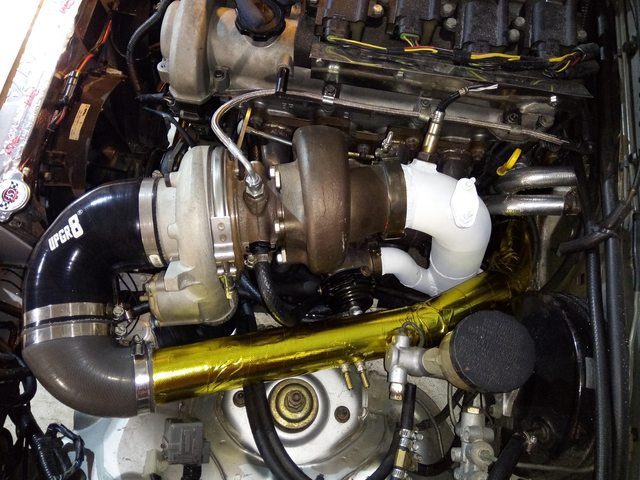
Oh I see. Well, they are 100 each... I'd need several, and couldn't use them with the MAF anyway. Design looks... OK. Seems like the o-rings would fail as they are sliding/moving to allow it to flex. I'm happy with what I built if it last. Just got all the pipes back on. Got a few small things left. Dang the details of trying to make things fit just right, and not cut any corners takes forever.
Reply
0
0
11-23-2017, 02:10 AM
#1458
Elite Member
Thread Starter
iTrader: (16)
Join Date: Aug 2007
Location: Houston, TX
Posts: 9,297
Total Cats: 477
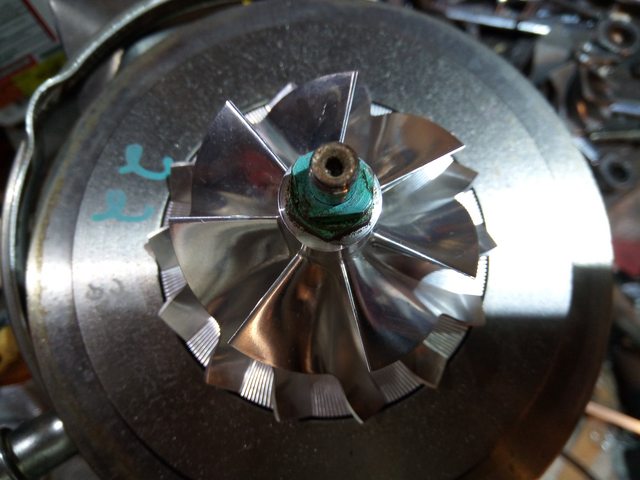
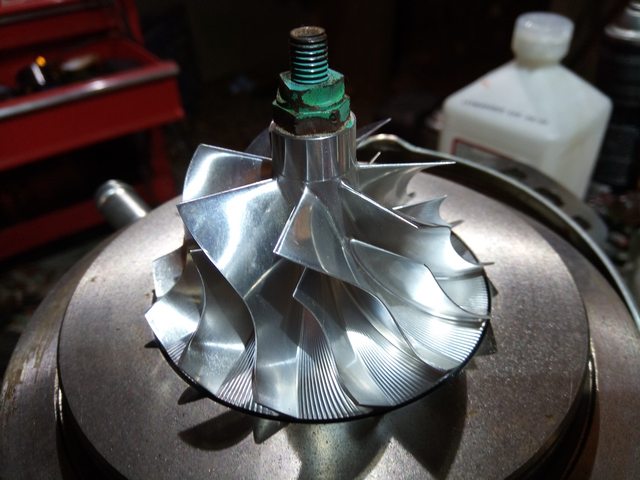
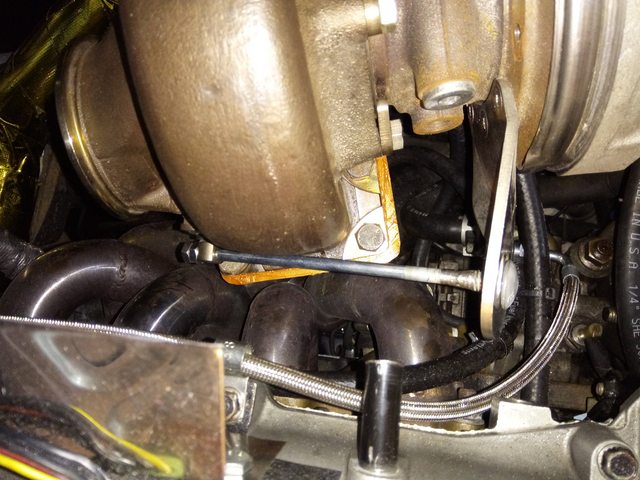
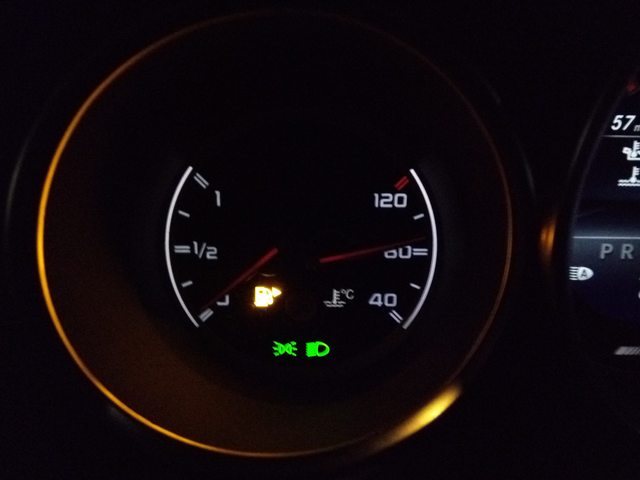
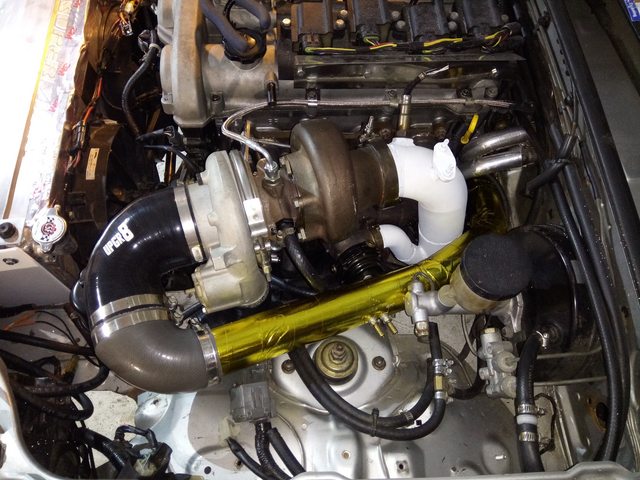
Runs! Had all the fittings on the water cooling for the EFR leak, had to re tighten all of them but they're fine now. I verified oil is draining/flowing through turbo. I let it idle a bit, then did an oil change to flush out the old oil. Gonna drive it a bit then do another oil change.
I don't remember if I mentioned this, but when the front turbo died, of course there was oil everywhere as the front seal on it dumped oil. But the rear turbo also had oil coming out it on the turbine side. All signs pointed to the rear oil pump failure. Sure enough, that pump is acting up. I hit the key and it didn't turn on, then tapped on the pump and it spun up to life. So... Gotta either replace the pump with another, or try to find some bombproof pump for it.
But, it runs! And all the V-bands are so far not leaking, which is nice. I put the bumper back on, forgot to take pics of that.
Gonna look into changing the muffler to something louder. Funny I'm saying that, fought forever to make it quiet, now want more exhaust sound.... But it's quieter than stock right now.
Reply
0
0
11-23-2017, 07:27 PM
#1459
Junior Member

Join Date: Jul 2016
Posts: 98
Total Cats: 17
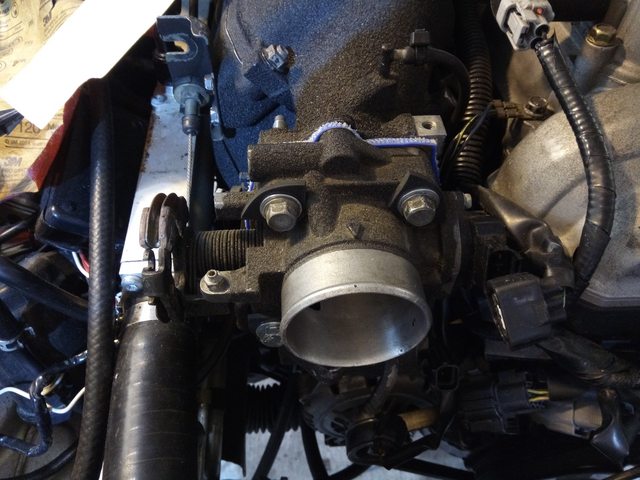
Hi Pat, many thanks for sharing your mind-mending build! Hey, that really thick blue gasket that you have cut for the throttle body to intake plenum - is that for megaboost reasons, or are you hoping it will also perform like a vibration damper to reduce the changes of a cracked tb axle?
Cheers
Cheers
Reply
0
0
11-24-2017, 12:10 AM
#1460
Elite Member
Thread Starter
iTrader: (16)
Join Date: Aug 2007
Location: Houston, TX
Posts: 9,297
Total Cats: 477
Hi Pat, many thanks for sharing your mind-mending build! Hey, that really thick blue gasket that you have cut for the throttle body to intake plenum - is that for megaboost reasons, or are you hoping it will also perform like a vibration damper to reduce the changes of a cracked tb axle?
Cheers
Cheers
Reply
0
0


