Prepping my '95 for track


Joined: Sep 2012
Posts: 4,560
Total Cats: 1,143
From: your mom's house phoenix, AZ
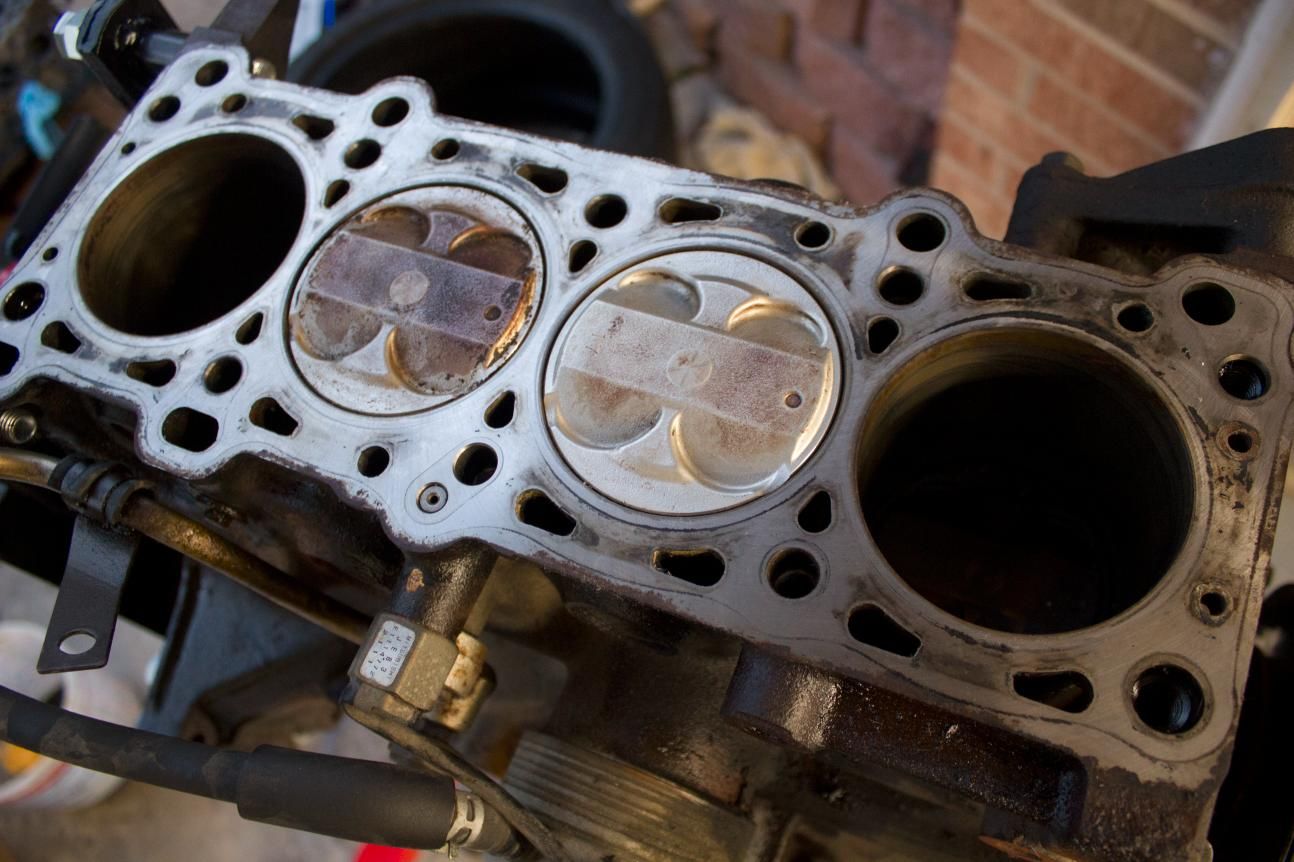
Be careful with the wire brush, or better yet don't use it at all. I used small wire brush on my 1.6 last year, and a tiny piece of bristle broke off unbeknownst to me, in between the piston and cylinder wall. It left a nice vertical score in the cylinder wall the length of the stroke, and then probably made its way into my oil pump and into the filter.
Reply
 0
0

0

Thread Starter
Joined: Jul 2012
Posts: 792
Total Cats: 143
From: durham NC
Good to know. The rag gets most of it. I have been soaking rags (not so much that they drip), laying them over the piston, and the taping aluminum foil down overtop. That prevents the acetone from evaporating as quickly and you can let it soak for while to soften up all the carbon.
Reply
0
0

Thread Starter
Joined: Jul 2012
Posts: 792
Total Cats: 143
From: durham NC
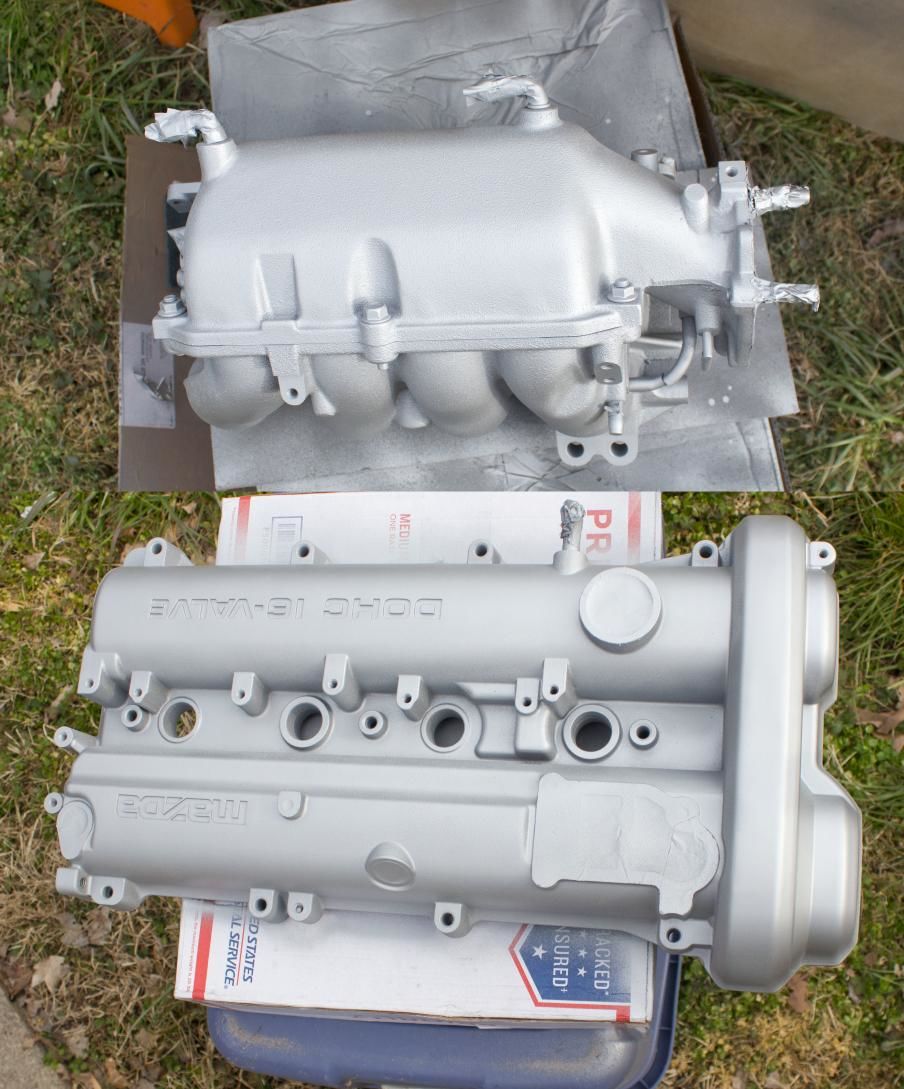
Seymour Alumi Blast on the valve cover and IM. I'll probably do the oil pan as well so I can find leaks easier. It looks pretty close to brand new cast aluminum.
Reply
0
0
Thread Starter
Joined: Jul 2012
Posts: 792
Total Cats: 143
From: durham NC
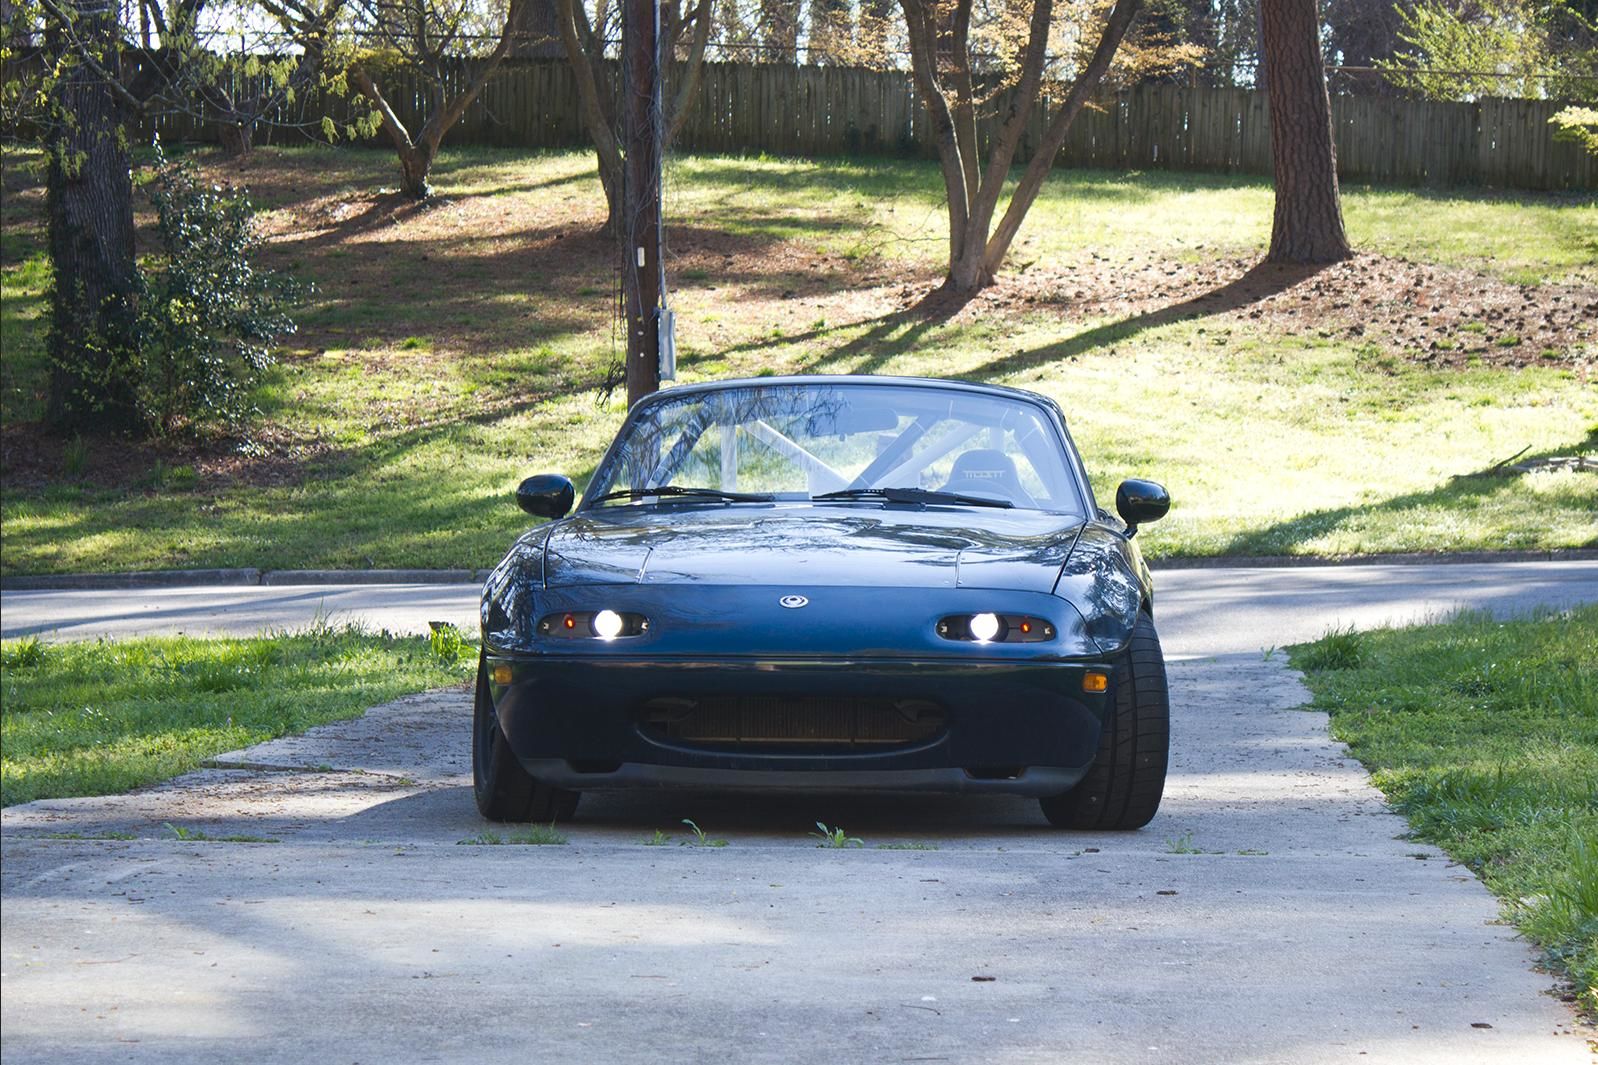
The headlights are in. I still need to file all the cut edges smooth, do cleanup, and mount the wiring, balasts, and turn signals.
https://i.imgur.com/bwbHW1S.jpg
https://i.imgur.com/bwbHW1S.jpg
Reply
0
0

Thread Starter
Joined: Jul 2012
Posts: 792
Total Cats: 143
From: durham NC
There is a nut welded into the underside of the support bar that was in the way. Instead of cutting all of that out I just drilled it out (that's the fresh 1/2" hole).
Reply
0
0
Thread Starter
Joined: Jul 2012
Posts: 792
Total Cats: 143
From: durham NC
The headlights and turn signals are wired and functional. The little plastic panel that holds the turn signal will get replaced with carbon plate:
I didn't weigh what was cut out of the car or the singular headlight lid brackets - I would guess the headlight lids brackets are only slightly heavier than the steel I removed. Final weight savings ends up being 14.7lb:
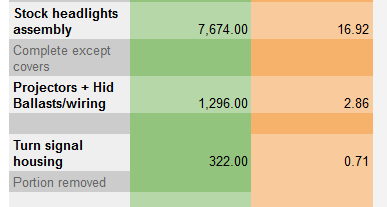
I didn't weigh what was cut out of the car or the singular headlight lid brackets - I would guess the headlight lids brackets are only slightly heavier than the steel I removed. Final weight savings ends up being 14.7lb:
Reply
0
0
Thread Starter
Joined: Jul 2012
Posts: 792
Total Cats: 143
From: durham NC
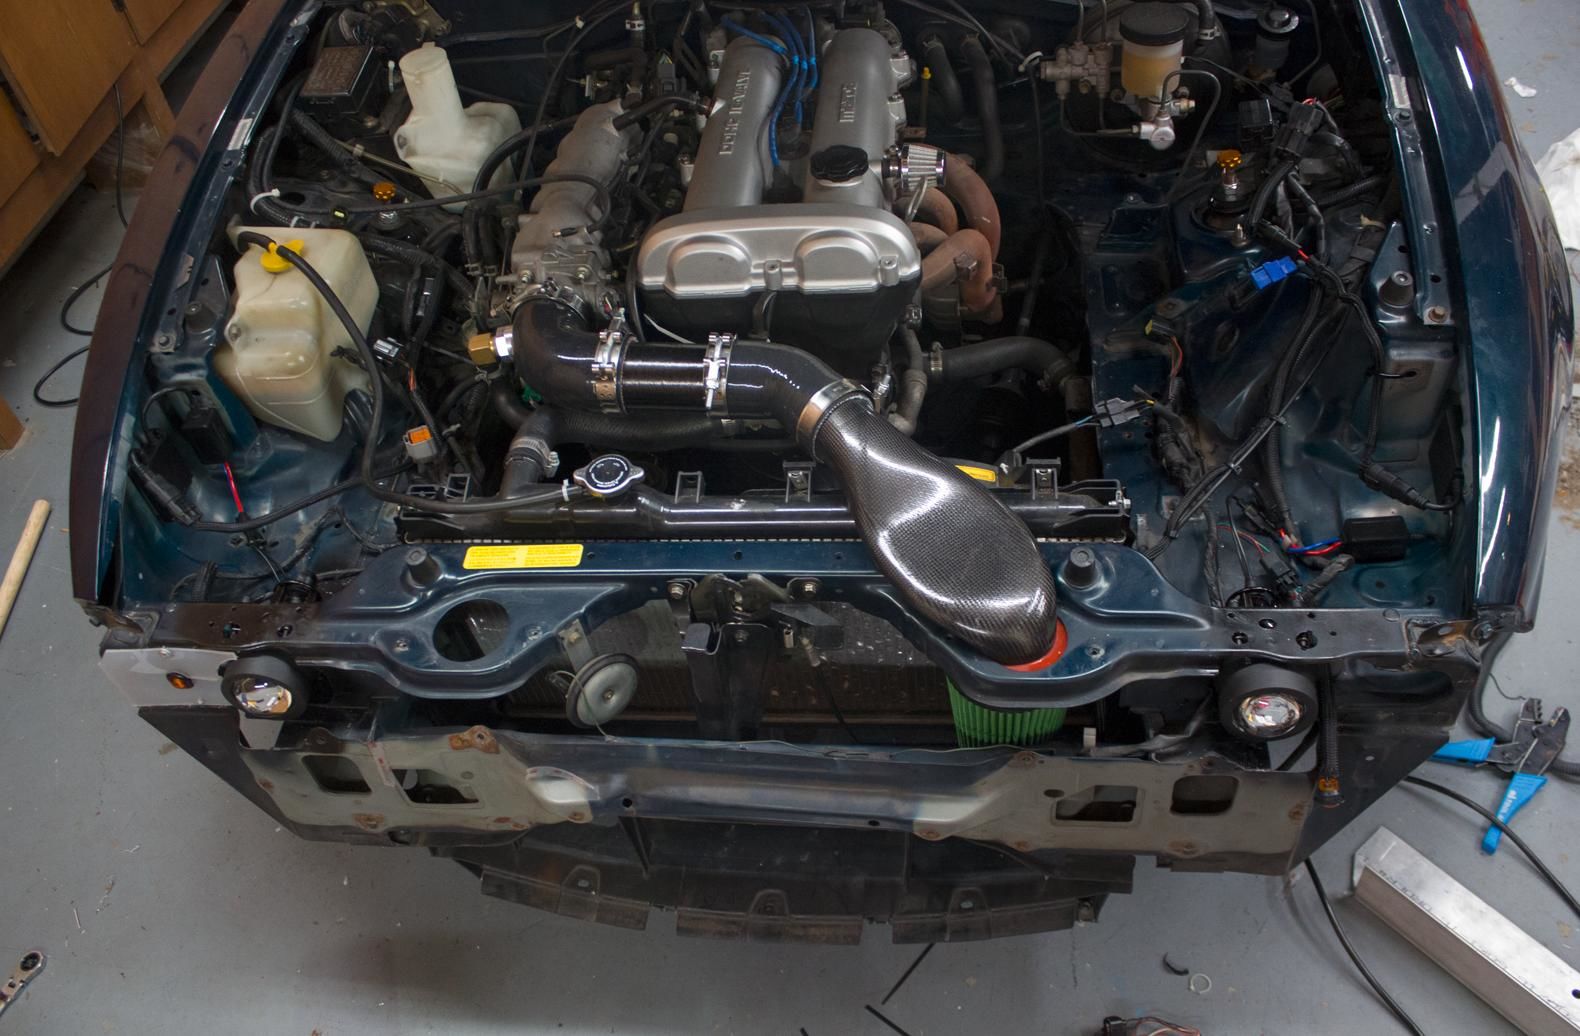
The 3 wire LED turn signals I got are intended to be run at half power for marker lamps and then toggle between 50% and 100% for turn signal operation. It is really hard to see the difference between 100% and 50% during the daytime so I am going to have to wire in a second set and get rid of the marker function. Everything else is finished:
Reply
0
0

Joined: Apr 2014
Posts: 18,643
Total Cats: 1,870
From: Beaverton, USA
The 3 wire LED turn signals I got are intended to be run at half power for marker lamps and then toggle between 50% and 100% for turn signal operation. It is really hard to see the difference between 100% and 50% during the daytime so I am going to have to wire in a second set and get rid of the marker function. Everything else is finished:
Reply
0
0