
Se7en Turbo Build (Was: Thermostat Rerouting)


SteyrTMP, yes I am on Locost as Twnpipe - CMC resurrected in build section. My car is on its 3rd build/rebuild from Grass Roots Motorsports original build. Its running and you pictures are up. CMC is a book frame I think.
Reply
 0
0

0

Thread Starter
Junior Member
Joined: Oct 2008
Posts: 113
Total Cats: 5
From: Cortland, Ohio
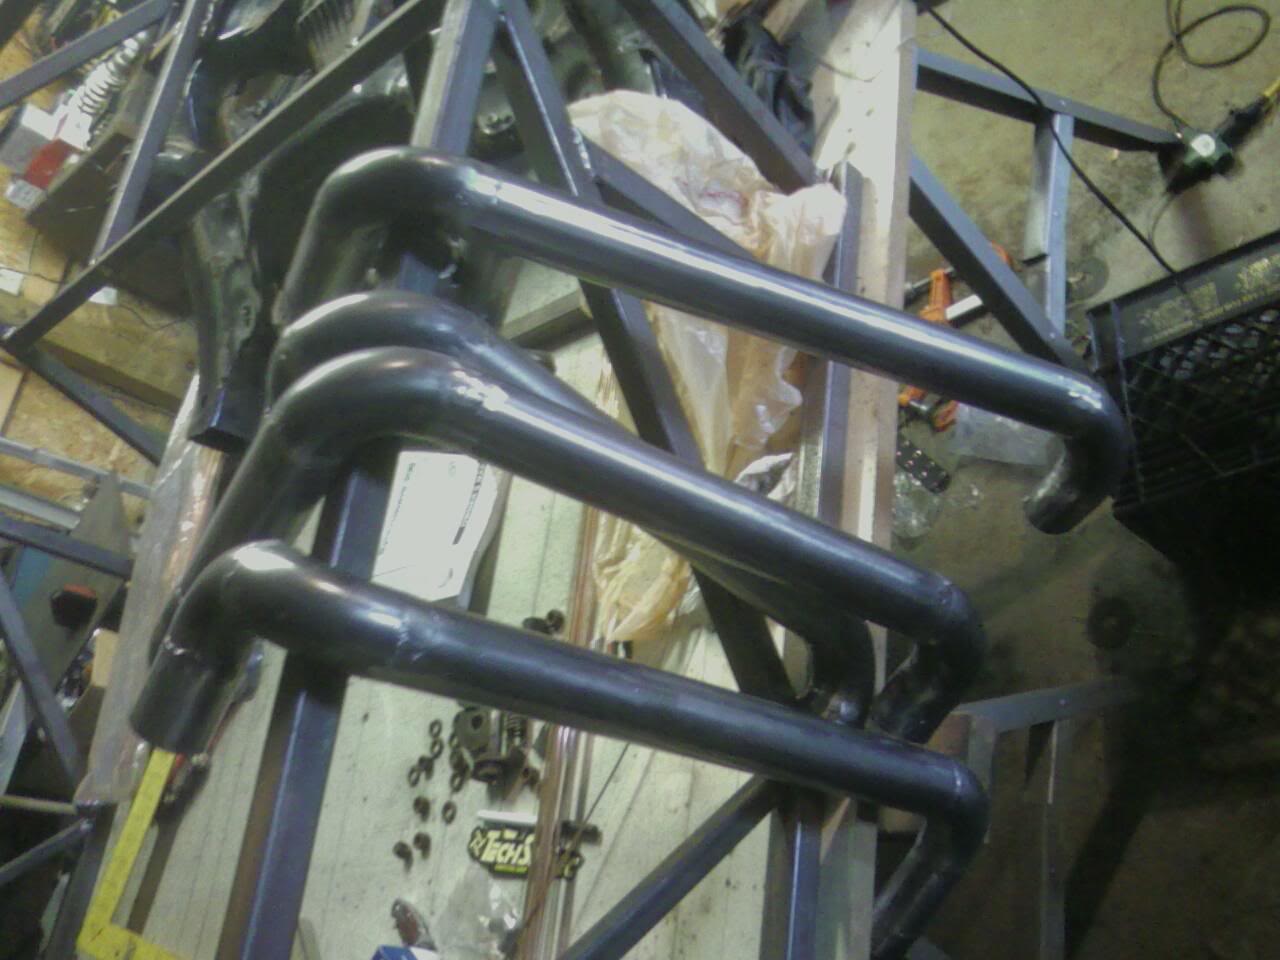
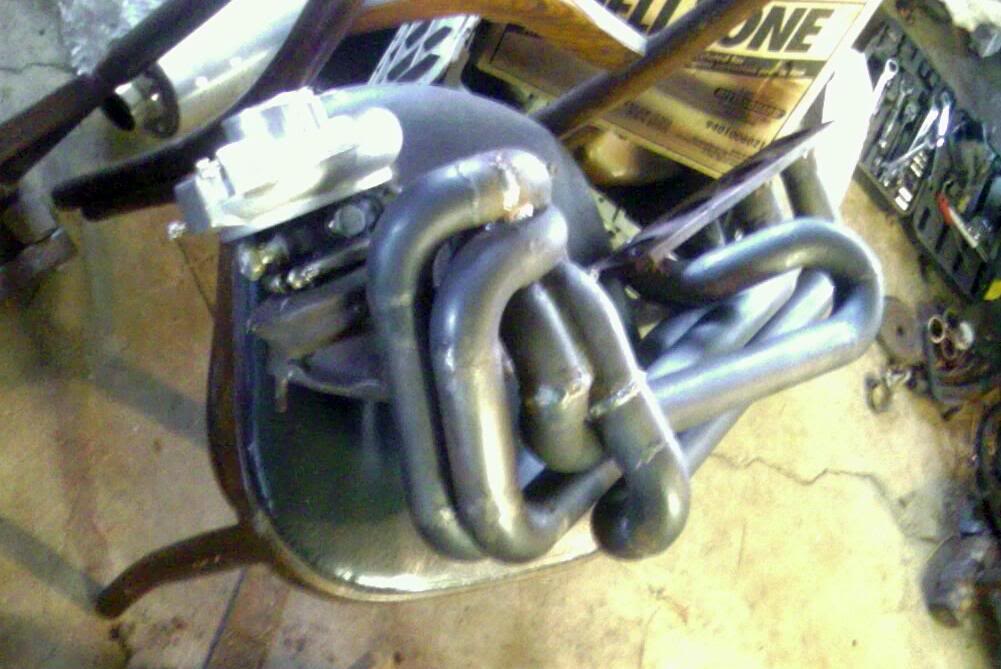
I've been getting a few hours here and there, and I've welded up the primaries. I have little experience tig welding steel, and personally prefer aluminum. I was unable to get the consistant "stack of dimes", although I do realize that tig welding small diameter tubing with no way of rotating it probably doesn't help.
Anyway, I still picked tig over mig die to the better penetration and less excess weld. I ground the welds close to flush, and most of them are good. One or two I am going to mig weld on the inside and then grind down just for extra measure.
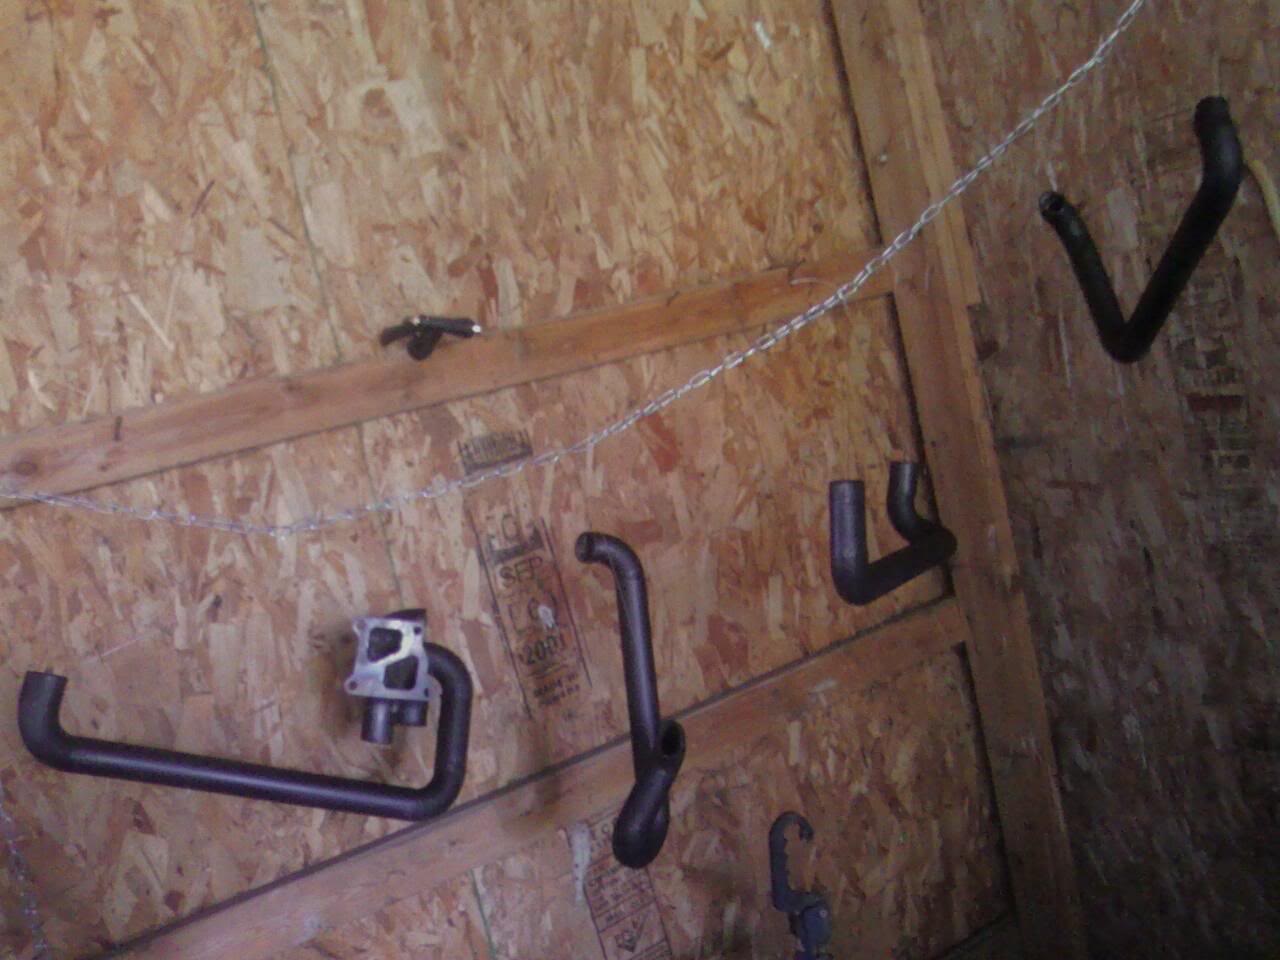
This morning I strung all four on welding wire and sprayed them with VHT FlameProof exhaust paint. I managed to get three coats with one can, and that should be enough until I weld them in place.
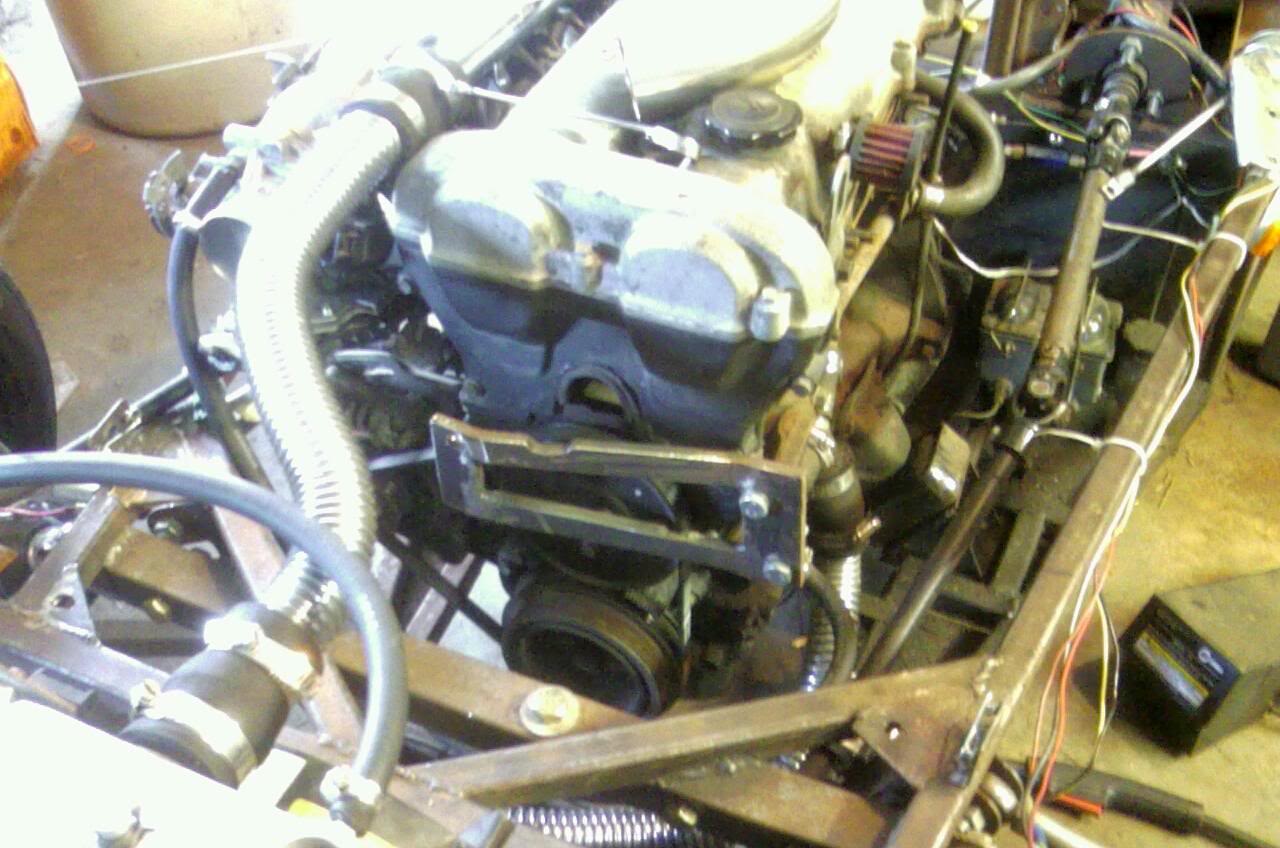
While they were drying, I started reassembling the front end. The steering rack is back in place, and I bolted the turbo to its bracket before I had to head home.
Tomorrow I will have all morning and plan on finishing the header and will probably start on the downpipe.
Anyone have any spare 2.5" straight stainless tubing? I need at most 2', which is harder to buy in such small sections without getting gouged. That and 2.28 dor the wastegate... I figure I may give in and have that mandrel-bent to fit.


Anyway, I still picked tig over mig die to the better penetration and less excess weld. I ground the welds close to flush, and most of them are good. One or two I am going to mig weld on the inside and then grind down just for extra measure.
This morning I strung all four on welding wire and sprayed them with VHT FlameProof exhaust paint. I managed to get three coats with one can, and that should be enough until I weld them in place.
While they were drying, I started reassembling the front end. The steering rack is back in place, and I bolted the turbo to its bracket before I had to head home.
Tomorrow I will have all morning and plan on finishing the header and will probably start on the downpipe.
Anyone have any spare 2.5" straight stainless tubing? I need at most 2', which is harder to buy in such small sections without getting gouged. That and 2.28 dor the wastegate... I figure I may give in and have that mandrel-bent to fit.
Reply
0
0
Thread Starter
Junior Member
Joined: Oct 2008
Posts: 113
Total Cats: 5
From: Cortland, Ohio
I've been getting a few hours here and there, and I've welded up the primaries. I have little experience tig welding steel, and personally prefer aluminum. I was unable to get the consistant "stack of dimes", although I do realize that tig welding small diameter tubing with no way of rotating it probably doesn't help.
Anyway, I still picked tig over mig die to the better penetration and less excess weld. I ground the welds close to flush, and most of them are good. One or two I am going to mig weld on the inside and then grind down just for extra measure.
This morning I strung all four on welding wire and sprayed them with VHT FlameProof exhaust paint. I managed to get three coats with one can, and that should be enough until I weld them in place.
While they were drying, I started reassembling the front end. The steering rack is back in place, and I bolted the turbo to its bracket before I had to head home.
Tomorrow I will have all morning and plan on finishing the header and will probably start on the downpipe.
Anyone have any spare 2.5" straight stainless tubing? I need at most 2', which is harder to buy in such small sections without getting gouged. That and 2.28 dor the wastegate... I figure I may give in and have that mandrel-bent to fit.
Reply
0
0
Thread Starter
Junior Member
Joined: Oct 2008
Posts: 113
Total Cats: 5
From: Cortland, Ohio
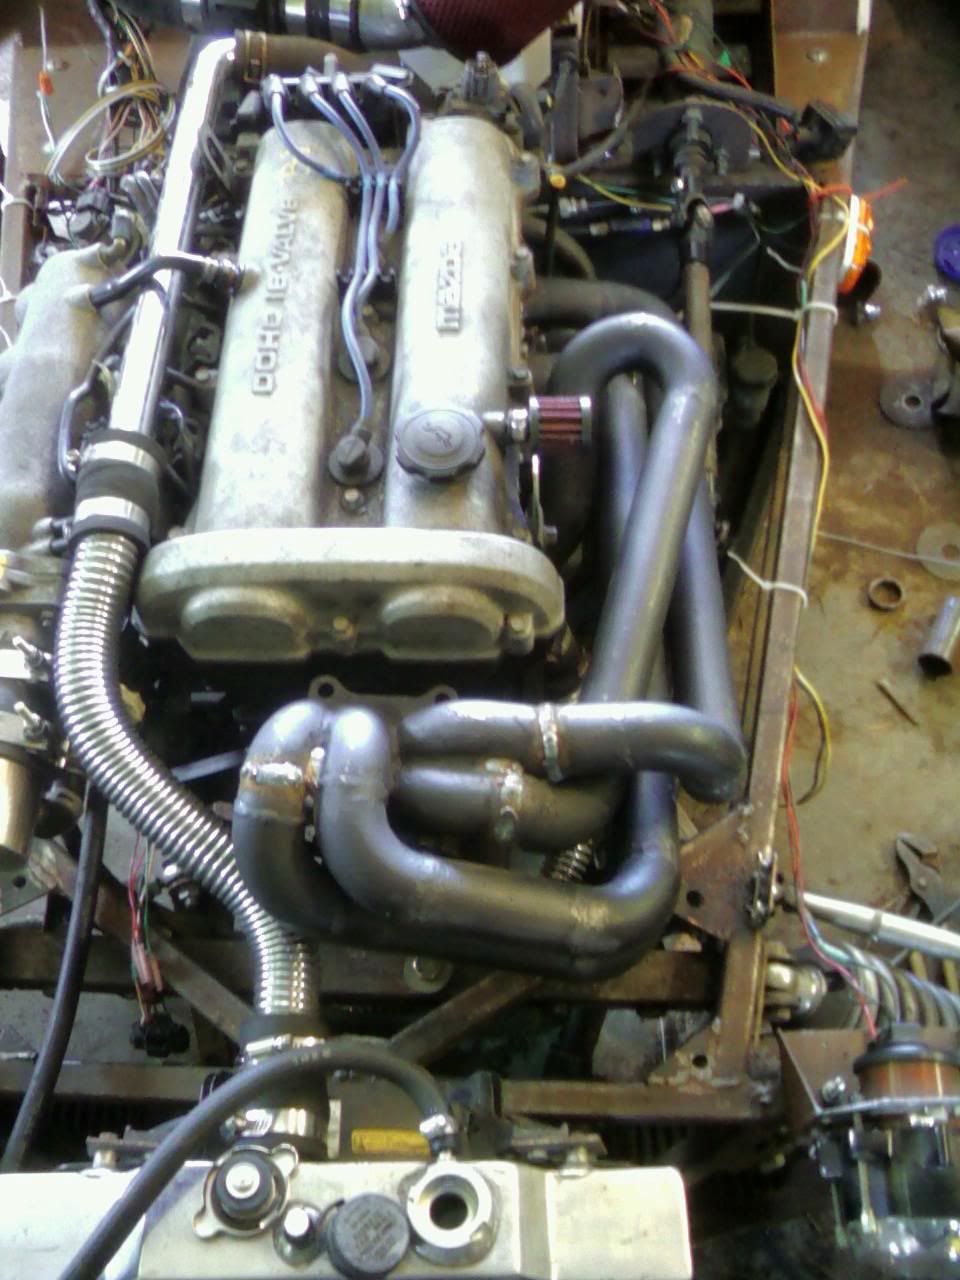
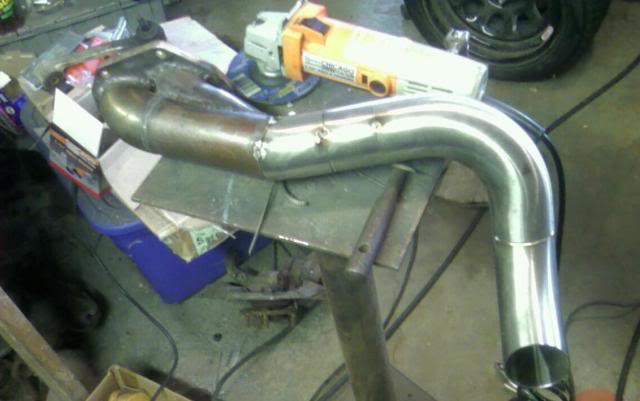
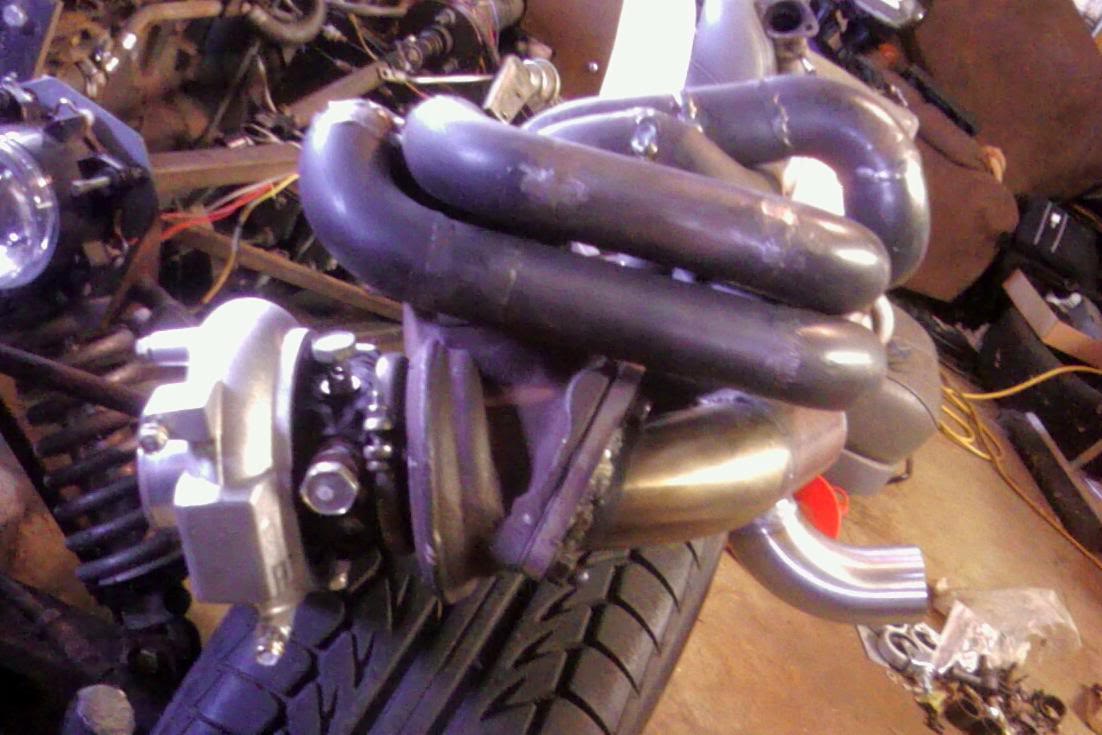
Finally! The header is complete other than some grinding to smooth welds!n both outside and inside, a few more coats of FlameProof, and wrapping.
After welding everything up, I put everthing back together with some assistance from Other Dave and I fired it up for the first time since spring. I can't wait to have the turbo mounted and plumbed!

After welding everything up, I put everthing back together with some assistance from Other Dave and I fired it up for the first time since spring. I can't wait to have the turbo mounted and plumbed!
Reply
0
0
Very interesting as I have been followiing along. What is your plan on the exhaust, 2 1/2 " ? and what muffler? With a 7 have many more options that a stock Miata body but not nearly as many problems that have been ironed out. With mine have similar steering column issues. I will do a mock up of sizing this week and see how much it would stick out hood.
Reply
0
0
Thread Starter
Junior Member
Joined: Oct 2008
Posts: 113
Total Cats: 5
From: Cortland, Ohio
2.5 stainless, and I am not using any muffler, only side exhaust behind the front left tire. I my make a bolt-on flange to allow future side exhaust, in case of city driving, but I doubt it.
Don't even ask me about room. I am cramming everything in there, with no space for everything. the bolts for the downpipe flange are going to be a nightmare to get on as the header covers just about everything.
Don't even ask me about room. I am cramming everything in there, with no space for everything. the bolts for the downpipe flange are going to be a nightmare to get on as the header covers just about everything.
Reply
0
0
Haven't heard an open turbo, should be fun. I recently blew out my Magnflow and it was about a straight pipe exiting next to my left ear. Magnaflow replaced under warranty so now I am street happy - no ear plugs. sent PP
Reply
0
0
Thread Starter
Junior Member
Joined: Oct 2008
Posts: 113
Total Cats: 5
From: Cortland, Ohio
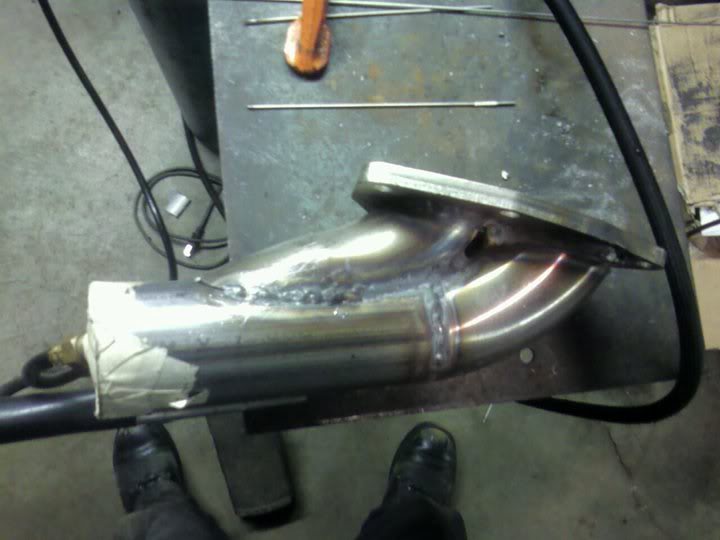
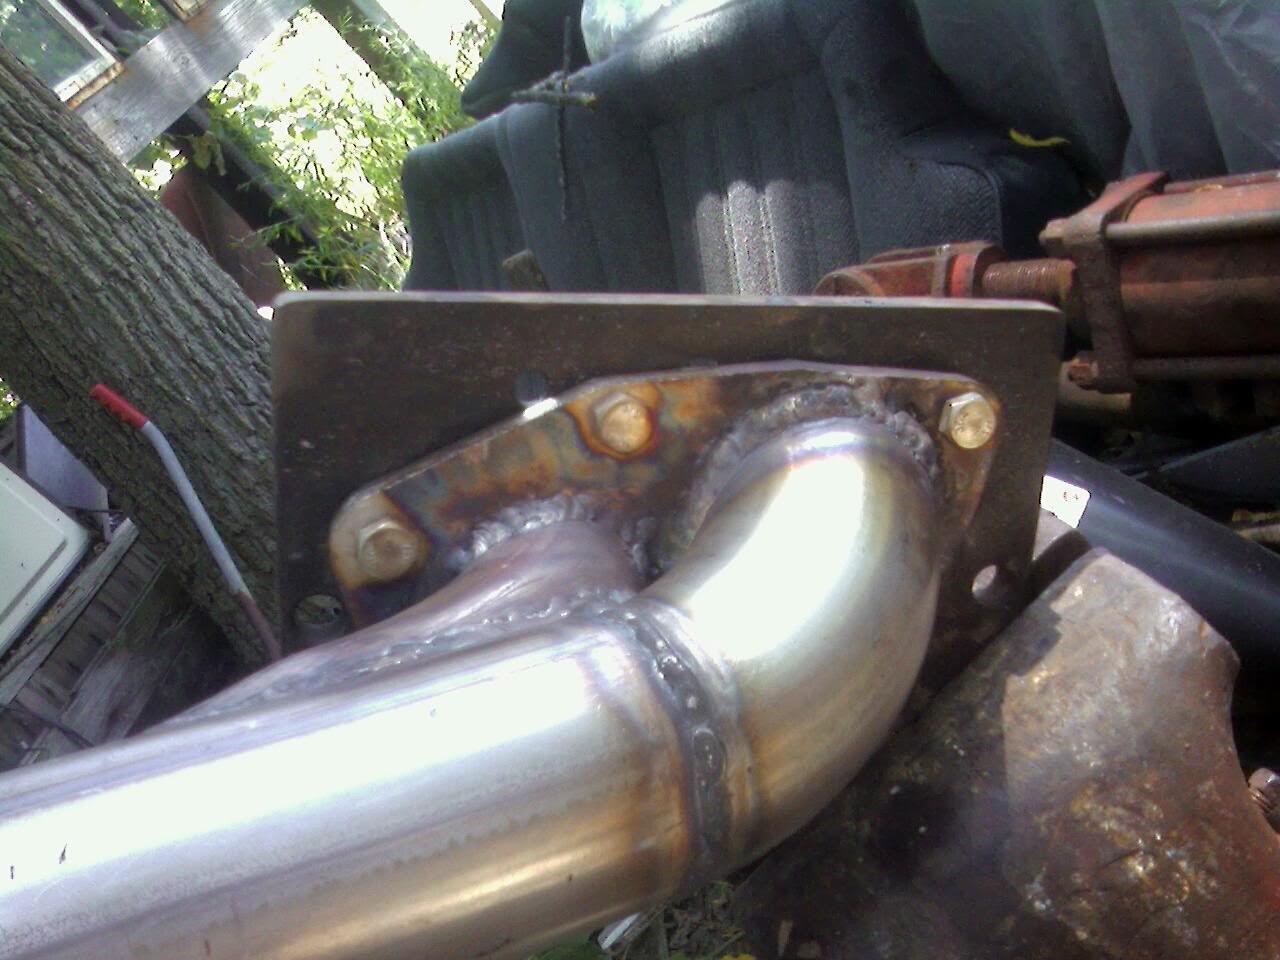
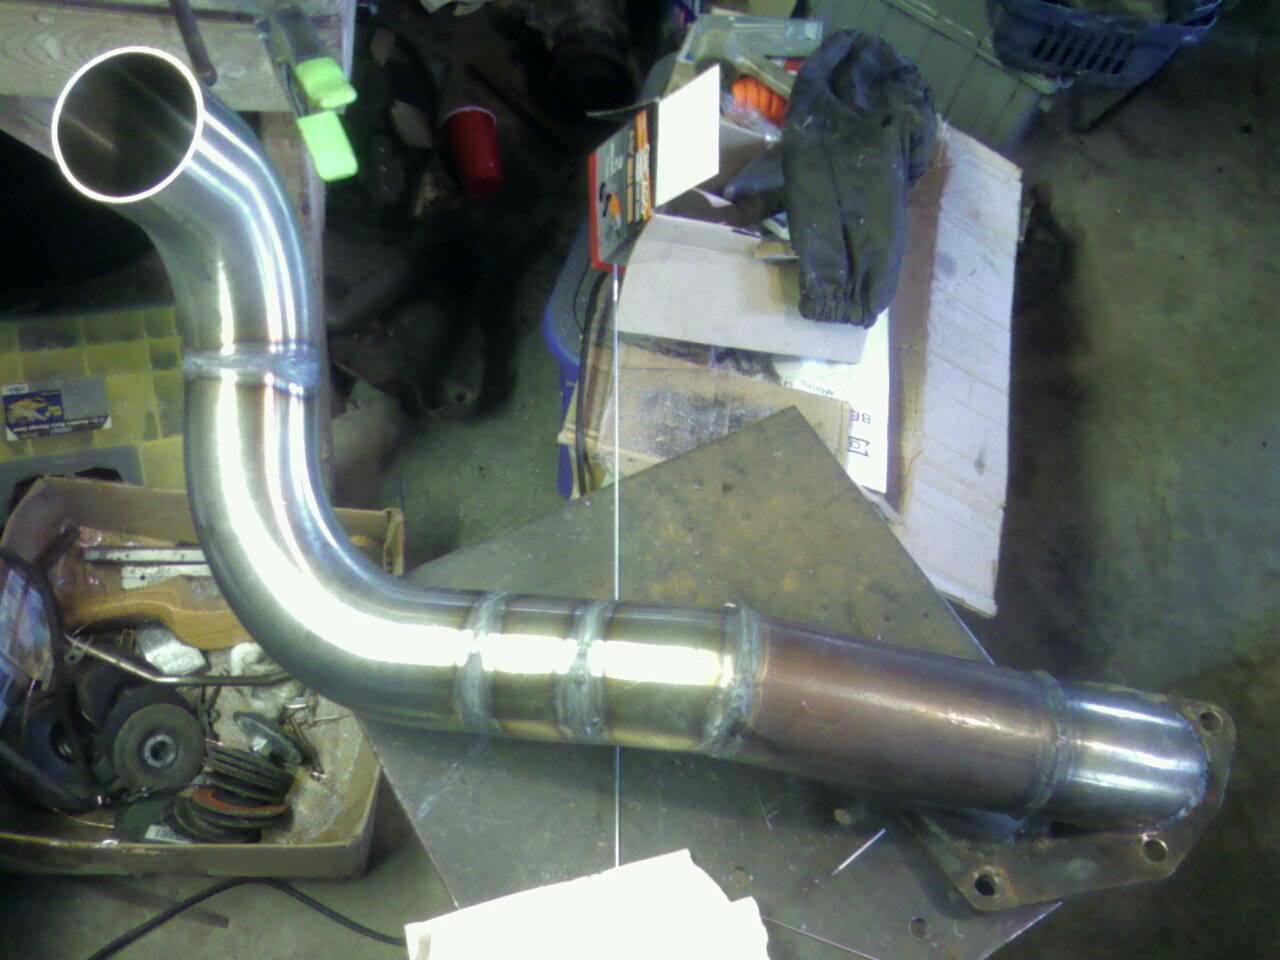
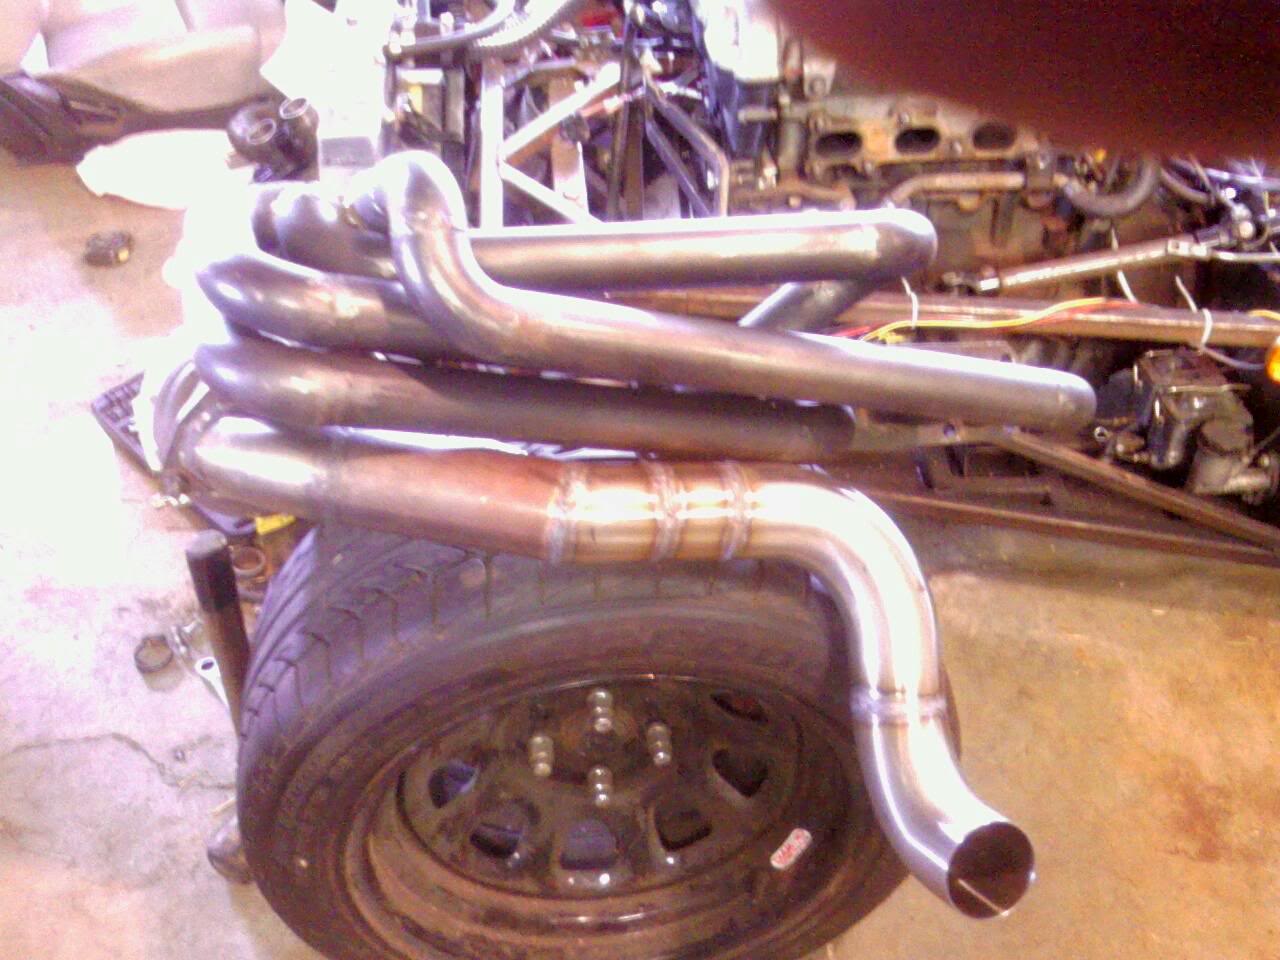
I spent most of the day working on the downpipe. I ended up with the "eyeball it once, cut several times" mantra, but luckily I was able to make the wastegate merge pipe without having to buy a second stainless elbow.
I had a small 60cf tank lying around the garage, so I brought it to the welding shop to have it refilled and to buy some 308 filler rod (I started welding the main pipe on the downpipe the other day with very odd and ugly blobbing results... Then I realized that the pile of filler rod I thought was 308 was actually 4043. When I went to grind the welds so I could redo it, the blobs just fell away--leaving a nice .5" gap half way around the base of the pipe. It was not fun trying to fill it.) When I asked for them to trade the tank for another 60cf tank of straight argon, they told me the only argon tank close to that was a 120cf tank. I reluctantly asked how much and was told 40 bucks. I happily took it, as at the other store I usually go to would have charged 60-100 to upgrade the tank and 30-odd to fill it. As it ended up, I am glad I got a large tank for purging.
I went to the garage, and spent the first hour shooting assorted firearms I brought with my buddy and one of his friends (XM607, 13" barreled Steyr AUG, HK-91 and a few pistols) and then went to work. Due to the tight confinement of space in the Seven's engine bay (that is starting to become a common statement lately), I have had to make some things, such as the downpipe, with less-than-optimal angles and bends than the ideal setup. However, I feel better after realizing that my downpipe is more free-flowing than the stock Evo cast version.
The main pipe wasn't a major issue, however the wastegate was, as I only had about 1.75" inch between the flange and the main pipe. My first attempt left way too much of a gap, but the second (which took somewhere upwards of 4 hours of grinding, measuring, cutting, banging into shape...) fit with minimal filling.
Welding was hard, due to the tight confinement of the two pipes, but I welded both inide and out just in case.
Now all I have to do is grind down the inside pipe welds and it will be ready to test.
One of the next projects is to figure where to find (and afford) custom oil and cooling lines for the turbo, along with tapping for the lines. I am about to finish a block-off plate for the IAC as well. I will see if the lines for that will work as turbo lines.
Reply
0
0


Thread Starter
Junior Member
Joined: Oct 2008
Posts: 113
Total Cats: 5
From: Cortland, Ohio
yeah, I wouldn't do it any other way. when I was welding on the inside of the tubing/flange seam, I had my buddy holding the argon line next to the tubing. I really don't want to screw this part up. I haven't TIG welded stainless (nor mild steel either for that matter) before, only aluminum and chromoly.
Reply
0
0
Thread Starter
Junior Member
Joined: Oct 2008
Posts: 113
Total Cats: 5
From: Cortland, Ohio
Saturday was pretty busy. I went with my buddy early to pick up an air compressor, sadly, it wasn't as big as described, but better than nothing.
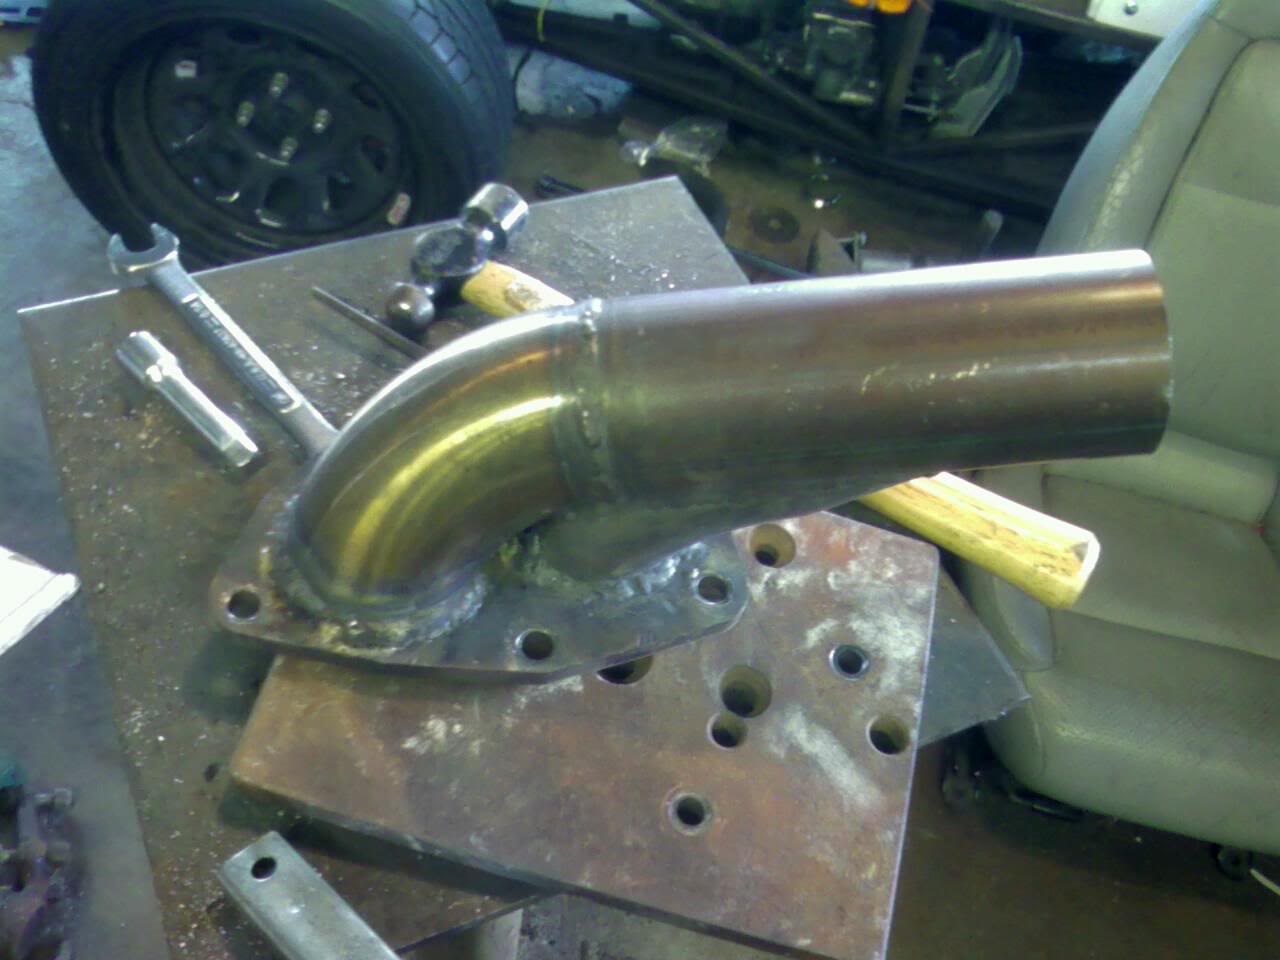
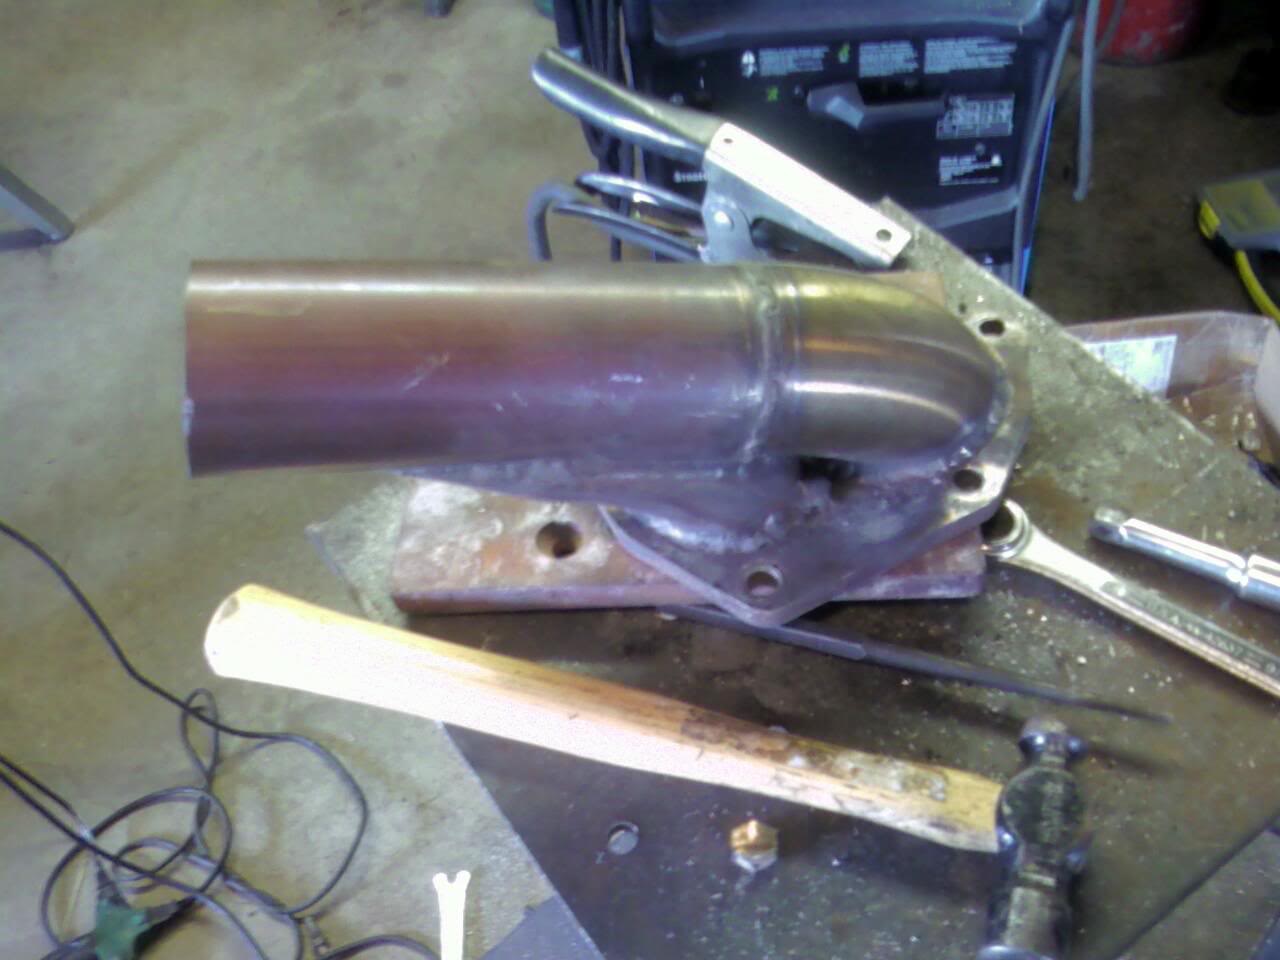
We then were talking about having the downpipe machined flat, as after welding it together, in spite of clamps, it warped about 1/8" or so side-to-side, and the pointed side front-to-back was over 1/4" warped. Some suggested heating it after bolting it to heavy plate and then heat it and tighten the bolts. I was slightly skeptical, but we found some 1/2" plate and bolts. I tightened the warped end down, and applied heat with an oxy-acetylene torch using propane instead of acetylene. After several passes, making sure each area was red hot before going to the next, we were able to bolt it down flat. However, I was concerned it would not stay flat, so we fired up the wood burner and threw in some charcoal and buried the downpipe in, still bolted down to the plate.
Once the fire burned down, a few hours later, the entire downpipe had the stainless discoloration, and when it was cooled down, I took the bolts off and it is near perfectly flat. Success!
I then worked on Other Dave's intake manifold--being a 4g63, we have to swap ends to point in the correct direction. I bored out a 5/8" plate of aluminum here to match the opening an welded it to the cut intake neck. Not the prettiest welds ever, but welding 1/4" cast alminum to 5/8" plate required all 200 amps at times. It will hold. Dave is going to finish grinding it to fit and then I will weld it to the intake manifold.
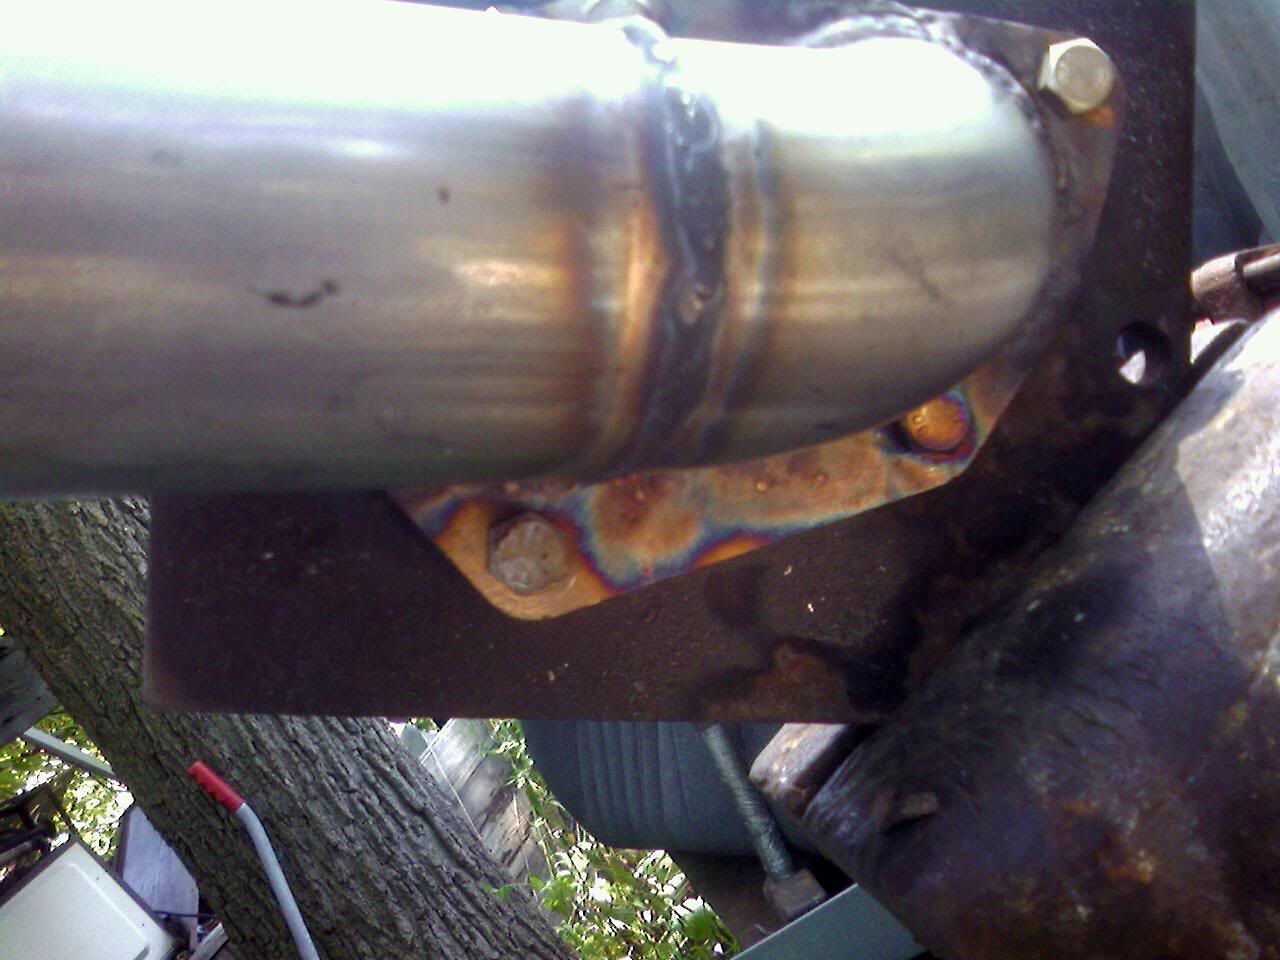
Back to my car, I bolted up the downpipe... Just to realize that when I measred clearance, I was fitting it up without the gasket. With the gasket, there is about 1/8" clearance between the downpipe and the frame. We took turns trying to rock the motor to get it to touch but were unable to. I realize there will be more torque while running, so torque dampeners become even more critical. An older guy at work reminded me they used to use chains to keep engines from going anywhere, but I would prefer to avoid that route.
Next time I stop by the garage, I will try to finish the exhaust and fit on the side panel.
We then were talking about having the downpipe machined flat, as after welding it together, in spite of clamps, it warped about 1/8" or so side-to-side, and the pointed side front-to-back was over 1/4" warped. Some suggested heating it after bolting it to heavy plate and then heat it and tighten the bolts. I was slightly skeptical, but we found some 1/2" plate and bolts. I tightened the warped end down, and applied heat with an oxy-acetylene torch using propane instead of acetylene. After several passes, making sure each area was red hot before going to the next, we were able to bolt it down flat. However, I was concerned it would not stay flat, so we fired up the wood burner and threw in some charcoal and buried the downpipe in, still bolted down to the plate.
Once the fire burned down, a few hours later, the entire downpipe had the stainless discoloration, and when it was cooled down, I took the bolts off and it is near perfectly flat. Success!
I then worked on Other Dave's intake manifold--being a 4g63, we have to swap ends to point in the correct direction. I bored out a 5/8" plate of aluminum here to match the opening an welded it to the cut intake neck. Not the prettiest welds ever, but welding 1/4" cast alminum to 5/8" plate required all 200 amps at times. It will hold. Dave is going to finish grinding it to fit and then I will weld it to the intake manifold.
Back to my car, I bolted up the downpipe... Just to realize that when I measred clearance, I was fitting it up without the gasket. With the gasket, there is about 1/8" clearance between the downpipe and the frame. We took turns trying to rock the motor to get it to touch but were unable to. I realize there will be more torque while running, so torque dampeners become even more critical. An older guy at work reminded me they used to use chains to keep engines from going anywhere, but I would prefer to avoid that route.
Next time I stop by the garage, I will try to finish the exhaust and fit on the side panel.
Reply
0
0
Thread Starter
Junior Member
Joined: Oct 2008
Posts: 113
Total Cats: 5
From: Cortland, Ohio
I took the downpipe off the car, trimmed off about 1.5" from the end, bolted it back on, and proceeded to cut, grind, and fit the rest of the exhaust. Tacking with the MIG and then TIG welding everything in the end, it looks good, to me, at least.
After tacking everything into place, I realized that it wasn't going to come off without removing the rest of the exhaust, so I unbolted the turbo from its brackets, and the manifold from the motor, and pulled everything out at once. This is the easiest and quickest way to get anything off of the exhaust setup, and will be repeated often, I figure.
That's all I managed to get done today, but I did finally find all the downpipe nuts'n'bolts, along with their original washers, and tightened it down off the car.
Reply
0
0

Thread Starter
Junior Member
Joined: Oct 2008
Posts: 113
Total Cats: 5
From: Cortland, Ohio
I didn't make it to work today. I don't remember most of it, but at one point, the tires on my faithful 2004 Mini Cooper S broke loose and it slid into a ditch at speed, hit a culvert, and (here's where I get hazy, I think I blacked out at this point) flipped/spun/rolled midair to land on all four wheels facing the wrong way. Not sure how long I was there, I think a few seconds, when I realized I couldn't see anything--everything seemed like I was looking through smoked glass. After rubbing my eyes a few times I realized the car was filled with smoke, whereupon I bailed. I saw flames coming from the hood scoops near the windshield, so, I grabbed some water bottles and tried to put it out but couldn't get them fast enough. As the flames grew, I tried to grab anything I could think of important out of the car, but at that point the ambulance arrived, and the last thing I saw were flames climing up the windshield and going above the roof.
I'm a little banged up, bruised ribs (Note: Get the 5- or 6-point harnesses. 4-point harnesses can be dangerous.) from the lap belt of the harnesses, a few cuts and bruises, but other than that I checked out ok at the hospital.
Sadly, I was getting ready to sell the Mini. I am pretty sure they will total it, so I will see how much the insurance agency will offer me. I may have to fight it, but it will be nice to be out of debt.
This month hasn't been that great. Pardon my spelling/language... I'm a little doped up. Yuck.
Reply
0
0


Newb
Joined: Jul 2010
Posts: 34
Total Cats: 0
From: kent, near london, uk
saw a build similar to this a couple years back but he had a turbo up on top poking out of the bonnet with a cone filter on it. hate to think of the boost creep he would get at speed lol
Reply
0
0


