
Went from one gay car to another. Now to make this one faster than the last.


Thread Starter
Junior Member
iTrader: (2)
Joined: Nov 2011
Posts: 252
Total Cats: 17
From: Troy, Michigan
Thanks! My goal is to have it running in time for the Dream Cruise, which is just under two weeks away now. There is no better way to break in a freshly built track oriented LS1 Miata than attending an event which is renown for heavy traffic and strict law enforcement.
Reply
 0
0

0
Thread Starter
Junior Member
iTrader: (2)
Joined: Nov 2011
Posts: 252
Total Cats: 17
From: Troy, Michigan
Definitely, and if I prove myself to be totally unworthy of building a car, the consequences of a failure at 3mph will be minimally detrimental to the health and safety of myself and those around me.
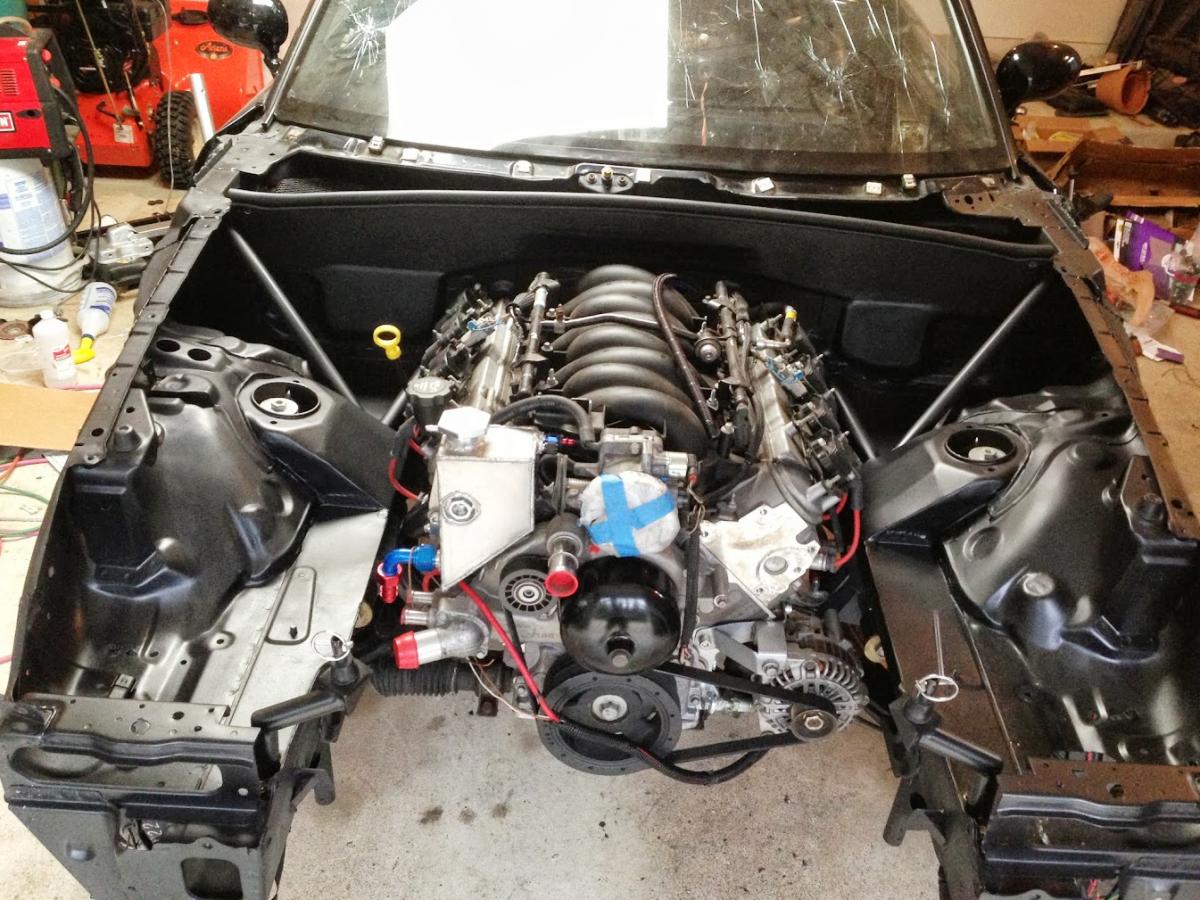
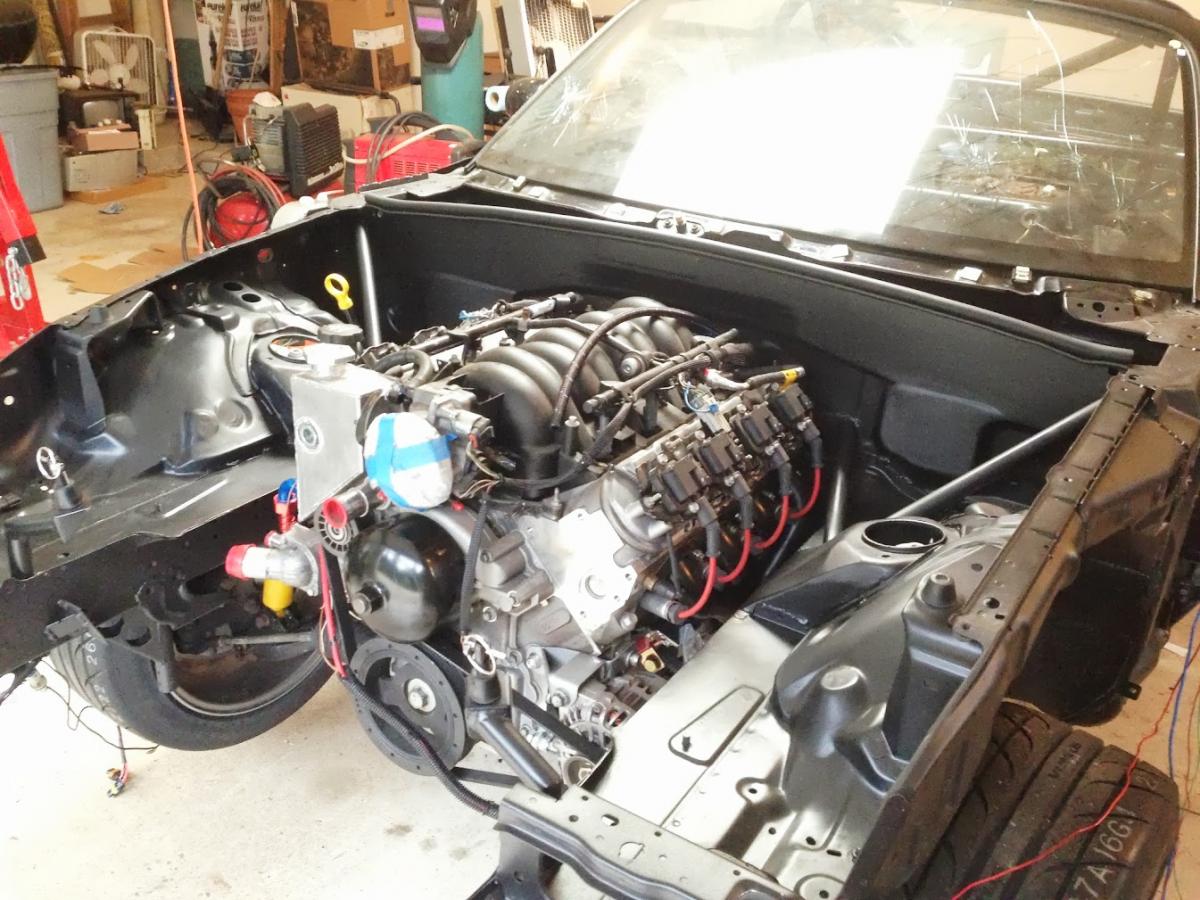
Anyway, more photos. So far, the two biggest issues that I've spotted relate to what I like the least: body work. Firstly, I should have gone a bit thicker with the body filler in a few places on the firewall. I was paranoid of adding too much, as that could lead to cracking, so the upper limit is about 1/16". Unfortunately, that has lead to imperfections that become apparent in direct sunlight as seen in the photo below. Second, the John Deere Blitz Black paint that many speak so very highly of online seems to be quite prone to chipping. That said, I like the appearance, it's extremely easy to touch up, and suspect that the durability will not be a huge issue once everything is together--I just have to be extra careful during the assembly process.
I'm really pleased with the way the wiper motor relocation turned out.
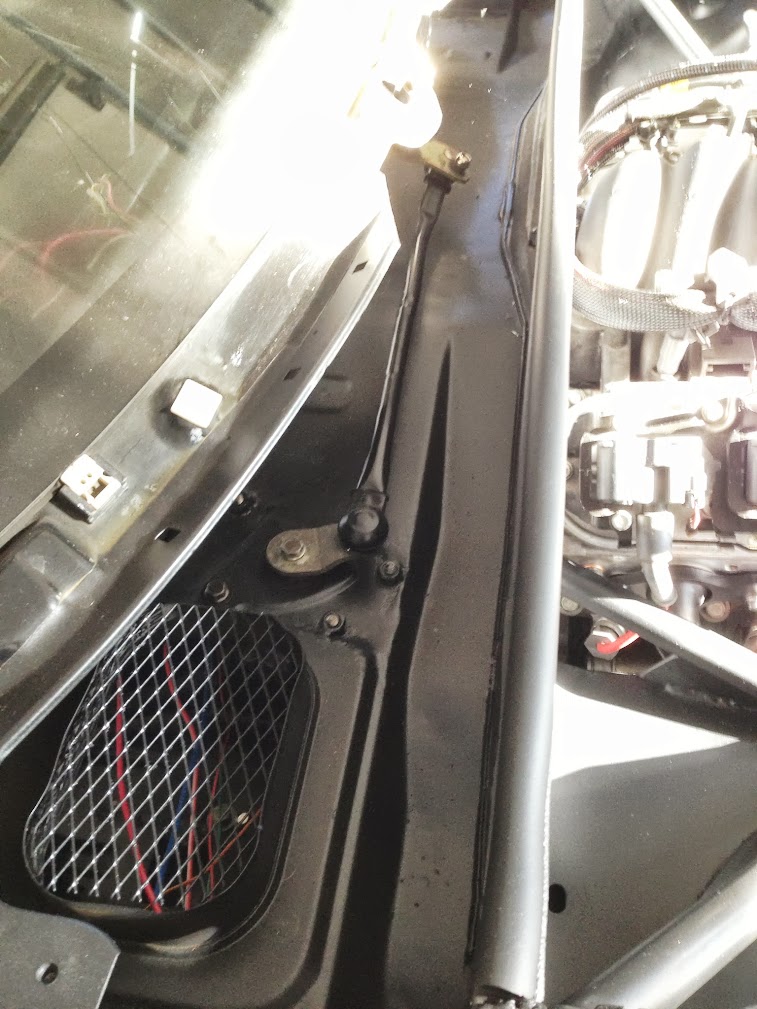

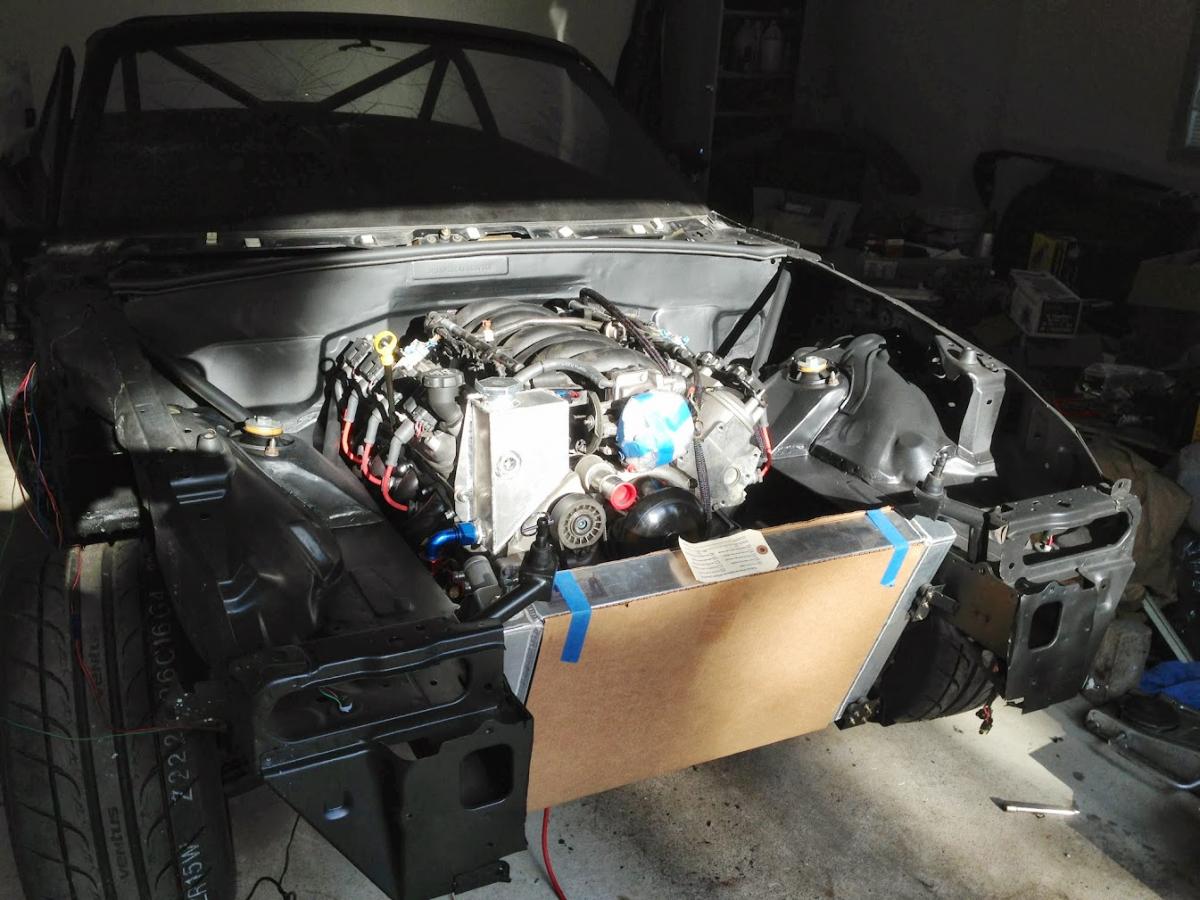
The radiator mounts also seem to be quite good. The radiator is entirely isolated from the chassis via little rubber things and is also very secure.
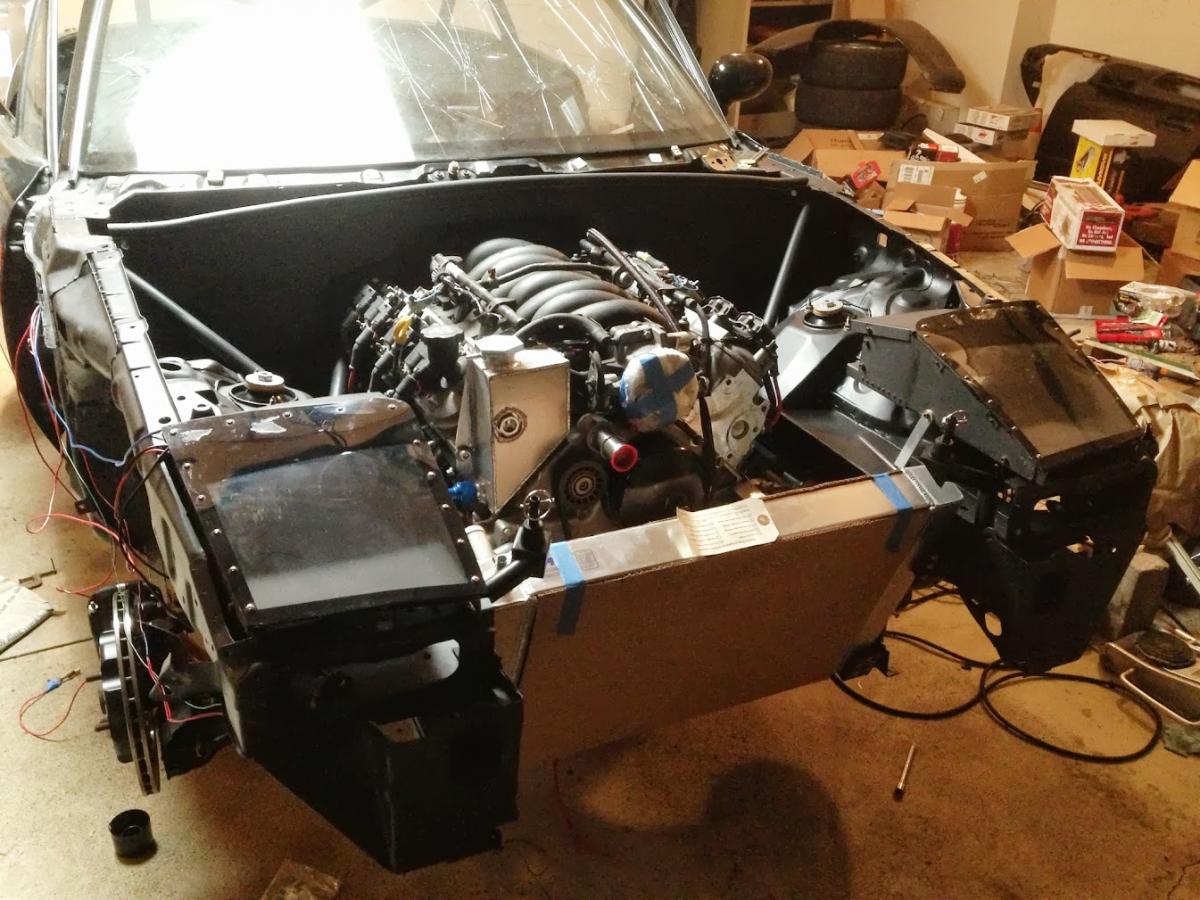
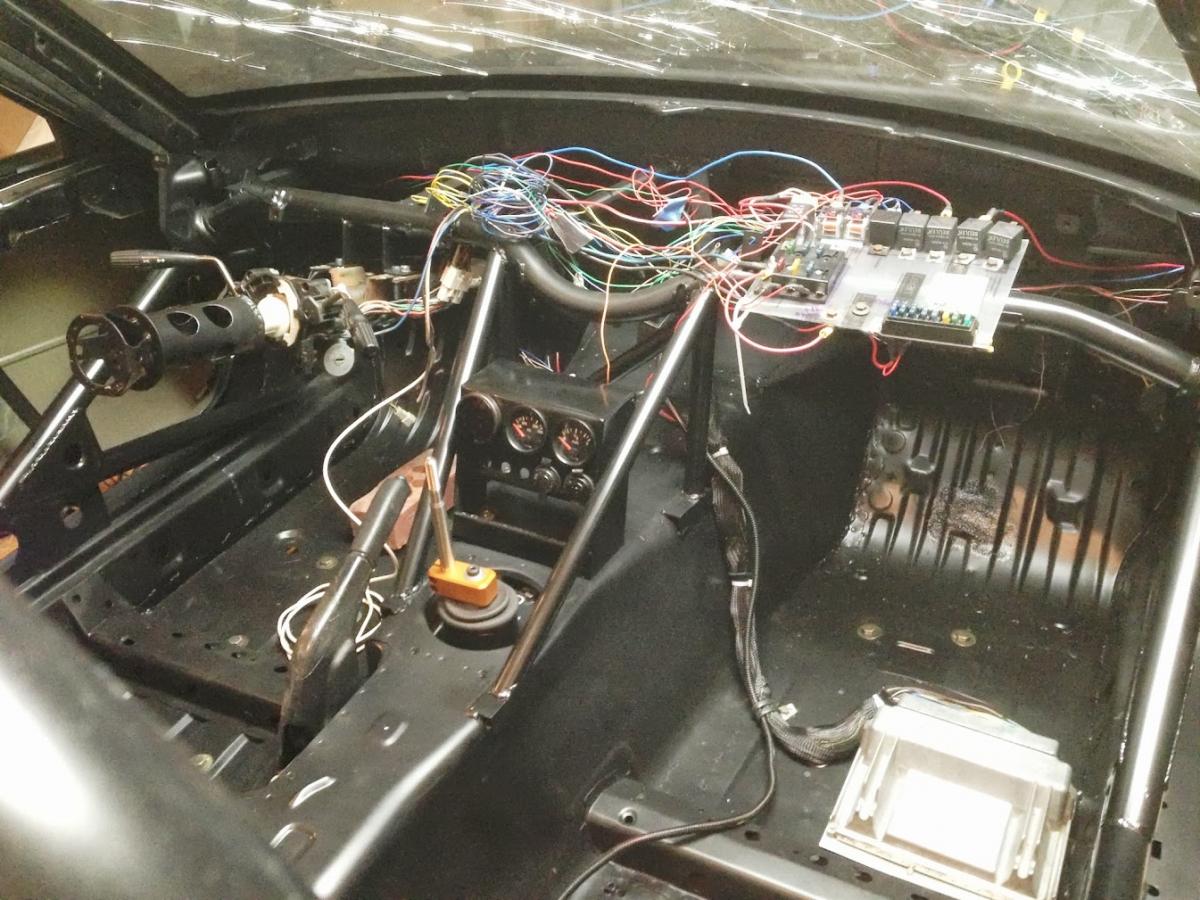
The wiring is mostly together. Most of what you see here was done quite some time ago. What remains is connecting the engine harness to the chassis harness, wiring the gauges, running a wire from the ignition to the starter solenoid, running a heavy wire from the starter to the battery, grounding the engine, and tidying everything up with loom and zip ties. That sounds like kind of a lot, but I should be able to get through it in an evening.
The remaining tasks at this point are plumbing and bleeding the brakes, finding appropriate coolant hoses, finishing the air intake, ducting the radiator, installing extended wheel studs in the front spindles, finishing the fuel system(still waiting on fittings), adding fluids, finishing the exhaust, and general assembly(seats, top, etc). Then I can get an alignment, a tune and start to enjoy this thing.
Anyway, more photos. So far, the two biggest issues that I've spotted relate to what I like the least: body work. Firstly, I should have gone a bit thicker with the body filler in a few places on the firewall. I was paranoid of adding too much, as that could lead to cracking, so the upper limit is about 1/16". Unfortunately, that has lead to imperfections that become apparent in direct sunlight as seen in the photo below. Second, the John Deere Blitz Black paint that many speak so very highly of online seems to be quite prone to chipping. That said, I like the appearance, it's extremely easy to touch up, and suspect that the durability will not be a huge issue once everything is together--I just have to be extra careful during the assembly process.
I'm really pleased with the way the wiper motor relocation turned out.
The radiator mounts also seem to be quite good. The radiator is entirely isolated from the chassis via little rubber things and is also very secure.
The wiring is mostly together. Most of what you see here was done quite some time ago. What remains is connecting the engine harness to the chassis harness, wiring the gauges, running a wire from the ignition to the starter solenoid, running a heavy wire from the starter to the battery, grounding the engine, and tidying everything up with loom and zip ties. That sounds like kind of a lot, but I should be able to get through it in an evening.
The remaining tasks at this point are plumbing and bleeding the brakes, finding appropriate coolant hoses, finishing the air intake, ducting the radiator, installing extended wheel studs in the front spindles, finishing the fuel system(still waiting on fittings), adding fluids, finishing the exhaust, and general assembly(seats, top, etc). Then I can get an alignment, a tune and start to enjoy this thing.
Reply
0
0
Thread Starter
Junior Member
iTrader: (2)
Joined: Nov 2011
Posts: 252
Total Cats: 17
From: Troy, Michigan
I don't have a lot to report since I've been obscenely busy with other things this week, but here's the latest:
Reading this thread motivated me to check the depth of the oil pickup tube. Engine Rebuild update - MX-5 Miata Forum
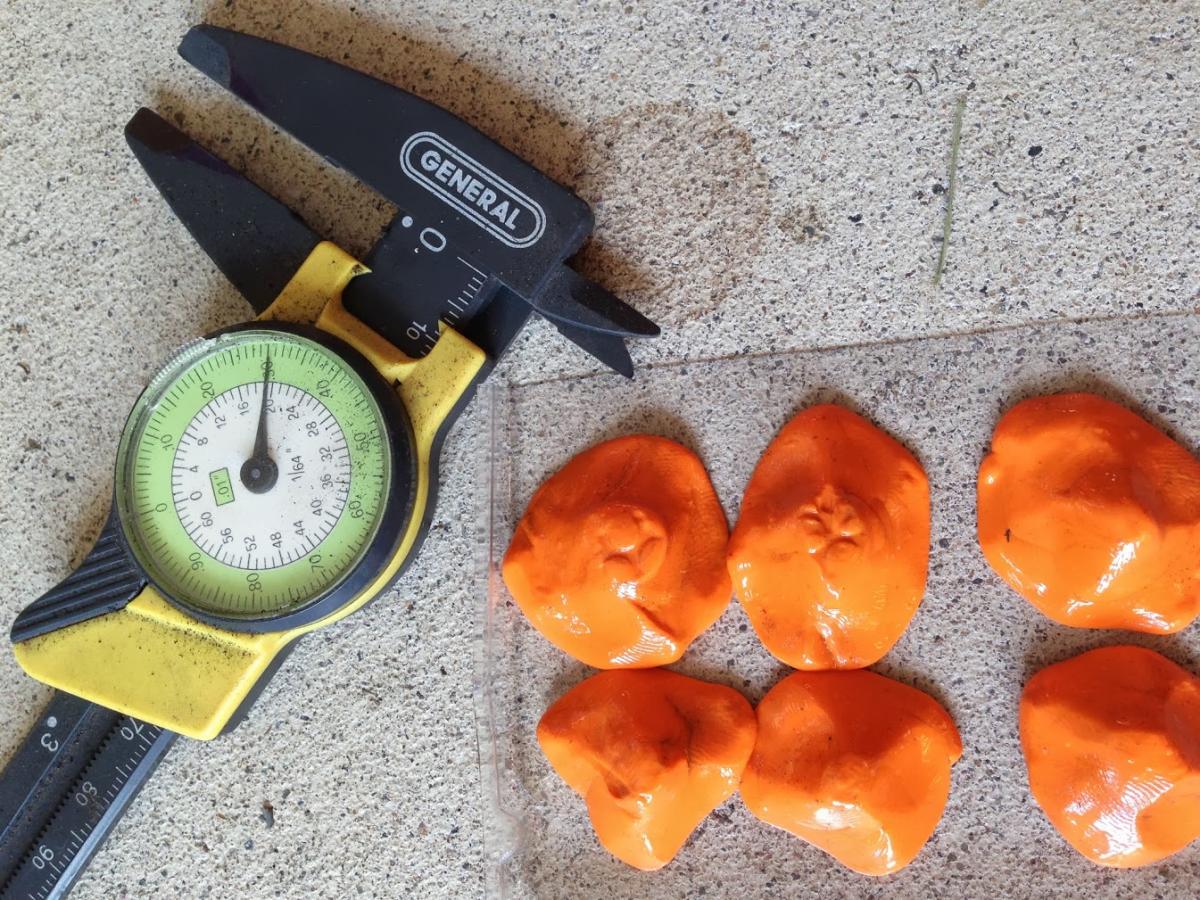
Pulling the drivetrain again didn't appeal to me so I checked the depth with the engine in the car. The clearance between the shallow part of the pan and the crossmember made that a bit difficult. After playing around with the pan and manipulating it just right, I was able to lower it enough to place my sophisticated measuring device at the bottom of the pan. The measuring device was a thin piece of packaging plastic with a few 3/8" mounds of silly putty, which I made a special trip to Walmart for, pressed onto it. I pressed the pan into the block, the screen on the pickup left an impression on the tops of the mounds that sat below it, and voila, I had the depth. I measured it to be .3", which is perfect. Spec is between 1/4" and 3/8".
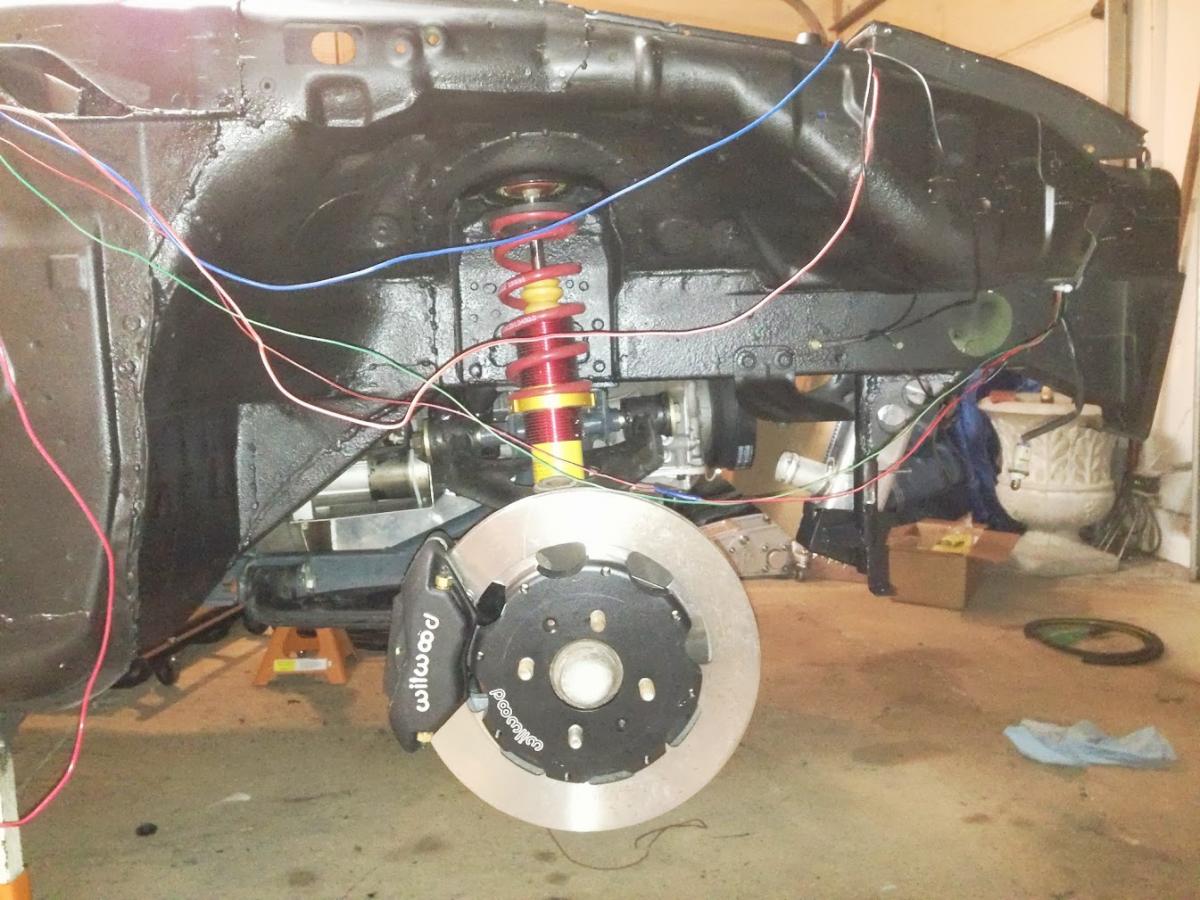
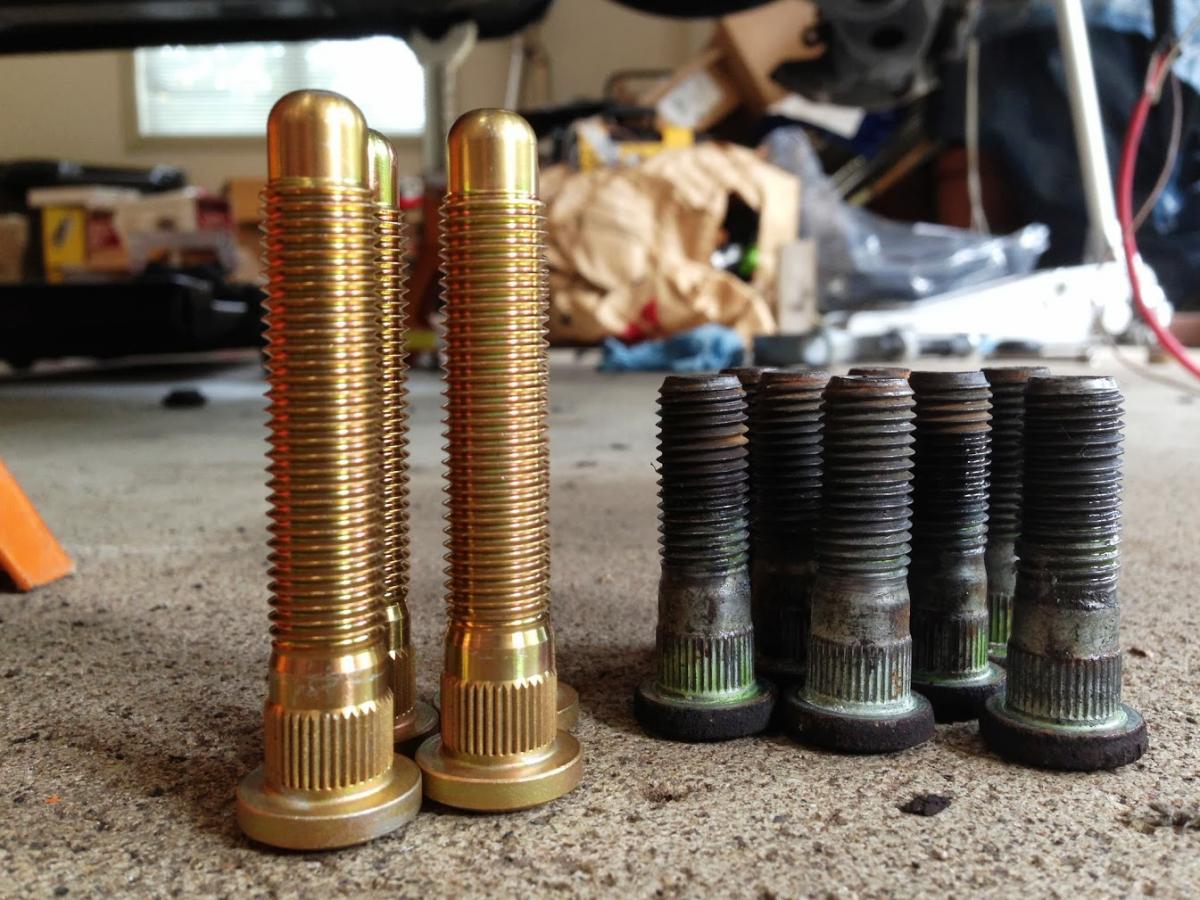
I wasn't satisfied with the amount of thread that the lug nuts were able to catch with the stock wheel studs, particularly since I have aluminum lugs. I ordered some ARP extended studs for the front(already had them on the rear), and pressed them in with the Harbor Freight balljoint service tool of glory(HFBJSTOG). They look very long, however the length is perfect. The nuts catch all of the thread and the knurled bit sticks out a tad.
Here's the HFBJSTOG in action. Note the additional C clamps that were used to stabilize the HFBJSTOG. They're almost a necessity if you're working solo.

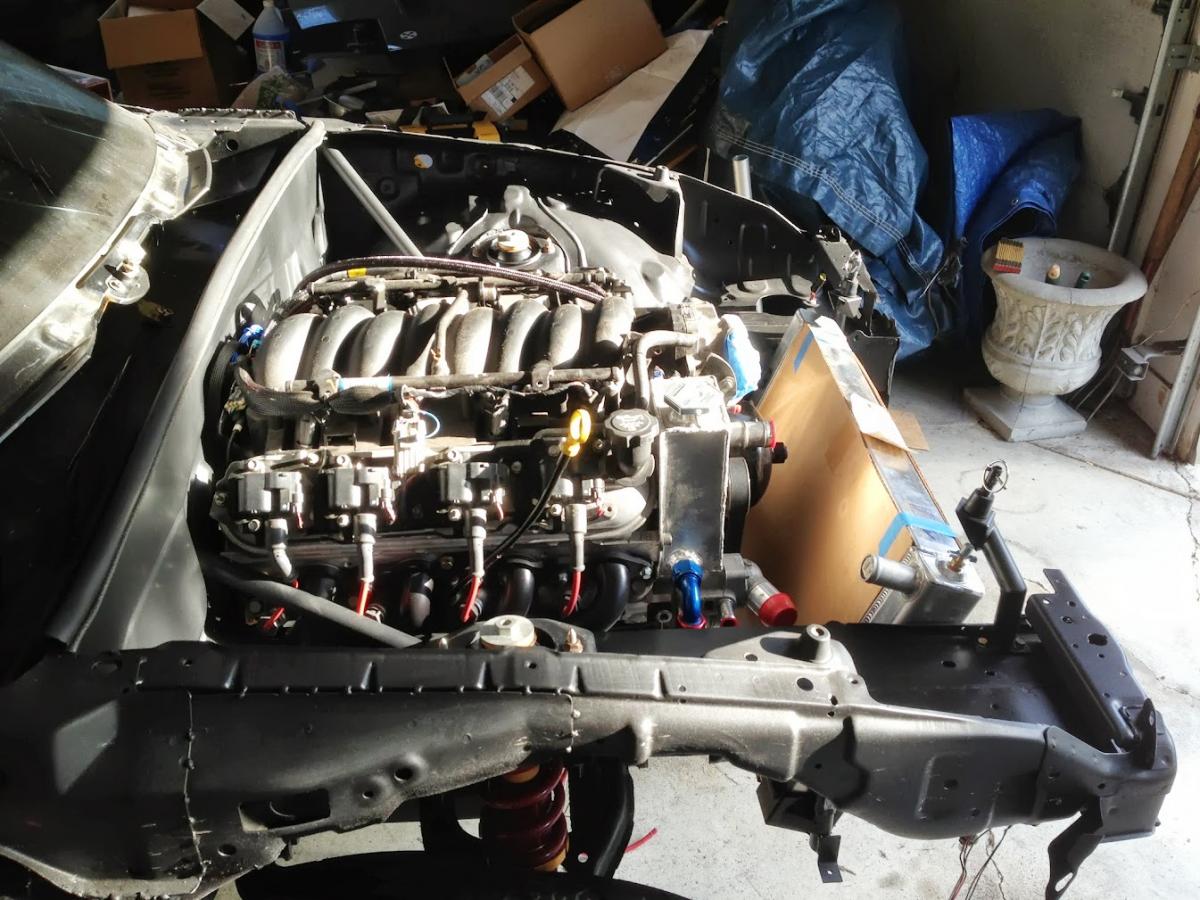
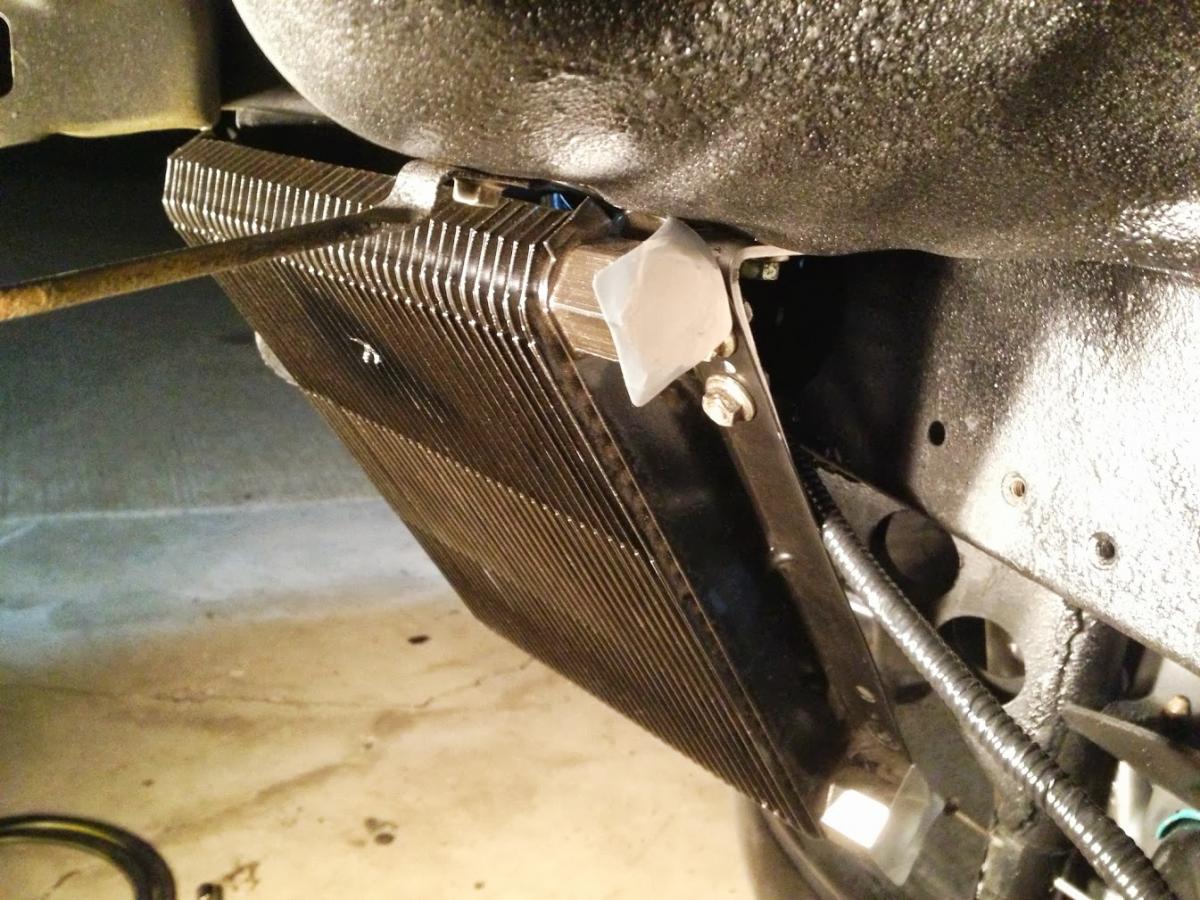
The oil cooler is mounted in what should be its final location. I initially had it on the passenger side but opted to move it to the drivers side so less hose will be required. The piece of aluminum angle is there to protect the exchanger. The corner of the exchanger sits pretty close to the bumper skin, making it vulnerable in small impacts. Now, with protection, I should be able to slam cones and graze tire walls allll dayy!
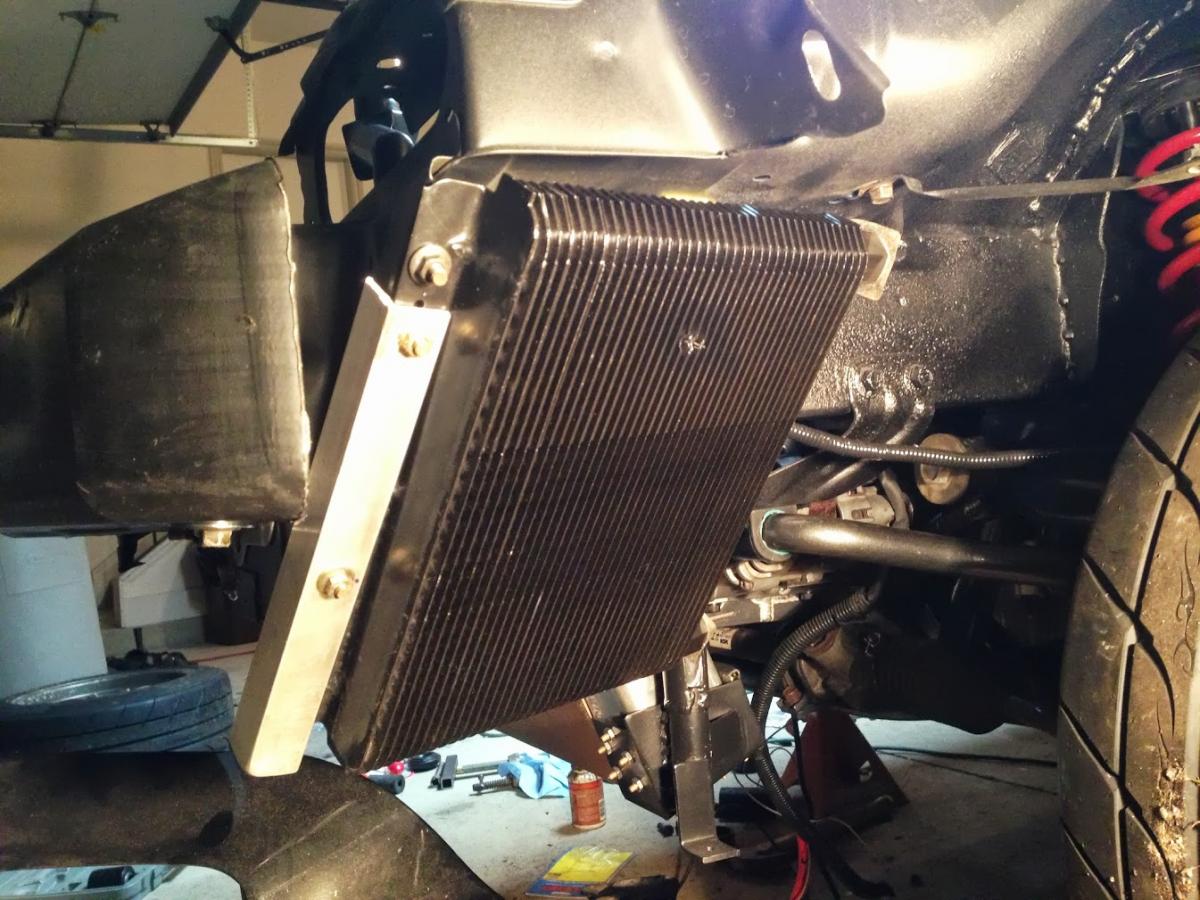
The aluminum angle lightly touches the bumper skin. I filed the corner and smoothed it with sand paper to prevent it from wearing through.
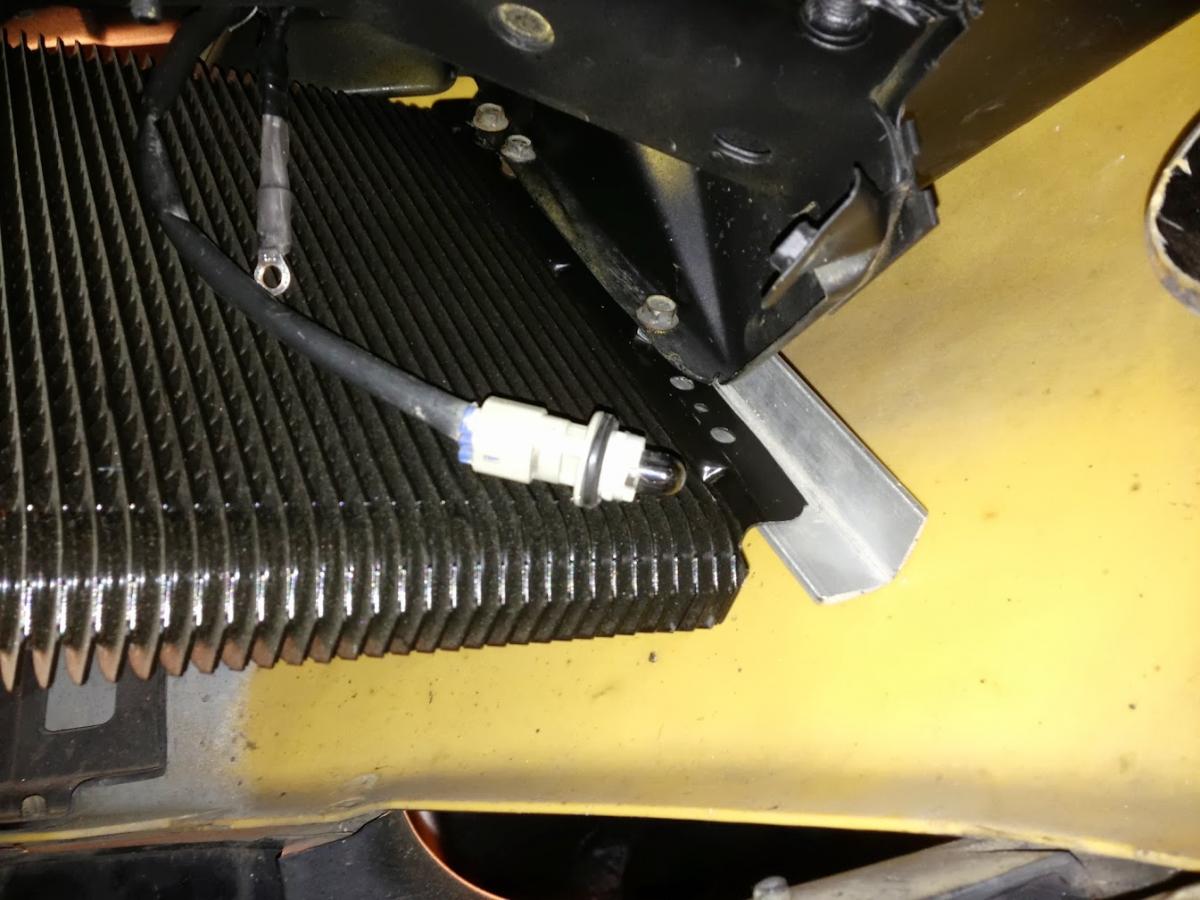
A simple bracket holds the other side in place.
Reading this thread motivated me to check the depth of the oil pickup tube. Engine Rebuild update - MX-5 Miata Forum
Pulling the drivetrain again didn't appeal to me so I checked the depth with the engine in the car. The clearance between the shallow part of the pan and the crossmember made that a bit difficult. After playing around with the pan and manipulating it just right, I was able to lower it enough to place my sophisticated measuring device at the bottom of the pan. The measuring device was a thin piece of packaging plastic with a few 3/8" mounds of silly putty, which I made a special trip to Walmart for, pressed onto it. I pressed the pan into the block, the screen on the pickup left an impression on the tops of the mounds that sat below it, and voila, I had the depth. I measured it to be .3", which is perfect. Spec is between 1/4" and 3/8".
I wasn't satisfied with the amount of thread that the lug nuts were able to catch with the stock wheel studs, particularly since I have aluminum lugs. I ordered some ARP extended studs for the front(already had them on the rear), and pressed them in with the Harbor Freight balljoint service tool of glory(HFBJSTOG). They look very long, however the length is perfect. The nuts catch all of the thread and the knurled bit sticks out a tad.
Here's the HFBJSTOG in action. Note the additional C clamps that were used to stabilize the HFBJSTOG. They're almost a necessity if you're working solo.
The oil cooler is mounted in what should be its final location. I initially had it on the passenger side but opted to move it to the drivers side so less hose will be required. The piece of aluminum angle is there to protect the exchanger. The corner of the exchanger sits pretty close to the bumper skin, making it vulnerable in small impacts. Now, with protection, I should be able to slam cones and graze tire walls allll dayy!
The aluminum angle lightly touches the bumper skin. I filed the corner and smoothed it with sand paper to prevent it from wearing through.
A simple bracket holds the other side in place.
Reply
0
0


1) who cares about the firewall imperfections. Still looks way better than the OEM one would have with hella holes in it.
2) AWESOME updates and build progress. Looks like you are doing it right. I like your c-clamp on a c-clamp on a c-clamp wheel stud installation procedure. Yo dawg, i heard you like c-clamps...
2) AWESOME updates and build progress. Looks like you are doing it right. I like your c-clamp on a c-clamp on a c-clamp wheel stud installation procedure. Yo dawg, i heard you like c-clamps...
Reply
0
0
Thread Starter
Junior Member
iTrader: (2)
Joined: Nov 2011
Posts: 252
Total Cats: 17
From: Troy, Michigan
1) who cares about the firewall imperfections. Still looks way better than the OEM one would have with hella holes in it.
2) AWESOME updates and build progress. Looks like you are doing it right. I like your c-clamp on a c-clamp on a c-clamp wheel stud installation procedure. Yo dawg, i heard you like c-clamps...
2) AWESOME updates and build progress. Looks like you are doing it right. I like your c-clamp on a c-clamp on a c-clamp wheel stud installation procedure. Yo dawg, i heard you like c-clamps...
Thanks, I'm trying. There's noting worse than down time and constantly breaking ****, and I'm trying to build it with that in mind.
Reply
2
2


Thread Starter
Junior Member
iTrader: (2)
Joined: Nov 2011
Posts: 252
Total Cats: 17
From: Troy, Michigan
Fuuuuu, it works for me. Anyway, here's the raw link, in code tags, so vbulletin hopefully won't be able to mess with it. Never have I had so much trouble posting a youtube video.
Code:
http://www.youtube.com/watch?v=QpCDHkLOWEY&feature=c4-overview&list=UUMlsO9-S6WurZ5ax2A5lFVQ
Reply
0
0
Thread Starter
Junior Member
iTrader: (2)
Joined: Nov 2011
Posts: 252
Total Cats: 17
From: Troy, Michigan
I drove the car for the first time on Friday night and things went pretty smoothly. After a short drive followed by an inspection, I felt comfortable going WOT a few times and driving out to some of the local car-person hangout spots. I had a buddy with me who flashed a base calibration with HP Tuners a while after we took off....and that made a pretty noticeable difference, both in smoothness of startup and in acceleration.
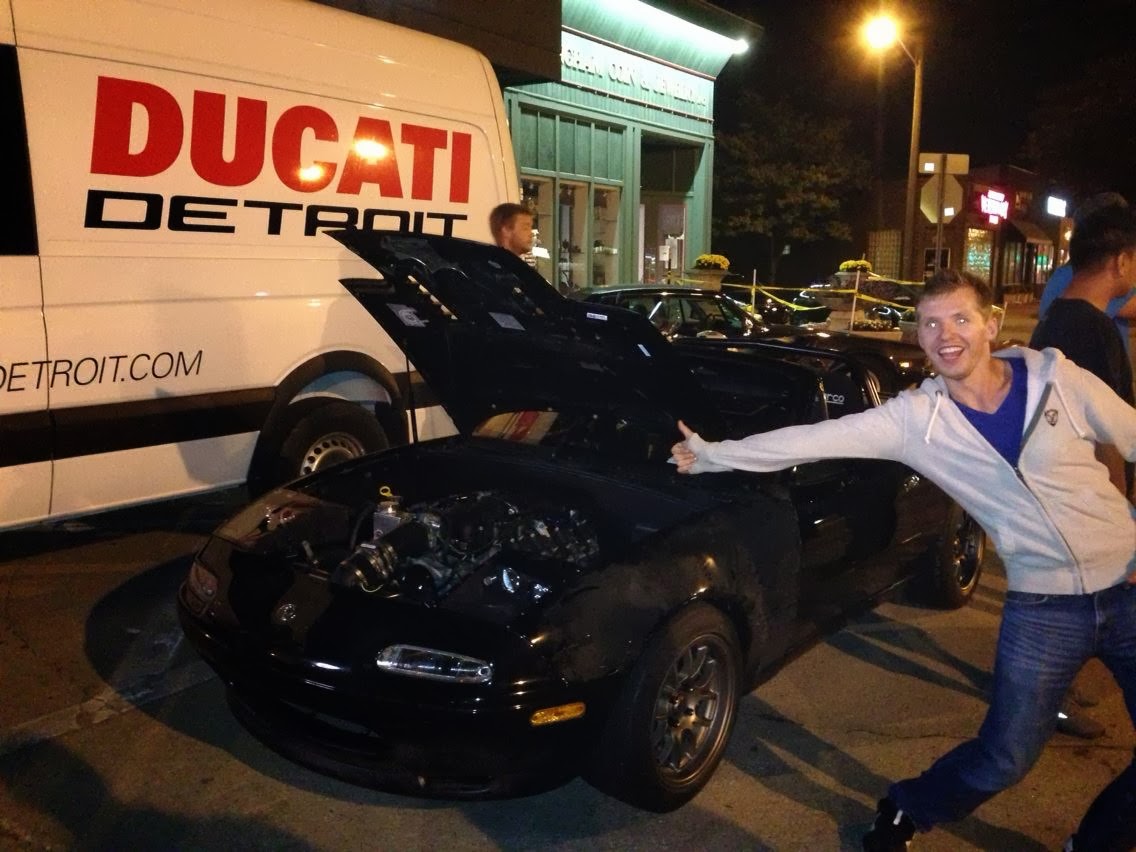
Here's a shot from friday. This guy is quite excited to see that my car has finally come to life:
The Woodward Dream Cruise was on Saturday. All of Woodward Ave basically turned into a parking lot, as car enthusiasts gathered for what, if I recall correctly, is the largest automotive gathering in the nation. I spent the morning cleaning up a couple of small things that I hood-rigged to get the car out the night before and hit up the Dream Cruise in the afternoon. The car continued to run well, although the cooling system doesn't appreciate prolonged stop and go traffic on hot sunny days. Once the temp reached 210 or so, I hopped onto a road with less traffic and it dropped back down in a hurry. I guess 210 is fairly normal for a stock thermostat ls1, though.
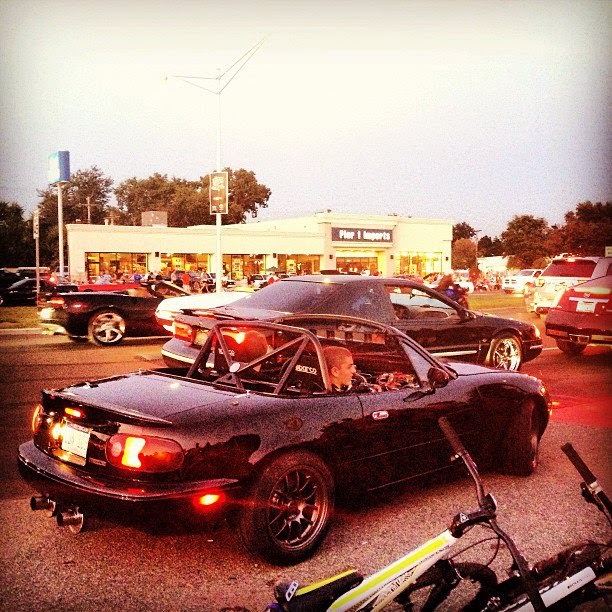
A leaky slave cylinder fitting is the biggest problem that I had. The clutch master cylinder reservoir had gone dry. When I noticed that the clutch engagement point was working its way towards the floor, I parked and got a ride home for more fluid. With a couple of top-offs, I made it though the rest of the night without any issues. There's a known problem with the fitting that the kit provides and solving the problem shouldn't be too terribly difficult.
Here's a photo that somebody snapped of me as I was stopping to give someone a ride:
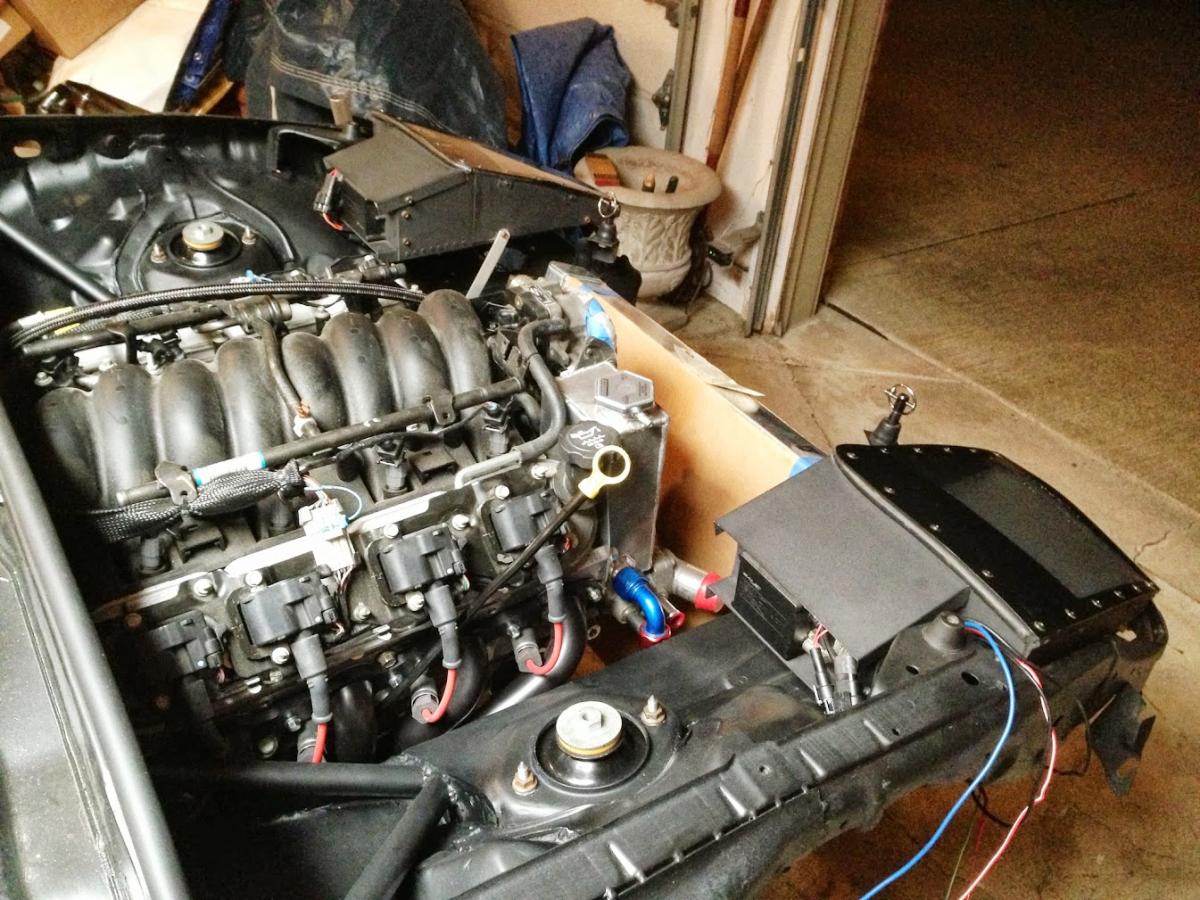
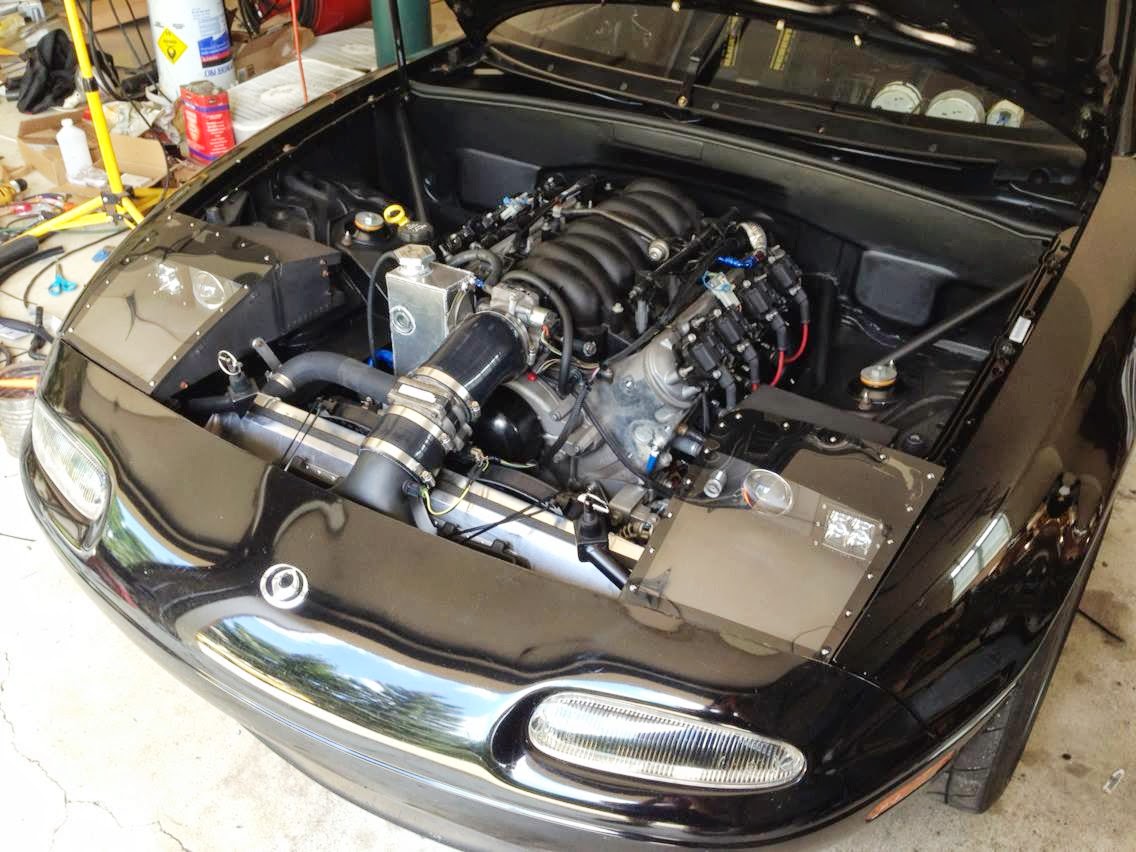
Here's the fully populated engine bay. Yes, the radiator fans are held back with zip ties. I never said the car was truly done.
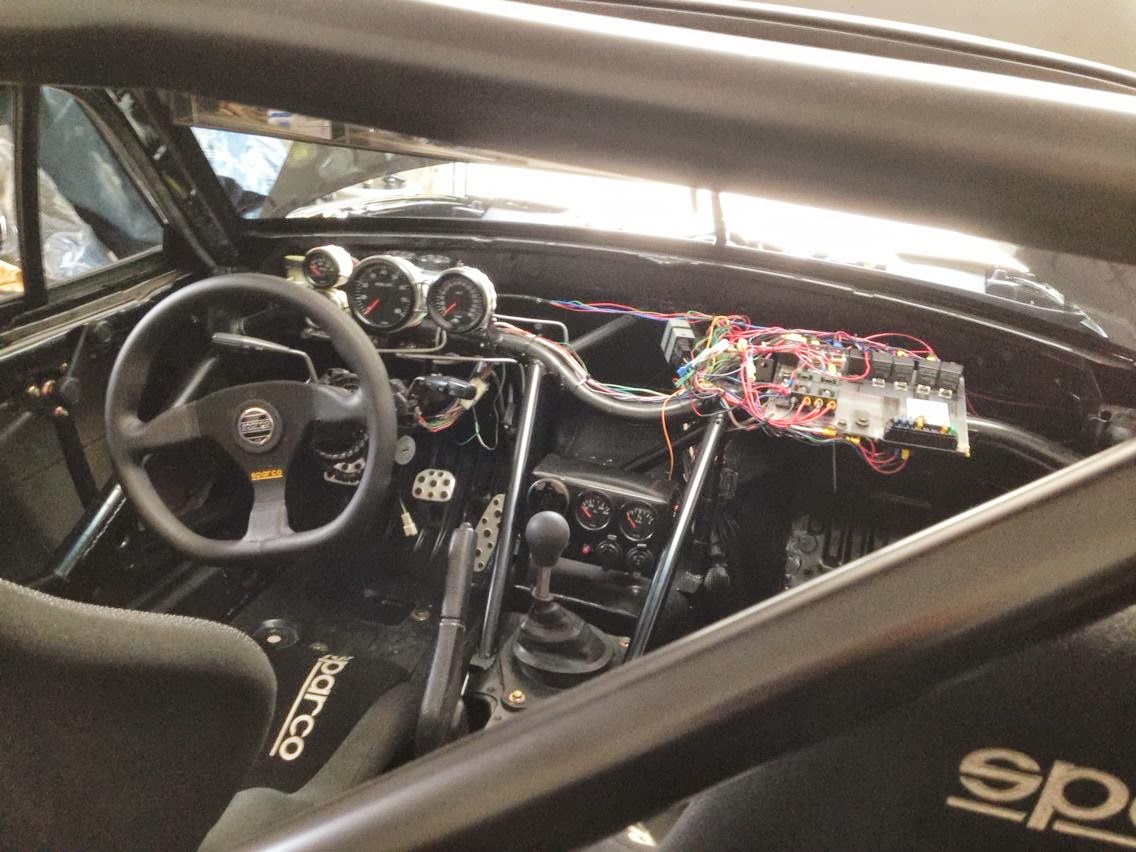
Here's the interior. I was planning to reinstall the dash, but now I'm leaning towards leaving everything exposed. I kind of like it this way.
Here's a shot from friday. This guy is quite excited to see that my car has finally come to life:
The Woodward Dream Cruise was on Saturday. All of Woodward Ave basically turned into a parking lot, as car enthusiasts gathered for what, if I recall correctly, is the largest automotive gathering in the nation. I spent the morning cleaning up a couple of small things that I hood-rigged to get the car out the night before and hit up the Dream Cruise in the afternoon. The car continued to run well, although the cooling system doesn't appreciate prolonged stop and go traffic on hot sunny days. Once the temp reached 210 or so, I hopped onto a road with less traffic and it dropped back down in a hurry. I guess 210 is fairly normal for a stock thermostat ls1, though.
A leaky slave cylinder fitting is the biggest problem that I had. The clutch master cylinder reservoir had gone dry. When I noticed that the clutch engagement point was working its way towards the floor, I parked and got a ride home for more fluid. With a couple of top-offs, I made it though the rest of the night without any issues. There's a known problem with the fitting that the kit provides and solving the problem shouldn't be too terribly difficult.
Here's a photo that somebody snapped of me as I was stopping to give someone a ride:
Here's the fully populated engine bay. Yes, the radiator fans are held back with zip ties. I never said the car was truly done.
Here's the interior. I was planning to reinstall the dash, but now I'm leaning towards leaving everything exposed. I kind of like it this way.
Reply
0
0


