When you click on links to various merchants on this site and make a purchase, this can result in this site earning a commission. Affiliate programs and affiliations include, but are not limited to, the eBay Partner Network.
This thread will document the conversion of my 1994 BP powered NA(also known as "Blue")into a K24Z3 powered rocketing deathtrap.
For an in-depth dive in to what this car was and where it/I started, there is a previous build thread/log that chronicled both this car, and the NB that gave its life/drivetrain so Blue could be born. https://www.mx5atlanta.com/forum/mx5...on-of-thoughts
For the 99% that are sensible enough to not dive into that thread, a brief summery of the car as it currently sits:
T12, HPDE session at Road Atlanta
1994 Chassis. Complete NB subframe/driveline swap, powered by a 12:1 N/A BP4W/VVT hybrid. Honestly, that combination did quite well for an N/A BP. Other then a few teething issues early in its life, it was rock solid and I almost never had an engine issue sideline the car, something I aim to maintain for the Z3 swap.
Blue was used both for HPDE lapping, as well as SCCA TT and Hillclimbs, claiming podiums several years running in both those events. Fully gutted, stripped, and with driver/quarter tank of gas, it tips the scales at 2240lb and tickles the dynamometer at 150whp/126tq. The addition of both 9LR and DIY aero made it quite a fun car to drive when I have some good tire to throw under it.
Downhill return grid, Pine Mountain Hillclimb
The K24 swap option arrived on my gaydar basically as soon as the OG K24A2 swap kits went public. I loved everything about it. More power, more RPM, Honda reliability. However, the high price point of both the swap and the motors turned me off.
This changed early 2019 when Kpower dropped the K24Z3 swap option. Can't really say it better then the man himself, but this option ticked all the previous boxes, but at a much lower entry price.
"The engines are inexpensive, widely available, strong, reliable, should be good for over 200whp with a tune. The K24Z3 single exhaust port could give us the tighter exhaust packaging needed to run a stock, unmodified subframe."- David Calzada
I was hooked and preparations began. Thanks to the shitshow that was 2020, I was unable to make any headway into the swap, so I was stuck with the lead block BP for another year. I've been slowly accruing parts and plans to pull this off, and its finally time.
The Goals:
#1. Produce, for the lowest cost feasible, a fully fleshed out, running, driving K24Z3 swapped TT/Time Attack/Hillclimb/HPDE miata, maintaining all the reliably of a stock BP, but with an extra 60whp. 60whp for now anyway
#2. Prove beyond all reasonable doubt that Miata's are a bad time attack car.
#3. In keeping with the reliability point of #1, where possible, use fully OEM parts, or slightly modified, easily obtainable parts that can be sourced anywhere across the country without the need for specials orders, overnighting parts from Japan, or going any farther then the closest generic parts store for replacements. Where it is not feasible to use OEM parts, beefcake one off/custom/mission critical parts to the point their failure means I have much bigger issues to worry about.
#4. Dial this thing in to the point it can be driven, tire trailer in tow, 5+ hours to a multiple day event, turn every lap of every session, and still return home. Yes, this car is still street legal, and driven to ALL TT events.
#5. Claim the title of fastest NA/NB Miata to lap Road Atlanta, period, no asterisks. Currently 12 seconds off that mark so this K24 has some work to do. If I can claim that over an NC too, that's cool, but unlikely once NC development catches up.
#5b. Claim King of the Hill two consecutive years at the annual Chasing the Dragon Hillclimb. 8 seconds off last years P1 so again, this K24 better be ready to play ball.
#6. DIY everything even remotely possible. The more in house this car is, the better. Obviously the basic swap items will come from Kpower, but the rest of the build is... well its a garage build. And not a fancy garage either, but we will get back to that.
Now, with those housekeeping items out of the way, lets get started, shall we?
Last edited by Wingman703; Sep 24, 2021 at 02:36 PM.
Any good engine swap saga starts with an engine. So, here it is.
Rona19 kinda screwed up engine pricing. Pre-rona it seemed sub $500, low mile Z3's were falling out of the sky. In the last few months of keeping my eye out for one, prices were absolute crackhead prices, local junkyards wanting $1100+ for 150K mile specimens.
I eventually found one though at a yard a state over and had it shipped to me. 95K miles, known runner, $550 delivered to my place of work, where our American V8 loving parts guy joked that I was "going big block"
I was told over the phone that it did not come with any wiring harness, but I was pleasantly surprised to find that I had been lied to, and there was plenty to build a harness from scratch with. Big W
I wasted no time and found the sketchiest bolts possible to mount it to my HF engine stand and take a peak at what was under that dress.
I told myself if I died trying to remove a Honda crank bolt with 8ft worth of leverage and a can of PB blaster, it was just what was ment to be.
Spoiler alert, I did not die, but it was frighting the amount of bouncing on that bar it took to break it loose.
Very happy. Much cleaner then 90% of BP's I'm used to working on. Could hear it make compression when rotated, cams and head have a nice gold oil color, not a smeared poo brown oil color.
Yall hang out for awhile, get to know each other. I'm expecting a long, healthy relationship.
I've been planning most details of this build for the last 8-10 months, but only recently did I finish the majority of my wiring plans.
I have an MS3 EVO currently installed, but its obviously wired to run a BP, and is half hacked OEM harness, half aviation grade wiring. the OEM parts of it have started giving me a few minor issues, so I figure its better to start fresh and throw everything away(except for the MS3) and start fresh, with both the engine harness and the body harness. Planning out the wiring is 9/10th of the battle, I've found that once I have diagrams with neat little pin numbers in hand, I can chew though several hours of wiring work without too much trouble.
I've been using RapidHarness for most of my planning as opposed to my normal hand drawn stuff. It took awhile to get a workflow down, but once I got used to the software it wasn't to bad. There are some SERIOUS limitations and quirks to it that frankly ticked me off. Don't know if I would want to use it again for any future projects, but I'll stick with it for this one as I'm committed.
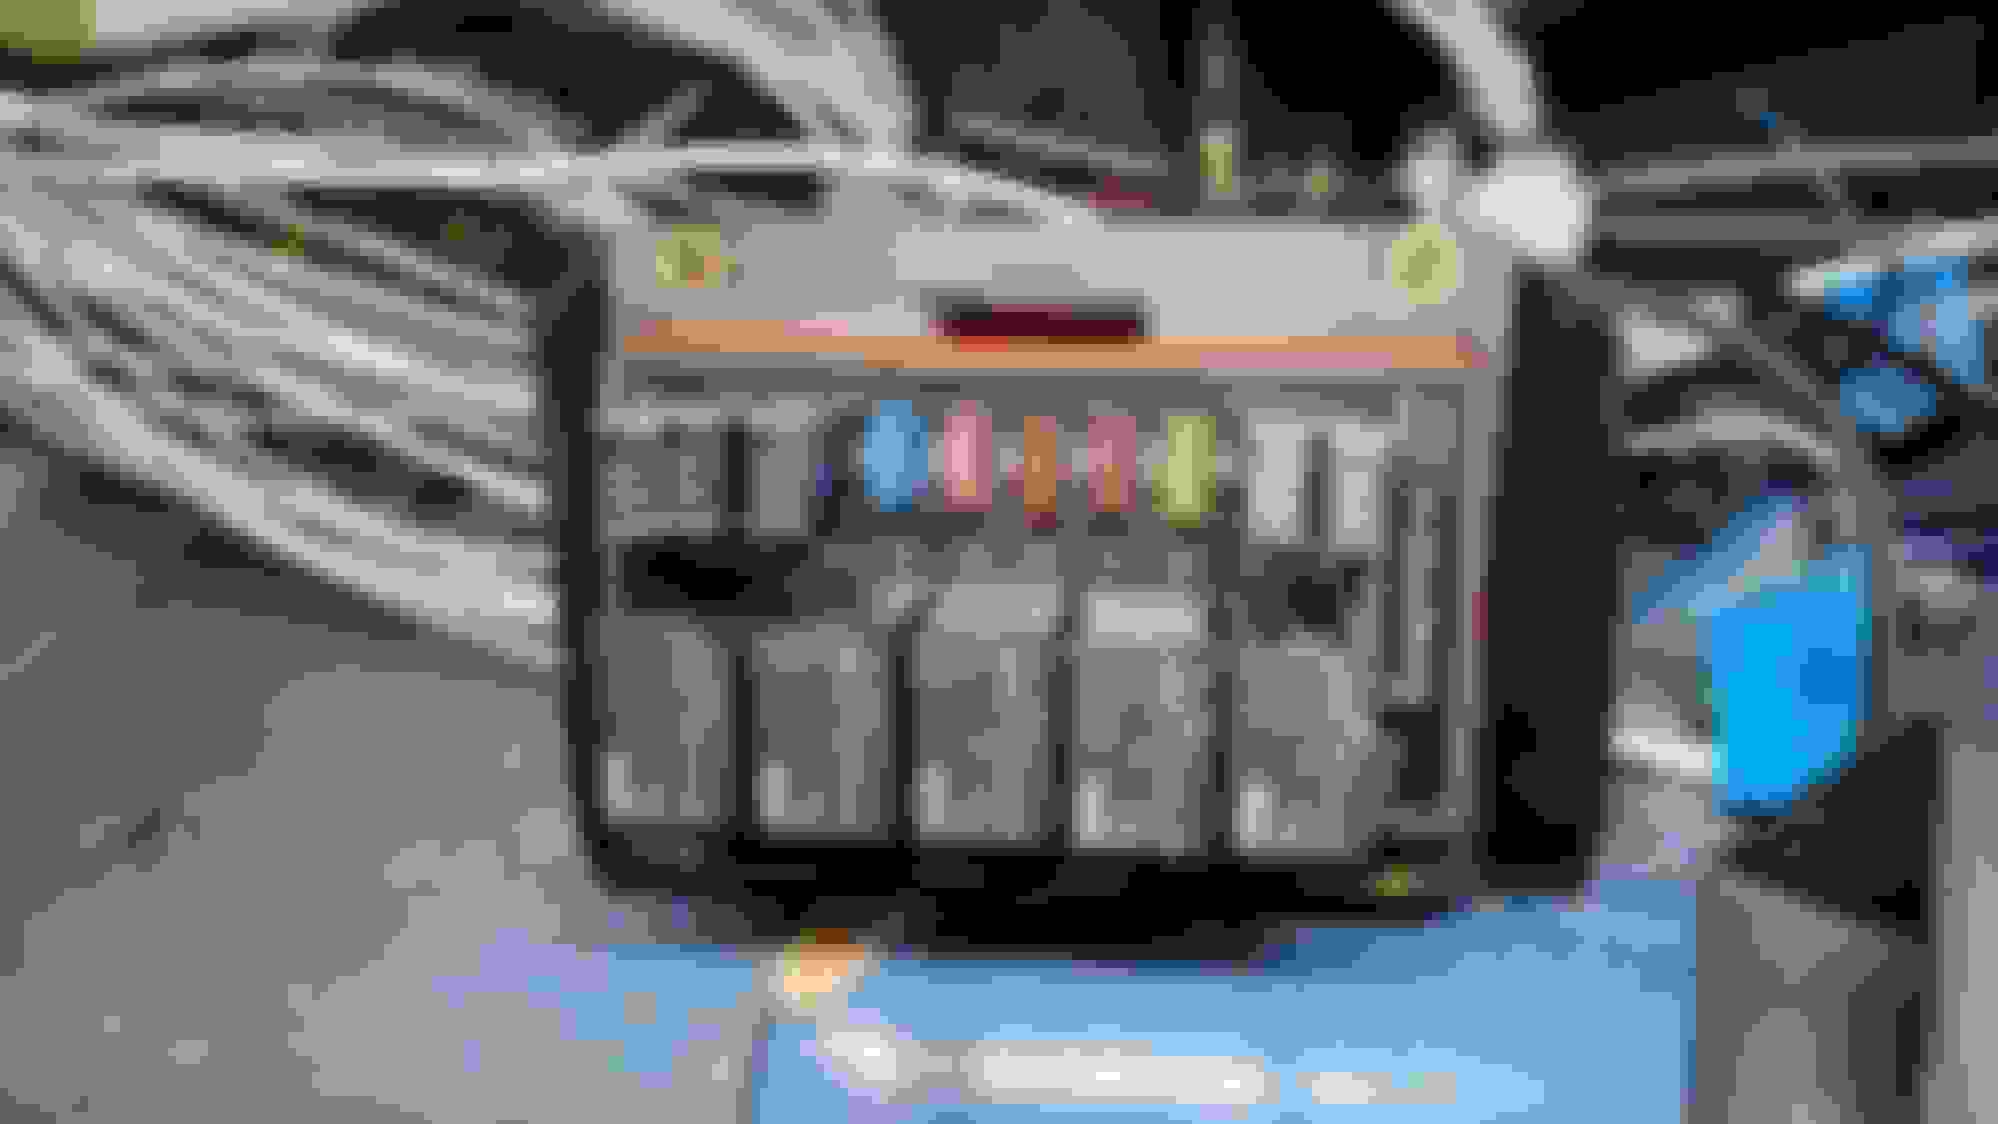
The heart of the electrical system is a Bussmann 15303-4, populated for five, 280 solid state relays, and ten type 2 solid state auto reset CB's. First time I've used solid state stuff on a personal project, but this should work out nicely and really wasn't as expensive as I was expecting.
Oh, speaking of costs, small detour.
I have a running spreadsheets listing EVERY part, item, and bolt I'll be buying for this swap, as well as the dreaded totals. If "Purchased Cost" line is empty, it means I have yet to lay my grubby hands on that item. Rest of the doc should be pretty self explanatory. https://docs.google.com/spreadsheets...Ks4/edit#gid=0
At the very bottom is a *tentative* schedule of when I hope to roll it out of the garage under its own power, but that timeframe really depends on a lot of things, i.e, Kmiata's backlog, and how much I can stomach dropping in a month on car stuff.
Back to wiring.
Thankfully this is a "rAcEcaR bRuH", but that being said, it still is street legal and will remain that way, more or less. I'm located in the deep south so I have some good leeway on what's "legal" vs what's *actually given a **** about*
My point being its not going to be quite as simple for me as throwing in some fuel pump wiring, building an engine harness and off you go, but its not too complex with only 3-4 additional load sources.
The basic overview:
The only subsystem that has given me major headaches has been the MS/Engine harness. I.e, it only occurred to me yesterday that BOTH cam sensors are not required, MS only needs to see one cam for sequential.
There's not quite as much information out there on running a Z3 with stock sensors, but I've found a few nuggets on here and some Haltec information that makes me think I have a slight chance of getting it to fire.
I'll be reusing my switch panel with some modifications, as I'm quite used to it. Its also heavily integrated into the car itself at this point, and makes everyone ooooo and ahhhh at Cars and Coffee. Its wired on two disconnects so most changes can be made on the chassis side of the harness with messing to much in the panel itself.
The OEM body harness will be tossed and rebuilt from scratch with an eye on weight savings and simplicity. Its really not to much, mostly lights and a few interior items.
Last edited by Wingman703; Sep 23, 2021 at 02:28 AM.
What tire/wheel setup are you usually running? K24 will be at home in this build!
Street is a 205 or 225 on a 8".
Track depends, I have 9.5" freeforms that fit anything from a normal 245 to a hella stretched 205 Hoosier. Just depends what I can get my hands on.
Friends TT6 car lost an engine due to oil starvation, so my old BP found a new home.
Last time I pull a BP out of this car. God knows I've done this to many times already.
Ironically the point in time I'm ditching the BP is the same time I have two of them sitting in my garage.
With that lump of iron out of the way, I can finish ditching everything that doesn't need to be there any more.
Messy engine bay, fresh from the pull:
"Clean" engine bay, ready to be worked in.
And an entire Miata worth of wiring. I have no idea how this hacked up harness hadn't given me a host of issues, there's three years worth of work into trimming it down into just that, and varying levels of workmanship and solder joint quality.
Preface: I hate slave cylinders inside the transmission bellhousing, I.E, corvette/350Z style. Slave failure means dropping the transmission and some very annoying clutch bleeding. When I saw that Kmiata had moved to this style for their K24Z3 kits I... well lets just say I was NOT a fan of that change. I know Kmiata claims their custom quartermaster bearing is extra robust and will have less/no failures, but I've seen several early adapters have issues with it, or have slaves that needed additional machining to properly work. AND, the kit requires you run a Wilwood master cylinder, not an OEM Miata master that you could find at any parts store in a pinch. All this to say, I did not want to add $600 to the build cost, just to have a system I could not source parts for trackside, and any failure meant I was dropping the trans to fix.
The obvious issue with keeping the Miata clutch hydraulics is that the exhaust doesn't fit down the passenger side of the transmission. There simply isn't room to fit fuel lines, a slave, AND a 3" downpipe without going to a tubular subframe(K24A2 style) or choking down the exhaust to 1.5" oval.
My solution? Sidepipes, Passey style.
I first want to thank Ryan for doing this many years ago on his LFX swapped car and providing pictures of how he did it, as well as advising me on material choices. Without knowing what I was getting into and what was under there, I would not have had the confidence to start chopping up my own rockers.
First obvious issue: 3" pipes obviously don't fit in the wheelwell when sharing space with a wheel of any size. Shocking, I know.
Pictured: 3" tubing trying to find a home between a Miata pinchweld and a 245 RC-1 on a Konig 15x9.5.
Second issue. I want to be able to run this car at more strict tracks like AMP and NCM, and not blowing out my own eardrums would be nice. I'll have to stuff some noise reduction in there, not just a raw 3" straight pipe. Mufflers mean I'll need to make space for them in the rockers as well, as if fitting 3" wasn't going to be enough of a challenge. I picked up two straight though mufflers with an outside diameter of 4", the biggest I figured I would be able to package. If this doesn't mute the car enough I'll have to get creative, but that's future me's problem.
I planned to take the exhaust all the way back to the rear wheel like shown, however this didn't end up working. More on that later.
Okay... all the planning I could do had been done... time to start. Rockers getting cut. Scary. No turning back now!
Didn't take me long to realize I had already made a booboo and there was probably a reason that Passey ended his exhaust where he did. I cut all the the way to the rear wheelwell straight away before taking a peak at what was back there.
Turns out there's some internal webbing that comes down along the rear door sill that looks fairly structural, and would be a complete pain to cut/reroute the load paths. The view inside the rocker, looking to the rear:
I opted to not get into that, and reweld the paneling I had already cut, shortening the exhaust. I hadn't been stupid enough to cut the rocker off the internal webbing, so I could tack it back without comprising anything structural.
Little bondo over that and some spray paint, and its like it never even happened. Thankfully its low down on the car and not a high visibility location.
With those hours of painstakingly tac welding miata tinfoil back together past me, I was able to return to the fun bits. I took the main exhaust body into work and fumbled my way though some tig work. I'll tig wherever it will be viewable to make it look pretty and professional, and then mig for ease and speed where its hidden.
Great news! Looks like the 4" mufflers will be juuuust a smidge higher then my pinch welds/frame rails, so I *shouldn't* have to worry about dragging pipes on the ground or over bumps.
I searched fruitlessly for someone selling 5" pipe in 16g, coming up short and worrying I painted myself into a corner before Ryan rescued me and said he just used 5" exhaust tubing. Seems like a rather obvious solution in hindsight, its even fairly cheap and NAPA sells it by the foot. I could get two sections out of a single run of pipe by cutting it in half, so I only had to order 3' worth and I ended up with about 10" uncut pipeing left over.
Where possible I welded the backside to the miata sheetmetal, but I think it would be fine just welding the top to the door sill and the bottem to the pinch weld.
At the pinchweld inside the fender I added some thick steel vertically to add some strength I cut out of the jackpoint locations. Heads up, don't have anything flammable inside the footwell, because it WILL catch on fire from the heat... ask me how I know.
It ain't the prettiest, but you know what they say.. grinder and paint make me the welder I ain't. You also can't see any of this once the exhaust is mounted.
Ground and painted:
And the exhaust mounted.
Pleenty of room to clear the tire now. Pictured at full lock and droop, there's more clearance at normal ride heights. As pictured I can stick two fingers in there.
I should have just enough room to snake 3" between the framerail and the subframe. Might have to bend some brake lines out of the way, but no biggie. Fuel lines will be moved out of there and relocated anyway. Plan is to ceramic coat the entire exhaust once done to try and keep the heat controlled.
This is as far as I want to go before I receive my swap kit, I want to physically mount the engine in the bay so I know exactly where I'm aiming for my termination point. Kmiata says they are currently doing around 60 day wait times for kit shipments, so fingers crossed mine ships around the end of November.
Oh my god, sooo many labor hours, and I didn't exactly take my time to make it perfect. I have at least 30hrs into just the rocker section(Not counting the 2-3 hours I spend welding back where I cut to far), and 5-6 into the actual exhaust, and its not even completely done lol.
Wires, wires, wires.
I had contemplated keeping my original Mazda harness and just making the needed changes for the K, but I rapidly nixed that idea and decided to strip the entire chassis of every scrap of wiring, and start from scratch. Looking back, I'm quite glad I made this call, as my harness had been changed/hacked up in so many places, and still had a good chunk of unneeded wiring in it.
The main harness building begins:
I'm using a Bussmann as my relay/fuse holder, it's really the cheapest easy button shy of shelling out for a fancy PDM. I filled it with solid state relays and type 2 auto resetting circuit breakers for the important stuff, and normal lame blow fuses for non-essential items.
I opted to run anything heading rearward along the trans tunnel instead of along the passenger sill. As my exhaust is now part of the rocker panel I don't know how hot that area will get even with ceramic coating and heatwrap, but I didn't want to take a chance on melted wiring causing issues down the road.
Switch panel disconnects through three molex connections, engine harness runs to a 30some pin bulkhead connector, digital dash also has two molex disconnects. Only OEM component I kept was the flasher box for turn signals and the fuel sensor/guage. Everything else is tefzel wiring, 20g and 16g for most things, 12g for heavy loads, and a few twisted pairs for sensor lines.
Everything under the dash completed, secured, and ready for the dash to go back in. Don't look too closely at the mess of wires at the back of the Bussmann, it got pretty crowded back there.
I got a little antsy and wanted to make sure what I had done so far was working, so I grabbed the battery off the shelf and connected it in a completely non-ghetto way.
Buuuuut nothing caught fire, and the Megasquirt/Pi dash booted up without issue for the first time in three months. Definitely good to see.
I still need to wire up the headlights/taillights, but I've done the heavy lifting, the rest is easy stuff. Good to get this chunk of labor done and out of the way now, as once my Kmiata kit arrives I'm sure I'll have zero drive to fiddle with wiring stuff.
Obviously nothing on a K24's fuel system matches what the NA Miata supplies. K24's come with a returnless fuel system and of course need MUCH more fuel then the lowly Miata pump can supply.
I dropped a walbro 255 into the tank to solve the quantity issue and give me plenty of headroom, nothing new there.
For the supply lines, I replaced all my rubber lines with Continental fuel line that's rated for E85. $30 bought 25ft of line, which is plenty to do everything twice over and still have hose to spare.
K24 has the intake on the drivers side, so I bent the OEM hardline up and back to the firewall, flared it and ran rubber from there across the top of the tunnel and into a regulator.
I had gone back and forth between a dead head or a through system, decided to dead head it for simplicity for the time being. If I need to change it in the future its fairly easy, just need more AN fittings.
Fuel lines wrapped in some harness sheathing to protect against abrasion in critical areas. In lieu of a traditional analog fuel pressure gauge, I installed a 0-5v pressure sensor I'll feed to MS so I can have fuel pressure live on my Pi dash. This probably will not prevent me from running out of gas trying to outrun the fuel gauge needle, but hey, at least I tried.
Also added a GM E85 flex fuel sensor, as the plan is to run both 93 and E85 for all the horsepowers. Currently targeting NASA TT3 and SCCA U2 as potential competition classes, and I'll need all the horsepower I can squeeze out of the Z3 or find a good chunk of weight to drop for TT3, especially with the new tire modification allowances they just dropped.
All the money I saved by not going full AN/braded line I put into something I know MiataTurbo will like, some insanely overkill, non-knockoff injectors.
These are Injector Dynamic 1050's, capable of supporting 600whp on pump gas, or 500whp on E85, and mounted to a K24 Radium fuel rail. Honestly the rail was not needed, but I got it for cheap and its quite pretty, as well as giving me complete access to all K24 injector sizes.
I guess you could call this.... futureproofing, but really it was simple economics to buy once, cry once. $500 for 1050cc injectors that will flow everything I need and more, or $300 for 550cc injectors that would already be nearing maxed with E85 and 220whp.
Enough engine and wiring stuff for the moment! Time to break out the angle grinder and build some aero.
My previous splitter had lasted a solid two years, but it was showing it. One can only ask it to eat so many curbs before the material starts to buckle. I have a local source that I can get 4'x8' sheets of alumalite from for $150, and I much prefur that over plywood. Carbon is a little to pricy for my tax bracket.
Fresh new sheet of 10mm alumalite mocked into place:
Previous splitters were very conservative in size, 3" lips. As a result the 9LR dual element wing easily overpowered them, even with splitter ramps, and I would get terriffic understeer. The car really only balanced out once I removed the front swaybar completely. In an effort to not have the same problem at higher speeds, I cut the splitter for 5.5"(inside NASA's 6" limit), and left myself space to add additional splitter ramps if need be.
I added rubber edging for a smooth lip and skid plates to help the splitter survive, but apparently I didn't bother to take a photo after that.
After sitting in the garage for 3 months during extensive angle grinding and other dusty work, the car was filthy. I popped some wheels on and pushed it outside for a bath during a warm break in the weather. Sidepipe doesn't look half bad!
Way back when I bought this shell, the paint on the hood and trunk was pretty bad, so I sprayed it with some gloss black and moved on with my life, having much bigger priorities then aesthetics.
A few years of track use and Georgia sunshine didn't do that hasty spray job any favors, and it was really showing some wear. Additionally and more importantly, the black top was incredibly hot. Standing in the paddock of Road Atlanta one day, I placed my hand on the white stripe adorning the hardtop and found there was at least a 15* difference between it and the black paint. Between the black exterior and the exhaust right next to my leg, the interior was an absolute nightmarish oven in anything but the coldest winter days.
All that to say, the black had to go, and stat.
I was already dumping money into the car, so I didn't feel like adding the additional cost of a full wrap job into my plans. Instead, I whipped up a few designs, had IG vote on their favorite, and went with it.
I really, really hate body work, and hours of sanding is no fun. So I really didn't take any photos of the during process... just the final product.
Its defiantly identifiable as a rattle can job, but it passes my requirements of 50/50 with ease... looks good at 50ft and 50mph.
Between this and routing the exhaust out the fender, hopefully this makes the interior much more pleasant.
I also got a "real" laptimer, tired of being hassled over using Harry's, and wanting the more accurate data that comes with a real system. Aim Solo 2, mounted conveniently just below immediate eyeline and hardwired into the car for power. Not configured to read off the MS3 as I didn't spring for the out of stock "DL" model that was also $300 more.
Last edited by Wingman703; Dec 31, 2021 at 12:15 AM.
And now for a final item... and the reason there hasn't been any real activity here in over a month.
Kmiata, or as they are now known, K Power Industries.
/rant
KPower's communication is both awesome and complete garbage at the same time.
I placed my original order September 23rd for a "basic" swap kit and a few other items. No electronics, no flywheel, no trans adapter, just the oiling system, mounts, valve cover, and a few odds and ends. Nothing(I thought) that would be terribly held up even in this post Rona hellscape of material shortages.
Their website quoted a 45-60 day lead time. Around day 30 I sent an inquiry email asking if that was still correct and was told that no one had ever waited more then 90 days for a kit, most of my order was ready, and they were just waiting on a few things, but it was on track to be shipping around day 60. Great!
Day 60 came and went, so I sent another inquiry seeing how things were going, to which I was told they were having unforeseen holdups, and it would be another 2-3 weeks. Unfortunate, but it was what it was and I wasn't too disheartened.
Last week day 90 arrived(December 23rd), and I got an email from Kpower apologizing for the wait, and stating they still didn't have all the items on hand, but would be shipping what they did have ready. I was quite happy to at last get my hands on something, and thinking a late Christmas present would be VERY nice, and sent an email back thanking them and asking what would be shipping and what was still being held up... but didn't hear back.
No biggie, its now Christmas weekend... I'm sure I'll hear something from them early next week... Nope. So I send a follow up email the 29th(day 96 of waiting), only to get an autoreply stating they are all out of office till January 3rd. GAHHH. So now, once again, I sit, twiddling my thumbs and waiting, knowing full well I'm probably not going to hear anything from them till a week into the new year.
So back to my original point... their communication is both awesome and garbage.
Awesome at returning emails within 24hrs or so(generally) and being very helpful and understanding with questions and order changes.
But absolutely garbage at providing a good time frame and tempering my expectations, especially with the email stating parts of my kit was shipping... even though my kit was NOT shipping yet and wouldn't till after the new year. I get that supply chains are FUBAR right now... but just tell me that its not shipping till late February, and then make me happy when it shows up a month "early", not this "just another two weeks!" annoyance of being strung along.
Anyway, /endrant
Sooo... yeah. I'm at a dead stop now till I get swap stuff in. I need motor mounts to see where my exhaust terminates so I can finish it and send it out for ceramic coating. I need the motor mounted in the bay so I can order the final engine items and build the firewall side of the engine harness. I need an oil pan so I can see how my splitter will fit. I need all of the above in place so I can figure out how I'm routing my cooling system and a half dozen other things. But for now... I wait. *Slightly* impatiently.
I’m fairly certain if they quoted February, it wouldn’t show up till April. That’s how bad it is. You can’t just add a month, because sometimes it’s 2 months oops I mean 6.
And now for a final item... and the reason there hasn't been any real activity here in over a month.
Kmiata, or as they are now known, K Power Industries.
/rant
KPower's communication is both awesome and complete garbage at the same time.
I placed my original order September 23rd for a "basic" swap kit and a few other items. No electronics, no flywheel, no trans adapter, just the oiling system, mounts, valve cover, and a few odds and ends. Nothing(I thought) that would be terribly held up even in this post Rona hellscape of material shortages.
Their website quoted a 45-60 day lead time. Around day 30 I sent an inquiry email asking if that was still correct and was told that no one had ever waited more then 90 days for a kit, most of my order was ready, and they were just waiting on a few things, but it was on track to be shipping around day 60. Great!
Day 60 came and went, so I sent another inquiry seeing how things were going, to which I was told they were having unforeseen holdups, and it would be another 2-3 weeks. Unfortunate, but it was what it was and I wasn't too disheartened.
Last week day 90 arrived(December 23rd), and I got an email from Kpower apologizing for the wait, and stating they still didn't have all the items on hand, but would be shipping what they did have ready. I was quite happy to at last get my hands on something, and thinking a late Christmas present would be VERY nice, and sent an email back thanking them and asking what would be shipping and what was still being held up... but didn't hear back.
No biggie, its now Christmas weekend... I'm sure I'll hear something from them early next week... Nope. So I send a follow up email the 29th(day 96 of waiting), only to get an autoreply stating they are all out of office till January 3rd. GAHHH. So now, once again, I sit, twiddling my thumbs and waiting, knowing full well I'm probably not going to hear anything from them till a week into the new year.
So back to my original point... their communication is both awesome and garbage.
Awesome at returning emails within 24hrs or so(generally) and being very helpful and understanding with questions and order changes.
But absolutely garbage at providing a good time frame and tempering my expectations, especially with the email stating parts of my kit was shipping... even though my kit was NOT shipping yet and wouldn't till after the new year. I get that supply chains are FUBAR right now... but just tell me that its not shipping till late February, and then make me happy when it shows up a month "early", not this "just another two weeks!" annoyance of being strung along.
Anyway, /endrant
Sooo... yeah. I'm at a dead stop now till I get swap stuff in. I need motor mounts to see where my exhaust terminates so I can finish it and send it out for ceramic coating. I need the motor mounted in the bay so I can order the final engine items and build the firewall side of the engine harness. I need an oil pan so I can see how my splitter will fit. I need all of the above in place so I can figure out how I'm routing my cooling system and a half dozen other things. But for now... I wait. *Slightly* impatiently.
We've exchange a few DMs with my details. But I often look at my VVT and wonder if I would've been better off just leaving it in for another season. If come March (season start), my car is not back together, I'll be kicking myself.


 2
2