When you click on links to various merchants on this site and make a purchase, this can result in this site earning a commission. Affiliate programs and affiliations include, but are not limited to, the eBay Partner Network.
We've exchange a few DMs with my details. But I often look at my VVT and wonder if I would've been better off just leaving it in for another season. If come March (season start), my car is not back together, I'll be kicking myself.
I don't mind waiting for a kit. I was so sick of BP's. But yeah... If I my car doesn't run by early April I'll also be pretty peeved and scrambling to borrow/rent a car.
Originally Posted by curly
I�m fairly certain if they quoted February, it wouldn�t show up till April. That�s how bad it is. You can�t just add a month, because sometimes it�s 2 months oops I mean 6.
And I would be fine waiting even 6 months. If I have an accurate timescale I can plan ahead. But since the website quoted 60 days, and Kpower said 60 days... I foolishly believed it and planned accordingly. Had they said from the start "the wait may be up to 6 months" I just would have placed my order back in April. Hell, maybe I SHOULD have just placed my order back in April.
111 days after order placement, Kpower shipped the majority of my kit.
FedEx promptly "lost" the package.
Five days and several phonecalls later, they found it doing laps in one of their warehouses and I was able to pick it up. FINALLY. Box looked like it had taken a beating, but Kpower did a good job packing things and nothing inside was damaged in the slightest.
I of course wasted no time inventorying everything and starting to assemble what I could. I was happy to find they had shipped my entire order except for a valve cover modified to help fit under the hood. More on that later.
The kit instructions are adequate, but not the best. Several items are simple "do this" and leave you to figure out what bolts go where. Or that you have to remove an item they just had you install so you can add something to it.
The only "issue" I had was with the oil pickup tube. Kpower uses a "type S" Honda oil pump, and makes a machined part to adapt it to their custom oil pickup tube. When I tightened down the pickup tube the oring would seem to pinch and not seat cleanly, like so:
I gave them a call late on a Friday and they picked right up, took a look at the photos, and told me its good, send it. I'll be running oil pressure/temp sensors as well as using MS3's shutdown for low oil pressure, so I'll just observe and hope that's normal, or at least, not to badly abnormal.
Rest of the assembly went smoothly and I was able to drop the motor in for a first test fit. MAN that looked nice already. Hype levels to the moon.
Its really a tight squeeze to fit the oil pan around the subframe while keeping the transmission low enough to slide in. This would be a massive pain for an OEM car that still had its front structure in place.
With the motor in place I could finish the exhaust. Quite happy with the amount of room I had to work with.
After tac'ing it into place and confirming fitment, removed and tig welded the parts you can see while its in the car. Mig'ed the parts hidden in the wheelwell as its so much quicker and easier, as well as not being as picky about perfect cuts and non-existent gaps.
Split it into two sections to both aid complete removal, and make it easier to get at anything buried down in the passenger side of the engine bay, as this is where the K24Z3 crank trigger and miata slave cylinder live. Upper "downpipe" can be removed with a Vband and four header nuts for nearly complete access. Exhaust will go off for ceramic coating Monday, and I'm contemplating heatwrapping the downpipe for an additional layer of heat control inside the engine bay. Anyone know if wrapping fiberglass insolation over ceramic coating causes any issues?
Possibly the most daunting unknown, Custom K24Z3 Crank Trigger Settings.
I haven't found anyone online running a Z3 motor with OEM sensors/trigger wheels on megasquirt. As such, I've had to figure out the crank trigger settings myself, with a few cues from the Haltech information on the motor.
The Z3 uses a 58 physical toothed crank wheel, mounted at the very rear of the crankshaft behind #4 rod. There are two additional missing teeth, making the "total" amount of teeth 60, or to use trigger terms, a 60-2 crank trigger.
The intake cam has a four toothed wheel also at the rear of the cam, not sure what the teeth relate to though, its not to TDC.
The Z3 has an additional cam wheel/sensor on the exhaust cam, but the wheel is a weird asymmetrical three tooth design I don't think MS will read. An additional cam sensor is unneeded anyway, and VTEC/VVT both live on the intake cam, so no need to track the exhaust cam.
Setting up for a custom trigger wheel is detailed in the MS3 EVO manual on page 70, so I won't detail the entire process, just the end settings and numbers I used to get them.
Trigger wheel position with the #1 cylinder at TDC. Its hard to tell from the angle, but the sensor lines up with the 7th tooth. The wheel is rotating from right to left in this orientation, meaning the wheel has a loooong way to go to find tooth #1 again.
Counting the tooth gaps after this point yields us 51. At 6 per tooth(360�/60), this gives a 306� offset, which is then the number plugged into MS.
My theoretical trigger settings are as follows. Note that as of the time of writing this, these have NOT been tested or confirmed to work. If they do work, I'll come back make a note at the end of this post, or what changes were needed/suggested.
EDIT: Wingman from the future here, somehow I fumbled all that math and numbers. My only guess is that I somehow turned the motor over the wrong way while calculating. Reversing my trigger offset from 306� to 54� got the motor to fire, and once dialed in with the timing light I had the correct numbers below. Again, the above numbers are WRONG, the posted settings below are CORRECT.
For reference, here are the Haltech settings, as obtained from Supermiata.
Oh... did I say cues earlier? Because Haltech has the same tooth count numbers, even if their offset numbers don't make sense.
Last edited by Wingman703; 01-30-2022 at 09:38 PM.
Reason: am dumbass that can't math
With the important bits of the Kpower kit coming in, progress has jumped forward. I'm hoping to have first fireup by mid February at this point.
The sticking points:
1. Ceramic coating shop has a two week backlog.
2. I still need a valve cover and Kpower says their modfied covers are still a month out, more if you opted for the powder coating(which I did not).
3. Misc odds and ends I now need to order(why on earth does a new TPS sensor not come with its respective pigtail??)
#1 Isn't a huge deal as long as they stick to their two weeks, I need time to build the engine harness and make the engine play nice in the bay anyway.
#2, I'm not waiting ANOTHER month just to try and fire the motor up. I'm already signed up for a late March NASA event, and there's a mid March local trackday I would like to attend to use as a first shakedown close to home and with backup near. Before it even goes on track I want to log as many street hours as possible to work out any initial kinks, and get the car on a dyno to tune for both 93 and E85.
I ordered an OEM valve cover from a junkyard. There's a zero percent chance its going to fit under the hood(hell, I'm not even sure the modified one will), so I'll just have to run around hoodless for awhile. Better then trying to cram everything else into a two week period.
#3, I thought I was pretty well prepared, but nope, there's always a half dozen items you don't even think of... but why doesn't a TPS sensor come with the pigtail??(looking at you, Acuity).
The acuity does have an option for an adapter to B-series when you buy it. Otherwise all TPS sensors sold assume you�re plugging it into a factory harness. If you�d like, you can switch to a 90-93 mustang TPS, which has a permanent pigtail from the factory
The acuity does have an option for an adapter to B-series when you buy it. Otherwise all TPS sensors sold assume you�re plugging it into a factory harness. If you�d like, you can switch to a 90-93 mustang TPS, which has a permanent pigtail from the factory
Somehow I missed that. Or assumed that if nothing was selected, it would just come with a bare pigtail.
It's not a big deal as the pigtail was only $20 from acuity, just an annoyance in the moment that stuck with me.
Engine and driveline assembled and installed in the car for the final time. I loved my Supermiata ceramic clutch so much I tossed it right on behind the K, it had only seen a season's worth of use.
Unfortunately while tightening up bolts under the car I realized my PPF was cracked. Having seen Marcus's break a few weeks ago and end a day at Barber I wasn't about to send it and hope it stayed together for another year.
While possible to separate the diff from the PPF while still in the car, I've found its much easier to do so while both are out of the car. So out they both came. I'll use the opportunity to add some supermiata diff bushings(current are stock) and weld in the arm reinforcement I've had sitting on my shelf for a few months.
On the bright side, I lucked out with timing at the powdercoating shop and they had my exhaust ceramic coated and back to me within 48hrs(initially quoted two weeks). Very happy with the end product of how that turned out.
My temporary OEM valve cover also arrived today, so I tossed that in and got a jump on the engine harness wiring.
At this point the only thing that stands between me and first fireup is... me. While I'm still waiting on 2-3 items and need to grab some smaller things locally, I have what I need to finish the wiring, plumb the cooling system, and work on getting it started. Might get a chance to do just that this weekend depending on how much free time I find on my hands.
The excitement grows, and so do the nerves.
Solid progress, also big ups for the K24Z crank trigger info, will save me some time when I get there. I'm running an Emtron standalone and the stock trigger wheel is definitely much more appealing to use when compared to the K24A trigger that has WAY less teeth/resolution.
Diff welded and Supermiata bushings installed. People do not joke when they say that cast aluminum is a bitch to weld cleanly, and you cannot clean it enough. I got 2-3" of really nice looking welds, and the rest was... strong, but ugly. I ground down most of it, even though its not visible while in the car.
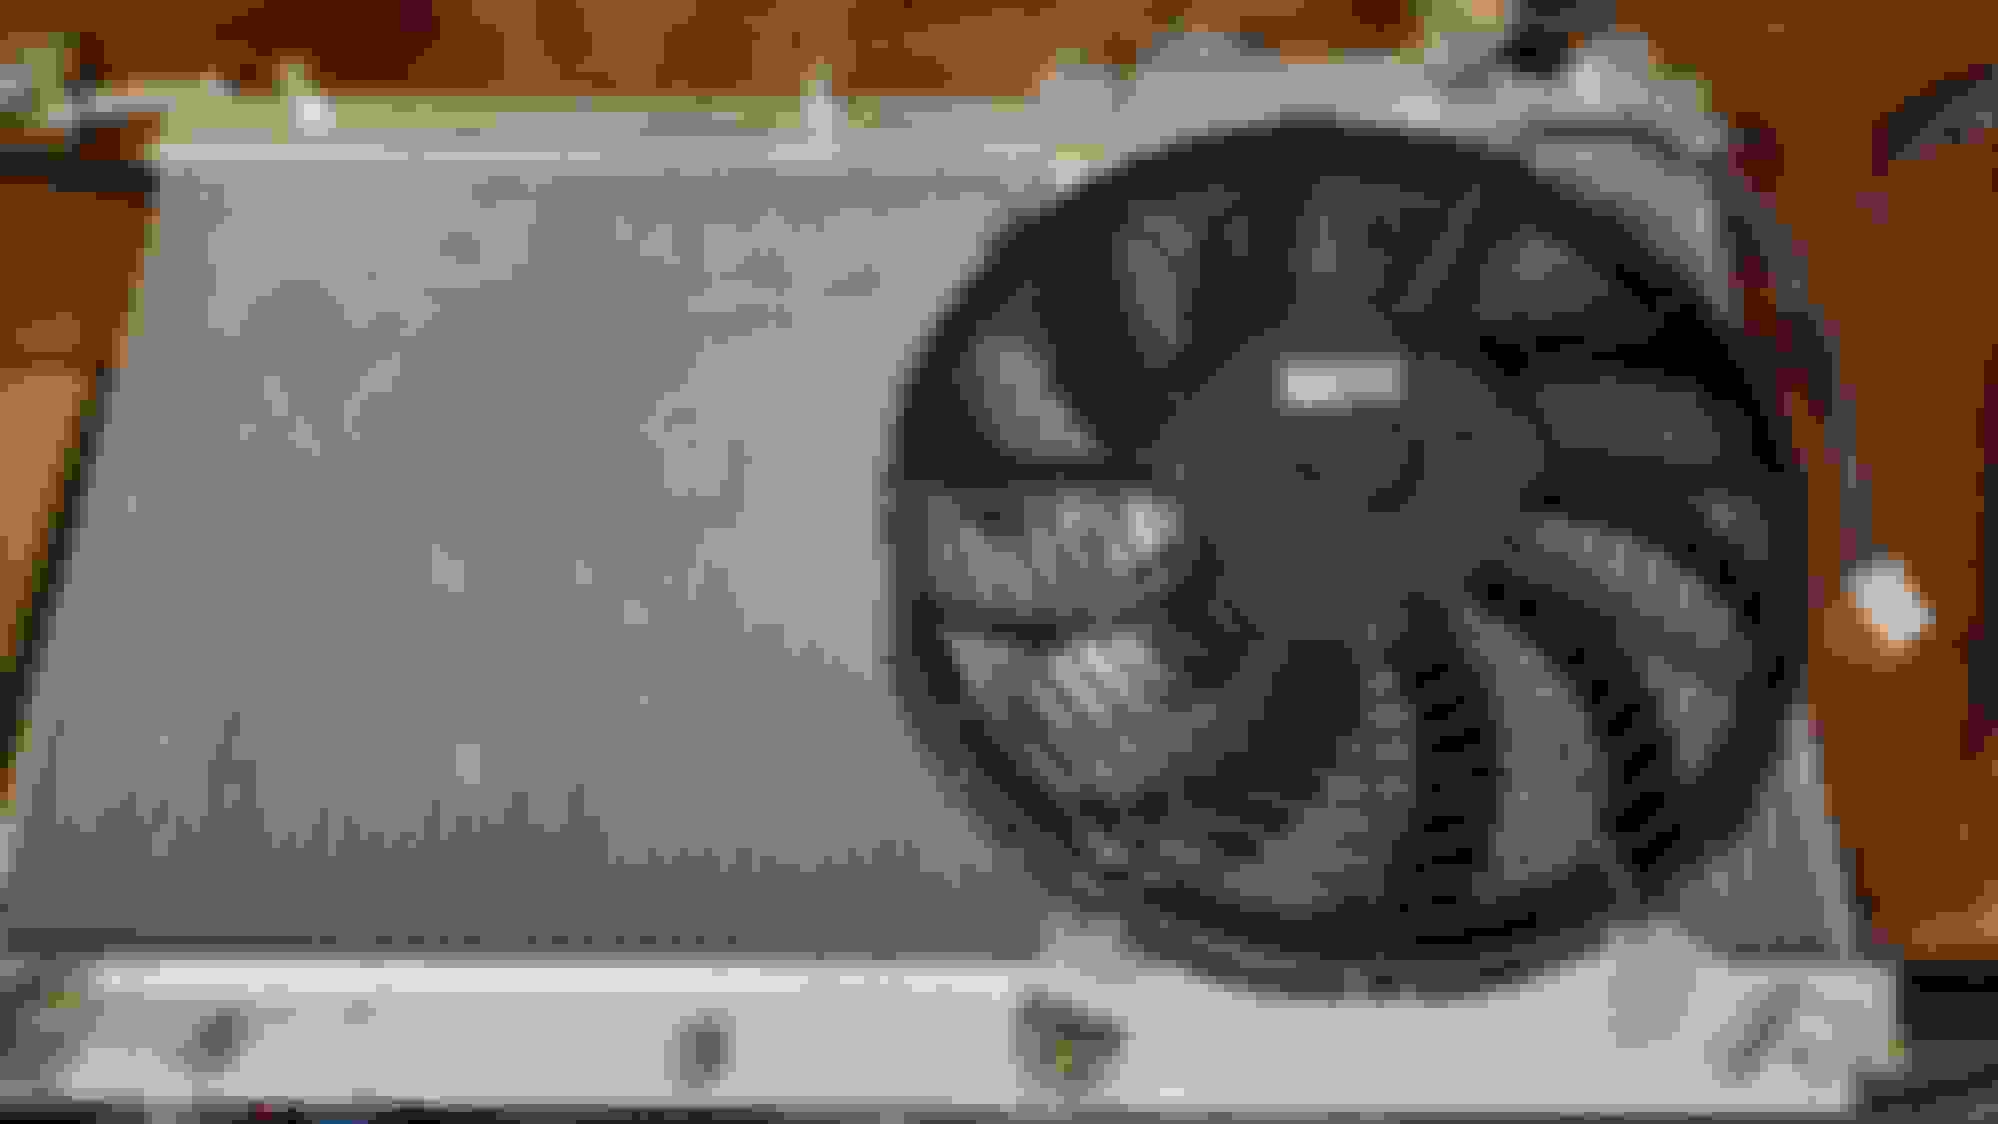
With the diff wrestled into place along with a new, uncracked PPF, the only thing needed was the radiator and fan setup. I splurged and got a nice spall fan, much lower profile then the OEM I had been rocking. This allowed me to push the radiator farther back and lower without hitting on the swaybar, a setup I had run with the BP and quite liked, as it both lowers a rather heavy fluid filled item sitting out on the nose, but also allows me to route the intake directly over the radiator to steal cold air from the radiator inlet.
I slapped the fan on with some quick and dirty aluminium brackets as I was getting impatient. I will definitely need to go back and redo those with steel brackets, or at least a stiffer aluminum, as the fan kinda gyrates into the radiator during use.
And once the engine had run and I confirmed all my wiring, I covered it in some split loom. There she lays, in all her K24 glory:
That intake filter is temporary. It was $10 from a vender I already had an order in with. I was unsure how much room I would have for filter space between the bumper and radiator ducting, once I know that I'll find a proper K&N to fit.
Now for the part that really stumped me. Somehow I managed to **** up the process to determine tooth #1 for Megasquirt. During initial cranking I kept getting starter kickback, even when lowering the cranking timing to -5�. The engine also didn't really sound like it wanted to fire off at all either.
In a stroke of lucky genus, I reversed my tooth offset from 306� to 54�, and it sputtered to life first try.
I must have been turning the engine the wrong way while counting teeth is the only thing I can think of for how I managed that, except that 54� offset still wasn't correct, as I later found out.
The K24Z3 has two different set of timing marks on the crank wheel, and two different marks on the timing cover. Of course the one that I immediately saw and gravitated to was very much the wrong one. For anyone else, do NOT use the timing marks on the side of the timing cover to set your ignition advance. Pictured is the WRONG set of timing marks:
I honestly don't know what those line up to, I suspect TDC for cylinder #1? Regardless, that side has 5 timing marks on the crank, with one being marked white, one red, and the rest uncolored. Again, do NOT use those for your ignition timing.
How did I find out those are wrong? Well... I went out for a few pulls and the car felt super sluggish... like old worn out BP sluggish. I didn't trust my butt dyno, so I took it out on the highway and struggled to break 90mph in 4th gear. Yeah, bad.
I brought it back home and inquired on one of the Kswap FB groups, where I learned the proper place to set ignition timing was from a mark at the 12:00 position on the timing cover, with the other set of crank marks, shown here:
Turns out that I had set the motor to 0� advance, thinking it was 10�. Yeah, 10� of ignition timing REALLY woke the motor up, like wow.
In the above picture, the white mark is 0�, and then 6�, 8�(red mark), 10�, left to right.
Wow. MUCH better. Car actually pulled now. I can't wait to get it on the dyno and see what she makes, but I have a dozen bugs to work out for now, most of them Megasquirt related.
For reference, here are the ignition settings that I now use, and ARE CONFIRMED to be correct, as dialed in with the timing light. My old post a page back will be edited to match.
The only other source of drama was bleeding coolant... you CANNOT have enough water on hand, or the nose too high in the air. A magic funnel is a REQUIREMENT.
I started with a gallon and a half of distilled water, along with a jug of Honda blue coolant. I used all that(just a dash of the honda coolant, its a trackcar remember?) just prefilling the system.
I had to do 5-6 heat cycles and lots of coolant line squeezing before I finally got it to hold a reasonable temperature and not shoot from 150 to 220 in seconds. Seems like the Tstat does NOT want to open up and release all its trapped air. But when it does, boy you better be ready. It blew coolant out of the funnel 3ft in the air, and then sucked down everything left, which was mostly air. I think I ended up using 4 gallons, 2 of which found its way to the floor. The temperature still does some weird stuff occasionally while driving, so there must be a bit of air left in there I guess.
At this point I've put about two hours of driving on it, combined put-putting around the block, and full blown pulls at my local tuning spots. No major issues, but a dozen small ones that need addressed. The car is defiantly too loud to pass sound at some of the more restrictive tracks, so I ordered an exhaust silencer that will hopefully kill some DB.
It also sounds like an open pipe tractor, but I'm not really sure what I expected from a 4 banger. In short, sounds like ***, moves a little quicker then before.
Rocking that hoodless look until Kpower ships me my modified valve cover.
The side pipe looks absolutely incredible. I can certainly believe it's loud, but damn it looks good.
Congrats on getting it fired up! Even if it did take some trial and error.
It actually sounds crazy at WOT(volume aside). I cannot wait to hear it screaming down the back straight of Road Atlanta. Honestly if it wasn't for the concern of passing sound at AMP and NCM, and trying to maintain at least some form of good relations with my neighbors, I'd leave it... Although a lower DB would make highway cruising more comfortable...
Holy hell, these things do wonders for killing volume.
My super accurate phone decibel reader tells me this took the car from 77db at 10ft away to 68db at 10ft away(both at idle). By ear its about the same noise level as the old BP was. Still loud, but much more liveable and will probably pass sound now. Hopefully it doesn't completely destroy power, Only a 6" long segment about 1.5" wide.
Last edited by Wingman703; 02-02-2022 at 10:49 PM.
Not a ton to report. I've been putting as many miles on it as possible to find any weak points and dial in my tune as much as I can on the street, but haven't had any gamebreaking issues as of yet. The exhaust is very rattly, I've had to hammer it in a few spots for some additional clearance, but no biggie.
I have had a bitch of a time getting it to warm up and stay warm while moving. I'm unsure if my cooling setup, which was designed to keep a raging BP in check even on hot August tracks, is just too much for the more efficient K, or if I have a stuck Tstat. At idle I can get it to 190-200�, but as soon as I start moving it drops rapidly to 130-150� and struggles to build temperature(with 30-40� ambient temps). I resorted to blocking off half of the radiator with cardboad, and this seems to be enough to keep it at ~160� during cruise with warmer ambient temperatures.
Had my first experience with corn. Man that stuff is fun and smells nice, but really burns quick. I *might* have gotten 200mi out of a full tank.
I've only seen as high as E72, which I guess isn't too bad for this time of year. I have a buddy that says he can get his hands on pump E89, so hopefully I can get some of that for the dyno.
Had a little bit of cheeky fun once I had the car running on E85, $10 on ebay was well spent.
Finally got around to compression checking the motor, very happy with what I saw. Hopefully this motor has several years of track life in its future. As of yet it hasn't leaked or burned any oil *knocks on wood*
Other then that... just enjoying driving it. Had it up in some of GA's mountain roads, absolutely loved the extra TQ. I could leave it in 3rd and smoothly pull out of corners I used to hammer into 2nd for with the BP.
I have dyno time booked for the 19th. I would LOVE to make 205whp on 93, and 220 on E85(dynojet). Fingers crossed.
Advice needed.
This is the first time I've logged fuel pressure, so while this behavior doesn't seem normal to me... well yall tell me.
1-5v pressure sensor, mounted to the FPR where there would normally be the analog guage. Fuel rail is setup as a dead head system, pump is a "new"(now used) Walbro 255. Fuel sock is new(installed with the pump), fuel filter has less then 6 months of use, and there are no leaks.
Fuel pump was rewired along with the entire car, its on its own 30amp relay with a 25amp breaker, 14 gauge wiring from the main battery buss to the OEM electrical plug on the tank, where it returns to 16/18 gauge for ~3" to the pump. Shouldn't be a voltage issue, rest of the car holds 14.5v solid.
Fuel pressure is set to ~60lb. Over the course of a pull, it *sometimes* drops as low as ~40lb, as shown here in this 2-3 pull:
Does more or less the same in just a 3rd gear pull:
But also sometimes it just comes right back to full pressure without any reason(and sometimes it only drops to 50/55lb and holds there for an entire pull)
I don't know if this points to either the fuel pump or the FPR, but it also doesn't hold 60lb when primed(holds it fine at idle and cruise), but immediately cuts to ~50lb and slowly drops from there, as shown in the video:
 12-31-2021, 11:30 AM


 0
0