
budget friendly MSM I/C for the Begi S


Thread Starter
Senior Member
iTrader: (1)
Joined: Apr 2007
Posts: 717
Total Cats: 0
From: North Jersey
my car gets more and more ghetto by the minute........(oh and ignore my ghetto camera too)
first, thanks evank for the I/C
since i am going OVER the radiator there is some fabrication required. in order to fit over the radiator i had to move it down (about 2”) forward (about 2”) and tip the top back (roughly 10 degrees). i was able to use the lower factory brakets but with some modifications. they get drilled w/ new holes and mount via the sway bar bracket bolts. driver side will also have to be moderately bent.
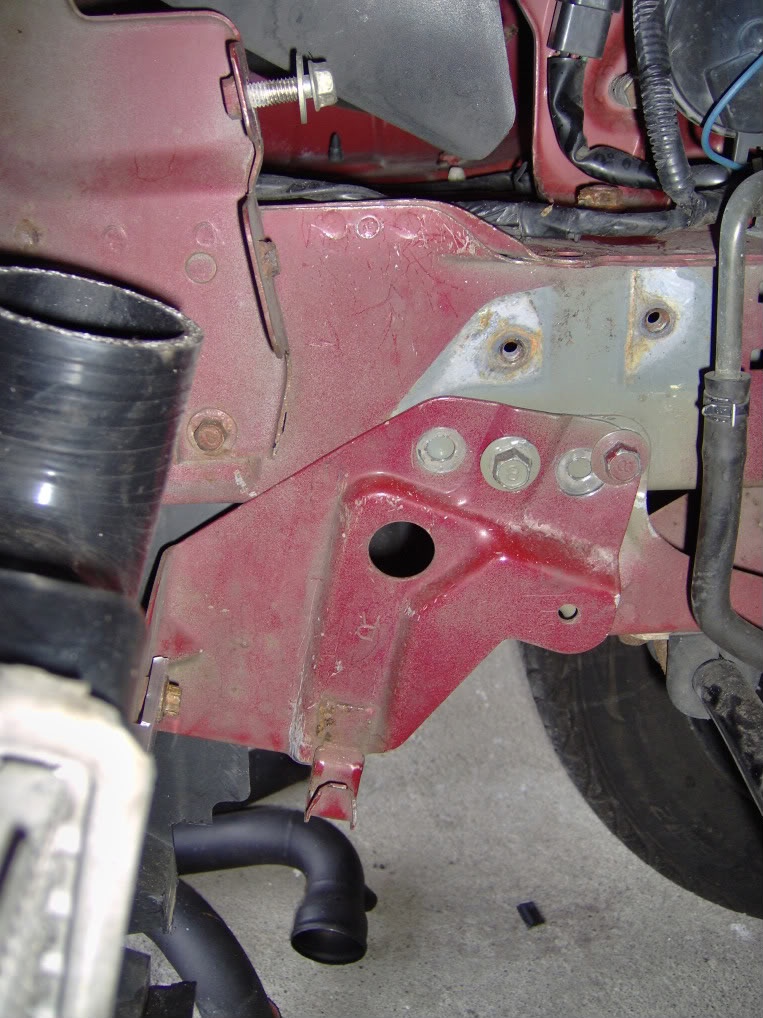
on the top side, i bent some flat stock bar and bolted one end to the chasis and the other to the radiator.
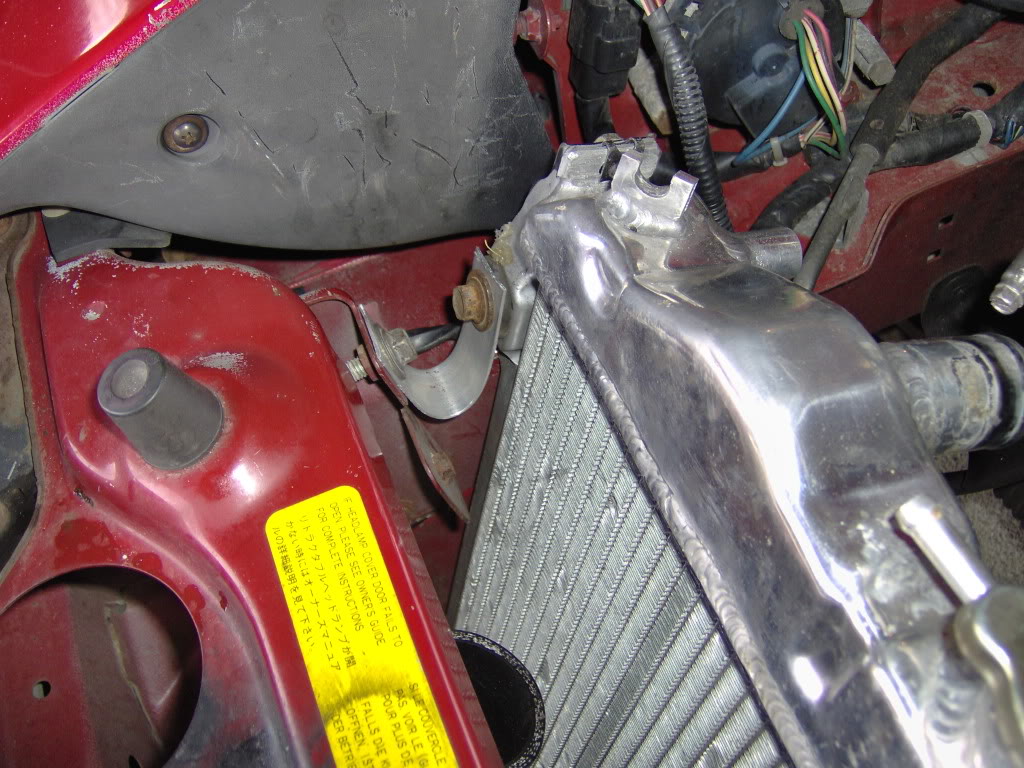
this gives the radiator a perfect position, allowing the I/C tubes to be run overtop without interference. i poked around napa to find radiator lines that fit the new configuration. i had assumed that the electric fan would not fit in this new position, but to my suprise, i mounted it up and it looks like it will be fine in the stock position.
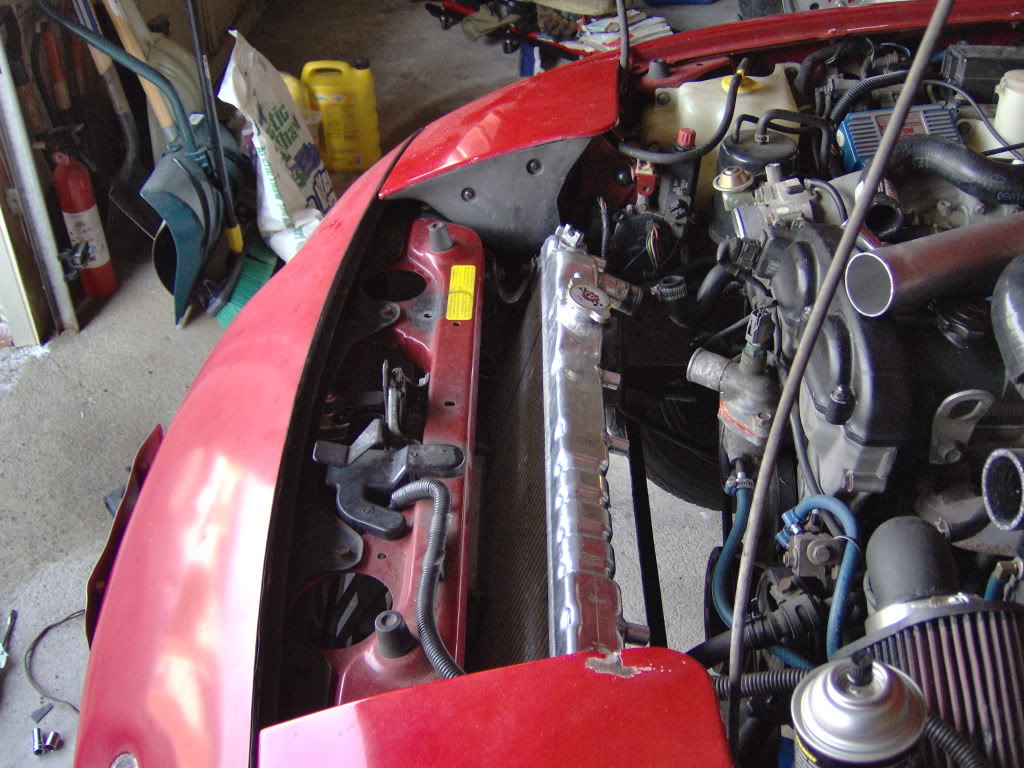
the intercooler mounting was be done by the seat of my pants….it’s a pretty tight fit between the bumper and the lower part of the radiator. i used the same flat stock bar and some "L" shaped bar to mount it.
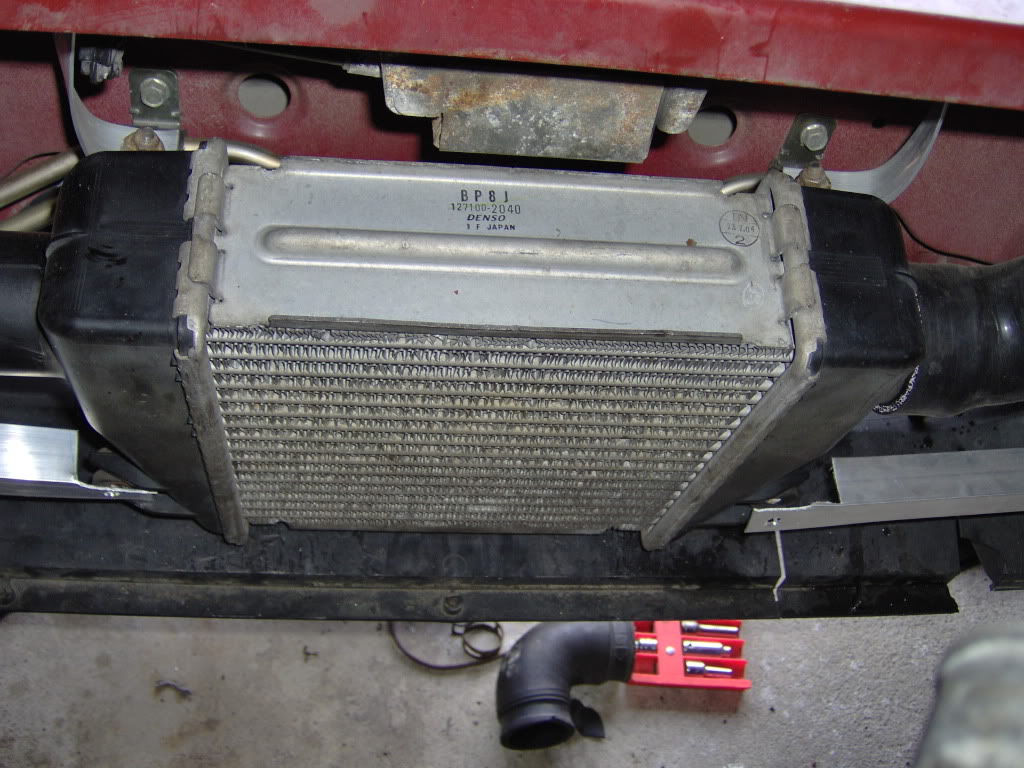
i/c routing in direction of flow is as follows:
2” 90* silicone coupler off of turbo
2” alum. tubing approx 6”
2” silicone T coupler w/ blowoff valve
2” alum. tubing approx 6”
2” 90* silcone coupler
2” alum. tubing approx 5”
2” 90* silcone coupler attached to I/C
I/C
2” 90* silcone coupler attached to I/C
2” alum. tubing approx 5” w/iat bung jb welded
2” 90* silcone coupler
2” alum. tubing approx 8”
2”-2.5” silcone coupler
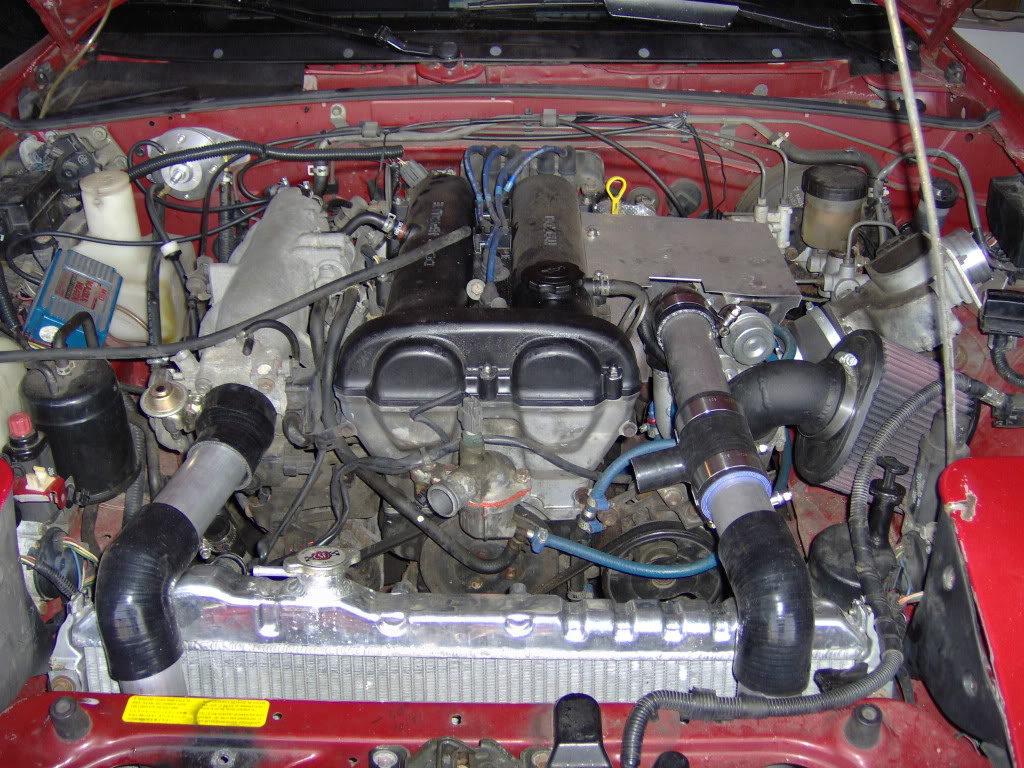
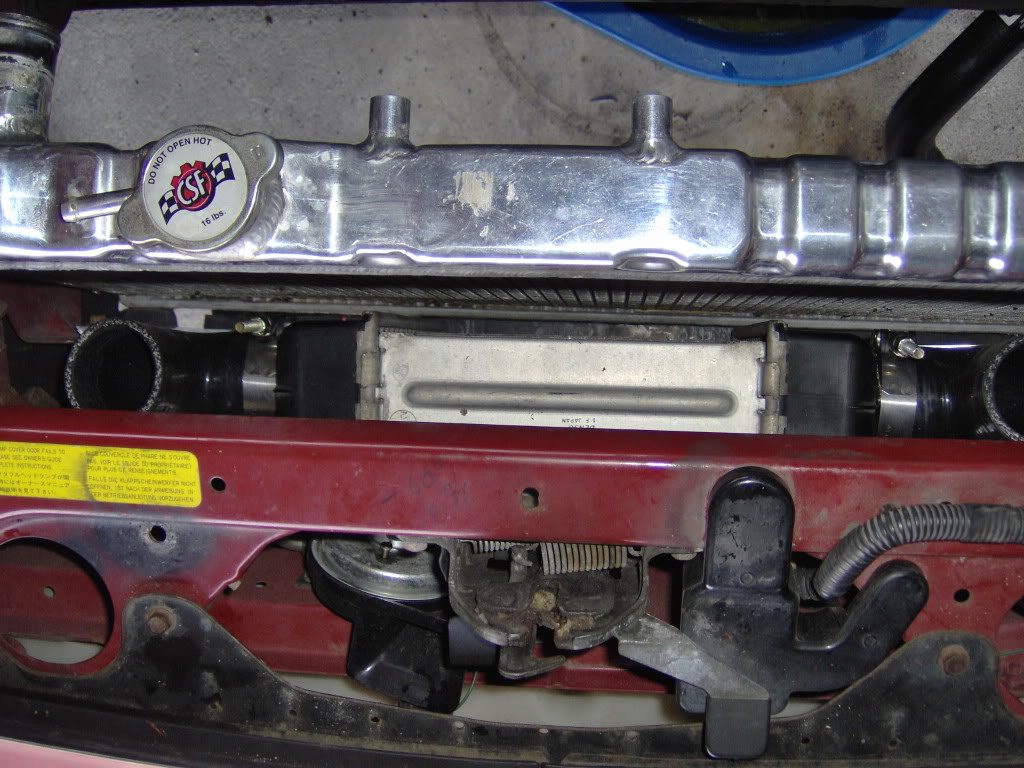
no cutting of the radiator support or hood required. approx $170 total
It's about 80% complete.
-waiting for the jb weld to cure so that i can get the iat complete
-need to remove the FMU and MSD box
-need to hook up an air filter at the iac hose
-wire up my MS
-cross my fingers and see if it'll start
first, thanks evank for the I/C
since i am going OVER the radiator there is some fabrication required. in order to fit over the radiator i had to move it down (about 2”) forward (about 2”) and tip the top back (roughly 10 degrees). i was able to use the lower factory brakets but with some modifications. they get drilled w/ new holes and mount via the sway bar bracket bolts. driver side will also have to be moderately bent.
on the top side, i bent some flat stock bar and bolted one end to the chasis and the other to the radiator.
this gives the radiator a perfect position, allowing the I/C tubes to be run overtop without interference. i poked around napa to find radiator lines that fit the new configuration. i had assumed that the electric fan would not fit in this new position, but to my suprise, i mounted it up and it looks like it will be fine in the stock position.
the intercooler mounting was be done by the seat of my pants….it’s a pretty tight fit between the bumper and the lower part of the radiator. i used the same flat stock bar and some "L" shaped bar to mount it.
i/c routing in direction of flow is as follows:
2” 90* silicone coupler off of turbo
2” alum. tubing approx 6”
2” silicone T coupler w/ blowoff valve
2” alum. tubing approx 6”
2” 90* silcone coupler
2” alum. tubing approx 5”
2” 90* silcone coupler attached to I/C
I/C
2” 90* silcone coupler attached to I/C
2” alum. tubing approx 5” w/iat bung jb welded
2” 90* silcone coupler
2” alum. tubing approx 8”
2”-2.5” silcone coupler
no cutting of the radiator support or hood required. approx $170 total
It's about 80% complete.
-waiting for the jb weld to cure so that i can get the iat complete
-need to remove the FMU and MSD box
-need to hook up an air filter at the iac hose
-wire up my MS
-cross my fingers and see if it'll start
Last edited by budget racer; Mar 18, 2009 at 08:50 PM.
Reply
 0
0

0

I did something very similar with my old IC setup. I used a little S4 IC, as it had 2" outlets sticking straight up out the top, and truck rad. hoses for bends. Total cost: $62. I ended up switching to a more conventional setup when I decided I wanted a bigger rad.
Reply
0
0

Thread
Thread Starter
Forum
Replies
Last Post
StratoBlue1109
Miata parts for sale/trade
21
Sep 30, 2018 01:09 PM


