When you click on links to various merchants on this site and make a purchase, this can result in this site earning a commission. Affiliate programs and affiliations include, but are not limited to, the eBay Partner Network.
I am making this thread to share what I've learned and will continue to learn along the way as I build my first engine and bring my '04 Mazdaspeed Miata back to life! I picked her up in late November of 2020 with 138k. It was a Nevada car for its whole life then Utah for a year. The car has zero rust but the rest of it was in pretty bad shape. The paint was and is awful, the dash was and is awful. It was stanced out with seized brake calipers, cut chassis braces and slammed to the ground on Form and Function Coilovers that were beat up after only 10k miles. It did come with a Mishimoto radiator and FM Intake and manual boost controller but was otherwise stock. Here is what she looked like when I brought her home:
To get into my driveway I had to immediately change the wheels and raise the ride height.
I started out fixing the most necessary stuff first, the brakes and suspension. I got brand new calipers all the way around with some new brake pads, braided lines, new rotors and Hawk HP520 fluid. Then I bought some Advanti Storm wheels and wrapped them in fresh rubber. The clutch also felt a little weird so I got a new slave and master with the new line from moss miata. I added bigger sway bars (turns out the MSM has a bigger rear sway already so the racing beat one was the same size lol) and adjustable end links from 949.
Once I had fixed all this I was excited to finally drive my car after 6 months! It sat over winter so I didn't work on it at all. After my first drive I noticed coolant was disappearing. Couldn't find a leak anywhere then one time at night noticed some coolant coming out of my exhaust as vapor/smoke. Sigh. So I did some research and came to the conclusion that it was the headgasket. I've never worked on cars growing up so this was daunting. I did lots of research and took the plunge. I also replaced those coilovers with FM Vmaxx's.
Since the head was off I got it decked and cleaned. I did all the other maintenance items like front seal, timing belt, gaskets, etc. But figured hey lets have some fun too! So I bought a MS3 PnP, FlowForce 725cc injectors, FM Boost gauge and AEM Series X wideband, UK flat top intake manifold, stage 8 locking hardware for the turbo, Vibrant intercooler, Fluidampr harmonic balancer, lots of various hoses. I'm not lying when I say it took me 3 months to do all of this. I felt way in over my head and wanted to give up at various points but it was also incredibly rewarding and fun at the same time. I had it towed to the tuner after a big fail of trying to get the base map to even idle for more than 2 seconds.
However now we are at present day... I am still burning coolant. I have no idea why. The only thing I know for a fact I did incorrectly was not hammering in the head alignment dowels, I merely placed them to line up the gasket and head. So maybe its that. Or maybe my block is way worse then I thought. I only got the head decked after all. I also reused the stock headbolts , which I believe are stretch style so that could be an issue as well (ARP studs were crazy backordered). I enjoyed the car for less than 500 miles but here is a fun pic lol.
Here is where I think the real fun is going to start. I decided screw it, I'll keep the BP5A in there and let it burn coolant while I drive it a bit this summer but I picked up a BP6D with 170k miles from an automatic car that previously had an overheating issue. I got it pretty cheap for todays prices and am going to tear it down and build it up. Then swap it in to my 'Speed. All while this is going on I'll be fixing the interior with a new dash, new climate controls, hopefully get the aftermarket radio to work (grounding issue I think), new seats and brackets, roll bar, harnesses and steering wheel as well as a Robbins OEM top. Nobody tell my wife about this thread LOL.
Here is my build list that I am planning. I would love feedback on pain points, possible upgrades or cost savings points or anything at all that you experts think is relevant!
Block:
Supertech pistons (still researching best compression ratio and if I should go to a 84mm bore)
Manley rods
ACL Rod bearings (4B8351H-STD)
ACL Main bearings (5M8353H-STD)
ACL Thrust bearings (1T8353H-STD)
ARP Main studs (218-5401)
Boundary oil pump VVT version with 3shim (incase I add oil cooler later on)
36-2 trigger wheel
Head:
deck and rebuild with OEM or supertech valves
Supertech valve stem seals (VS-T6E/VS-T6I)
ARP head studs (218-4701)
Maybe new springs too?
Port and polish?
swap over my BP5A intake cam?
Turbo:
Kraken full turbo kit with 3" turbo back
Garret 2860RS (not 100% decided)
Other:
DW200 fuel pump
Plan on e85 in the future, more research needed
Probably need a fuel pressure regulator
Probably need to find a bigger throttle body
relocate IAT sensor with the new DIY autotune one down closer to intercooler
Oem gasket and timing belt kit
Clutch (no clue on which one or what kind to get yet, need to research)
Other random thoughts and considerations:
some radiator shroud or ducting to close fan gap
re-drill radiator drain plug that might be leaking just a bit
will my Megasquirt work with the BP6D still since it was mazdaspeed specific?
my tuner said my current idle issue is due to the Flow Force injectors and recommend the ID 1050's so may be switching to those eventually. Didn't get any help from FF with my logs but others seem to have good experience with these injectors so may wait until engine is built and give these another shot.
delete AC, not sure if its worth it (5x racing has a little tube kit)
delete EGR recirc tube and register it in a state that doesn't require emissions
The BP6D is a VVT motor, will need to research tuning related to it and if it will work with my Megasquirt
Maybe get some better motor mounts
Need to figure out what all I need machine shop to do...balance rotating assembly with clutch and flywheel (find lighter one?), bore, hone, surface/deck, clean crank
As you can tell there's a lot I don't know and a lot I'm still learning and figuring out. I am making this as a medium to gather my thoughts and keep track of things and maybe as some entertainment to y'all haha. But hopefully eventually this thread will have good info for others in my shoes that are learning and want to build a fast and fun car! If I think of other things I will continue to add them. Thanks for reading!
-Matt
Last edited by Braineack; Mar 2, 2022 at 05:30 PM.
Had some time with fantastic weather so I got the engine torn down! Its actually in pretty good shape, a little scoring on a couple cylinders but otherwise good. I've also decided on the EFR 6258 turbo and 9:1 compression for the 84mm bore. Bore is going to be necessary now due to the scoring. Need to get it off to the machine shop for the presumably months long wait lol
Other:
DW200 fuel pump
Plan on e85 in the future, more research needed
Probably need a fuel pressure regulator
Probably need to find a bigger throttle body
relocate IAT sensor with the new DIY autotune one down closer to intercooler
Oem gasket and timing belt kit
Clutch (no clue on which one or what kind to get yet, need to research)
my tuner said my current idle issue is due to the Flow Force injectors and recommend the ID 1050's so may be switching to those eventually. Didn't get any help from FF with my logs but others seem to have good experience with these injectors so may wait until engine is built and give these another shot.
delete AC, not sure if its worth it (5x racing has a little tube kit)
-Matt
I am also working on a MSM with a mishmash of parts.
I'm using the FF 900cc injectors with 93 octane and getting pretty good idle with minimal tuning work aside from injector settings. What were the specific idle issues? I'm a weirdo running a Haltech so that could very well cause a difference.
I put my IAT in the intercooler outlet pipe; just took it to the local exhaust shop with the appropriate bung and $30. I'm using the standard GM IAT that I think pretty much everyone uses.
oh sweet! Yeah I wish I would've gone bigger from the start so ID1050s may be in my future haha. I've heard good things about Haltech but bought a MS without really knowing much about competitors. I've kind of narrowed it down to what I think the issue is. The majority of idle issue seems to be resolved just by staying in gear until around 1.5k then clutching in, since it likes to oscillate really hard. Basically I can't free rev the engine at all or it will oscillate and die. But I believe this may get solved once I install the new GM IAT sensor. Currently running the stock one still and its literally almost touching my radiator hose so I think its getting horrible heat soak and throwing off the readings.
Thinking of doing exactly that, somewhere down by the IC. Thanks for chiming in! Are you still running the stock turbo? The intercooler piping from the hotside is so restrictive.
Now that you mention oscillation I recall having to re-calibrate my IACV adjustment screw to get the car to idle correctly with the new injectors. I believe I put the ECU into open-loop idle and locked the spark advance value and then adjusted the screw until the idle was slightly above what I wanted. This keeps the ecu from using large timing or IACV adjustments to keep a steady idle.
IAT could also cause some minor AFR issues; I had a similar thing where the terminals were poorly crimped so if I went over a bump the right way the ECU would go from normal air temp to -40* F and throw everything off.
I am still on the stock turbo; it's more or less maxed out at 12 PSI. The car came with a relatively big IC and a Bell Tuning intake which seems at least a little bit less convoluted. I've opted to keep PS and AC because street car and it gets muggy in the south; that complicates the piping considerably.
Thats a good idea, I may have to give that a try, thanks! I read that since it was idling fine on the stock ecu and I never touched the idle screw that I shouldn't try messing with it. I'm going to probably pay a remote tuner to look more at my idle and probably make a post over on the MS forums and get some ideas of what other settings might affect it.
It has a while since I've been on here but I've just been accumulating parts and haven't done anything since my last post. I had a week off work and spent 60hrs in the garage doing all this stuff to get the interior in better shape. Previously to that I had also painted the calipers with POR-15 black paint to keep the corrosion at bay and disassembled the BP6D, which has been at the machine shop for over a month now.
First, a glamour shot...
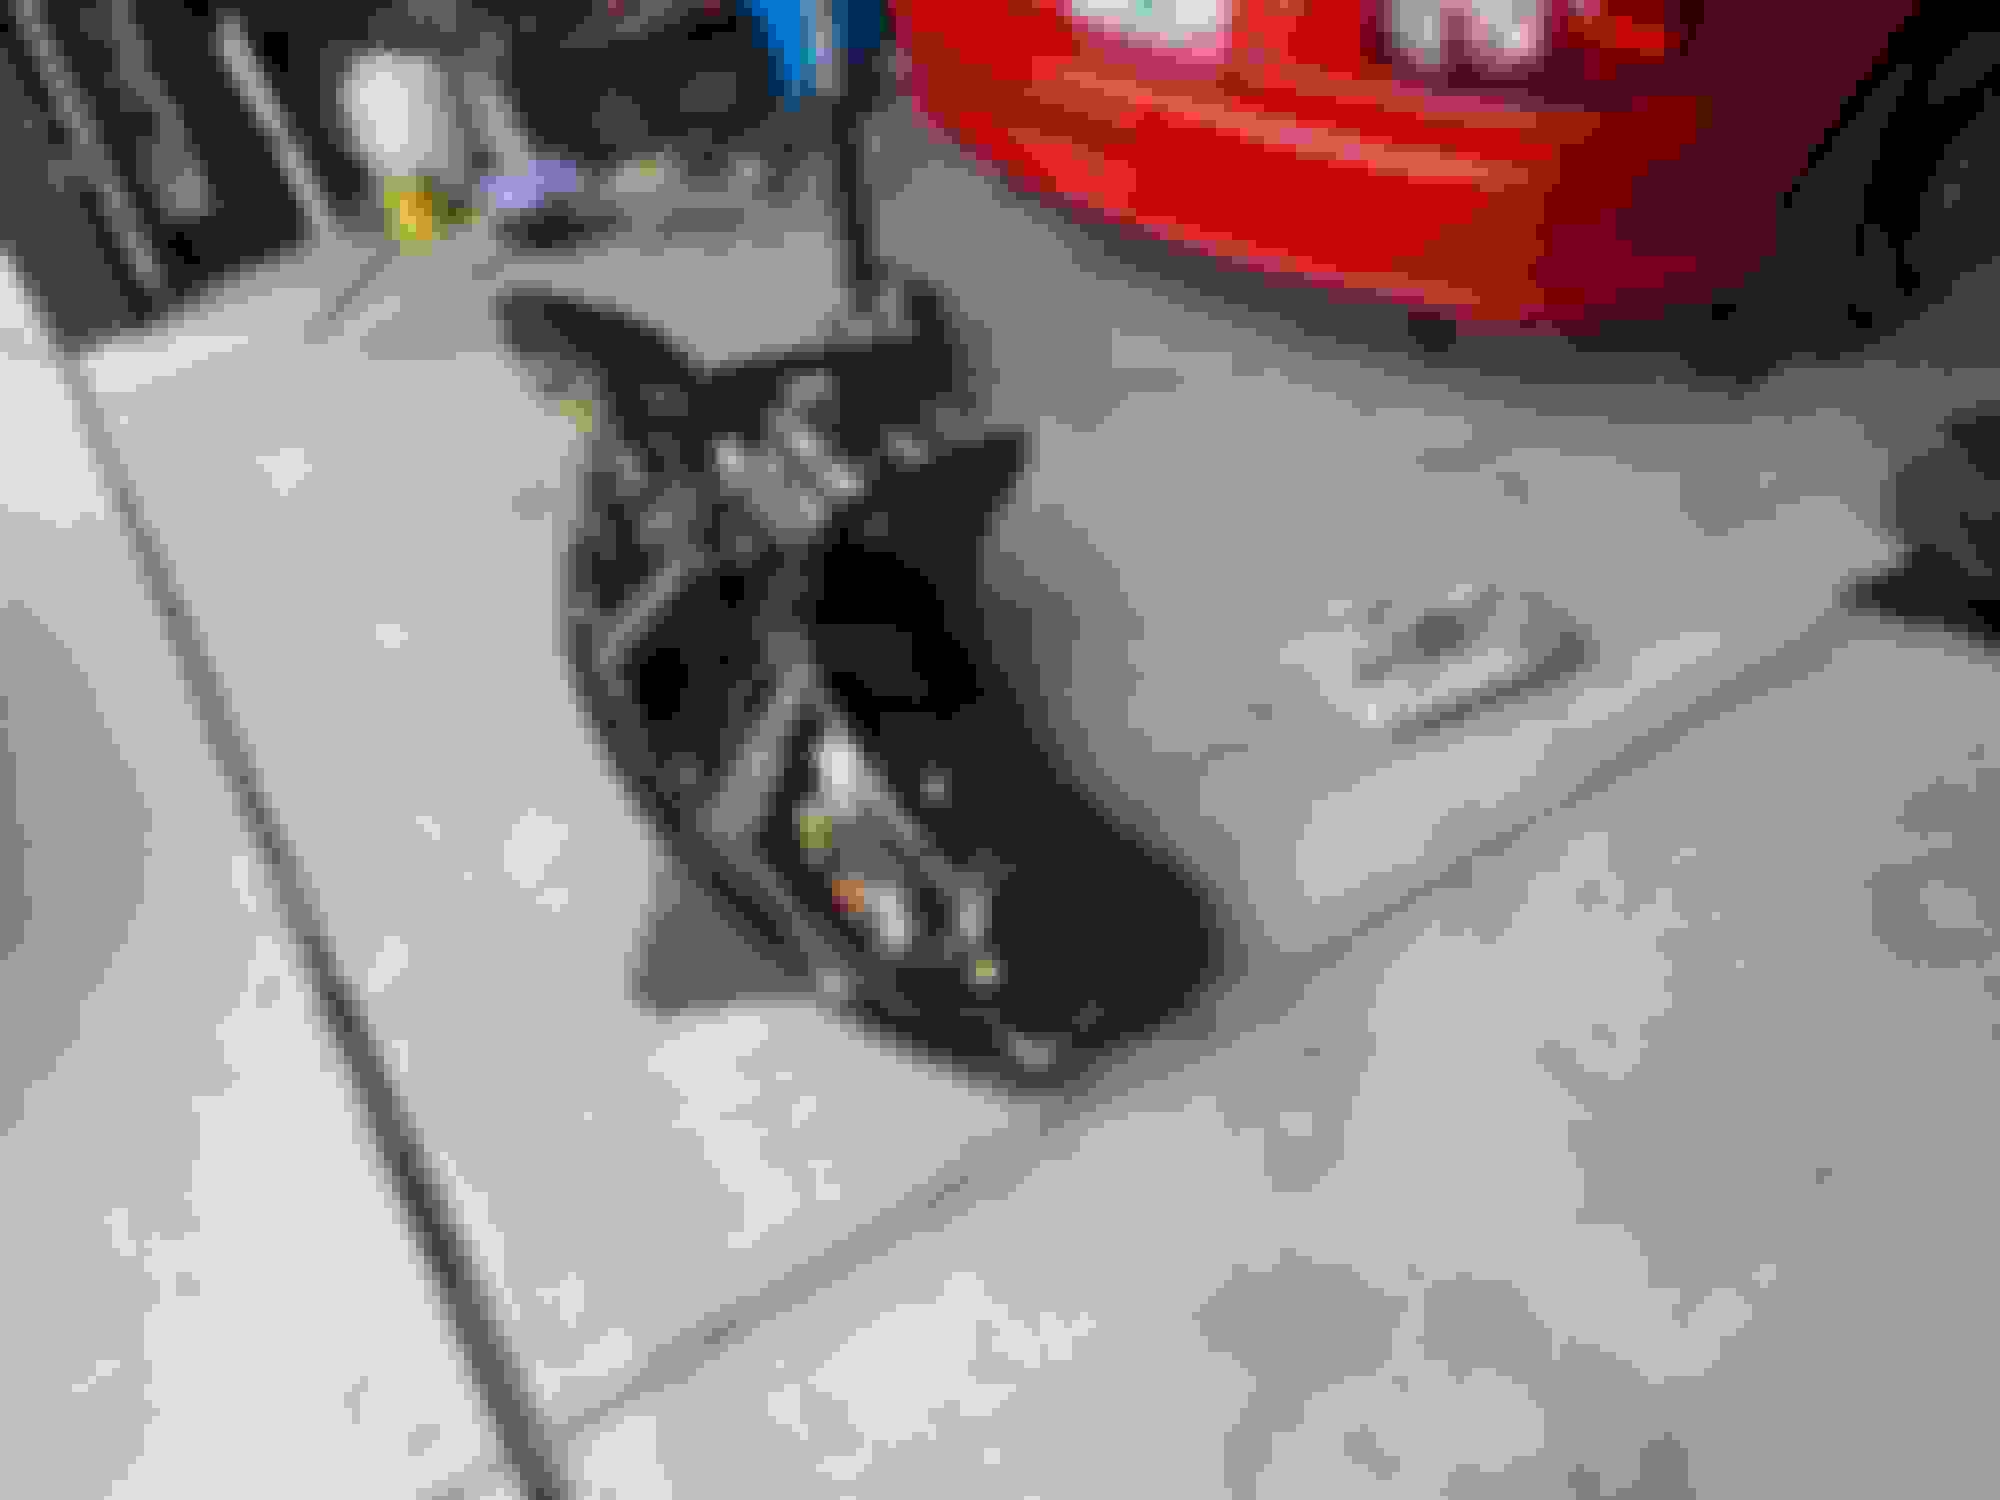
A couple pics of the motor being torn down...
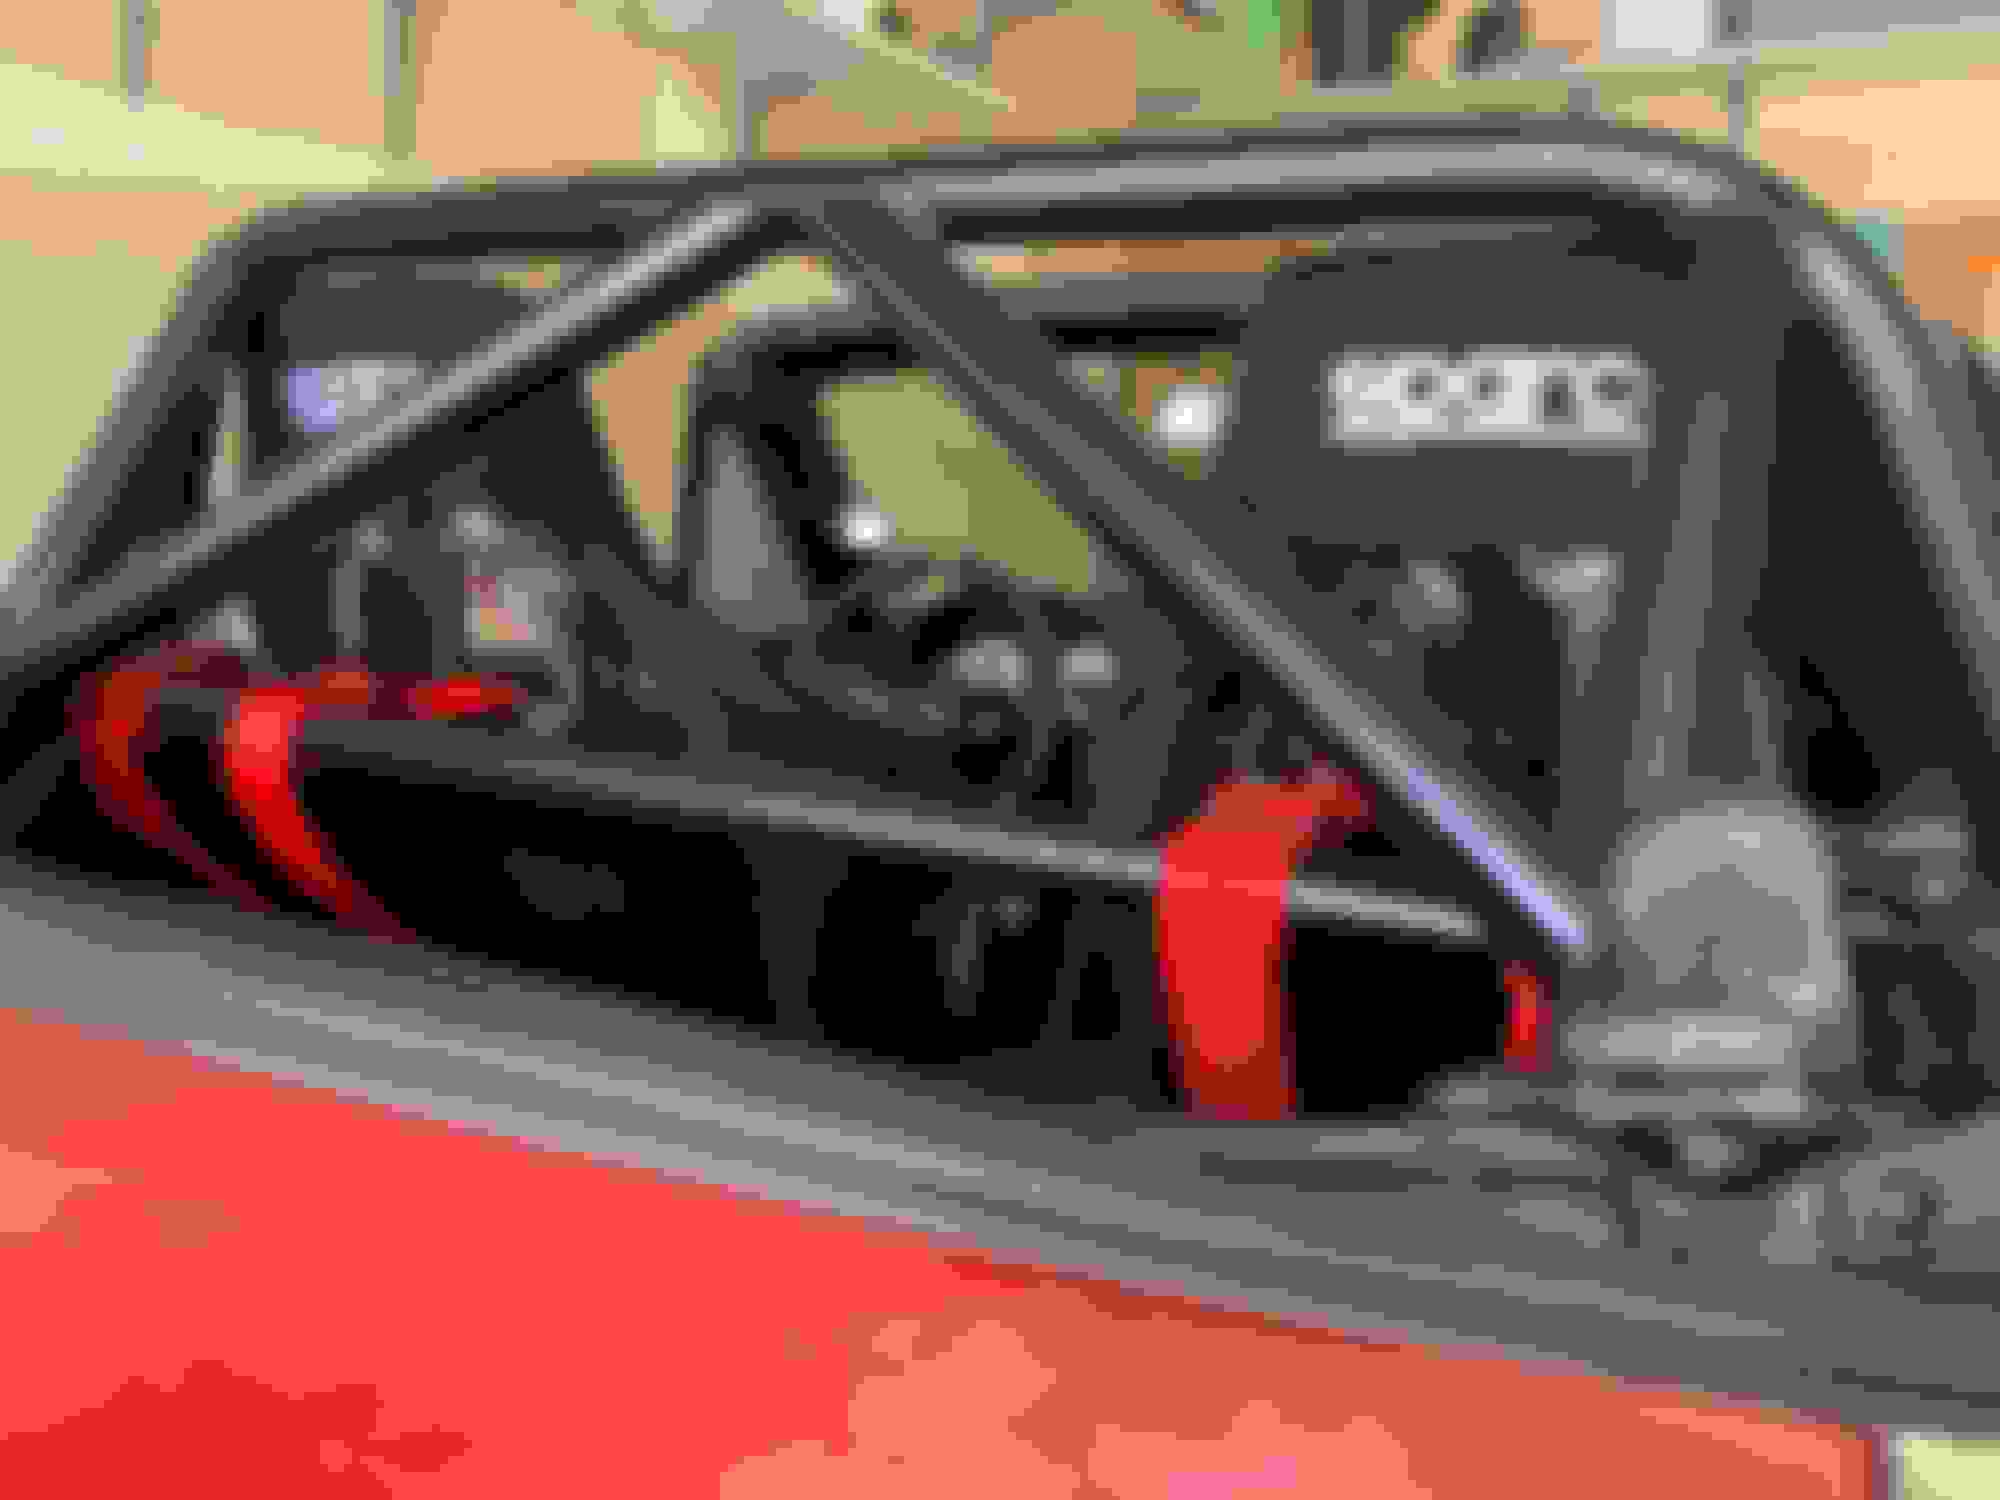
The interior work time! I started with a Hard Dog Hardcore Roll Bar. Getting that thing lined up and drilled by myself was quite tricky and took a couple days because I didn't want to rush it. I then silicone sealed the backing plates since they are in the wheel well.
In between frustration and tired break on the hardtop I replaced the soft top. Again, pretty tough for a one-man-show but not impossible. Quick tip for the retaining bracket during reinstallation, do the center bracket first!! A couple guys in the local community gave me that tip after I spent literally 3 hours trying to get that bracket in after I already had the sides on. Also should've done that before I put the roll bar in lol, oh well!
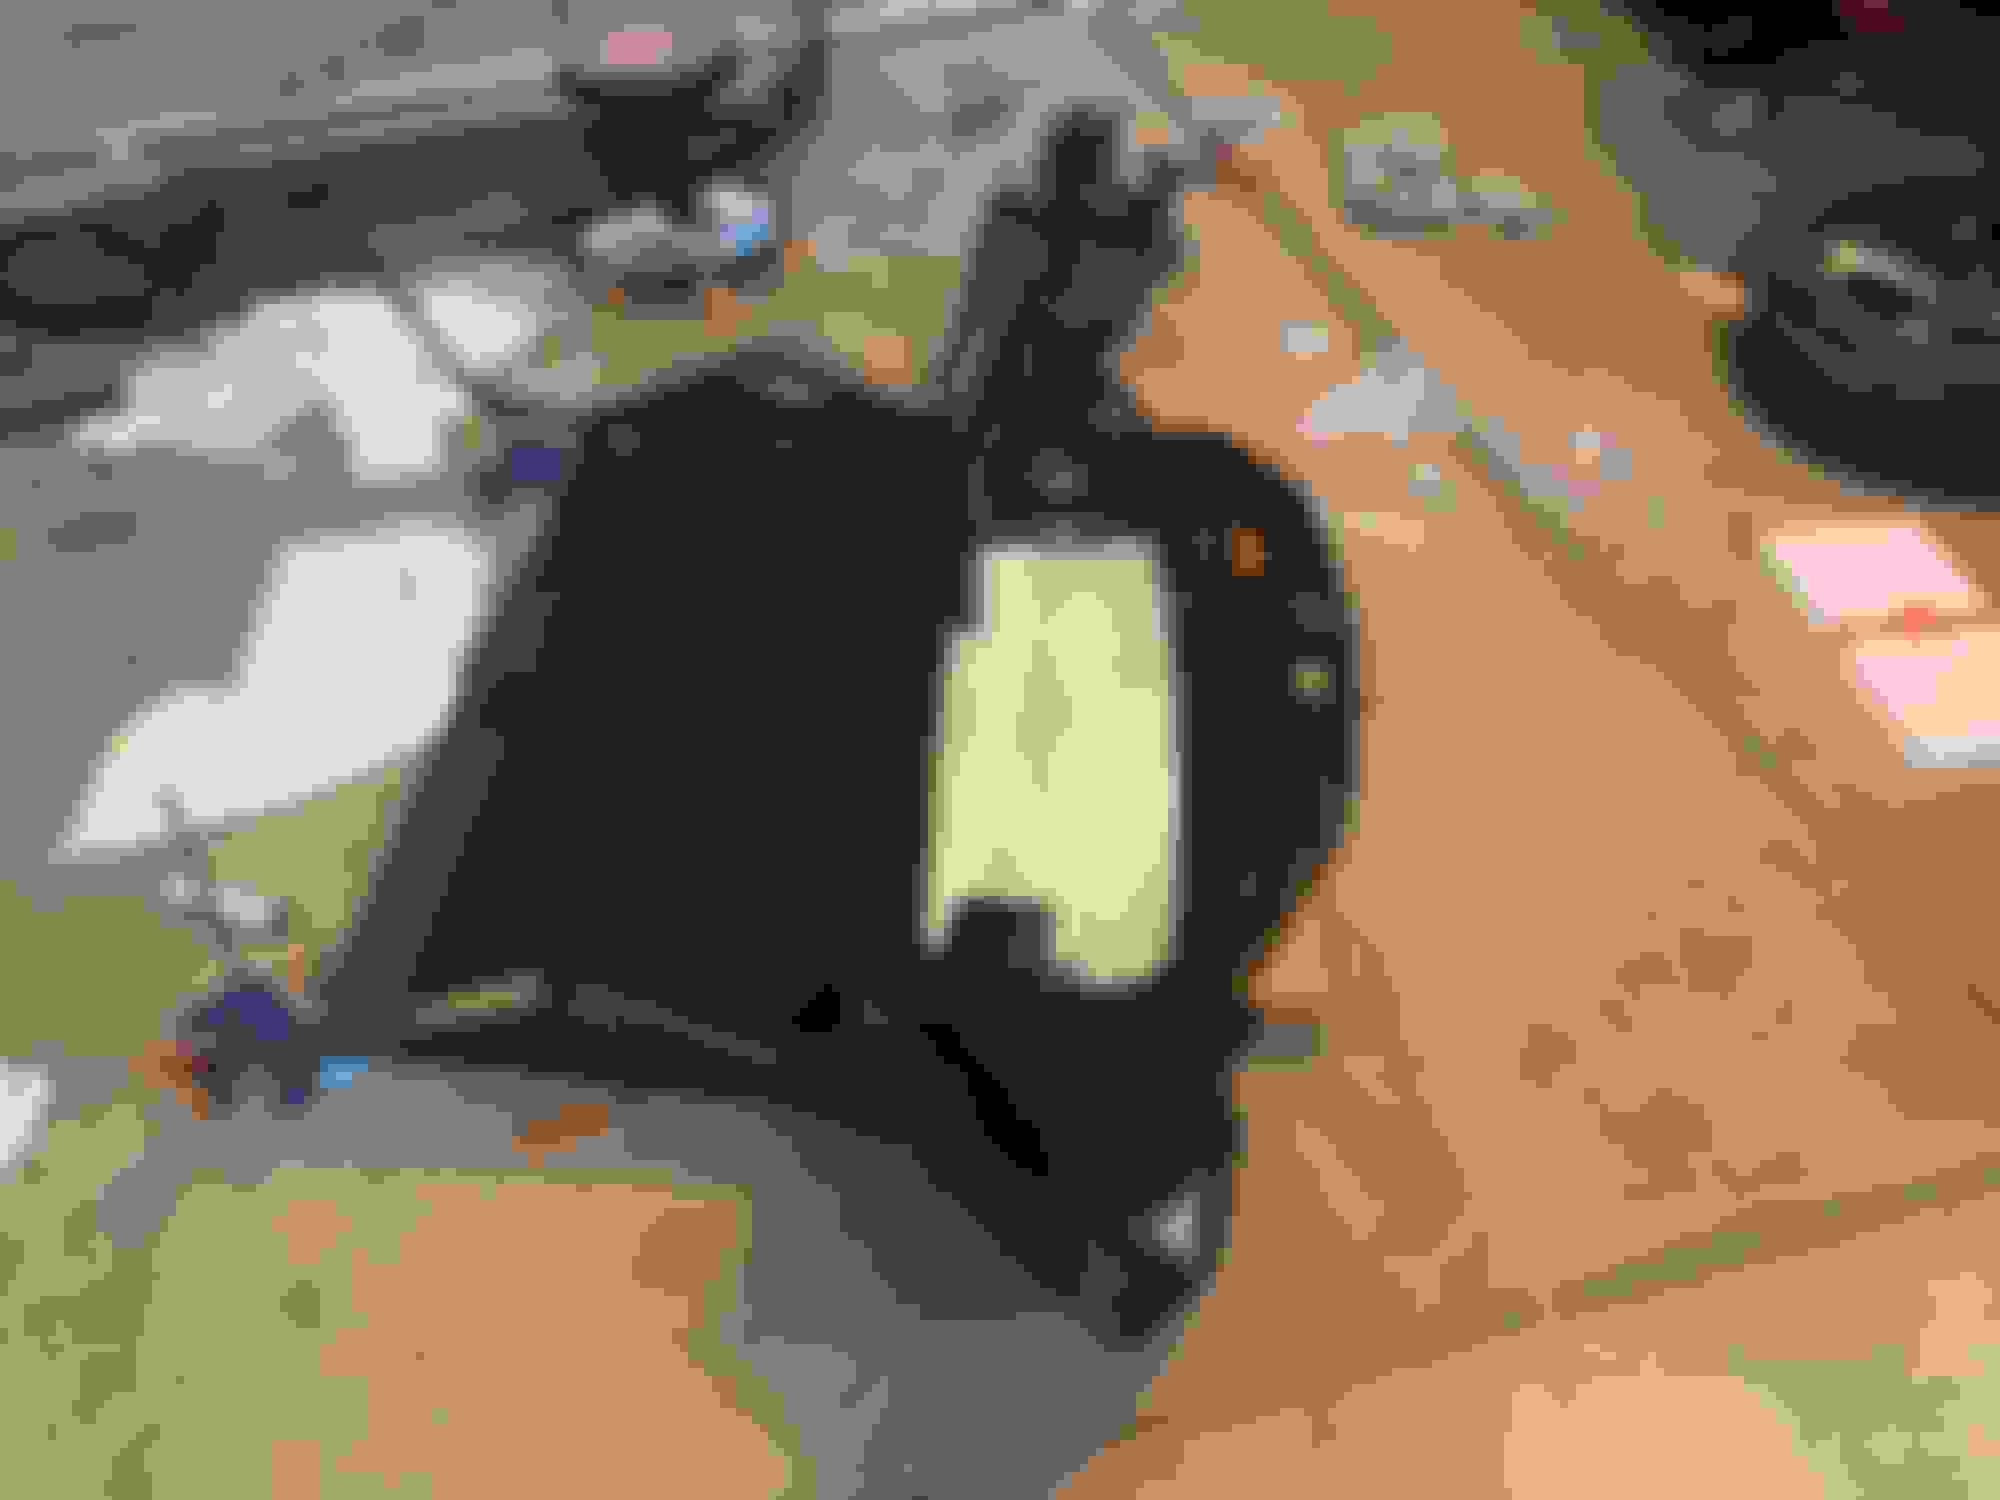
While waiting on fabric adhesive to dry I moved onto the big project of the interior. My dash was cracked and the HVAC fan control button was snapped off so I had no fan control, the glove box was also very scratched up from a PO's dog. I pulled the dash and swapped over the top section from a black/tan dash and snagged a new HVAC control panel off eBay. I swapped over the lock from my glovebox to the new one as well.
My cat Ascari snuck in there while I wasn't looking!
Eagle eyed viewers will notice the shifter boot difference in the last two photos. I also did the Shifter rebuild kit form 5x Racing, what a fantastic difference! I also feel a slight reduction in heat and smell from the trans since the boots were torn to pieces. There was ZERO fluid in my trans tower, which certainly isn't good.
I also put on a fresh new shift boot with red stitching to match! Next up was the steering wheel that was pretty worn. Plus I needed more leg room so my knees weren't in the wheel. I went with a NRG short hub and quick release and a Sparco steering wheel. It really transforms the feel of the car since that's what you're touching all the time while driving. I also took this opportunity to remove some sort of aftermarket immobilizer that the PO had installed with a mess of wires under the steering column.
Since my carpet was already up for the new seats coming and the roll bar, I did some FM frame rail braces, to stiffen up the car. Between the roll bar and these braces, the stiffer chassis is very noticeable and I could not be happier.
Our other cat Harpurr was checking out the new Sparco QRT-R's. No good pics of them yet since I haven't put the harnesses in but I did make sure to retain the stock 3pt belts for street driving. You can also see some new FM delrin door bushings which help a ton with door rattle.
And lastly, just this morning I wrapped up installing a GM IAT sensor and moving it to the cold side of the IC to help with the insane heat soak my stock IAT sensor was getting. Stock sensor was touching the radiator hose and just soaking all that heat into the sensor itself. My IAT's went down during boost lol.
Also, yes I know...JB weld. But its only there for a year until I get the good motor back and do new IC piping all the way around, and I don't know how to weld anyways. Stock Mazdaspeed IC piping is SUPER restrictive and very narrow. Also wired up a generic Deutsch connector for the stock IAT wires.
WELP that wraps up what I've been up to on this lately. Currently I have pretty much all the parts for the motor build, just need to buy the Kraken kit, the EFR 6258, Radium fuel rail and possibly some fuel pump and FPR stuff. There's a new gas station going in by my house and I'm crossing my fingers they will have e85.
If anyone has any questions on anything please don't hesitate to ask!! My insta is @meowmotor. I'll get more good pics up once I get it out for some drives, still dealing with a horrible idle tuning issue so I can't trust the car to travel very far.
Well thanks for nothing Matt ! I trawled for a photo like that before I pulled my dash, and now you post exactly what I was looking for, when mine has been out (for new heater core) and now back in! Sadly though, your LHD heater assembly is different to the RHD, so it would have only misled me. For anyone looking to do a RHD, the difference is in the aircon unit, and in the couplings between the blower box and the heater box. I'll get around to posting the story of my dash saga on my build thread, but for now I have to get the car back on the road first.
Last edited by Gee Emm; Jun 17, 2022 at 09:33 PM.
Reason: updating
Your mazdaspeed has a 6-speed, which does not have turret fluid. You can actually fill your trans through the shifter hole. So if you did put “turret” fluid in, your trans currently has ~4qts in it. Remove the fill plug and let it drain till it stops, or pull and replace the drain plug, and pour only 2 qts in the turret.
Well thanks for nothing Matt ! I trawled for a photo like that before I pulled my dash, and now you post exactly what I was looking for, when mine has been out (for new heater core) and now back in! Sadly though, your LHD heater assembly is different to the RHD, so it would have only misled me. For anyone looking to do a RHD, the difference is in the aircon unit, and in the couplings between the blower box and the heater box. I'll get around to posting the story of my dash saga on my build thread, but for now I have to get the car back on the road first.
Haha apologies!! Probably for the best then as to not lead you astray! Glad you got it figured out, these dashes aren't too terribly hard to pull out thankfully. Link that thread when you have it, I'd be curious to see the difference.
Your mazdaspeed has a 6-speed, which does not have turret fluid. You can actually fill your trans through the shifter hole. So if you did put �turret� fluid in, your trans currently has ~4qts in it. Remove the fill plug and let it drain till it stops, or pull and replace the drain plug, and pour only 2 qts in the turret.
Well crap! Thanks for the education!! I only put the recommended 40ml of fluid in the turret so it wasn't much. I'm assuming the drain plug then has that second "plug" like my Golf R has where you let it drain and it basically only drains to the level that's required? I haven't changed the trans fluid on this yet so that and the diff and probably engine too all could use a good fluid change.
You'll be fine then. But it sounds like it's time for a flush anyways. Yes, it's the same as almost any manual transmission and most differentials, a drain plug and fill/level plug. Drain till it's dripping, install drain plug, fill till it drips, install fill plug, done. There have been some folks who mistake a detent screw for the drain plug, so make sure you remove the right one. You know it's right when you see both fill and drain on the same side. If you're not sure, google images will help. Because most people are on jack stands, and most, if not all, fluid pumps are complete piles of garbage, I would suggest removing the drain for a good 10 minutes, replacing the crush washer and installing the drain plug, then simply pour 2qts of your favorite trans fluid into the turret and call it good. It's not an issue to be a tenth of a quart too high or too low, so no need to remove the fill plug.
I have a pretty decent fluid pump but I still think you're right, doing it through the top will be a breeze. Thanks Curly! I feel honored you stopped by my thread
Some pics of the new seats, I absolutely love them. Not the comfiest for long drives but 100x better than the ripped up stock leather seats. I had to do some transmission tunnel persuading with the hammer and trimmed down the Bell Raceworks bracket a bit to get the driver seat as far in as possible. It touches the doorcard but the impring is maybe half an inch and doesn't bother me at all.
I was also able to get some longer eyehole bolts and retain the stock 3pt buckle for street driving. Then I had the backing plates welded under the car by a local race shop.
As far as fit goes, I'm 6' and wear 33"x32" jeans. The shoulder fit is snug but I'm still able to lean over to access my phone/wallet so its not super squished like I was afraid would happen in a Sparco Sprint. These QRT-R's are a little wider.
So next... I got my block back from the machine shop and I'm not very thrilled. They did not tell me my piston to wall clearance. They cut my rings, like I asked, but claimed that all the pistons are the same so it doesn't matter which cylinder they go to. So now I have to weigh each rod/piston combo (they assembled them) to try to see if I can get balance close or if I'll need to swap some rods around. And also take all the rings off and check gap. They also didn't give me back my piston or rod spec sheets and I need to call them about that, hopefully they didn't lose those...
I also noticed a few small scratches in the cylinder so I'll post some pics later this week to get some input on if I should be worried or not.
Beyond that frustration, I ordered a Radium fuel rail, fuel pressure regulator kit from fab9. Decided, screw it, I'm gonna be ready for e85 out the gate! I've also decided to spring for the EFR 6758 as well after watching CarPassionChannel's dyno comparison video. I'm not chasing his hp numbers but it will be nice to have a little more turbo than I need shooting for that 400 crank number. (especially at altitude here in CO)
I also am going to order the Kraken turbo kit in the next few weeks. My only hesitation is ordering the intercooler kit form him as well. I have the fab9 stage 1 intercooler already and would love some "plug n play" intercooler piping but I haven't heard back from him on the dimensions of his intercooler. So I may end up having to go the custom tubing route after all. For someone that doesn't have the ability or tools to weld, thats going to be annoying lol. I've seen picks of some set ups that go straight up over the radiator which looks cool. But being its a Mazdaspeed, my car already has a cutout behind the headlight so hopefully can get some full 2.5" piping through there!
The list of what I have left to purchase is getting smaller but its big money items now
STILL NEED TO BUY:
EFR 6758 Turbo
Kraken manifold and exhaust
intercooler piping
AN fittings and lines for oil and water drain/feed
wastegate
BOV
Mishi oil feed sandwich plate
oil pressure sensor
oil temp sensor
Flex fuel sensor
sadfab ignition kit
Thanks to a raise at work, things are a little ahead of schedule but still shooting to have this motor built and in the car by summer 2023!
I believe I put the ECU into open-loop idle and locked the spark advance value and then adjusted the screw until the idle was slightly above what I wanted.
Yup, 15x8! I like the meaty tire look and the ride is really nice.
Oh damn I'm sorry to hear that! How did you determine that?
I need to review what my shop did, I see the galley plugs are in there (one is a press fit and one is like an allen key or something). I bought two brand new OEM plugs from Mazda but I think they must've tapped one of them and the press fit won't work on that one anymore. So I can pop them off to clean and check but not sure how I'll get new ones back in :(
In other news....spoke with Jeremy at Flyin Miata and he told me not to worry about the 2gram weight difference in my rod/piston combos. My neighbor who has built a few motors agreed as well so I'm just gonna send it.
I've had two badly warped heads that the machine shop said weren't worth it and I'm waiting on my 3rd. Hopefully I'll have the head built and back to me in the next month. Still waiting on Kraken kit and turbo. I have yet to start assembly, still waiting on my oil pan to come back from hot tanking). Lots of waiting on stuff, no fun lol.
I pull one plug by drilling and tapping it to 5/16-18, then use a slide hammer to remove it. Then I use a long rod to tap out the other side. I also remove the oil restrictor in the deck surface that feeds the head. I make replacements for all of these, so I have no idea if they are readily available. The head has galley plugs that need to be pulled and cleaned out as well.


 2
2


 ! I trawled for a photo like that before I pulled my dash, and now you post exactly what I was looking for, when mine has been out (for new heater core) and now back in! Sadly though, your LHD heater assembly is different to the RHD, so it would have only misled me. For anyone looking to do a RHD, the difference is in the aircon unit, and in the couplings between the blower box and the heater box. I'll get around to posting the story of my dash saga on my build thread, but for now I have to get the car back on the road first.