

My car wont start *Now 323 GTX Engine Swap!*

the surface area of the top of a 84mm piston is about 8.5 square inches. Assuming a 14psi atmospheric pressure, the pressure in the combustion chamber at 10:1 compression is 140 psi (which would measure as 126psi relative to ATM) which means that at the top of the stroke, you've got 126*8.5 = 1071 pounds of force pushing down on the single compressed piston. Fortunately, mechanical leverage means that you'll never see the full half-ton of force on the crank because there is simply no torque on the crankshaft at TDC. Now, for simplicities sake, Lets assume that at 90 degrees, compression is 2:1. You've still got 119 pounds of force on the compressing piston...but you wont see this force either, because when one piston is 90 degrees through the compression stroke, there is a second piston that is 90 degrees through the ignition/power stroke - so there are 2 pistons with 119 pounds of force on either side of the crank teeter-totter.
The force that you will push against is when you are moving between 90* BTDC and TDC. As you further compress the piston on the compression stroke, you increase force against it. You will also further decompress the piston on the ignition stroke, which will decrease the counter force, so you'll be fighting for the last 90 degrees.
Lets get simple again, and assume that at 45* BTDC, your 10:1 pistons are at 4:1 compression. You've got about 357 pounds of force on the piston. Your countering piston on the ignition stroke has 1.25:1 compression, or about 30 pounds of counterweight for a total of about 327 pounds. If we also assume that the force is being applied 1.5" from the centerline of the crankshaft (i don't know crankshaft dimensions very well) then you're fighting against 41 ft/lb of torque every time a compression piston sees 45* BTDC (twice per crankshaft rotation). This is the force your starter must overcome every time you start the car. Note that I'm not accounting for valvetrain torque. If you try to start your car without spark plugs, you'll find that it turns about like a hand-drill. There is no patterned laboring associated with the compressing of the pistons, it is rather an easy mono-tone spinning of the starter.
Gawd, i'm bored this morning
Reply
 0
0

0


Thread Starter
Elite Member
iTrader: (8)
Joined: Aug 2007
Posts: 2,712
Total Cats: 5
From: Bellingham, Wa
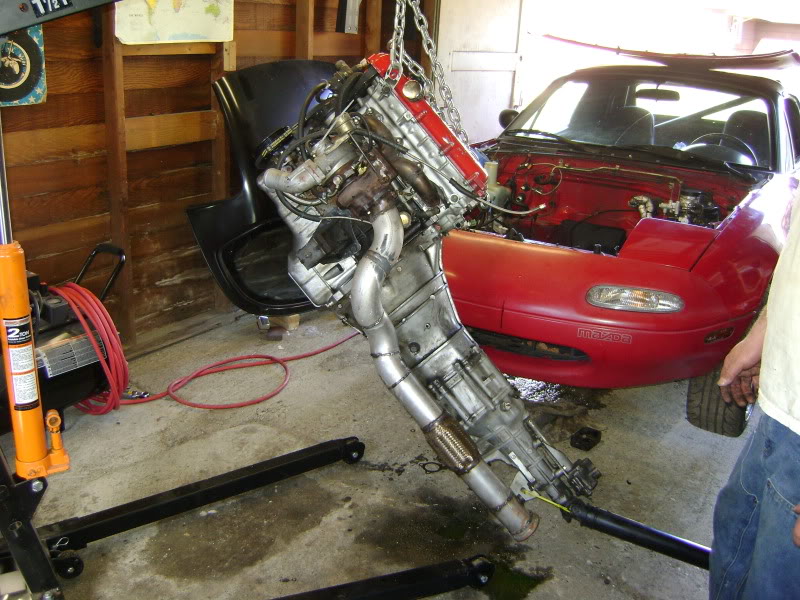
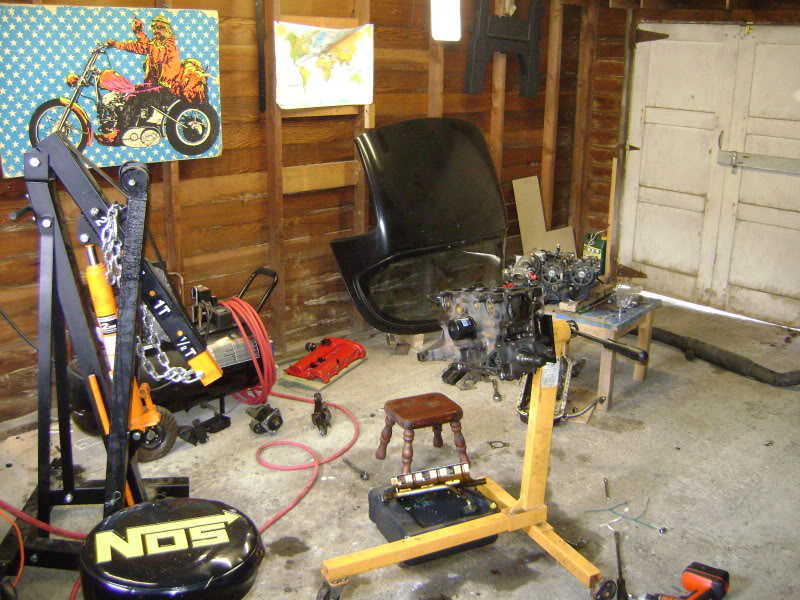
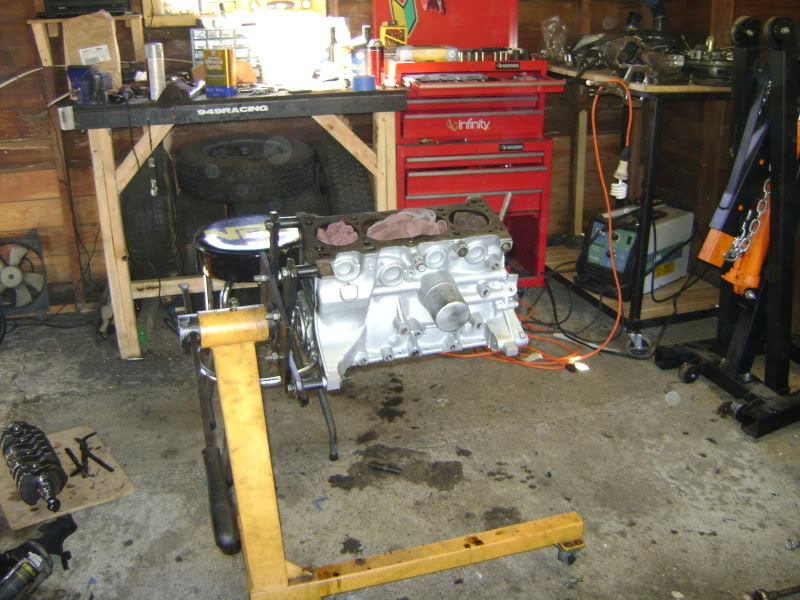
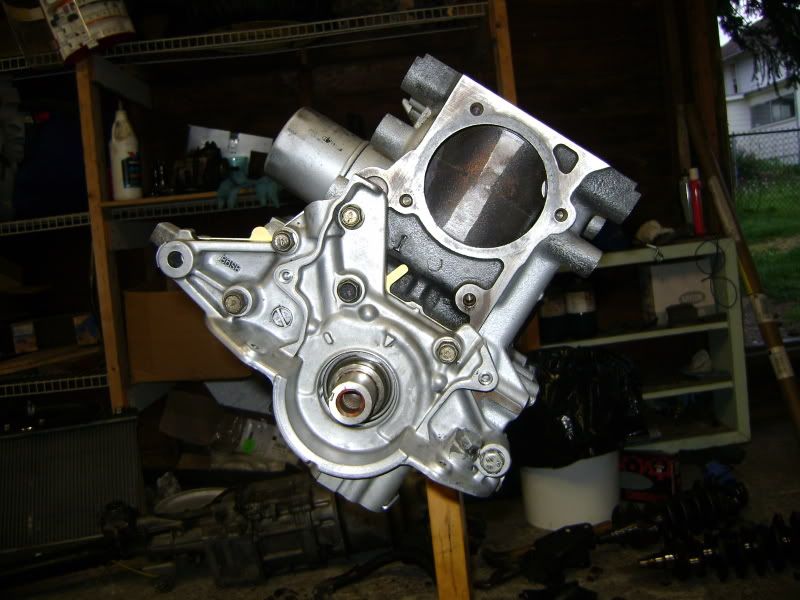
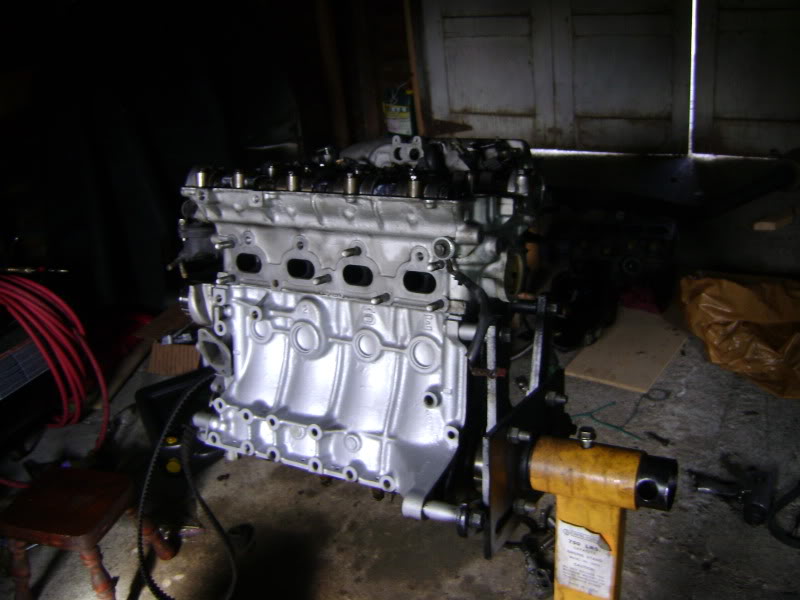
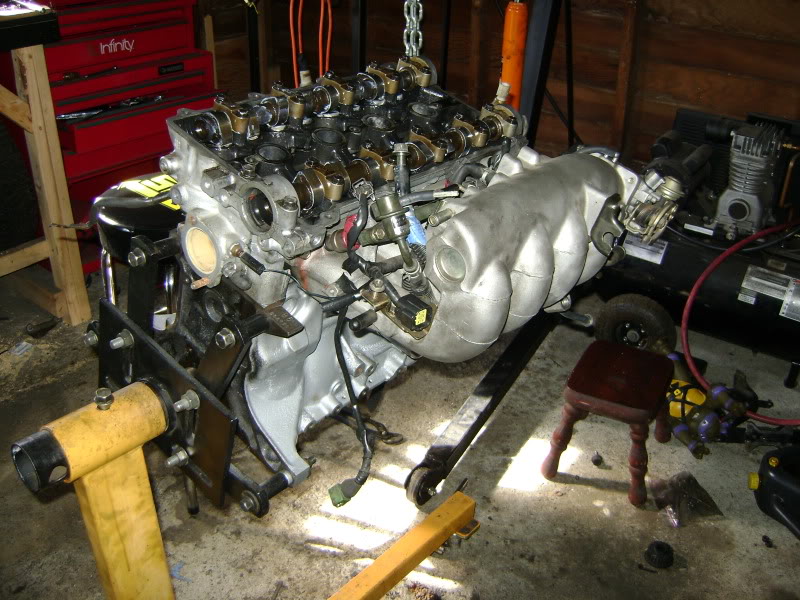
Engine came out today. This car is so easy to work on. My buddy came over to help me muscle it out and when we were done he said "thats it?!". Once we hooked up the hoist the engine was out 5 minutes later lol. Also, my garage is tiny but not as small as I thought. This couldn't have worked out much better. Pics!
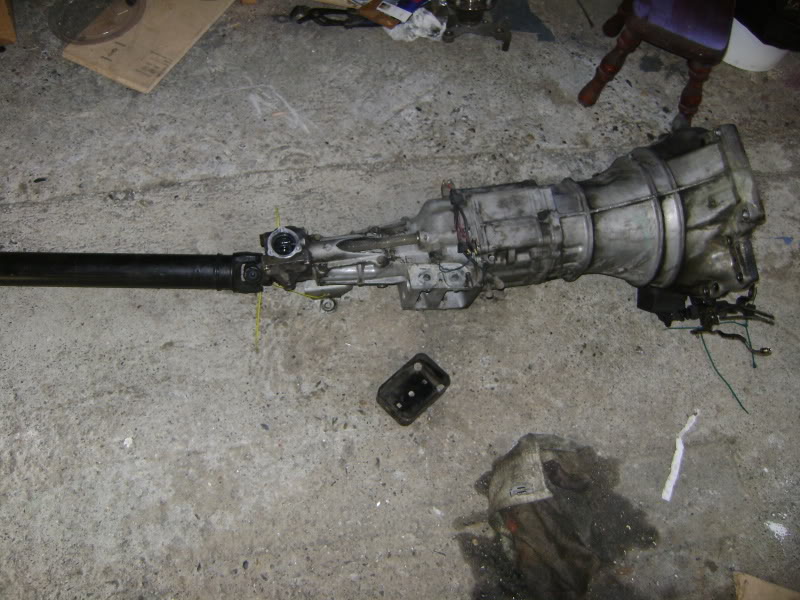
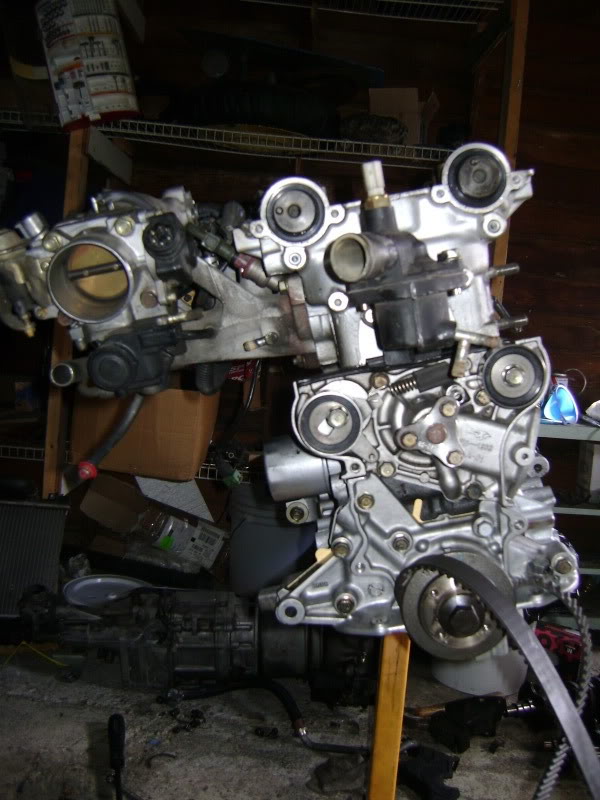
Engine, turbo stuff, trans, driveshaft and all.
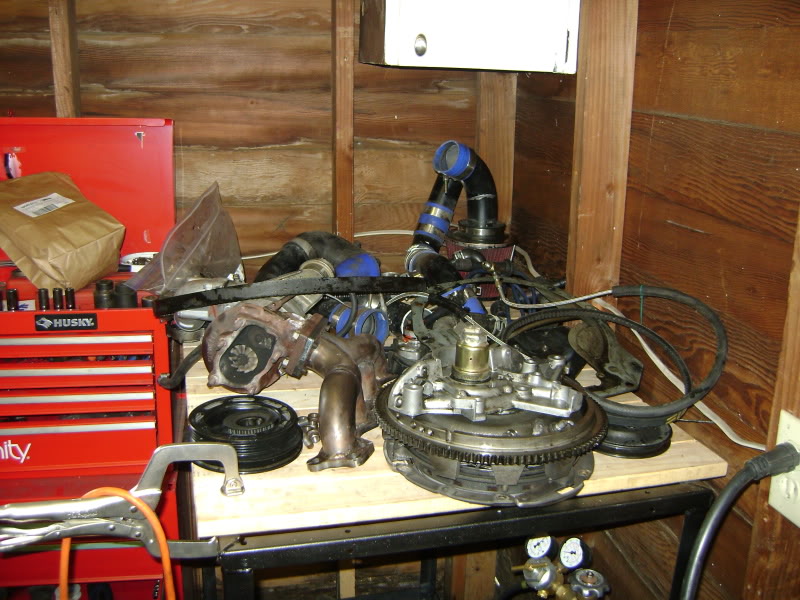
Purdy. I'll take this opportunity with everything apart to bandsaw the head flange off the manifold and weld on a new one.
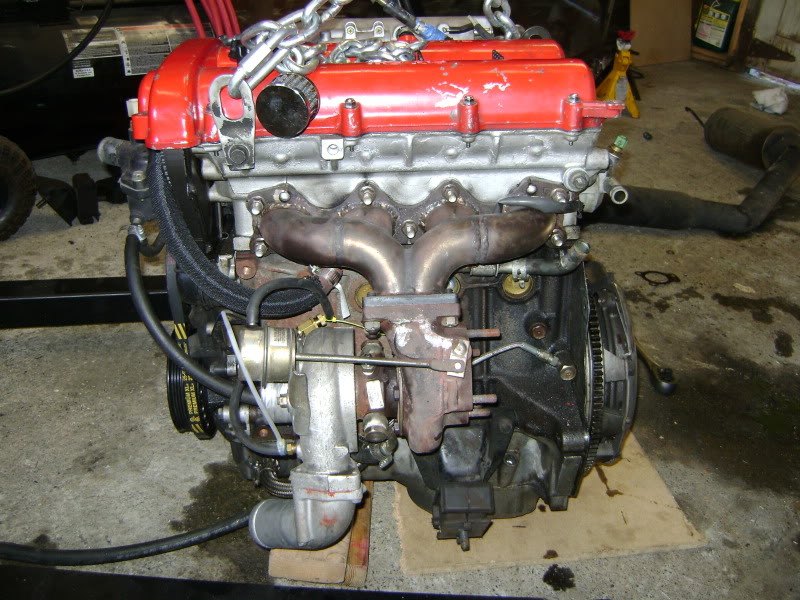
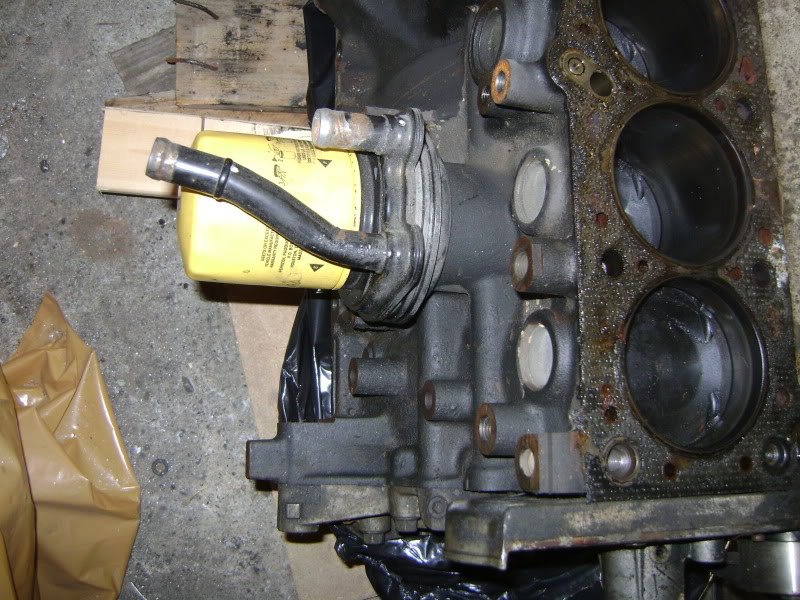
Subtle differences that the GTX engine comes with. Dished out 7.8:1 pistons, a better mixing manifold design and this particular one has no big breather port on the oil filter side. Also has an oil cooler that supposedly plumbs into the heater core on the GTX according to Bob.
Rear main leak much?
Should have the Old motor apart tomorrow for carnage pics.
Engine, turbo stuff, trans, driveshaft and all.
Purdy. I'll take this opportunity with everything apart to bandsaw the head flange off the manifold and weld on a new one.
Subtle differences that the GTX engine comes with. Dished out 7.8:1 pistons, a better mixing manifold design and this particular one has no big breather port on the oil filter side. Also has an oil cooler that supposedly plumbs into the heater core on the GTX according to Bob.
Rear main leak much?
Should have the Old motor apart tomorrow for carnage pics.
Reply
0
0

Thread Starter
Elite Member
iTrader: (8)
Joined: Aug 2007
Posts: 2,712
Total Cats: 5
From: Bellingham, Wa
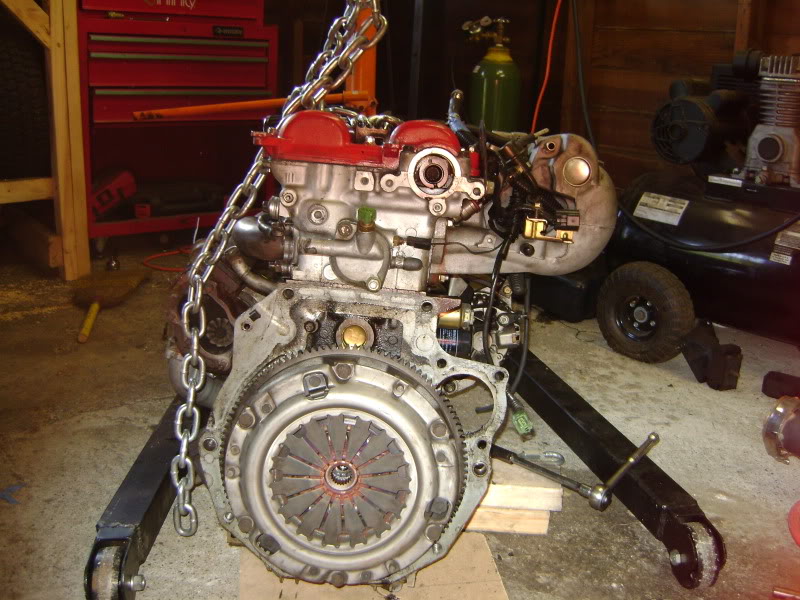
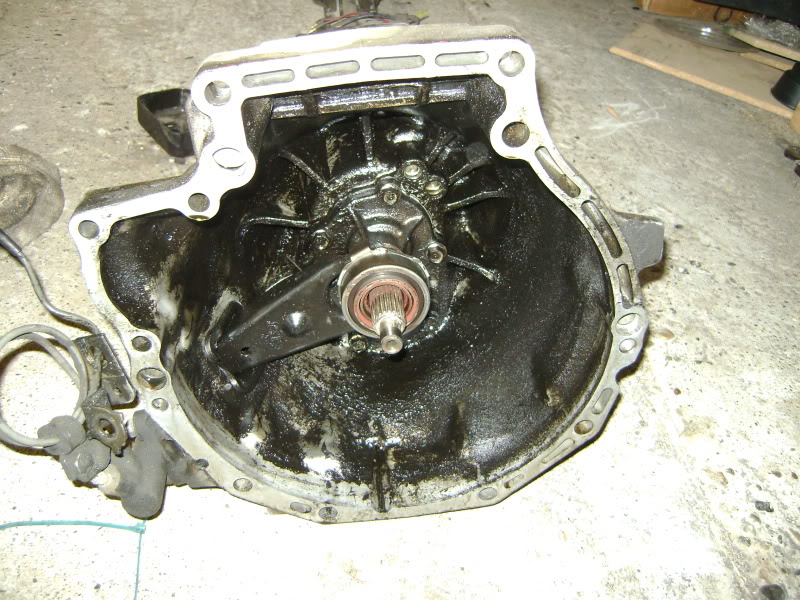
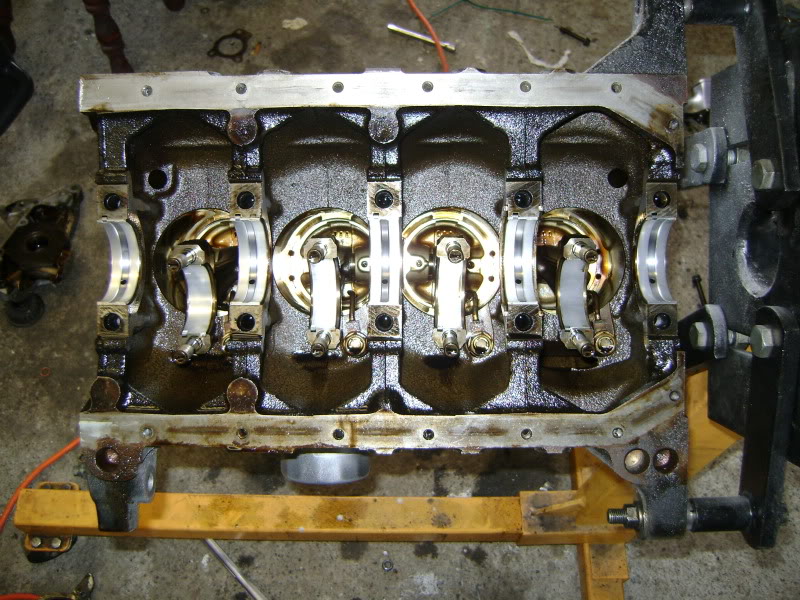
hour and a half of actual work.
This engine only has >10k on it and hasn't even been in for 2 years. The lower bell housing bolts were soaked in fresh oil. I also cleaned most of the schmutz out of the bell housing before I bolted it onto the motor. It had a felpro rear main so i'm not at all surprised that it look like this.
This engine only has >10k on it and hasn't even been in for 2 years. The lower bell housing bolts were soaked in fresh oil. I also cleaned most of the schmutz out of the bell housing before I bolted it onto the motor. It had a felpro rear main so i'm not at all surprised that it look like this.
Reply
0
0
Thread Starter
Elite Member
iTrader: (8)
Joined: Aug 2007
Posts: 2,712
Total Cats: 5
From: Bellingham, Wa
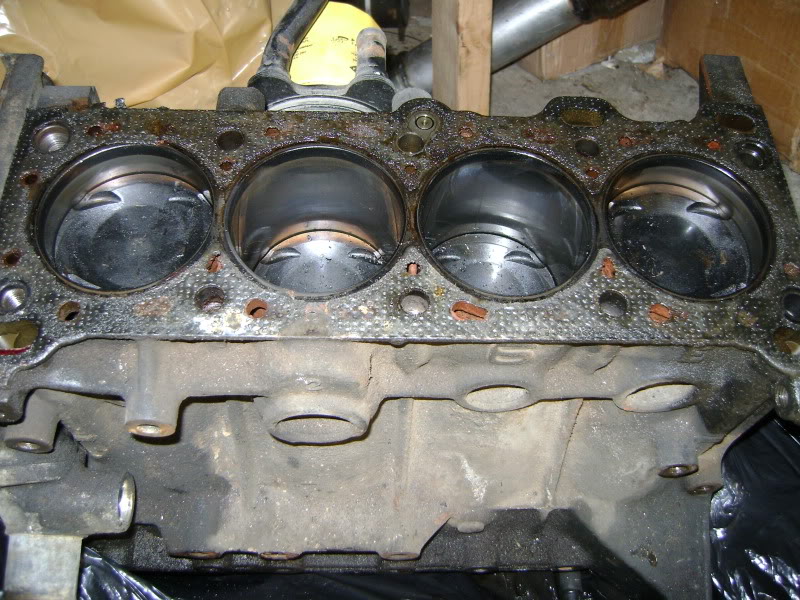
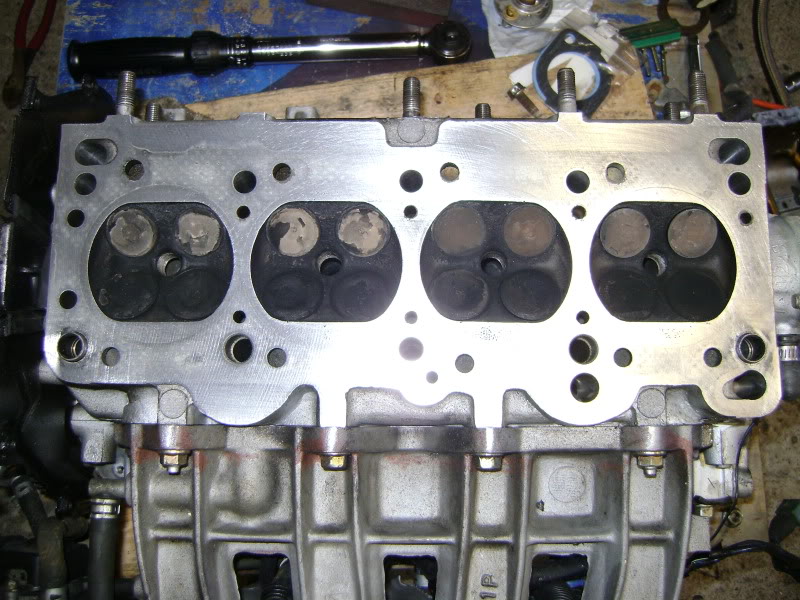
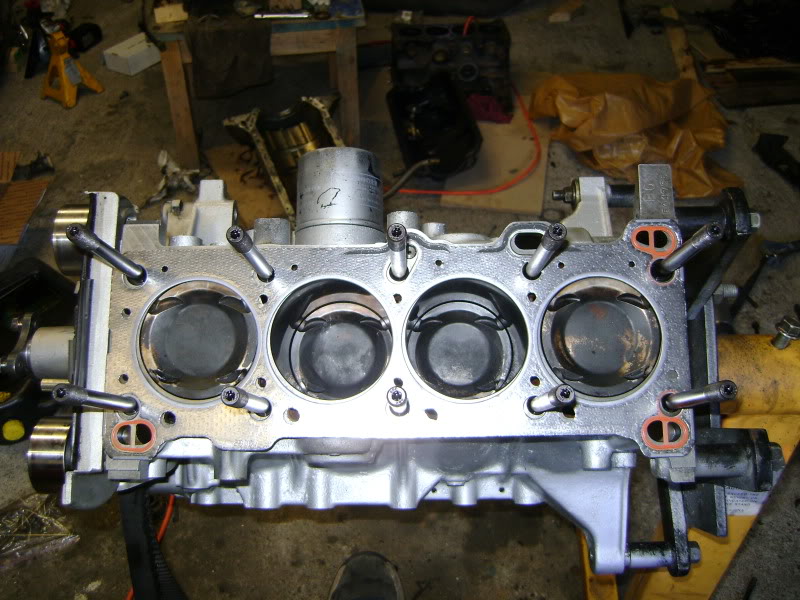
Head is off. No differences in piston height. The rings scream when you turn the block over as they scrape against the cylinder walls. The cams are very difficult to turn so I think the head is toast as well :(:(:(
Reply
0
0
Thread Starter
Elite Member
iTrader: (8)
Joined: Aug 2007
Posts: 2,712
Total Cats: 5
From: Bellingham, Wa
I always preach cleanliness and organization when doing this type of work and here I am not following my own advice. My garage is a mess.
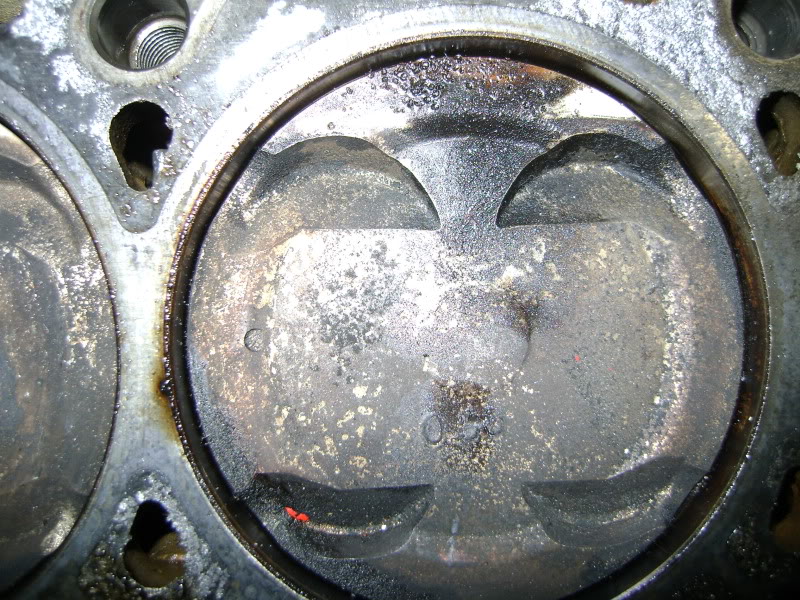
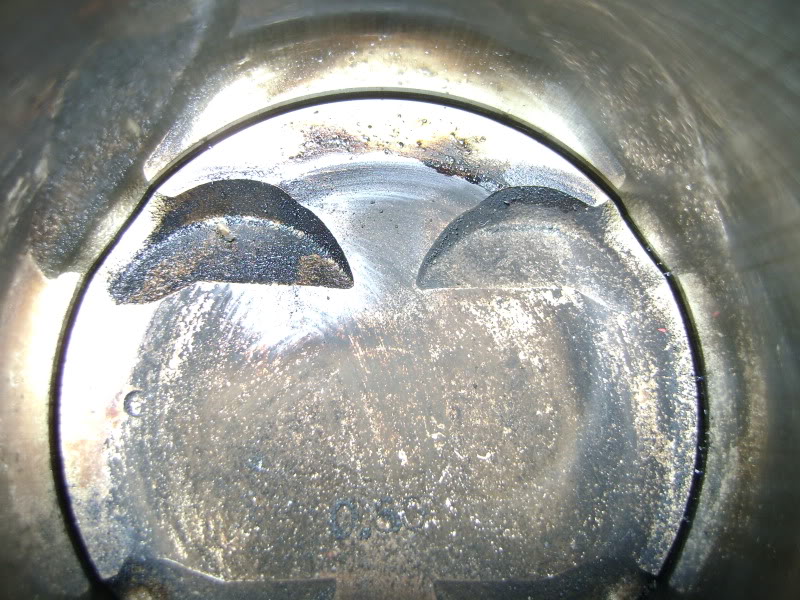
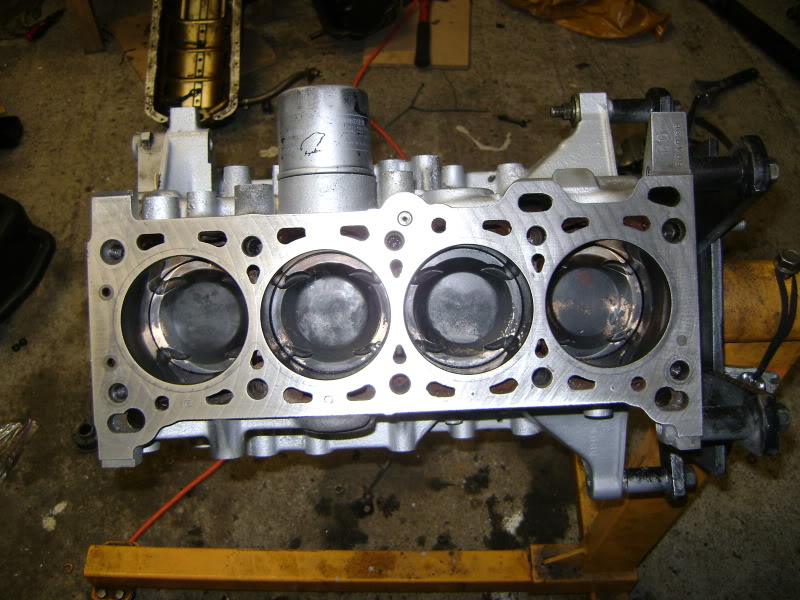
Piston pics. I dont like seeing obvious detonation.

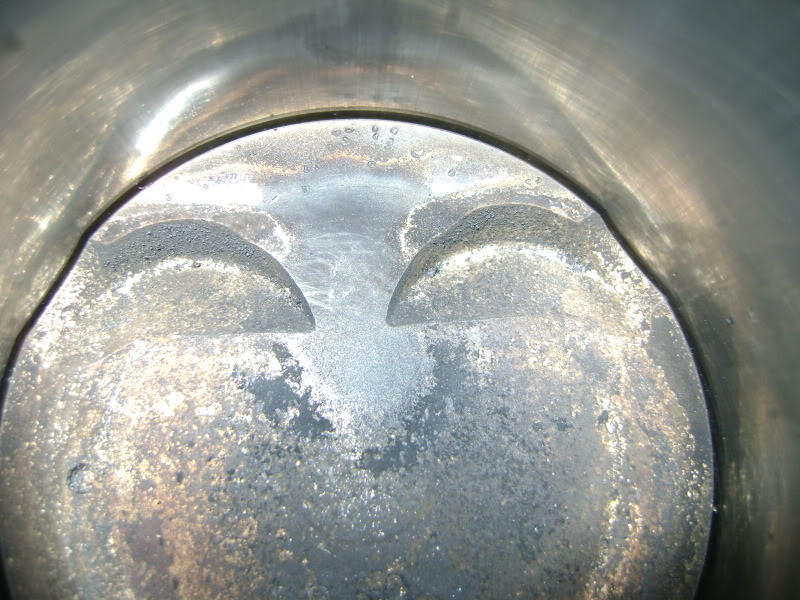
Done stripping the old block. Now on to swapping parts over to the GTX block.
Piston pics. I dont like seeing obvious detonation.
Done stripping the old block. Now on to swapping parts over to the GTX block.
Reply
0
0
Thread Starter
Elite Member
iTrader: (8)
Joined: Aug 2007
Posts: 2,712
Total Cats: 5
From: Bellingham, Wa
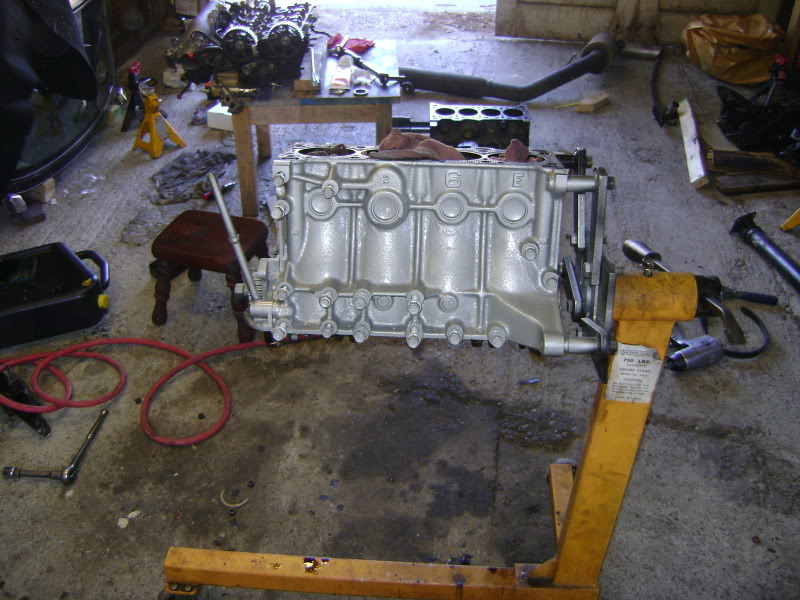
Small update. I've got the new block all cleaned and painted. I went with silver so I could see oil leaks easier. I changed the cam seals in the head after I took all the journals off and inspected them for wear.
Inbetween coats of paint I decided to clean up my engine bay. After pulling some of the wires loose from the body I decided that it would be easy to route them up under the fender for a mild wire tuck. By under the fender I do not mean behind the fender, just up along the top of the wheel well and most of it is tucked under the headlight now. Man did that all make a difference. FWIW windshield washer fluid makes a great engine bay detailer.
Before:
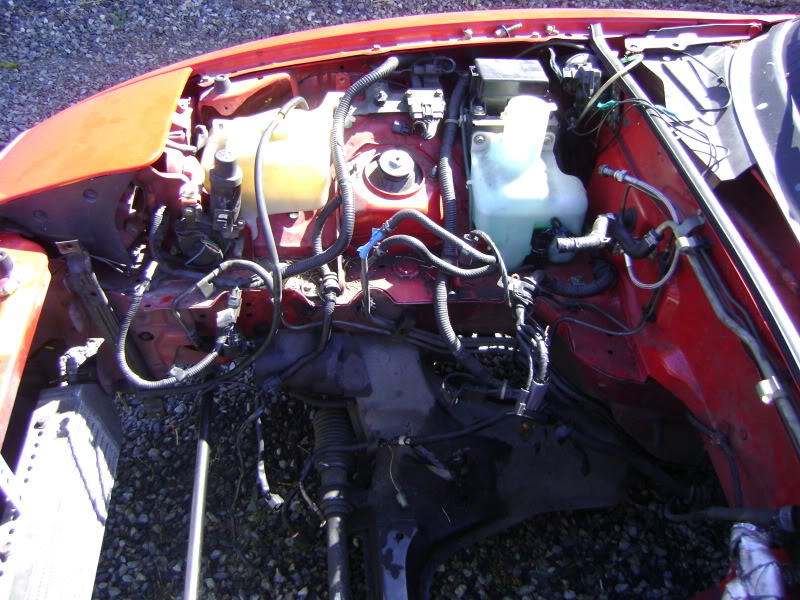
After:
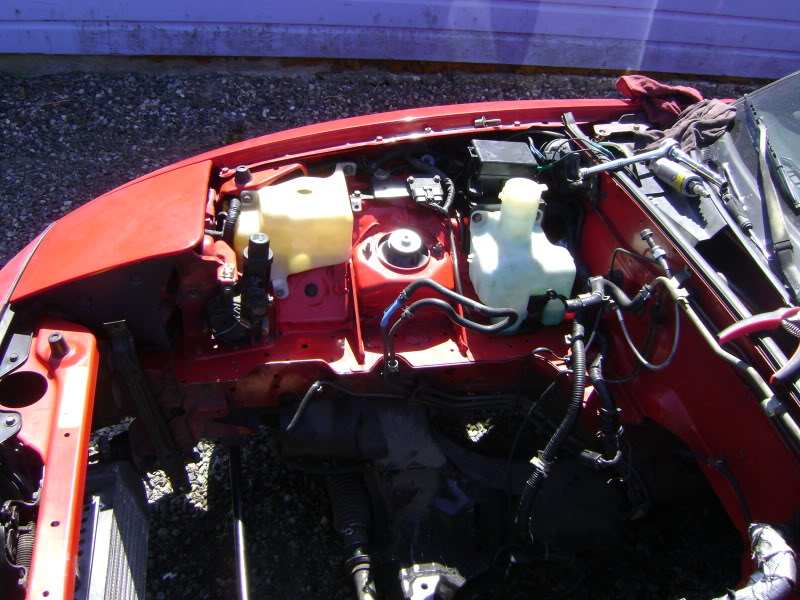
Gonna go out and start on the driver side here in a bit after lunch.
To finish my engine I need to swap the short nose crank for my extra long nose crank. I've got everything I need but I'm waiting for plastigauge I ordered to come in to make sure that these bearings are going to do the job.
Inbetween coats of paint I decided to clean up my engine bay. After pulling some of the wires loose from the body I decided that it would be easy to route them up under the fender for a mild wire tuck. By under the fender I do not mean behind the fender, just up along the top of the wheel well and most of it is tucked under the headlight now. Man did that all make a difference. FWIW windshield washer fluid makes a great engine bay detailer.
Before:
After:
Gonna go out and start on the driver side here in a bit after lunch.
To finish my engine I need to swap the short nose crank for my extra long nose crank. I've got everything I need but I'm waiting for plastigauge I ordered to come in to make sure that these bearings are going to do the job.
Reply
0
0
Thread Starter
Elite Member
iTrader: (8)
Joined: Aug 2007
Posts: 2,712
Total Cats: 5
From: Bellingham, Wa
More done today.
Short nose crank out, new bearings in.
New Long nose crank in.
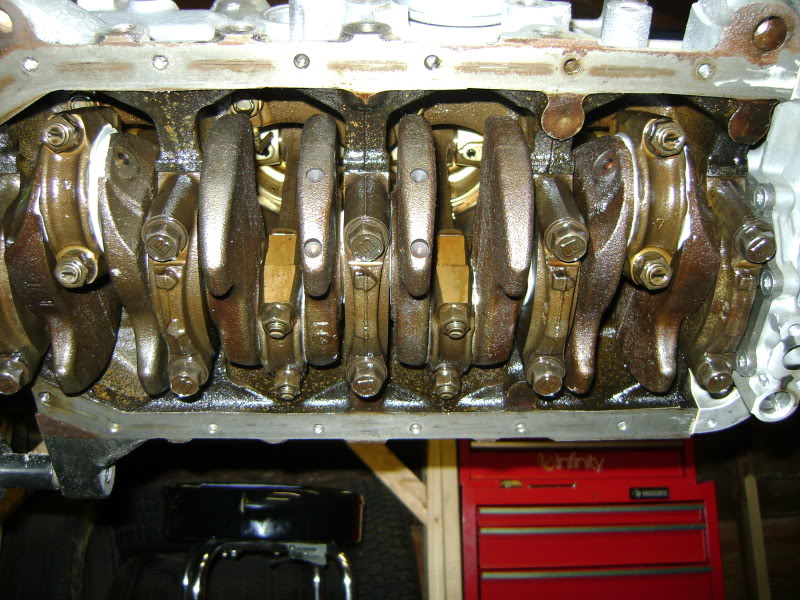
Cleaned the block deck. This was the hardest part of anything so far.
Cleaned up the oil pump and put it on. I lost my FSM, what are the torque specs for the oil pump and water pump?
Short nose crank out, new bearings in.
New Long nose crank in.
Cleaned the block deck. This was the hardest part of anything so far.
Cleaned up the oil pump and put it on. I lost my FSM, what are the torque specs for the oil pump and water pump?
Reply
0
0
Thread Starter
Elite Member
iTrader: (8)
Joined: Aug 2007
Posts: 2,712
Total Cats: 5
From: Bellingham, Wa
More little this and thats done today. I'm working slow. I still haven't gotten my oil pickup gasket yet, should be here this weekend I think. When I dont have every last part I have a hard time getting anything done because that missing piece is always in the back of my mind saying, "well, i'm not there yet so you cant finish anyway!"
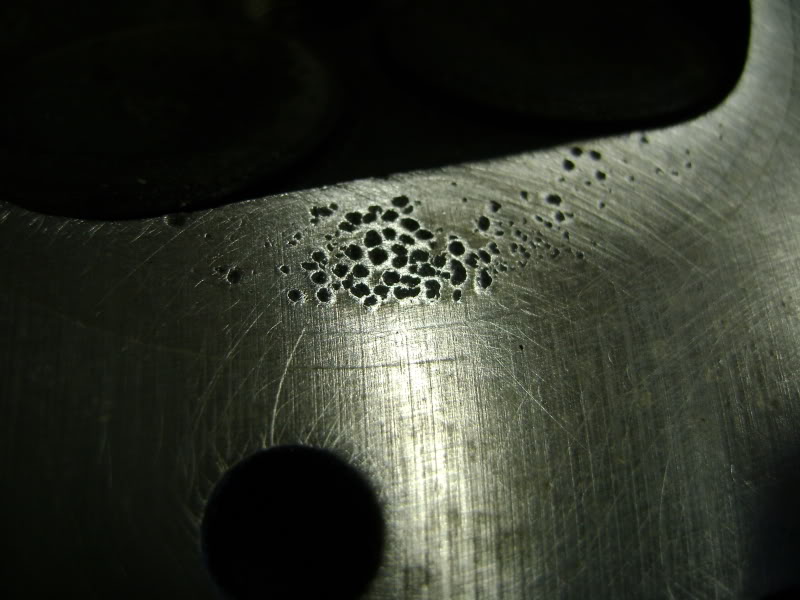
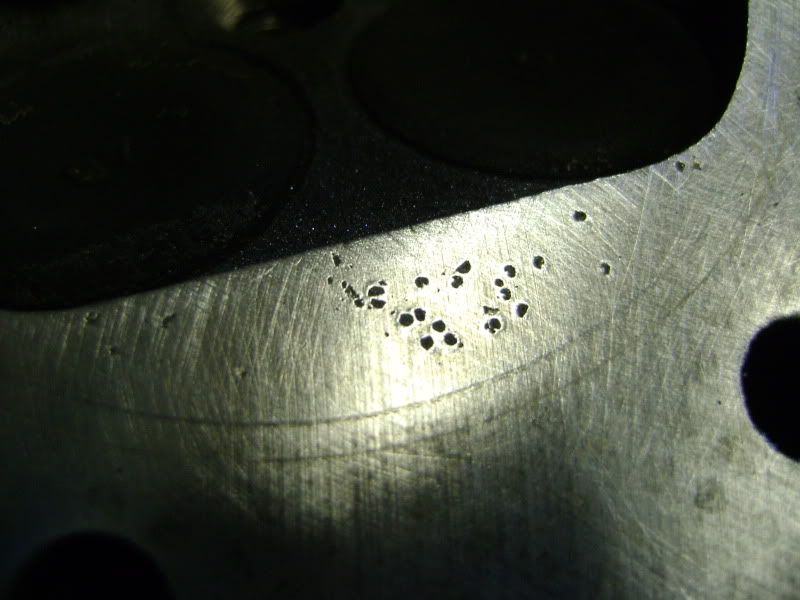
Anyway, I cleaned up the head a bit. Was much easier getting the old head gasket material off of it rather than off of the GTX block deck. Also check out the additional pics of detonation on the head. Still no idea why this happened. Cylinder 3 is the worst. I'm wondering if some cheap gas found its way into my car at some point. I'm not running an outrageous timing map.
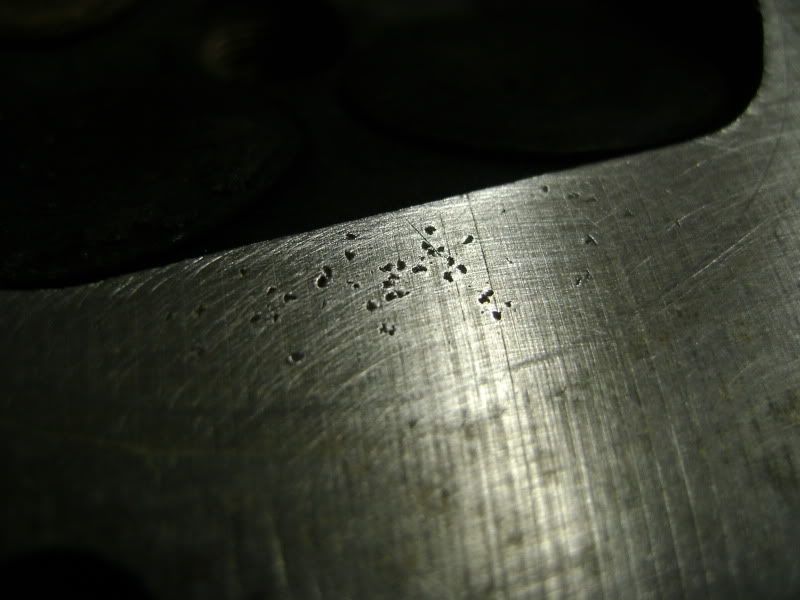
The head went back on the block. Its always a sad moment when this happens. Almost like i'll never see those pistons again. Well, I know i'll see them again someday...just not someday soon =P One last picture of them with the head studs in.
And bye bye pistons.
Still a lot to do but i'm hoping to have my car running again monday or tuesday. I'm also going to do a spacerless coolant re-route. More on that later.
Anyway, I cleaned up the head a bit. Was much easier getting the old head gasket material off of it rather than off of the GTX block deck. Also check out the additional pics of detonation on the head. Still no idea why this happened. Cylinder 3 is the worst. I'm wondering if some cheap gas found its way into my car at some point. I'm not running an outrageous timing map.
The head went back on the block. Its always a sad moment when this happens. Almost like i'll never see those pistons again. Well, I know i'll see them again someday...just not someday soon =P One last picture of them with the head studs in.
And bye bye pistons.
Still a lot to do but i'm hoping to have my car running again monday or tuesday. I'm also going to do a spacerless coolant re-route. More on that later.
Reply
0
0


Thread Starter
Elite Member
iTrader: (8)
Joined: Aug 2007
Posts: 2,712
Total Cats: 5
From: Bellingham, Wa
Originally Posted by na8psi
I havent been following, but this very interesting just in the last page. I'm assuming everything was assembled by your own hand? From the pan up?
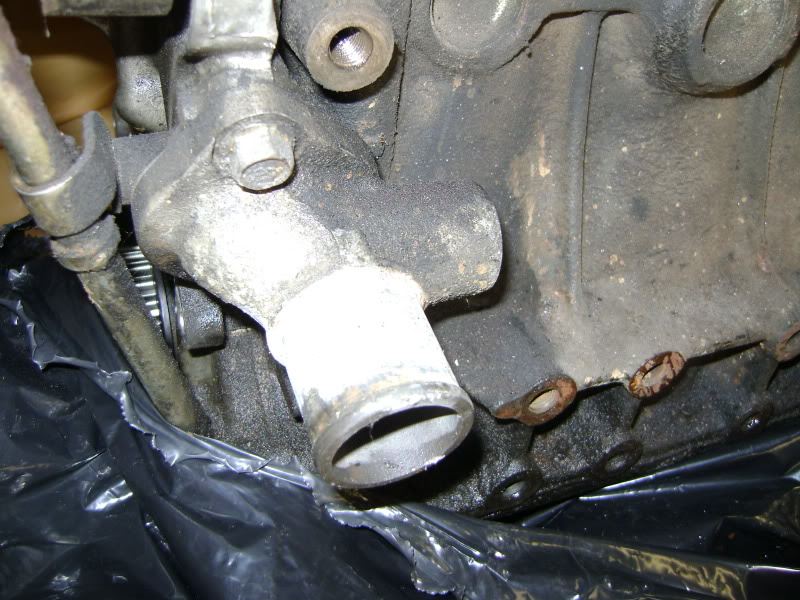
A question: Whats the thread size for the coolant port in the block? I'm going to use that for one of my turbo water lines. Going to run the other line to the mixing manifold. Ditching the throttle body coolant lines all together and the warmup valve thingy on the TB. Everything else about my reroute will be stock except the coolant will be returning to the radiator via the rear of the head vs the front. Pretty basic.
Reply
0
0
If you didn't live 6 hours away you could come borrow my drill and tap sets. I have a couple for both 3/8 NPT and 1/2 NPT, and all of the shanks have been turned down to fit into 1/2" chucks.
Reply
0
0
Thread Starter
Elite Member
iTrader: (8)
Joined: Aug 2007
Posts: 2,712
Total Cats: 5
From: Bellingham, Wa
 I think it would cost me 20+ to go buy another bit and tap at the hardware store, and even then I have to borrow a drill it will fit in.
Reply
0
0


