
The custom fabrication thread! (Post pics of stuff you have made)
 05-03-2013, 09:45 AM
#402
Elite Member

Join Date: Apr 2010
Location: Newcastle, Australia
Posts: 2,826
Total Cats: 67
Dam... Ive done enough of these now and i dont have any training in welding or anything and i hoped I could find someone who knew.
I want to just email a few companies who are pro but in other countries and asking if they have time to give me pics to show how.
Its the only thing i havnt really figured out how to do nicely.
Dann
I want to just email a few companies who are pro but in other countries and asking if they have time to give me pics to show how.
Its the only thing i havnt really figured out how to do nicely.
Dann

Reply
 0
0

0
05-03-2013, 11:07 AM
#407

Hmm, thats not quite enough to get all of the weld for connecting the runners to the collector. I needed to have like 1" sticking out for a couple of them, and that was with a standard nozzle and not a gas lens. I did of course turn the flow up to like 30-35cfm from like 20.
Reply
0
0
05-03-2013, 11:21 AM
#409
I normally never go more than the diameter to 1.5* the diameter of the tungsten out. But sometimes trying to fit into really tight spots you gotta do what you gotta do, and a weld with marginal shielding gas is going to seal better and be stronger than no weld at all.
Reply
0
0
05-03-2013, 11:49 AM
#412
I'm going to go with theres multiple ways of doing things. I was taught by someone who went by the 1-2 times the diameter of the tungsten should be out of the cup, if you need to do more than that, turn the gas flow up.
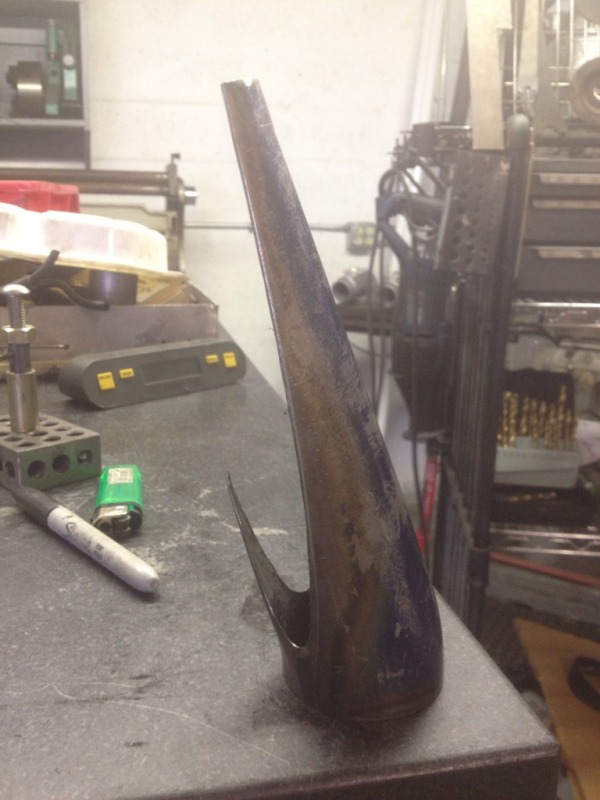
But if they're too short you run into a worse problem. Mine were really short, welding the pipe to the collector was a bit of a bear once there was more than one runner on it. You can see how tight the merge was on this side.
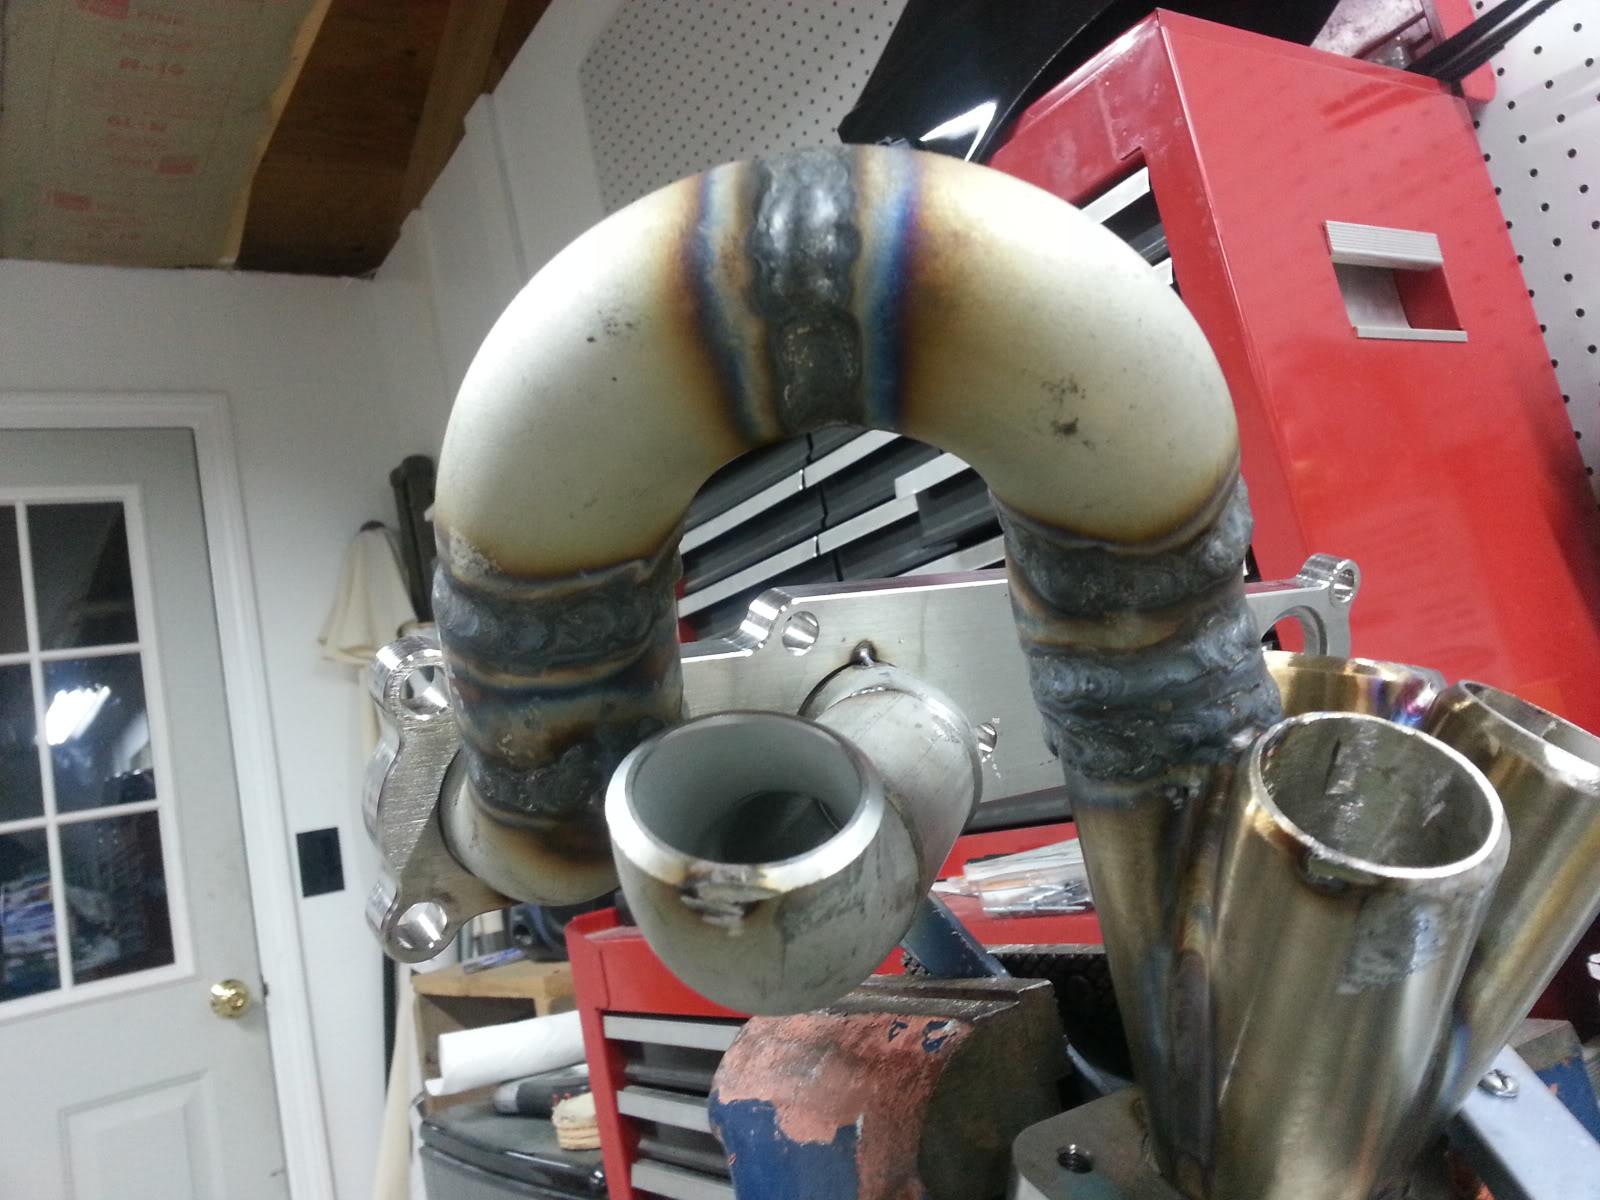
And no I'm not terribly happy with my weld quality on this, I've done much better, I was experimenting with ceriated tungsten and trying to weld sch40 with on 110v.
But if they're too short you run into a worse problem. Mine were really short, welding the pipe to the collector was a bit of a bear once there was more than one runner on it. You can see how tight the merge was on this side.
And no I'm not terribly happy with my weld quality on this, I've done much better, I was experimenting with ceriated tungsten and trying to weld sch40 with on 110v.
Reply
0
0
 05-03-2013, 12:00 PM
#414
Elite Member

iTrader: (5)
Join Date: Oct 2011
Location: Detroit (the part with no rules or laws)
Posts: 5,677
Total Cats: 800
But quit trying "different" fancy ****.
Just learn the basics first man. I'm not really sure where to start with this. If you were running on 110, you were using allofit because that is REALLY hot.
I'm not even sure where to point you, because i feel there is so much to fix.
I think i told you this before, quit flat pedaling it.
Get yourself some flat stock, and see how small of a bead you can make. Turn that thing way down and hardly made a bead. Get your gap super super close too.
Reply
0
0
05-03-2013, 12:21 PM
#416
Probably going to come off wrong.
But quit trying "different" fancy ****.
Just learn the basics first man. I'm not really sure where to start with this. If you were running on 110, you were using allofit because that is REALLY hot.
I'm not even sure where to point you, because i feel there is so much to fix.
I think i told you this before, quit flat pedaling it.
Get yourself some flat stock, and see how small of a bead you can make. Turn that thing way down and hardly made a bead. Get your gap super super close too.
I've gotten a lot better since that manifold.
Reply
0
0
05-03-2013, 02:14 PM
#417
Elite Member
iTrader: (8)

Join Date: Dec 2008
Location: Kingston, Ontario
Posts: 2,910
Total Cats: 51
basically instead of having a 5 degree window that your cup can fit into you have a 60 degree window.
Im not saying to make it a short one with a larger angle, just less length after they actually merge.
Try it and you will see.
Reply
0
0
05-03-2013, 05:24 PM
#418

Shortnening the collector that far ruins the scavenging properties.
I always assumed you would have to weld the spike portion from the inside of the collector with a long gas lens.
You could use a cheap sand blasting cabinet as a gas chamber and evacuate the whole thing with argon, than a gas lens would be unnecessary.
I always assumed you would have to weld the spike portion from the inside of the collector with a long gas lens.
You could use a cheap sand blasting cabinet as a gas chamber and evacuate the whole thing with argon, than a gas lens would be unnecessary.
Reply
0
0
05-03-2013, 05:39 PM
#419
Couldnt you just pump argon inside the pipe? I know its used as a shield but to build a sealed box for welding it is a bit silly; I already saw someone said just blast argon, and stick the tungsten rod out a bit far, but doesnt that also make the weld a bit weaker in penetration?
Reply
0
0
05-03-2013, 09:18 PM
#420
Junior Member
Thread Starter

Join Date: Jun 2010
Posts: 176
Total Cats: 4
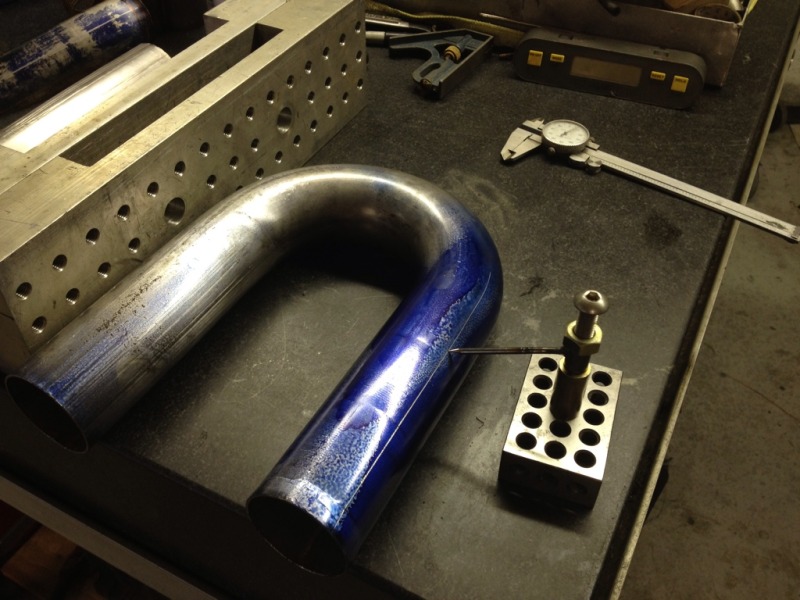
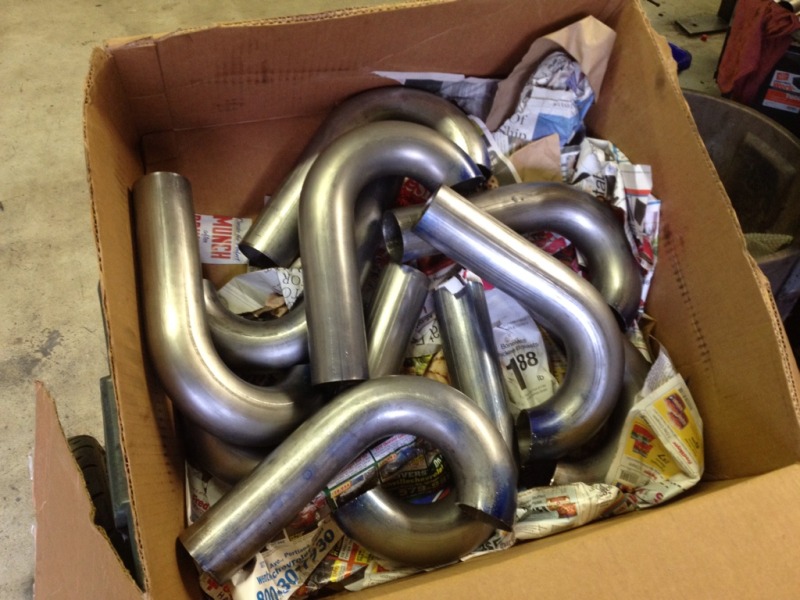
Here's how I make collectors. Keep in mind, I cut out the triangle points and weld them to the header tubes without the collector, then weld on the collector.... That way I don't have to do any welding on the inside.
I make my bend by cutting off the starting end of a u bend. Yes they're not perfectly symmetrical on the front and back.
Transfer dye for scribing a line
Device for scribing a line 45* off 90*. Scribed in 2 positions, 90* apart.
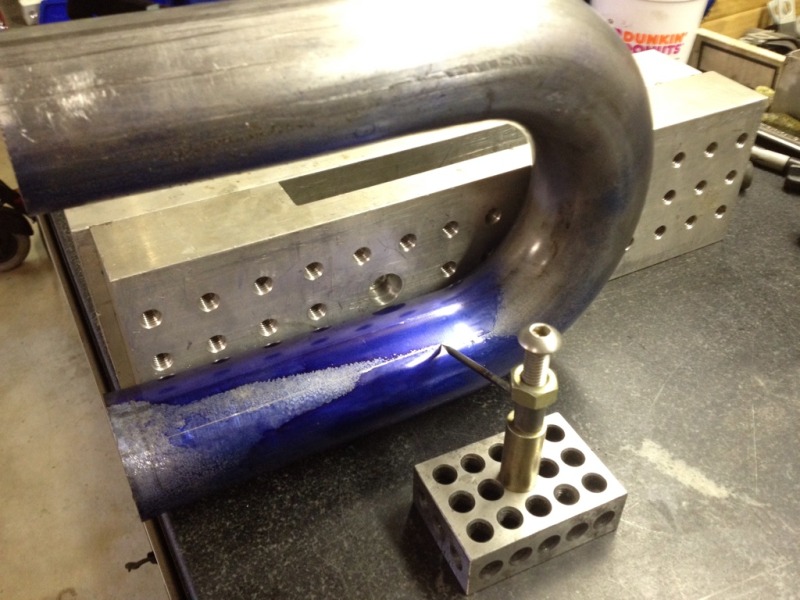
Both lines scribed
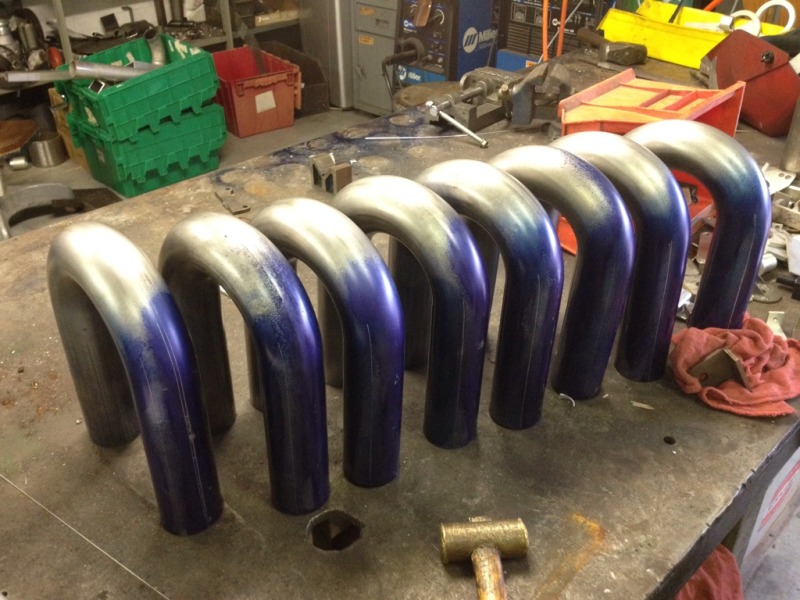
Then cut them all with a bit extra
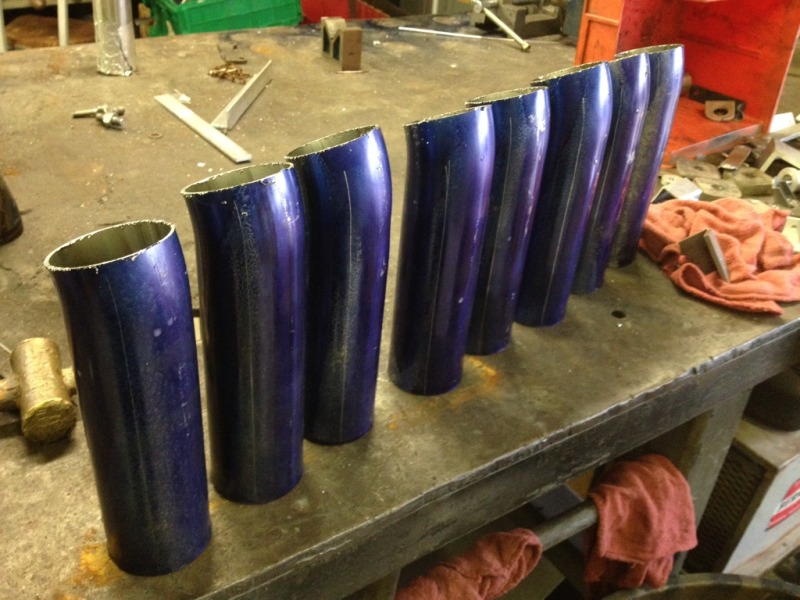
As you can see I have plenty to finish these headers (big block Chevy)
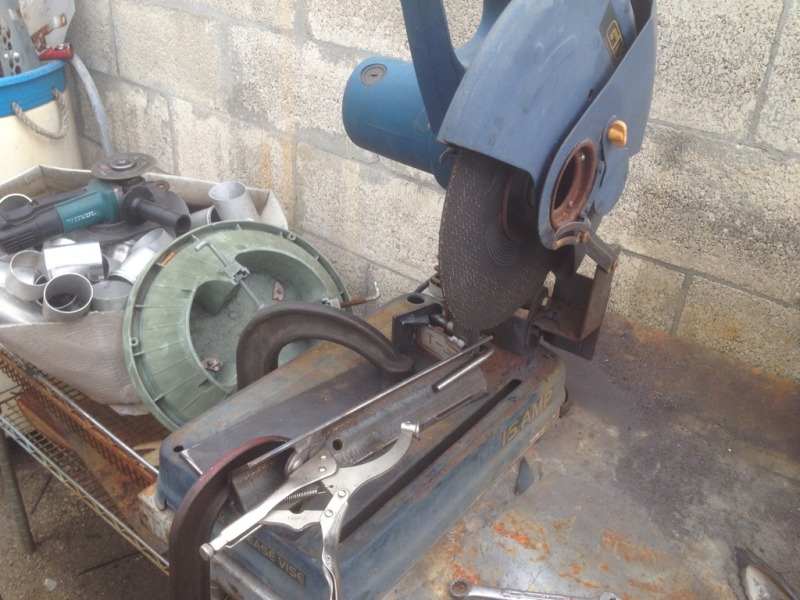
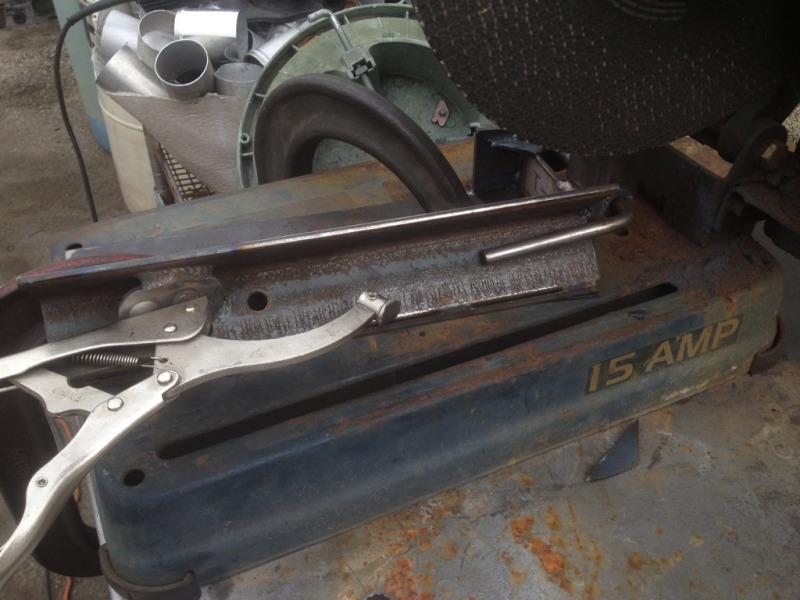
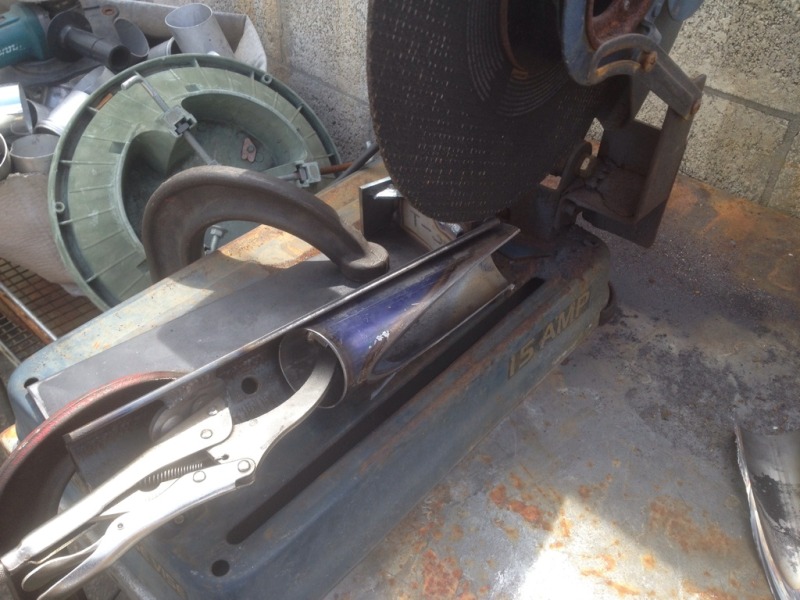
Made the fixture for the 14" abrasive saw, the rear tightening "pin" has a bolt you tighten to get the back snug.
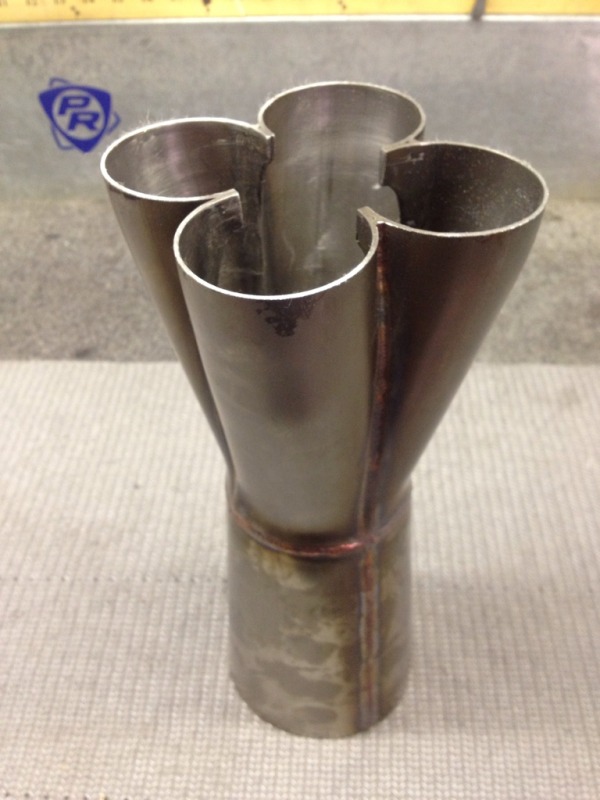
Then you end up with these, rough and in need of deburing.
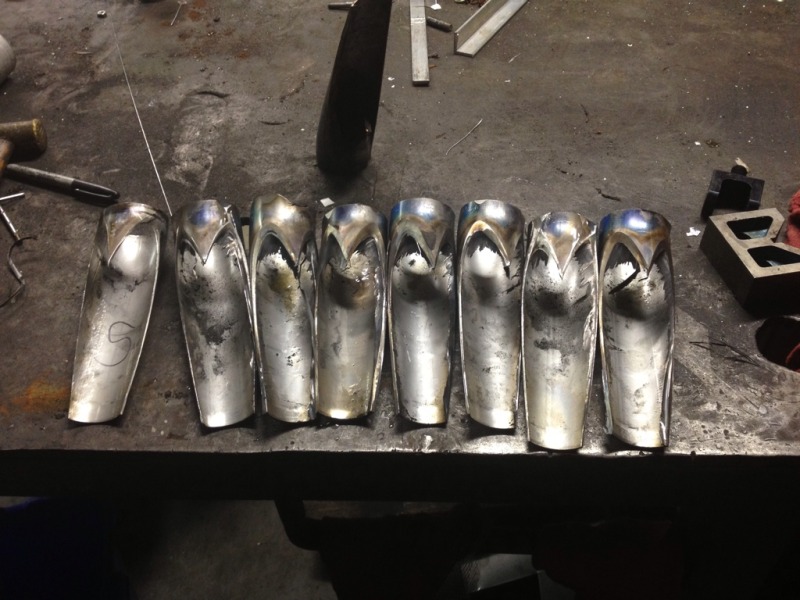
Debured.
I tack one half at a time

Then I am done, here is a before, and after of trimming material. I do a rough cut with the cutoff wheel, then pass it on the belt sander.
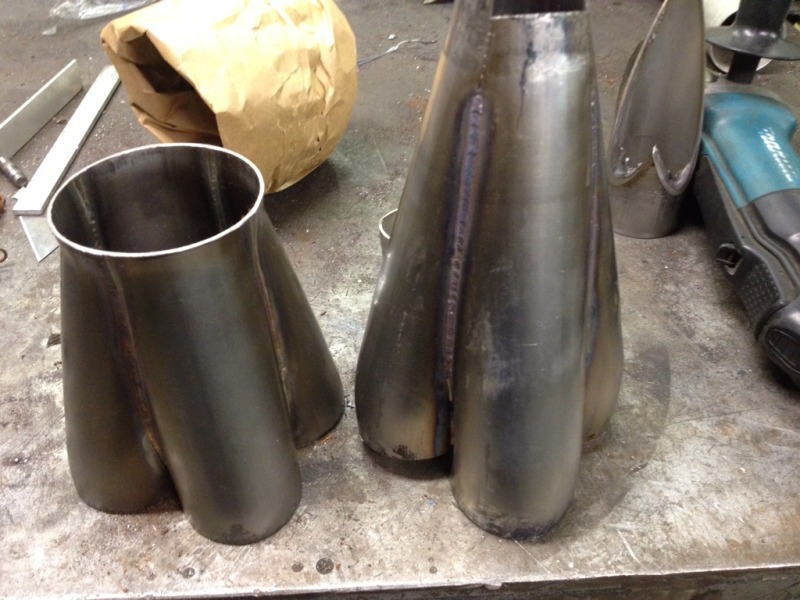
Ooo sexy.
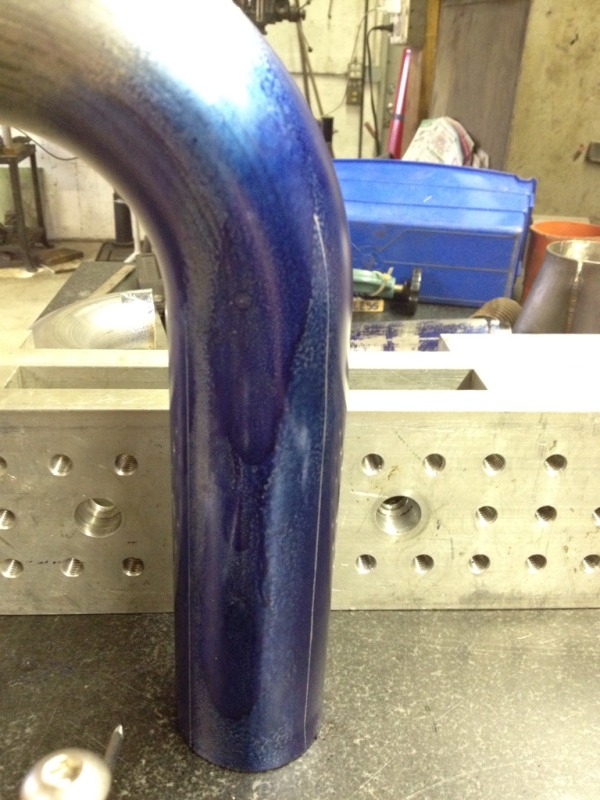
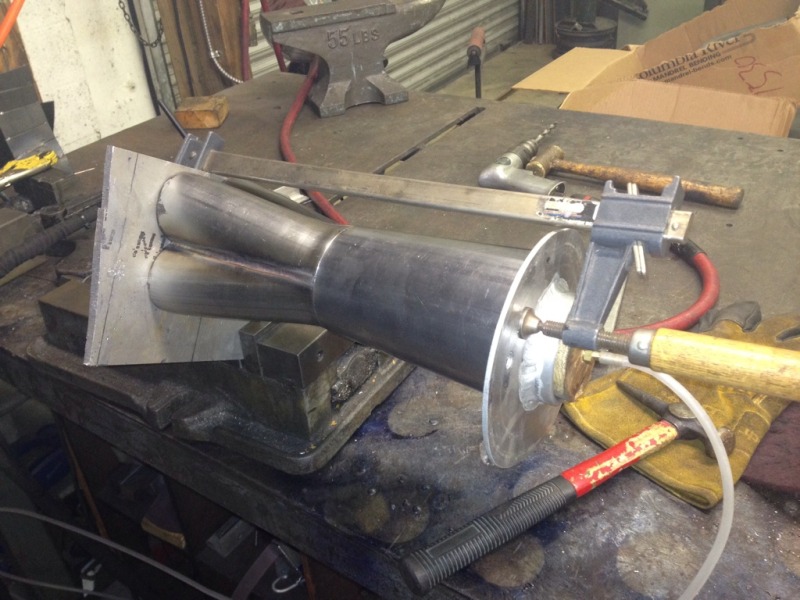
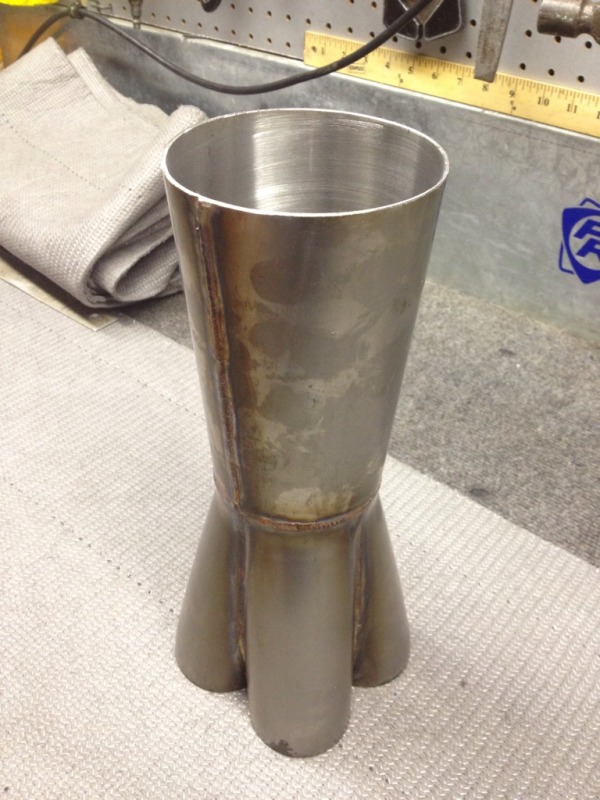
Then it gets flared out at the end
Video of flaring on hydraulic press, with anti size as a lube. Just so it's said I was being sarcastic when I said "what do I do now?"
http://i104.photobucket.com/albums/m...9B1E93FA5B.mp4
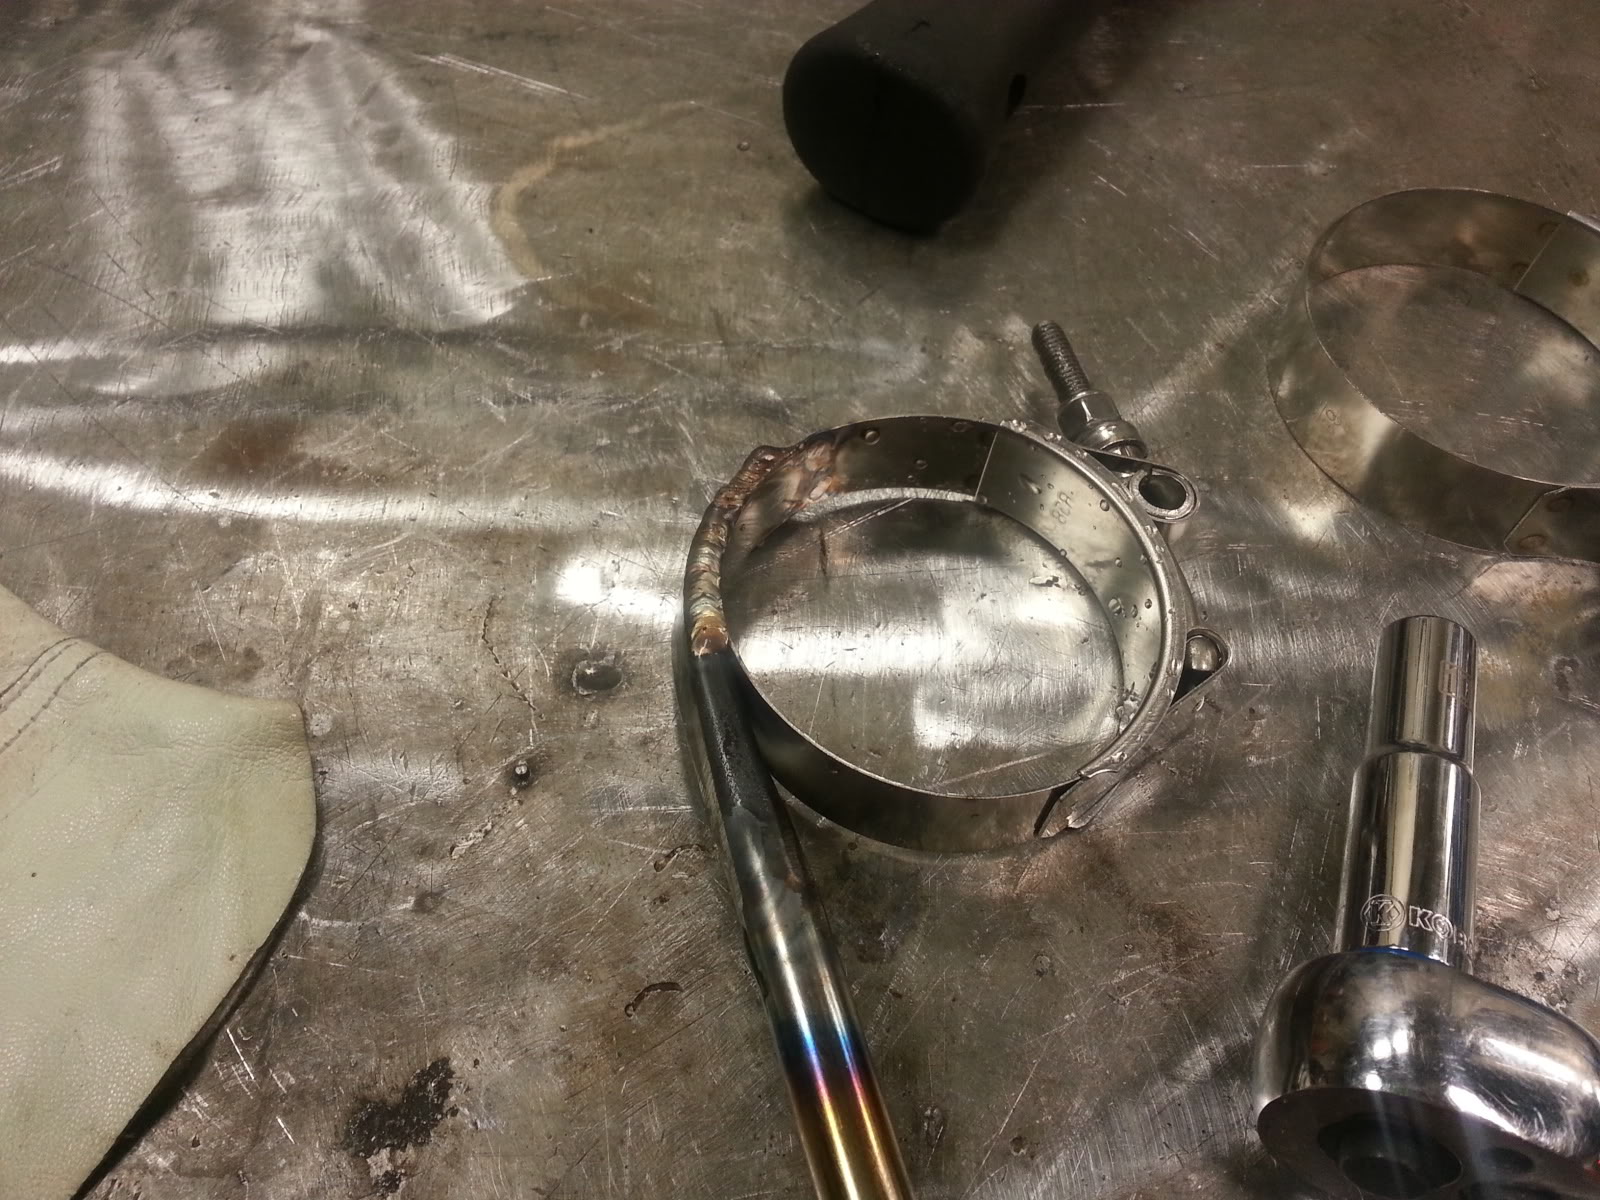
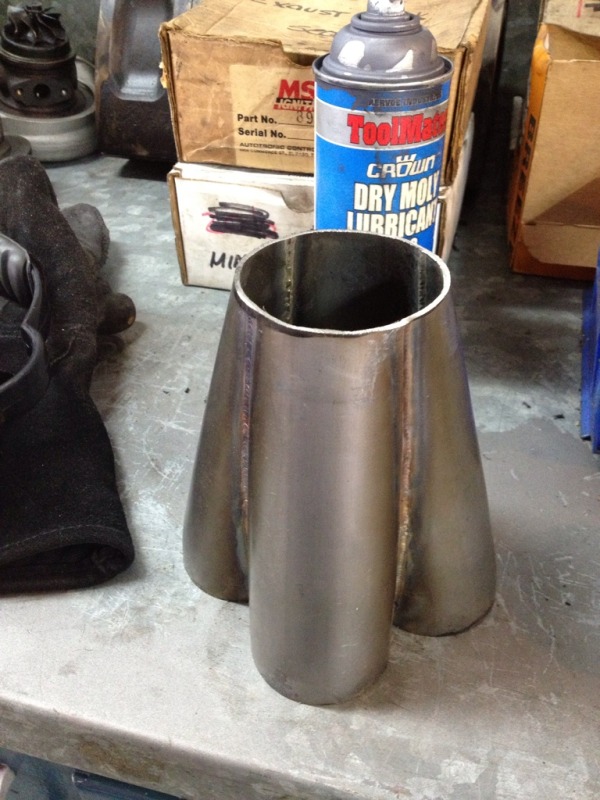
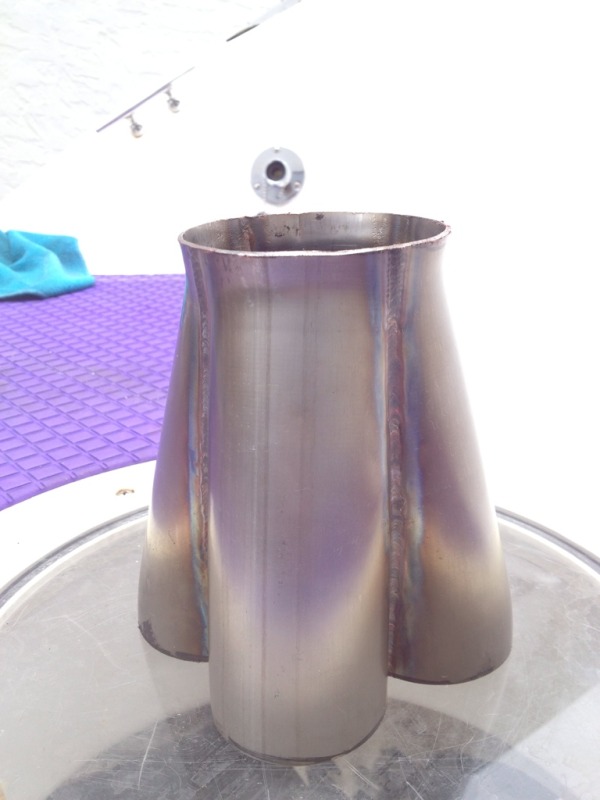
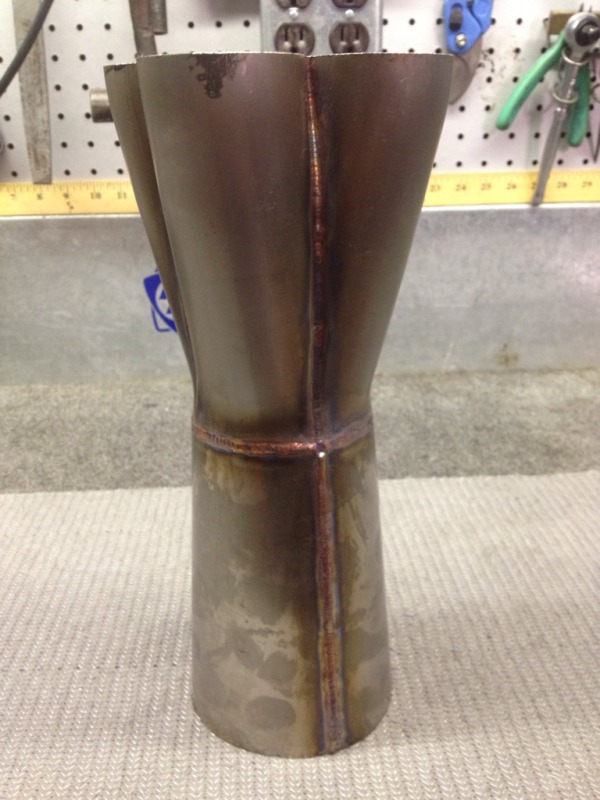
Made a tapered cone, this is the fixture for back purging. Lol a bulkhead worked nicely for the bung to fit.
All done!
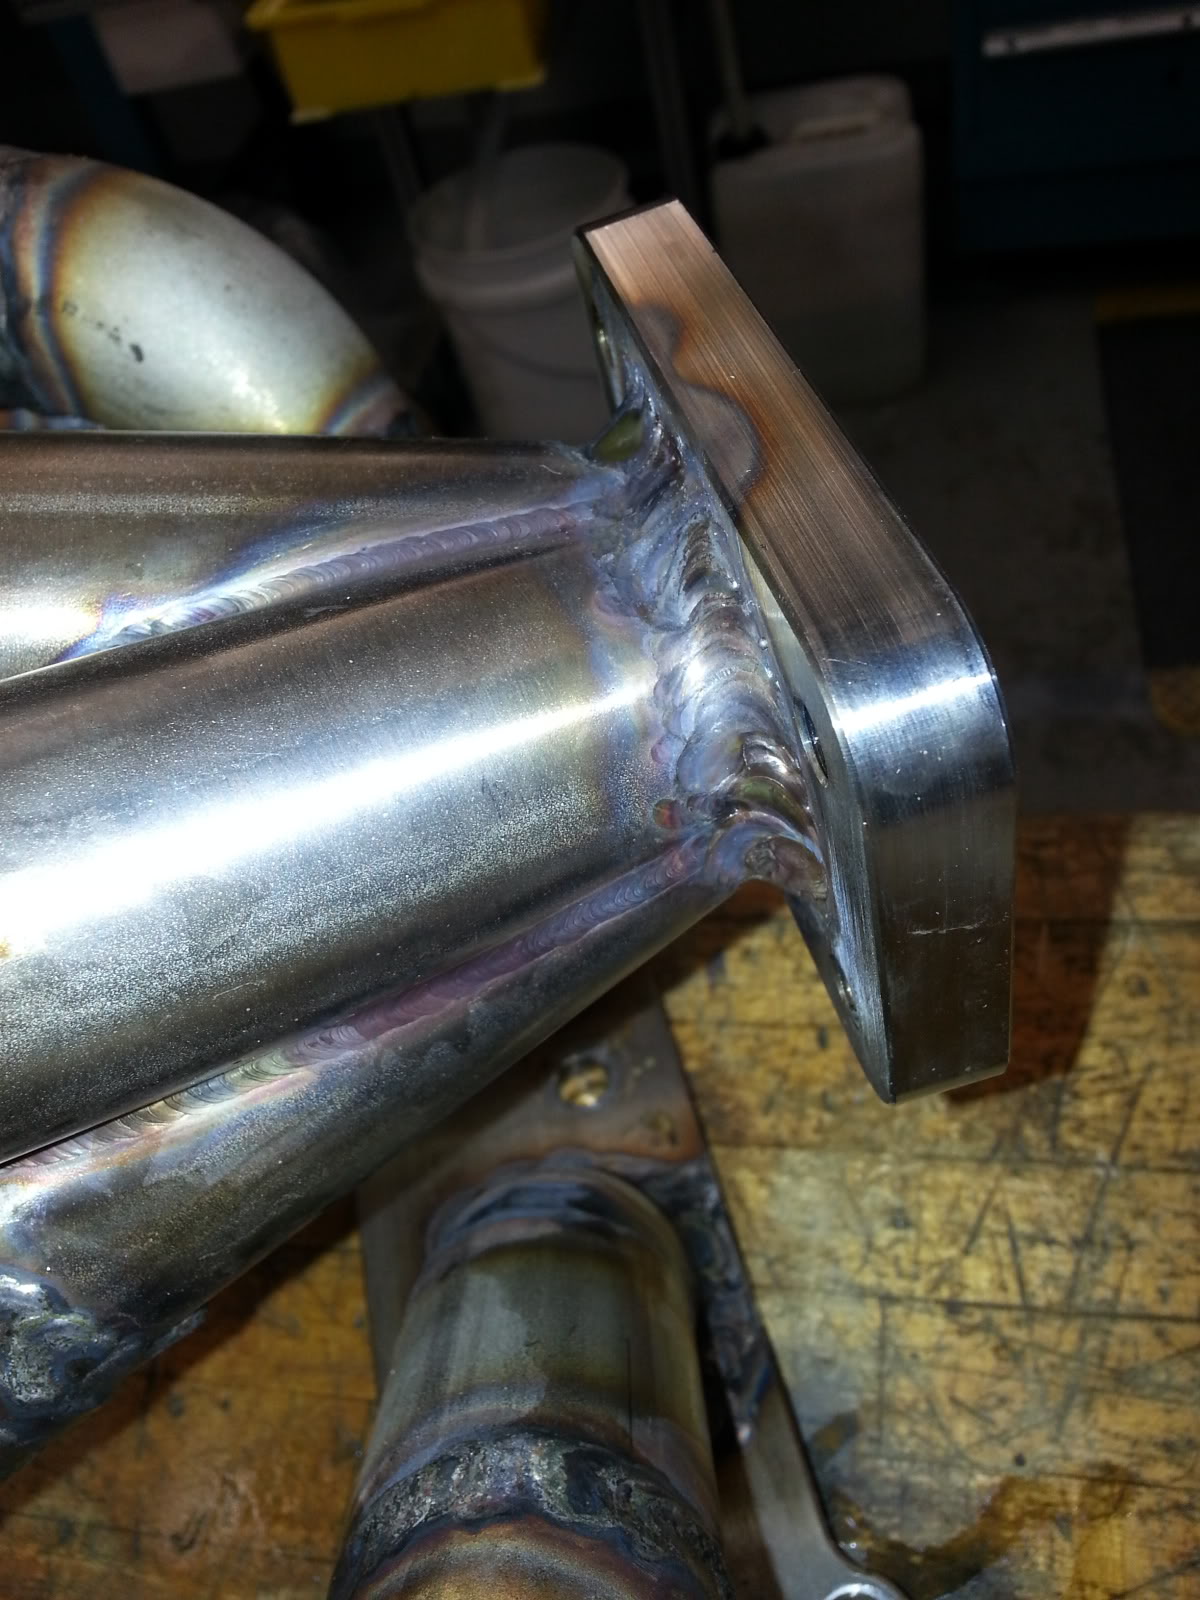
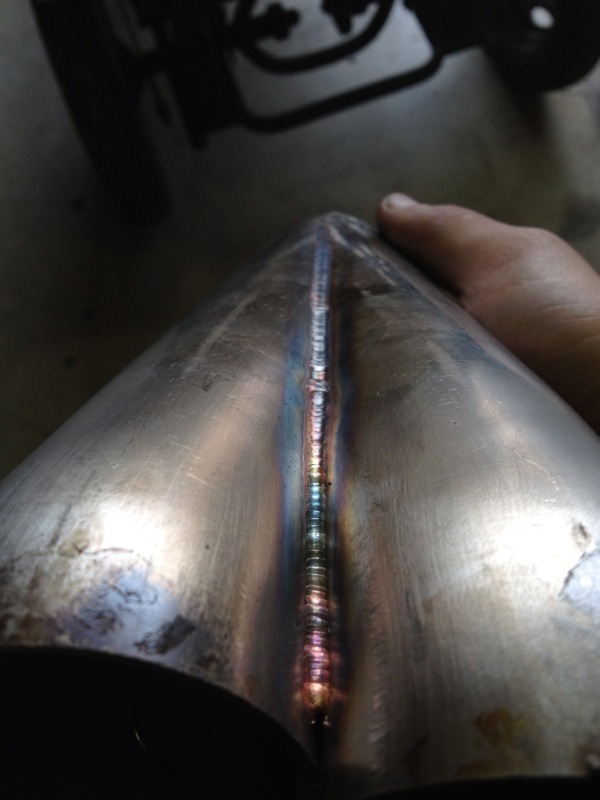
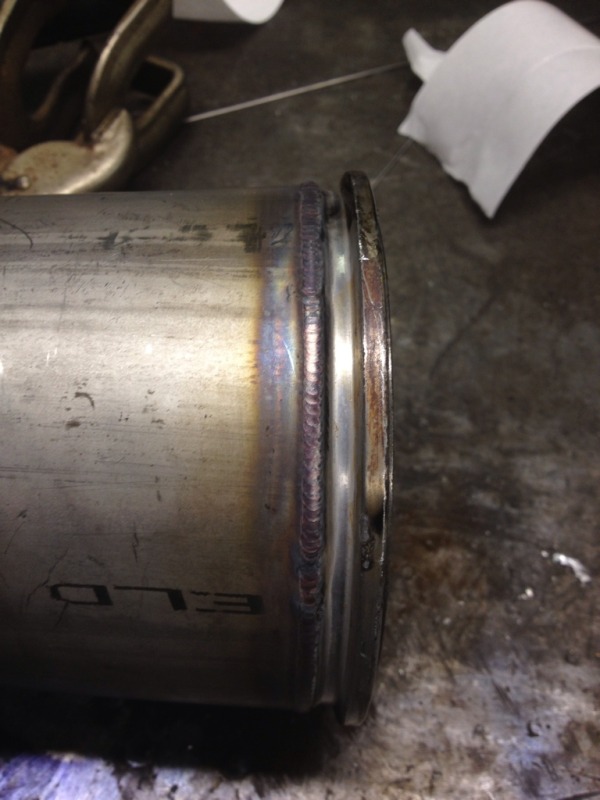
And here's a nice weld I wanted to show off.
I make my bend by cutting off the starting end of a u bend. Yes they're not perfectly symmetrical on the front and back.
Transfer dye for scribing a line
Device for scribing a line 45* off 90*. Scribed in 2 positions, 90* apart.
Both lines scribed
Then cut them all with a bit extra
As you can see I have plenty to finish these headers (big block Chevy)
Made the fixture for the 14" abrasive saw, the rear tightening "pin" has a bolt you tighten to get the back snug.
Then you end up with these, rough and in need of deburing.
Debured.
I tack one half at a time
Then I am done, here is a before, and after of trimming material. I do a rough cut with the cutoff wheel, then pass it on the belt sander.
Ooo sexy.
Then it gets flared out at the end
Video of flaring on hydraulic press, with anti size as a lube. Just so it's said I was being sarcastic when I said "what do I do now?"
http://i104.photobucket.com/albums/m...9B1E93FA5B.mp4
Made a tapered cone, this is the fixture for back purging. Lol a bulkhead worked nicely for the bung to fit.
All done!
And here's a nice weld I wanted to show off.
Last edited by Boost_addict; 05-04-2013 at 09:23 AM.
Reply
2
2


