Mental
 09-14-2014, 01:06 AM
#21
Junior Member

Join Date: Apr 2010
Location: Laguna Niguel
Posts: 231
Total Cats: 105
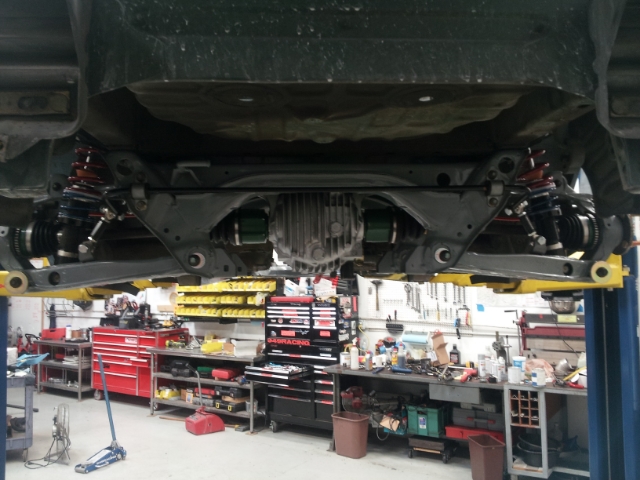
This diff is the one that came out of Nemo... smokin' (well, the housing is)
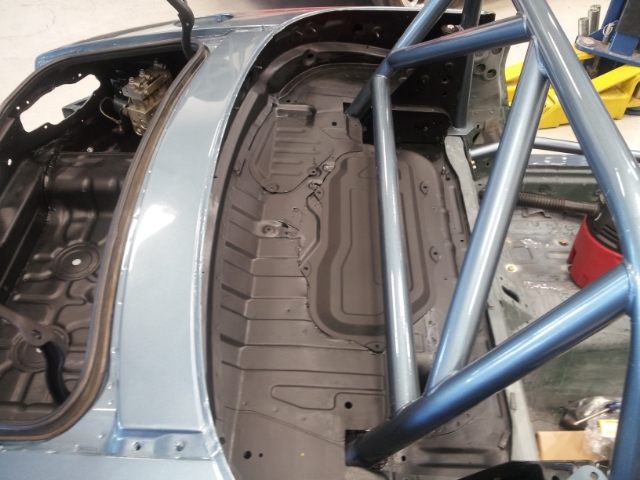
The tank is now installed with the lines to the filter and that part of the job is finished. Had to get it to this point to clear the lift to work on work projects.
Next comes interior paint and prep.

The tank is now installed with the lines to the filter and that part of the job is finished. Had to get it to this point to clear the lift to work on work projects.

Next comes interior paint and prep.

Reply
 0
0

0
09-14-2014, 01:07 AM
#22
Junior Member
Join Date: Apr 2010
Location: Laguna Niguel
Posts: 231
Total Cats: 105
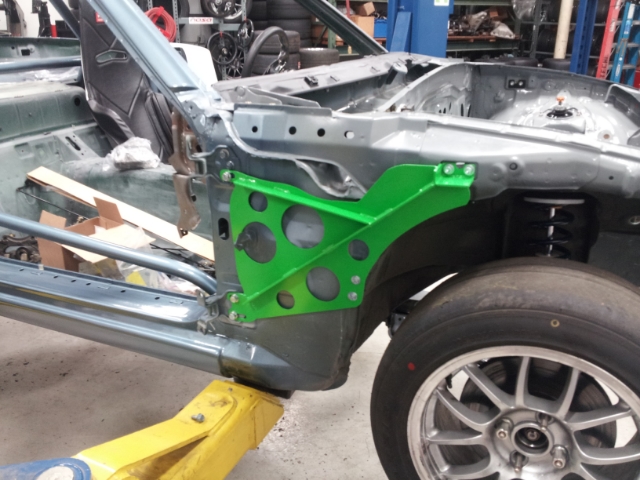
Not too much excitement here. Lots of painting and painting prep. Installed the Frog Arms.
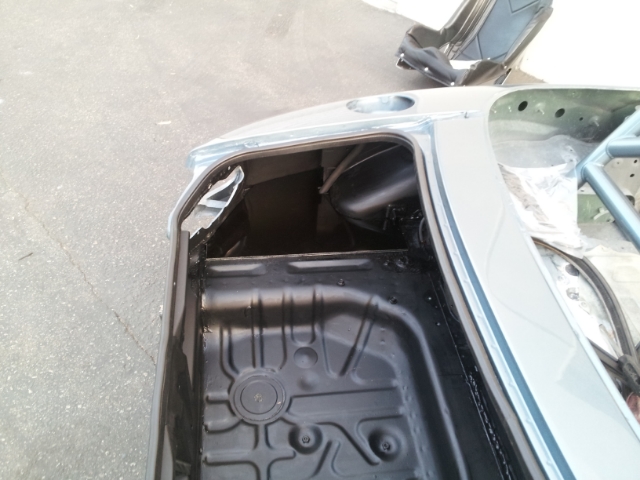
Painted the inside of the trunk.
Said frog arms.
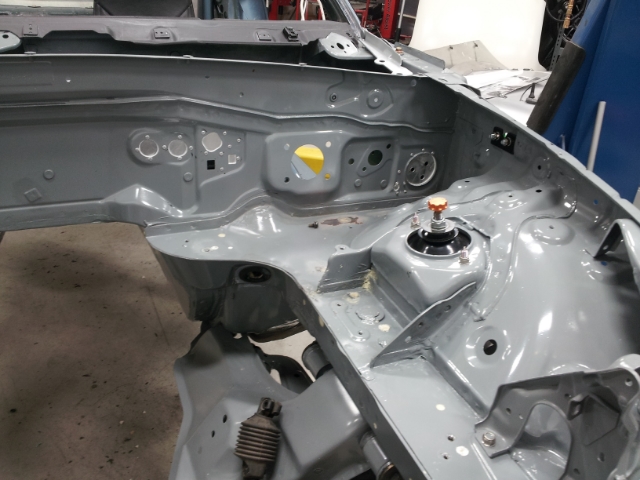
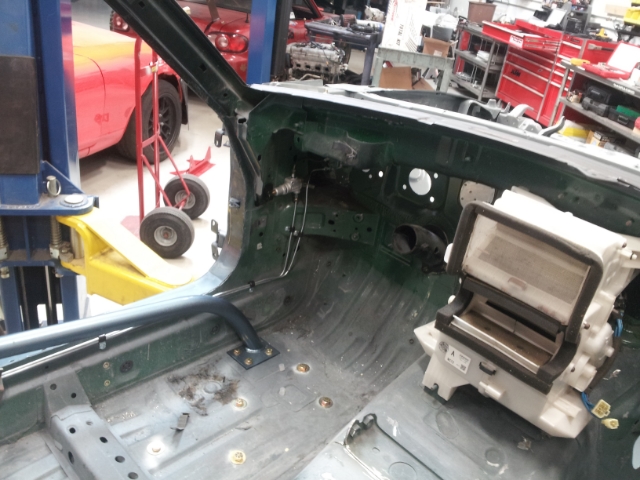
Put plates over all the holes in the firewall that are no longer being used.
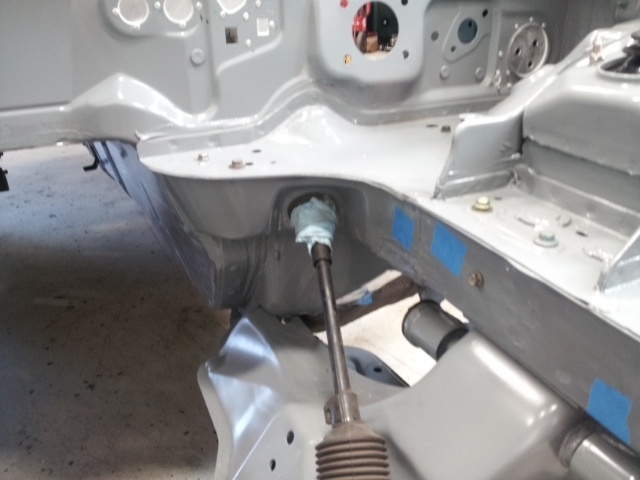
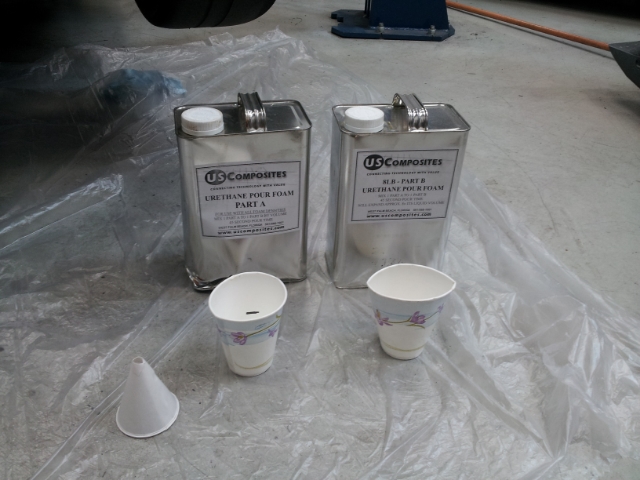
And put 8lb structural foam inside the frame rails. The foam is nasty stuff when it is active and expanding. It is so sticky that you can't really get it off of any thing it touches. Once it is hard, it takes a hammer and chisel to remove it, so I took care to not get it anywhere I didn't want it. I put bolts in all the holes that are threaded in case I want to use them in the future. You can see the blue tape over all the other holes. In retrospect, I would have used better tape on the bigger holes. The foam was able to push the blue tape off. So even with all the prep it still was a mess.
I would tilt the car to control the flow. It flows well for about 45 seconds after mixing starts and then it just gets messy. I would mix for 20 seconds, leaving me about 25 seconds to pour.

I marked a line on the inside of the cups to measure the 2 part liquids. You mix it 1:1. I used a third disposable cup to mix in. It would ruin anything else, so you might as well just throw it away. A supply of cheap funnels is also handy. These are the cone shaped paper cups with the tip cut off. Cheapest solution I could find. Cover the floor if you care about it. It will take force to remove the foam from the floor.
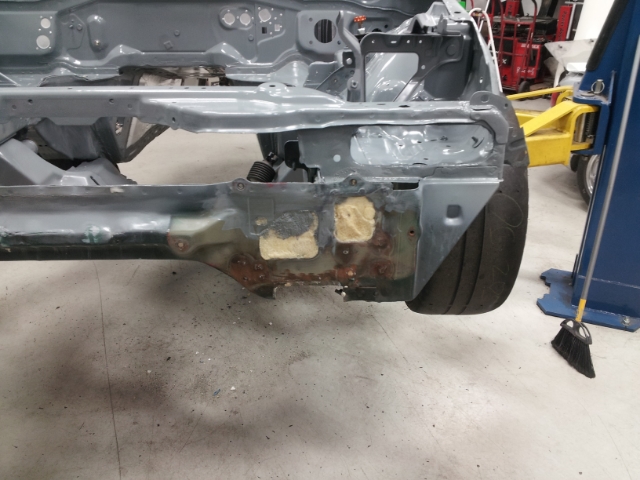
Here you can see the foam in the rails. I forgot to take some pictures, but my hands were covered in foam stuff and I did not want to touch my phone. I had already used a drill with wire wheel to remove some foam and then painted some. I had to add some holes to the rails to get better distribution.
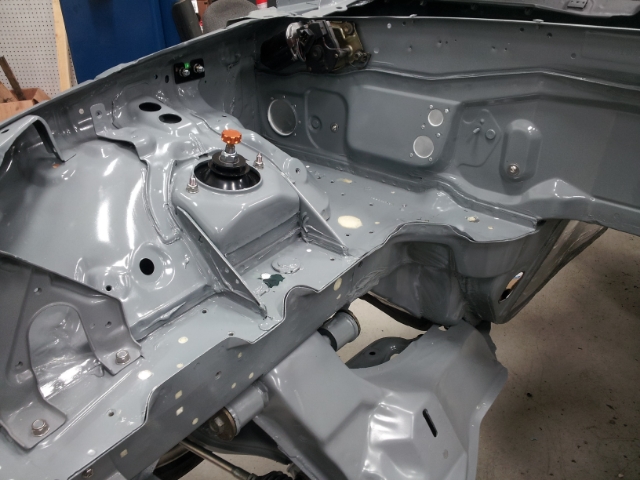
I topped off the holes with a paintable caulk to prevent water getting in the rails since it now has no way out. Next time I will foam before paint. I was not sure I was going to do it. Thinking about doing the windshield frame in 4lb spray in foam. Still 2 part foam, but pressurized in 2 cans with a mixing nozzle.
Painted the inside of the trunk.

Said frog arms.

Put plates over all the holes in the firewall that are no longer being used.
And put 8lb structural foam inside the frame rails. The foam is nasty stuff when it is active and expanding. It is so sticky that you can't really get it off of any thing it touches. Once it is hard, it takes a hammer and chisel to remove it, so I took care to not get it anywhere I didn't want it. I put bolts in all the holes that are threaded in case I want to use them in the future. You can see the blue tape over all the other holes. In retrospect, I would have used better tape on the bigger holes. The foam was able to push the blue tape off. So even with all the prep it still was a mess.

I would tilt the car to control the flow. It flows well for about 45 seconds after mixing starts and then it just gets messy. I would mix for 20 seconds, leaving me about 25 seconds to pour.

I marked a line on the inside of the cups to measure the 2 part liquids. You mix it 1:1. I used a third disposable cup to mix in. It would ruin anything else, so you might as well just throw it away. A supply of cheap funnels is also handy. These are the cone shaped paper cups with the tip cut off. Cheapest solution I could find. Cover the floor if you care about it. It will take force to remove the foam from the floor.

Here you can see the foam in the rails. I forgot to take some pictures, but my hands were covered in foam stuff and I did not want to touch my phone. I had already used a drill with wire wheel to remove some foam and then painted some. I had to add some holes to the rails to get better distribution.


I topped off the holes with a paintable caulk to prevent water getting in the rails since it now has no way out. Next time I will foam before paint. I was not sure I was going to do it. Thinking about doing the windshield frame in 4lb spray in foam. Still 2 part foam, but pressurized in 2 cans with a mixing nozzle.
Reply
0
0
09-14-2014, 01:08 AM
#23
Junior Member
Join Date: Apr 2010
Location: Laguna Niguel
Posts: 231
Total Cats: 105
Trying to increase the stiffness and reduce chassis flex and twist. The car I started and abandoned had the foam and seam welding. I dream of S2000 levels of stiffness in a Miata, but will settle for better than an NB in an NA.
More painting today. Got the package shelf area done. Trying to decide if I want a soft top or not, and what trim pieces to put back into the car. Getting tired of painting already.
Not great, but most of it will never be seen.
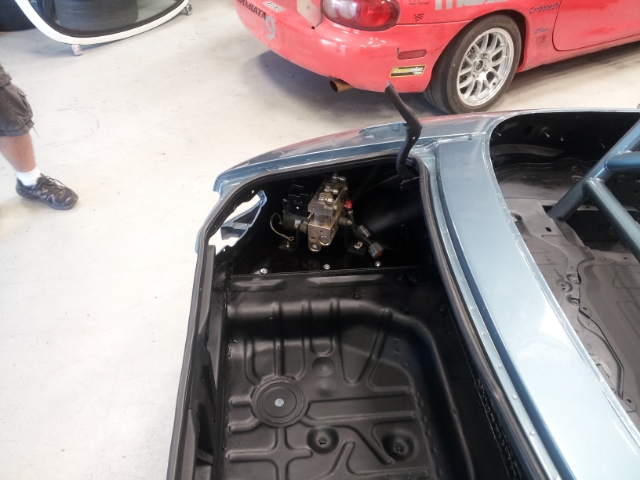
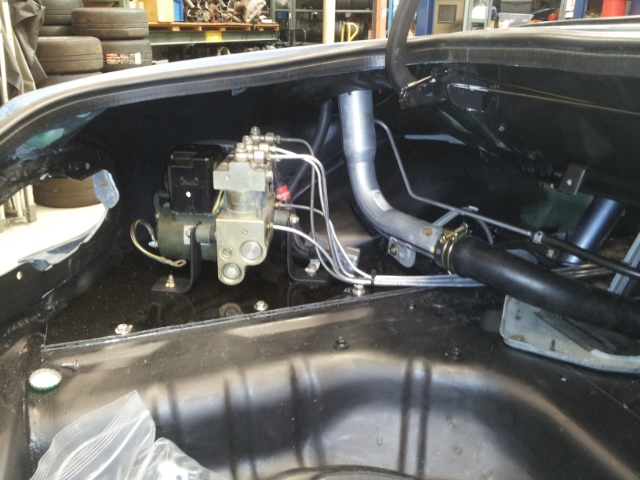
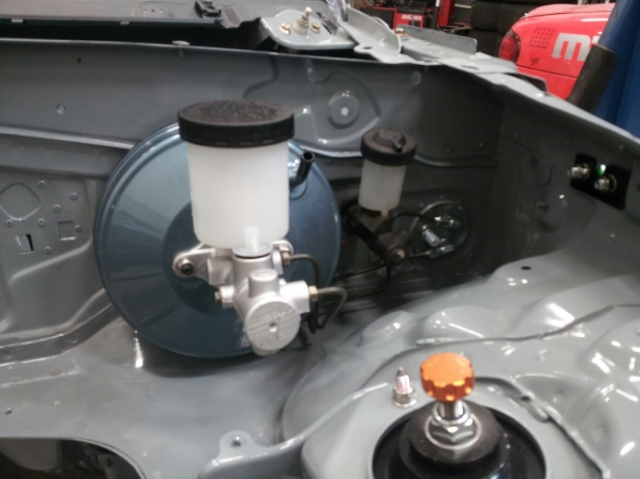
Installed the ABS pump.
Included sexy leg in shot. Guessing that is Chris's leg since he and Sonny were there getting Miller running again.
More painting today. Got the package shelf area done. Trying to decide if I want a soft top or not, and what trim pieces to put back into the car. Getting tired of painting already.

Not great, but most of it will never be seen.
Installed the ABS pump.

Included sexy leg in shot. Guessing that is Chris's leg since he and Sonny were there getting Miller running again.
Reply
0
0
09-14-2014, 01:09 AM
#24
Junior Member
Join Date: Apr 2010
Location: Laguna Niguel
Posts: 231
Total Cats: 105
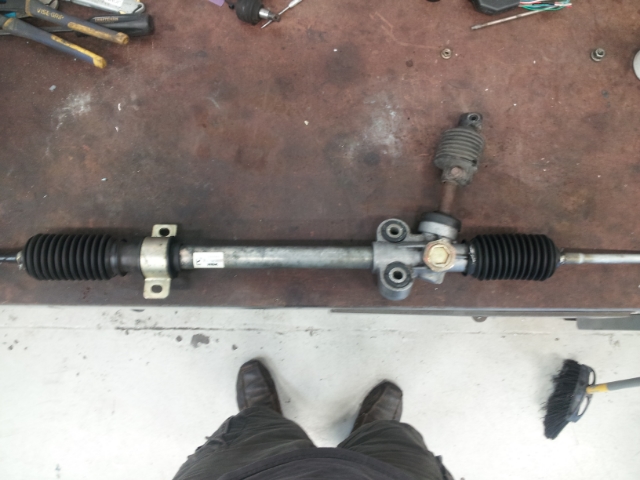
Got this at the 949 Racing swap meet. Going to give it a try and see if I like the ratio better.
Ran the interior brake lines.
Messed up and used a 45� flare tool for the AN fittings instead of a 37� tool. I guess I am going to have to pull the lines and reflare them. Not happy about it. Not real happy with how it looks but I don't think I will bother to redo the lines for that. Ran out of fittings, too. Reload and continue after getting ready for the next race.

Ran the interior brake lines.


Messed up and used a 45� flare tool for the AN fittings instead of a 37� tool. I guess I am going to have to pull the lines and reflare them. Not happy about it. Not real happy with how it looks but I don't think I will bother to redo the lines for that. Ran out of fittings, too. Reload and continue after getting ready for the next race.
Reply
0
0
09-14-2014, 01:09 AM
#25
Junior Member
Join Date: Apr 2010
Location: Laguna Niguel
Posts: 231
Total Cats: 105
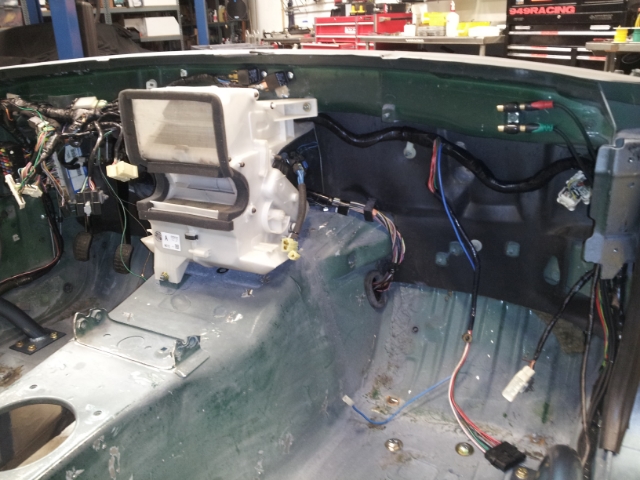
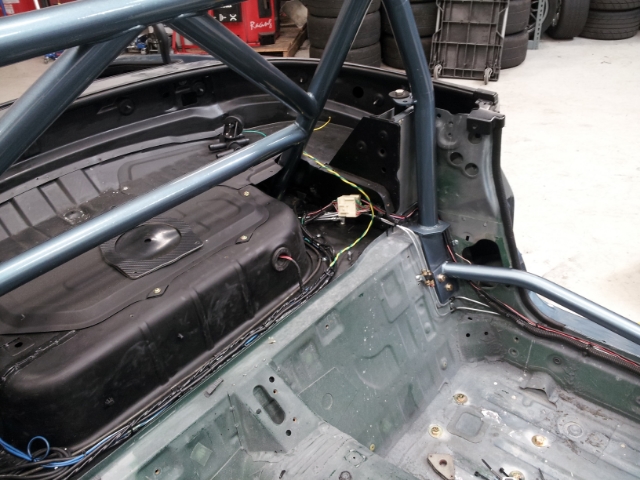
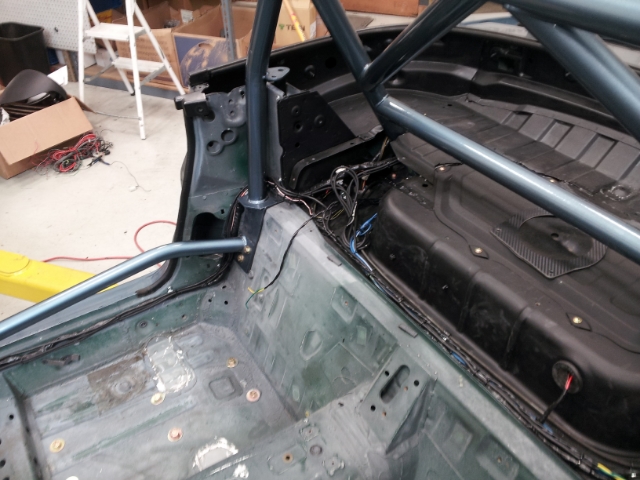
Been knocking out electrical for the last couple of weeks. No reason to post pictures of the mess. I am not real happy with the outcome, but so far everything works. I figure I am about 95% done inside the car, 80% in the trunk and 20% under the hood. Need to install the engine and get busy on that harness.
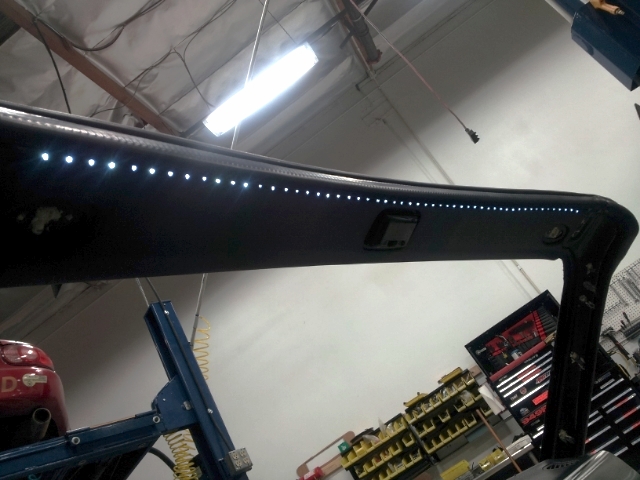
This picture shows part of my interior lights. I took a NB windshield header trim piece, drilled a line of holes, installed a LED light strip, and wired it to the stock NB interior light switch. Not a great picture, but I think you can see what I was shooting for.
The rest of this series just shows the electrical in it's current state. I have had the dash in the car for trouble shooting, but removed it to work on finishing out the interior.
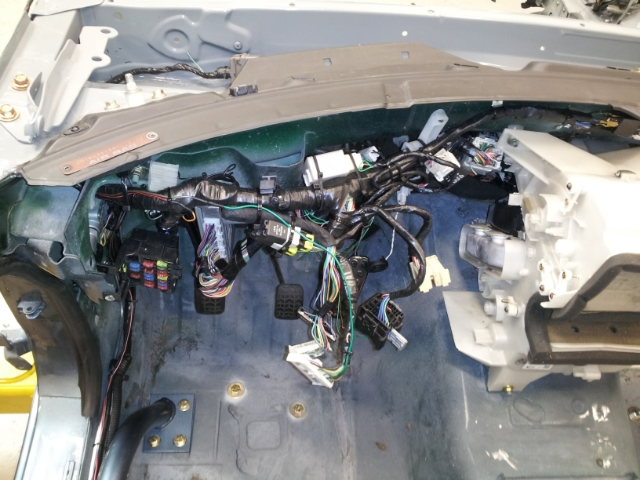
I have a zip tie fetish going on here.
This picture shows part of my interior lights. I took a NB windshield header trim piece, drilled a line of holes, installed a LED light strip, and wired it to the stock NB interior light switch. Not a great picture, but I think you can see what I was shooting for.

The rest of this series just shows the electrical in it's current state. I have had the dash in the car for trouble shooting, but removed it to work on finishing out the interior.


I have a zip tie fetish going on here.
Reply
0
0
09-14-2014, 01:10 AM
#26
Junior Member
Join Date: Apr 2010
Location: Laguna Niguel
Posts: 231
Total Cats: 105
Been too busy attempting to make money and not spending any on stupid projects.
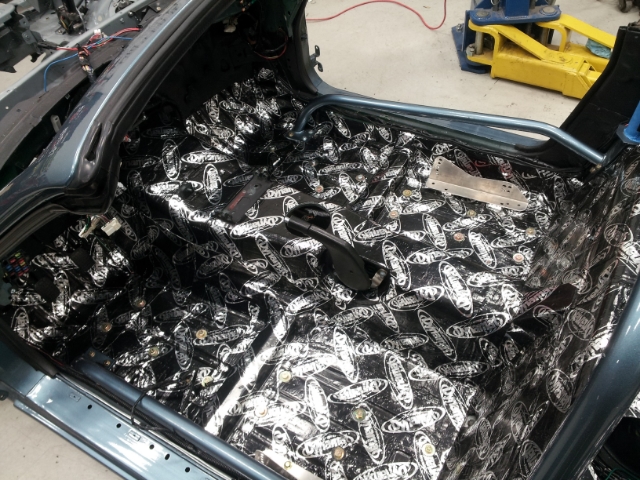
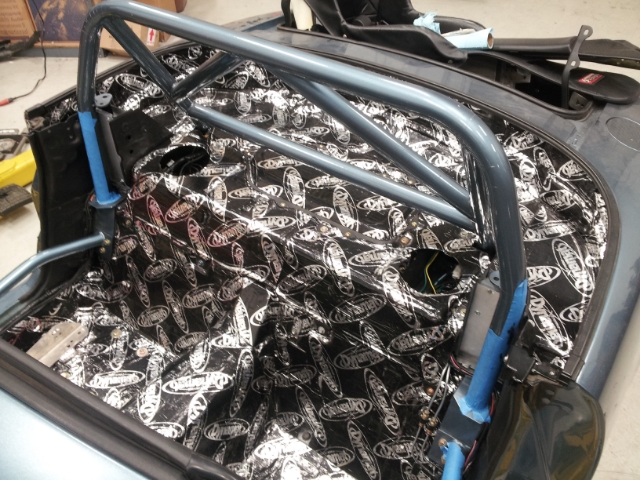
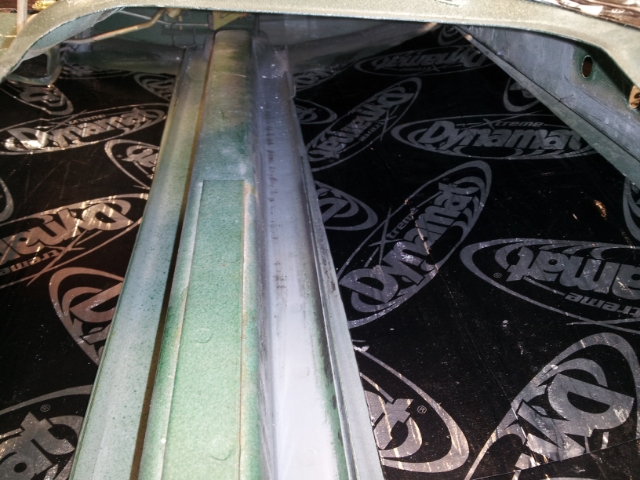
Finally finished with the sound deadening on the tub:
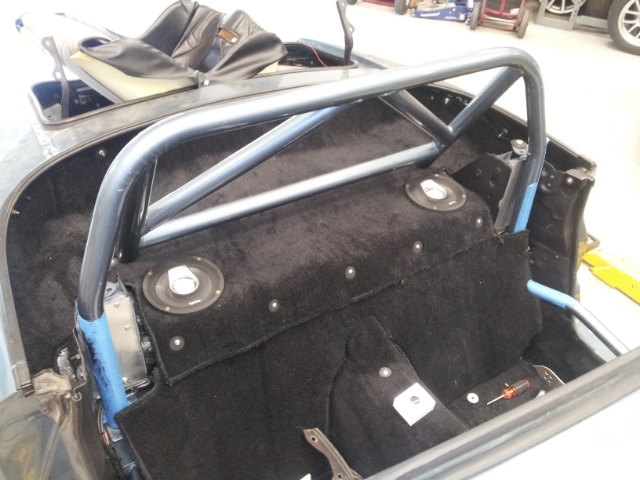
Installed the rear deck carpeting and speakers:
Not planning on having a soft top at this time. I will go back and touch up the bolts and screw heads to make them less noticeable.
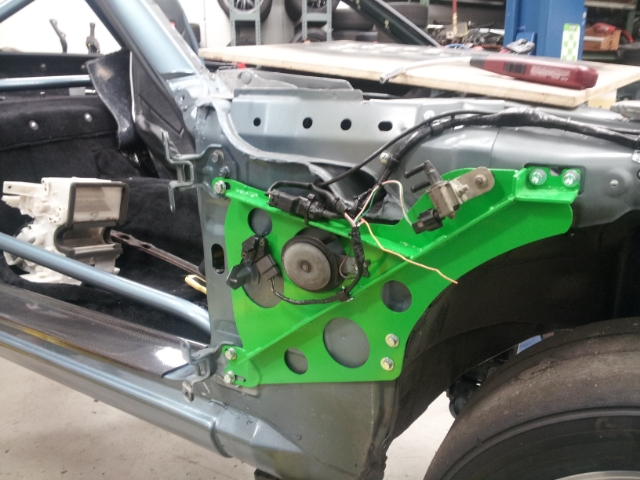
I installed some of the emission / engine controls:
And I have installed the seats:
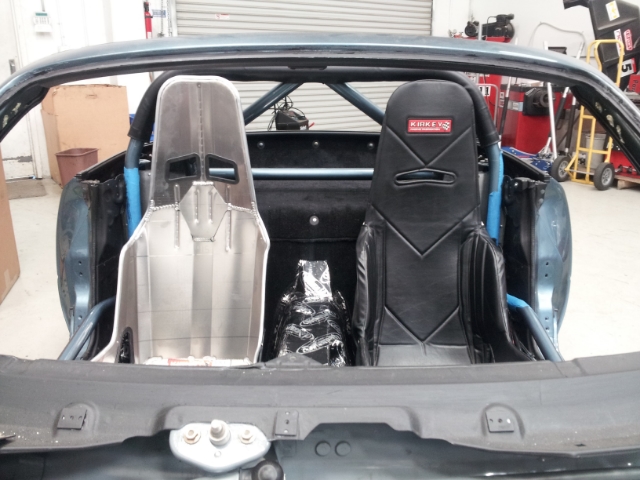
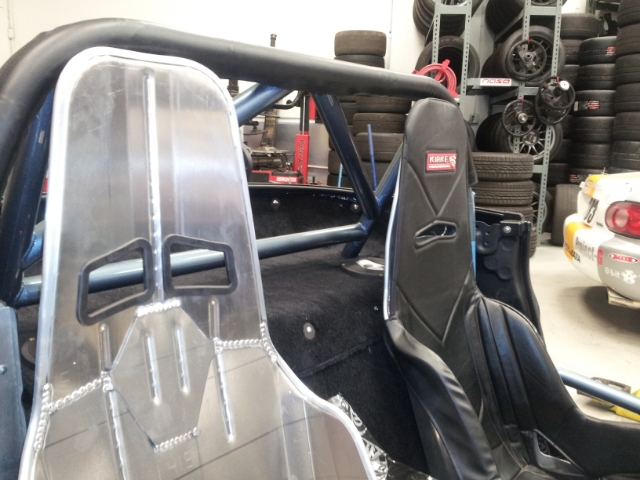
Still need to add back braces for those.
Today I am going to install some Schroth 5 point ASM belts, tidy up some interior wiring, install the floorpan carpet, install the heater core, install the dash, and hook up the steering. Hopefully all of that will be for the last time...
Finally finished with the sound deadening on the tub:


Installed the rear deck carpeting and speakers:

Not planning on having a soft top at this time. I will go back and touch up the bolts and screw heads to make them less noticeable.
I installed some of the emission / engine controls:

And I have installed the seats:


Still need to add back braces for those.
Today I am going to install some Schroth 5 point ASM belts, tidy up some interior wiring, install the floorpan carpet, install the heater core, install the dash, and hook up the steering. Hopefully all of that will be for the last time...
Reply
0
0
09-14-2014, 01:12 AM
#27
Junior Member
Join Date: Apr 2010
Location: Laguna Niguel
Posts: 231
Total Cats: 105
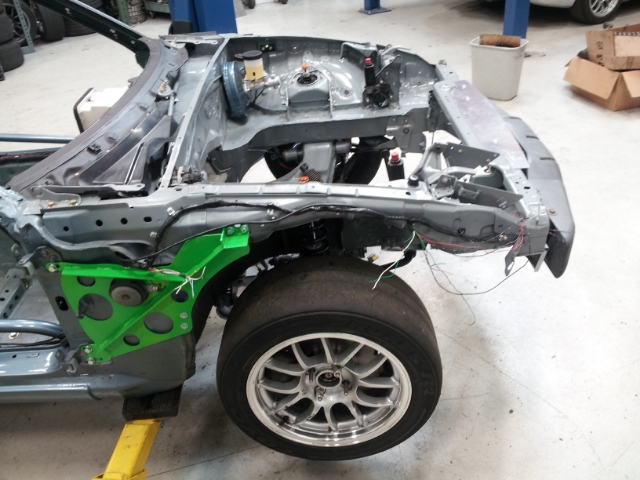
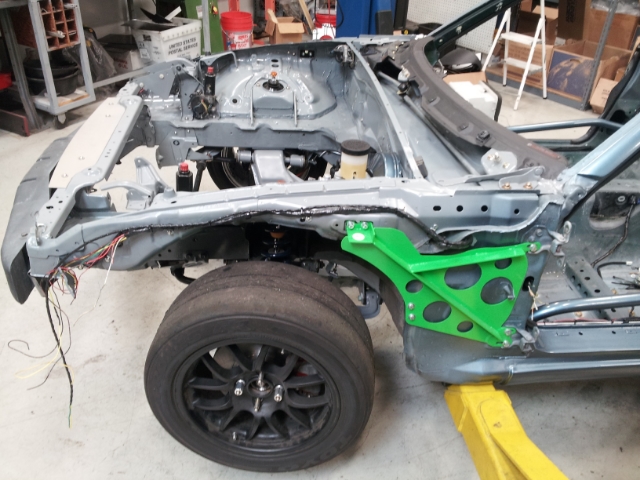
Got sidetracked on building a new race car, AKA earning money. But we are back on track now. E thinks we need a new name for this car. Stupid really applies to the chemically dipped, seam welded, foam filled NA tub that I have sitting outside the shop (anyone need a project tub?)
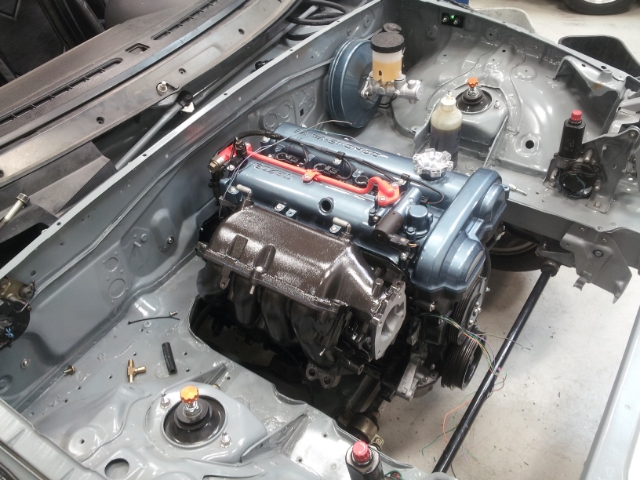
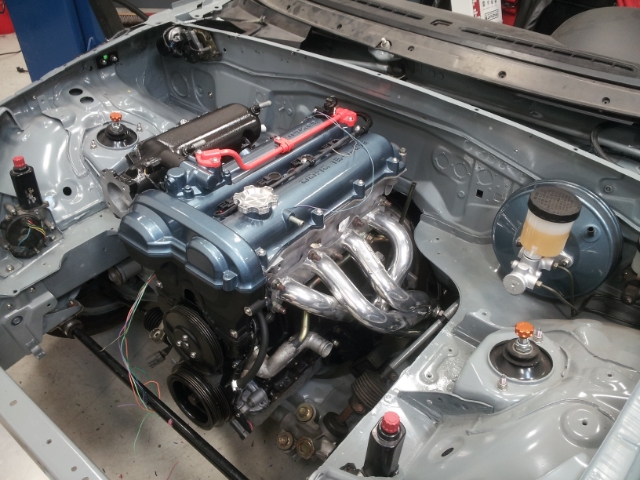
On to business. I found the time to put the engine in and do the engine wiring. The wiring on the engine was nearly a 40 hour job... so if you want me to duplicate it, plan on spending $2000 to start. I did not take any pics of that process, but here are the near finished results.
Tight fit for the wires. I smoothed sharp edges and paid attention to bending and chafing areas.
I will tighten things up once I do the final install. I have finished the engine wiring and moved on to the headlights but need to take more pictures. NB and NA headlights are wired differently. NB uses ground switching for HI/LO beam, and NA uses power switching. I have an NB wiring harness in this car with NA headlights. Took me a few minutes of thinking to figure out the work around without pulling the harness... relays to the rescue.
On to business. I found the time to put the engine in and do the engine wiring. The wiring on the engine was nearly a 40 hour job... so if you want me to duplicate it, plan on spending $2000 to start. I did not take any pics of that process, but here are the near finished results.


Tight fit for the wires. I smoothed sharp edges and paid attention to bending and chafing areas.

I will tighten things up once I do the final install. I have finished the engine wiring and moved on to the headlights but need to take more pictures. NB and NA headlights are wired differently. NB uses ground switching for HI/LO beam, and NA uses power switching. I have an NB wiring harness in this car with NA headlights. Took me a few minutes of thinking to figure out the work around without pulling the harness... relays to the rescue.
Reply
0
0
09-14-2014, 01:13 AM
#28
Junior Member
Join Date: Apr 2010
Location: Laguna Niguel
Posts: 231
Total Cats: 105
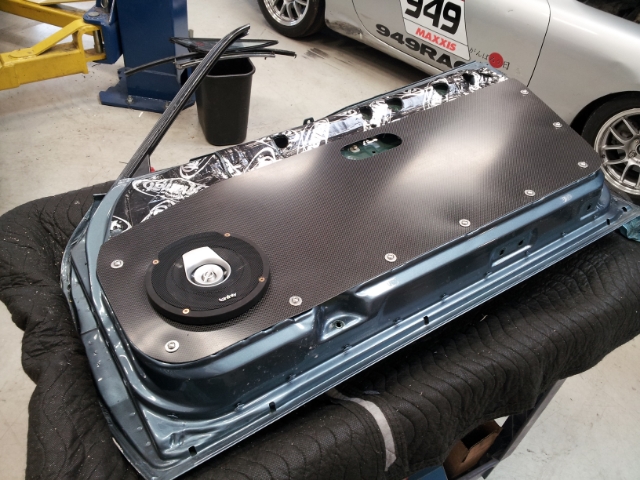
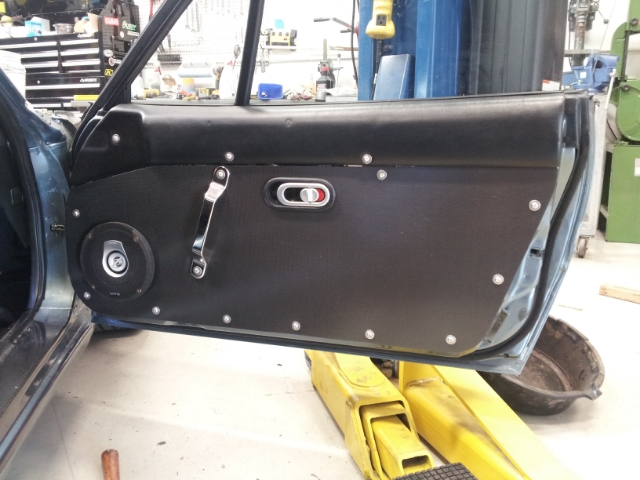
Adding mass to a door:
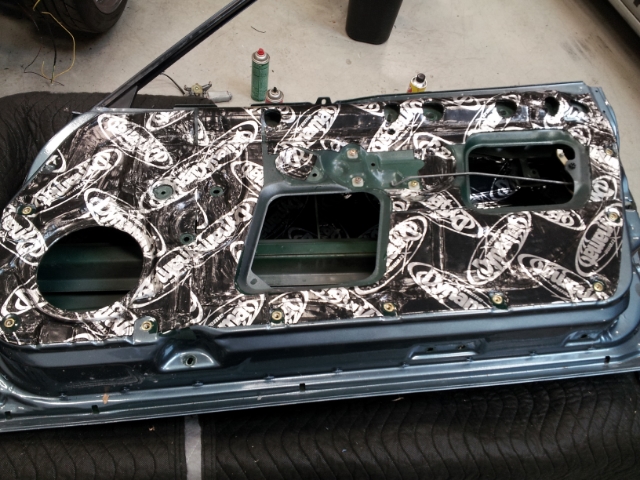
Making panels to cover access holes in the doors:
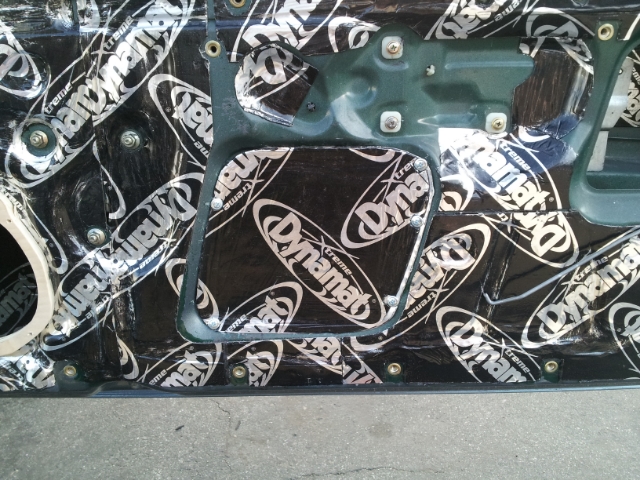
Also worked on the window regulator to get it working better. 10 hours into that door and still not done with it. Have not touched the other side yet.
Getting stuff to fit:
Headlights in:
Door and trunklid installed:

The door looks darker in this picture, but I can't see it looking the other way. Probably my lack of skill with a cell phone camera.
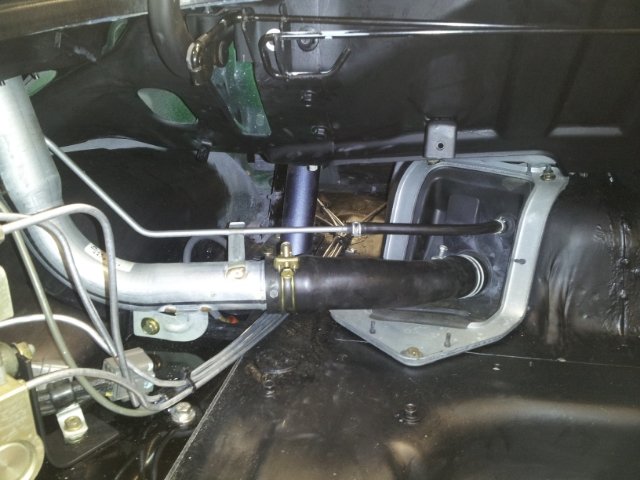
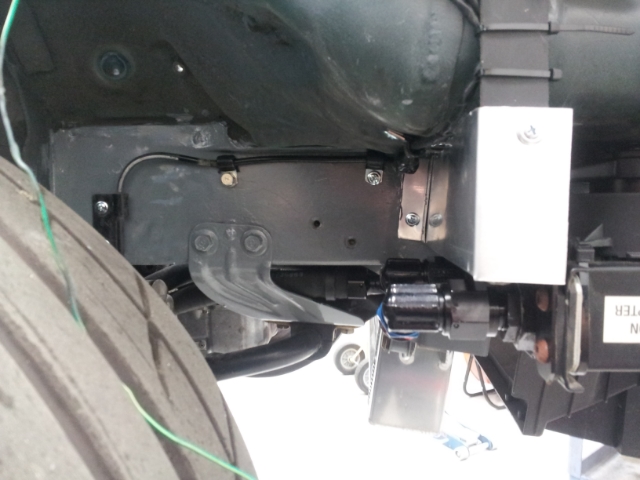
Brake booster vacuum line:
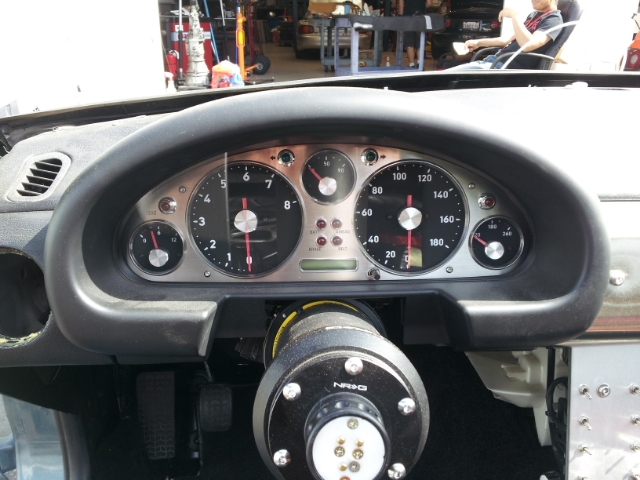
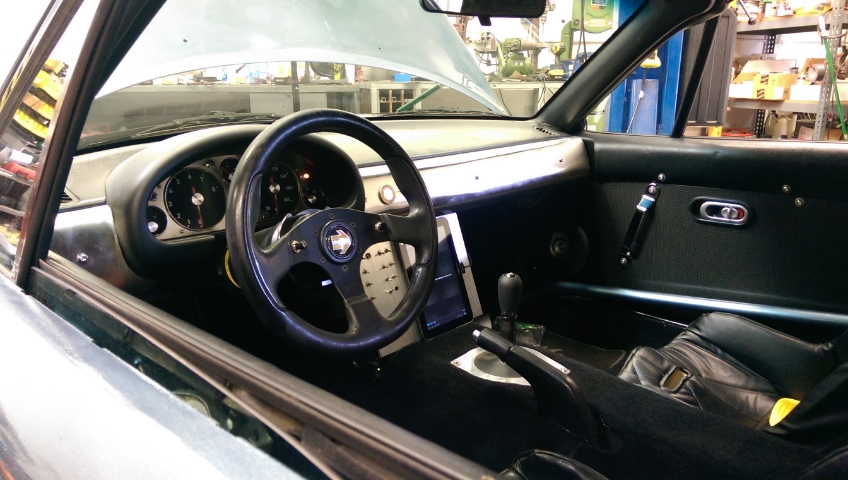
Gauges:


Making panels to cover access holes in the doors:

Also worked on the window regulator to get it working better. 10 hours into that door and still not done with it. Have not touched the other side yet.
Getting stuff to fit:

Headlights in:

Door and trunklid installed:

The door looks darker in this picture, but I can't see it looking the other way. Probably my lack of skill with a cell phone camera.
Brake booster vacuum line:

Gauges:

Reply
0
0
09-14-2014, 01:14 AM
#29
Junior Member
Join Date: Apr 2010
Location: Laguna Niguel
Posts: 231
Total Cats: 105
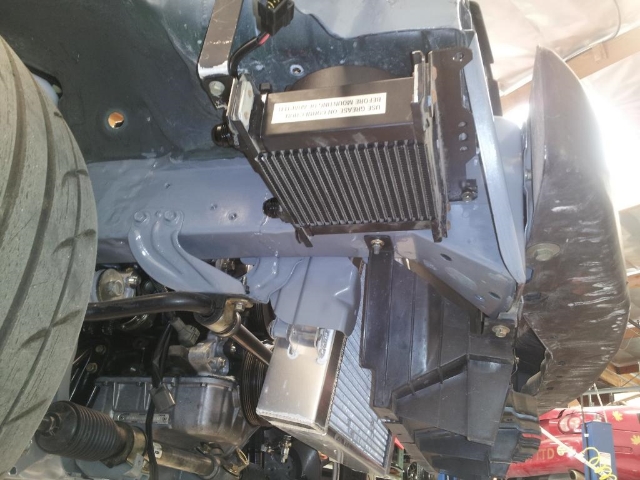
Oil cooler with a shield to keep stuff out of it.
Another shot
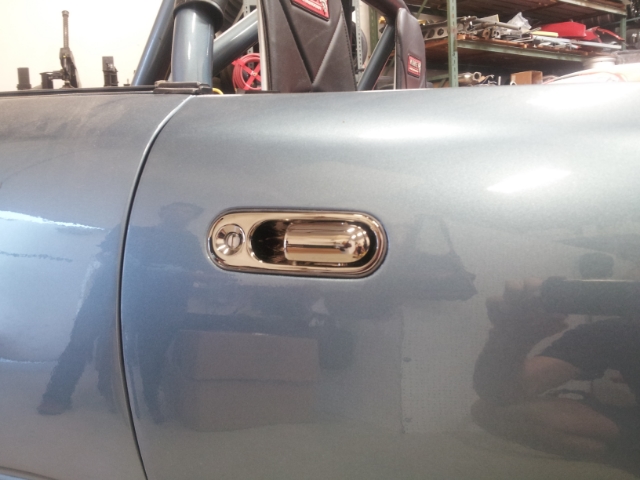
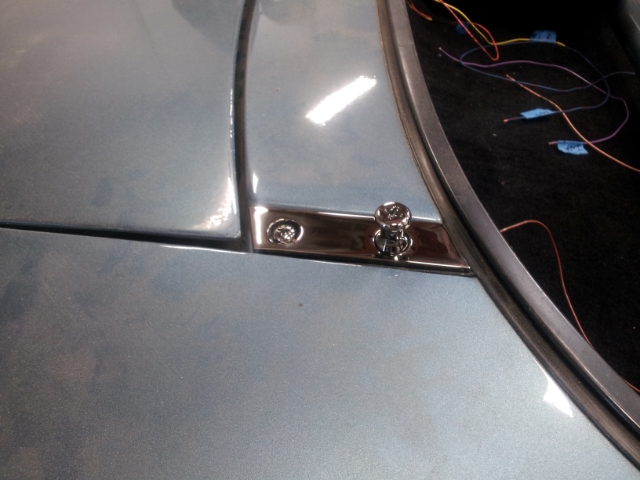
Some Black Chrome plated accents:
The nearly done door. Need to take another picture now that I have finished it. Also done with the driver's side.
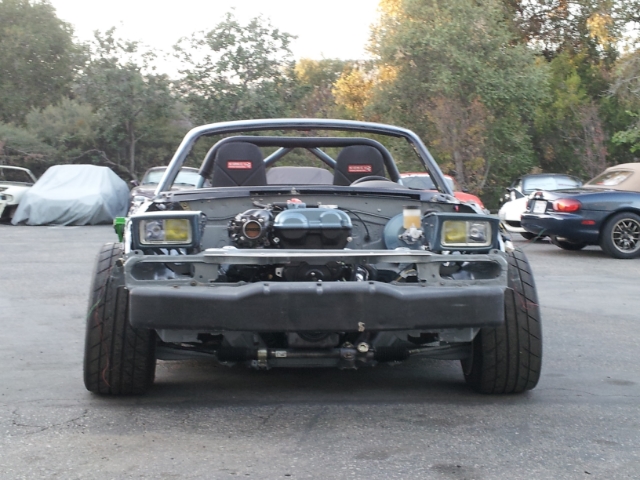
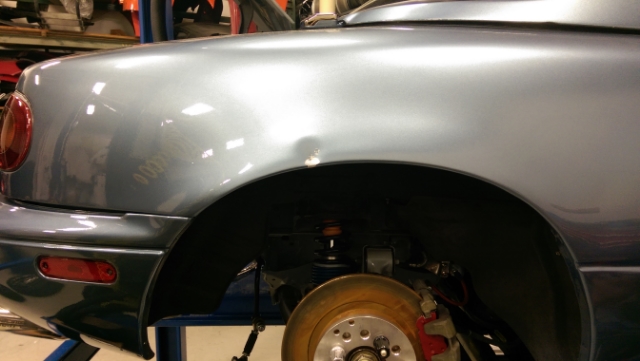
First fit of the body parts. Not great, a combination of cheap fenders and a bent body.
I have it a bit better now, but it won't be great without taking it to a place that can apply some force to the mounting points.

Another shot

Some Black Chrome plated accents:


The nearly done door. Need to take another picture now that I have finished it. Also done with the driver's side.

First fit of the body parts. Not great, a combination of cheap fenders and a bent body.


I have it a bit better now, but it won't be great without taking it to a place that can apply some force to the mounting points.
Reply
0
0
09-14-2014, 01:15 AM
#30
Junior Member
Join Date: Apr 2010
Location: Laguna Niguel
Posts: 231
Total Cats: 105
Installed Aerocatches. The tool I was using to cut the holes skipped out, dented the hood and put a huge gouge in the paint. It gets a professional detail on Monday, will see what they can do with it beyond touch up. May have to get it resprayed. Only slightly bummed since I know the dents and scratches will come with driving around LA.
Another shot where you can see the dent more clearly. Just to the right (in the picture) of the passenger side (RH) catch. You can also see how bad the body panels line up. I forgot that this car is bent.
Also finished my stainless steel dash pad cover... the small bit to the left of the dash pod.
I got a new phone that is taking pictures in a different aspect ratio. Will this bother the engineer in me enough to go back and take new pictures in the old ratio? Time will tell...

Another shot where you can see the dent more clearly. Just to the right (in the picture) of the passenger side (RH) catch. You can also see how bad the body panels line up. I forgot that this car is bent.

Also finished my stainless steel dash pad cover... the small bit to the left of the dash pod.

I got a new phone that is taking pictures in a different aspect ratio. Will this bother the engineer in me enough to go back and take new pictures in the old ratio? Time will tell...
Reply
0
0
09-14-2014, 01:15 AM
#31
Junior Member
Join Date: Apr 2010
Location: Laguna Niguel
Posts: 231
Total Cats: 105
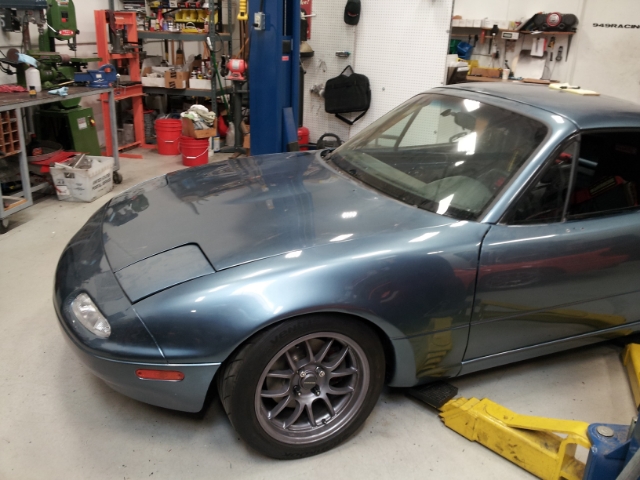
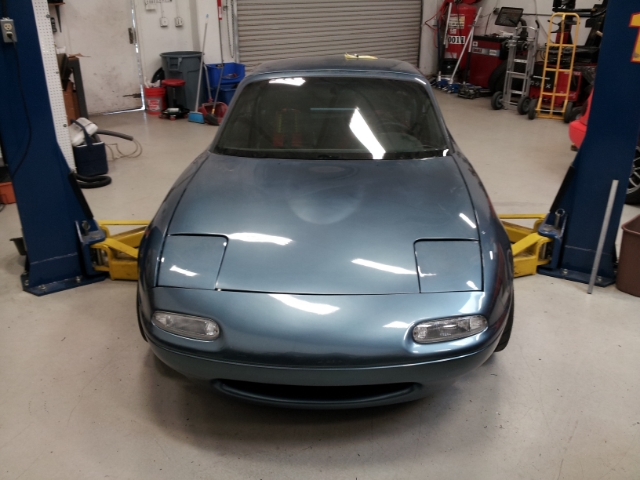
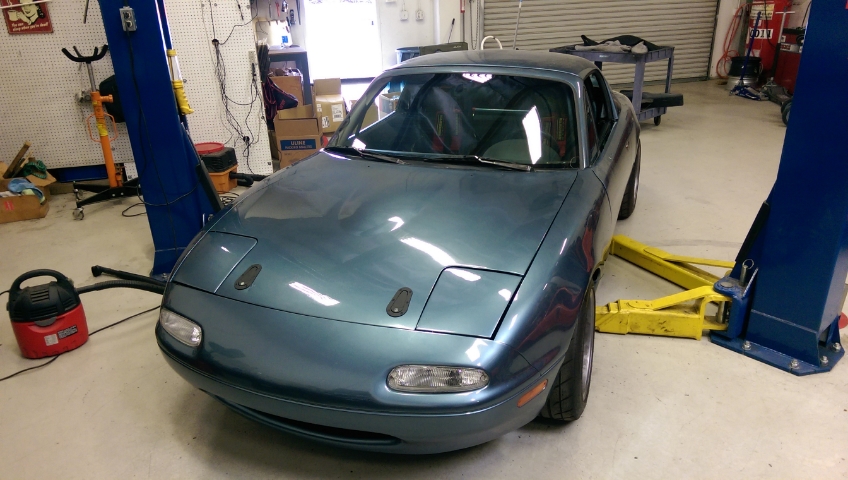
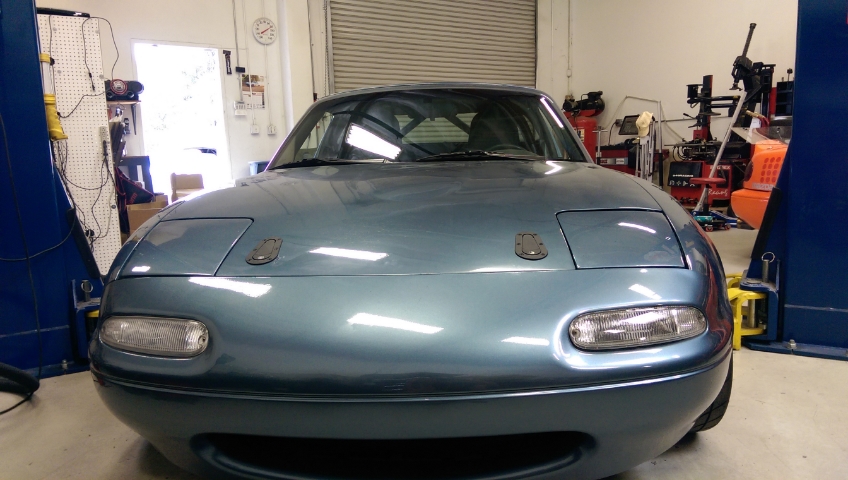
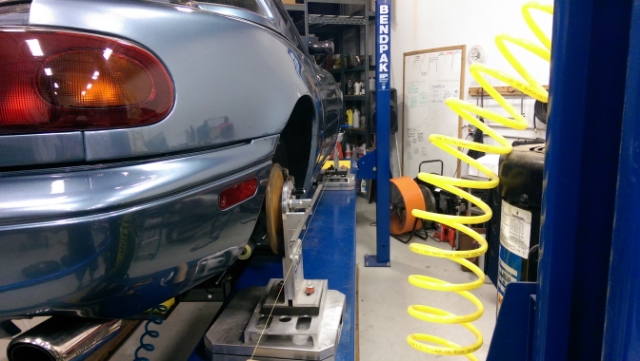
Had it polished. Installed the window trim, mirrors, and lip. Just need to get tires mounted on the wheels and the exterior will be complete. Still does not run... just a minor detail. Suspension is not set up yet. Will do that with the correct wheels and tires on it.
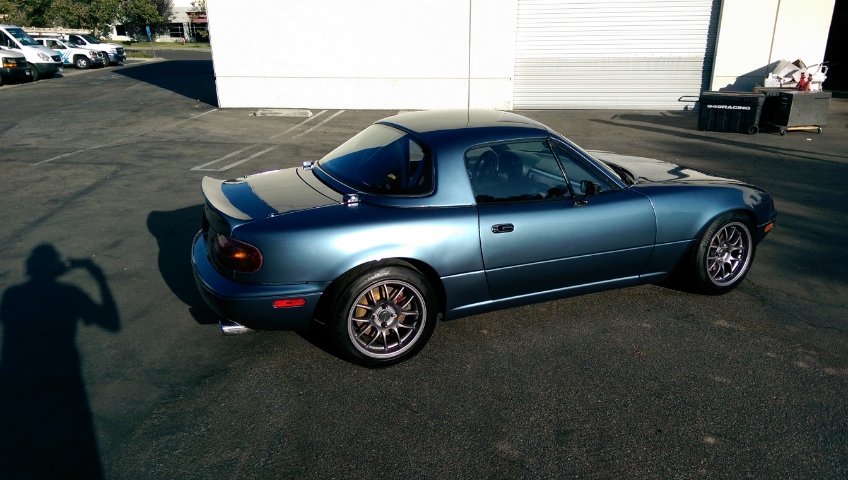
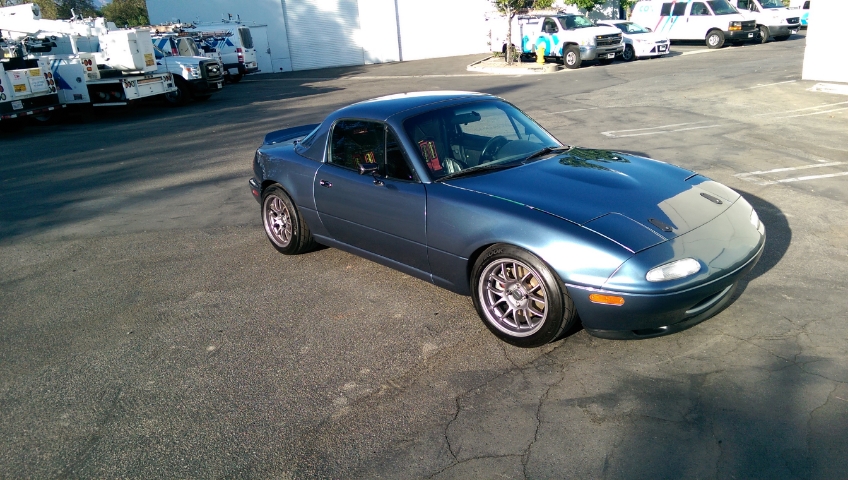
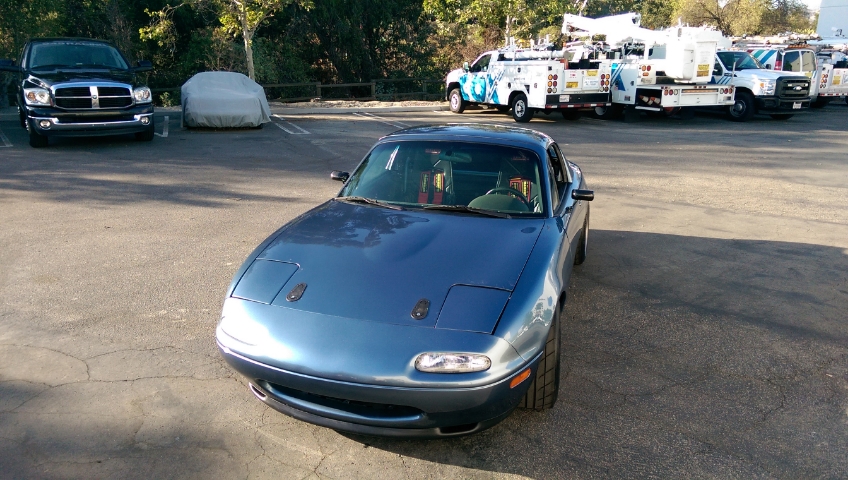
The finish line is in sight, but still a couple of weeks away.


The finish line is in sight, but still a couple of weeks away.
Reply
0
0
09-14-2014, 01:16 AM
#32
Junior Member
Join Date: Apr 2010
Location: Laguna Niguel
Posts: 231
Total Cats: 105
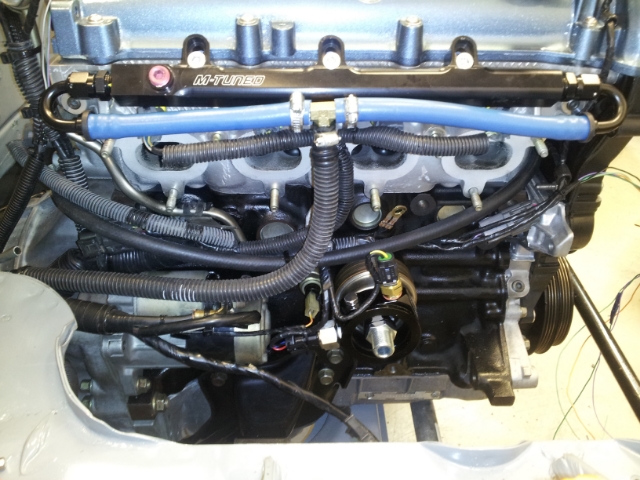
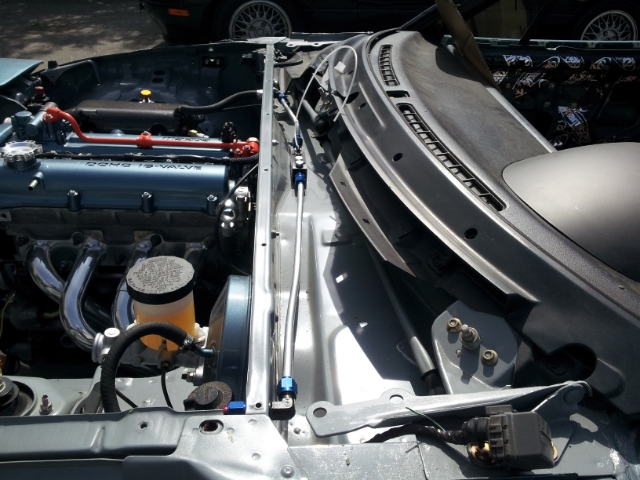
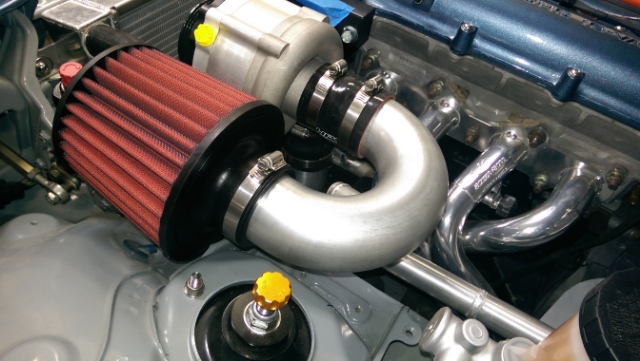
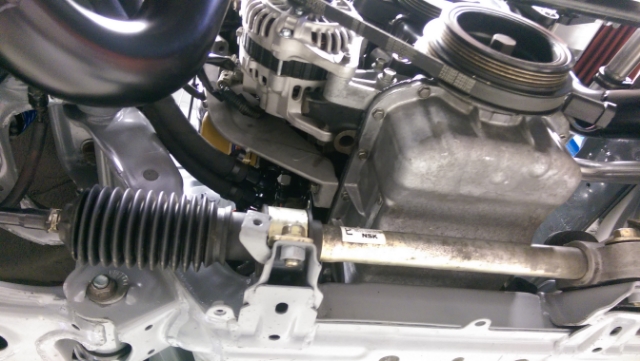
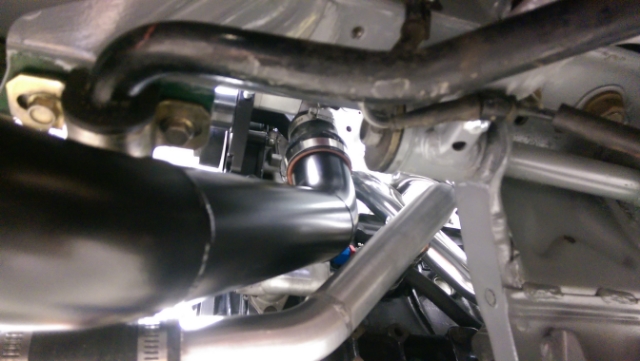
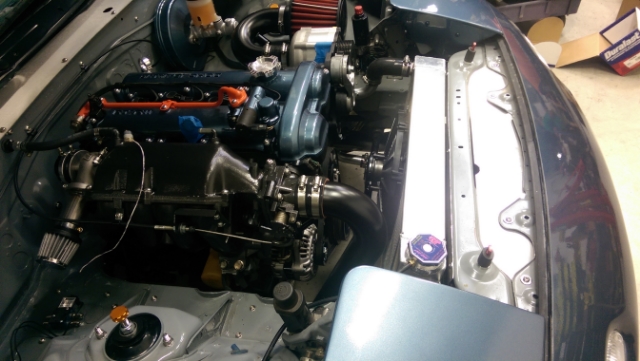
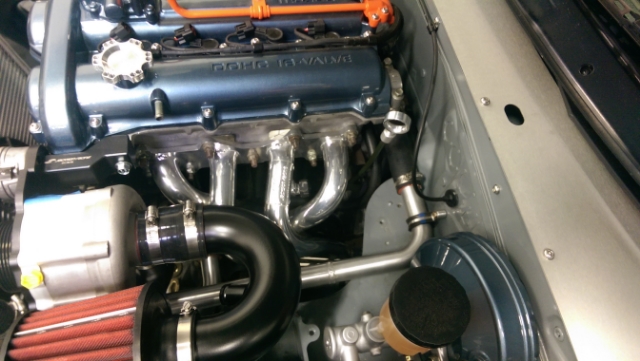
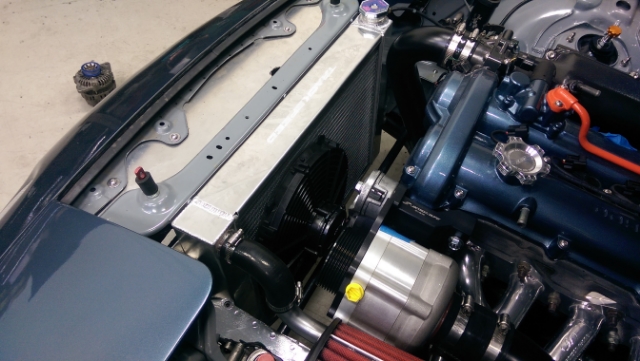
Now that Jackson Racing has released information regarding their new CARB approved Rotrex supercharger kits for the Miata, I can resume posting on my build. Most of this has been done for months...
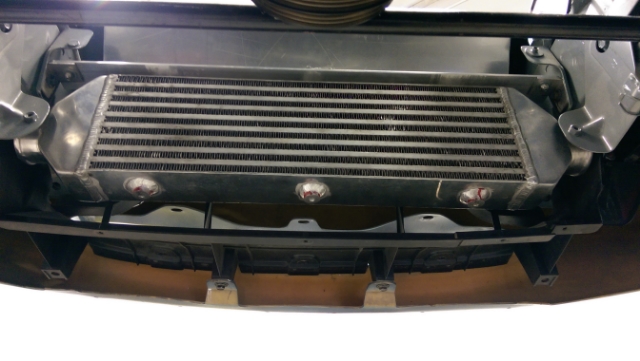
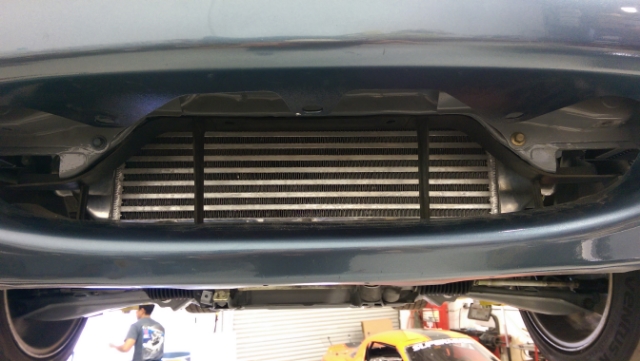
FMIC
I am setting the charger up to make max boost and will use this to control the pressure in the intake based on what fuel I am using.

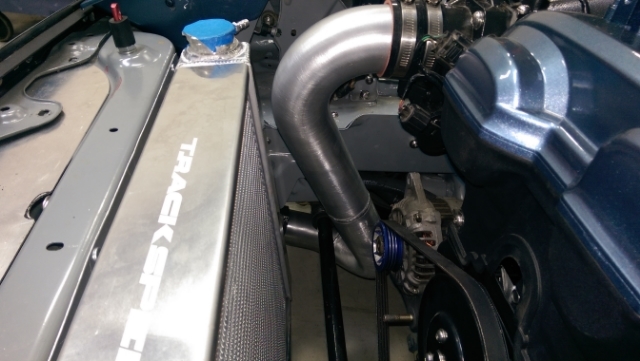
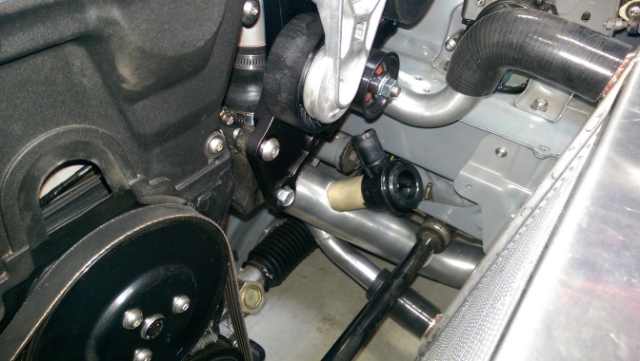
Charge piping and other stuff done by our local race exhaust specialist, Hytech Exhaust. Prior to powder coating.
And while waiting on some parts... Sonny does the alignment.
A little setback. Should go into the body shop Tuesday and out on Thursday for a little road trip.
Parts came in.
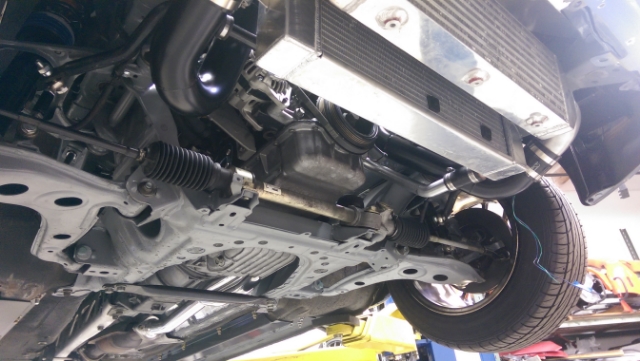
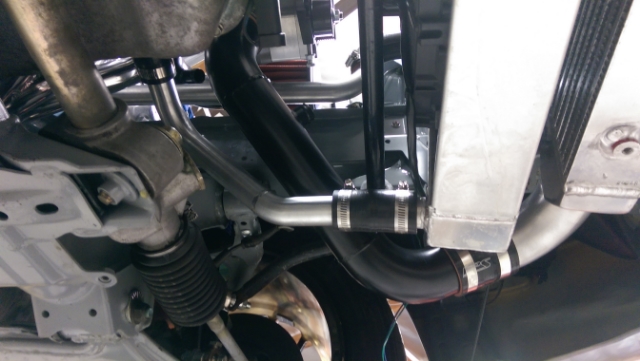
I had to modify this brace to clear the oil cooler stuff.
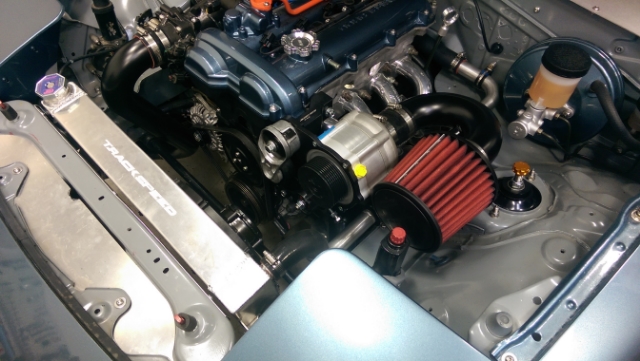
If it goes according to plan, I will have it running today. Put some miles on it, a little dyno tuning, a trip to the body shop, and then a road trip to MRLS.
FMIC


I am setting the charger up to make max boost and will use this to control the pressure in the intake based on what fuel I am using.

Charge piping and other stuff done by our local race exhaust specialist, Hytech Exhaust. Prior to powder coating.


And while waiting on some parts... Sonny does the alignment.

A little setback. Should go into the body shop Tuesday and out on Thursday for a little road trip.

Parts came in.


I had to modify this brace to clear the oil cooler stuff.


If it goes according to plan, I will have it running today. Put some miles on it, a little dyno tuning, a trip to the body shop, and then a road trip to MRLS.
Reply
0
0
09-14-2014, 01:21 AM
#33
Junior Member
Join Date: Apr 2010
Location: Laguna Niguel
Posts: 231
Total Cats: 105
Did not make it to MRLS. Just got it running a couple of days ago. Took it to Kinod last night and drove it home for the first time. Need to rack up some break in miles before we start to tune it in earnest. I have some more pictures to add to the album before I can make more updates.
Big thanks to 949Racing, Jackson Racing, and Alex from 2nd Chance Roadsters for making all of this possible.
Big thanks to 949Racing, Jackson Racing, and Alex from 2nd Chance Roadsters for making all of this possible.
Reply
0
0
09-14-2014, 11:07 AM
#35
Elite Member
iTrader: (13)

Join Date: Dec 2006
Location: Taos, New mexico
Posts: 6,612
Total Cats: 567
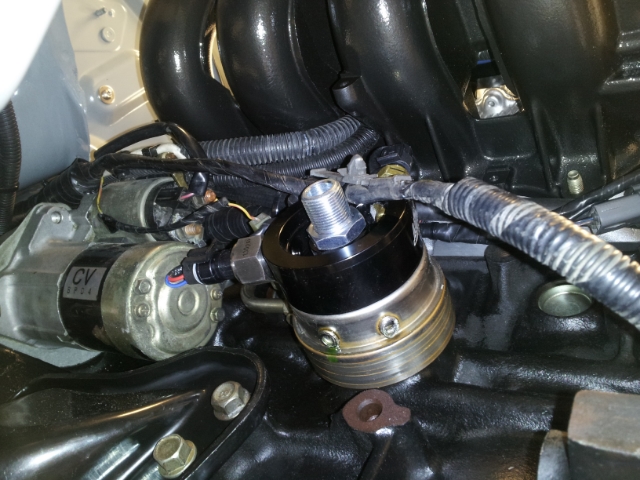
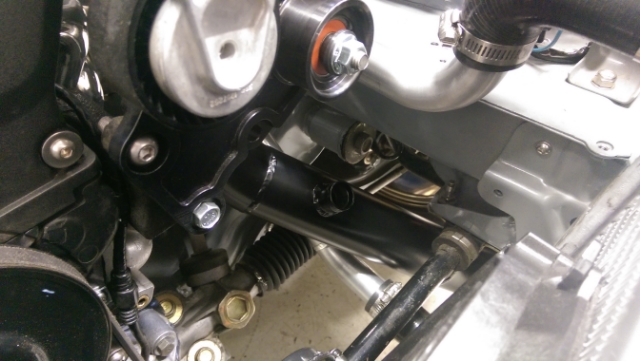
Whoah, amazing job on this thing. Quite a few things I have never seen done, for instance the wastegate above.
I too would like to know more about the IM/wastegate.. I understand how it works in theory, but that is strange!
I too would like to know more about the IM/wastegate.. I understand how it works in theory, but that is strange!
Reply
0
0
 09-14-2014, 11:20 AM
#37
Bannisheded

Join Date: Aug 2014
Posts: 129
Total Cats: -172
I read what he wrote dumb ***, in fact I read it on his real thread in mazdaroadster.net, still this doesn't explain many things like why he puts a filter while the waste gate is venting to atmosphere. It doesn't make sense to me. did you ever think of that you ******* idiot??
Reply
-3
-3
09-14-2014, 11:39 AM
#38
Elite Member
iTrader: (13)
Join Date: Dec 2006
Location: Taos, New mexico
Posts: 6,612
Total Cats: 567
Clearly it's something you would only do with a centrifugal supercharger running ALLOFIT, but how does venting excess pressure there effect the flow to cylinder 4 vs cylinder 1?
Last edited by Fireindc; 09-14-2014 at 11:52 AM.
Reply
0
0
09-14-2014, 12:01 PM
#39
Elite Member
iTrader: (37)

Join Date: Apr 2010
Location: Very NorCal
Posts: 10,441
Total Cats: 1,899
Emilio actually explained it pretty well in the 95R thread. Read: https://www.miataturbo.net/general-m...project-63125/
Also: like the man said, chill the **** out. Its not like everyone reads every thread on this forum every day.
That's a good question. Its a squaretop so its got a pretty open plenum, maybe the guys have a header with 4 EGTs they could throw on and see what happens?
Also: like the man said, chill the **** out. Its not like everyone reads every thread on this forum every day.
That's a good question. Its a squaretop so its got a pretty open plenum, maybe the guys have a header with 4 EGTs they could throw on and see what happens?
Last edited by EO2K; 09-14-2014 at 12:12 PM.
Reply
0
0
09-14-2014, 12:24 PM
#40
Bannisheded
Join Date: Aug 2014
Posts: 129
Total Cats: -172
What **** me off the most is that asked a polite question and then some idiot jumps insulting me for no reason. My apologies to the OP and John the owner of Mental. About the wastegate connected to intake manifold, I read Emilio's thread and thanks for sharing it EO2K. Still do not know what wastegate spring is best for Rotrex Supercharger, and this particular setup. I know Tial sells something like a 3psi spring for supercharger setups tough.
About the filter location in the wastegate, wouldn't it make more sense tu run a pipe down to vent under the tranny??
About the filter location in the wastegate, wouldn't it make more sense tu run a pipe down to vent under the tranny??
Reply
-3
-3


