
Post pictures of your DIY style valve covers


Thread Starter
Elite Member
iTrader: (15)
Joined: Sep 2007
Posts: 2,034
Total Cats: 5
From: Incline Village, NV
Looking for some ideas, lets see what you guys have.
Lets put:
What brand of paint, rattle can, powdercoated ect..
Time between coats
Temp of day during drying process
Time between final coat and install
Post up!
Lets put:
What brand of paint, rattle can, powdercoated ect..
Time between coats
Temp of day during drying process
Time between final coat and install
Post up!
Reply
 0
0

0


I'll play.
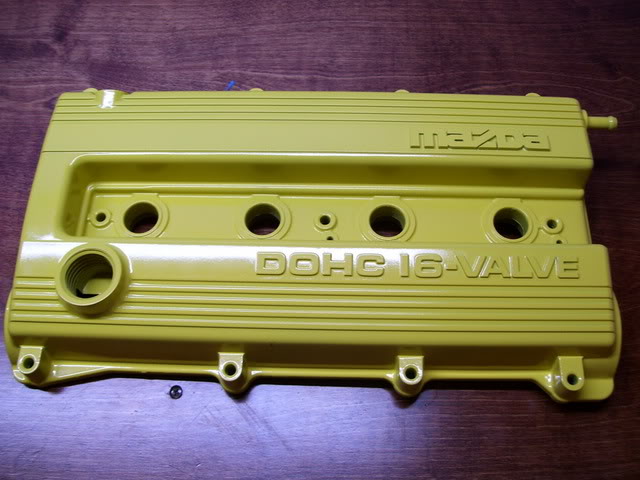
What brand of paint, rattle can, powdercoated ect: Dupli COlor Engine Enamel, rattle can
Time between coats: 2 days
Temp of day during drying process: 80*F
Time between final coat and install: Sold it after painting.
Also, I bead blasted and primed it before painting it. I think I put 3 coats of yellow on it, sanding between coats of course.
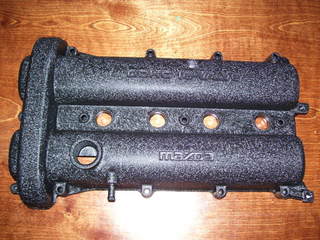
I used some crinkle pant from autozone on this one. VC was bead blasted and primed. 15 minutes between 3 light coats. 90*F Sold a month later.
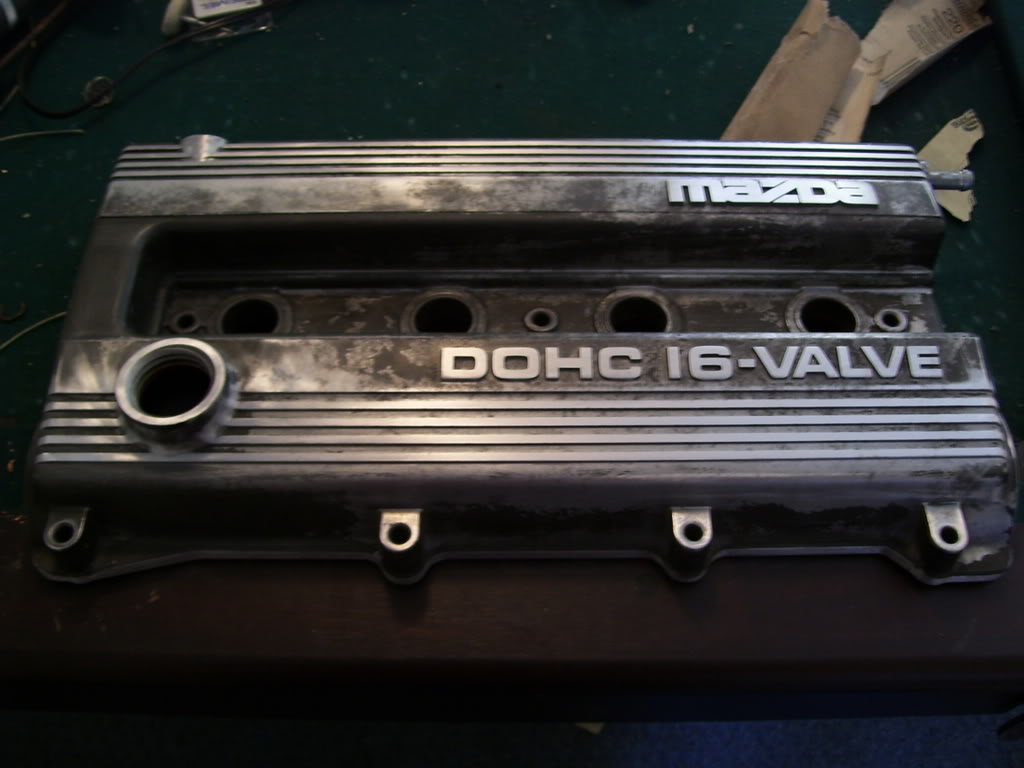
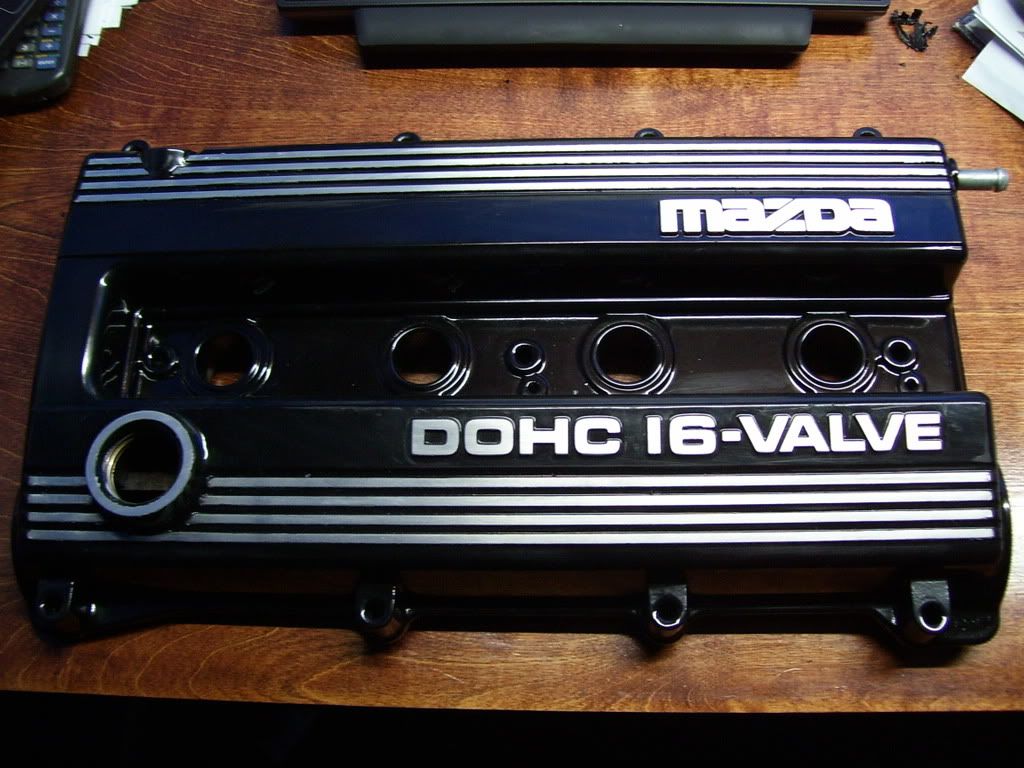
This one got the works. Used black Dupli Color on this one. All casting marks removed, generally smoothed out for a cleaner look, bead blasted, polished raised lettering, then primed and 3-4 coats sanding between coats with 2 days between coats. Took a while but it came out nice.
Bead blasted, casting marks removed, and polished raised lettering.
After priming:
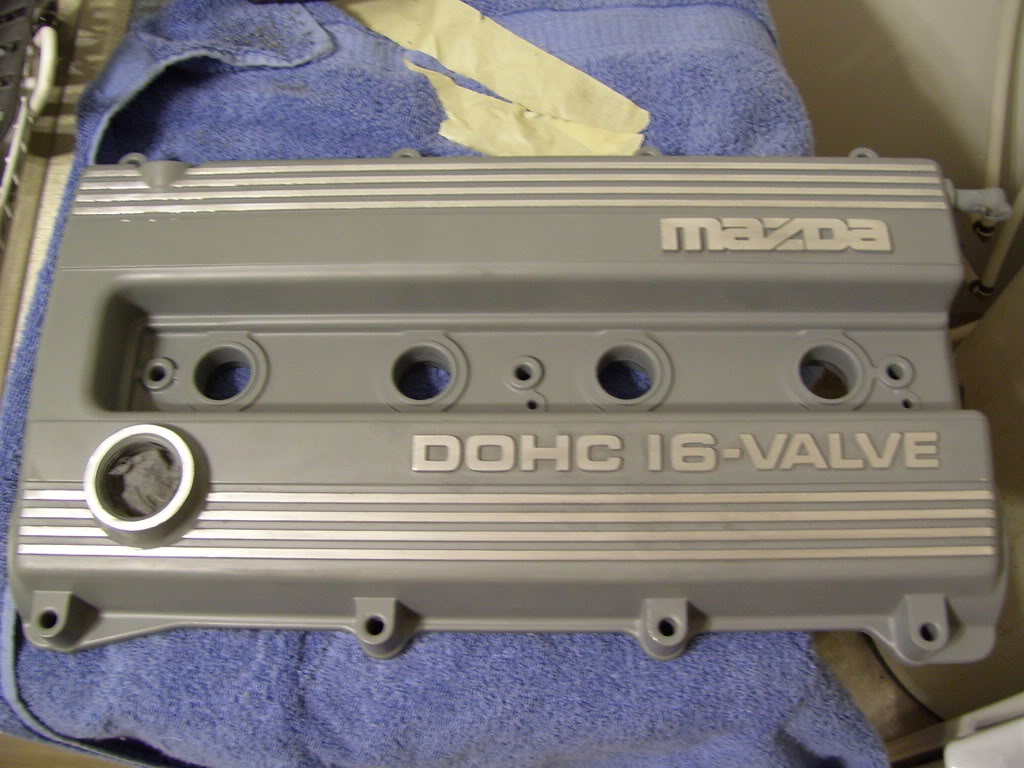
Finished

What brand of paint, rattle can, powdercoated ect: Dupli COlor Engine Enamel, rattle can
Time between coats: 2 days
Temp of day during drying process: 80*F
Time between final coat and install: Sold it after painting.
Also, I bead blasted and primed it before painting it. I think I put 3 coats of yellow on it, sanding between coats of course.
I used some crinkle pant from autozone on this one. VC was bead blasted and primed. 15 minutes between 3 light coats. 90*F Sold a month later.
This one got the works. Used black Dupli Color on this one. All casting marks removed, generally smoothed out for a cleaner look, bead blasted, polished raised lettering, then primed and 3-4 coats sanding between coats with 2 days between coats. Took a while but it came out nice.
Bead blasted, casting marks removed, and polished raised lettering.
After priming:
Finished
Reply
0
0


That looks damn good. How much do you charge?
__________________
Best Car Insurance | Auto Protection Today | FREE Trade-In Quote
Reply
0
0
I have the cover. How much to get it to look like that?
__________________
Best Car Insurance | Auto Protection Today | FREE Trade-In Quote
__________________
Best Car Insurance | Auto Protection Today | FREE Trade-In Quote
Reply
0
0

Senior Member
iTrader: (10)
Joined: Feb 2007
Posts: 1,274
Total Cats: 0
From: South Eastern Wisconsin
VHT Wrinkle Plus (Black) - Cheapest that I found was to buy 2+ on Ebay, came out to be less than $10 a can.
I sand blasted the valve cover, then set it up under spot lights until it was hot to the touch. I layed on a heavy coat, as heavy as I could without running, then after a few minutes went back and touched up whatever I missed before the paint started curing. I let it sit under the lights for a few hours, then sanded off the paint on the raised lettering the next day. It has lasted a season so far, only thing that sucks is trying to clean oil off it.
I would have preferred to use an oven since thats what the directions recommended, but I sure as hell wasn't baking it in my house. This paint STINKS when warmed up. Letting it dry with no heat makes the wrinkles really deep, but letting it dry at the max temp makes them very tight and more consistent, which I prefer.
Reply
0
0


Crappy white balance in that photo, but its a really pretty color. Red Rum Wrinkle powder coating. Don't have the ***** to hit the Embossed lettering with the sander...

Reply
0
0

 Thanks!
 ) isn't blue anymore.. it faded to purple.
Reply
0
0
Reply
0
0
Reply
0
0

Rattle can Red High heat paint with several hours between coats.....did not finish sand except for the lettering due to time restraints and haven't bothered going back to finish it. Painted in the summer during low humidity with around 85-90* abmbient in the garage.
Reply
0
0


Don't mean to threadjack.. Did you get your FE from a sportage or was it imported? It came as the Non-Turbo FE 16 valve and you turbo'd it?
Reply
0
0


