When you click on links to various merchants on this site and make a purchase, this can result in this site earning a commission. Affiliate programs and affiliations include, but are not limited to, the eBay Partner Network.
Hi all, I have a 1997 M edition with 146k miles. I just purchased the full MKturbo kit from Lars. I will receive the MS3 in a couple days. Car is stock other than Meisterrr Coilovers and FM sway bars. I'm super pumped to get started! I've been reading alot on this site for info but if you have any tips tricks for my install please let me know!
I'm going to try to video most the install since I havent seen many of the mkturbo kit installs on youtube.
A couple of things I remember. Bend the heater hard line until it just about touches the dip stick. I took mine out and used the garage door track as a brace to bend from. Now you can get a socket on the back bolt. Tighten the crap out of the turbo to manifold. Once installed you can't get to them. Don't over tighten the turbo when clocking it. These bolts will strip if cranked on. Best to loosely fit manifold, then pull it to clock turbo. Easier to get to bolts. When installing down pipe, push it as far towards the transmission as you can. This will prevent it from hitting the body. These are things I found on my NB2, your car may be different.
So far I have installed the MS3 pnppro, innovate mtxl wideband, and the gm iat sensor. The iat sensor is in the airbox for now until I get the turbo installed. Now inhave just been getting used to Tunerstudio and getting the car tuned while it's still na. Soon I'll get the Injectors installed and retune after that. I still have to go see Lars to.get the rest of the kit.
Received the turbo yesterday! Going to get to work on porting the wastegate hole. I found that one of the bolt holes was drilled all the way through so you can see daylight. Talked to Lars about it and he said its normal for the Chinese turbos and the bolt will seal it up fine. Just an FYI if you run into the same thing.
I still have to finish tuning, install injectors, install the new clutch, and tune again before hooking up the turbo, IC, and exhaust.
If you haven't already done so, I'd recommend working on making a ramp into the wastegate hole from the other side. I had to open mine up at least as much as yours along with a healthy ramp into the other side to get mine to quit boost creeping. Initially I thought it would have to come off sooner or later, so I'd just try it to see what would happen. Now, I wish I would have spent an extra 30 minutes before installing it so I wouldn't have had to take it all apart.
If you haven't already done so, I'd recommend working on making a ramp into the wastegate hole from the other side. I had to open mine up at least as much as yours along with a healthy ramp into the other side to get mine to quit boost creeping. Initially I thought it would have to come off sooner or later, so I'd just try it to see what would happen. Now, I wish I would have spent an extra 30 minutes before installing it so I wouldn't have had to take it all apart.
I did a little bit, but it was tough getting the Dremel in there. You had boost creep even at 10psi? I heard that if you are a good bit above 7psi the boost creep isn't as much of an issue. I know you have an NB, but have you had yours on the dyno? what numbers did you get at 10psi? I was hoping to get around 230hp and 200+ tq. Figured I would be between 10-15 psi to get those numbers on an NA.
I had boost creep after porting it out what I hoped was sufficient, which it wasn't. It would hit 8 psi around 4k RPM and climb quickly after that. For the first 1000 miles I really couldn't make a full pull in any gear above 2nd due to boost cut. It was fun, but it got old having to let off all the time. I pulled the turbo and ported it some more, got the boost creep under control, then put the EBC on so I could hold 10 psi from as soon as the turbo spools all the way to red line.
I always wash my parts with soap and water after any grinding, it's the only way to get all the bits off. The soap changes the static charge of the surface to let that stuff leave. Then spray it with a little WD 40 or something so it doesn't rust.
I actually shrank my wastegate port on my current turbine housing, but I am trying to maintain 30psi at redline, but I don't really recommend it.
Has anyone else on here installed the mkturbo intercooler and piping on an NA? Preferably someone who kept AC and PS. Im curious about how you clocked the turbo and how you ran the ic piping. I have a basic idea, but wasn't sure if.anyone has pics or videos of it actually on the car.
I know at this point I'm just talking to myself on here, but after getting the intercooler and piping and looking under the car I am very much considering removing the AC and power steering. It would make installing the turbo components so much easier and would give more power. I live in coastal Georgia where it gets hot as *****, but I don't drive the car unless I have the top down and with the top down the AC doesn't help anyway. I'm also thinking that no power steering in this car wouldn't be too bad because its so small and light.
Just tough to make the decision because once all that crap comes out, it can't go back in.
Definitely remove ps and just drain the rack and loop the lines. I kept a/c even on a mostly track car because Florida hot and humid. Dumping ps opens up a lot of space.
I clocked my turbo to discharge vertically. I have PS but deleted my AC as I am in Minnesota and always have the top down in the summer. The A tube barely touches the hood so I strapped a piece of rubber to it.
Thanks man that helps a lot. I also decided to remove the AC. I.must have done mine wrong bc I have an elbow coupling coming out of the throttle body. The kit.doesnt come with instructions so I'm kinda winging it. It took me forever to figure out how.and where to.mount the intercooler.
If you have any tips for.making the rest of the install easier please share.
No problem! Here are a few more pics of the tubing.
I did end up trimming and beading a couple of the tubes to get a better fit and to allow for the air dam to fit back on (with plenty of trimming). I added some straps to secure the bottom of the IC too.
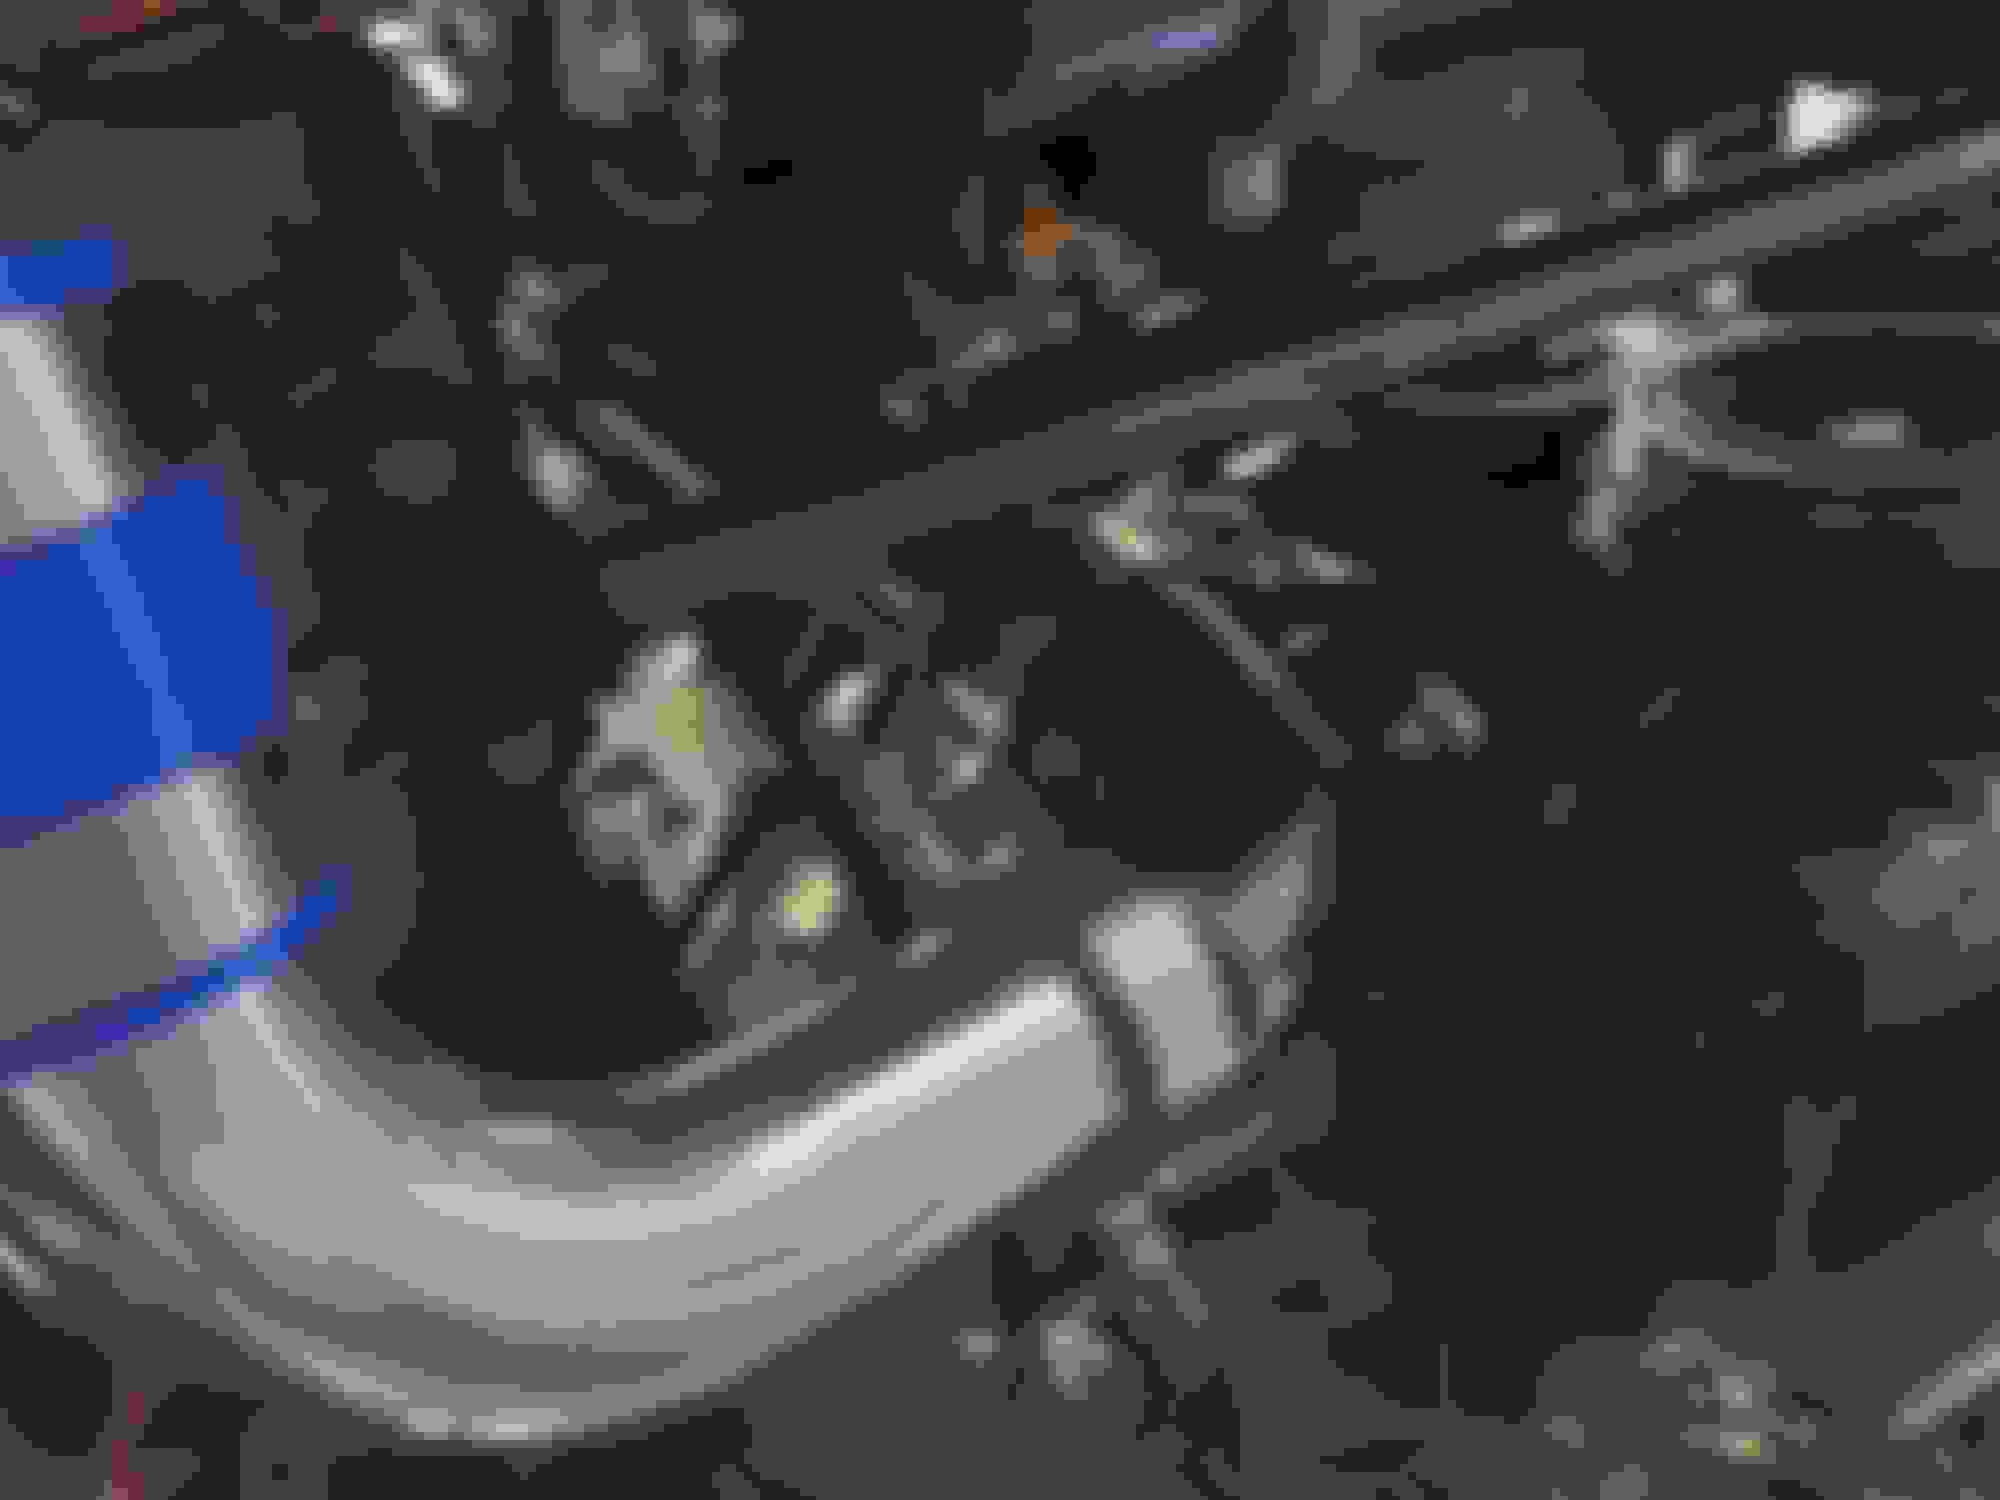
Finally have the intercooler installed and the cold side ic piping. I put the air filter on the other side of the intercooler for now until I install the turbo. I'm waiting on an injector part so I can finish the 640cc flow.force injectors. Then will make sure its running right and tune it. Once that's done I'm going to install the rest of the turbo system and a new clutch at the same time.
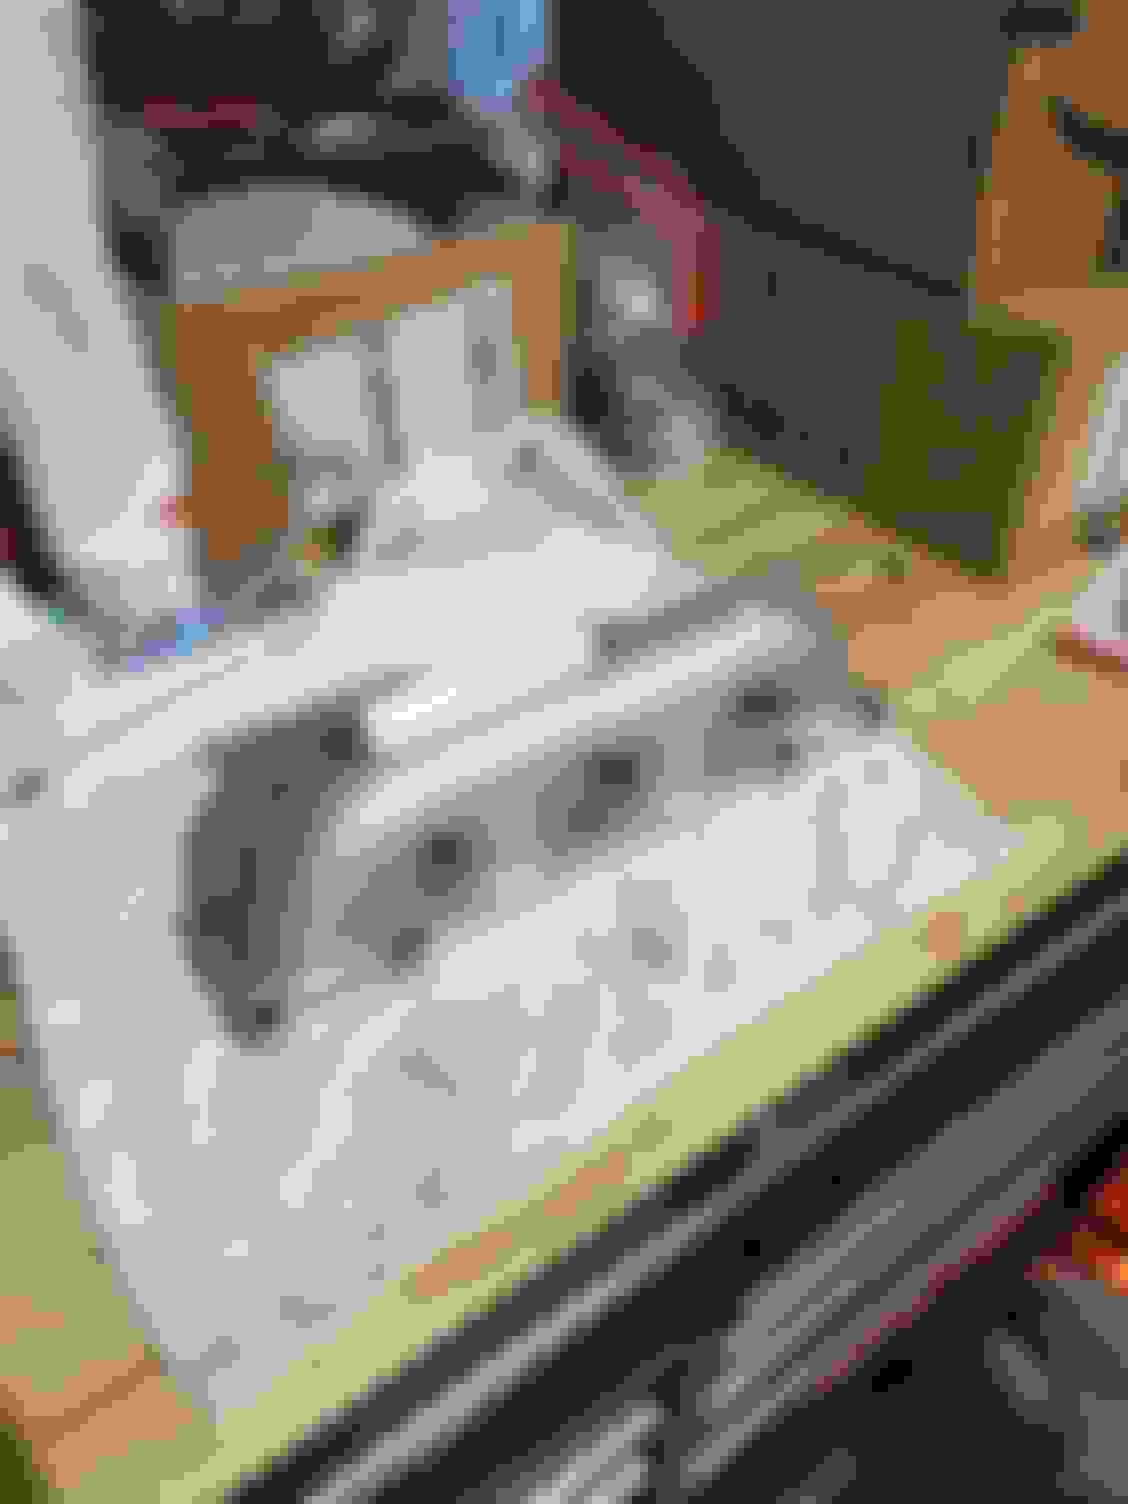
Coupler to first cold side ic pipe. This has 2 bungs. I have one to the throttle body vacuum hose and the other to the valve cover recirculation hose. BOV also connects to this pipe. black elbow coupler connects pipe from throttle body to 2nd ic pipe. straight coupler to final cold side pipe with iac installed in bung. Cold side connected to intercooler. Filter on other side. top of intercooler showing where it mounts. You have to remove the latch brace
Last edited by user 8202; 04-14-2020 at 12:22 PM.
Reason: Add info
You can notch the hood release bracket if you want to retain it, here is a picture of mine.
I had only one bung on my D tube, used for my IAC hose as well. I tapped a second, smaller line to feed my turbo wastegate as I�ve read that you want to have that supply come from the downstream side of the IC but not from the throttle body.
I painted the log manifold with some of the 2000 degree paint. I've heard mixed reviews on whether the paint will.stay so I guess we will see. I painted it and then baked it in the oven according to the directions.
2nd picture is my redneck rigging I did on the fuel injector plugs since 2 of the retaining clips snapped when removing my stock injectors.
I got the flow force 640cc injectors installed and the car running. Definitely need more tuning. My idle and afrs are jacked up. Started out super lean and now too rich my afr at idle is around 13.2 and while driving i noticed it go.down to 10.4 at wot. I'm also confused about the whole injector dead time settings. I only see the one thing to change and mine is currently at 1. Everything else is just graphs
 04-02-2020, 03:50 PM


 0
0