

Managing heat with a flat underbody


Thread Starter

Joined: Jul 2006
Posts: 3,310
Total Cats: 1,237
From: San Diego
Ok guys, going to update this since version 2 is now done.
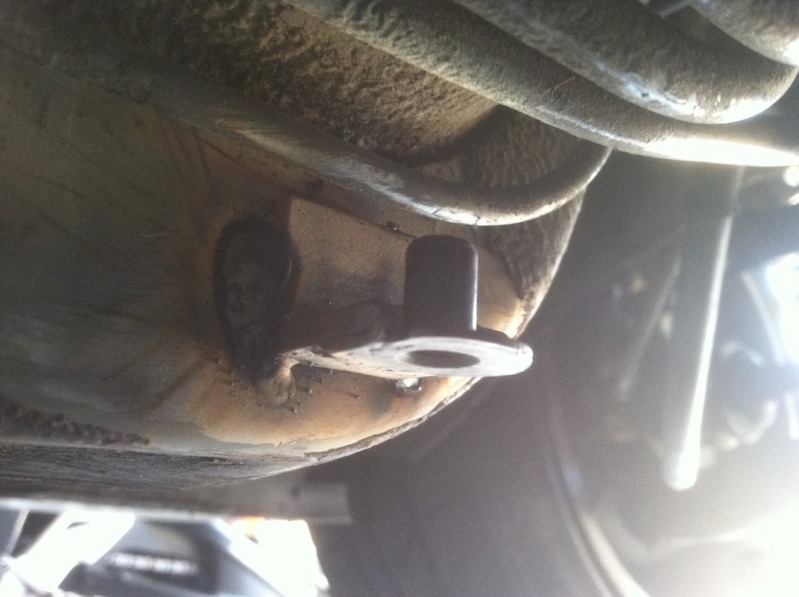
I Re-designed the mounting points. At first I had drilled/tapped holes in the frame rails and bolted aluminum L brackets to them. To simplify, make a stronger mounting point, and save weight, I changed the design to a small section of angle iron welded to the frame rail with a weld nut welded to that:
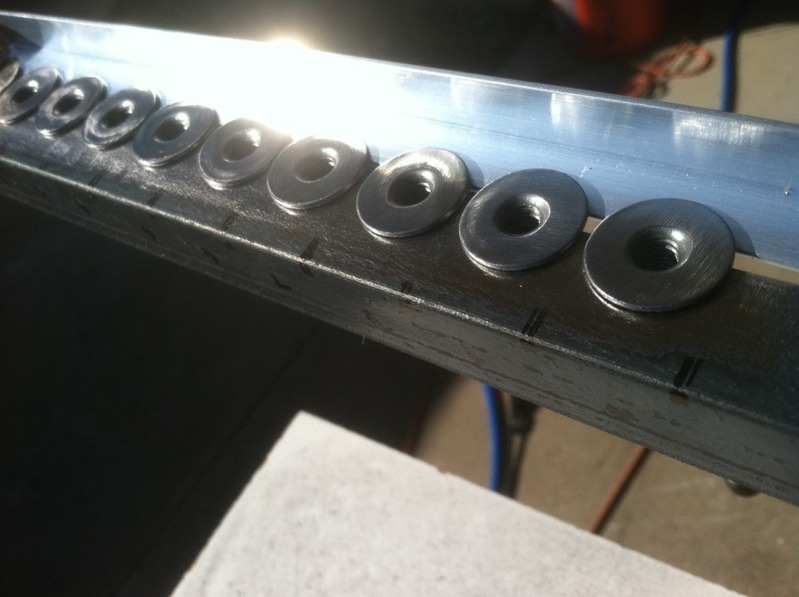
Fabbing the new mounting tabs:
Old tab design, total weight 281 grams:
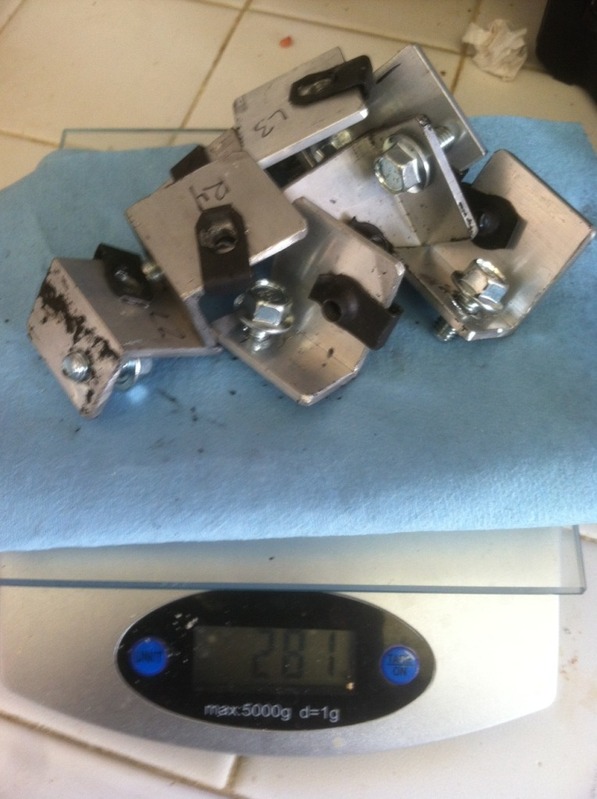
New tab design, total weight 157 grams:

Tab welded to the frame rail:
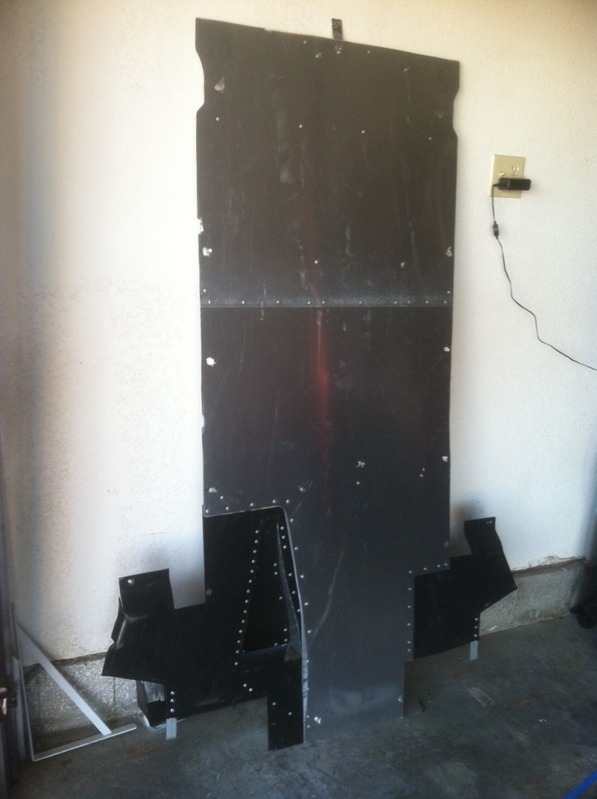
Version 1 of the flat bottom, post- Auto Club Speedway. It survived the day, plus hundreds of miles to/from the event on the highway, but it served its purpose as a prototype and now its time to move on to something that won't melt
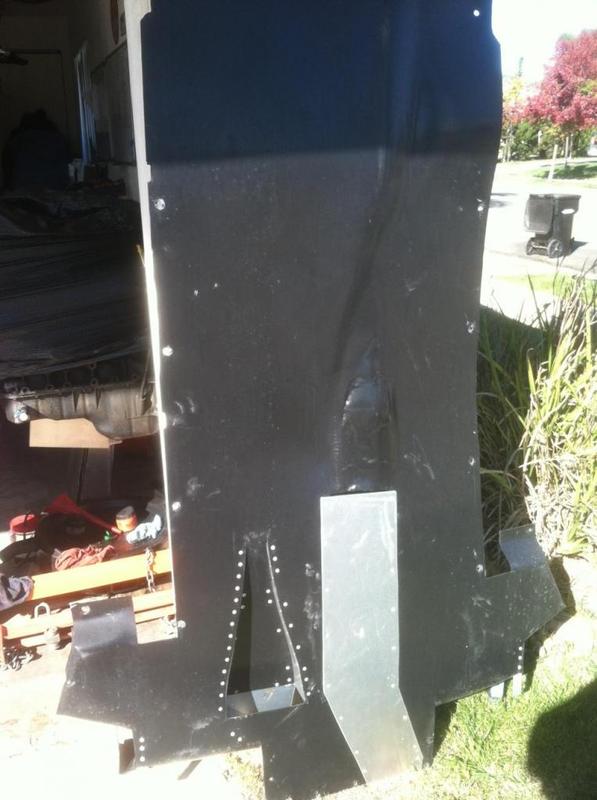
Version 2, lighter and more rigid, plus almost entirely aluminum, so no melting! Total weight is down around 11.5 lbs! I re-used the rear side sections since they are nowhere near the exhaust, and that way I didn't have to re-make the NACA duct that supplies cool air to the differential:
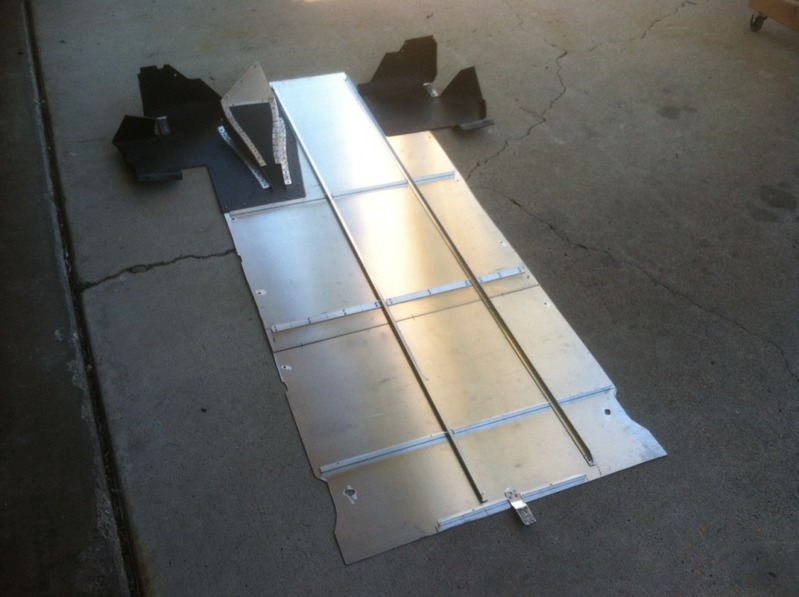
Just finished mounting version 2, and mating it to the rear diffuser. I'll take a mounted picture tomorrow.
-Ryan
I Re-designed the mounting points. At first I had drilled/tapped holes in the frame rails and bolted aluminum L brackets to them. To simplify, make a stronger mounting point, and save weight, I changed the design to a small section of angle iron welded to the frame rail with a weld nut welded to that:
Fabbing the new mounting tabs:
Old tab design, total weight 281 grams:
New tab design, total weight 157 grams:
Tab welded to the frame rail:
Version 1 of the flat bottom, post- Auto Club Speedway. It survived the day, plus hundreds of miles to/from the event on the highway, but it served its purpose as a prototype and now its time to move on to something that won't melt
Version 2, lighter and more rigid, plus almost entirely aluminum, so no melting! Total weight is down around 11.5 lbs! I re-used the rear side sections since they are nowhere near the exhaust, and that way I didn't have to re-make the NACA duct that supplies cool air to the differential:
Just finished mounting version 2, and mating it to the rear diffuser. I'll take a mounted picture tomorrow.
-Ryan

Reply
 0
0

0

Elite Member
Joined: Apr 2010
Posts: 2,826
Total Cats: 66
From: Newcastle, Australia
Looks fantastic, what thickness is the aluminium and you just rivetted the alloy angle to it?
What did you pay for the sheet, down here in Oz im guessing price will be double but it would be nice to know.
Dann
What did you pay for the sheet, down here in Oz im guessing price will be double but it would be nice to know.
Dann
Reply
0
0

Senior Member
Joined: Oct 2011
Posts: 646
Total Cats: 62
From: The Race Track & St Pete FL
Good job ThePass I too in the future will be changing the design and will do the same as my first one go from side skirt to side skirt, then axle to axle. The reason it will be changing is due to the new engine transplant, I need frame rails.
Reply
0
0
Thread Starter
Joined: Jul 2006
Posts: 3,310
Total Cats: 1,237
From: San Diego
Aluminum is affordable at my local Industrial Metal Supply ~$3.00 per lb. All the more reason to build things lightweight if you're paying for material by the pound right?
-Ryan
Reply
0
0
Thread Starter
Joined: Jul 2006
Posts: 3,310
Total Cats: 1,237
From: San Diego
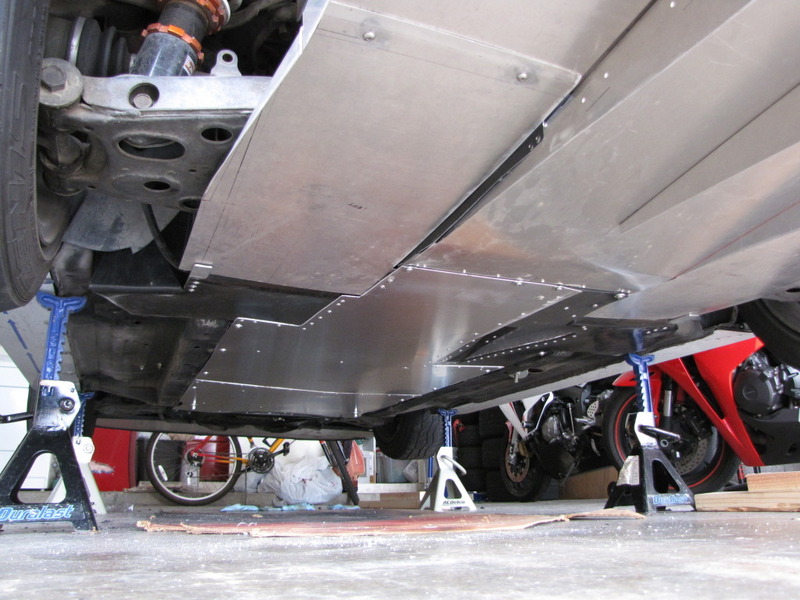
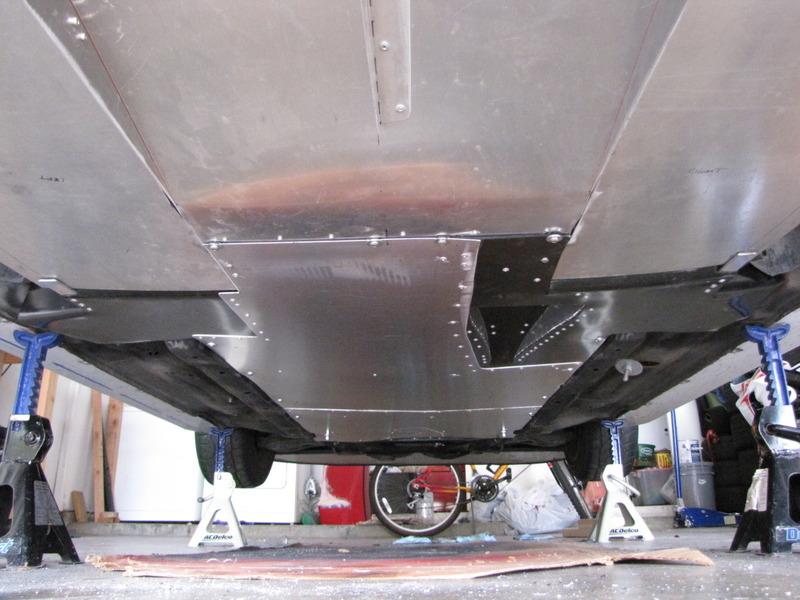
Took a couple of mounted pics today while I was working on the car. Pics of the underbody when the car is only ~15" off the ground don't look great, but what-ev. Maybe some time I'll have the car on a lift and be able to snap a good pic:
Reply
0
0

Junior Member
Joined: Jun 2013
Posts: 122
Total Cats: -10
From: Raleigh, NC
reviving this from the dead to see progress!! That and have you considered adding sheeting out to the sides of the car to create one smooth tunnel? Side skirts that stop air from coming in from the sides would also improve efficiency.
My plan looks a lot like your set up but i think I might run the exhaust out past the license plates to get more air flow into that low pressure zone back there
My plan looks a lot like your set up but i think I might run the exhaust out past the license plates to get more air flow into that low pressure zone back there
Reply
0
0

Junior Member
Joined: Apr 2016
Posts: 225
Total Cats: 0
I'm going to be building a flat underbody for my miata within the next few weeks, but I have a few questions before I dive into this whole process.
1) My biggest issue is where and how you guys are mounting the panels? I was thinking of mounting the panel over the outside of the frame rails and then on some of the bracing but some more insight on this particular topic would be much appreciated.
2) I see some people having the entire underside covered while others have a channel for the exhaust. What are the pros/cons to each one? If I decide to cover the entire underside, would I have to bend the panel in order to fit over the exhaust or what?
3) What material are you guys using? I've read that 2mm 5052 aluminum is perfect. Is this the correct thickness/grade aluminum?
I'm sure I'll have some more questions once I dive into the process, but this is all I can think of at them moment.
Reply
-2
-2
Senior Member
Joined: Oct 2011
Posts: 646
Total Cats: 62
From: The Race Track & St Pete FL
Nothing, I drove it to 128 mph on stock power and I noticed the wind noise was lessen. The car didn't float at high speed, but during street drives mine was noisy during bumps. Driving it at high speeds make you nerves go, not knowing if the wind would break it off.
Reply
0
0

Junior Member
Joined: Jan 2016
Posts: 362
Total Cats: 94
From: Munich
Planning a flat underbody for my turbo. As others I'm concerned about engine, exhaust and tranny heat, and how to shed them. Therefore my idea was to use 3mm ABS plastic with a 1.5mm aluminium center section around the catalytic converter and exhaust. I some spots I'd replace the flat aluminium panels with some louvered aluminium panels to promote airflow through the transmission tunnel and out underneath the car. Have others tried going that route before?
Reply
0
0
Senior Member
Joined: Oct 2011
Posts: 646
Total Cats: 62
From: The Race Track & St Pete FL
Planning a flat underbody for my turbo. As others I'm concerned about engine, exhaust and tranny heat, and how to shed them. Therefore my idea was to use 3mm ABS plastic with a 1.5mm aluminium center section around the catalytic converter and exhaust. I some spots I'd replace the flat aluminium panels with some louvered aluminium panels to promote airflow through the transmission tunnel and out underneath the car. Have others tried going that route before?

Last edited by 1993ka24det; May 7, 2018 at 08:32 PM.
Reply
0
0

Thread
Thread Starter
Forum
Replies
Last Post
russian
Miata parts for sale/trade
6
Oct 8, 2015 03:01 PM


