
Singular Motorsports 2.5" & 3" Brake Ducts
 08-30-2014, 05:40 AM
#1
Supporting Vendor

Thread Starter
iTrader: (3)

Join Date: Jul 2006
Location: San Diego
Posts: 3,303
Total Cats: 1,216
These have been in the works for a while, I almost spilled the beans when everyone was talking about brake duct sizes a couple weeks back, but finally now I’m really pleased to offer 2.5” and 3” brake duct solutions to our community. 
These are now in stock at Good-Win Racing and Trackspeed Engineering:
2.5" Brake Ducts @Good-Win & 3" Brake Ducts @Good-Win
2.5" Brake Ducts @TSE & 3" Brake Ducts @TSE
Andrew is also offering kits with hose of the appropriate size, clamps, and zip ties as an add-on.

Why 2.5” or 3” ducts?
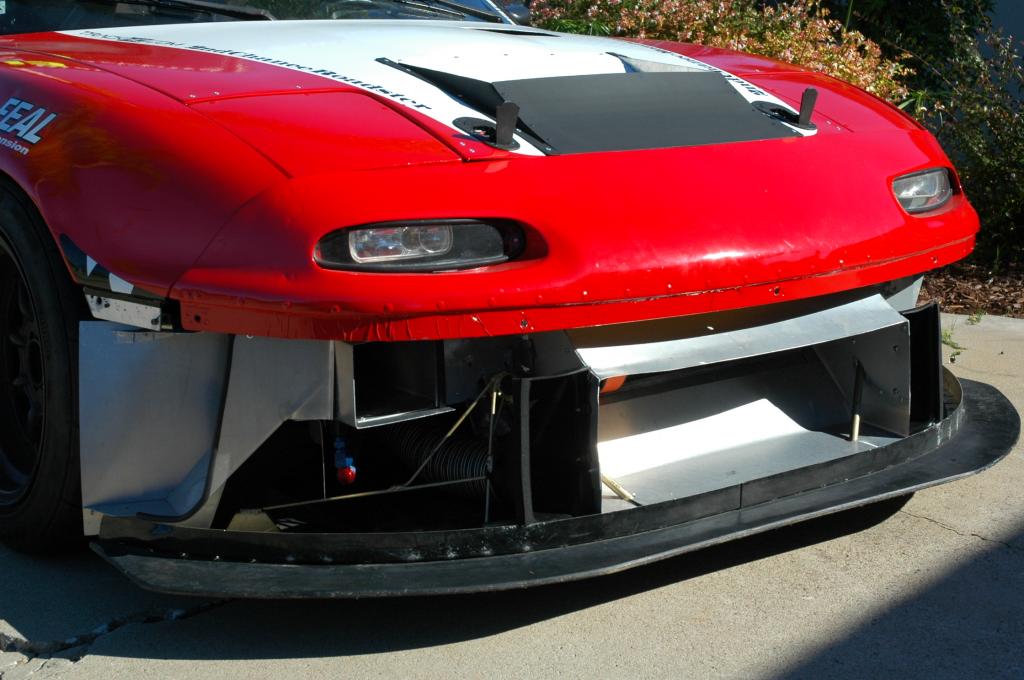
By this point it’s well established that proper brake ducts are a key part to a track car’s braking system, and there are huge benefits to increased hose size - the airflow increases as a square of the diameter, so a �” increase in hose size actually produces a very significant difference.
This sums up the recent discussions that have been going on regarding brake duct size, and this is essentially the type of findings that started me down the path of developing these:
The largest difficulty that arises as hose size increases (especially with 3”) is getting the orientation just right between the wheel, spindle, sway bar, etc. since tolerances are slim - so a specialized part that locates the hose and its outlet position becomes more critical - and that is what these do for you.
But, these are not only for the extreme track crowd. It makes sense to use brake ducts on nearly ANY track-driven miata for two reasons:
A) Even if you aren’t at the limit of the brake pad/fluid’s operating temperature, decreasing the temps of the brakes can drastically increase their lifespan - in many cases pad life can nearly double (In other words, these pay for themselves over time)
B) A low-power car may be able to run track-only pads and avoid reaching the limits of the pad, but many people in the double-duty street/track category want to run a less than crazy aggressive pad. In these cases, really good brake ducting can be the key to keeping those pads within their operating temperature range and not destroying them.
3" vs. No Ducts test:
I recently ran the 3” version vs. no ducting at the track (taped over the duct inlet on one side of the car). Following a brief half-session, and after a cool down lap which allowed temps to come down and stabilize a bit, on the non-ducted side we saw caliper temps of 585*. For those of you keeping score, that’s just a breath away from the boiling point of the Motul RBF600.
On the ducted side of the car, the caliper was 445*. Perfectly happy.
I had intended to do more testing with the side that was blocked off, but after seeing those temps I aborted that plan and kept both sides ducted the rest of the day. I literally would not run my car without these.
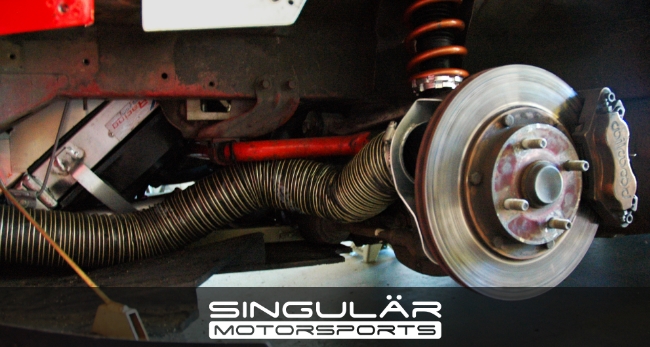
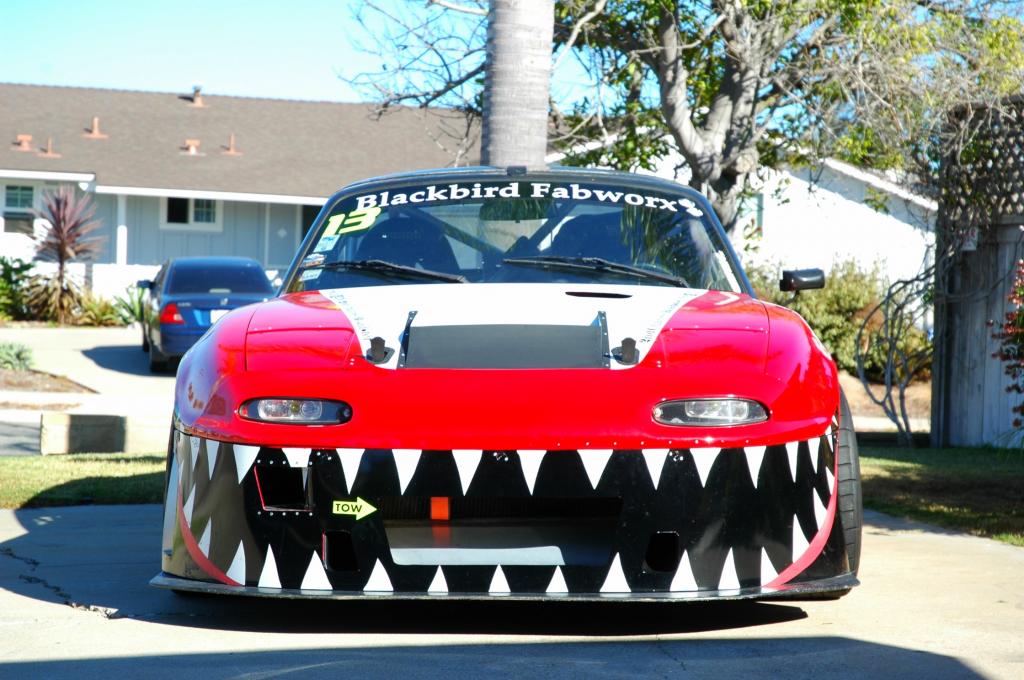
I’m running the 3” on my car and Sean has the 2.5” on his, and these are already out there on a few member's cars - Keith Tanner is running the 3” units on the V8 Targa car, Martin has recently added 3” units to Lazarus, and Curly is running the 2.5" versions. I’ll welcome them to give any of their impressions and input if they’d like.
3" On my car:
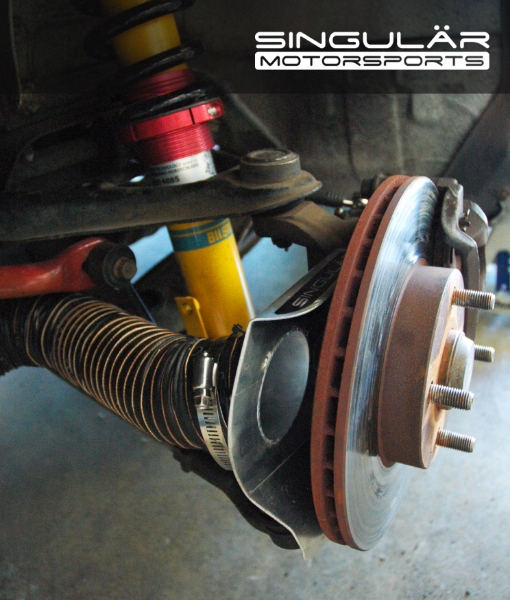
2.5" on Scooby (Sean's car):
I'm really excited to see and hear about you guys further raising the bar with your car's potential. It gives me a special kind of satisfaction to be able to have a hand in making that possible.
-Ryan
These are now in stock at Good-Win Racing and Trackspeed Engineering:
2.5" Brake Ducts @Good-Win & 3" Brake Ducts @Good-Win
2.5" Brake Ducts @TSE & 3" Brake Ducts @TSE
Andrew is also offering kits with hose of the appropriate size, clamps, and zip ties as an add-on.
Why 2.5” or 3” ducts?
By this point it’s well established that proper brake ducts are a key part to a track car’s braking system, and there are huge benefits to increased hose size - the airflow increases as a square of the diameter, so a �” increase in hose size actually produces a very significant difference.
This sums up the recent discussions that have been going on regarding brake duct size, and this is essentially the type of findings that started me down the path of developing these:
We found the difference in velocity and volume from 2" to 2.5" to be huge, even with almost no bends. With a 90� bend the flow from the 2" dropped off to a bare fraction of the 2.5". The 3" was awesome even when kinked twice but just about impossible to fit in there with wide wheels. So we run 2.5" and aim it at the hub/center of rotor.
But, these are not only for the extreme track crowd. It makes sense to use brake ducts on nearly ANY track-driven miata for two reasons:
A) Even if you aren’t at the limit of the brake pad/fluid’s operating temperature, decreasing the temps of the brakes can drastically increase their lifespan - in many cases pad life can nearly double (In other words, these pay for themselves over time)
B) A low-power car may be able to run track-only pads and avoid reaching the limits of the pad, but many people in the double-duty street/track category want to run a less than crazy aggressive pad. In these cases, really good brake ducting can be the key to keeping those pads within their operating temperature range and not destroying them.
3" vs. No Ducts test:
I recently ran the 3” version vs. no ducting at the track (taped over the duct inlet on one side of the car). Following a brief half-session, and after a cool down lap which allowed temps to come down and stabilize a bit, on the non-ducted side we saw caliper temps of 585*. For those of you keeping score, that’s just a breath away from the boiling point of the Motul RBF600.
On the ducted side of the car, the caliper was 445*. Perfectly happy.
I had intended to do more testing with the side that was blocked off, but after seeing those temps I aborted that plan and kept both sides ducted the rest of the day. I literally would not run my car without these.
I’m running the 3” on my car and Sean has the 2.5” on his, and these are already out there on a few member's cars - Keith Tanner is running the 3” units on the V8 Targa car, Martin has recently added 3” units to Lazarus, and Curly is running the 2.5" versions. I’ll welcome them to give any of their impressions and input if they’d like.
3" On my car:
2.5" on Scooby (Sean's car):
I'm really excited to see and hear about you guys further raising the bar with your car's potential. It gives me a special kind of satisfaction to be able to have a hand in making that possible.
-Ryan

Last edited by ThePass; 08-30-2014 at 12:25 PM.

Reply
 3
3

3
08-30-2014, 10:07 PM
#2
Elite Member
iTrader: (14)

Join Date: Sep 2009
Location: Birmingham, AL
Posts: 2,101
Total Cats: 180
I've got a request... make something similar that will fit the Kiesler drop spindles. I'll help with what I can to get you dimensions. I think those of us baller enough to run them deserve brake cooling awesomeness as well 
What say you Mr. Pass?
What say you Mr. Pass?
Reply
0
0
 08-31-2014, 02:35 AM
#5
Supporting Vendor
Thread Starter
iTrader: (3)
Join Date: Jul 2006
Location: San Diego
Posts: 3,303
Total Cats: 1,216
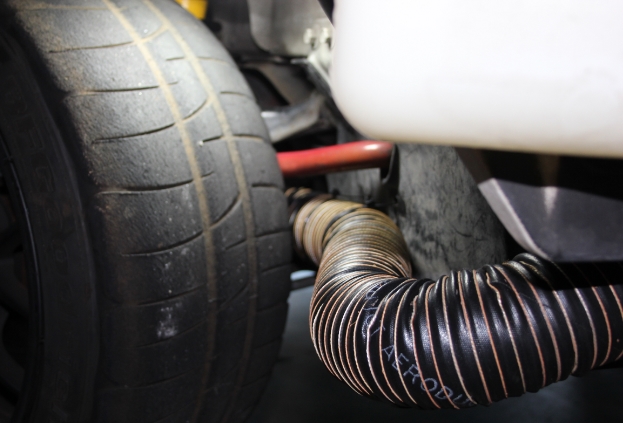
2.5" hose run alongside the factory plastic undertray - 15x9 wheel turned to full lock, no spacer (keep in mind you're never at full lock except for in the pits or parking lots). Plenty of room:
3" hose, factory undertray removed, 15x9 wheel with no spacers turned to full lock. Perfect fit:
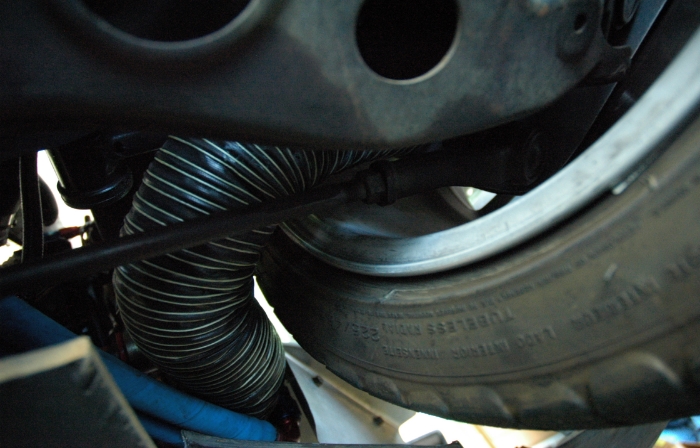
3" hose, factory undertray removed, 15x9 wheel with no spacers turned to full lock. Perfect fit:
Reply
0
0


 09-01-2014, 05:42 PM
#14
Former Vendor

iTrader: (31)

Join Date: Nov 2006
Location: Sunnyvale, CA
Posts: 15,442
Total Cats: 2,100
ABS sensor hole doesn't make any difference. The spindle is the limiting factor, and Mazda used the ABS-style spindle on every 94-05 car. It makes absolutely zero economic sense to produce a brake duct that only fits a 90-93 spindle (and for you NB guys, that means sourcing a new 90-97 UCA as well). BTDT.
Reply
0
0
09-01-2014, 06:26 PM
#15
ABS sensor hole doesn't make any difference. The spindle is the limiting factor, and Mazda used the ABS-style spindle on every 94-05 car. It makes absolutely zero economic sense to produce a brake duct that only fits a 90-93 spindle (and for you NB guys, that means sourcing a new 90-97 UCA as well). BTDT.
I understand the economic side of things. It's probably hard enough getting a ROI on such an item without making it more specialized than it already is. Requiring people to grind off the ABS boss will make it even more limiting.
Reply
0
0

 09-03-2014, 11:54 PM
#18
Supporting Vendor
Thread Starter
iTrader: (3)
Join Date: Jul 2006
Location: San Diego
Posts: 3,303
Total Cats: 1,216
Lots of DIY solutions out there for the air source, and lots of universal inlets available on the market that you can get creative with. Any inlet on the front of the car will work to a degree. They will be more effective the closer to the center of the bumper you can put them. As you move away from center, the air is traveling sideways over the bumper, not straight on, so inlets further to the sides are less effective.
Lots of guys put together some form of duct on the backside of the R package lip holes, or put an inlet in the NB fog light hole.
One trick solution is to put the inlets inside the bumper mouth, on the vertical walls of the ducting forwards of the radiator - air pressure is very high there so this is both effective and efficient as it doesn't add additional openings on the front of the car which would add a bit more drag.
Lots of ways to skin that cat. Here's my solution: oversized duct behind the bumper skin, and I've yet to but plan to make an adjustable block-off plate that allows me to adjust the inlet size on the bumper skin so that I can trim the opening down for when I run at ACS (NASCAR oval + infield where you spend ~45 seconds flat out on the straight/banked turn and top speed is king):
-Ryan
Reply
1
1
09-04-2014, 04:20 PM
#19
Newb

Join Date: Sep 2011
Posts: 2
Total Cats: 0
It looks to me like there is going to be a hell of a lot of leakage with that sort of setup. Also, being a 'vented rotor' you want to feed all the air in to the eye of the rotor / bell, so the cooling air passes through the vanes at pressure cooling the rotor, not the surface of the disc/rotor!! Smallest gap possible so there's no leakage. Cools the bearing too (and the bell if you have them)
Obviously that setup works, but it can be optimized a bit more?
Obviously that setup works, but it can be optimized a bit more?
Reply
0
0
09-06-2014, 03:02 AM
#20
Supporting Vendor
Thread Starter
iTrader: (3)
Join Date: Jul 2006
Location: San Diego
Posts: 3,303
Total Cats: 1,216
You'll actually find if you look around at alternatives that this is the least "leaky" design out there for our cars 
Sure, in perfect hypothetical dream land we'd all have hollow hubs with the brake duct passing through the center injecting air straight into the center of the rotor. Guess what, we don't have that. This is as close as a bolt-on option can get to the center of the rotor on a factory spindle. The only way to get closer is to grind down the spindle. And if you do go through that trouble, you only move it ~1" closer. It's still pointed right where it is.
It would be a mistake to think of the air as exiting the brake duct and then bam it does it's job and it's done when it contacts the rear surface of the rotor. For one, the duct outlet is angled towards the center of the rotor, so the air exits the duct and continues on a path towards the rotor center. Additionally, the top and bottom of the duct are angled towards the rotor (they get within ~1/8" to the rotor surface - you can't exactly seal against the rotating rotor any more than that) to channel the air towards the center of the rotor.
-Ryan
Reply
0
0


