
Geoff builds a silly 'car' in the few weeks before M@MRLS, every year!


Thread Starter
Senior Member
iTrader: (1)
Joined: Mar 2010
Posts: 820
Total Cats: 276
From: Bay Area, CA
Took the day off work and poked at the exofish some.
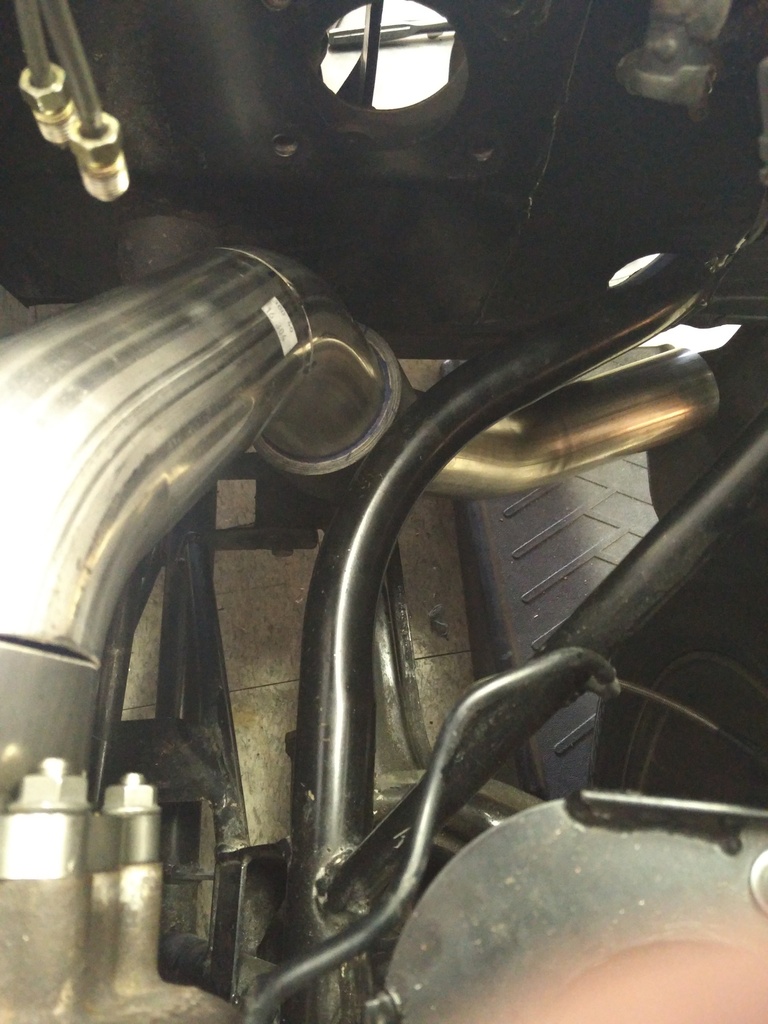
Removed MC and booster.
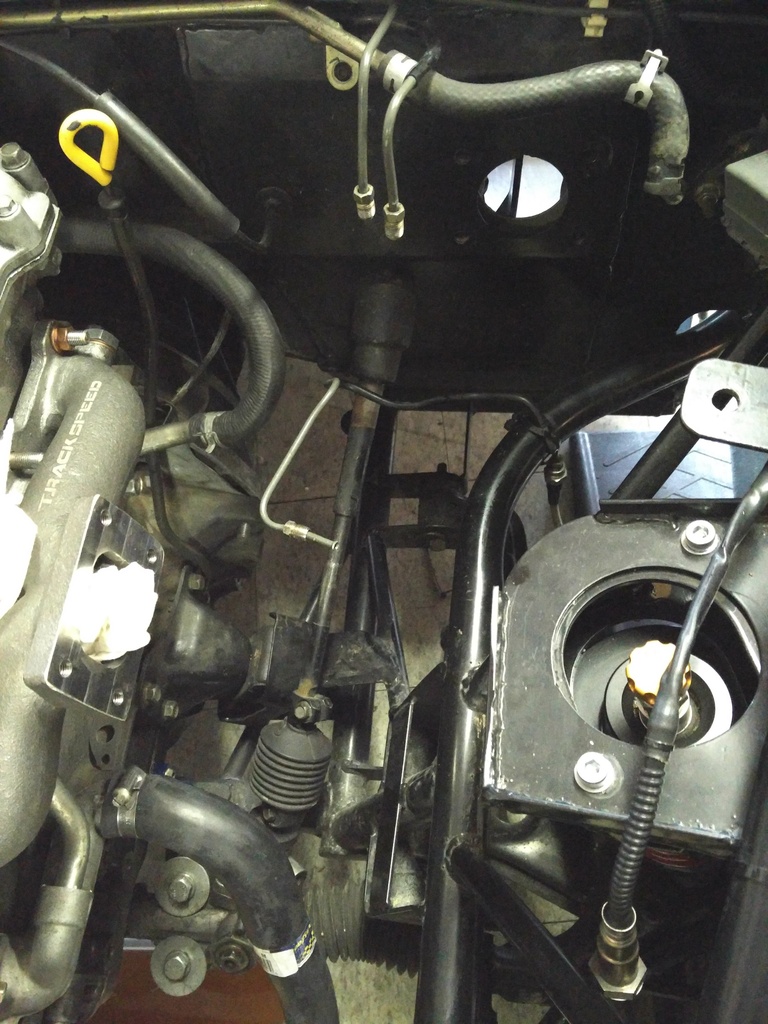
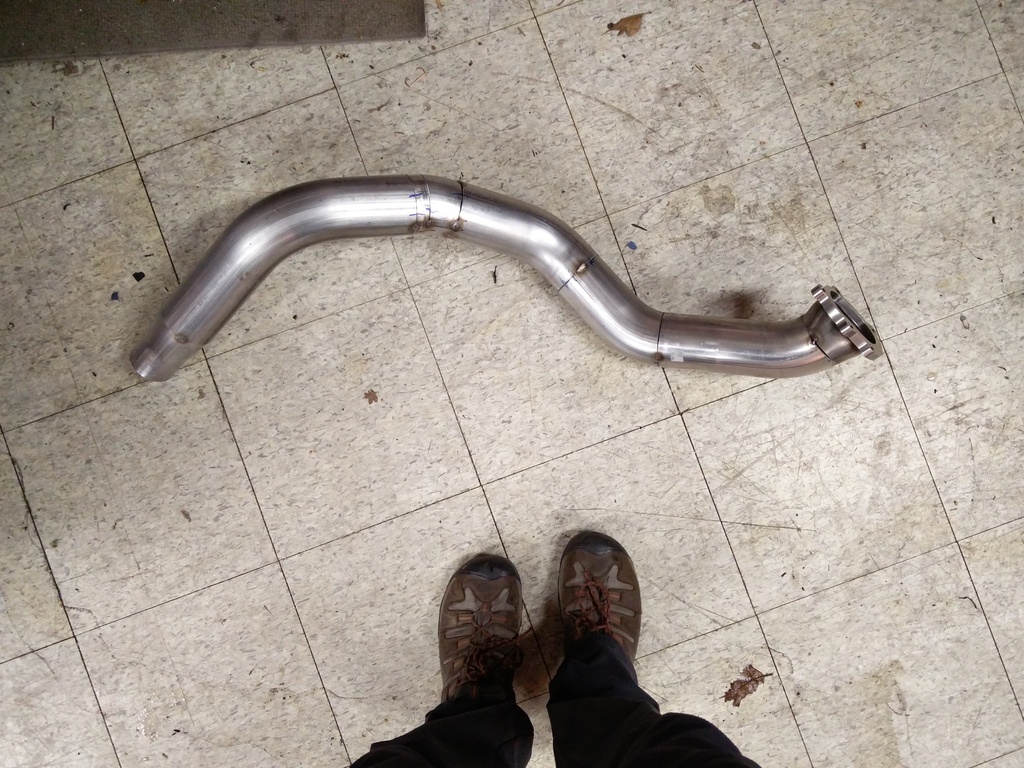
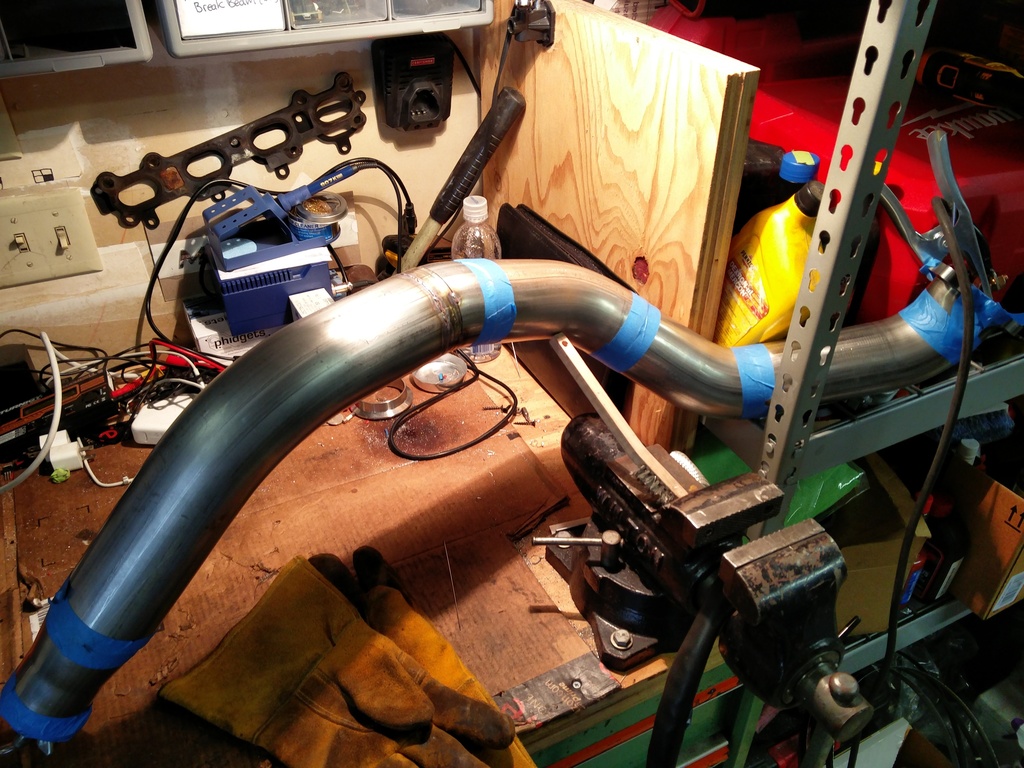
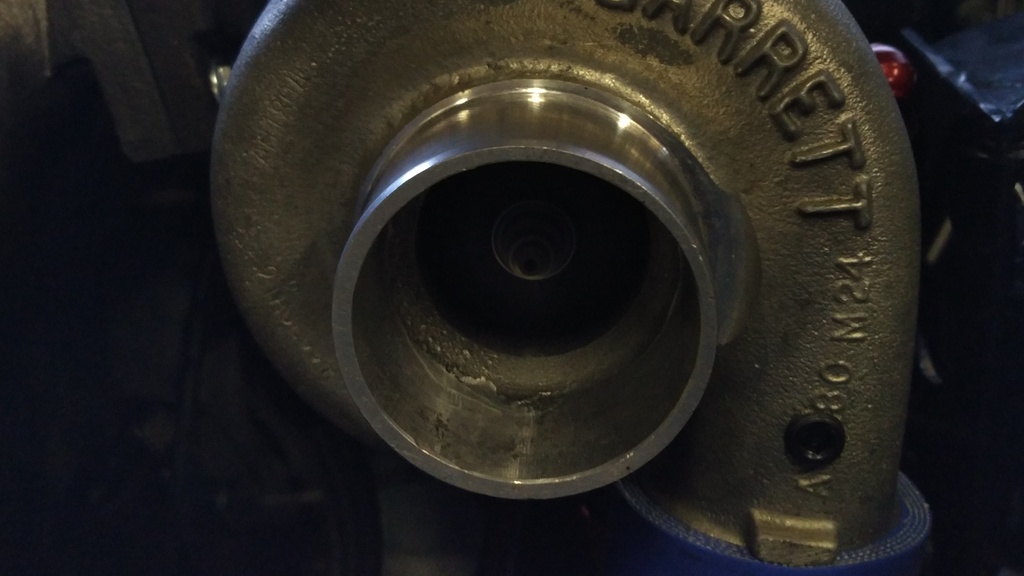
Look at all that room for a downpipe now!
3" mandrel bent stainless!
No way the booster is going back in. Guess I'll need to make an adapter plate to mount the MC to the "fire wall".
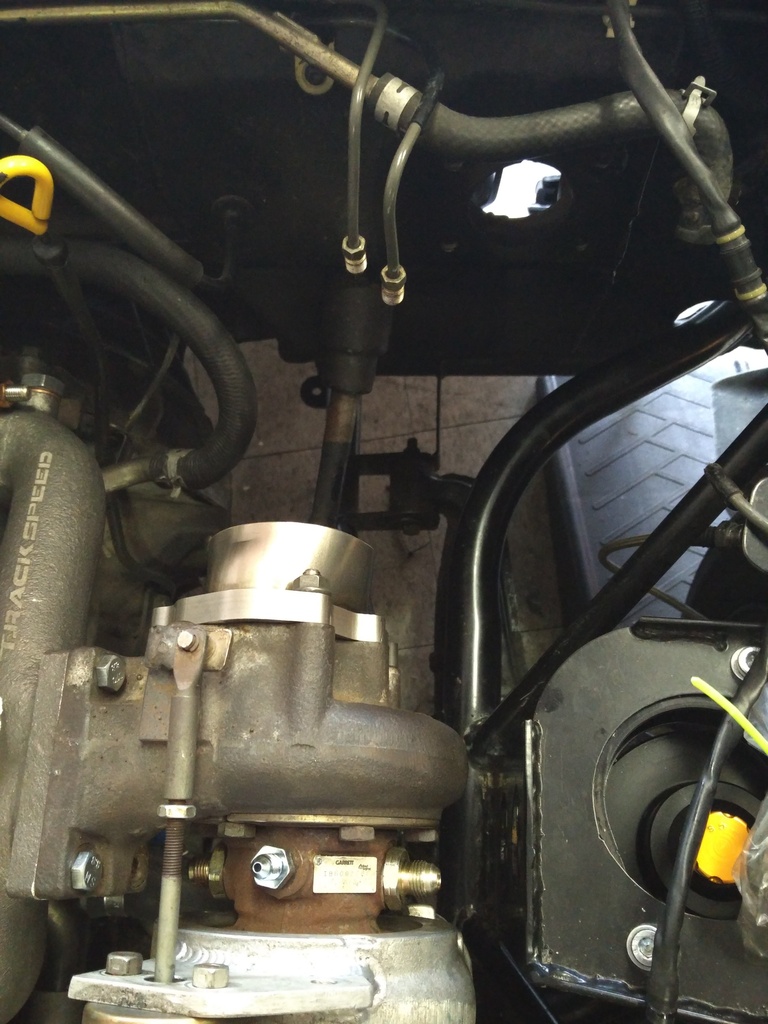
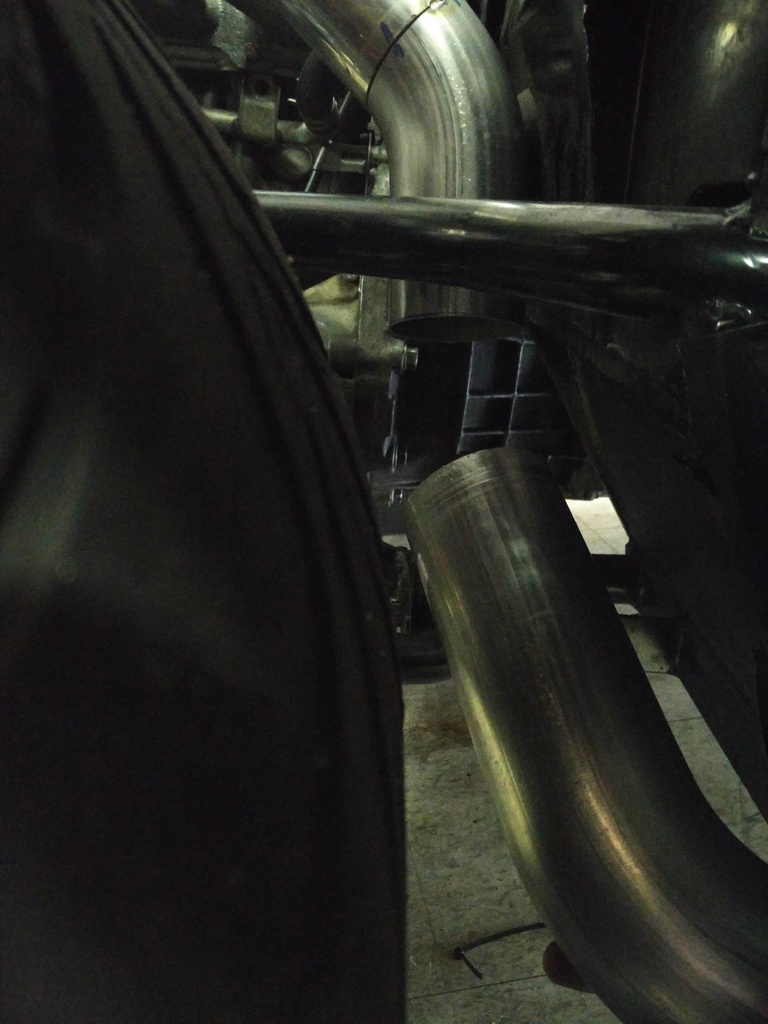
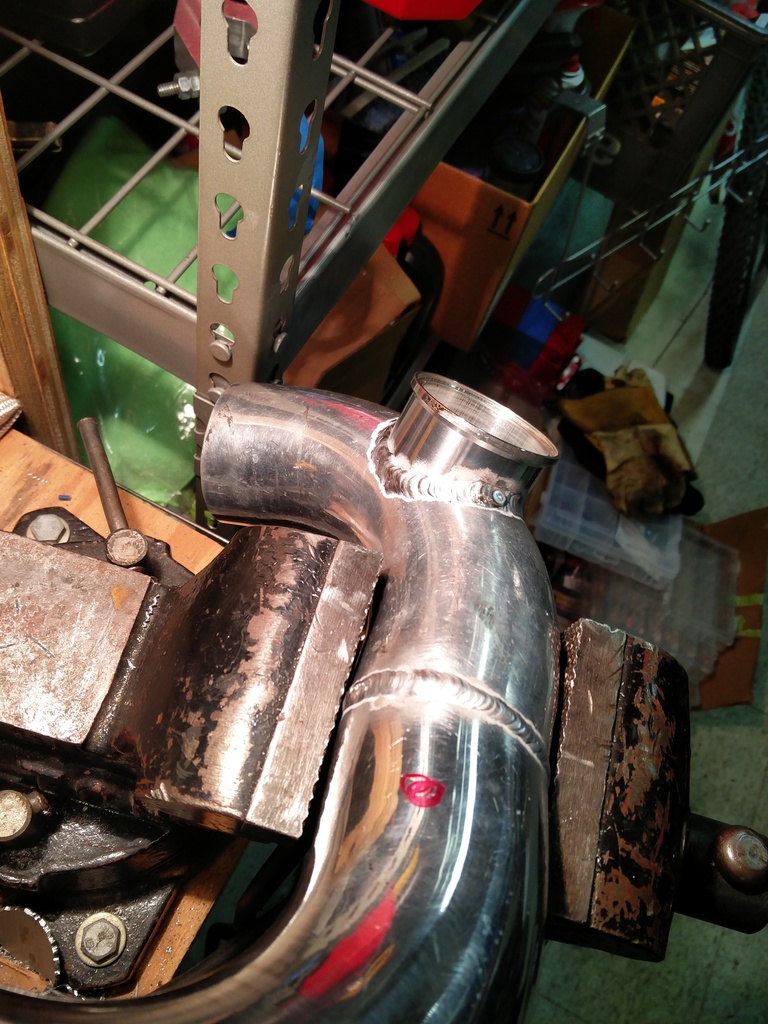
Mocking up the rest of the pipe. I got a bit further after this, but I'm short a bend. So the rest of the DP will have to wait for now. I also need to buy a flow meter for my 2nd argon tank so I can back purge.
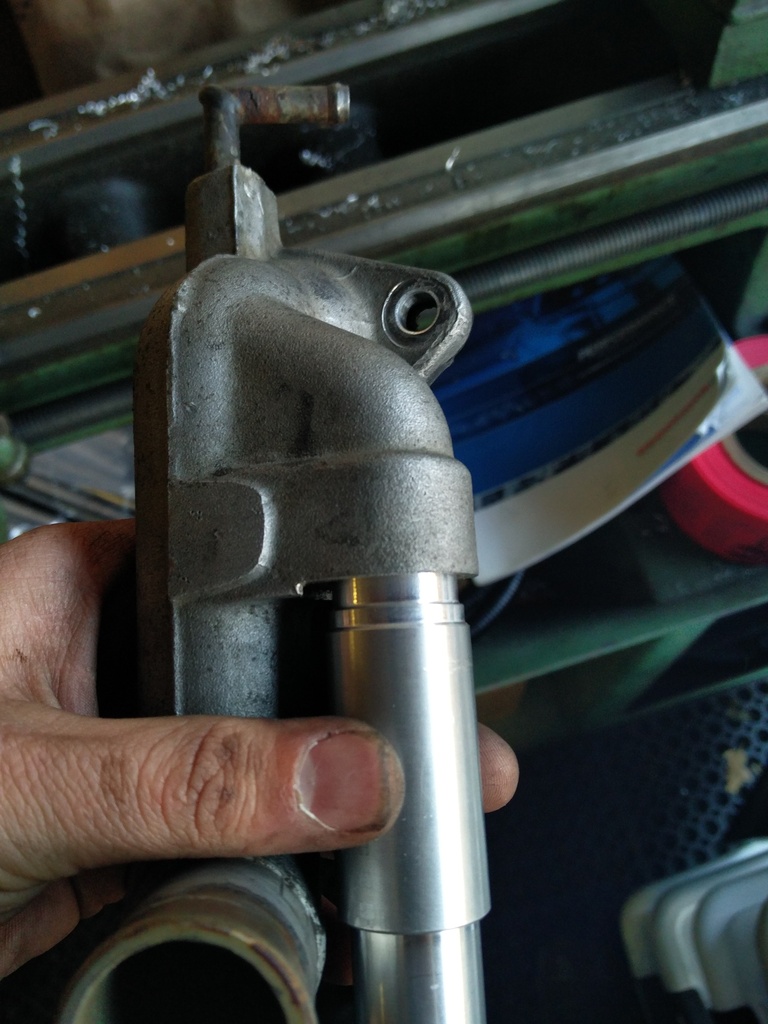
Didn't feel like trying to pull the rear water outlet to block the heater core nipple so I turned a plug for the hose out of aluminum. Added an 1/8th npt port to the plug just in case.

This is for the other end of the heater hose.

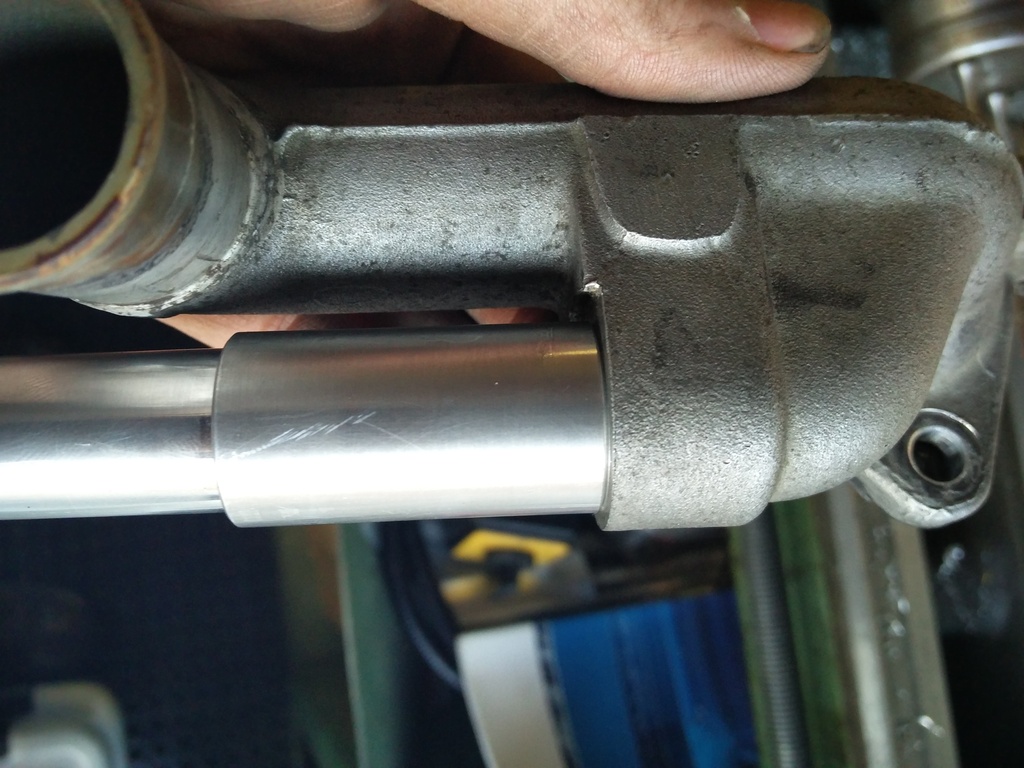
Fits snuggly.
6an weld bung in place.
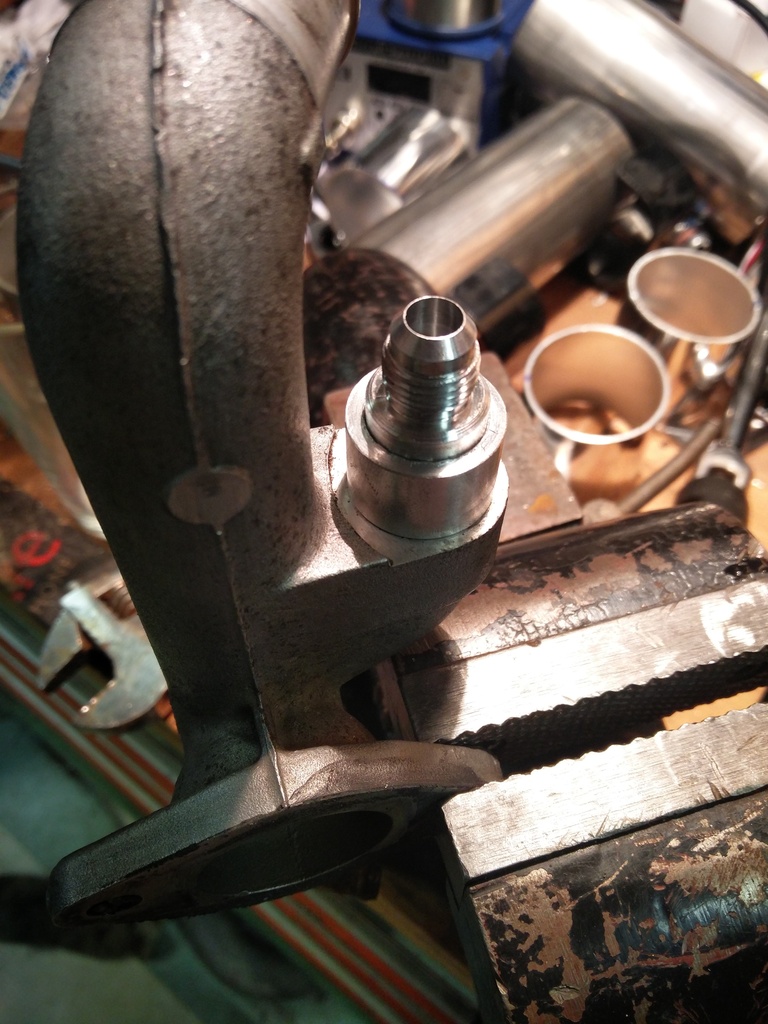
All welded up and mixing manifold re-installed.
Another angle with the 6an hose fitting in place.
And that's all I got done. Doesn't feel like enough, but it's progress in the right direction!
Edit: Just noticed the tags! Given how long I've been working on the car "years to spool" seems right
Removed MC and booster.
Look at all that room for a downpipe now!
3" mandrel bent stainless!
No way the booster is going back in. Guess I'll need to make an adapter plate to mount the MC to the "fire wall".
Mocking up the rest of the pipe. I got a bit further after this, but I'm short a bend. So the rest of the DP will have to wait for now. I also need to buy a flow meter for my 2nd argon tank so I can back purge.
Didn't feel like trying to pull the rear water outlet to block the heater core nipple so I turned a plug for the hose out of aluminum. Added an 1/8th npt port to the plug just in case.
This is for the other end of the heater hose.
Fits snuggly.
6an weld bung in place.
All welded up and mixing manifold re-installed.
Another angle with the 6an hose fitting in place.
And that's all I got done. Doesn't feel like enough, but it's progress in the right direction!
Edit: Just noticed the tags! Given how long I've been working on the car "years to spool" seems right
Reply
 0
0

0


Joined: Apr 2014
Posts: 18,643
Total Cats: 1,870
From: Beaverton, USA
Argon CO2 MIG TIG Flow Meter Regulator w Hose 4 Gas Welding Weld Machine New | eBay
Thats what I got for backpurging. Blew through my tank really fast though lol.
Thats what I got for backpurging. Blew through my tank really fast though lol.
Reply
0
0
Thread Starter
Senior Member
iTrader: (1)
Joined: Mar 2010
Posts: 820
Total Cats: 276
From: Bay Area, CA
Bit of a postdate on this post.
Last Sunday I helped Rauf get a tinyio connected to his LC2 and MS2. Took some debugging but we got it all worked out
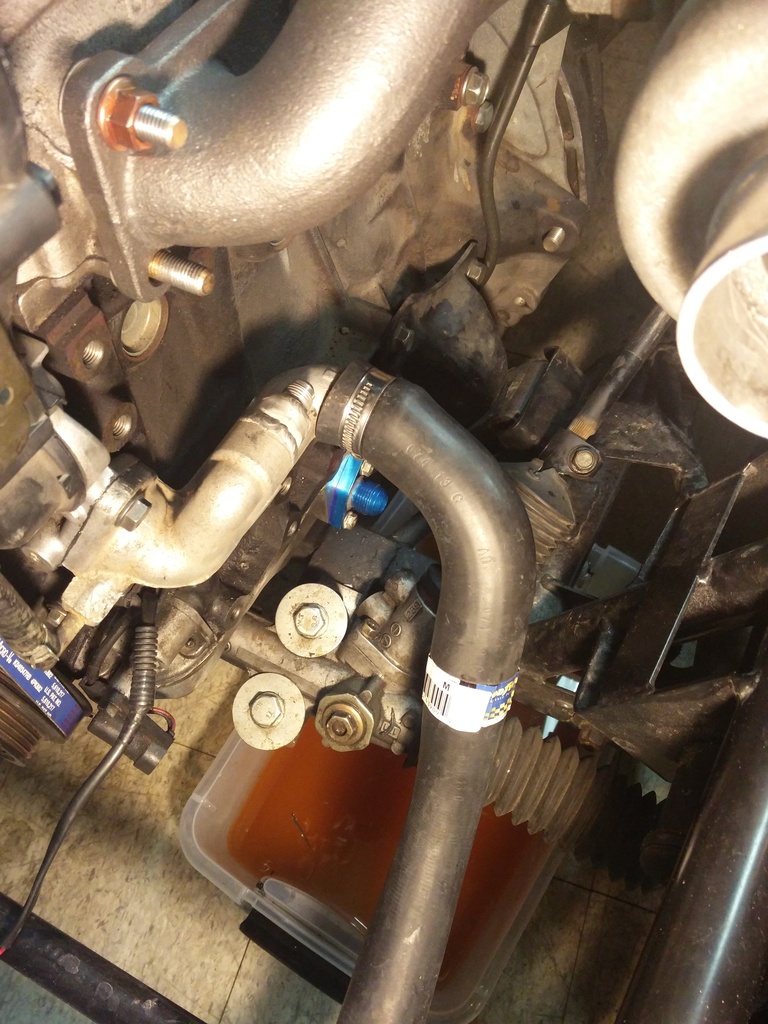
After we got that working Rauf helped me finish fitting and tack welding my down pipe.
I also installed all the fittings I had (and ordered the stuff I didn't) and cut the hoses to length and installed them on the AN fittings.
Last Sunday I helped Rauf get a tinyio connected to his LC2 and MS2. Took some debugging but we got it all worked out
After we got that working Rauf helped me finish fitting and tack welding my down pipe.
I also installed all the fittings I had (and ordered the stuff I didn't) and cut the hoses to length and installed them on the AN fittings.
Reply
0
0
Thread Starter
Senior Member
iTrader: (1)
Joined: Mar 2010
Posts: 820
Total Cats: 276
From: Bay Area, CA
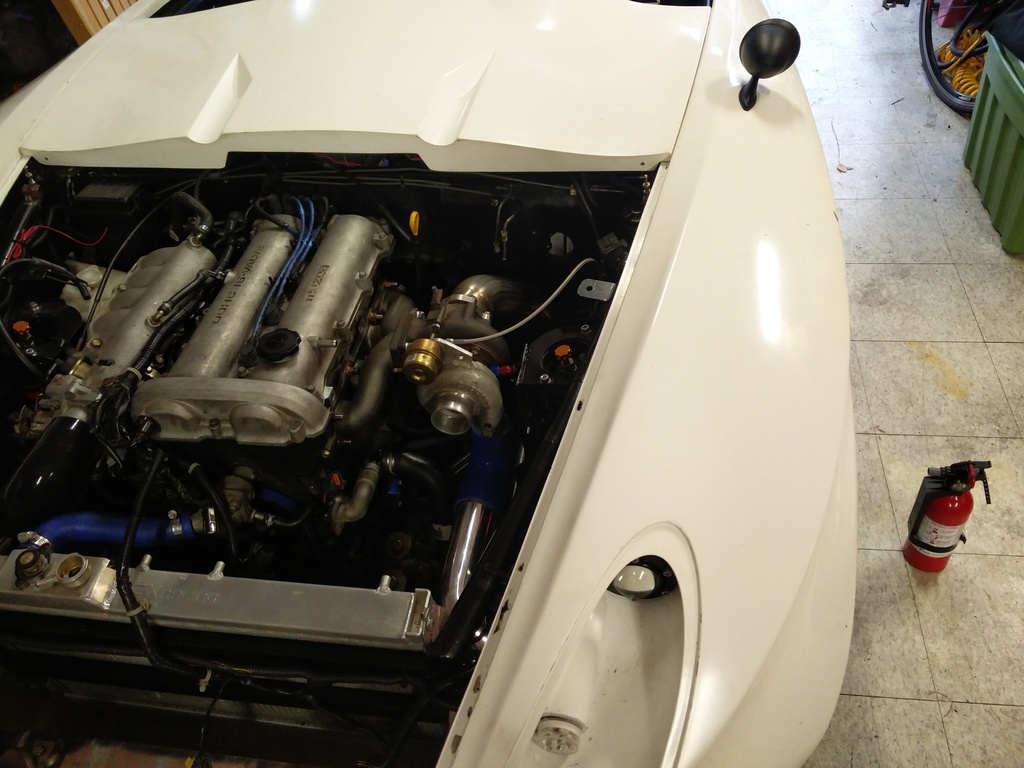
And that brings us to this weekend.
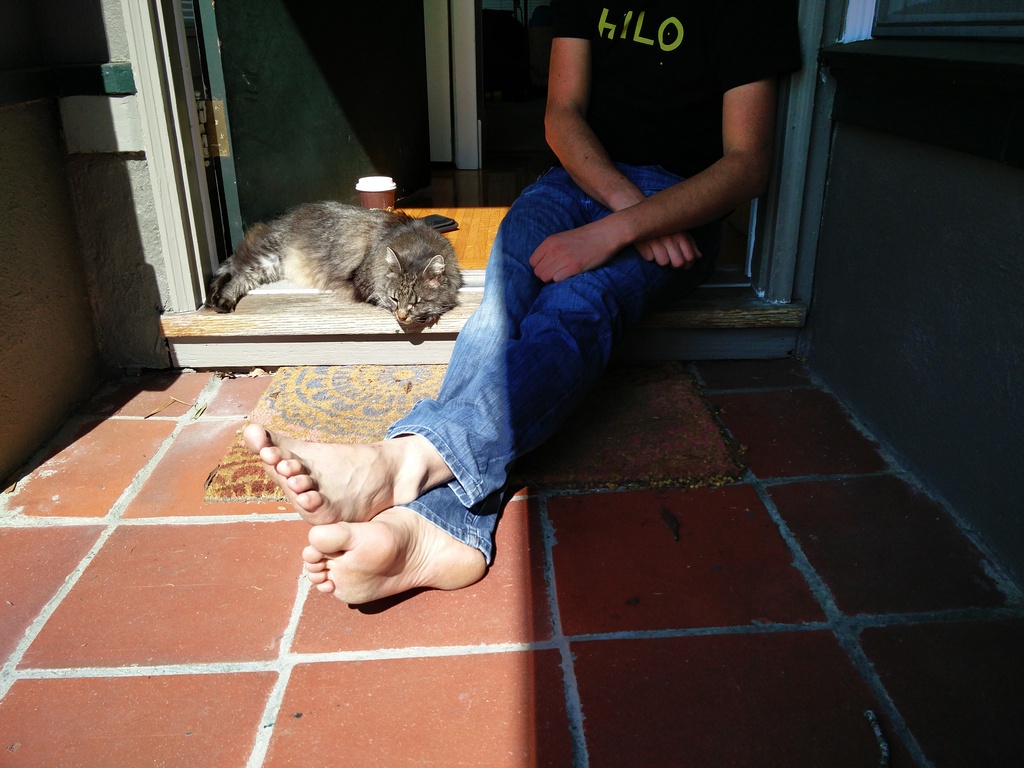
Saturday was a lazy morning with the cat and coffee(Philz <3 ). After hanging out for a while, my GF and I went for a mountain bike ride.
Stick with me... it get's better...
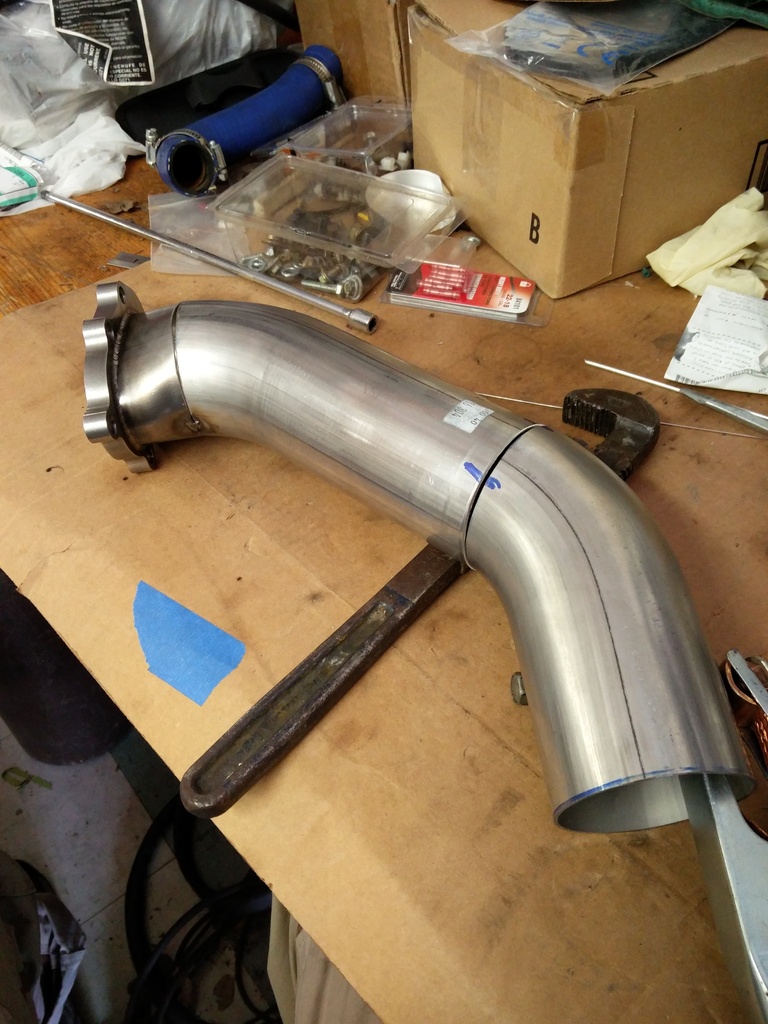
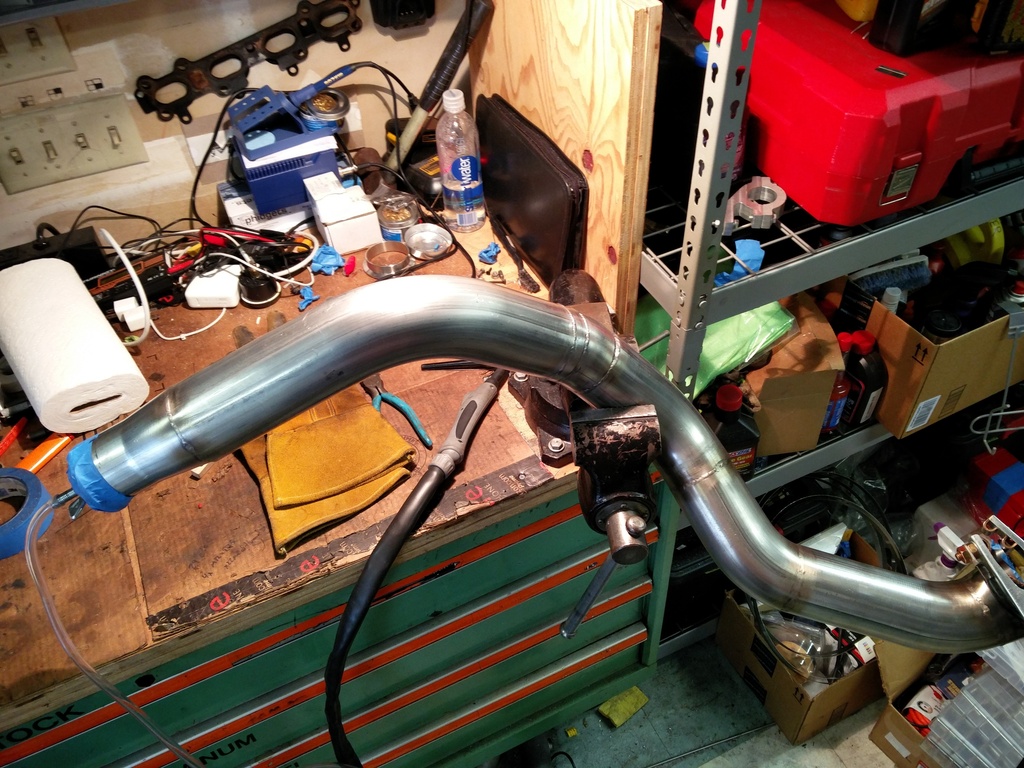
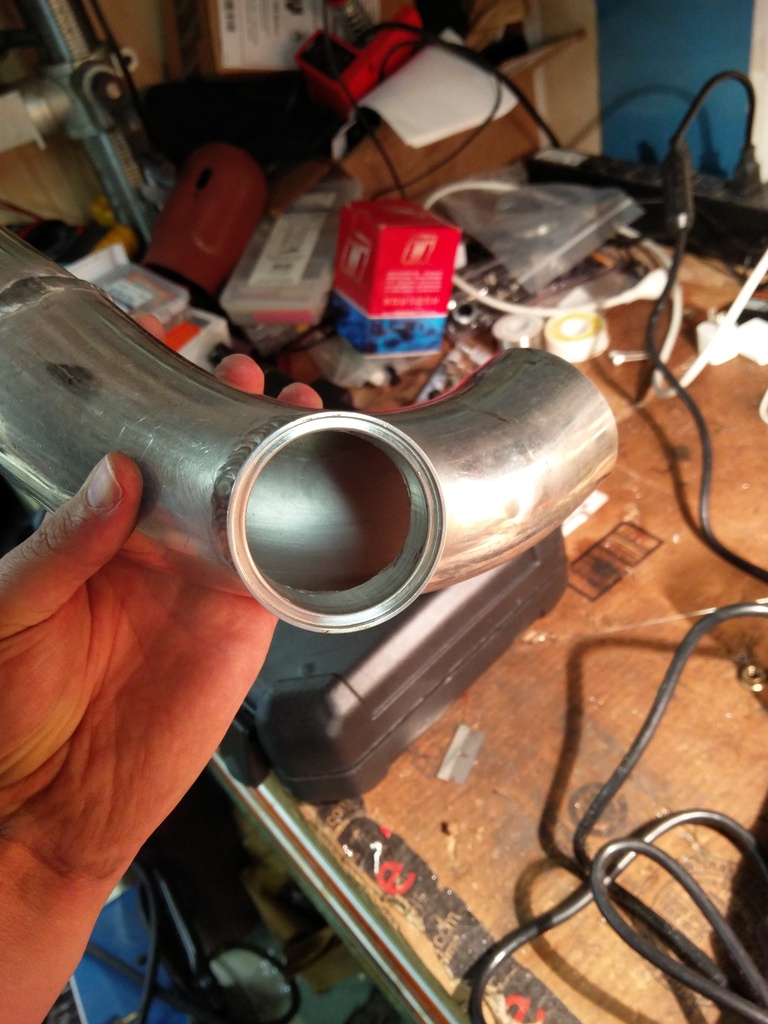
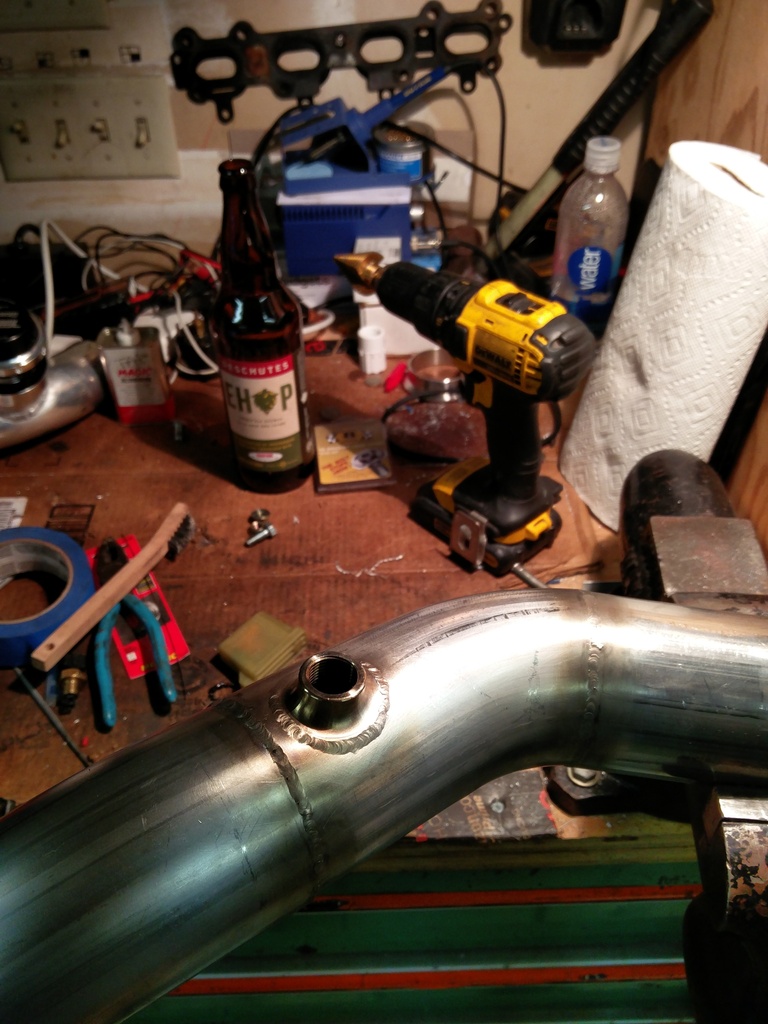
My argon flow regulator got here sometime last week, so today I finish welded the downpipe.
It turns out 2.5" is not a standard house pipe size so I just taped my gun drilled 3" plug to the end of the downpipe. Inside of the welds look pretty nice, so it worked

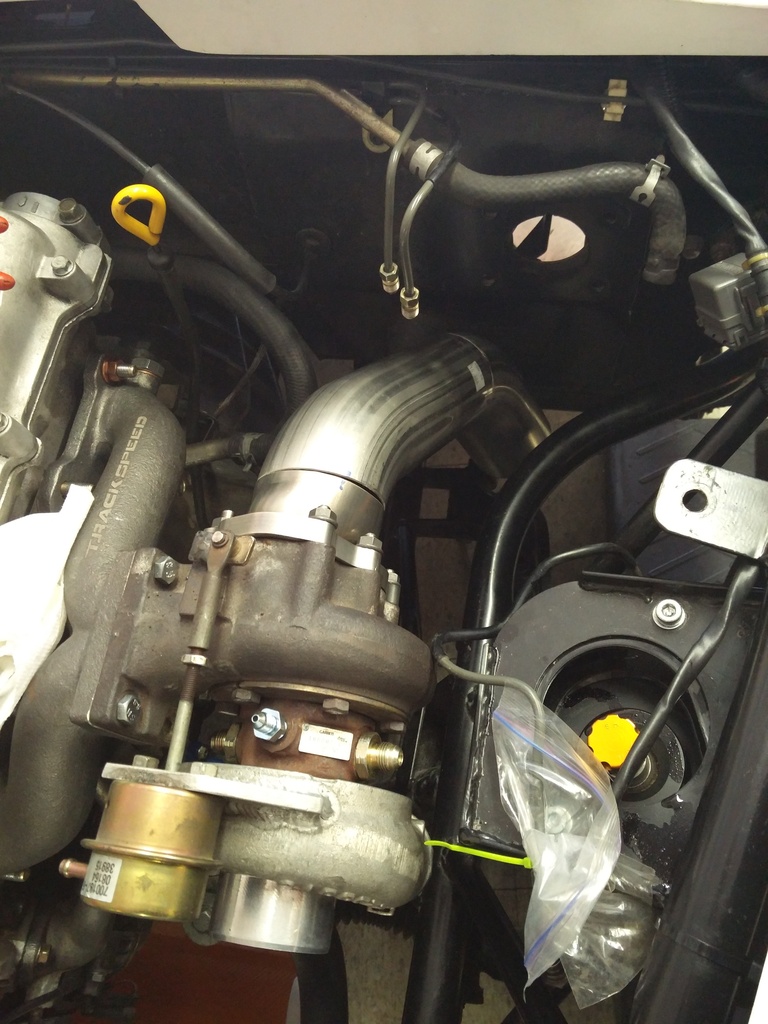
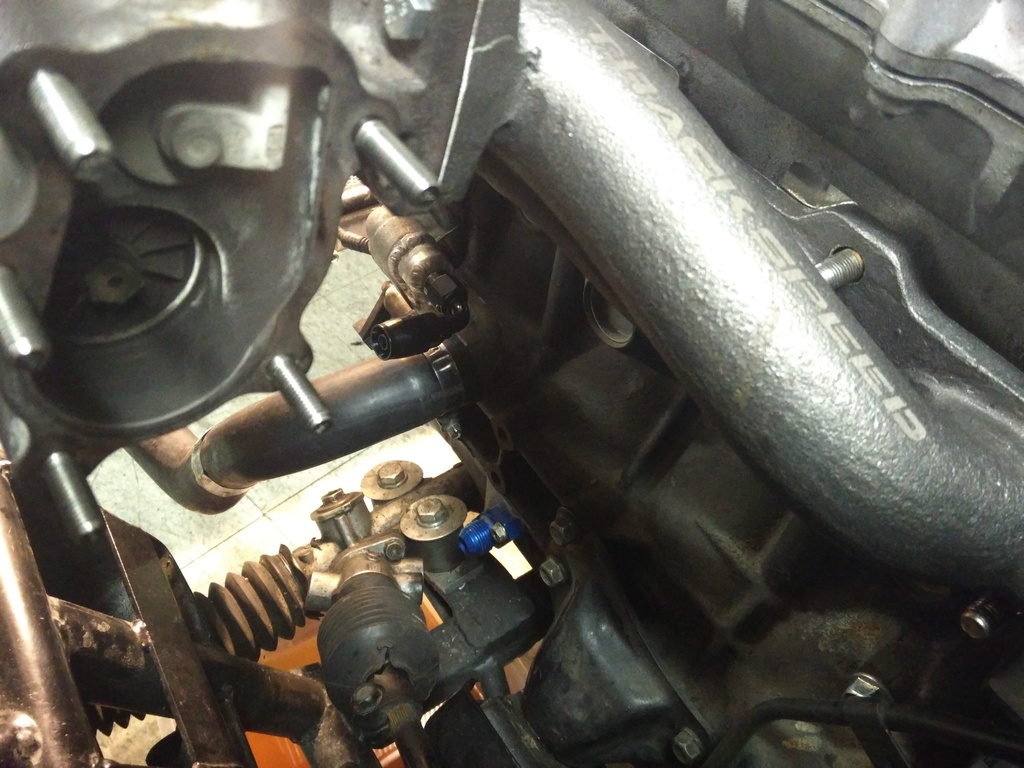
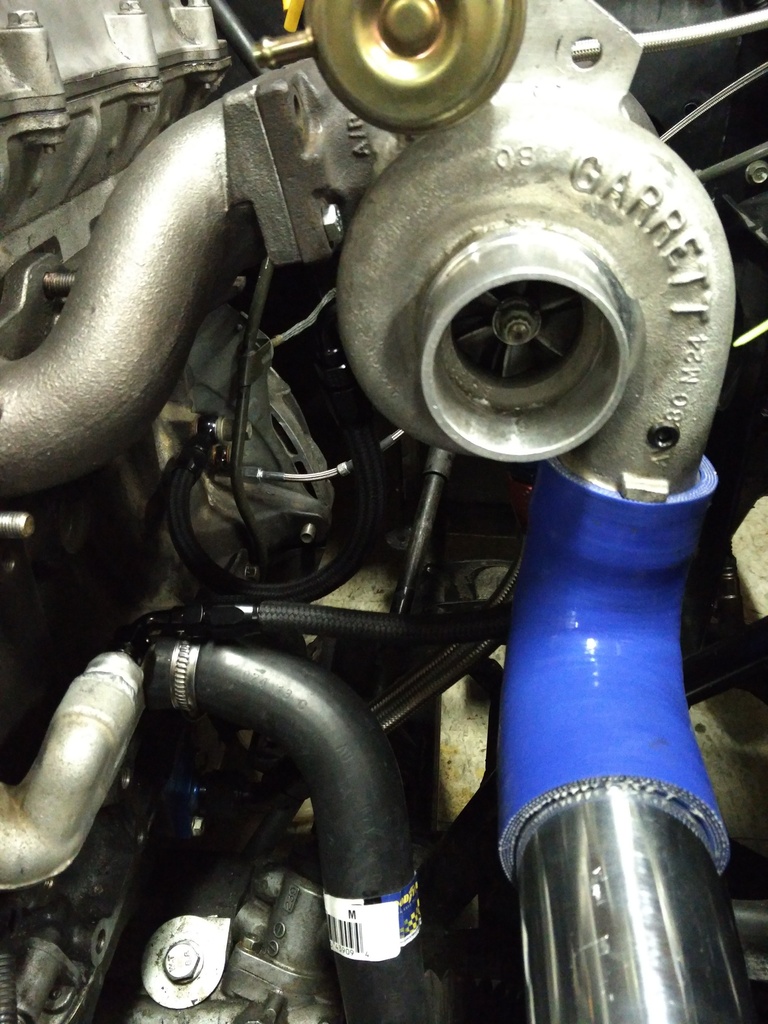
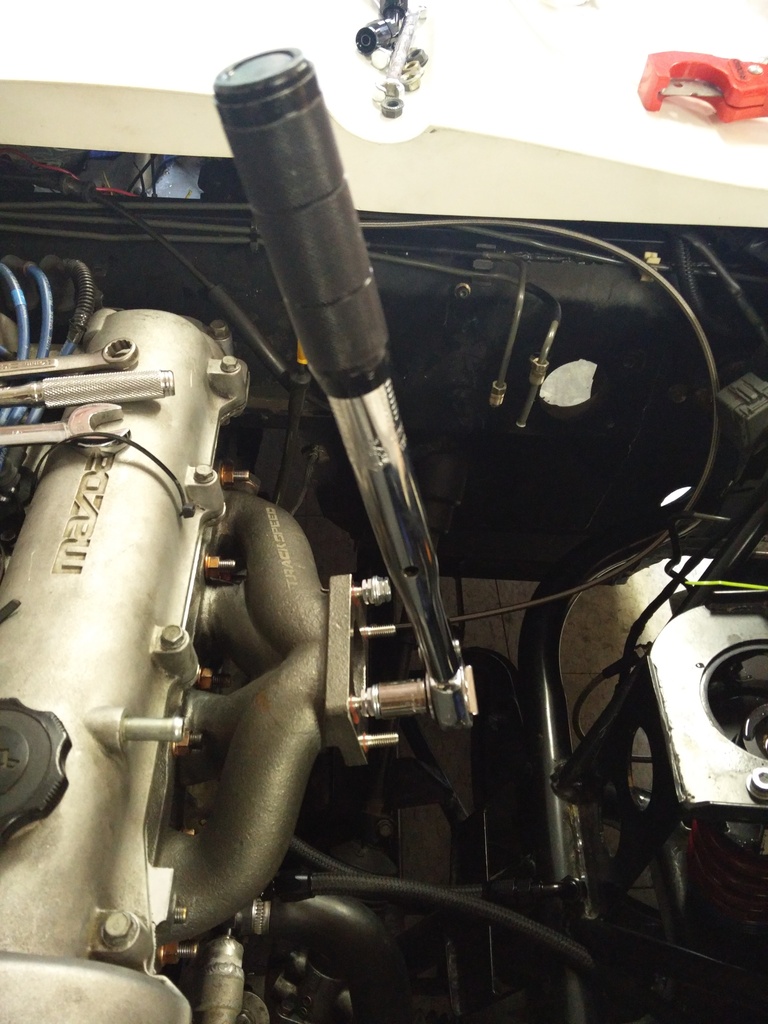
I then bolted and torqued the TSE manifold down and installed/resbonded the inconel studs in.
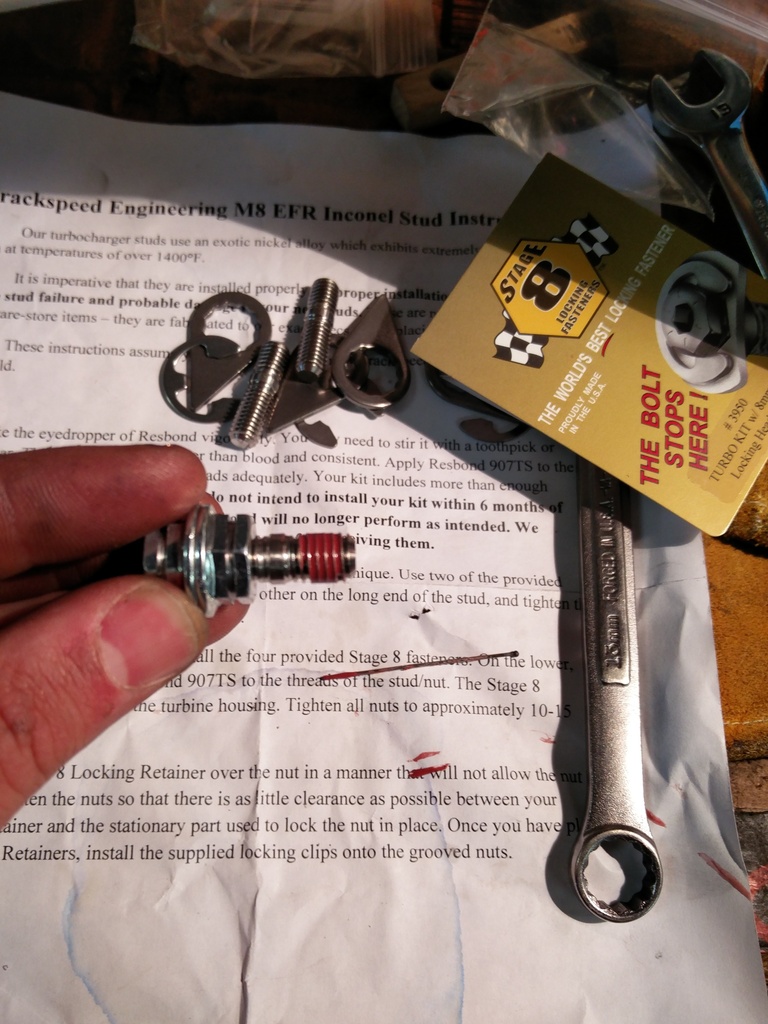
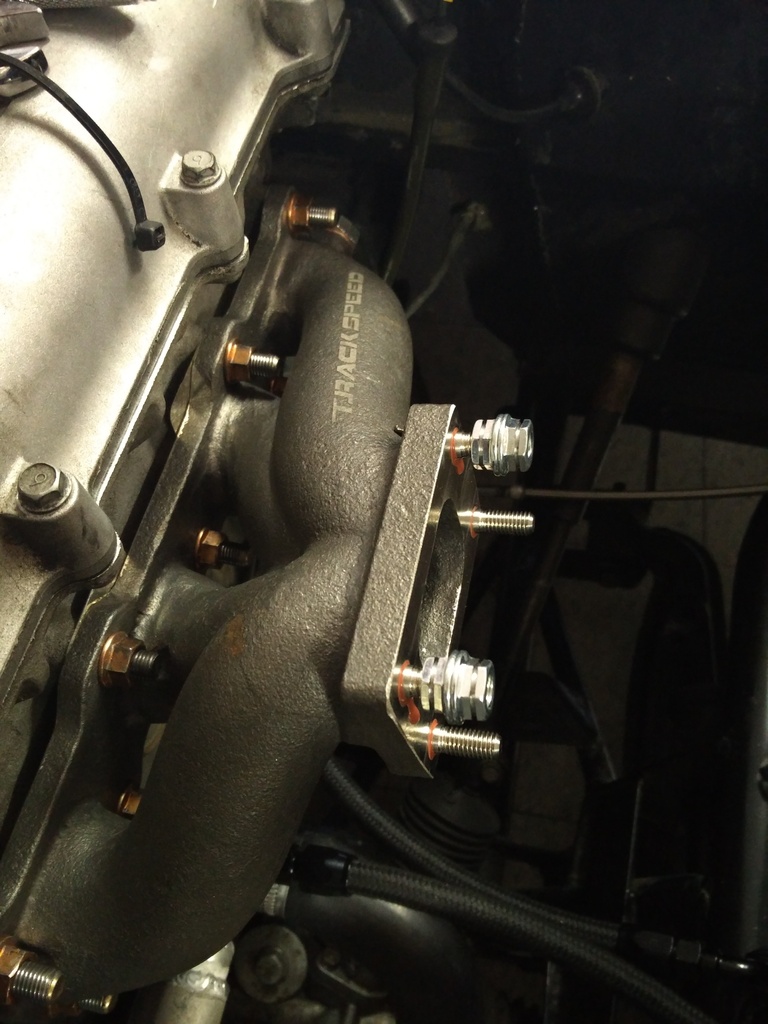
I managed to convince Andrew to sell me(wasn't too hard) 5 more inconel studs for the turbo outlet (I know, if it was an EFR I wouldn't need these ). So I resbonded them in too.
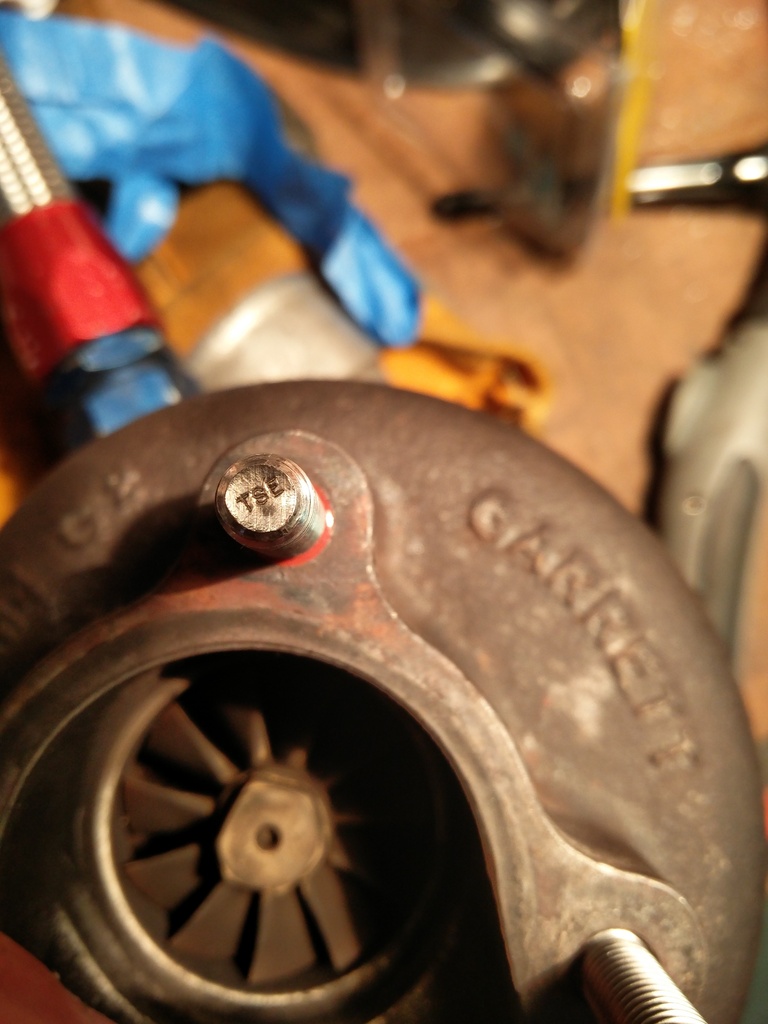
And all bolted up! The turbo has to be removed to install/remove the downpipe, but everything fits and the downpipe lines up with the muffler.
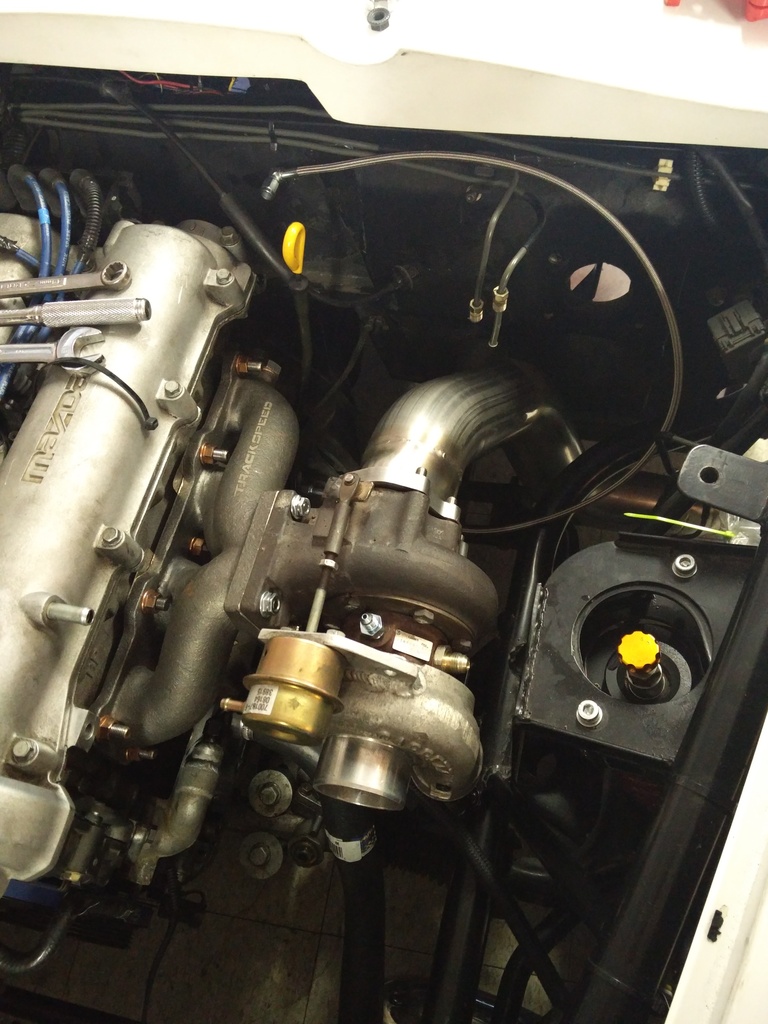
I then finished installing the hoses (with the new adapters that came in last week) and disconnected the crank sensor and spun it over until I got oil out of the feed line. The downpipe has to come out at least one more time so I didn't install the stage8 clips.

Properly set up so as to not make an epic fail video for youtube.
And Success!
Lot's of things that still need doing before this can go anywhere, but it's a good feeling to get here!
Saturday was a lazy morning with the cat and coffee(Philz <3 ). After hanging out for a while, my GF and I went for a mountain bike ride.
Stick with me... it get's better...
My argon flow regulator got here sometime last week, so today I finish welded the downpipe.
It turns out 2.5" is not a standard house pipe size so I just taped my gun drilled 3" plug to the end of the downpipe. Inside of the welds look pretty nice, so it worked
I then bolted and torqued the TSE manifold down and installed/resbonded the inconel studs in.
I managed to convince Andrew to sell me(wasn't too hard) 5 more inconel studs for the turbo outlet (I know, if it was an EFR I wouldn't need these
). So I resbonded them in too.And all bolted up!
The turbo has to be removed to install/remove the downpipe, but everything fits and the downpipe lines up with the muffler.I then finished installing the hoses (with the new adapters that came in last week) and disconnected the crank sensor and spun it over until I got oil out of the feed line. The downpipe has to come out at least one more time so I didn't install the stage8 clips.
Properly set up so as to not make an epic fail video for youtube.
And Success!
Lot's of things that still need doing before this can go anywhere, but it's a good feeling to get here!
Reply
0
0

Thread Starter
Senior Member
iTrader: (1)
Joined: Mar 2010
Posts: 820
Total Cats: 276
From: Bay Area, CA
Yeah, I'm rather excited about it
The tinyio connects to the serial output of the wideband and to the CANBUS connection on the MS2E. This means the wideband data get's to the MS all digitally, so there is no issue with ground offset's and all that BS. The tinyio also has a bunch of inputs/outputs so you can add more sensors for logging easily.
There are ton's of things that still need to be done, but the most pressing currently are:
- Brakes: needs an adapter plate and adjust the pedal ratio, rebend the lines, add in the wilwood prop valve, and bleed.
- Downpipe/exhuast: Add the wideband weldbung, weld the vband on to the down pipe, make mounts for the muffler, and cut the fiberglass a bit on the side panel for clearance for the outlet.
- Intake piping: Weld on BOV flange, run tubing for the BOV, build a shield for the BOV, order and install t-bolt clamps, finish the mount for the intercooler, figure out catch can setup, make and weld in a bung for the AIT sensor.
- Heat shielding: Stick on heat shield on the drivers side firewall, heat shielding for the brake master, head shielding for the cabin from the muffler.
If I get all those done I can at least drive it around a bit.
I started on at least one of those things before turning in this evening.
Reply
1
1
Thread Starter
Senior Member
iTrader: (1)
Joined: Mar 2010
Posts: 820
Total Cats: 276
From: Bay Area, CA
I put a giant hole in my intake! (Cleaned it up as it was just a rough cut hole before)
And then I plugged it!
I was gonna make the bung for the AIT butbit turns out I ordered an m12x1.25 tap instead of an m12x1.5 :(
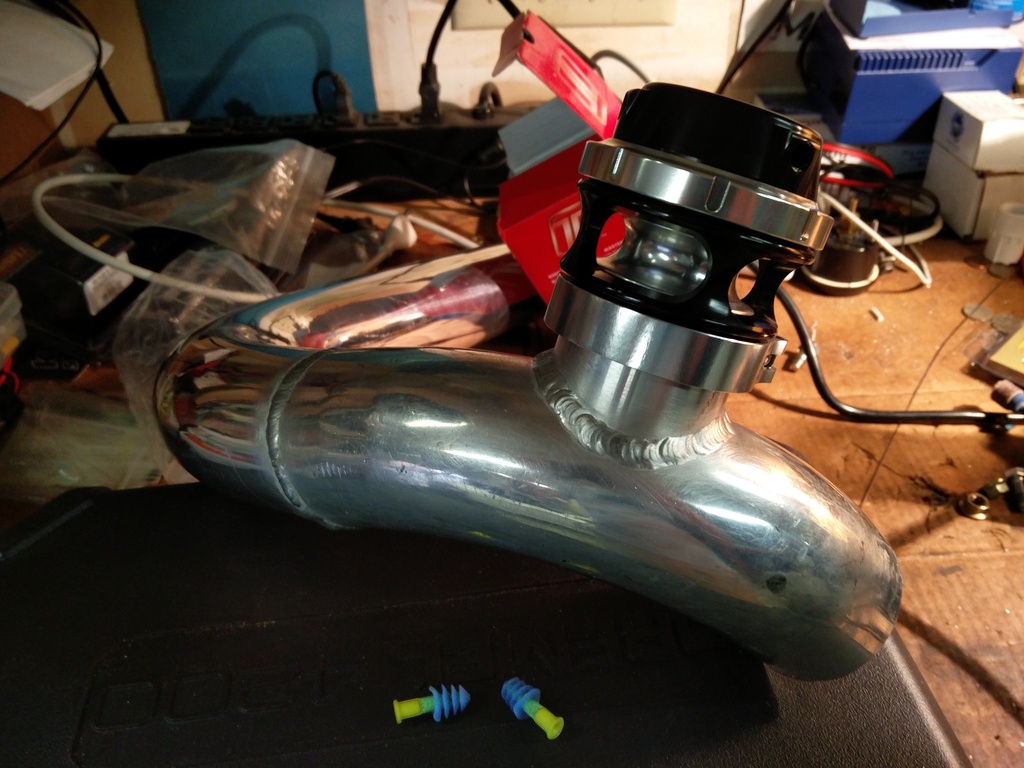
So instead I pulled the downpipe and added the wideband bung and welded the muffler v-band on. Don't drink and weld kids...
And then I plugged it!
I was gonna make the bung for the AIT butbit turns out I ordered an m12x1.25 tap instead of an m12x1.5 :(
So instead I pulled the downpipe and added the wideband bung and welded the muffler v-band on. Don't drink and weld kids...
Reply
1
1


Joined: Apr 2014
Posts: 18,643
Total Cats: 1,870
From: Beaverton, USA
2 things.
1. What debugging did you do with tinyiox. I have mine hooked up and communicating over CAN. And i can configure it. But it isn't reading my lc-1 data.
2. Please stop working on the exofish and finish the NB
1. What debugging did you do with tinyiox. I have mine hooked up and communicating over CAN. And i can configure it. But it isn't reading my lc-1 data.
2. Please stop working on the exofish and finish the NB
Reply
0
0
Joined: Apr 2014
Posts: 18,643
Total Cats: 1,870
From: Beaverton, USA
The exofish is cool and all, but your NB is way cooler.
Also I want to make one of your fancy CAN gauges if you have any details on it. My VEI dual temp gauge is pissing me off
Also I want to make one of your fancy CAN gauges if you have any details on it. My VEI dual temp gauge is pissing me off
Reply
0
0

Thread Starter
Senior Member
iTrader: (1)
Joined: Mar 2010
Posts: 820
Total Cats: 276
From: Bay Area, CA
Works been really busy recently so I've done nothing to either car. Also this happened so I'm even more distracted.
 the gauge is pretty simple, ardunio, can interface, 7 segment displays, and a stepper motor. Hardest part is packaging all that in a 52mm gauge pod. I figure the NB is going to get a throttle limiter for bit once it's running.
Reply
0
0
Joined: Apr 2014
Posts: 18,643
Total Cats: 1,870
From: Beaverton, USA
I guess I don't need to package it in a 52mm pod. Just need it to fit in the gauge cluster where the temp gauge went. If you watch any of my latest track videos the VEI gauge is just flashing and freaking out the whole time.
Reply
0
0


