When you click on links to various merchants on this site and make a purchase, this can result in this site earning a commission. Affiliate programs and affiliations include, but are not limited to, the eBay Partner Network.
"Installing a Seat in an NB2 Miata for Filthy Newbs Like Me
I don't have a huge update for this thread, but I have made some progress on the car, by way of a seat and harness on the driver side. I did not find much info on the seat installation process anywhere, like exactly what it means to "massage" the transmission tunnel, so I will take the time to write this up in detail for other folks. I'm sure there are better choices that could have been made along the way, but this is what I did, like it or not.
Let's install this thing. Or, at least begin the loooooooooooong process.As previously mentioned, the seat is a Corbeau FX1 Pro, which is an inexpensive, entry-level, lightweight (17lbs) fiberglass composite "racing" bucket, that is not FIA rated. This seat can be side or bottom mounted, but unless you want to drive from a throne on high and snootily look down upon the Suburbans and Expeditions of this world, side mounting is the only option.
The bracket set I chose is the SB255DR from Planted Technologies. They have a hardware kit available for purchase for $12 or $15. You will not need it. The only parts you may use are flat washers that you can get from any hardware store's racing department. Everything else comes with the seat. The brackets are very well made, and are of powder coated steel construction. Numerous holes and slots are available for seat positioning, but the harness slots in the Corbeau seat restrict how far back the seat can be mounted without spacers between the seat and brackets, and spacers are death in a car this small (photo to come). Fortunately, my preferred seating position is compatible with this combination of kit.
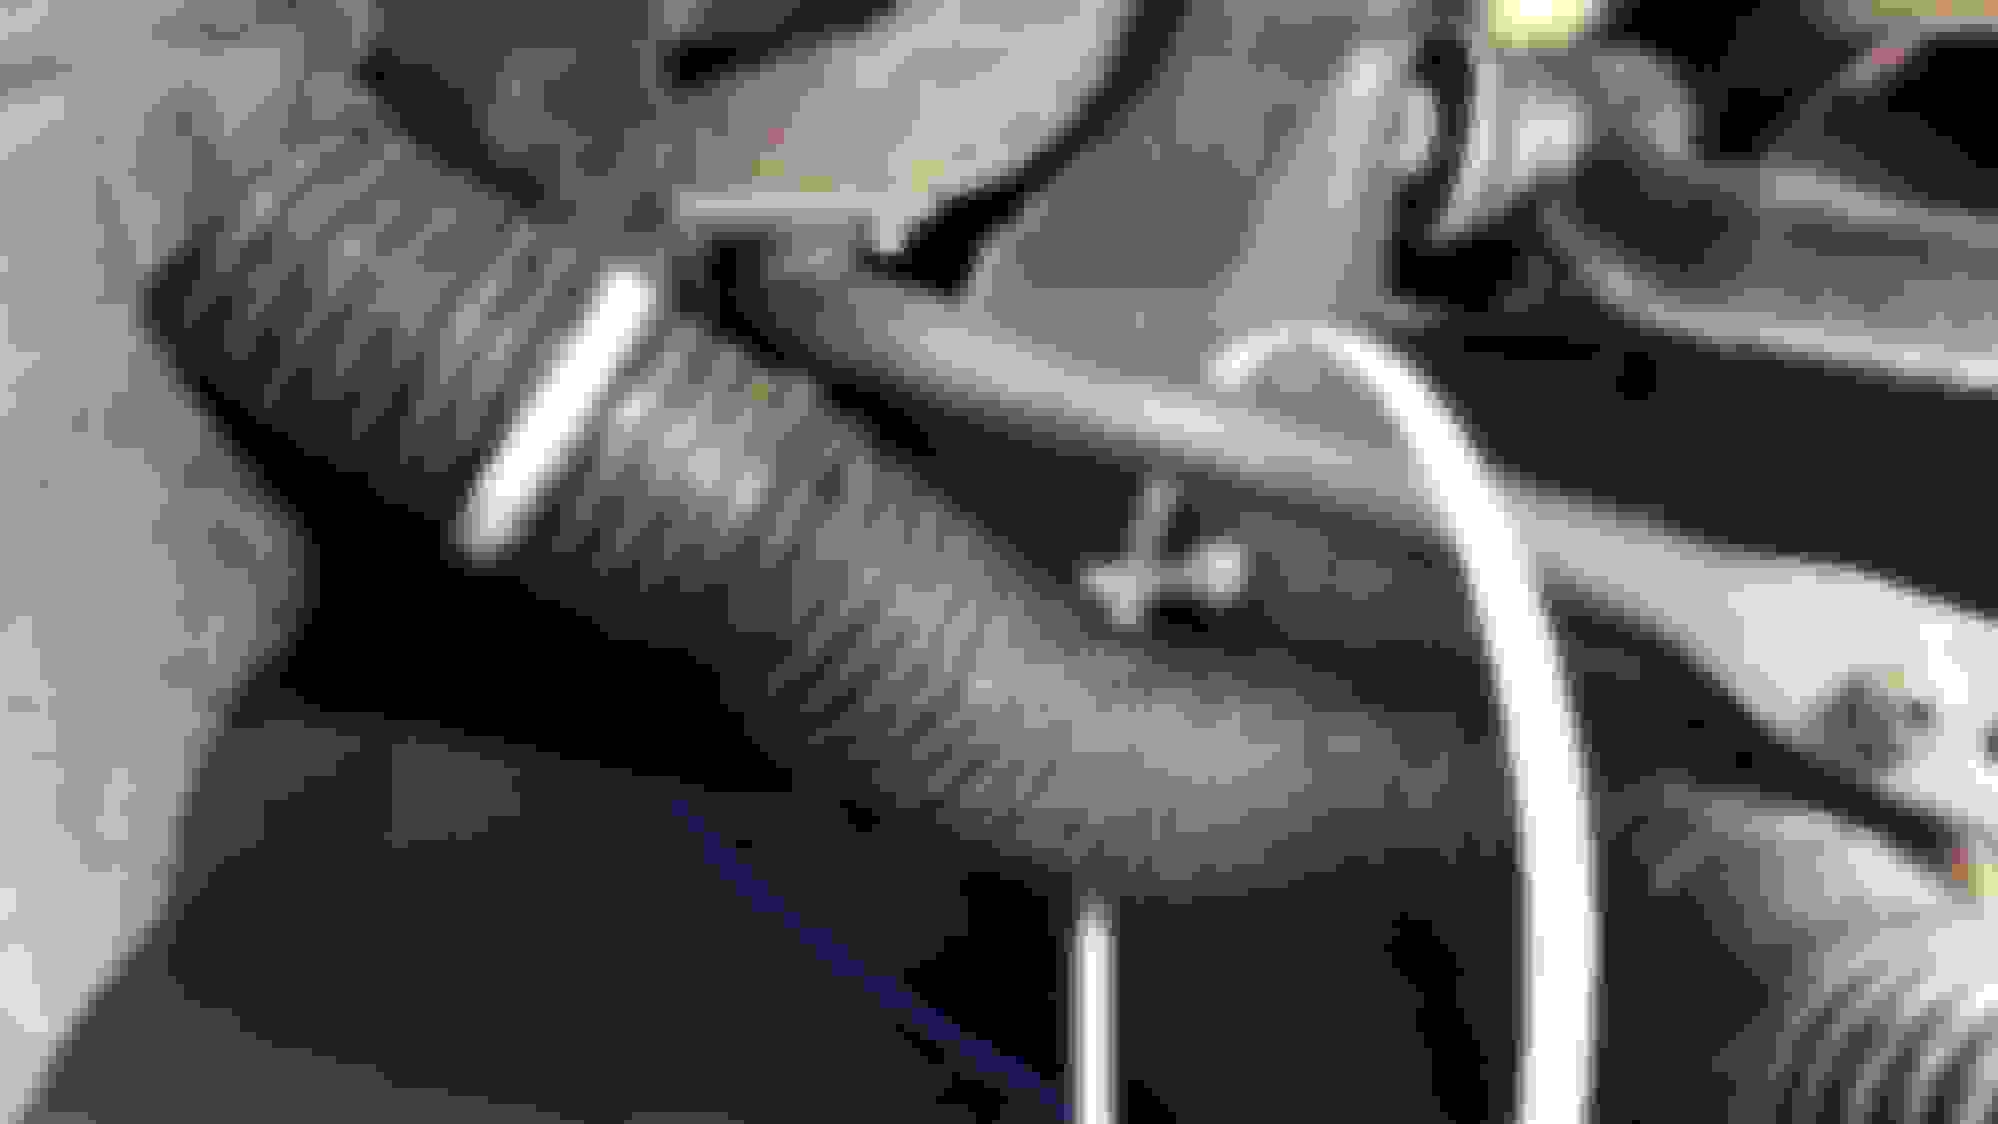
Here are the brackets being test fitted for the first time. Look at the front of the inboard mount. The bolt is nearly all the way to the right. It needs to be all the way to the left for the seat to be mostly centered and fit in the car. To solve that problem, I cut out a small amount of carpet where the bracket touches the seam on the transmission tunnel and wailed on that sheet metal with my 3 lb BFH and a large blunt nose cold punch. A lot. For about 30 minutes.
We will see the result of that in a few minutes, but let's have a look at test fitting the seat in the brackets without making any modifications first. With the seat pushed inboard as far as possible, it still contacts the map pocket on the door card near the bottom, and the wing contacts the door card on the top to the point the door will not close. The seat is mounted more than 2" off center toward the door. A harness will not work with my roll bar safely. Finally, the word "high" does not begin to describe it.
This is the area that needs a loving massage from your BFH. It will never see the light of day again, so I took a shortcut and cut a bit of carpet out of the way, instead of taking the time to peel the carpet back. Wail on it about twice as much as you think you should, then wail on it twice that much more. Then do it again.
If you are slightly neurotic like jeffbucc and I am, hit it with flat black paint to prevent rust and make it look nicer.
The reward for this little workout is a bracket that will slide all the way inboard.
That's probably enough photos for one post. I have no idea why these photos are turned all whicha way. <-- Good English thataway.
.
Last edited by Steve Dallas; 03-25-2017 at 09:11 AM.
Once you have made the determination that you are OK with ruining any resale value your seat may ever have, tape the seat up with trash bags to protect the fabric and get busy with your angle grinder. I used a cut-off disc first to cut the mounting bosses off the bottom. Then, I went to town with a metal grinding disc. I should have gone past town, because I didn't take enough off the first 2 times, had to hit again a 3rd time, then had to file parts of the bottom of the shell itself to square it up on the brackets.
Here it is after the cut-off disc. Grind those bosses ALL THE WAY DOWN. Also, do a better job of taping the trash bag seams than I did, because that dust gets EVERYWHERE. This should go without saying, but wear safety glasses, a face shield, and a respirator when you do this.
Once you get that all cleaned up, you can start test fitting the bracket to the seat, and both of those things to the car. I marked my OEM seat location with blue tape, and matched the new seat to that location as much as possible.When you find your starting location, it is time to fine tune the fit of the brackets on the seat itself. You will want to use a mounting bolt to make sure the mounted seat will fit the bracket with the bolt in place.
You will probably find that you need to grind a recess with a Dremel tool to clear the bolt. You will probably also find that you need to grind or file the bosses more and maybe reshape the bottom of the shell. I think the seat met the grinder and a file 2 more times after this photo was taken.
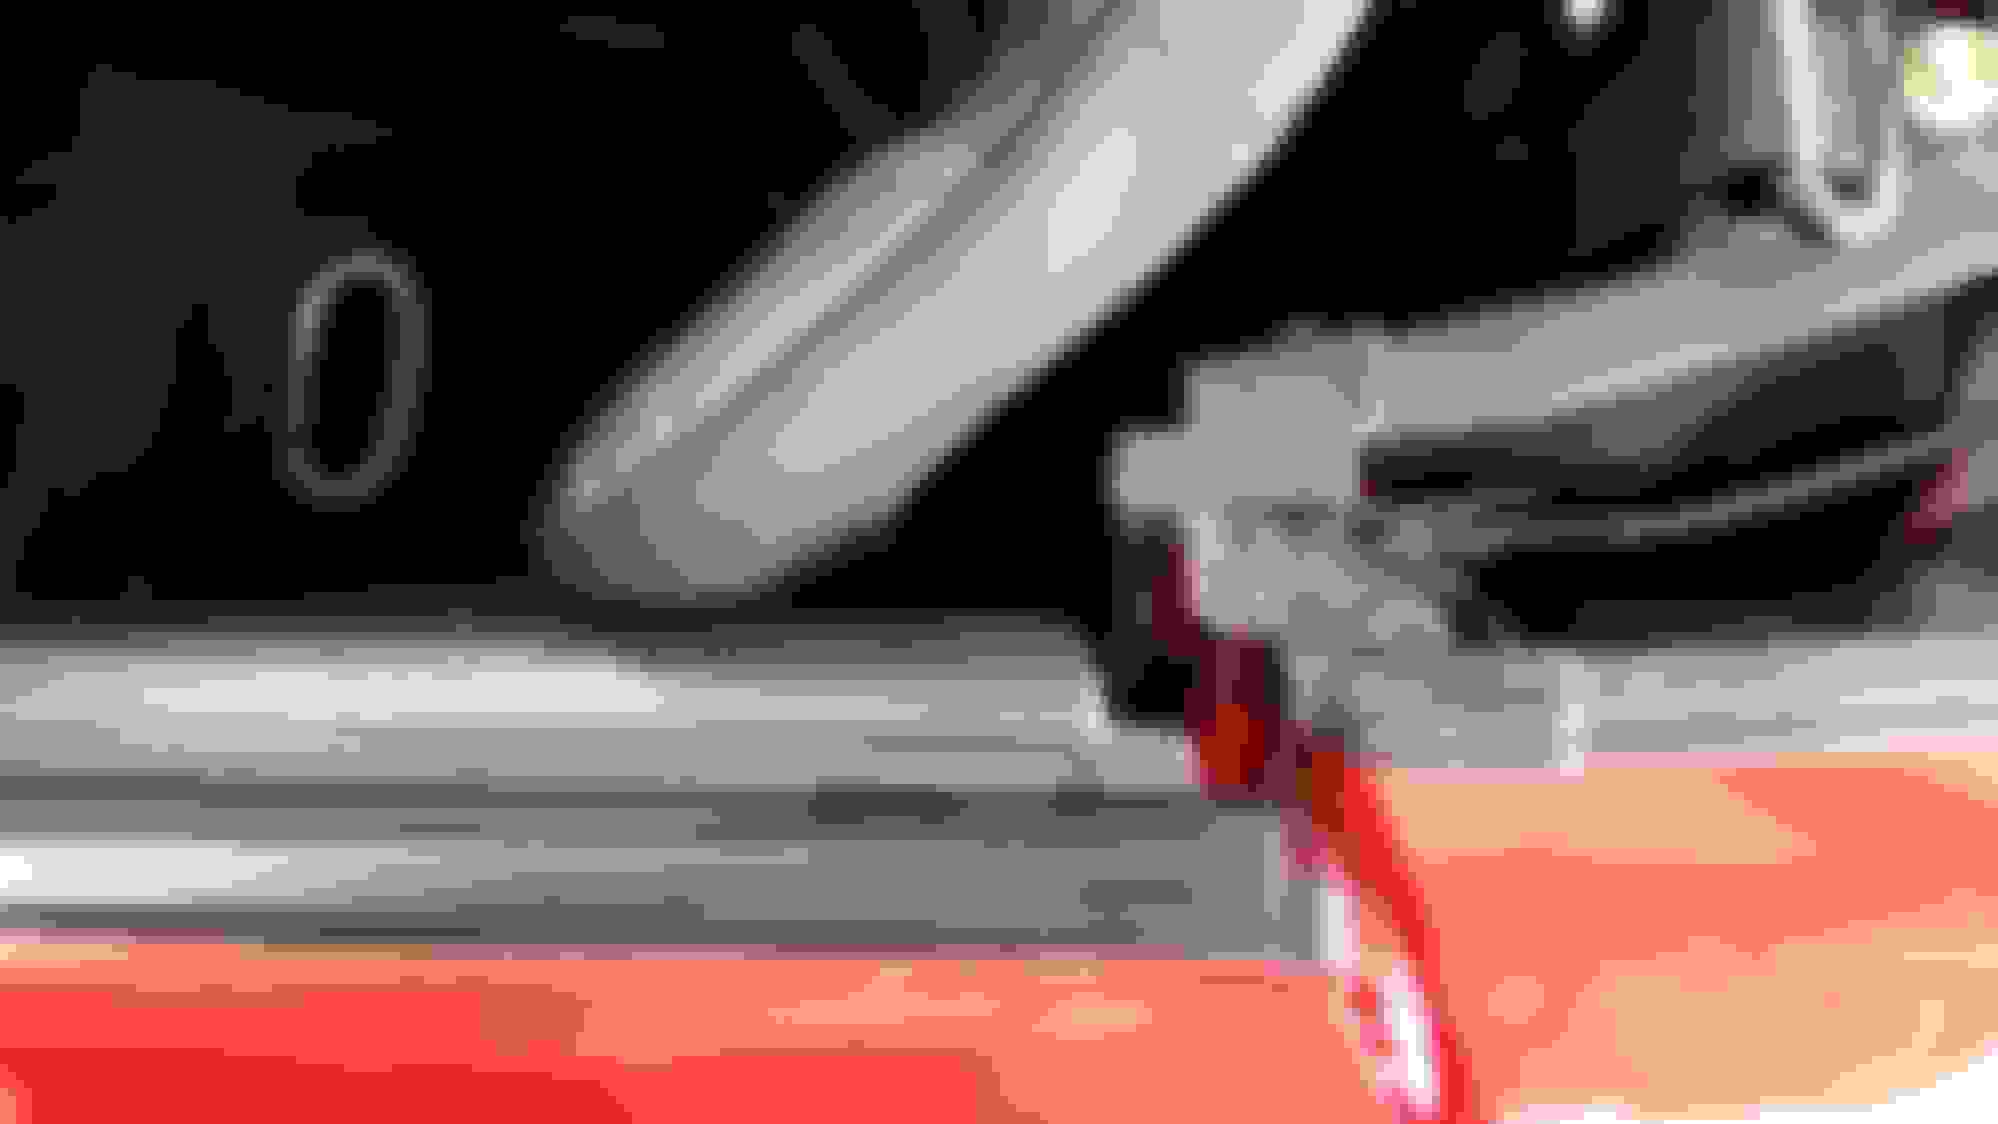
As you test fit the brackets, you will probably see a lot of this, which will cause you to grumble bigly. Notice how the seat cannot be mounted any farther back with this bracket without using spacers (and, more importantly, interfering with your harness)?
Once everything fits together with proper clearance, assemble everything finger-tight and mount the seat in the car and sit in it to test its location. Sit it in for a while and operate the pedals and steering wheel, while making zoom-zoom sounds, to check all ergonomics. Make adjustments as needed by removing, reconfiguring, and remounting. Choose your the mounting holes for your final position, and mark them. Then test fit everything several more times. I recommend at least 647.
Should you mount the seat as low as I did, you will have to mount the brackets in the car first, because the rear mounting bolts have to be torqued before the seat is installed. This requires a LOT of adjustment--especially since the seat is not square. The brackets will be angled in a few degrees at the rear. The critical bolts are both of the inboard bracket bolts. The front needs to be tight against the transmission tunnel, and the rear needs to be a few mm in from touching the carpet. Once you think that bracket is in the right place, mount the seat to it and get an idea of where the other outboard bracket will fall. Keep adjusting things until the seat is mounted as far inboard as possible, both brackets line up with the seat, the seat is straight, and all 4 side mounting bolts can be finger-tightened without resistance. To make that process easier, I ended one evening by gluing a washer to the seat at each rear mounting point. The brackets should look something like this:
Reaching this milestone is a critical inflection point in the installation process. Remove the seat and torque the bracket mounting bolts to factory specs as you pray nothing moves. Then, test fit the seat AGAIN to make sure nothing did move. It moved. Start over.
Once that is out of the way, you can assess the situation with the left wing to see how much you need to grind off. Actually, you can do that earlier, because I did it for you. Grind ALL OF IT. Or at least, all of the lip.The cover is held on by a spring and cable. Release the spring, and the cable will relax, which will allow you to peel the cover off the wing area. More trash bags and tape, and more time with the grinder. Shave all of the lip off the back side where it contacts the door. Don't worry about the cover, it will still attach and look normal afterward.
Here is a photo after not enough was shaved off. The part between the Sharpie marks needs to be ground all the way down.
This seems like a good stopping point.
Last edited by Steve Dallas; 03-25-2017 at 09:17 AM.
I highly recommend you do all the grinding at once. I didn't know exactly where or how much needed to be taken off the first time through, but armed with knowledge, I could do it all in one shot in less than an hour now.
Once everything is cleaned up, and the cover is back on, it is time to mount the seat for the "final" time. This is accomplished by dropping the seat into the brackets, inserting and tightening each side mounting bolt to finger tight, then tightening to snug plus 1/8 to 1/4 turn. Three of the bolts can be manipulated with a standard Allen key. The front right bolt requires that you get in your other car, drive to Harbor Freight, buy a cheap Allen wrench set for $5.99, drive back home, drag out the angle grinder you just put away, reinstall the cut-off wheel, cut off the short end of the 6mm key, and use your new stubby wrench to reach said bolt.
Again, all 4 of the side mounting bolts must line up well enough, that you can tighten them with your fingers, without putting any stress on the seat.
When finished, you can bask in the glory of your Ozymandian accomplishments by sitting in your new seat and cracking open the last and 30th of your fine Colorado brew.
Random thoughts: I know this seat is no lower than the OEM seat, because I did not have to adjust the rear view mirror. There is a harness in some of the pics. I am not satisfied with how it turned out, so I will be revisiting it in the near future with a different model. Some photos were taken before everything was completely buttoned up. Things like seat belt routing, etc. were left for last and are properly done. Backing plates were correctly used.
Anyway, how much easier can I expect the passenger seat to be?
.
Last edited by Steve Dallas; 03-25-2017 at 09:21 AM.
Since the seat ended up sitting at basically OEM height, I decided to try replacing the butt cushion with some 1" medium (blue) Confor foam. This stuff is wonderful. I didn't take any photos of the install process, but it consists of simply removing the old foam through the Velco access under the cushion, using the old foam as a pattern, cutting the new foam to fit with a pair of poultry shears, stuffing it in the cover, and closing it back up. I am sitting about 1.5" lower now, and it is quite comfortable. I bought another piece for the front leg bolster, which I intended to sort of roll up inside the cover, but I decided to cut 1" off the bottom of the factory foam with a bread knife first. So far, that seems to be all that is needed. I'll drive it this way for a while and see how I like it. Today's project is to use some of the foam remnant to fashion some additional lumbar support in the back cushion.
.
Last edited by Steve Dallas; 03-24-2017 at 09:46 PM.
Gave you a couple kitties because you made me chuckle.
Nice work. I wish I would have thought about Corbeau when I was seat shopping. Instead, I grossly overpaid for a Sparco POS that's bottom-mount only it's comfy but it's a good thing I'm short.
The Round Things Fairy visited me again. I love her and all of her round things.
She brought me this too. It's lubed and everything.
Not sure when I will have a chance to install them yet, but I am quite tired of the drivetrain shudder in this car. Abusing it at the track makes it go away for a little while, but it comes back after about a week.
Jeffbucc haunted my dreams again. He told me, I must fix the floor mat, because it has been affecting his OCD in Miata Timeout Purgatory. I complied, because one does not want to cross jeffbucc, lest one be power washed and painted.
I originally used brass grommets in 3/8" diameter, because that is what I had at on hand at work. They were a little too small for the holes, in addition to being gold. I found 1/2" black oxide grommets and a grommet tool cheap on Amazon, so I hit the 1-Click button yesterday and had them this afternoon. Much better, although my tiny #10 bolts now look like hot dogs in hallways. Jeffbucc will want me to upgrade those bolts to 1/4". Just watch. You know I'll be changing that next.
Not sure when I will have a chance to install them yet, but I am quite tired of the drivetrain shudder in this car. Abusing it at the track makes it go away for a little while, but it comes back after about a week.
Sounds like you need to tell Mrs. Dallas that the only way to fix that annoying sound in your car is to track it at least once a week!
Just read through all of the thread. Super interested to see how you mount your oil cooler as I will shamelessly steal all your ingenuity for my own gain!
I've only been to Cresson once but I'm hoping to start tracking my car again this spring/summer. Love the track and I have only good things to say about Apex Driving Academy. A family friend of ours used to be an instructor there for years. I was there almost two years ago, my instructor's name was Richard and he drove a matte black S2000 with an APR wing. Is he still around?
Since you brought up the oil cooler...
There will be no ingenuity. There will only be copycat antics. Honestly, I have not figured out how I want to do it yet. I have read the oil cooler thread, and there are a lot of great ideas in there, but none exactly matches my plans for the car (or total lack of fabrication skills), which is to have a FMIC, brake ducts in the fog light holes, retain A/C, and retain P/S. The closest match is hornetball's silver turbo car, where he mounts a large Long oil cooler behind the radiator, where the condenser fan normally sits, then mounts a small pusher fan on the front of the radiator to replace the condenser fan.
One idea I am kicking around is to omit the condenser fan, mount the oil cooler in its place, and replace the cooling fan with a high performance SPAL unit plus the requisite wiring and relay. Both OEM fans together pull around 2400 CFM. SPAL has a 12" fan rated 1870 CFM. It could be wired such that the ECU would turn it on when it decides either of the OEM fans should be on. It might be able to serve as a suitable replacement for both OEM fans in such a configuration, but there is only one way to find out.
Being to the track once is not enough. You need to get hooked like the rest of us! I know of Richard, but I don't think I have seen him out there in a while. I'll look for him on the 15th.
Edit to add:
Here are the relevant posts in hornetball's builds.
I used a pair of Long oil coolers in my old '78 Suburban 454 for engine oil and transmission oil. I hauled boats with it for 4 years, then sold it to a carpet installer, who hauled carpet and tools for ~5 years, and then sold it to a painter who hauled paint and tools for at least 5 years. The last time I saw it, it still had those same oil coolers under the grill. Good stuff. Of course, they are made in Mexico now, so...
.
Last edited by Steve Dallas; 06-03-2017 at 07:45 PM.
Reason: Resources for theft from hornetball and fixed links
I took my 19 year-old son out for his first track day 2 weeks ago in the Miata. He did really well, even though we pissed off a lot of other members with our slowness, and some of them were sure to let us know with their antics. Anyway, I don't know exactly what caused it, but the brake ducts took a beating. It is pretty common to see somewhat mangled ducts, but I decided to revise my approach a bit by anchoring them to the side of the undertray and making them longer. Without further boring commentary, let's get to the photos.
Drilled 4 holes in the undertray:
Looped industrial wire ties through the holes to make anchors, then looped wire ties around the hose and through those anchors:
Zipped everything up. The frontward tie is fairly tight to make things more rigid toward the front. The rearward tie is looser, to allow for some articulation. There is now more wheel clearance, and hopefully the bands of picked up rubber that sling off and attack the ducts will have a harder time reaching them. Hopefully.
I'm sure everyone knows this, but you can screw sections of hose together, which makes replacing the sections that are likely to wear very easy. One can also use that feature to make certain sections more rigid if needed.
.
Last edited by Steve Dallas; 04-04-2017 at 11:09 AM.
Reason: Spellins and grammers
Goodridge stainless brake lines installed. Eh. The fronts seem kinda short. I'm normally a fan of just using rubber lines and replacing them every 3 years on the cheap, but these were on sale for $50, so I went stainless.
To Do List
Brake ducting
Use wire ties for something
Brake lines
Oil cooler before spring
Coolant re-route before spring
Remove pesky little coolant lines
Make environmentalists cry
Radiator sealing and ducting before summer
Oil and water temp gauges before summer
Seat and harness
Clutch
Learn to drive
ECU?
Match spec Miata record
Trubo!
It's getting warm outside, so the coolant re-route is probably next on the list. I need to switch over to the summer coolant mix anyway. This is also a good time to figure out what I want to do for gauges, since the re-reoute adapter will need a temp sender before it goes in.
Then, I need to figure out what I want to do for an oil cooler and an oil temp gauge (see musings above).
Clutch and lightweight flywheel after that, I suppose.
The ECU decision is also on the horizon. More research needed, included how to pass emissions without having to do a ton of work every year.
The ECU decision is also on the horizon. More research needed, included how to pass emissions without having to do a ton of work every year.
If you are staying naturally aspirated, then all you really need to do is swap the ECU out, cap the vacuum line. I would just weld in an extra bung for the wideband, and leave the 2 stock narrowband installed. Other then that it would be plugging in the MAF.
I am planning on forced induction as my upcoming winter project. That means everything you listed, plus swapping injectors, limiting boost, etc. I wish I could find a place that would pass it without OBDII testing, but I have never been able to manage that in 4 years of trying with my catless RX-8.
I am planning on forced induction as my upcoming winter project. That means everything you listed, plus swapping injectors, limiting boost, etc. I wish I could find a place that would pass it without OBDII testing, but I have never been able to manage that in 4 years of trying with my catless RX-8.
Well if going FI it will depends slightly on your setup. I am going to assume that you are going with a TSE setup, because it is the only track reliable setup. In that case you will have to swap back to stock injectors, pull out IC, pull off the turbo and exhaust, plug the oil feed line and cap the oil drain line. You can't just wire open the wastegate on the EFR or else it will destroy the blades, so it will need to come off. If you are using any other turbo setup on the market then you should be able to leave the exhaust on and just wire wastegate open.
You *can* wire the wastegate open on the EFR, you just can't wire it all the way open.
As far as track reliability of turbo hardware goes, FM's is pretty solid in that respect when given the inconel studs. The Garretts don't spool like the EFR does of course, but I haven't seen any turbo hardware failures in my car on track since switching to the newer-generation FM hardware in 2008 or so.
I can say that it's possible to get a stock 99 ECU to set all of the emissions monitors in 2 10-mile drives with an FM turbo installed, wastegate wired open, light throttle and keeping revs below about 4000. Man it's slow like that.
 02-21-2017, 10:05 PM


 0
0


 it's comfy but it's a good thing I'm short.


 )
)